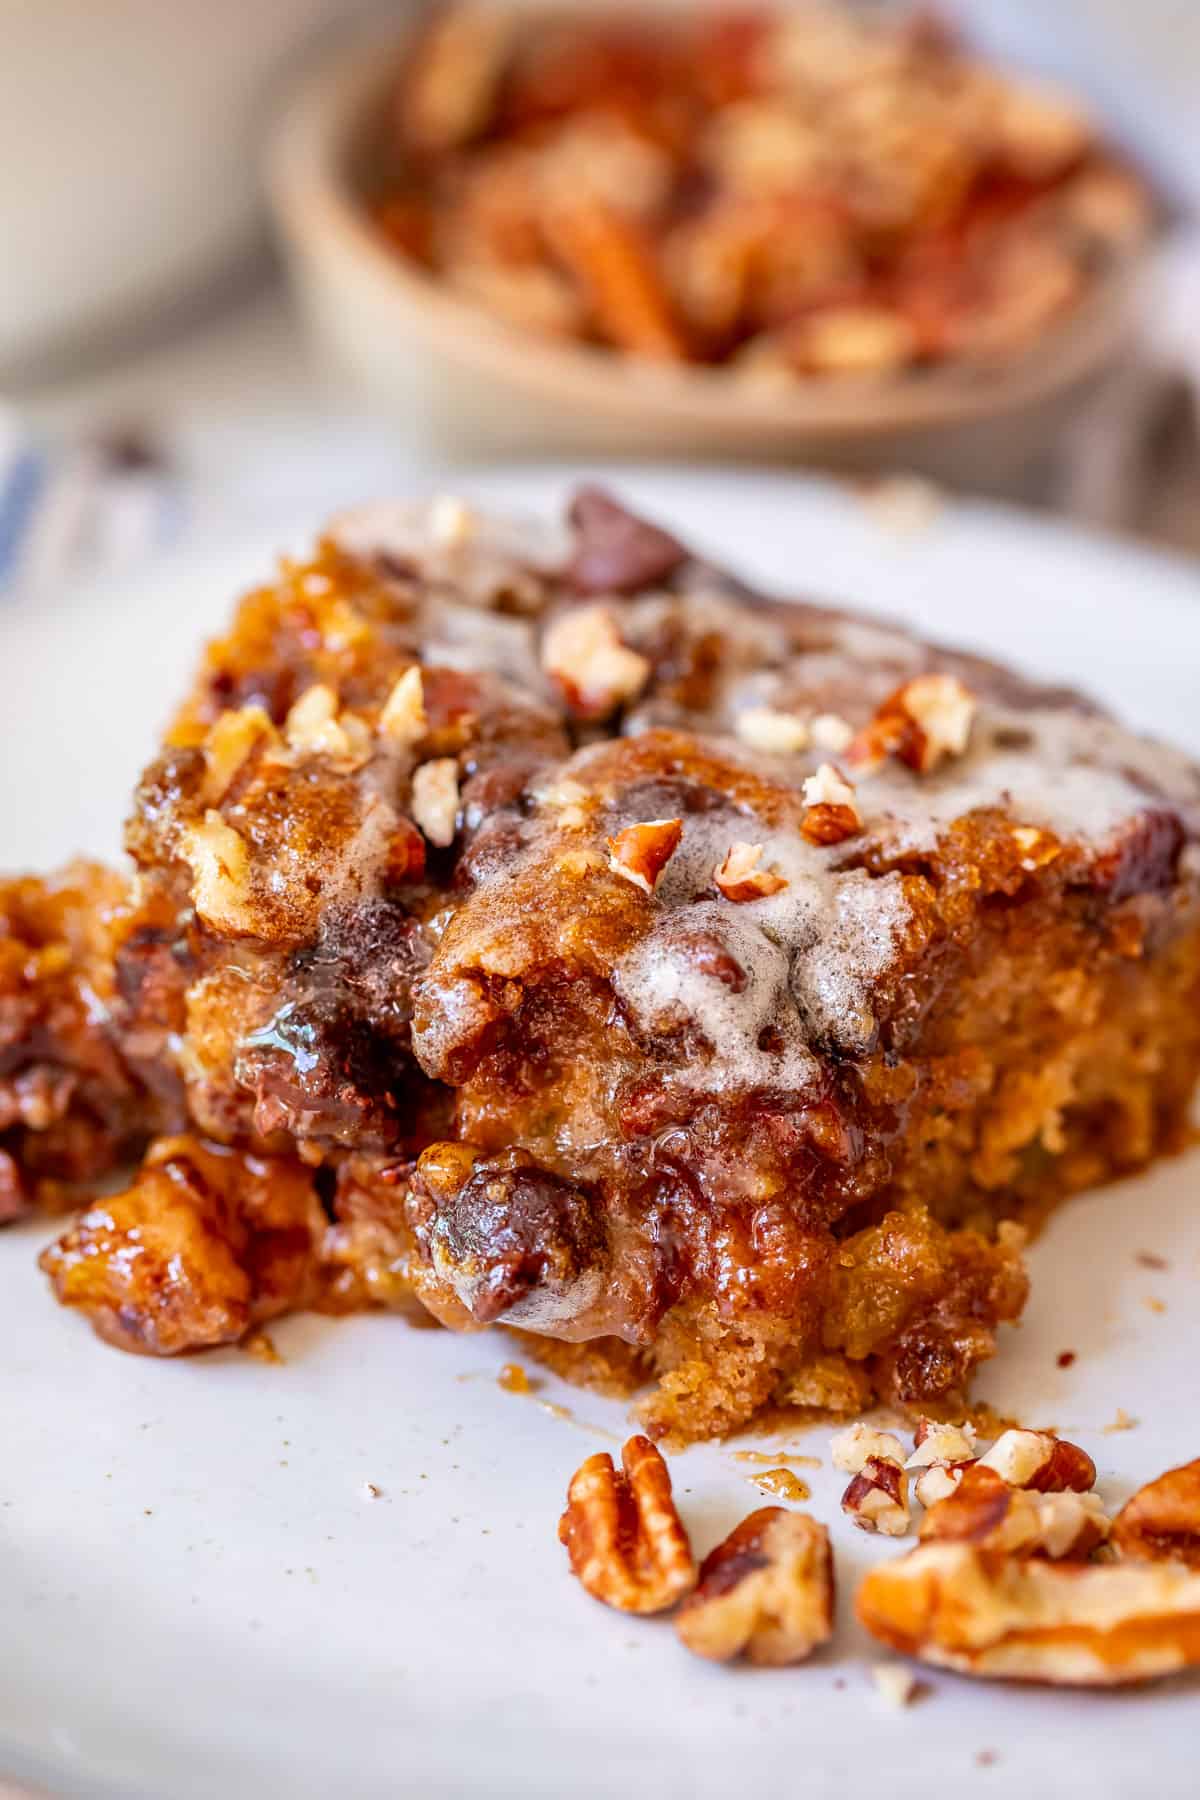
Picnic Cake is one of the most unexpected desserts you will ever make! It’s a lightly spiced cake with cinnamon, chocolate chips, a pecan and brown sugar topping, and raisins…Wait, come baaaack! I hate raisins in my baked goods and I LOVE this cake. Trust me, a change of heart can happen for you too. Also, come celebrate 12 years of blogging with me!
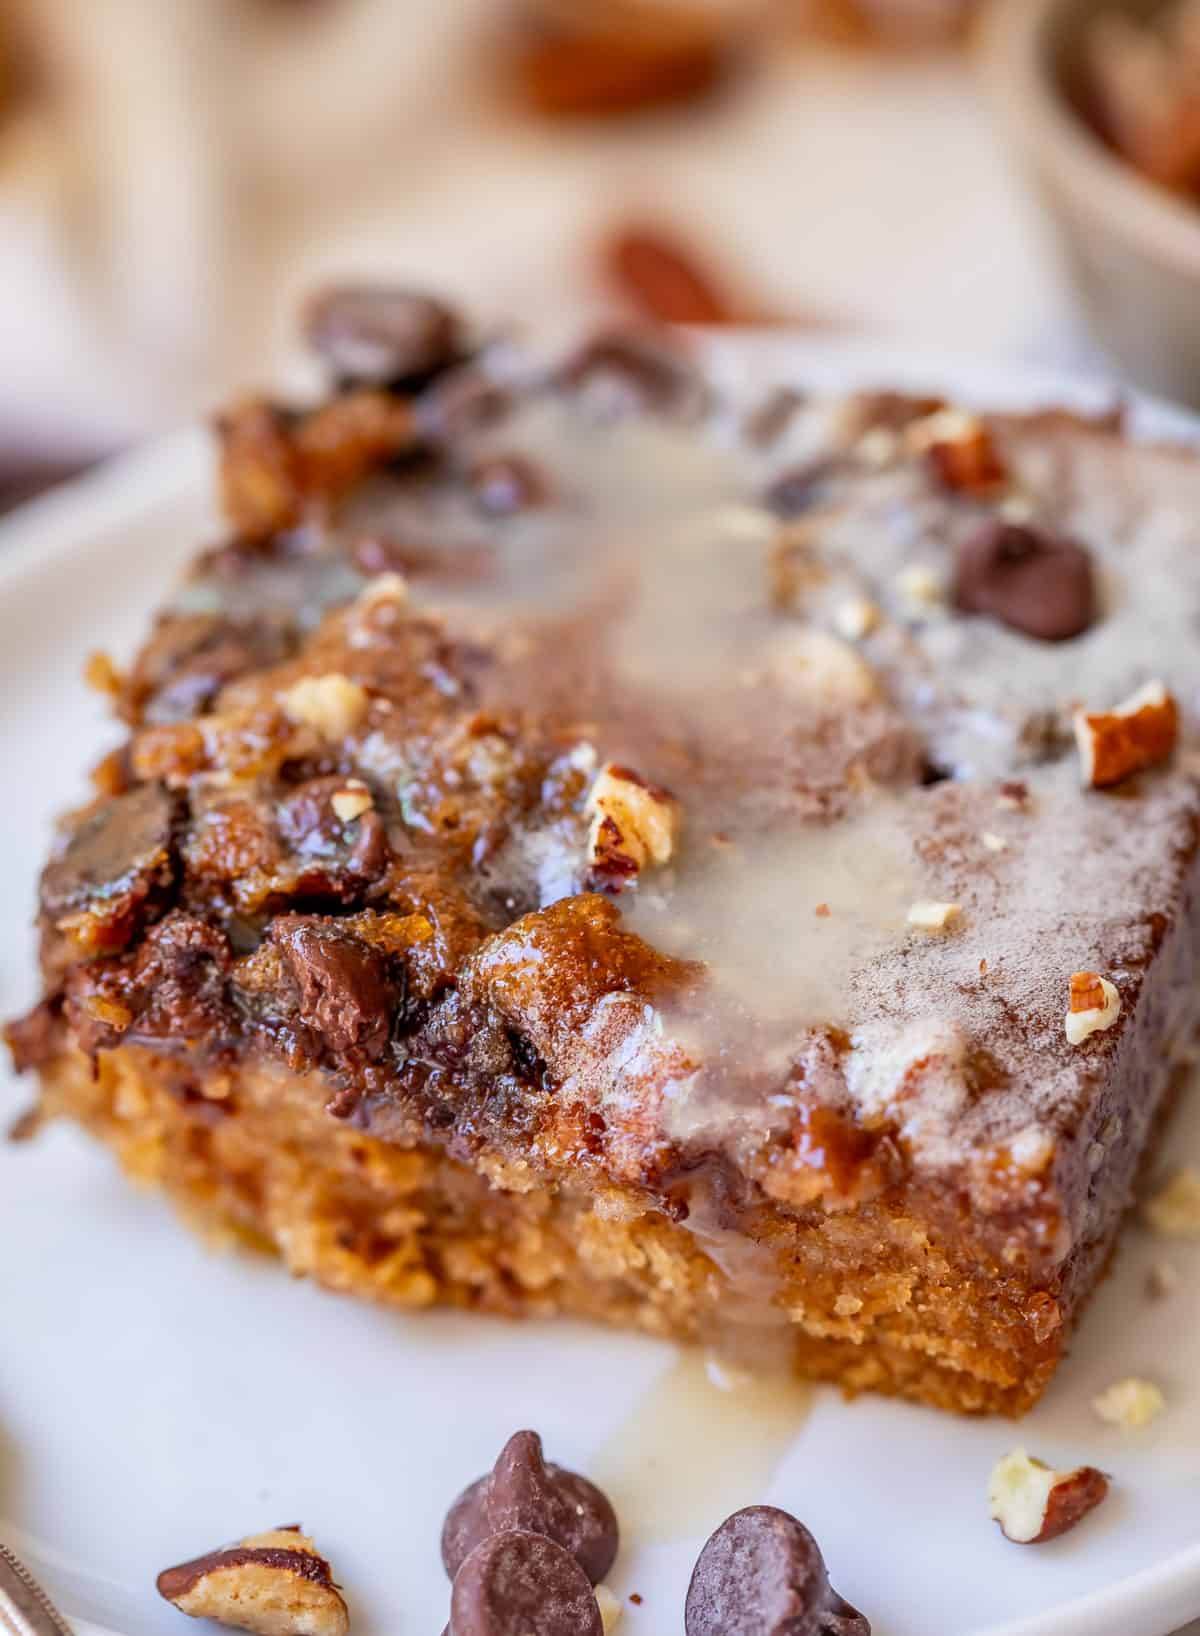
Table of Contents
- 12 years, what??
- Blogging: I do not think that means what you think it means
- The very best Picnic cake recipe
- What are picnic cakes, anyway?
- Picnic cake ingredients
- How to make picnic cake
- What to serve with picnic cake
- Picnic cake served for brunch
- How to store leftover picnic cake
- Can you freeze picnic cake?
- Frequently asked questions
- More delicious snack cake recipes to try!
- Picnic Cake with Buttermilk Glaze Recipe
12 years, what??
✨ T W E L V E Y E A R S ✨ my friends!!
That’s how long we’ve been going here at The Food Charlatan! 12 years, 929 recipes, 4 kids, 1 sustained marriage, (praise Jesus, and praise Eric, you patient, patient man), and a partridge in a pear tree.
Did you guys know I don’t do this gig alone anymore? Surprise! haha. Let me introduce you to “the staff:”
Karen (thas me)
Chief content producer. This is a fancy way of saying I’m still the one making all these recipes, even the weird ones with baking soda raisins. 😬 Thanks for sitting with me in these moments, guys. If you’re new here, I promise I have lots of totally normal content. (Maybe don’t check out Seafoam Salad??)
Eric
The husband…and now Chief of Everything Else here at The Food Charlatan.
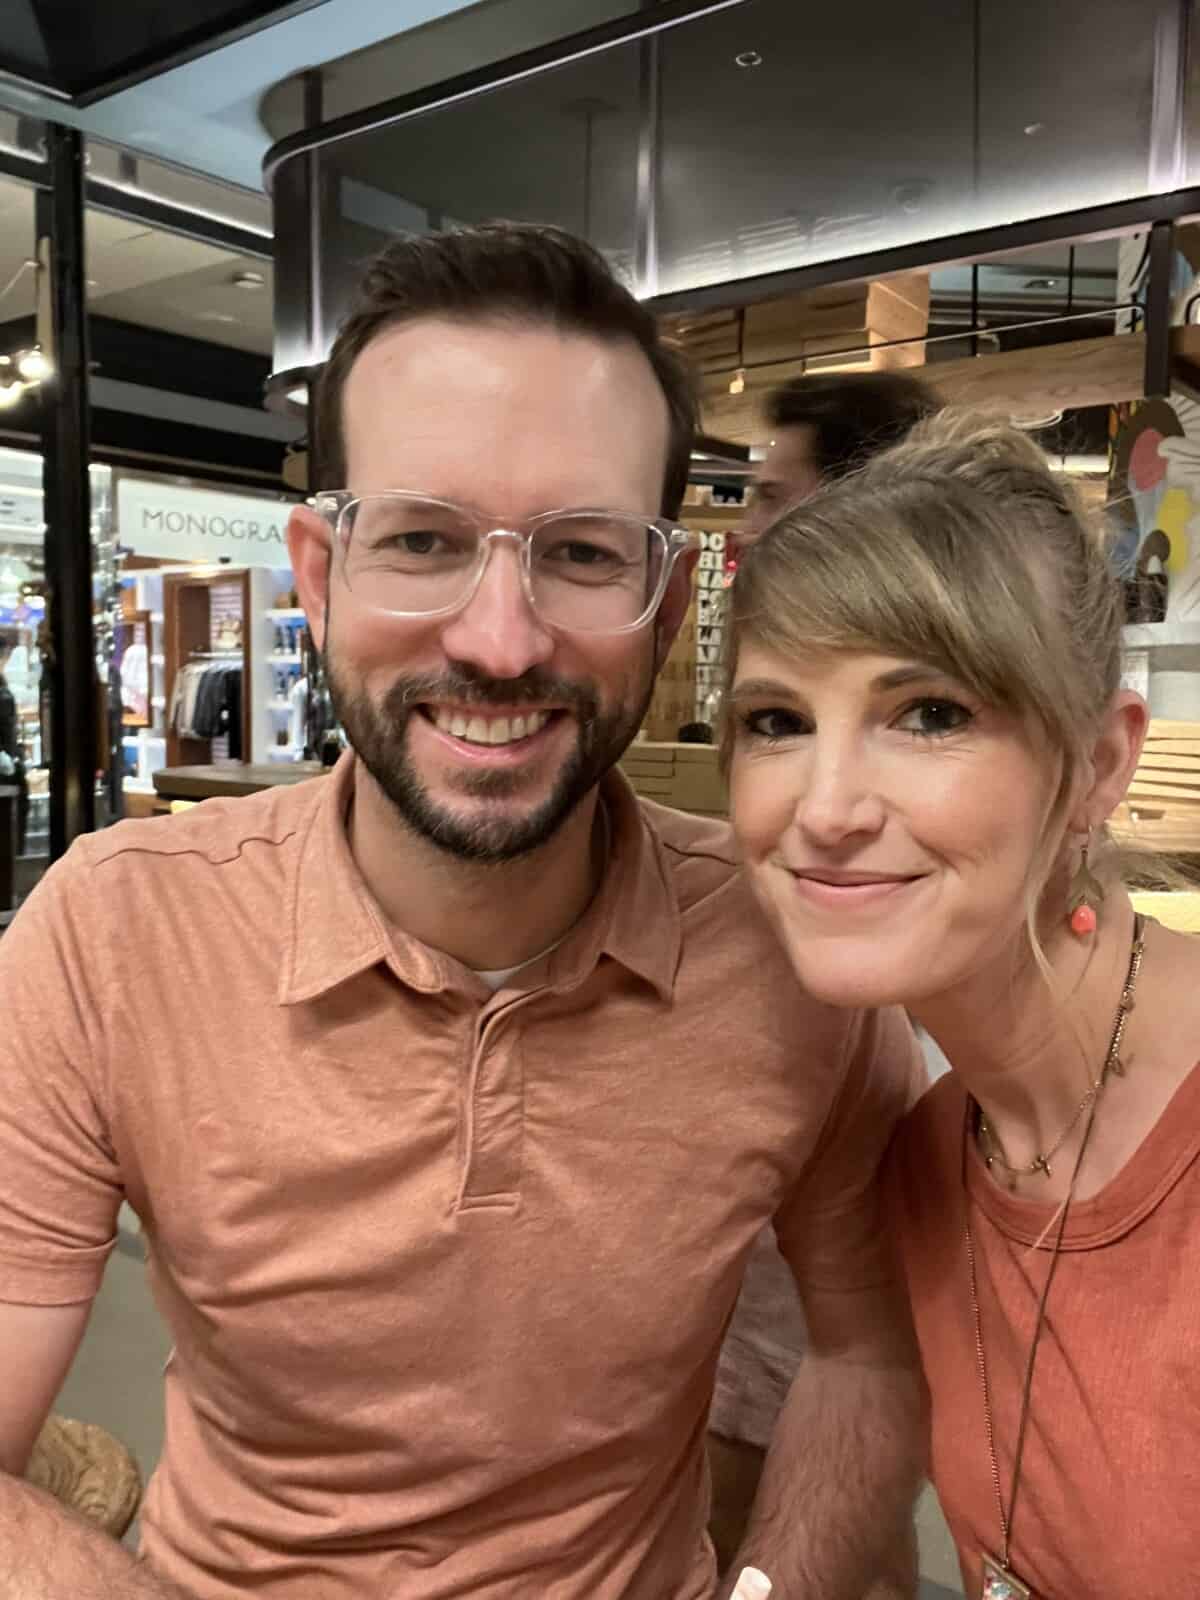
Yes, for real! Eric has always been an important part of The Food Charlatan, and not just as Champion Dish Washer and Official Taste Tester. Now he’s here for good, helping run things behind the scenes so that I can focus more on getting you even more recipes!
That’s right folks, my husband quit his job to manage all the hard stuff so that I can keep baking cookies for a living. He’s all mine, ladies.
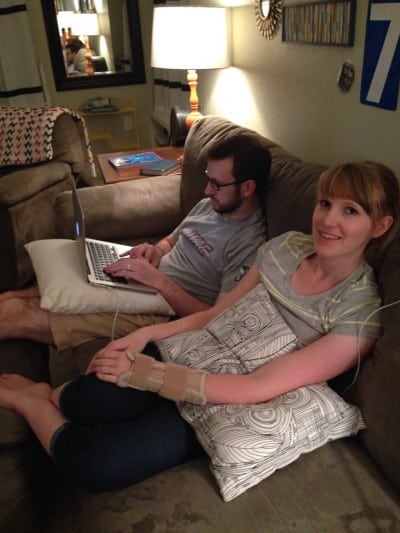
Eric has always been INCREDIBLY supportive of all the time I spend in CharlatanLand, even back when it was just a hobby. Here he is in 2014 writing this 13 Easy Back to School Dinners post as I dictated to him. Why? Because he loves me, and as you can see in the photo, I was having serious pain issues in my wrist at the time from tendonitis, and couldn’t type:
Eric used to work for UC Davis in their development department. In 2018 he took some courses and learned all about how to help my recipes get discovered easier when people are googling. It helped so much. He did tech stuff and other management things over the years. A few months ago, in June 2023, after 10 years, he left his position at UC Davis to help me full time with the “everything else” on this blog! He is literally the best and we are pretty excited about our new adventure!
Eric and I are the full-timers. Let me introduce my other part-time helpers!
Laura
Laura is my amazing sister and has worked with me the longest! I hired her about 7 or 8 years ago to help with Virtual Assistant tasks: managing my Facebook page and Pinterest account. She is SO good at her job and I never would have gotten by all these years without her! She helps me with some of the blog formatting and writing these days too.
Sarah
Sarah is my BFF from college. She’s the person in my life who remembers more about my past than I do, for better or for worse. You would not BELIEVE the college stories she has. 😂 Last year she came on as my project manager, to help me get organized. Kind of like how she used to give in and get my laundry started when my hamper spilled over onto her side of the dorm room when I was 18. Sarah, you are a saint.
Niki
Niki helps me organize and write my emails! I still write the emails for new content. If you haven’t joined my email list yet, I would love to have you! We have a lot of fun over there in the inboxes! Subscribe here.
Melissa
Helps manage my Instagram account! Posts are written by me for the time being, but Melissa helps put up my stories (that are recipe links) and responds to recipe requests. Melissa is an IRL friend who worked for me for a couple years before we thought to mention it to all our mutual friends, and when they found out, they all joked that Melissa poses as me on Instagram stories using one of those masks from Mission Impossible. Haha! nope 😂 we are not that fancy!
Whitnee
Helps create my videos! She’s a gem! I made a few “hands in pans” videos by myself when they first became popular (I made this Butter Pecan video by myself for example), but quickly realized I was NOT that good at it and it took up WAY too much time, time that I would rather spend making up new recipes. So Whitnee helps me out! Fun fact: We have never met in person. So weird right? This modern life!!
Jadah
Jadah is my business coach and keeps my head from actually spinning off of my body. She helps me strategize my dreams and think big picture about where I want The Food Charlatan to go! Love her!
Mom
My mom is a well deserved Honorable Mention because she doesn’t get paid a dime and still puts up with me texting her after EVERY SINGLE POST is published, asking her to take a look at it for typos and stuff 😂 Super classy. She’s the best. Thanks mom!
And to my other mom, Kris (Eric’s mom), who claimed 10 posts into this blog that 25% of the content was recipes from her. The same might still be true. Her fine palate has saved me so many times! (Remember the Chocolate Cream Pie? ha!) Thank you for being my kitchen fairy godmother!
Blogging: I do not think that means what you think it means
Blogging is quite the journey, and The Food Charlatan has certainly been an unexpected adventure for me and my family over the years. Thank you for joining in on the ride! We are pretty excited about what’s coming next. (YouTube, are you accepting new content creators?? 😉 Technically I am on Youtube already but my lip sync battle content clearly needs some revamping.)
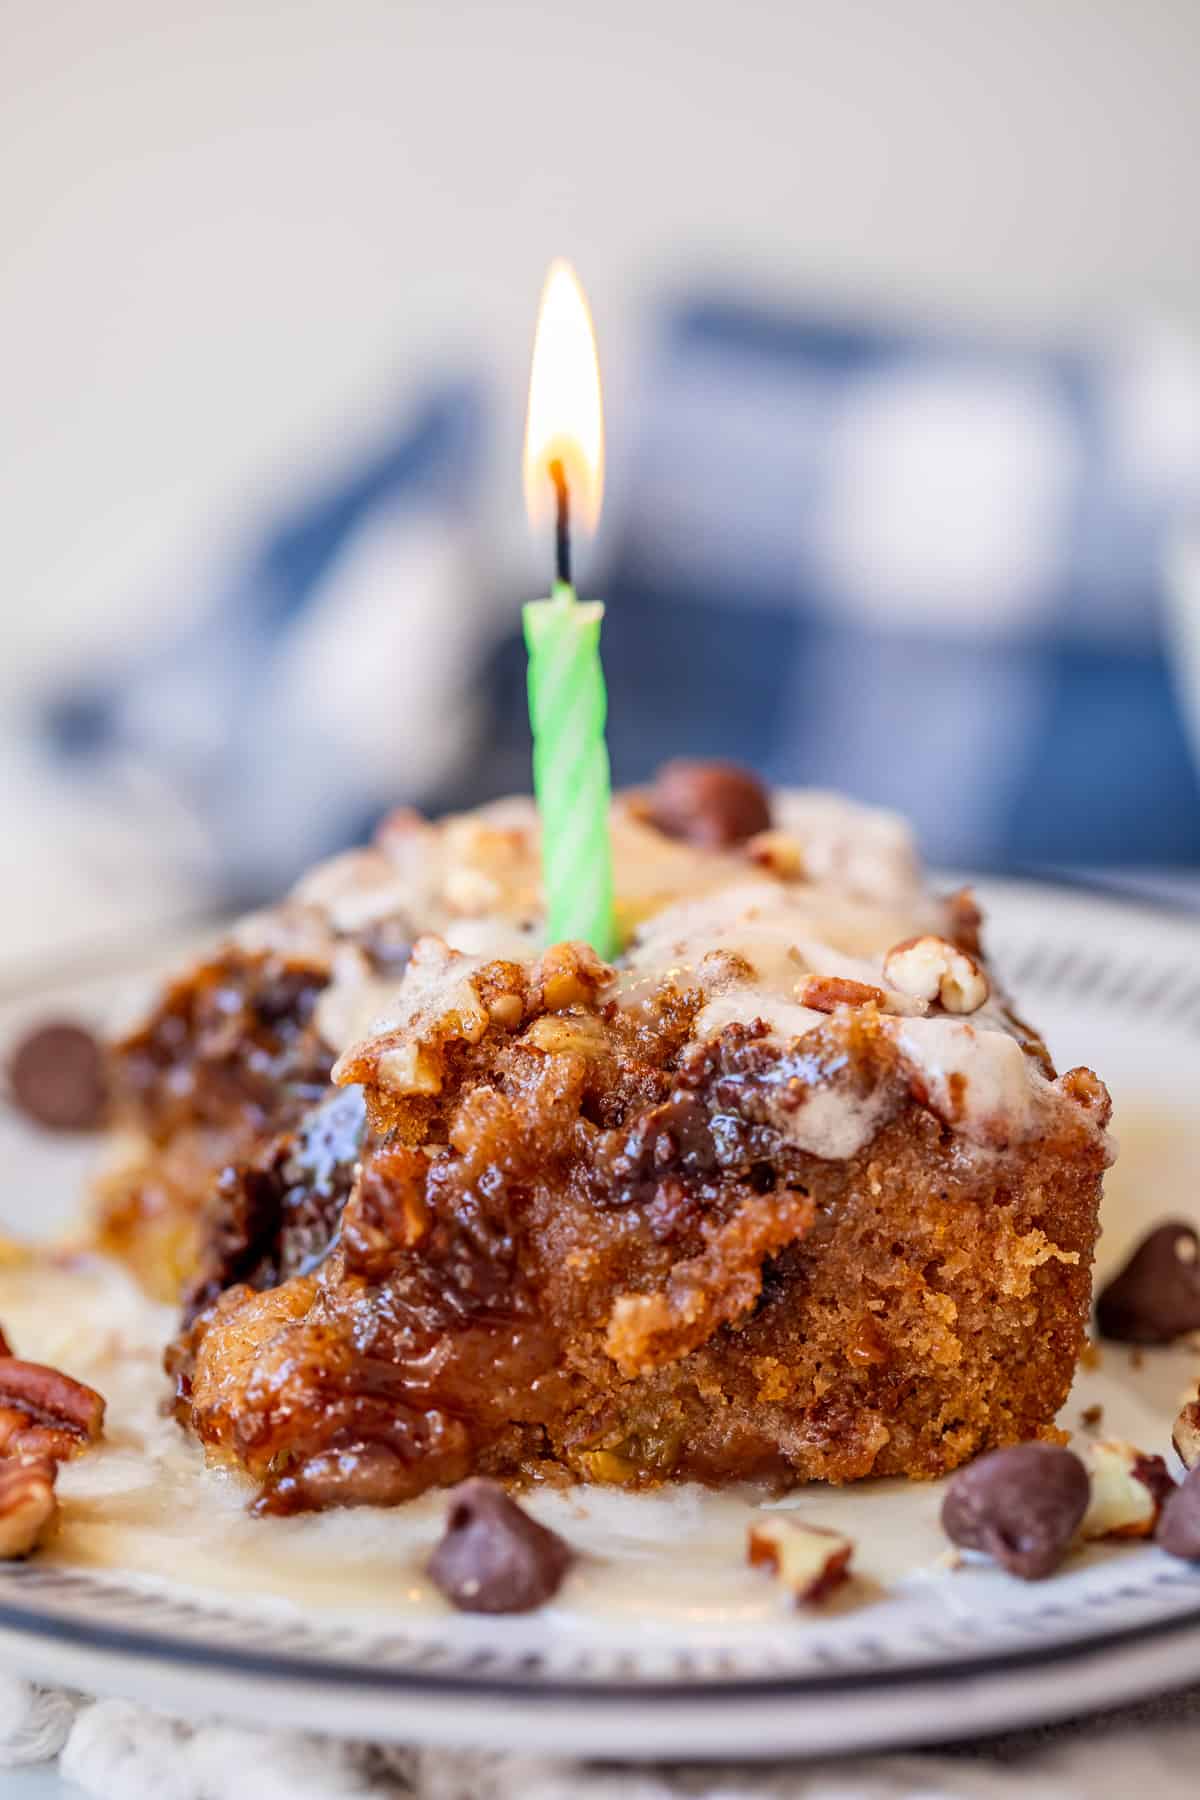
Every year, I bake myself a cake for my blog anniversary. If you would like to take a walk down memory lane, here is my first blog post, and all of my anniversary posts over the years:
- The first blog post on The Food Charlatan (2011): Pumpkin Oatmeal White Chocolate Cookies
- 1st Anniversary (2012): Cake Mix Coffee Cake
- 2nd Anniversary (2013): Pumpkin Oatmeal White Chocolate Chip Cookies (I did a photo reshoot of my first recipe, which I totally regret!)
- 3rd Anniversary (2014): The Food Charlatan’s New Blog Design
- 4th Anniversary (2015): The Best Chocolate Cake I’ve Ever Had
- 5th Anniversary (2016): Death by Chocolate Bundt Cake
- 6th Anniversary (2017): Upside Down Almond Crunch Cupcakes
- 7th Anniversary (2018): Ginger Sticky Toffee Pudding Cake
- 8th Anniversary (2019): Sour Cream Coffee Cake, with a Ridiculous Amount of Streusel
- 9th Anniversary (2020): Homemade Spice Cake
- 10th Anniversary (2021): Classic Cheesecake (and an IRL party for 10 years! 🥳)
- 11th Anniversary (2022): Pumpkin Coffee Cake
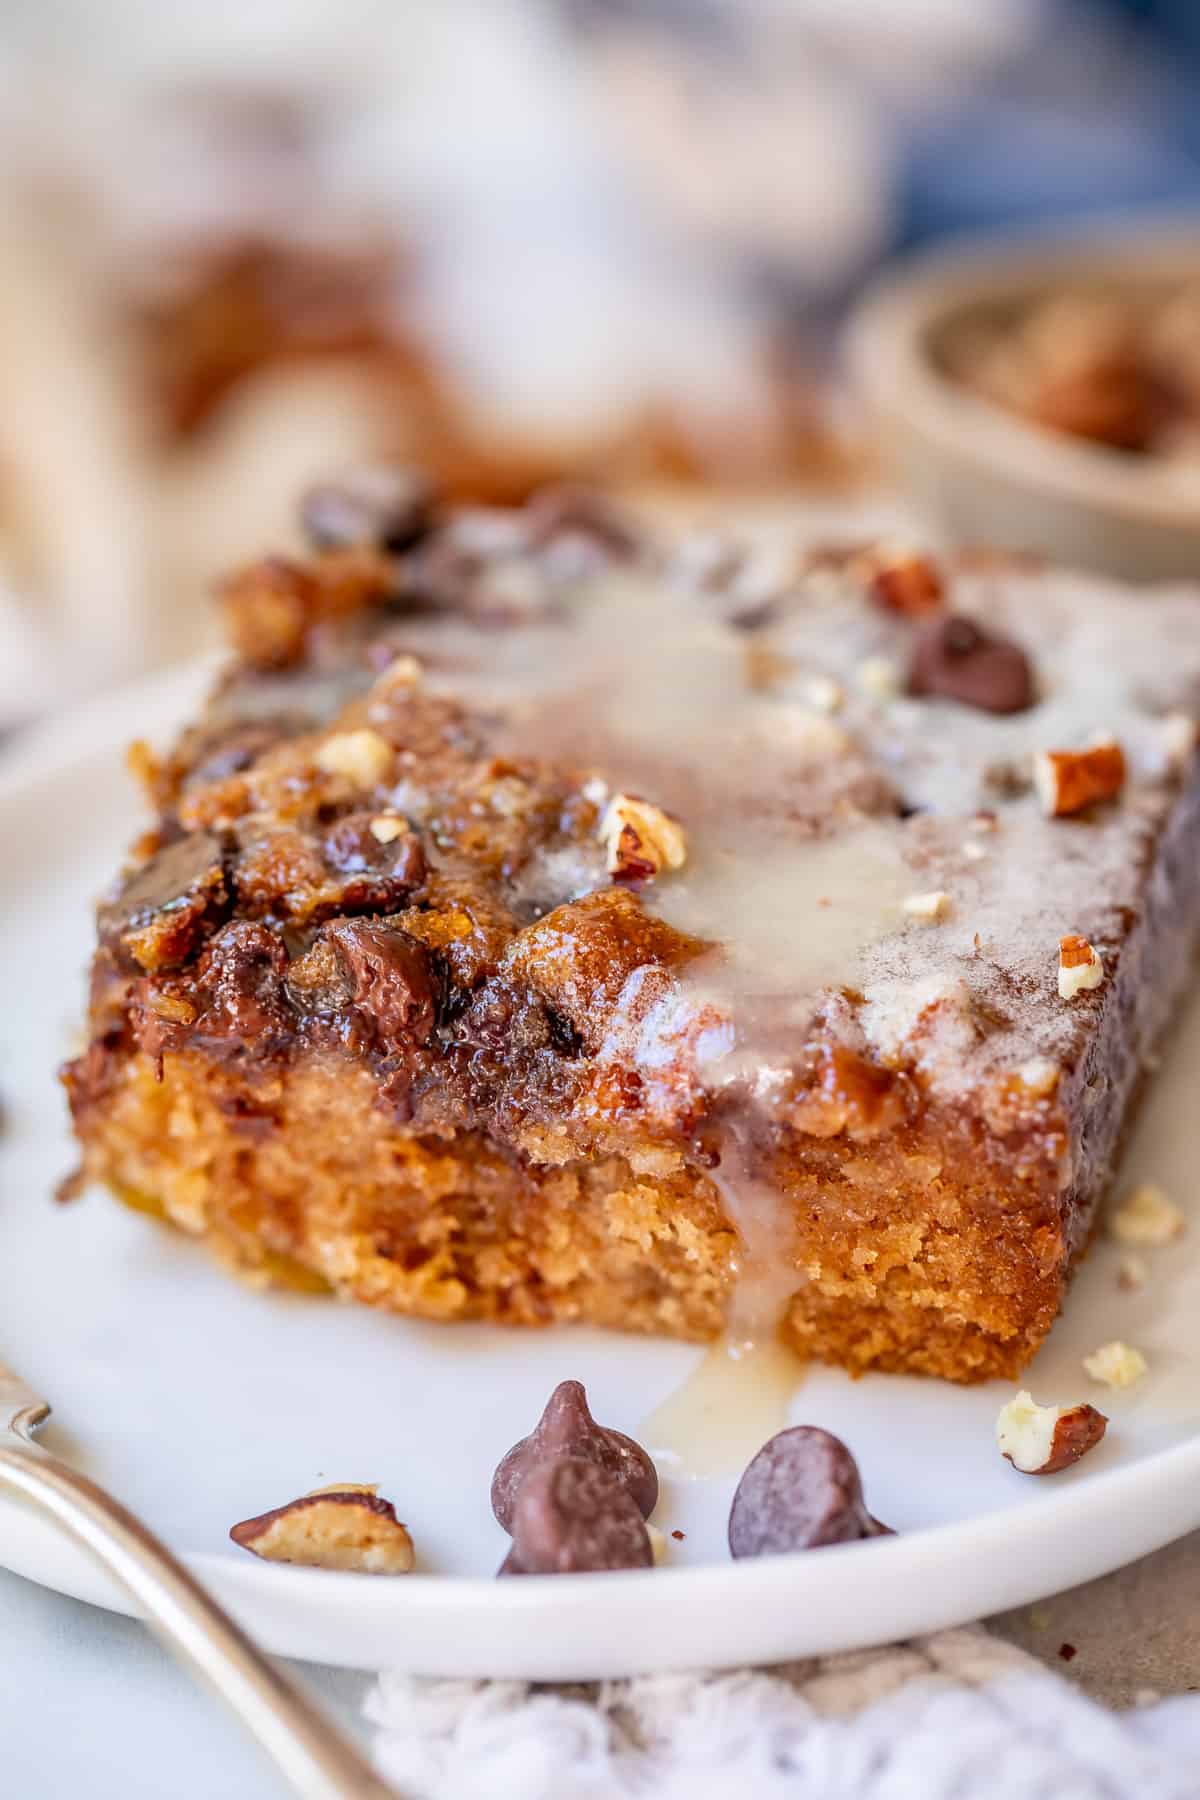
And ta-da! Here is this year’s cake! It’s so amazingly good!
The very best Picnic cake recipe
Have you heard of this recipe? Your grandma might have served it. It’s an oldie.
Picnic Cake is a study in paradox. Take a bunch of ingredients that you might lift your eyebrows at –boiled raisins fizzed with baking soda, anyone?? — and walk away with the most decadent, delicious cake that no one will be able to stop talking about, even amidst their confusion. (“What IS it? How is it so GOOD? Excuse me did you say raisins? I definitely don’t like raisins.”)
Well, I hear you sister. I don’t like raisins either, but somehow this cake makes it all ok.
There are lots of versions of this cake, and many recipes call for an equal amount of chopped dates instead of raisins. My recipe for Ginger Sticky Toffee Pudding Cake also calls for boiling dates with baking soda, and it gives a cake a SUPER moist and tender texture, and a sophisticated, caramel-y taste that is not weird. If you have had a pudding like that, you will know what to expect at least for the cake part of this recipe.
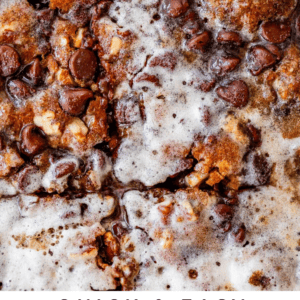
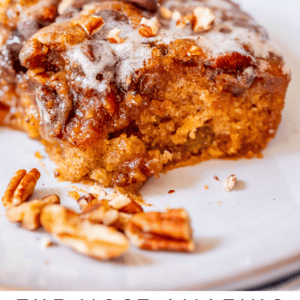
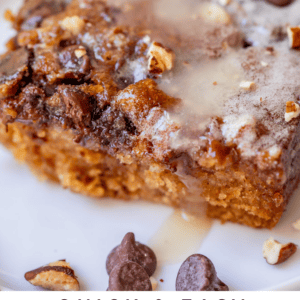
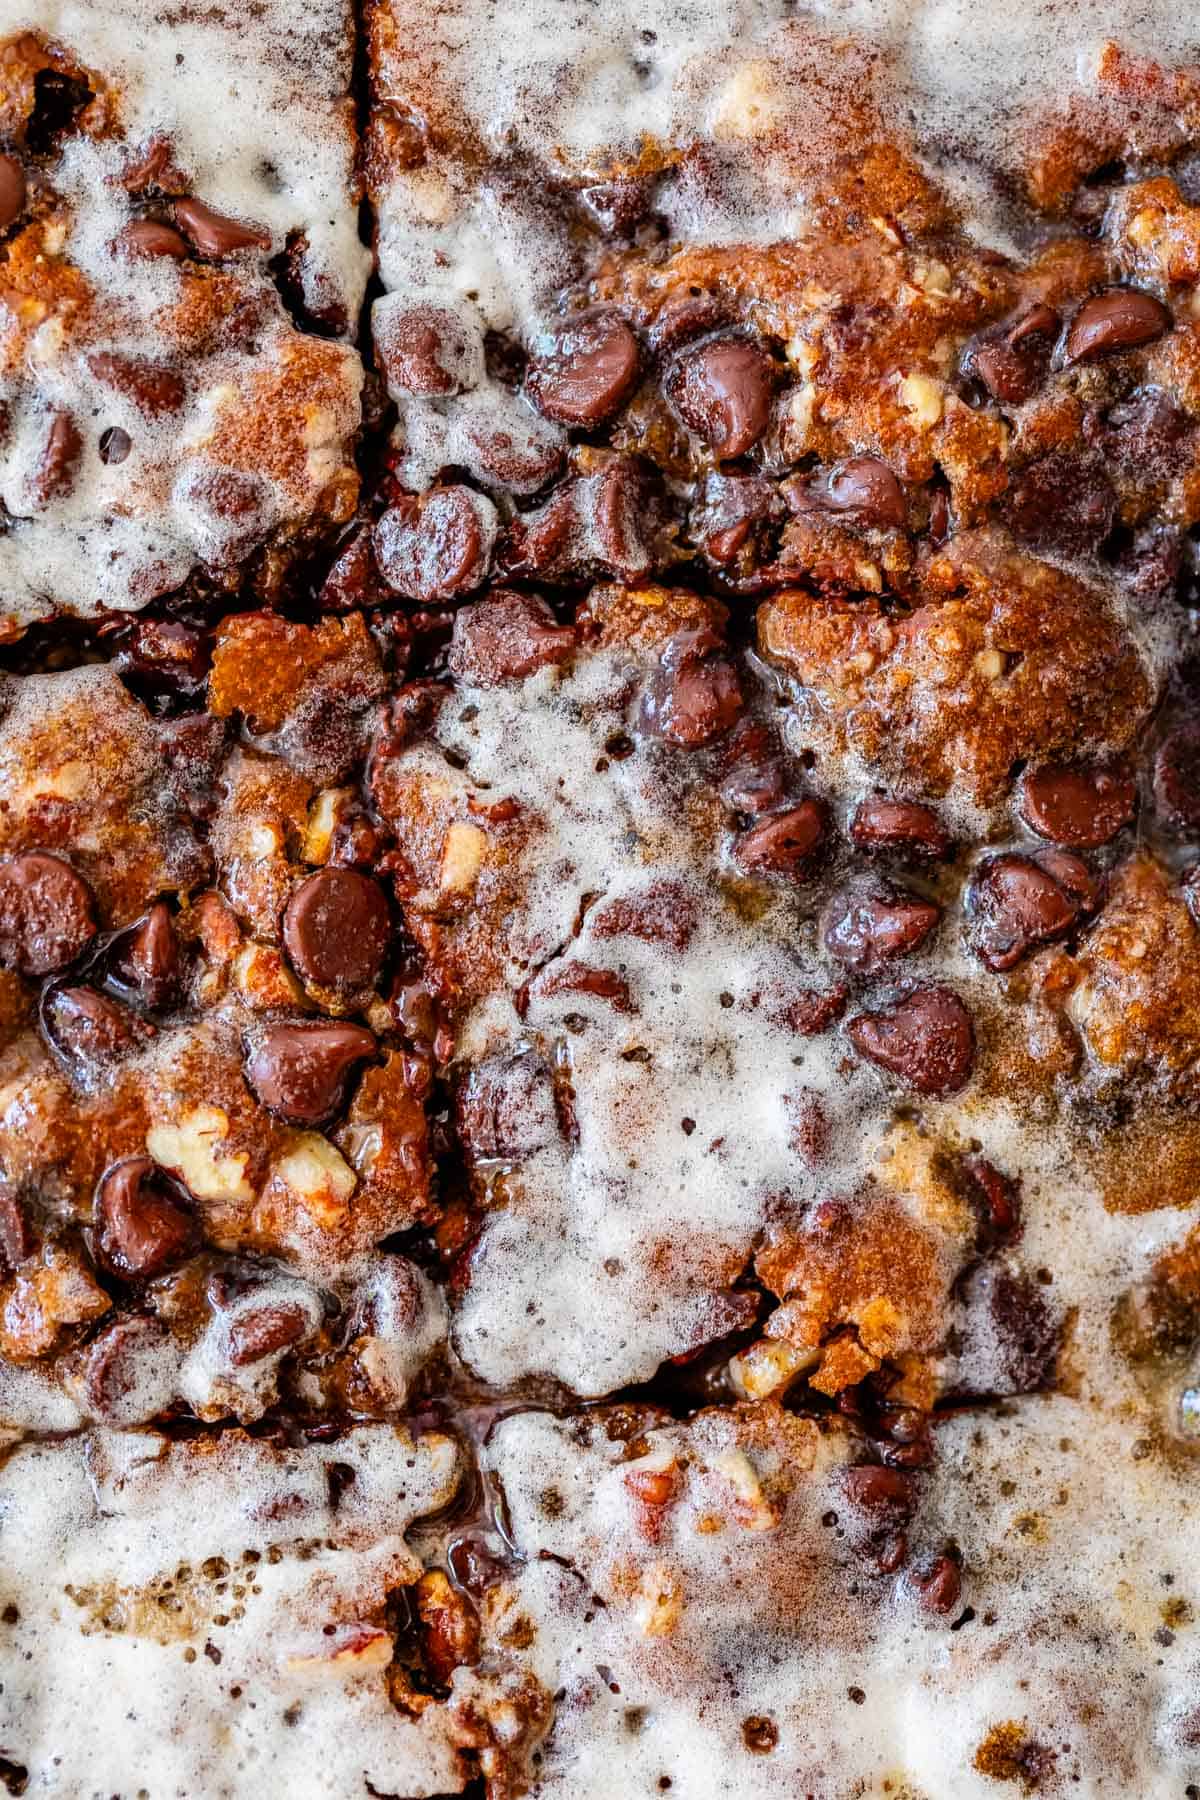
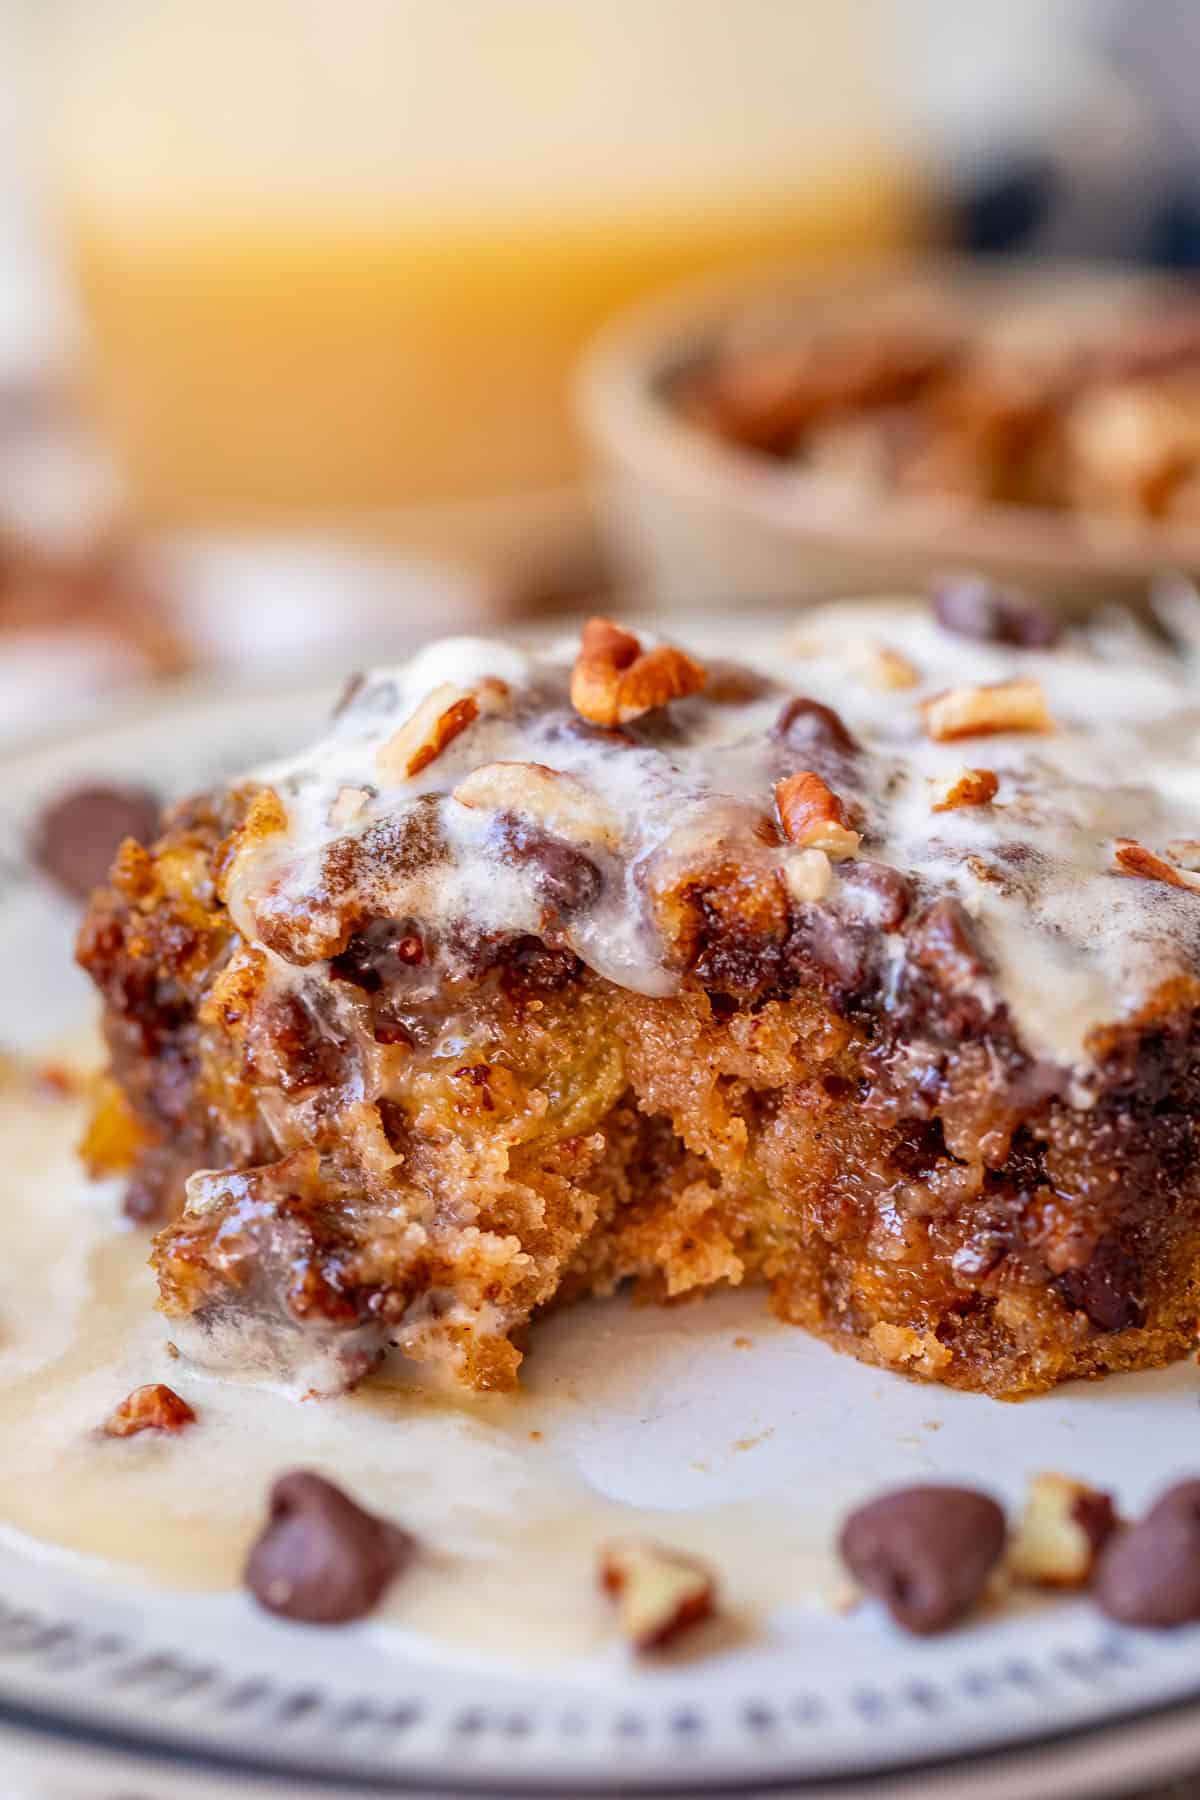
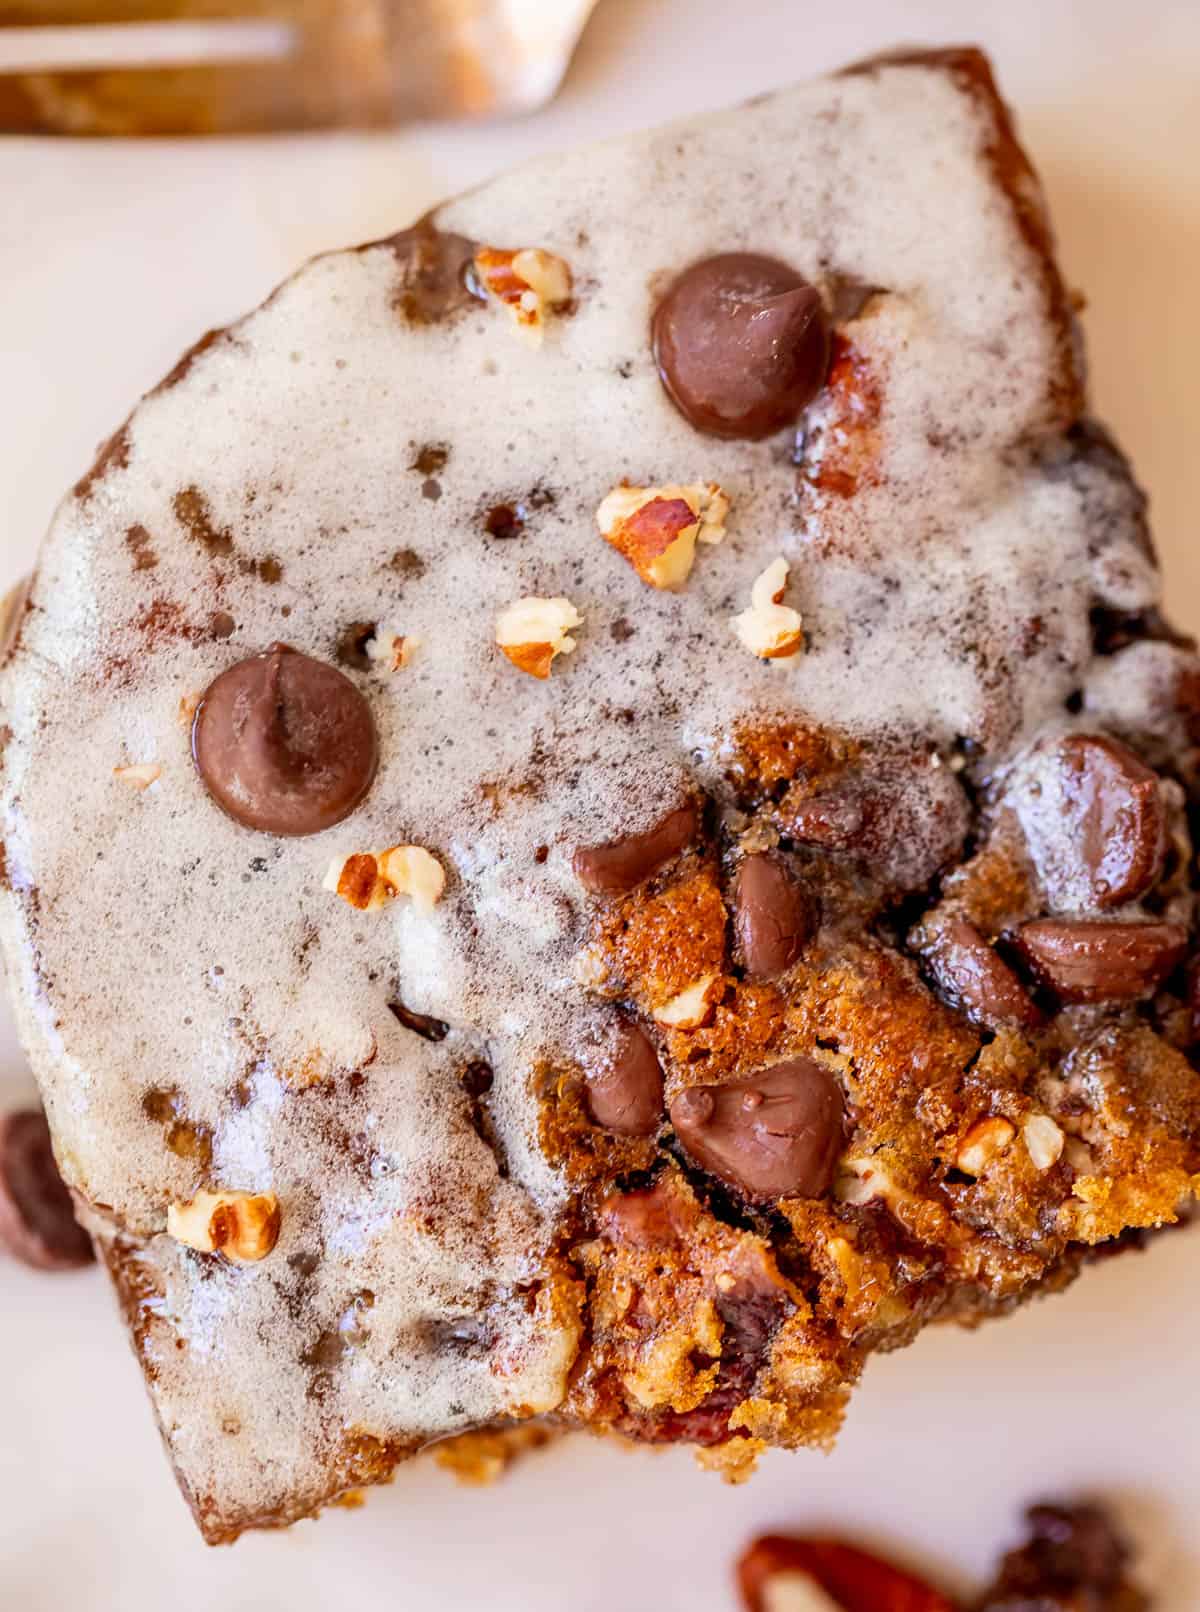
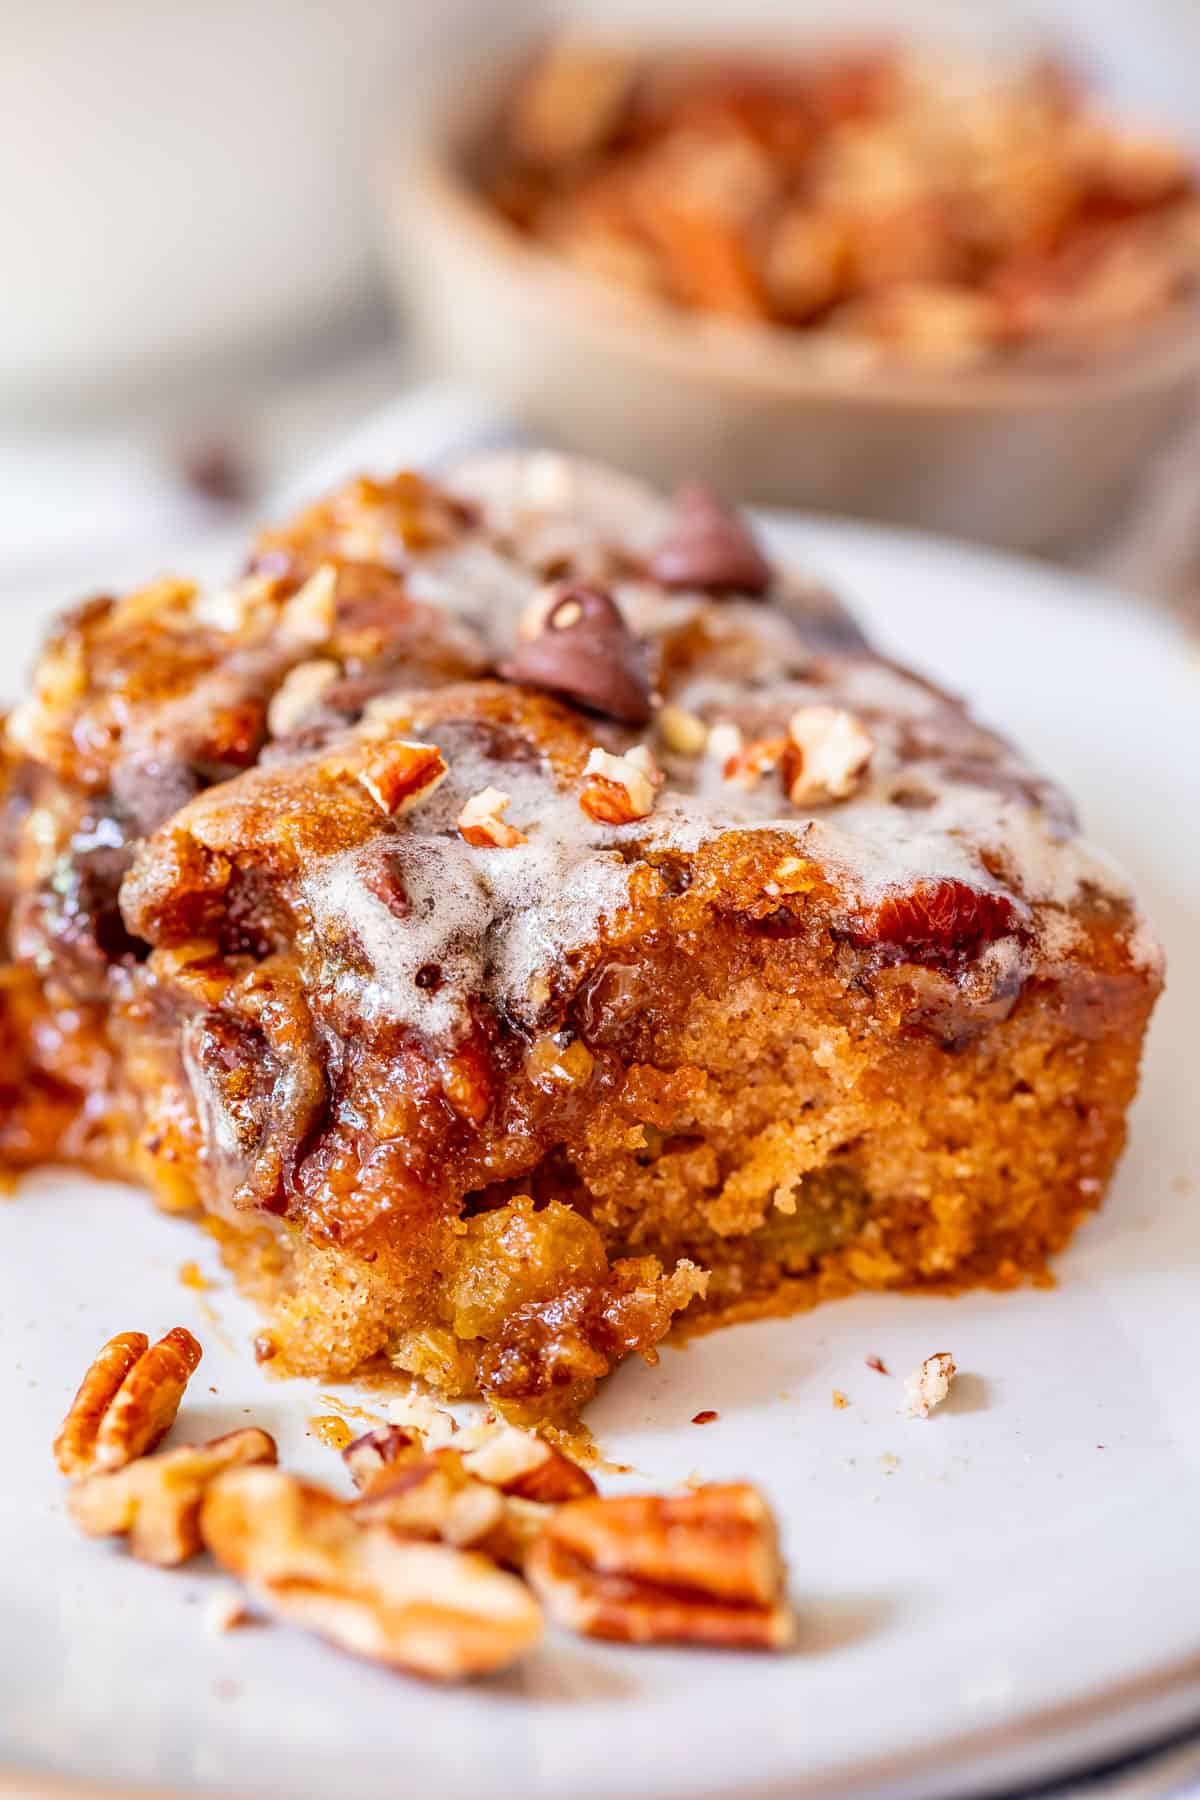
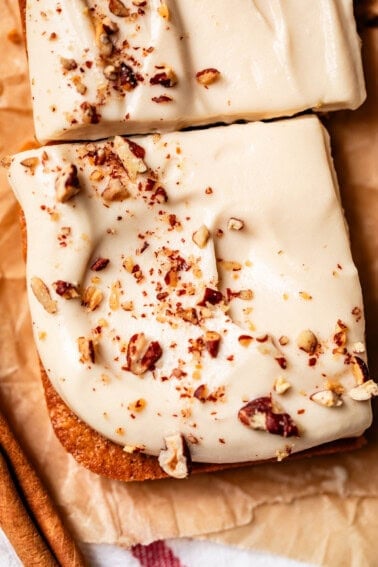
All bets are off for the topping though. After the batter is made, sprinkle the top of the cake with a layer of pecans or walnuts, straight up brown sugar, and chocolate chips. It creates the most fun, crunchy, chocolate-y topping.
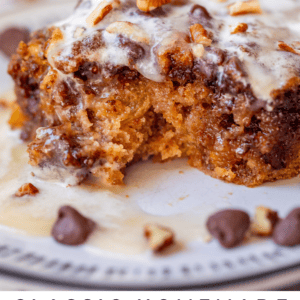
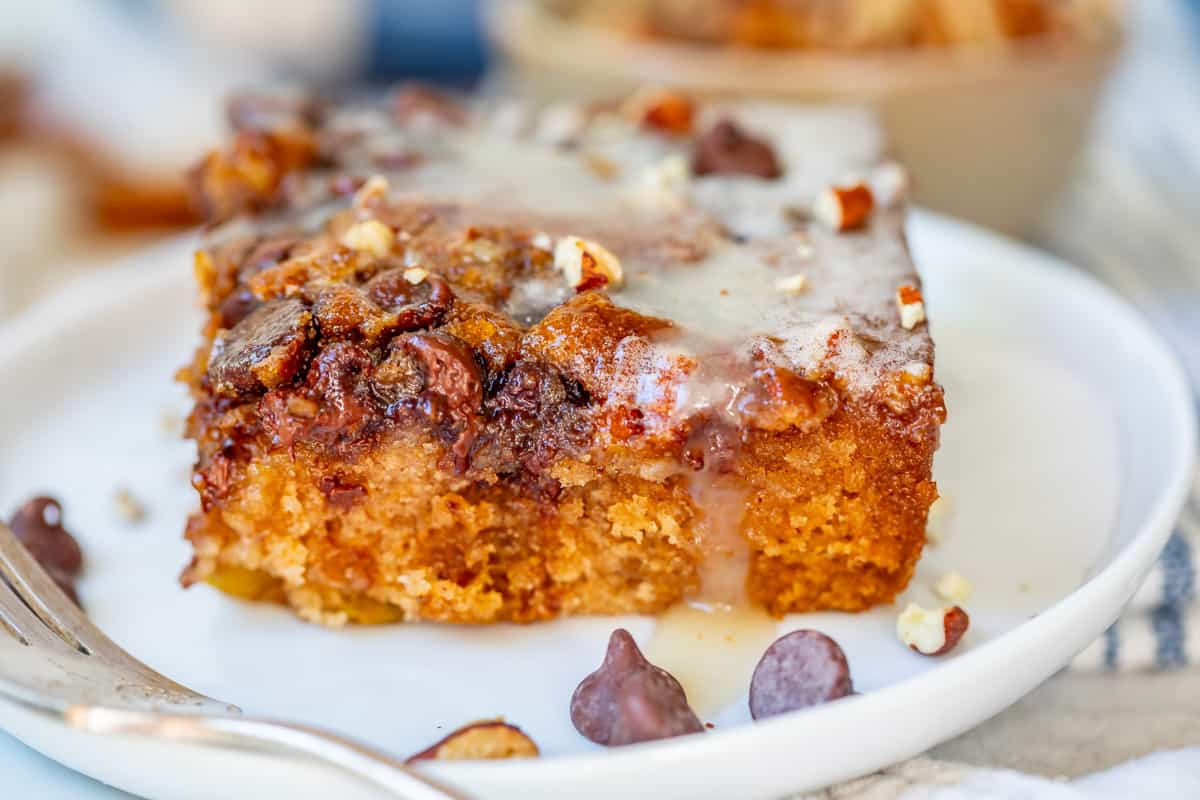
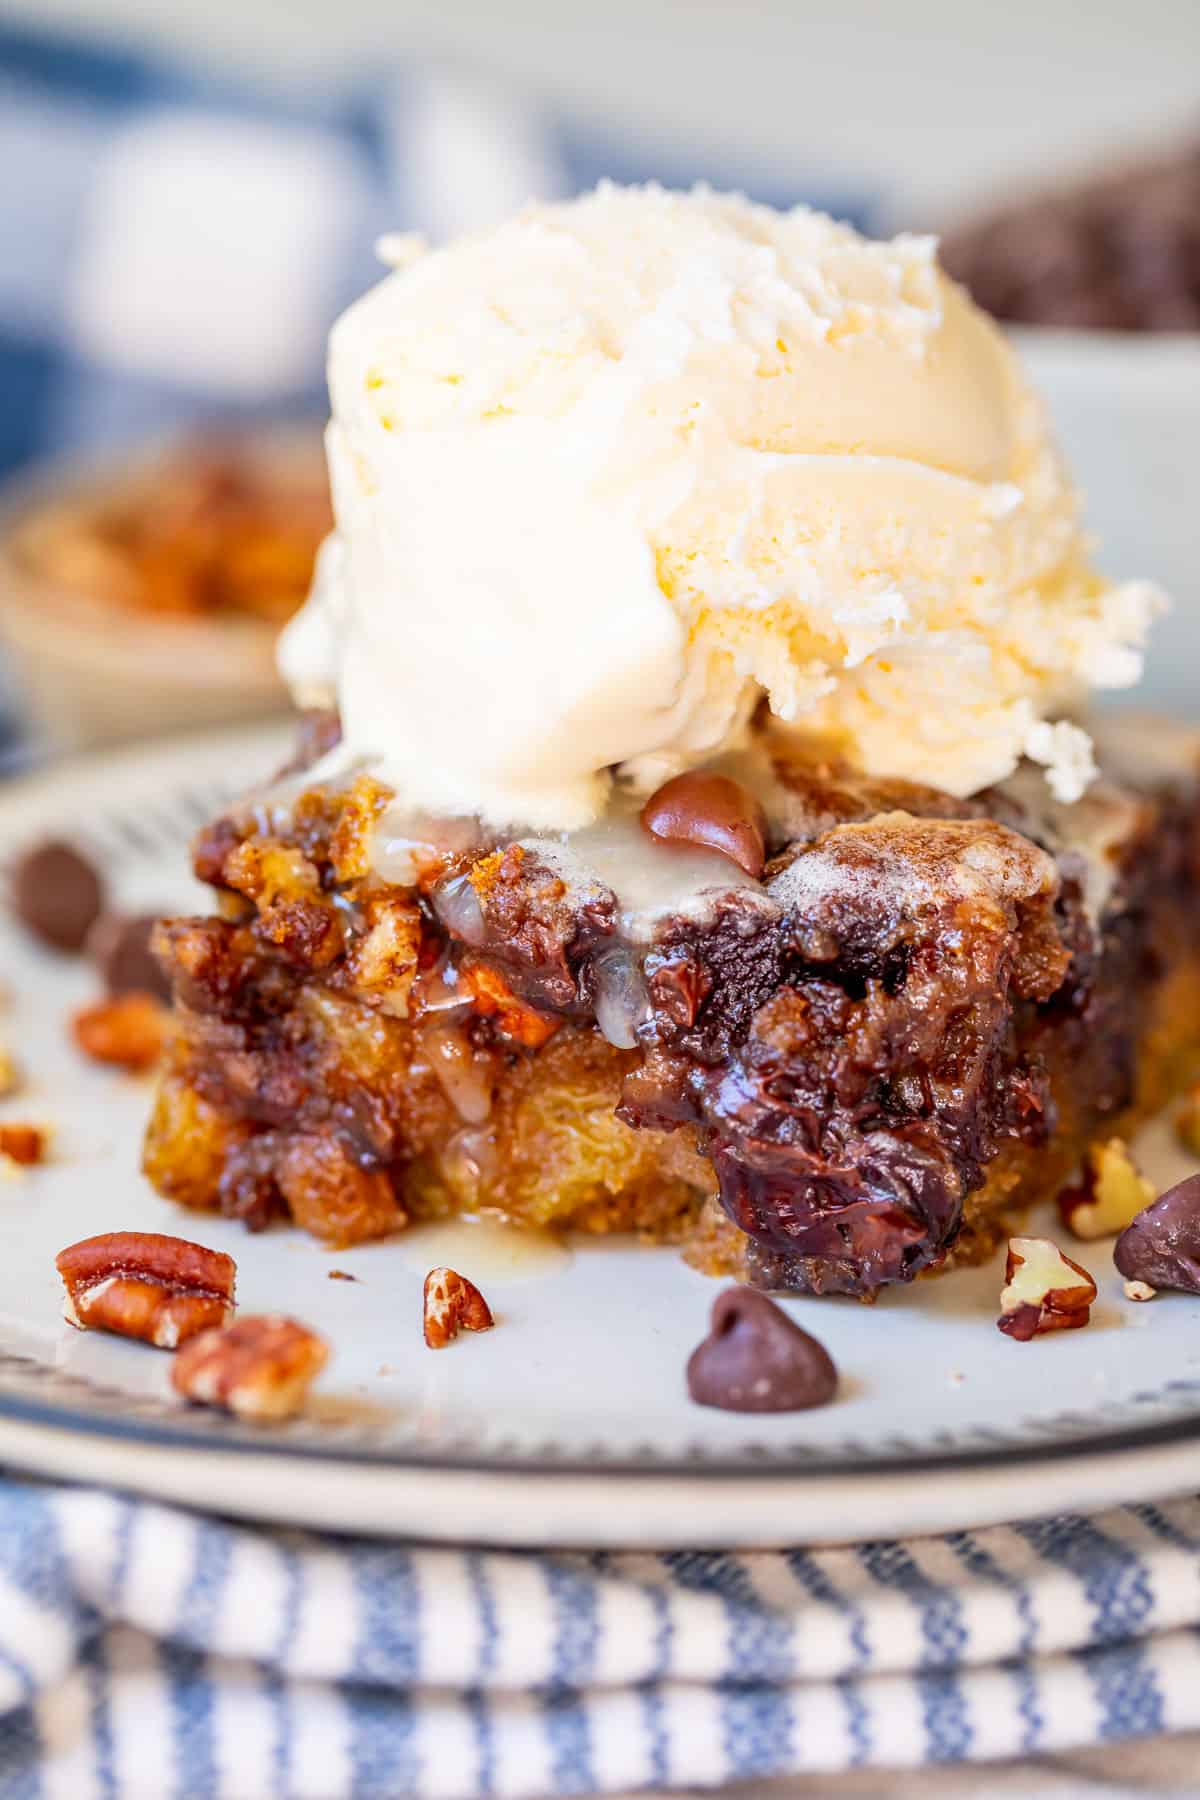
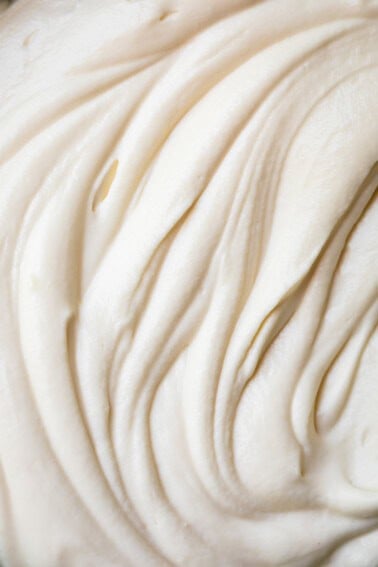
THEN after it comes out of the oven, we drown the whole thing in 5 minute Homemade Buttermilk Syrup, which I posted last week. Amazing on pancakes, amazing on this cake. The syrup (we will call it a “glaze” in the name of cake, but it’s the same thing) pools on top of the cake and you will think it’s ruined but it’s NOT. It seeps in after a few minutes, leaving you with the most decadent, moist, flavorful cake in all the land. It’s truly incredible served warm with ice cream.
Leave the nuts out if you must. Or leave the chocolate chips out if you are not a cinnamon-chocolate person (I’m usually not, actually, but the cinnamon is mild in this recipe.)
But DON’T skip the sprinkle of brown sugar (it’s crucial for getting a crunchy top), DON’T skip the Buttermilk syrup glaze (it’s fizzy and warm and just so good), and DON’T skip the raisins. I said what I said people. The raisins turn this cake into a whole other thing. Don’t question this baking soda boiling business! Our grandmothers know what’s up.
What are picnic cakes, anyway?
Have you had this before? Did you grow up with a specific version of a picnic cake? Like I said, it’s a classic. There are MANY versions of picnic cake. Turns out, the name of the cake can refer to just about any simple cake that is baked and then topped or frosted in the same pan, which makes it very convenient to bring with you to any event: a picnic, a potluck, you name it. They typically don’t have buttercream frosting, which would melt in the sun. Picnic cakes are easy, and great for sharing with a crowd or bringing with you on the go.
Picnic cake ingredients
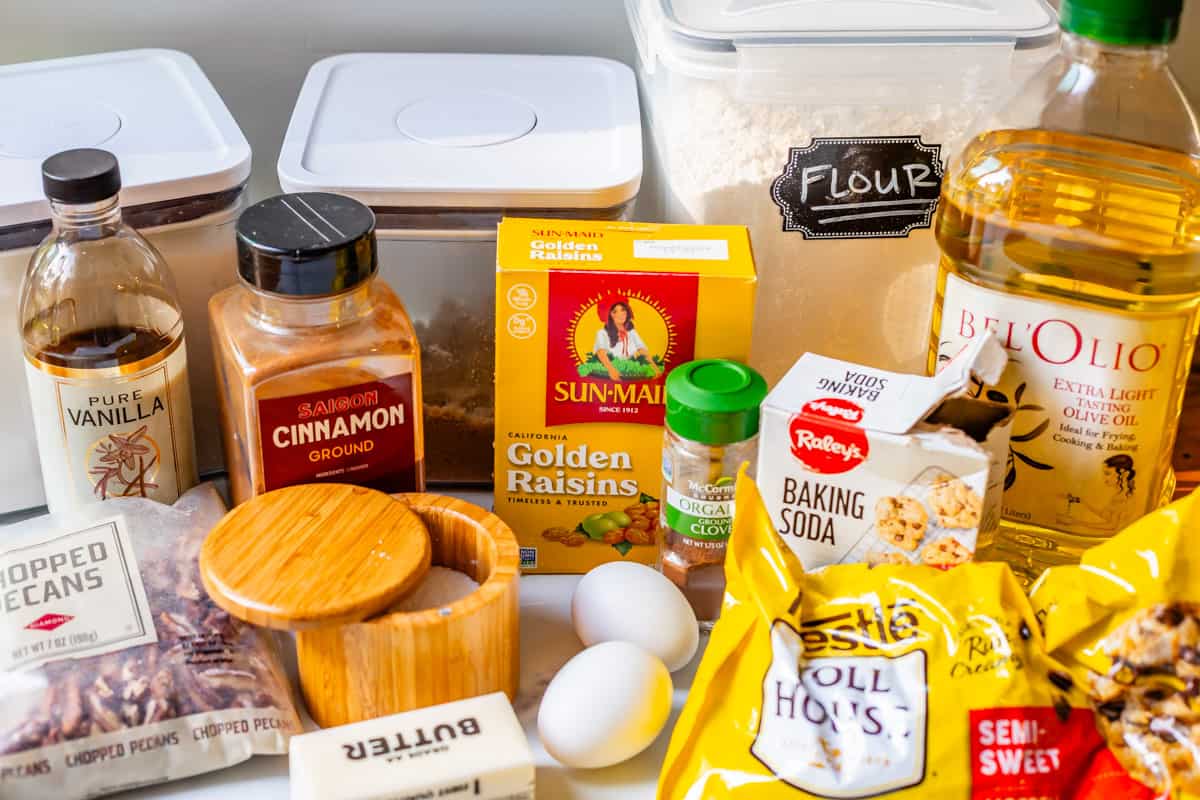
You probably already have most of the ingredients at home. Even the Buttermilk Syrup is a cinch to throw together with basic ingredients. Here’s a list to give you an idea of everything you need. As always, a full ingredient list with amounts and instructions are in the recipe card.
- golden raisins (or any kind)
- baking soda
- butter
- granulated sugar
- vegetable oil
- eggs
- vanilla
- all purpose flour
- ground cinnamon
- ground cloves
- kosher salt
- pecans (or walnuts)
- dark brown sugar
- Buttermilk Syrup (tap for recipe)
How to make picnic cake
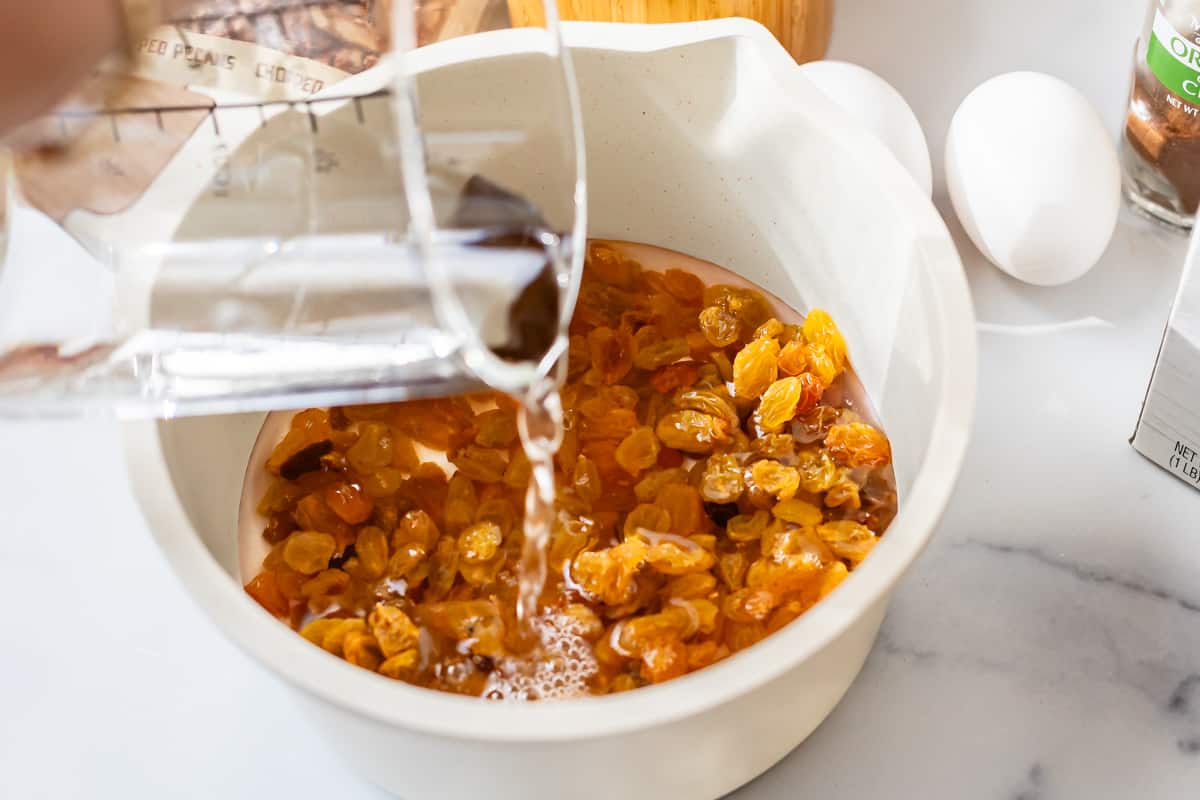
Let’s get going! First start by boiling the raisins. I know this sounds so weird! But trust the process! Or whatever other woo-woo phrase will get you through this!
After they have come to a boil add in the baking soda…
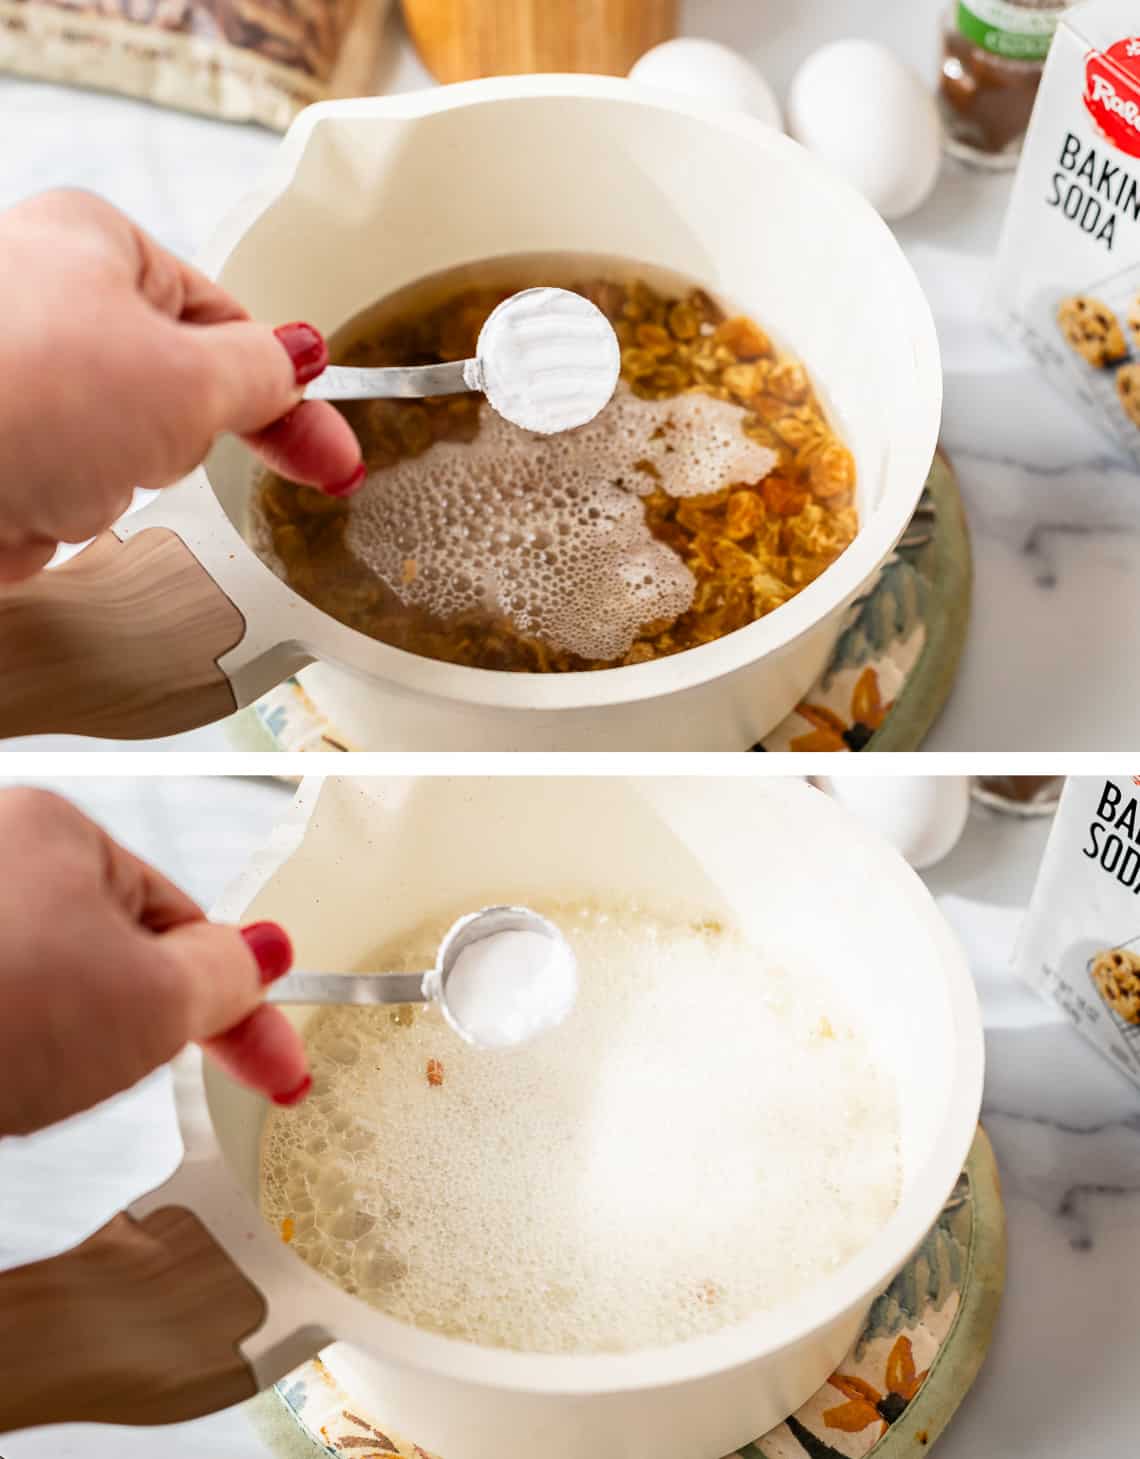
and watch it fizz up. Set that aside, heat oven to 350 degrees if you haven’t yet, and start making the cake part:
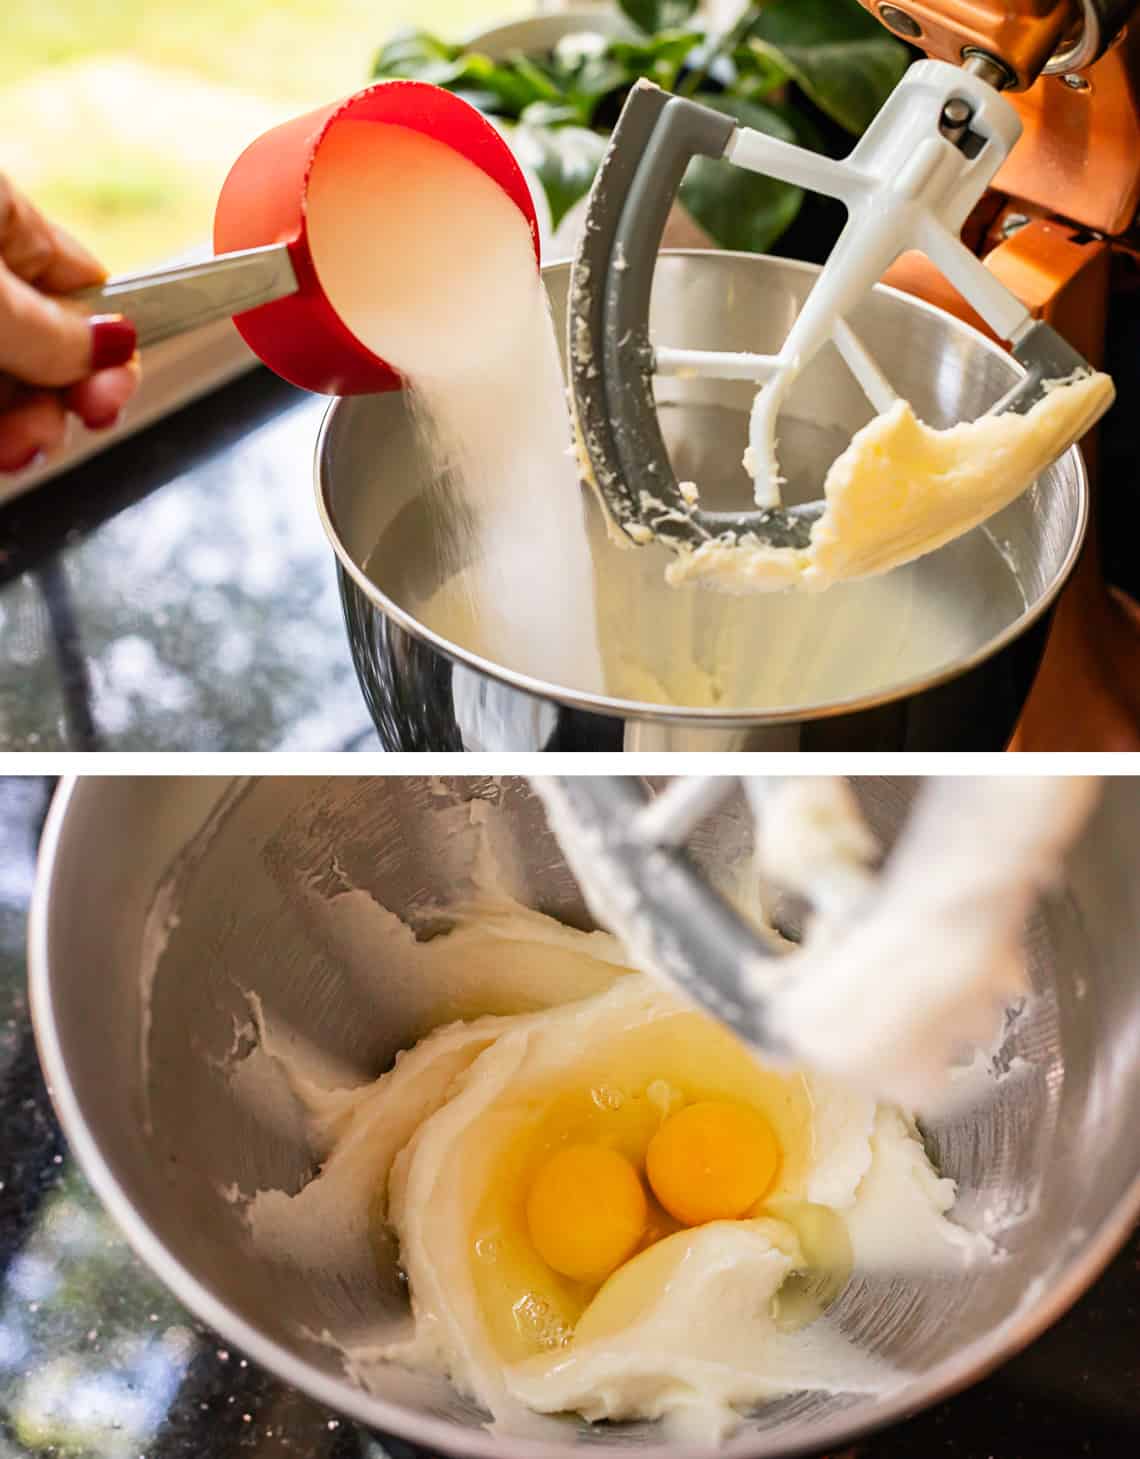
Combine your wet ingredients: cream butter and sugar, then oil, then add in the eggs and vanilla extract.
Then add all your dry ingredients together. I show them in a large mixing bowl here, but you can actually just add the flour and salt and spices straight to the bowl with the butter, see recipe for details.
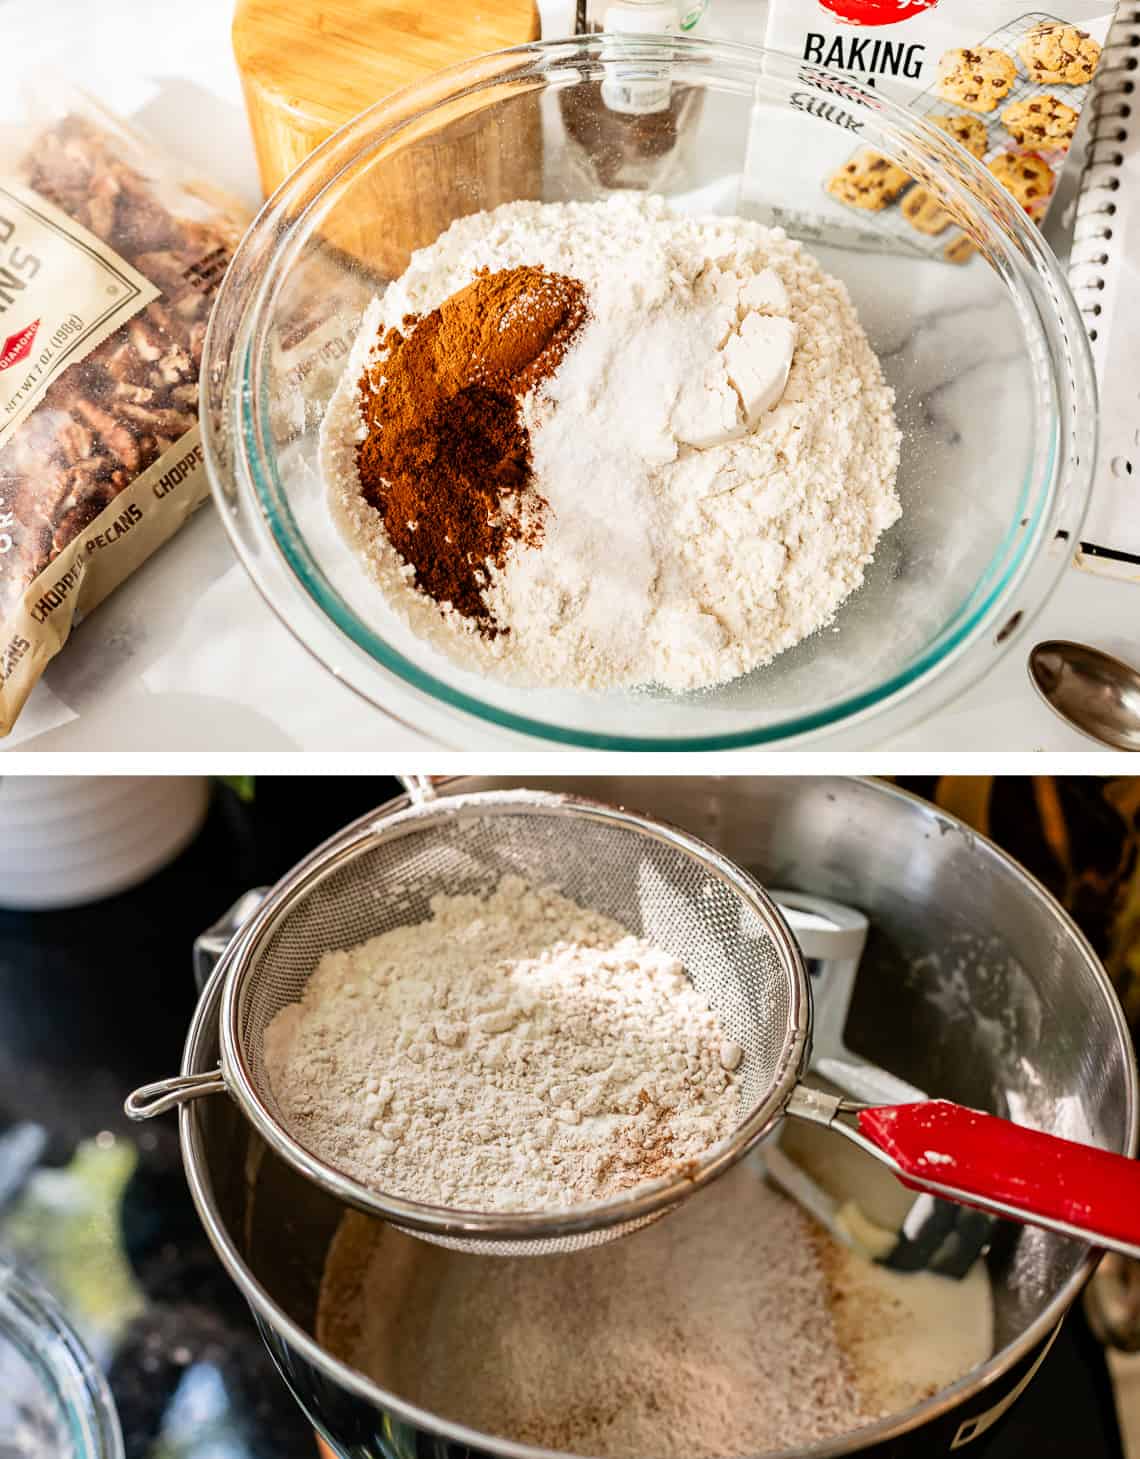
Sifting always helps a cake from being lumpy.
Beat the cake batter until it is just combined. Science lesson for you: beating flour a whole bunch will develop the gluten protein strands, giving it more structure. Great if you’re making bread, which needs to be sturdy. But we don’t want sturdy cake. We want soft, delicate cake. Over beating makes it tough. So just beat until combined!
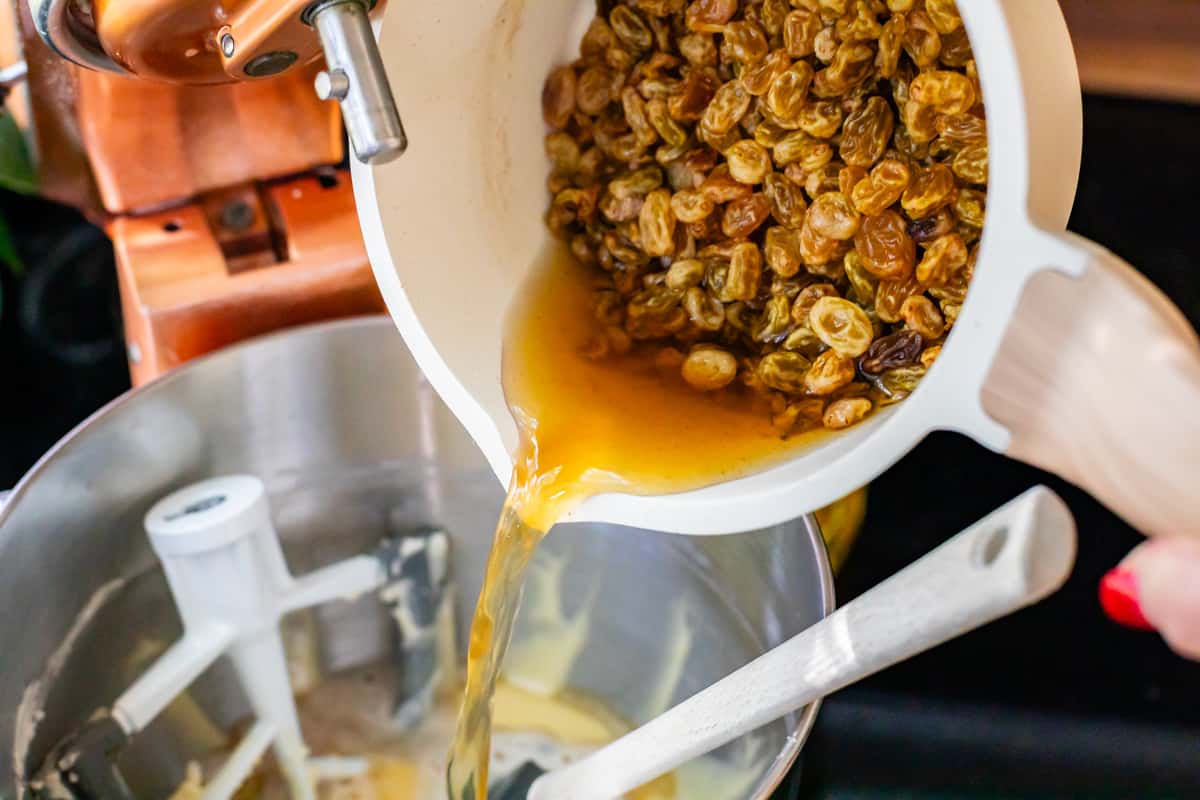
The last step for the cake batter is to pour in the raisins and all the water into the mixture! This feels a little strange because it looks like a lot of water, but I promise it works. Stir to combine everything. The batter will turn out pretty thin. Pour it into a 9×13 inch pan and make sure you distribute the raisins so each slice of cake will have enough.
Now it’s time for the topping! Start with the chopped pecans. You can do walnuts if you prefer. No need to toast, they will get toasty in the oven. Do not mix!
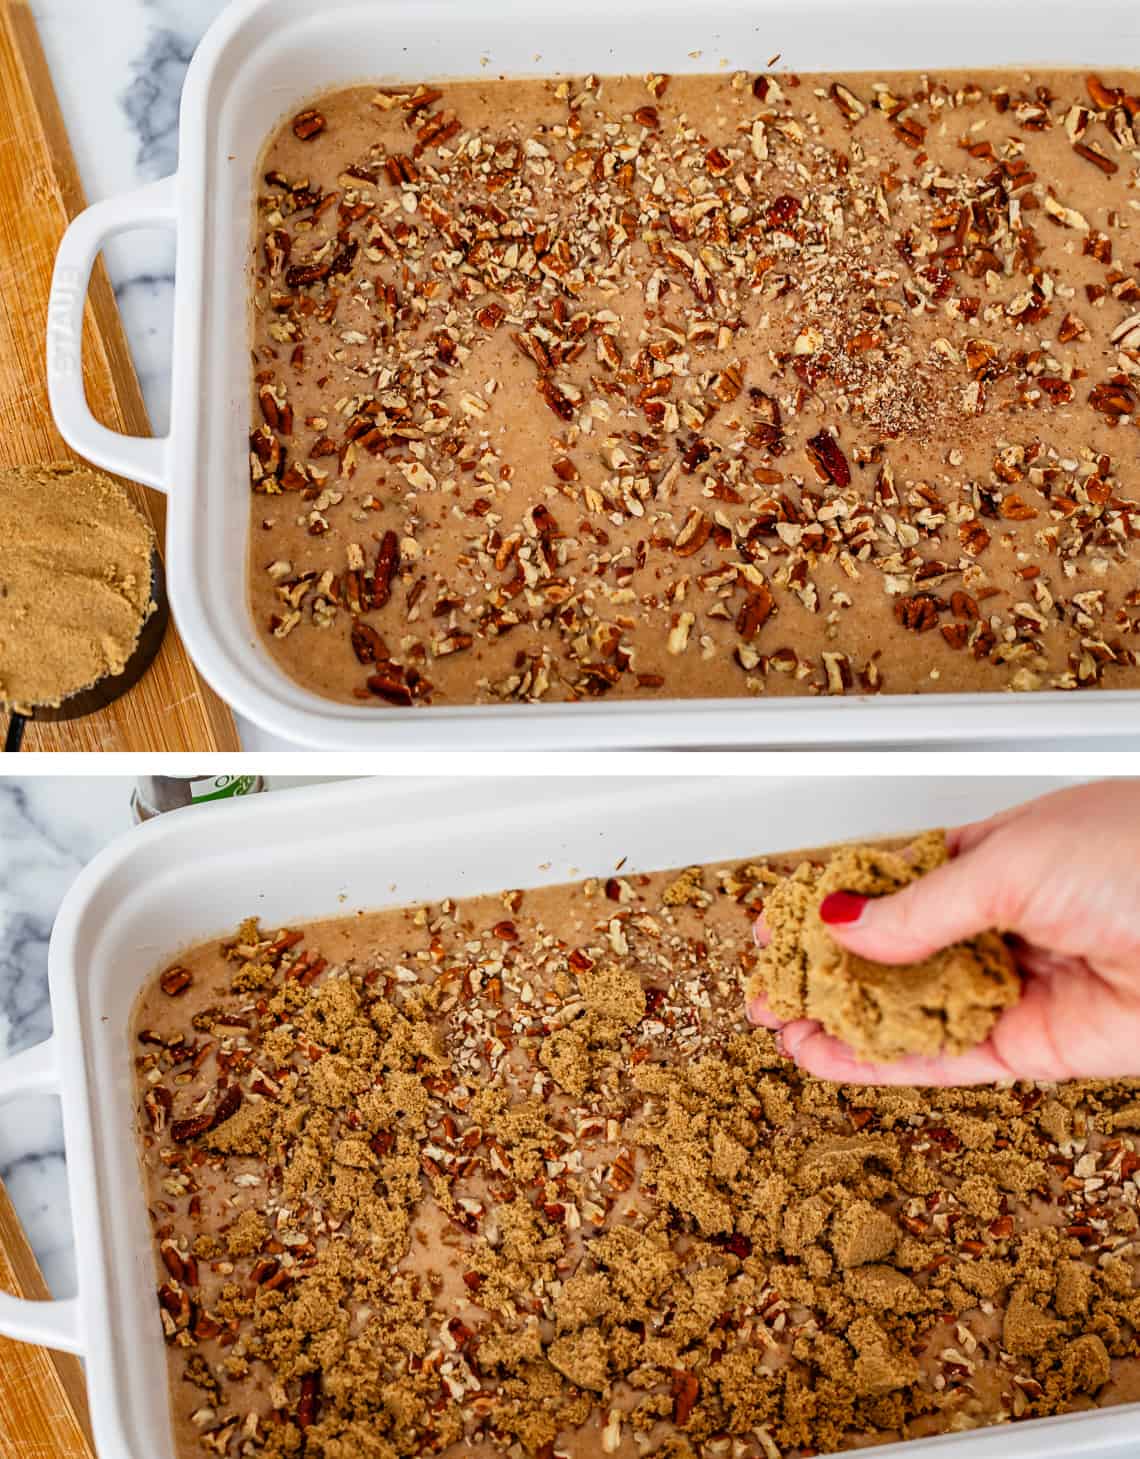
Next sprinkle on a half cup brown sugar. You can go wild and sprinkle on a bit more if you like, even up to 1 cup. I was happy with the half cup. (and that’s saying something, I’m the sugar queen.)
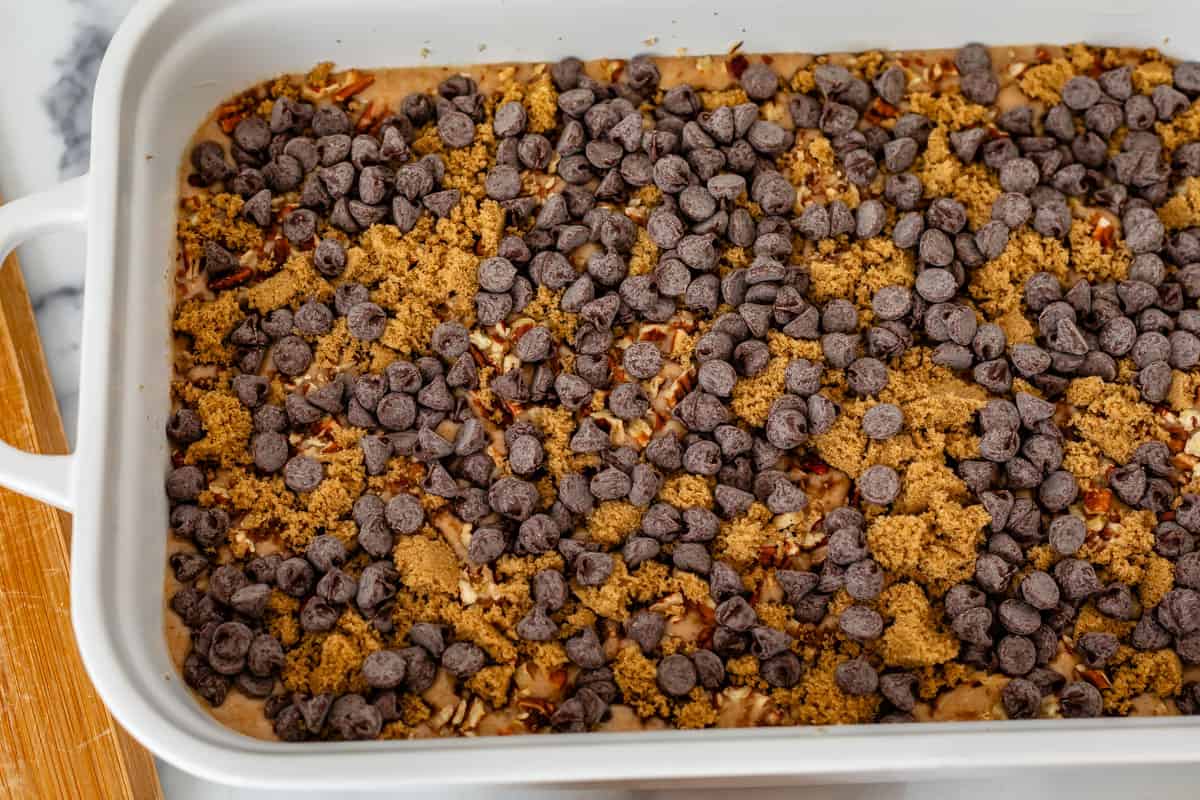
Last topping item: chocolate chips. Add 1 cup. Don’t mix!
That’s it! Pop it in the oven and bake for about 30 minutes.
While it’s in the oven, make the Buttermilk Syrup.
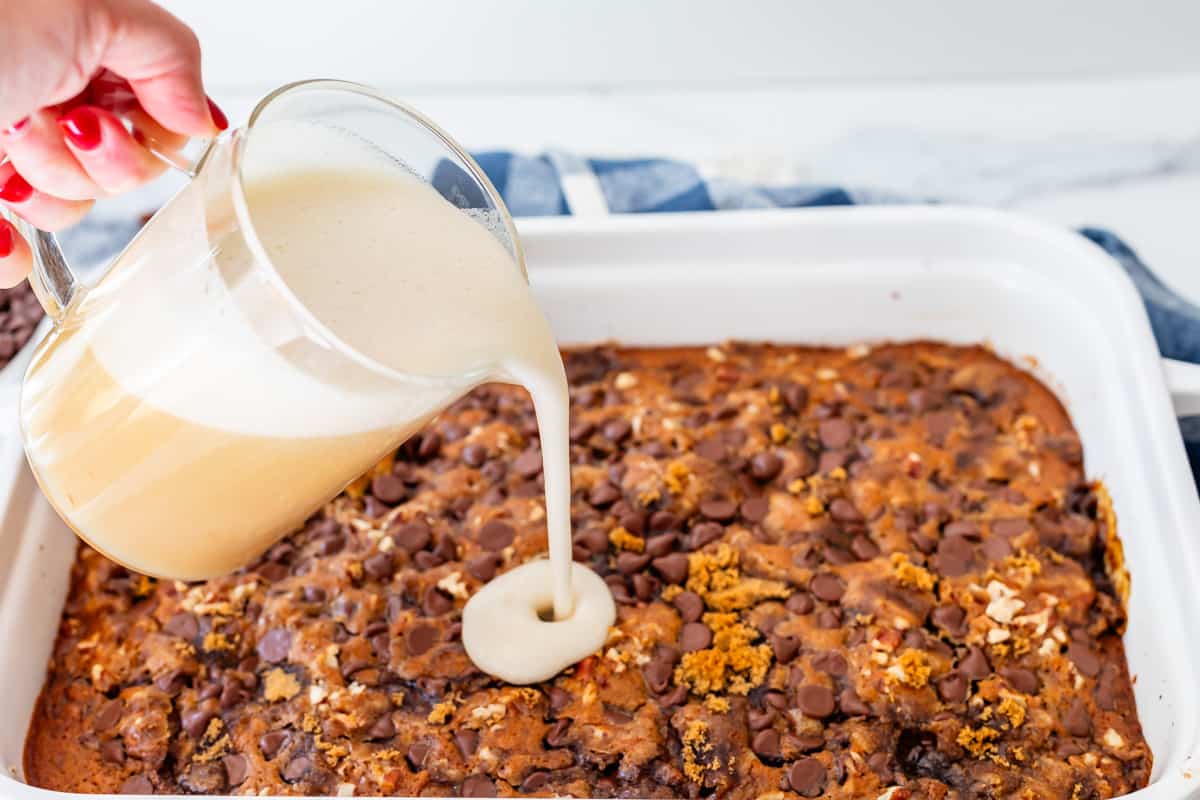
You can kind of see in this picture how cripsy-crackly the topping is, from the brown sugar. It’s so good! After a few minutes of resting, pour the Buttermilk glaze over the top of the cake. No need to add all of it, I like to save some to pour over individual slices. You do you: let your buttermilk dreams speak to your heart.
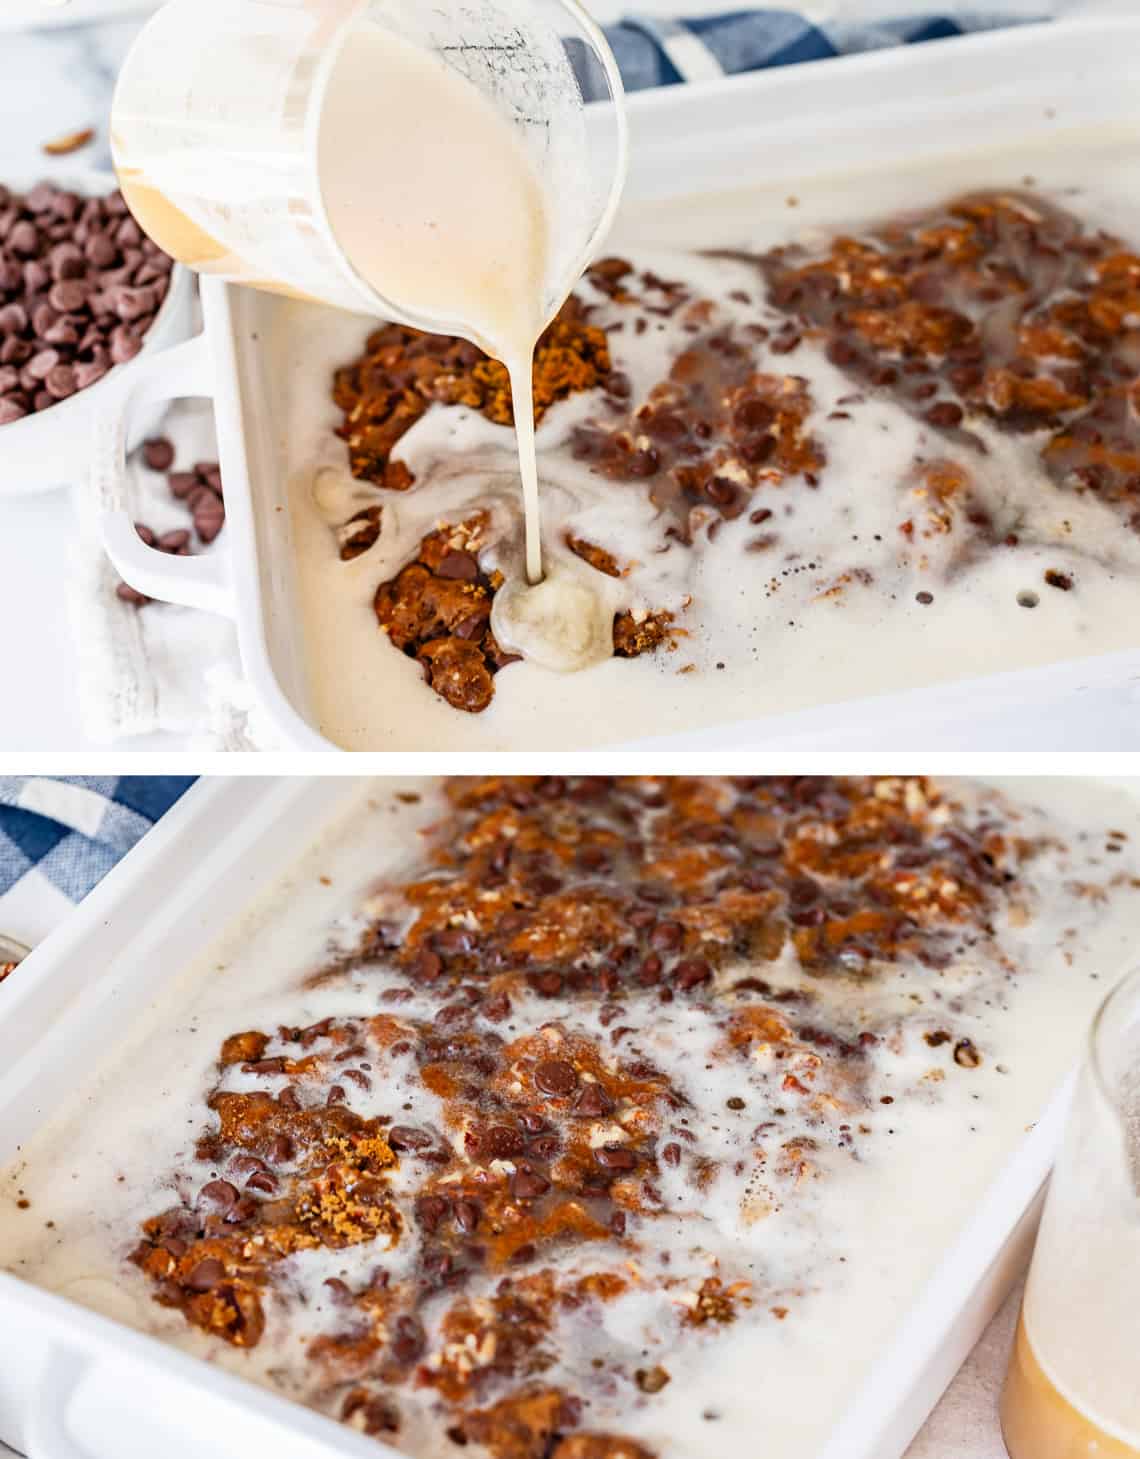
It will kind of look like your pour cake is drowning in too much of a good thing. But never fear! The glaze seeps into the cake in about 10-20 minutes.
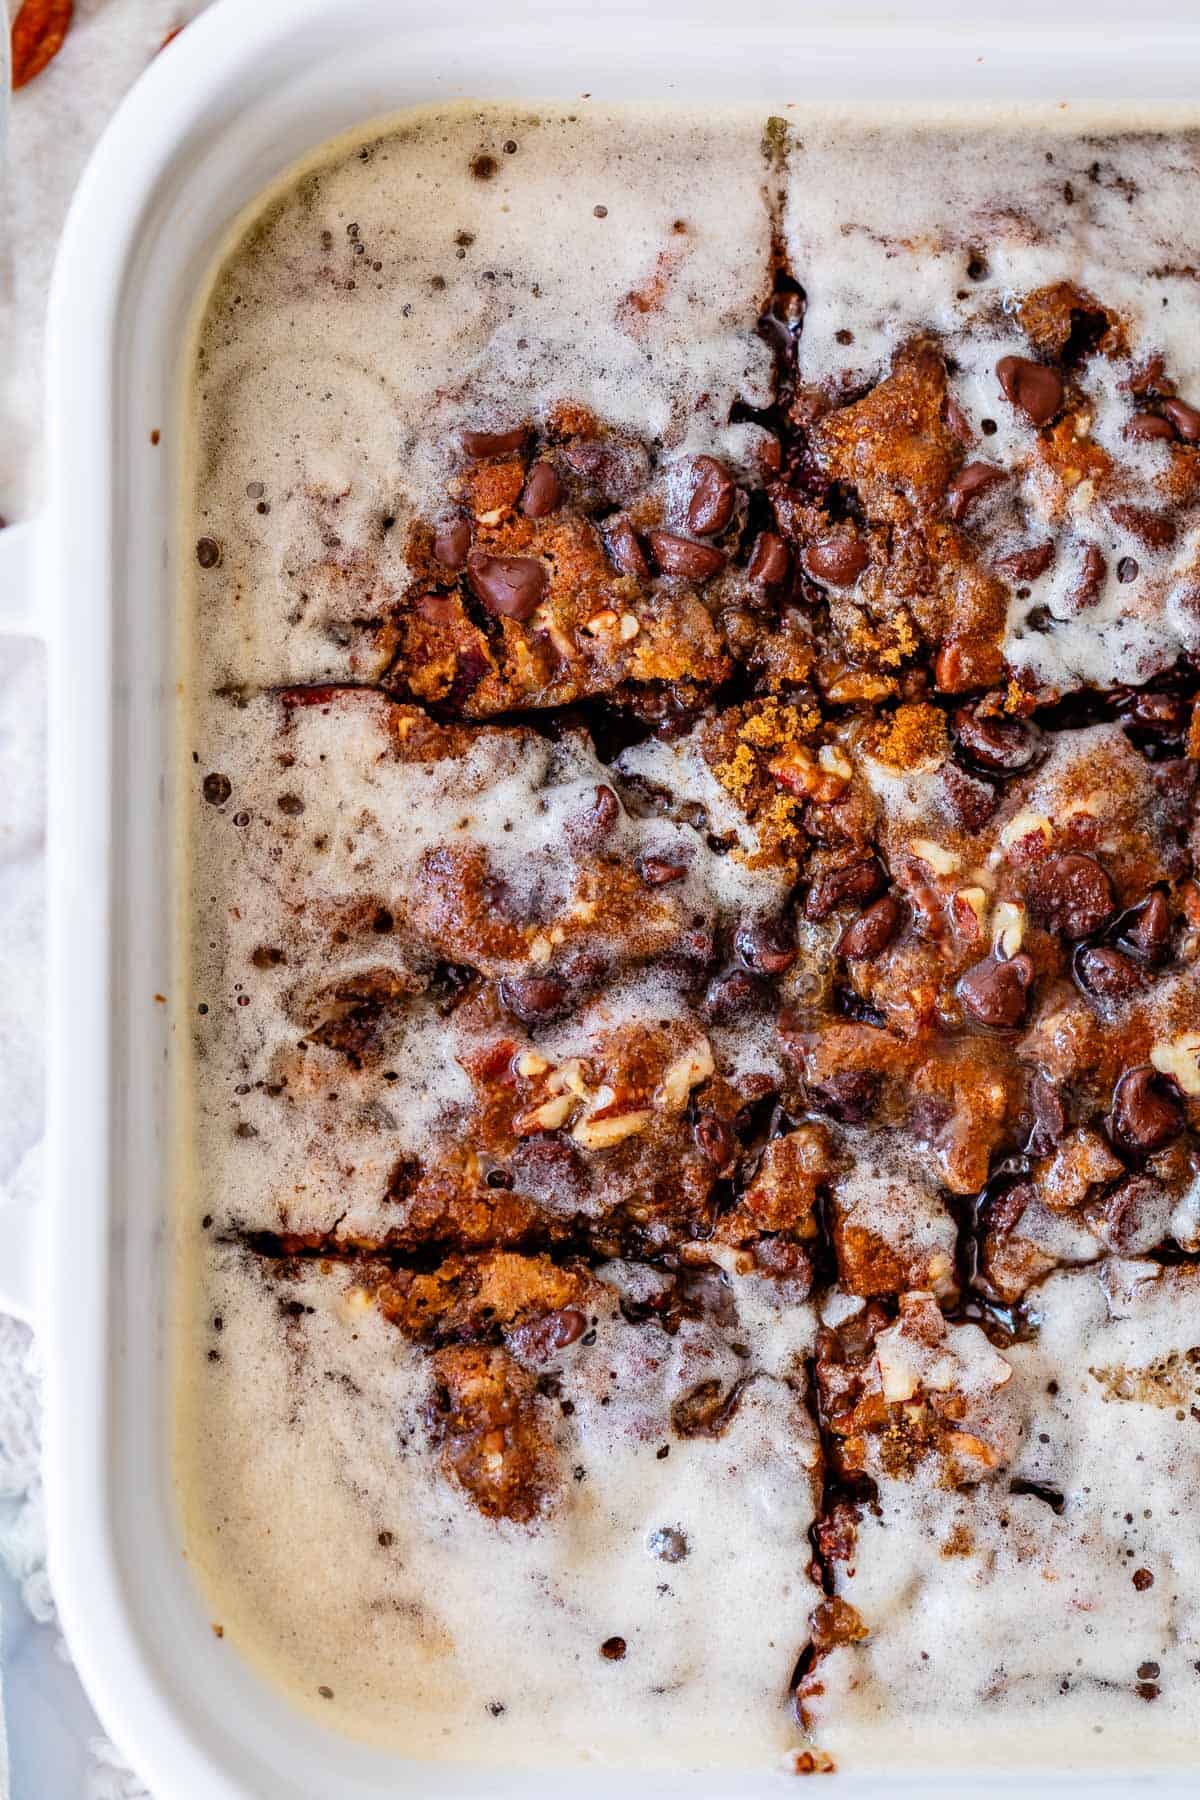
And you end up with this lovely situation. SO.GOOD.
What to serve with picnic cake
Honestly? A tall glass of cold milk, or coffee if you’re into that. It’s so rich and delicious that it really needs nothing else with it. Now, it IS called picnic cake after all, so here are some great picnic foods!
- Pulled Pork Recipe: Slow Cooker or Oven Roasted OR BBQ Smoked Pulled Pork (on a Gas Grill) >> to make the most epic pulled pork sandwiches
- How To Make The Best BLT Sandwich! >> bring your ingredients separately, and BOOM amazing picnic sandwich
- Chicken Salad with Mandarin Oranges >> this chicken salad + croissants = amazing picnic food
- Best Sliders Recipe >> You can make these cheeseburger sliders ahead of time!
- 2-Ingredient Kielbasa Puffs >> perfect make ahead finger food at a picnic, and you can use hot dogs for the kids!
- Classic Deviled Egg Recipe >> deviled egg perfection, truly. The trick is to not add too much mayo. One of my dreams for heaven includes asking God to make me a Reel of all the instances throughout time when people are carrying a tray of deviled eggs and they ALL slide off. I laugh just imagining this, every time.
- Easy Broccoli and Bacon Salad >> easy to make and a huge crowd pleaser
- The BEST Macaroni Salad Recipe >> the only macaroni salad recipe you need!
Picnic cake served for brunch
This cake would also work as an amazing centerpiece coffeecake for a brunch! With that in mind, here are some more brunch ideas to go along with it!
- Easy Quiche Recipe with Bacon and Spinach >> my favorite quiche recipe, and such a classic for brunch
- Tomato Tart with Blue Cheese >>buttery crust, quiche-like filling, and beautiful tomatoes!
- The Best Scone Recipe I’ve Ever Made >> perfect hand-held pockets of goodness
- Flaky Buttermilk Biscuits From Scratch >> crispy on the outside, soft and tender in the middle
- Strawberry Cucumber Salad with Honey Balsamic Dressing >> simple, delicious, and SO impressive
- Caprese Salad Skewers Appetizer >> seriously, everyone loves this traditional flavor combo
- Honey-Drizzled Bleu Cheese Strawberry Bites >> perfect combination of savory and sweet
- Cheesecake Stuffed Strawberries (Strawberry Blossoms) >> these are so elegant and just may be the plate that empties first – they’re that good!
- Baked Oatmeal from Two Peas and Their Pod
- Sheet Pan Breakfast Sandwiches from A Beautiful Mess
How to store leftover picnic cake
Leftover picnic cake is so easy to store! Just make sure you cover it with a lid or plastic wrap and you can leave it out on the counter. If you still miraculously have cake left after three days on the counter, transfer the cake to the refrigerator where it will last another 2-3 days. The sooner you can eat the leftovers though, the better, to avoid sogginess. You can warm up individual pieces in the microwave if you want, or large portions of the cake (like a half cake) at 300 degrees for 10 minutes or until heated through.
Can you freeze picnic cake?
Yes! In fact, if you’re not going to be able to eat all the leftovers within a day or two, I recommend freezing the remaining cake. You can wrap a whole or half cake completely in plastic wrap and then put the portion into a gallon or 2 gallon ziplock freezer bag. You can also cut individual portions and wrap/bag them the same way. (It’s the perfect way to have a sneaky afternoon snack for one!)
If you have a large portion of cake or a whole cake to use from the freezer, set it out on the counter for at least one hour or two til thawed through. If you want it warm, place it (unwrapped) in an appropriate size pan and pop it in a 300 degree oven for about 10-15 minutes or until it’s heated to your liking. Let individual portions sit on the counter for about 20-30 minutes, then warm in the microwave at 50% power til warmed through. Or you could try putting it straight into the microwave if you just have no patience for your treat, like me.
Frequently asked questions
A picnic cake refers to any kind of cake that can be baked and topped or frosted in the same pan. It’s more common to have a topping vs frosting. The name comes from the fact that this type of cake is easy to take with you to other places, like a picnic for instance!
Most cakes will, because they have buttercream frosting that melts in the sun. But THIS cake is perfect for a picnic. No frosting = no melting. (Buttermilk glaze is perfect for travel!) In fact, this picnic cake is delicious served hot or cold, so no matter the temperature you are going to love it!
So many answers to this question! The top issues people have are, in no particular order: using old or expired leavening (in this cake, baking soda); under or over mixing the batter; switching out ingredients without thinking about how it will affect the chemistry in the baking process, not measuring ingredients properly (spoon and level that flour, people!), and baking at the wrong temperature or putting the cake in before the oven is preheated. Phew! I know there are more, baking truly is a *fairly* precise science. But if you follow instructions you will have success every time!
More delicious snack cake recipes to try!
I love that this cake is so versatile and can be eaten at any time of day. Breakfast? Afternoon snack? Of course! After dinner? You betcha. Here are some more coffee and snack cakes that fill a similar role: delicious, and the perfect little treat at any time of day.
- Coffee Cake with a Ridiculous Amount of Streusel >> I’m all about the MAX amount of streusel in this cake
- Maple Butter Twist Coffee Cake >> it’s like a maple flavored twist of a cake and a cinnamon roll!
- Pumpkin Coffee Cake >> a perfect fall-flavored version of the sour cream coffee cake
- Best Banana Bread Recipe (Moist!) >> super moist, fluffy, and NOT too dense
- Best Recipe for Zucchini Bread >> so stinking easy to make and WORTH IT. check the reviews on this one, people love it.
- Chocolate Babka >> soft and sweet bread filled with chocolate. yum!
- Cinnamon Sugar Dipped Muffins (French Breakfast Puffs) >> an entire muffin, dipped in butter and cinnamon sugar is definitely a treat worthy for any time of day. My girl Sarah (BFF project manager) introduced these to me.
- The Best Pound Cake Recipe from Sugar Spun Run
- Coconut Buns from Wild Wild Whisk
Facebook | Pinterest | Instagram
Picnic Cake with Buttermilk Glaze
Ingredients
Equipment
Wet ingredients
- 1 cup golden raisins, packed, or any kind of raisin is fine
- 1 & 1/2 cups water
- 1 teaspoon baking soda
- 1/2 cup butter, (1 stick), softened
- 1 cup granulated sugar
- 1/4 cup vegetable oil
- 2 large eggs
- 2 teaspoons vanilla
Dry Ingredients
- 1 & 3/4 cup all purpose flour, spooned and leveled
- 2 teaspoons ground cinnamon
- 1/4 teaspoon ground cloves
- 1 teaspoon kosher salt
Topping
- 3/4 cup pecans*, chopped; don't toast them first
- 1/2 cup dark brown sugar, packed (or light brown is fine)
- 1 cup semisweet chocolate chips
- 1 batch Buttermilk Syrup
Instructions
- Prepare a 9×13 inch cake pan with nonstick spray, or rub the inside with a bit of butter or oil. Preheat the oven to 350 degrees F.
- Prep the raisins: Add 1 packed cup of raisins to a small saucepan. Add 1 and 1/2 cups water. Bring to a boil over high heat. Once boiling, remove from the heat.
- Add 1 teaspoon baking soda. It will fizz up at you! Stir it all together to distribute the soda. This helps soften the skins of the raisins, and the boiling water makes them nice and plump. Set this mixture aside and let soak for at least 10 minutes.
- Wet ingredients: Meanwhile, beat 1/2 cup butter in a large bowl or stand mixer until it is soft and creamy. Add 1 cup sugar and beat well, at least 1 minute, until light and fluffy, making sure to scrape down the sides of the bowl a couple times.
- Add 1/4 cup vegetable oil to the butter and beat well.
- Add 2 eggs and 2 teaspoons vanilla to the mixture and beat well, scraping the edges of the bowl until fully incorporated.
- Dry ingredients: Add 1 and 3/4 cup flour on top of the butter mixture, but do not stir yet. Add 2 teaspoons cinnamon, 1/4 teaspoon cloves, and 1 teaspoon kosher salt on top of the flour and gently stir it into the flour with a small spoon.
- Once all the dry ingredients are adding, beat once again, scraping down the sides of the bowl, until the mixture has just barely come together. You want to make sure the flour has been fully incorporated (no white steaks) but once you’ve achieved this, stop beating.
- Add the raisins. Once the flour is incorporated, and your raisins have had a nice good soak in the spa, add the raisin and water mixture to the flour mixture. Add all of the liquid. Gently beat the raisins and water into the cake batter, just until combined.
- Pour the cake batter into the greased 9×13 inch pan. Spread to the edges and make sure it’s even. Distribute the raisins as necessary to make sure every slice of cake will have plenty.
- Add the toppings. Chop 3/4 cup pecans, or walnuts are great too. There is no need to toast them first since they sit on top of the cake and will get toasty enough while the cake is baking. Sprinkle the nuts evenly over the cake.
- Sprinkle 1/2 cup packed brown sugar over the walnuts.
- Sprinkle 1 cup chocolate chips over the top of the cake.
- Bake the cake at 350 degrees F, on the center rack, for about 30-35 minutes, until the edges look set and a toothpick comes out of the center with no wet batter on it. This can be tricky because of the chocolate chips. Make sure you are not mistaking melted chocolate for wet batter. You can also gently wiggle the pan: it’s ok if the cake jiggles a little bit, as long as it’s doing so evenly across the whole top of the cake. If the center of the cake (which will finish baking last) looks at all sloshy or moves a lot more than the inner edges, then bake a couple minutes longer.
- When the cake is about 5 minutes out from finishing, make the Buttermilk Syrup. Tap for the recipe. Technically you can skip this; the cake is good on its own. But come now. Don’t leave this on the table! It’s SO good with the buttermilk glaze on top.
- Once your syrup has bubbled and fizzed after adding the baking soda, and you’ve added the vanilla, you can pour it right on top of the cake. I usually add most of it, but not all of it (maybe 1 and 3/4 cup or so), that way there is a little leftover to pass around so that guests can drizzle more if they like. The syrup will pool on top of the cake and you will think you have royally messed up. But you haven’t! Eventually the glaze will seep down into the cake, making it incredibly moist.
- Wait at least 15-20 minutes for the Buttermilk Glaze to settle in, then serve the cake warm with whipped cream or ice cream! I love this cake any way you give it to me, but warm is definitely my favorite. Heat up leftover individual slices and top with the little bit of the Buttermilk glaze you kept out. Amazing, even on day two!
- How to store: Store this cake covered on the counter for up to 3 days. After that I would move it to the fridge.


This is so exciting! I used to work with Eric at UC Davis. How cool you are both able to do this! :)
I need to try this recipe too. I wonder if I could use dried apricots instead of raisins? I have some to use up.
Awww, I’m so excited to get included on the list- I love reading over your posts, and the teacher in me loves finding a tiny grammar thing every so often 👻 I’m spoiled that I get to taste what you cook so often – though I was sadly disappointed to miss out on this one- guess I’ll have to make it myself!
So excited to see both your faces and love that you two are doing so well. We do miss Eric so much at UC Davis but know he is in the right place at the right time. Hope you and your sweet family are well!
Happy 12th blogging anniversary, and congratulations on your new full time “employee!” You and Eric make a great team both in your professional and personal lives. Wishing you continued success!
Wow! What an accomplishment for your family! I agree with a previous commenter who said that it is surprising to learn about the large team behind your success. But, boy, I am so thankful for each of you! I love your recipes. Your site and one other are my “go-to” places. Thank you! God bless y’all.
Congratulations on the anniversary and full-time husband partnership! Also cool is that it’s a family & friends affair. Who knew it took that many people to run the show? I had no idea!
You are my favorite food blogger, hands down.
I do have a question about the Picnic Cake. I only have dark corn syrup on hand. Do you think it would change things in a negative way? I’m thinking it may taste more caramel-y??