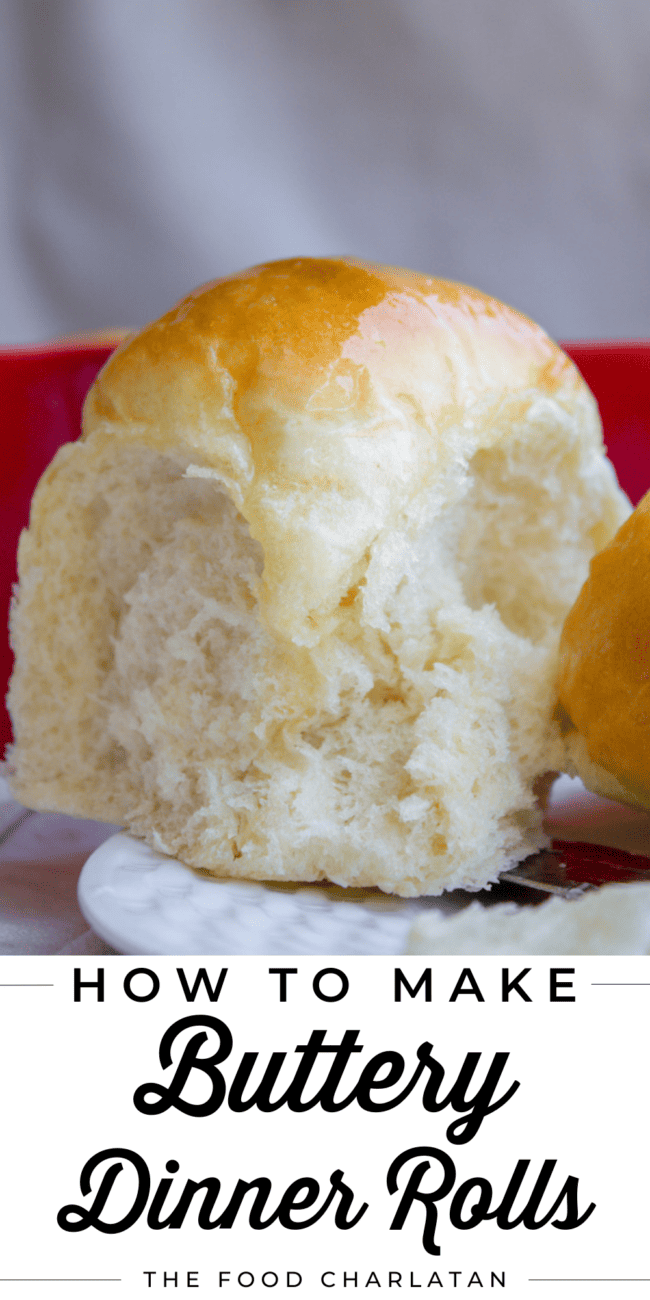
These buttery Homemade Dinner Rolls are so light, so fluffy, with SO much heavenly buttery goodness. Who needs dinner when you’ve got these dinner rolls?? I could eat the whole batch. My Aunt Shirley is basically the baking queen. This is her famous dinner roll recipe! Originally published June 14, 2016.
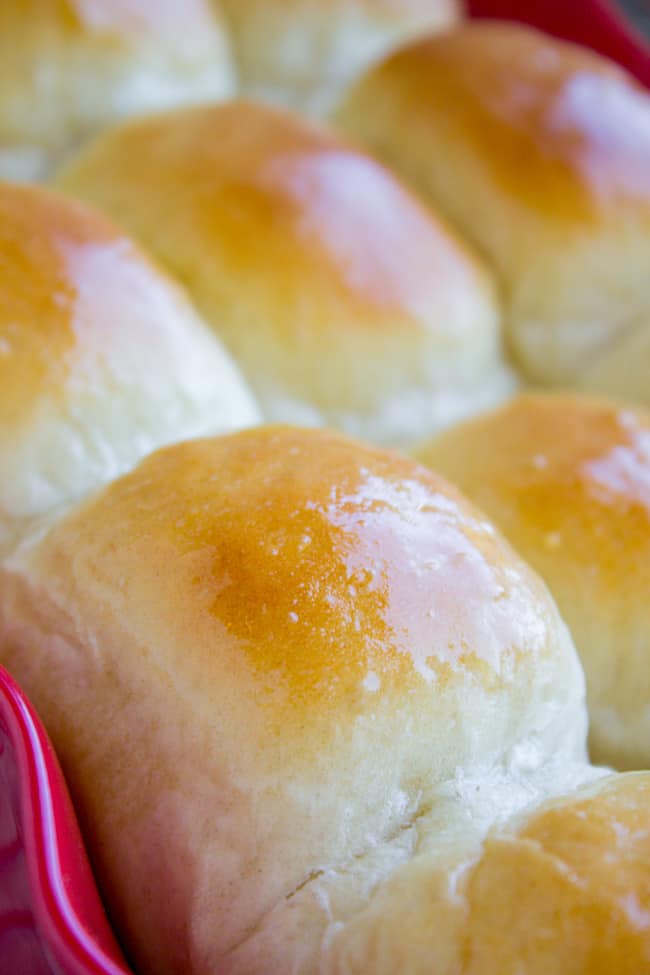
Table of Contents
We’ve got all KINDS of buns going on today. Not just the yeasty kind…

The baby kind too. ( ^^12 weeks. This was about a month ago.) Here’s the already-waddling oven in which the bun bakes:

Yay! Eric and I are SO excited for baby #3, and don’t even get me started on the kids. Charlotte wants a girl and Truman wants a boy (of course). We find out in a few weeks.
(Any guesses? I’m clueless. I didn’t get the gender-intuition-gene. I thought Charlotte was a boy and Truman was a girl.)


So now you know why I have been almost completely absent the last couple months. I get super sick for my first trimester. Like, the-thought-of-food-makes-me-actually-hurl kind of sick. I basically lived on milk and cereal for months. (I’m not exaggerating. Some days me and the kids would go through an entire half gallon of milk. Baby won’t be hurting for calcium…)
When food makes you sick but your entire job revolves around food, you are kind of forced to take a break, hence the radio silence going on here at The Food Charlatan.

When I drove from Sacramento to Philadelphia, I was still feeling pretty awful. But by the time I got home and left for Seattle, I was mostly better, with just a few setbacks here are there. Now I’m almost completely back to normal, if not fitting into any of my clothes by 19 weeks is normal. Hallelujah!
We are due on November 8. Guess when our multi-family Disneyland trip was scheduled for? November 14. Ooooops. Sorry family. (We managed to reschedule for October. Will they give me a wheelchair at 35 weeks pregnant you think?? Please say yes.)
Who already knew I was pregnant?? Come on, some of you ladies guessed, right?
What makes these the Best Dinner Rolls
My cousin Amber brought her mom’s dinner rolls to our Easter get together this year, and I literally ate nothing else. If you think I’m exaggerating, then you have never had morning sickness before. It really is possible to ignore ham, asparagus, jello salad, and all kinds of other amazing food when faced with queasiness and an entire pan of dinner rolls.

I begged for the recipe and now you lucky kids get to try them too! I love them because they have 2 full tablespoons of yeast and are SO fluffy and light. The flavor is just amazing. My Aunt Shirley uses Crisco in her recipe, but if that’s not your thing, I’m sure butter would work too. The shortening makes them SOOO soft though, and I used butter-flavored Crisco, so no flavor sacrifices.
Dinner Roll Recipe ingredients
Here’s a quick shopping list to help you gather your ingredients. See the recipe card below for the full ingredients and instructions!
- Active dry yeast
- White sugar
- Milk
- Kosher salt
- Butter-flavored shortening (or butter)
- Egg
- Flour
- Butter (for brushing)
How to make dinner rolls
I’ve got all the step-by-step instructions you need to make these a huge success!
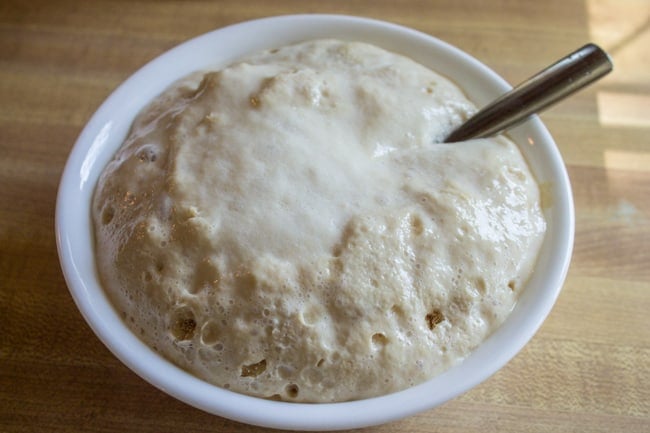
- Proof your yeast to make sure you don’t kill it. There is so much yeast in this recipe that you have to move fast before it overflows the bowl!

- When the dough has been kneaded, it should still be pretty sticky. You want to be able to work with it, but don’t dry it out with too much flour.

- Don’t run errands during your one hour rise, because you will be late and this will happen.

- Separate the dough into 24 pieces and shape them by gathering it and pinching with your fingers, then make the pinch the bottom of the roll.

I’m fussy and like to use a scale. Each roll should be about 2 ounces. On the right you can see just how fast these rolls rise. Both of these weigh 2 ounces, but you can kinda see that the one on the right has started to puff a little, even though it had only been a couple minutes.
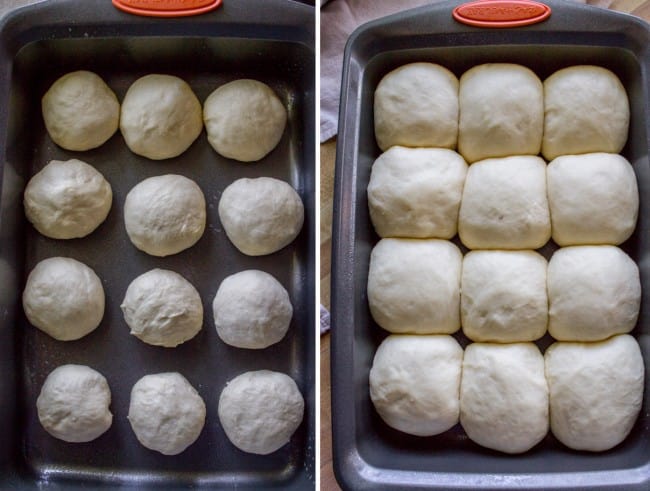
- Here’s the spacing situation when you use a 9×13 inch pan.
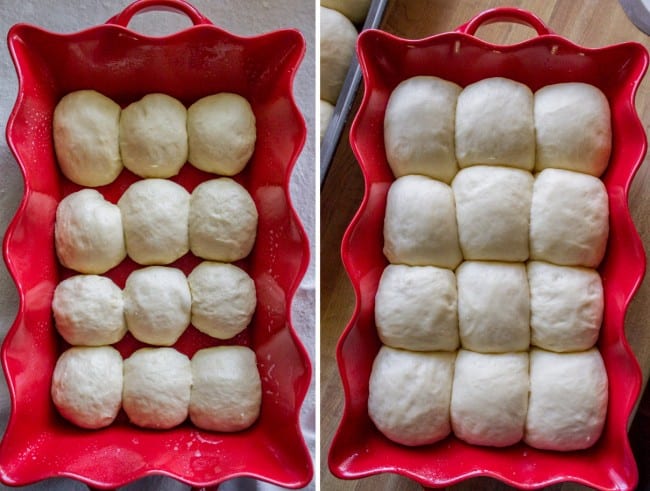
This is a 2 quart casserole dish, so the rolls are more squished, but it worked great.

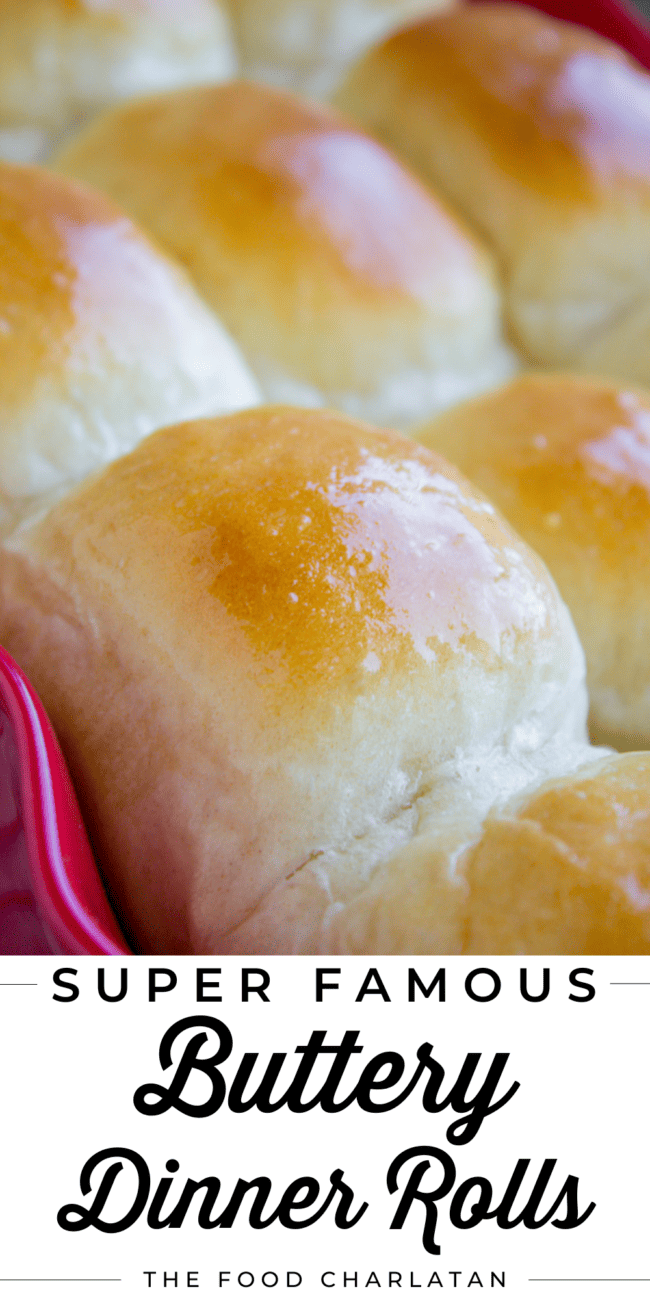
- Pull them out of the oven when they are a nice golden brown all over the top! If you make these, I’d love to see them! Tag #TheFoodCharlatan on Instagram!
How to serve the Best Dinner Rolls
Warm, with a great deal of butter. Also, with any nice meal you’re serving. Here are some of my favorite dinners that pair just perfectly with a boatload of buttery rolls.
Shepherd’s Pie Recipe with Cheese Topping << gravy soaked beefy goodness, just begging for a dinner roll to soak up the sauce.
Easy Salisbury Steak Recipe (30 Minutes) << another favorite of mine with lots of delicious sauce! Comforting homey food.
Pork Chops in Creamy Mushroom Sauce << something about pork chops just screams Sunday dinner am I right??
1770 House Meatloaf (Ina Garten) << think you don’t like meatloaf? Think again.
Old Fashioned Beef Stroganoff << absolute crowd-pleaser right here. So easy!
How to store Homemade Dinner Rolls
These rolls need to be covered so they won’t dry out. I just put them in a big tupperware container or in a ziplock bag. If you have leftovers, they freeze very well; just let them cool and then pop them into the container of your choice. They’re fine to pull out anytime in the next 2-3 months. Just let them come to room temperature on the counter or warm one up in the microwave whenever you need a roll.
Dinner Rolls Recipe FAQs
A dinner roll is small enough to set on a plate with your meat and potatoes. It usually includes milk and butter, as well as sugar, meaning that it’s soft, sweet, and tender. It can be buttered or not (it’s already buttery). It’s meant to be torn off and buttered, one piece at a time. Contrast that with, say, a loaf of crusty bread–it doesn’t include milk, butter, and sugar. It really DOES need to be spread with a little butter, and if it’s a bigger loaf, the slice might not fit as neatly on your plate. I’m not knocking crusty bread by any means here, but it’s no surprise that a dinner roll is a popular companion to a nice meal.
Dinner rolls will stay soft overnight as long as they’re kept in a tightly closed container. I recommend a Tupperware container or a sealed ziplock bag. Since they’re made with an enriched yeast dough (meaning that there are dairy ingredients in the dough), they’re best within the first 2-3 days. If you’d like to make them further in advance, just freeze them as soon as they’re cool and they’ll last for 2-3 months.
There are a few reasons that your dinner rolls may not be coming out light and fluffy. Here are some possible problems you might be encountering (and what to do differently next time):
You used too much flour. I always recommend the fluff and scoop method. Use a spoon to fluff up the flour in its container, then use that same spoon to scoop flour into the measuring cup. No packing it down! Level off the top and add it to your dough.
You killed the yeast. Hot water kills yeast!! We want to get that water lukewarm, not hot. If you’re not sure you can temp it with a thermometer. 100-110 degrees Fahrenheit is what you’re going for.
You used old yeast. I store my active dry yeast in the freezer, where it stays fresh a LOT longer. If you have a little jar of yeast, and you’re keeping it in the fridge, it’s only good for four months. Write on it with a Sharpie when you open it so you know when it’s time to buy a new jar.
You didn’t let the rolls rise in a warm place. If your house is really cold (I know this happens to me sometimes!) you’re going to need to create a sort of “proofing box” by using your oven. Turn it on to 350 for a minute or two, then turn it off. Put your covered, shaped rolls inside the turned-off oven. Now they have a nice warm place to puff up!
More delicious yeasty delights:
Imagine eating these rolls with a little pot of this Cinnamon Honey Butter. HEAVEN
Easy Fluffy One Hour Dinner Rolls << For when you need rolls STAT!
Buttery Sweet Potato Rolls << Delicious for a different flavor
Big Fat Crescent Rolls << Bad picture. But these are amazing rolls.
Facebook | Pinterest | Instagram
Homemade Dinner Rolls Recipe

Ingredients
- 1/2 cup water
- 2 tablespoons active dry yeast
- 2 teaspoons white sugar
- 2 cups milk
- 1/3 cup white sugar
- 2 & 1/2 teaspoons kosher salt
- 1/4 cup butter-flavored shortening , OR real butter
- 1 egg
- 5-6 cups all purpose flour, spooned and leveled**
- 4 tablespoons melted butter, for brushing
Instructions
- In a small bowl or coffee mug, microwave the 1/2 cup water for 20-30 seconds, until it is lukewarm but not hot.
- Add the yeast and 2 teaspoons sugar and stir. Let this mixture sit for 5 minutes. Watch it so it doesn’t overflow!*
- In a glass measuring cup, microwave 2 cups milk for 1-2 minutes until it is warm but not hot.
- In a large bowl or stand mixer, add 1/3 cup sugar, kosher salt, and shortening, and 2 cups of the flour. Stir together with a wooden spoon.
- Add the warm milk, yeast mixture, and 1 egg. Mix well and let rest 5 minutes. At this point I started using the dough hook on my mixer.
- Add 4 cups of flour, one cup at a time, mixing in between. Use your best judgment to continue adding flour until the dough is smooth and pulling away from the sides of the bowl, up to 5 or even 6 cups. Don’t add so much that the dough becomes stiff. It should be soft and rather sticky, but still workable. The less flour you use, the more tender your rolls will turn out. See notes.
- Once all the flour has been incorporated, knead for 5-6 minutes, using your hands or the dough hook.
- Grease a large bowl well with oil or butter. Scrape all the dough into the bowl, shape it together, then turn it over so that the top is greased.
- Cover loosely with a tea towel or plastic wrap. Let rise until doubled, about 1 hour.
- Punch down the dough. Divide the dough into 24 equal pieces. Shape each piece into a ball (pinch one end with your fingers).
- Place the rolls in 2 well-greased pans. I used one 9×13 pan and one 2 quart casserole dish.
- Cover the pans with tea towels and let them rise in a warm spot for another 30-45 minutes, until doubled in size. When they are almost done rising, preheat your oven to 375 degrees F.
- Bake at 375 for 12-15 minutes or until golden brown all across the top.
- Remove from the oven and brush with melted butter.
- Eat hot!







Thanks for this dinner roll recipe! So far its the only recipe that I can use without fail! Rolls come out delicious every single time!
Isn’t it so nice when you find a recipe that works every time? I love that. I’m glad you found it! Thanks so much for commenting!
Made these wonderful rolls today. Turned out great app. 6 cups of bread flour. When my last batch of cookies were not up to par I discovered I had bough bread flour by mistake. We have been plowing through the cookies tho quite dry 9 ( not substitutable). I have made a number of your wonderful recipes, tho this is my first time writing to you, I want thank you so much for making me a better cook. Your comments are so enjoyable too..
Jacki, I’m so happy to hear that! Thank you for your very sweet comment. And I can’t tell you how many not-up-to-par cookies my family has to go through because of all the recipe testing I do. Ever when they are not great, they get eaten. It’s so funny!
How many loaves of bread does one recipe of 24 buns make?
Hi Cali, I’ve never tried this as loaves before, let me know if you try it out!
What type flour did you use? Would bread flour be appropriate? I am not a bread maker but I think the amount of protein in bread flour is higher that all purpose. Want to give this recipe a try.
Hi Angela! I used regular all purpose flour. I haven’t tried bread flour, I’m sure it would be great! You are right, bread flour has a higher protein content and yields a bit stiffer of a dough. But it will still be good!
well I made the rolls yesterday, and by far the best rolls I have EVER had and I have had a bunch. I of course like some had very, very sticky dough, I think a little stickier then yours, but I did look at all the wonderful (thank you by the way) step by step directions, but as other people I did not want to add anymore flour after the 6 cups, BUT with this said, I had a very hard time handling it, but soon picked up a routine, I could not separate into 24 balls I had to just pull some (ha ha the consistency of slime) off and I had a plate with flour so I dabbed the dough into it till I could at least get it into a ball working very fast, so I could use the least amount of flour I did up with 23 because of the loss of sticking, which was not bad considering, but HOLY!!!!!!!! thinking to do the same thing next time because the trouble I had was so WAY WORTH the end result, maybe, just maybe I might add up using 1/2 cup more flour, but that will be it if I even do it… Thank you so very much for sharing this recipe, this is going to be the only one I use from now on… I am anxious to try some of your other recipes and that is the greatest compliment I can give you because normally I don’t look at more recipes from any one blogger…. all I can say is WOW, and what can I say to other people trying this recipe is hang in there it is so worth it…..
Hey Sandra! Thanks for all the details and tips! I’m so glad you liked the rolls. The idea with this recipe is to add as little flour as possible while still being able to work the dough. So feel free to add a bit more flour until the dough is manageable. There are so many variables when it comes to adding flour to bread, it’s hard to nail down an exact amount. I’m so glad it turned out well for you!
So easy to make and what a beautiful Golden brown crust and soft chewey interior!
They really are the best, right Curt? Thanks for your review!
Also what speed in a stand mixer do you kneed the dough for 5mins
Low or medium low, just keep the dough moving so that it kneads. :)
Can you make the dough for these rolls ahead of time or do you have to make the dough on the same day they will be eaten?
Hi June! I haven’t experimented with making this dough ahead of time. I suppose you could make the dough, rise it, shape the rolls, and then freeze them. Then let them thaw, rise, and bake. But I haven’t tried it so can’t vouch for results! Tell me how it goes!
I did see a comment that you wrote some one back that said you can shape the balls and then cover them and put them in the refrigerator the day before and then take them out the day of and Let them rise till double in size is that correct I have to work tomorrow so I have to make them today if I’m gonna make fresh bread
You are totally right, I do have a comment below that says that! I THINK it would work fine, but I have not tried it so can’t guarantee results.
Can you make the deal the day before and then bring it to room temperature and make the dough balls and let them rise or even make the dough balls let them rise and then put them in the refrigerator or will they continue to rise
Hey Robin! I’m not sure exactly what you’re asking, but yes they will keep rising in the fridge, just at a slower rate. I wouldn’t make the dough a day ahead of time and try to bake the next day. See my response to Karley (I just told her how to make these ahead of time, it’s best if you bake them and then freeze.)
More of a question… are you able to prepare these ahead of time? If so, how far in advance and any tips? Happy Thanksgiving!
Hey Karley! Yes, you can make these ahead of time IF you freeze them. (They will get stale if you don’t) Put them in ziplock bags and freeze, then let thaw in the sealed bag on the counter for a few hours. Put them on a pan in the oven on the keep warm setting (170 degrees) for 5-10 minutes and then serve. Enjoy!
First time making buns: lovely recipe. Used 5cups flour. Each bun was 2oz raw dough as suggested. Great tip! Will try 15-18 min in my oven next time. Brushed tops with butter/garlic pwdr/Italian seasoning mixture. Lovely. 🌻
oooooh love the Italian seasoning/garlic idea!!! That sounds so yummy! Thanks Vera!
Made these some few days ago and loved the taste. They tasted even better the following day. Thanks for sharing as is my first time of baking bread and I did all without a mixer.
I’m so happy your first time baking bread went well Abigail! Check you out! And I’m so glad you liked the rolls. They are a huge favorite of mine!
I love this recipe! My daughter has a dairy allergy so I have to do a little substituting. (Rice Milk and Vegan Butter instead of milk and real butter) Those that don’t have a dairy allergy don’t know the difference.
Wow great tip Cheryl! I will have to try that out!
At what point in the recipe can you refrigerate or freeze to cook later?
Hey Lacy! You can cover and refrigerate overnight as soon as you have shaped the rolls. Take them out and let rise at room temperature until double in size. Not sure how long it will take, probably at least 2 hours.
Excellent rolls! I have never made any type of bread, including pizza dough. These were easy, and so delicious.
Thank you for the receipe.
Thanks Tracy! I’m so glad you liked them. I just made these again for T-day last week. Thanks for coming back to comment! I love that!
I just made these rolls for our Thanksgiving dinner. I used butter because I do not generally have shortening on hand. The dough was stickier than I am used to when making bread but they came out so soft and fluffy! I absolutely love them. I will be saving this recipe for future use.
I am wondering if you habe ever used this dough to make loaves instead of rolls.
I haven’t tried making loaves Laura! I’m sure it would work great! Have you tried it? I’m so glad you enjoyed the recipe!