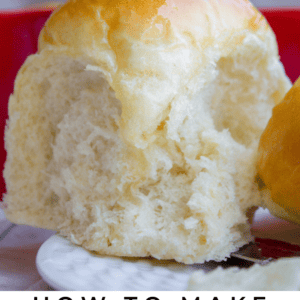
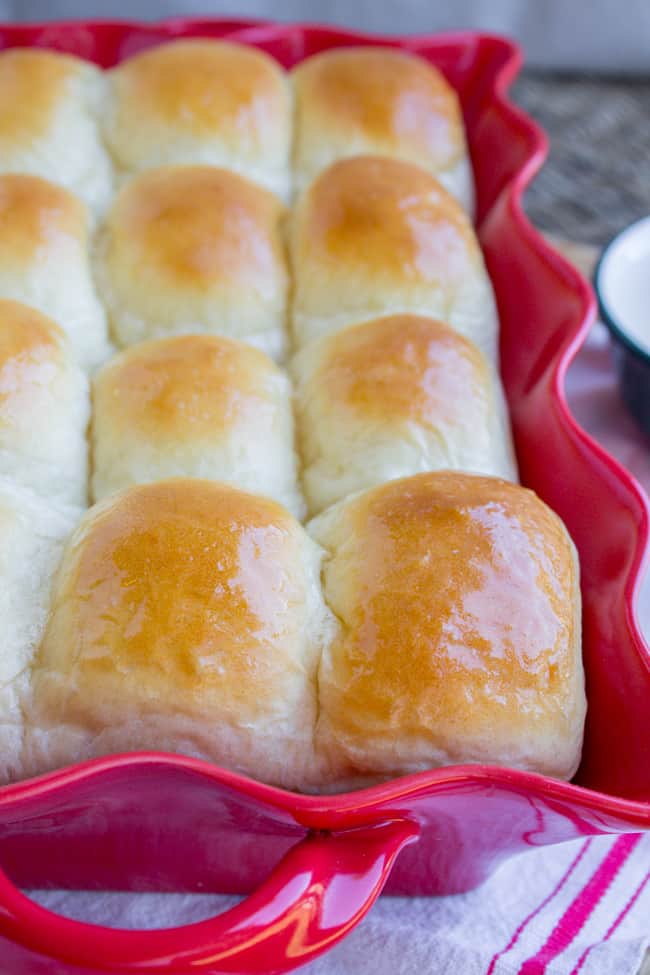
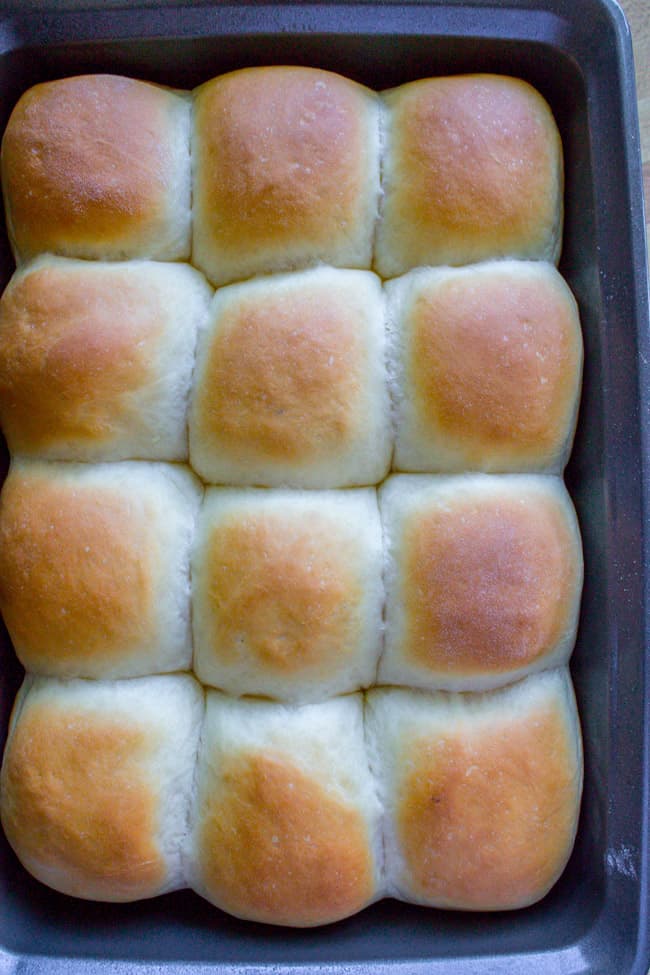
These buttery Homemade Dinner Rolls are so light, so fluffy, with SO much heavenly buttery goodness. Who needs dinner when you’ve got these dinner rolls?? I could eat the whole batch. My Aunt Shirley is basically the baking queen. This is her famous dinner roll recipe! Originally published June 14, 2016.
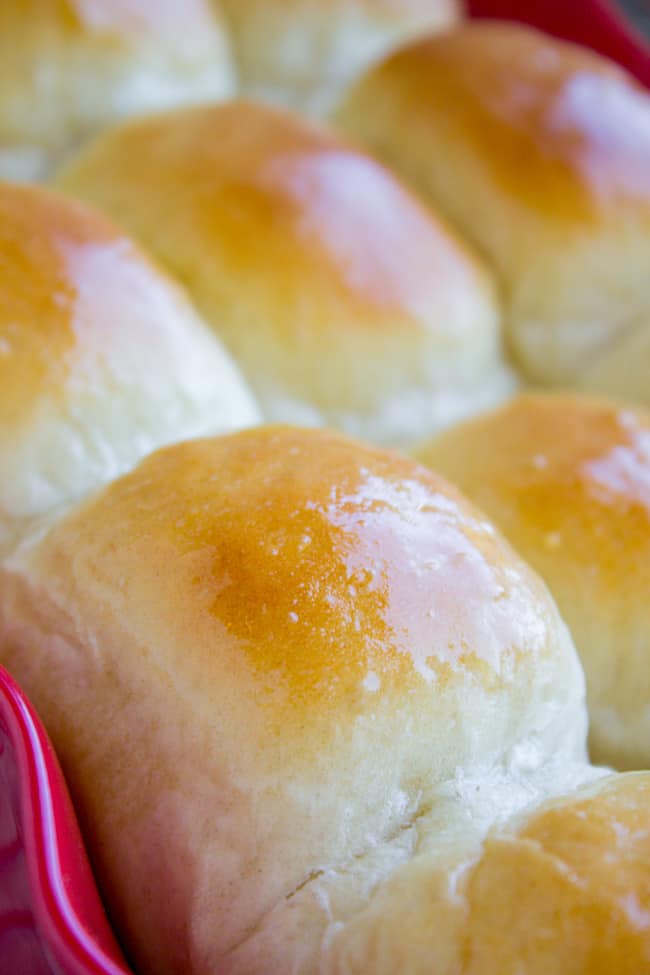
Table of Contents
We’ve got all KINDS of buns going on today. Not just the yeasty kind…

The baby kind too. ( ^^12 weeks. This was about a month ago.) Here’s the already-waddling oven in which the bun bakes:

Yay! Eric and I are SO excited for baby #3, and don’t even get me started on the kids. Charlotte wants a girl and Truman wants a boy (of course). We find out in a few weeks.
(Any guesses? I’m clueless. I didn’t get the gender-intuition-gene. I thought Charlotte was a boy and Truman was a girl.)
So now you know why I have been almost completely absent the last couple months. I get super sick for my first trimester. Like, the-thought-of-food-makes-me-actually-hurl kind of sick. I basically lived on milk and cereal for months. (I’m not exaggerating. Some days me and the kids would go through an entire half gallon of milk. Baby won’t be hurting for calcium…)
When food makes you sick but your entire job revolves around food, you are kind of forced to take a break, hence the radio silence going on here at The Food Charlatan.
When I drove from Sacramento to Philadelphia, I was still feeling pretty awful. But by the time I got home and left for Seattle, I was mostly better, with just a few setbacks here are there. Now I’m almost completely back to normal, if not fitting into any of my clothes by 19 weeks is normal. Hallelujah!
We are due on November 8. Guess when our multi-family Disneyland trip was scheduled for? November 14. Ooooops. Sorry family. (We managed to reschedule for October. Will they give me a wheelchair at 35 weeks pregnant you think?? Please say yes.)

Who already knew I was pregnant?? Come on, some of you ladies guessed, right?
What makes these the Best Dinner Rolls
My cousin Amber brought her mom’s dinner rolls to our Easter get together this year, and I literally ate nothing else. If you think I’m exaggerating, then you have never had morning sickness before. It really is possible to ignore ham, asparagus, jello salad, and all kinds of other amazing food when faced with queasiness and an entire pan of dinner rolls.
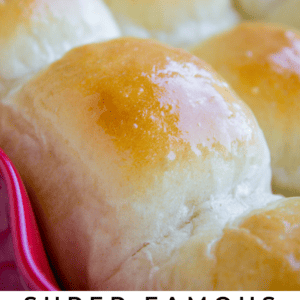
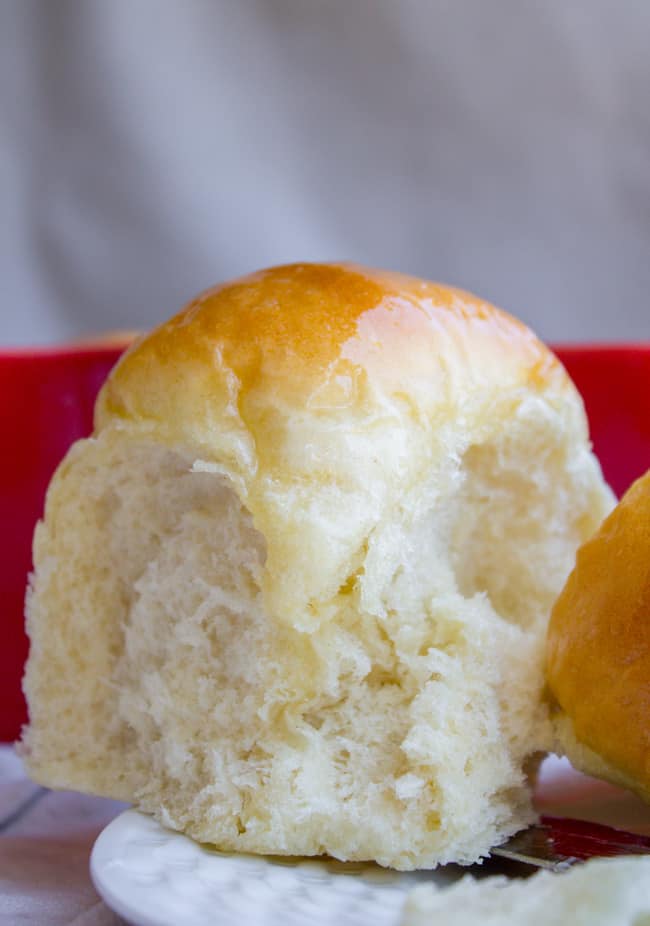
I begged for the recipe and now you lucky kids get to try them too! I love them because they have 2 full tablespoons of yeast and are SO fluffy and light. The flavor is just amazing. My Aunt Shirley uses Crisco in her recipe, but if that’s not your thing, I’m sure butter would work too. The shortening makes them SOOO soft though, and I used butter-flavored Crisco, so no flavor sacrifices.
Dinner Roll Recipe ingredients
Here’s a quick shopping list to help you gather your ingredients. See the recipe card below for the full ingredients and instructions!
- Active dry yeast
- White sugar
- Milk
- Kosher salt
- Butter-flavored shortening (or butter)
- Egg
- Flour
- Butter (for brushing)
How to make dinner rolls
I’ve got all the step-by-step instructions you need to make these a huge success!
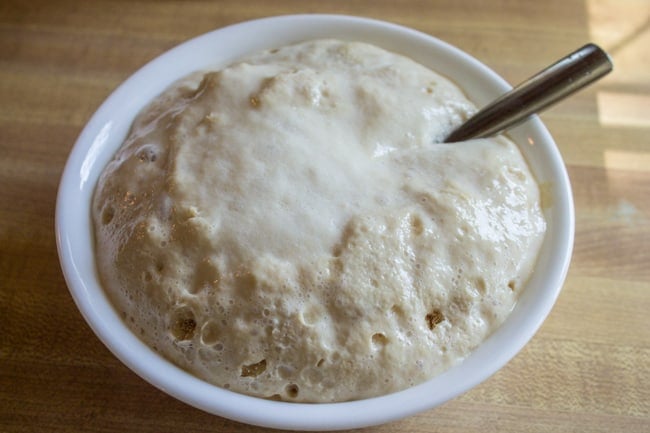
- Proof your yeast to make sure you don’t kill it. There is so much yeast in this recipe that you have to move fast before it overflows the bowl!
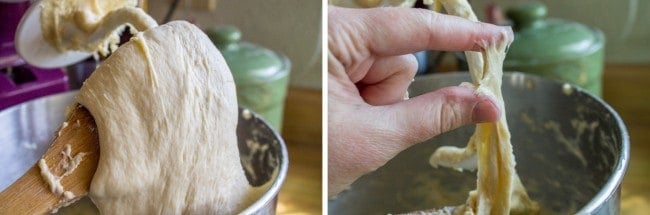
- When the dough has been kneaded, it should still be pretty sticky. You want to be able to work with it, but don’t dry it out with too much flour.
- Don’t run errands during your one hour rise, because you will be late and this will happen.
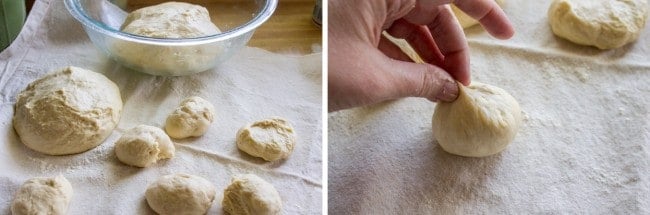
- Separate the dough into 24 pieces and shape them by gathering it and pinching with your fingers, then make the pinch the bottom of the roll.
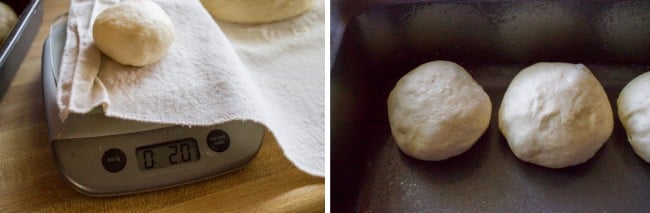
I’m fussy and like to use a scale. Each roll should be about 2 ounces. On the right you can see just how fast these rolls rise. Both of these weigh 2 ounces, but you can kinda see that the one on the right has started to puff a little, even though it had only been a couple minutes.
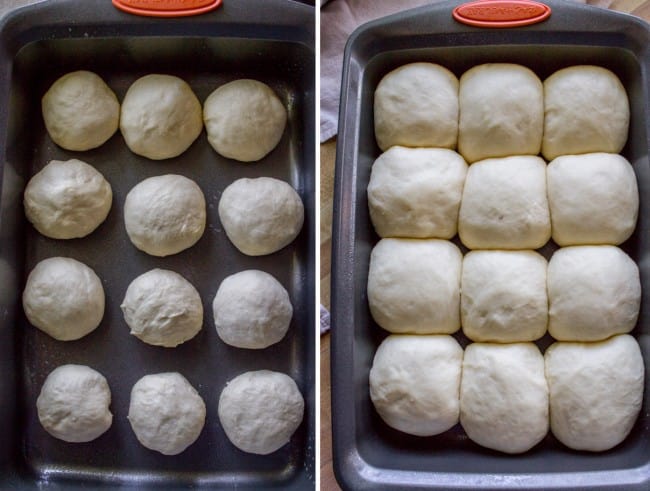
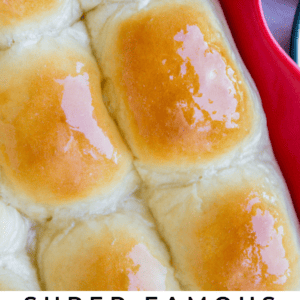
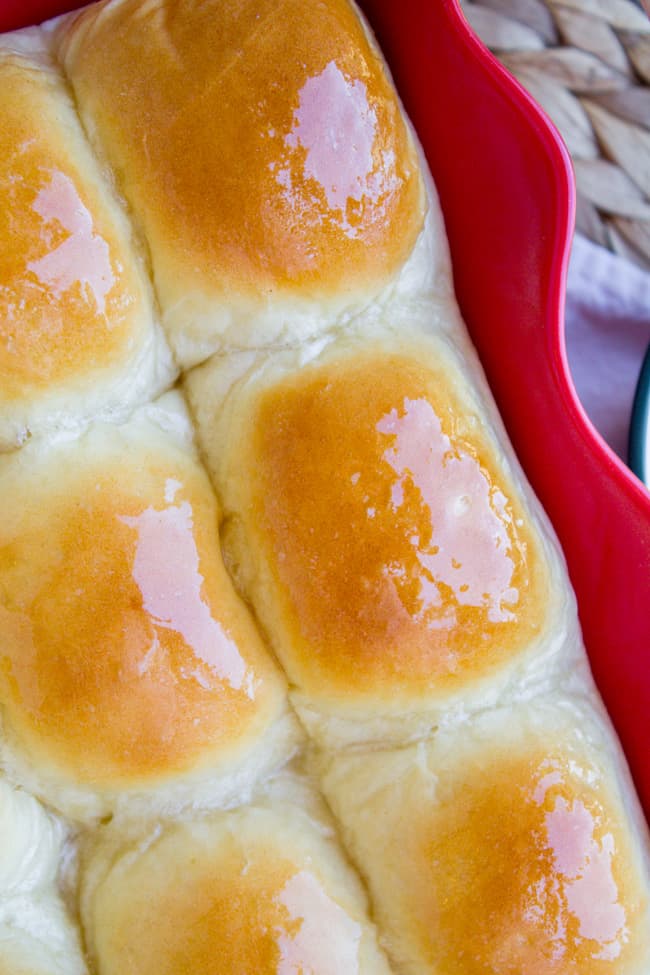
- Here’s the spacing situation when you use a 9×13 inch pan.
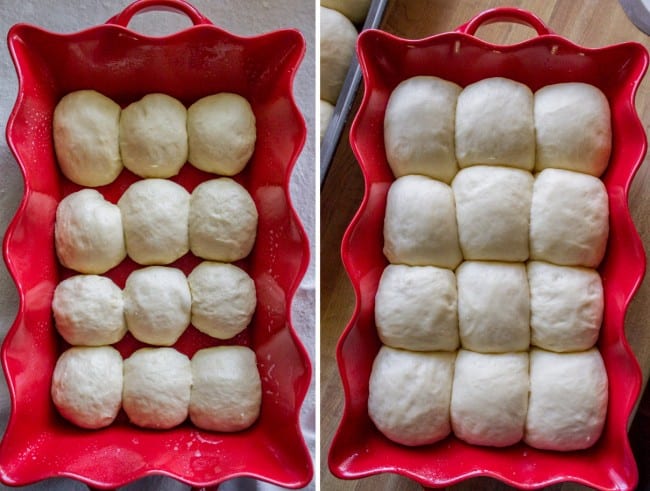
This is a 2 quart casserole dish, so the rolls are more squished, but it worked great.
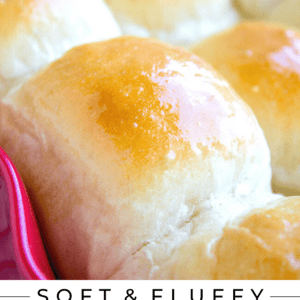
- Pull them out of the oven when they are a nice golden brown all over the top! If you make these, I’d love to see them! Tag #TheFoodCharlatan on Instagram!
How to serve the Best Dinner Rolls
Warm, with a great deal of butter. Also, with any nice meal you’re serving. Here are some of my favorite dinners that pair just perfectly with a boatload of buttery rolls.
Prime Rib Recipe To Impress Your Guests >> a holiday main dish that’ll knock your socks off, especially with these rolls as a side!
Shepherd’s Pie Recipe with Cheese Topping << gravy soaked beefy goodness, just begging for a dinner roll to soak up the sauce.
Easy Salisbury Steak Recipe (30 Minutes) << another favorite of mine with lots of delicious sauce! Comforting homey food.
Pork Chops in Creamy Mushroom Sauce << something about pork chops just screams Sunday dinner am I right??
1770 House Meatloaf (Ina Garten) << think you don’t like meatloaf? Think again.
Old Fashioned Beef Stroganoff << absolute crowd-pleaser right here. So easy!
How to store Homemade Dinner Rolls
These rolls need to be covered so they won’t dry out. I just put them in a big tupperware container or in a ziplock bag. If you have leftovers, they freeze very well; just let them cool and then pop them into the container of your choice. They’re fine to pull out anytime in the next 2-3 months. Just let them come to room temperature on the counter or warm one up in the microwave whenever you need a roll.
Dinner Rolls Recipe FAQs
A dinner roll is small enough to set on a plate with your meat and potatoes. It usually includes milk and butter, as well as sugar, meaning that it’s soft, sweet, and tender. It can be buttered or not (it’s already buttery). It’s meant to be torn off and buttered, one piece at a time. Contrast that with, say, a loaf of crusty bread–it doesn’t include milk, butter, and sugar. It really DOES need to be spread with a little butter, and if it’s a bigger loaf, the slice might not fit as neatly on your plate. I’m not knocking crusty bread by any means here, but it’s no surprise that a dinner roll is a popular companion to a nice meal.
Dinner rolls will stay soft overnight as long as they’re kept in a tightly closed container. I recommend a Tupperware container or a sealed ziplock bag. Since they’re made with an enriched yeast dough (meaning that there are dairy ingredients in the dough), they’re best within the first 2-3 days. If you’d like to make them further in advance, just freeze them as soon as they’re cool and they’ll last for 2-3 months.
There are a few reasons that your dinner rolls may not be coming out light and fluffy. Here are some possible problems you might be encountering (and what to do differently next time):
You used too much flour. I always recommend the fluff and scoop method. Use a spoon to fluff up the flour in its container, then use that same spoon to scoop flour into the measuring cup. No packing it down! Level off the top and add it to your dough.
You killed the yeast. Hot water kills yeast!! We want to get that water lukewarm, not hot. If you’re not sure you can temp it with a thermometer. 100-110 degrees Fahrenheit is what you’re going for.
You used old yeast. I store my active dry yeast in the freezer, where it stays fresh a LOT longer. If you have a little jar of yeast, and you’re keeping it in the fridge, it’s only good for four months. Write on it with a Sharpie when you open it so you know when it’s time to buy a new jar.
You didn’t let the rolls rise in a warm place. If your house is really cold (I know this happens to me sometimes!) you’re going to need to create a sort of “proofing box” by using your oven. Turn it on to 350 for a minute or two, then turn it off. Put your covered, shaped rolls inside the turned-off oven. Now they have a nice warm place to puff up!
More delicious yeasty delights:
Imagine eating these rolls with a little pot of this Cinnamon Honey Butter. HEAVEN
Easy Fluffy One Hour Dinner Rolls << For when you need rolls STAT!
Buttery Sweet Potato Rolls << Delicious for a different flavor
Big Fat Crescent Rolls << Bad picture. But these are amazing rolls.
Facebook | Pinterest | Instagram
Homemade Dinner Rolls Recipe
Ingredients
- 1/2 cup water
- 2 tablespoons active dry yeast
- 2 teaspoons white sugar
- 2 cups milk
- 1/3 cup white sugar
- 2 & 1/2 teaspoons kosher salt
- 1/4 cup butter-flavored shortening , OR real butter
- 1 egg
- 5-6 cups all purpose flour, spooned and leveled**
- 4 tablespoons melted butter, for brushing
Instructions
- In a small bowl or coffee mug, microwave the 1/2 cup water for 20-30 seconds, until it is lukewarm but not hot.
- Add the yeast and 2 teaspoons sugar and stir. Let this mixture sit for 5 minutes. Watch it so it doesn’t overflow!*
- In a glass measuring cup, microwave 2 cups milk for 1-2 minutes until it is warm but not hot.
- In a large bowl or stand mixer, add 1/3 cup sugar, kosher salt, and shortening, and 2 cups of the flour. Stir together with a wooden spoon.
- Add the warm milk, yeast mixture, and 1 egg. Mix well and let rest 5 minutes. At this point I started using the dough hook on my mixer.
- Add 4 cups of flour, one cup at a time, mixing in between. Use your best judgment to continue adding flour until the dough is smooth and pulling away from the sides of the bowl, up to 5 or even 6 cups. Don’t add so much that the dough becomes stiff. It should be soft and rather sticky, but still workable. The less flour you use, the more tender your rolls will turn out. See notes.
- Once all the flour has been incorporated, knead for 5-6 minutes, using your hands or the dough hook.
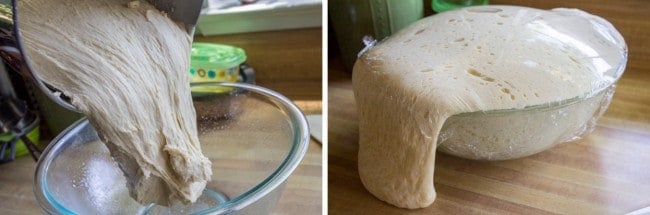
- Grease a large bowl well with oil or butter. Scrape all the dough into the bowl, shape it together, then turn it over so that the top is greased.
- Cover loosely with a tea towel or plastic wrap. Let rise until doubled, about 1 hour.
- Punch down the dough. Divide the dough into 24 equal pieces. Shape each piece into a ball (pinch one end with your fingers).
- Place the rolls in 2 well-greased pans. I used one 9×13 pan and one 2 quart casserole dish.
- Cover the pans with tea towels and let them rise in a warm spot for another 30-45 minutes, until doubled in size. When they are almost done rising, preheat your oven to 375 degrees F.
- Bake at 375 for 12-15 minutes or until golden brown all across the top.
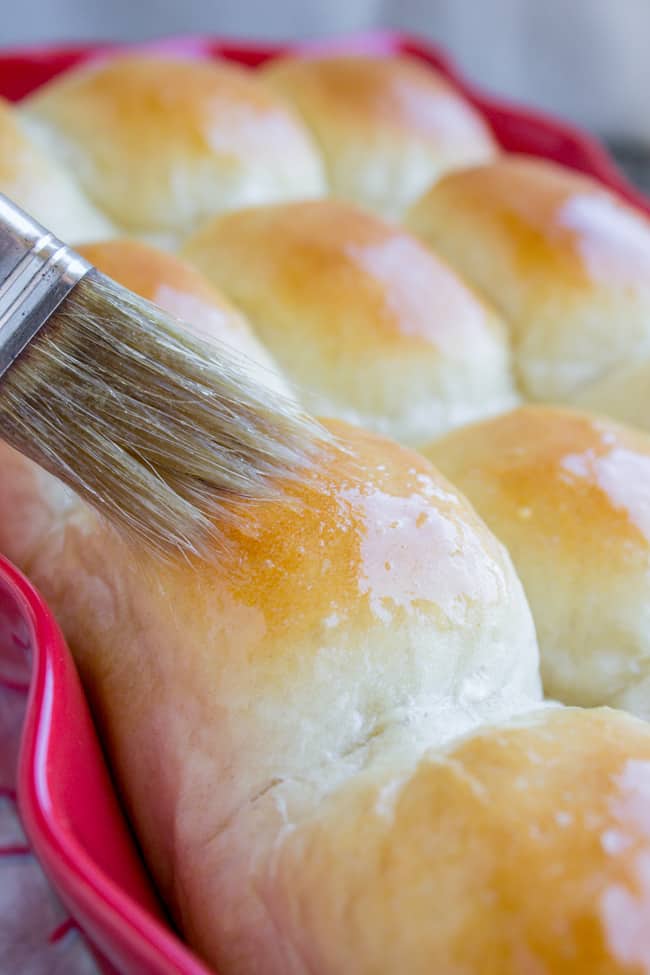
- Remove from the oven and brush with melted butter.
- Eat hot!


Hi Karen! These rolls were a hit yesterday! I made them for our pre-thanksgiving tradition we do every year and everyone loved them. By the end of the night I went and looked to see if I could have another one myself and they were all gone! Not just that, the cinnamon honey butter was also a hit that everyone was taking cups to take some home with them! I have been requested to make this every year now for Thanksgiving !
Also, I saw on the post above about the dough being sticky. I live in Florida so mine was really sticky as well but I did not want to add more flour because I like to stay constant with the recipe. So I just buttered up my hands each time I made a roll and that really helped! I think it even added that extra kick of buttery flavor to it (:
Awesome! Now you can be family-famous for being the “roll-person” ;) that’s the best! it’s sooo good with cinnamon honey butter, I’m so glad you made it! Thanks for the review!
Hi, Karen! These rolls look positively AMAZING! But, please, I need your HELP! I have just finished my second attempt at making them, and I feel tantalizingly close to throwing this batch out the window. This hatred is second only to the hatred I felt for the first batch I made last week. :-( I cook all the time and make homemade breads, cakes, and everything in between with success, but these rolls appear to want to be the death of me! The dough is so STICKY. Both times I have used the max amount of flour you allowed for in the recipe, and both times the dough has been so sticky and runny that it is impossible to form little balls of dough to create rolls. After my first endeavor, I figured that I MUST have done something wrong, so I tried again today, following every single detail of the directions to the most minute of details, and…same results! Your rolls look like bread from heaven, and I’d love to make them for Thanksgiving. Do you have any advice or thoughts on why my dough might be so sticky and runny? Thanks so much in advance! And congratulations on your new little one!!!
Aaah no that is the worst Amy!! I’m so sorry you’re having trouble! The thing with bread dough is that it is SO finicky and needs different levels of flour depending on humidity and all kind of other variables. I think that really is your only problem. It just needs more flour. Add it 1/4 cup at a time until the dough is workable and then STOP! Refer to the photos below the recipe to see what the dough ought to look like. I hope it works! 3rd times the charm!!
You’re so kind to reply—thank you! I’ll give it a try! Fingers crossed!
Amy-I made them today for the second time for Thanksgiving today. Mine keep getting super sticky too. I added the max +1/4 C of flour AND I GREASED THE HECK OUT OF MY HANDS with vegetable shortening. Before I touched those sticky things. Well, they formed better-ish, and I was able to get 24!!
I was relentless to try them for the second time, but even though the first time I made them they were beyond ugly looking, they tasted like heaven. So at the end I went for flavor than aesthetics. They are in the oven now!
I made them today for the first time and I thought the same thing….looks more like soup. I can bake and cook with the best if them so it should not have been that hard. I ended up adding 6 1/2 cups to even get it to a workable dough. They turned out great….i guess it is more humid here than I thought.
Thanks for the feedback M! I think you’re right. I’m a pretty experienced dough maker, so I always just add flour until I know it’s right. But over the past few years of making this recipe, I consistently use more than the 5 cups called for, so I’ve changed the recipe to reflect that. Thank you for commenting!
I made these for the first time last weekend Karen. I made them to go along with the Beef Barley Soup and the combination was perfection. These rolls really are amazing. Chip and I finished the entire batch yesterday I believe, so. . . 24 rolls divided by 2 people divided by 4 days = 3 rolls per day per person. And actually there were only 2 rolls left yesterday morning so actually ore like 3 1/2 rolls per day per person. These are going to be in regular rotation with the Big Fat Crescent Rolls. Thanks Aunt Shirley!!
3 and 1/2 rolls per day per person sounds like my idea of heaven. (minus cellulite.)
Mommas don’t get cellulite … It is only baby fluff! Congratulations on #3!
Love this recipe. Thank you so much for sharing this. Also, love the red casserole dish. Where can buy this?
Thanks much,
Megha
Hey Megha! I’m so glad you love the recipe. The dish was a gift, my mother-in-law bought it at the hardware and furniture store they own up in Montana. I see it on Amazon here, but it’s out of stock! https://www.amazon.com/gp/product/B001DM96QS?
Can u use regular cisco or golden cisco. ..e don’t have butter flavoured here…..
Hey Rachael! You can use any kind of shortening, or even real butter if you like. I tested it recently with all butter and it was delicious!
Have you tried lard?..
I haven’t Becky! If you try it let me know how it goes. My mother in law just started using lard in her pie crusts and LOVED it, but rolls are a little different. I would have to test it.
Can I freeze the dough at all to prepare it ahead of time? I’ve never made dinner rolls from scratch in my life! I’m hosting Thanksgiving this year and am hoping to save some time if I can!! Thanks!
Hey Krista! Yes you can, though I’ve never actually tried it. I just read this awesome post from my friend Courtney over at Neighborfood: http://neighborfoodblog.com/2014/11/make-ahead-butterhorns.html
She gives different methods for how to make the rolls ahead of time. You can use her freezing methods with my recipe (or any roll recipe). Let me know how it works out!
YAY!!!!! CONGRATS!!!! I’m so excited for you guys!!!! Wish I could give you a big hug! :) Morning sickness is soooo not fun!! And I can totally relate to only wanting carbs. I lived off of pb toast, plain bread, popsicles and frozen grapes on my last pregnancy. Glad things are starting to get better for you!! And these rolls, I could totally eat the whole pan!!
Karen!!! Congratulations! So excited for you and your family. :) Morning sickness is AWFUL, I am glad you are moving beyond that now!
Thanks Claire!! I’m sad you can relate to morning sickness! I wouldn’t wish it on my worst enemy!! :)
Oooo! This looks so good!
Aaw yay, congrats, Karen! So happy for all of you! Glad to hear you’re feeling better too! These buns look perfect – so soft and fluffy!!
Yay!! Congratulations!!! So so happy for you all! And these dinner rolls – major carb love!
Yay! What a fun announcement! I am so excited for you and that little baby bump!
Congratulations! That’s wonderful. What exciting news!
In my opinion you can never have too many homemade bread/bun recipes. I just adore that smell. And so much better than store-bought.
Congratulations for so many things I dont know where to start. Your ‘special bun’ those rolls – yum, brilliant photography which make one dream for a minute that the buns are real!!, your story but especially to your little Prima Ballerina!! She looks adorable – is she excited to have a new baby in the house? Take care, stay safe and hopefully this sickness will now go. Carina
Congratulations, Karen! What an exciting time! And yes, I can see why you’d want to eat these and nothing else. :)