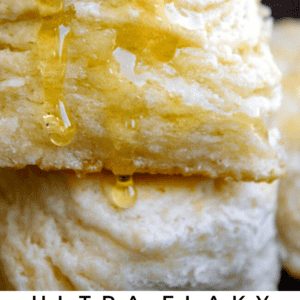

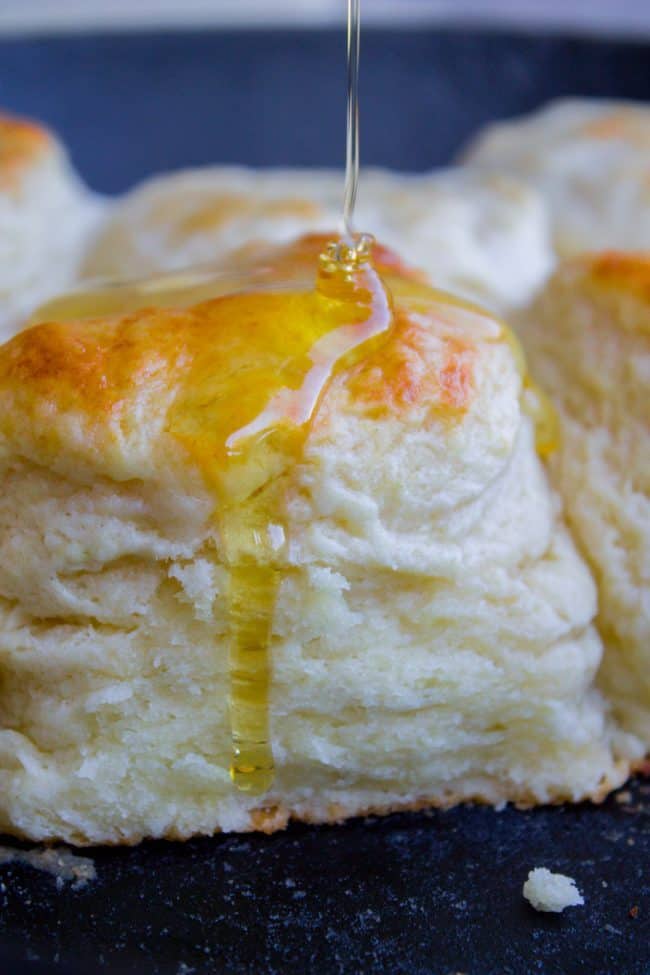
These ultra flaky homemade buttermilk biscuits are the perfect comfort food! Who can resist a crispy-on-the-outside, tender-in-the-middle, mile-high flaky buttermilk biscuit? Here’s how to make them. It’s not hard, just a few simple tricks! Keep reading! Originally posted August 30, 2017.

Table of Contents
- Buttermilk Biscuits from Scratch
- Flaky Buttermilk Biscuits Ingredients
- How to Make Flaky Buttermilk Biscuits
- Why are my biscuits not flaky?
- What difference does buttermilk make in biscuits?
- Frequently asked questions about biscuits
- Other biscuity recipes you are going to love!
- How to Make Flaky Buttermilk Biscuits Recipe
Charlotte, my 6 year old, has spent her entire summer reading voraciously. Sometimes she will have her nose in a book and I’ll say something like, “Charlotte, come help me fold laundry,” or even something less demanding like, “Charlotte, what do you want for breakfast?” And I get NO response. NOTHING. No glance, no “mm-hmm,” no “just a minute.” It’s like I don’t even exist.
It’s in moments like these that I know karma is real, because I’m pretty sure I do this to my kids every single day. “Mom…Mom. MOM!! Are you even listening??” (Me: huh? what? stop yelling.)

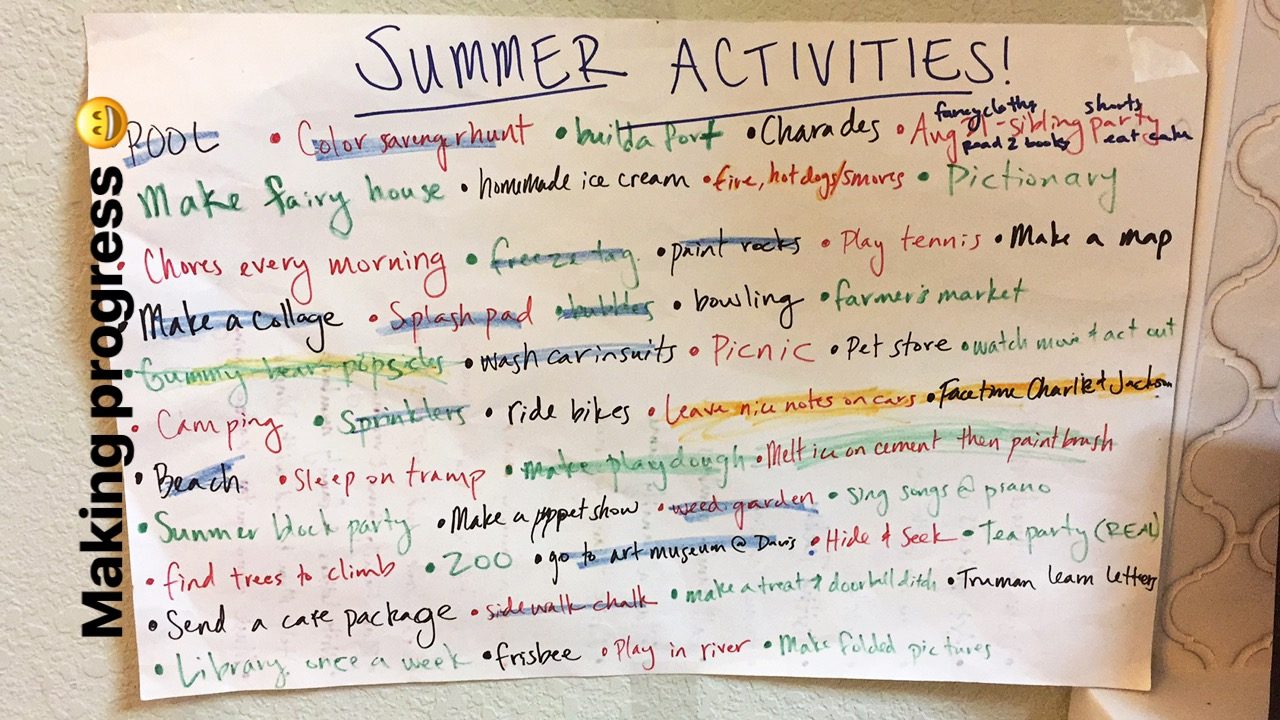
Tomorrow is the last day of summer for us! Charlotte is starting first grade and Truman will be in preschool a couple days a week this year. We made an epic bucket list and did a pretty good job getting through it. I love being at home with the kids. (Some days it makes me want to rip my hair out. But most days, it’s the best.) I will miss having no schedule and just being able to hang out with them all the time. (I will also love having a schedule and not having to hang out with them all the time. Ah, motherhood!)
Buttermilk Biscuits from Scratch
Last week my mom was visiting from Manteca (the town where I grew up, about an hour away. It means lard in Spanish. Isn’t that so great?) I was on my 4th or 5th batch of testing these biscuits (which have zero lard in them, for the record) and she was SO excited to try them. “I’ve never made homemade biscuits before,” she said. And then my head exploded.

“Really?? Like, NEVER, not once?” No, I just always use Bisquick, she said.
Part of the reason this is so disturbing to me is knowing how much my mom loves anything baked. Guys, I’m not saying Bisquick is the worst thing ever. Canned Pillsbury biscuits have their place; sometimes you just gotta git er done. But NEVER? Put your hand on your heart right now, this moment, and promise me that one day you will try making homemade buttermilk biscuits. They are SO worth the time!
Flaky Buttermilk Biscuits Ingredients
Here’s what you’ll need for melt-in-your-mouth flaky goodness.
- All purpose flour
- Kosher salt
- Sugar
- Baking powder
- Butter
- Egg
- Buttermilk (cheater buttermilk is ok, see notes!)
- Ice water
How to Make Flaky Buttermilk Biscuits
I’ve included some step-by-step photos to make it easy on you! Go to the recipe card at the bottom of the post for complete instructions.

Cut up that buttah. Your pastry cutter is your friend.

Chop your butter, or use a cheese grater! Kind of fun!

Use a pastry cutter to work the butter into the flour. If you don’t have one, you can use a knife or a fork, or heck even your hands (make sure you chill it for a few minutes if you use your hands.) You want to end up with a soft crumbly mixture, with pea-size chunks of butter.


Here’s the business letter fold. You CAN just roll out the dough without doing the business letter fold. But you won’t get those gorgeous layers, your biscuits won’t maintain their circular shape as well, and they won’t split apart perfectly when you open them up to slather them with butter and jam. I’d say it’s well worth the extra folding time.
At this point, turn it over so the seam of your “letter” is facing down.

Don’t twist your biscuit cutter when cutting biscuits. Just push straight down. Twisting seals the edges of the biscuit, making it harder for them to rise.

Butter up that cast iron skillet. You don’t HAVE to bake them in a skillet, but you will feel more Southern if you do. Plus it makes the bottoms crispier, yes please. Oh and don’t forget to brush the tops with buttermilk!! Gimme that golden top!
Why are my biscuits not flaky?
Because you didn’t follow the instructions. Just kidding, just kidding, come baaaack! Here are the techniques that will make your biscuit ultra flaky and tender:
First, don’t over mix the dough! Mixing the dough creates gluten in the flour, which gluten is magical for bread and chewy pizza crust, but terrible for the light, tender, flaky biscuit we want. Work the dough as little as possible.
Second, you need to know that cold cold biscuits going into a hot hot oven is what makes flaky layers. Do not underestimate this!! We achieve this dramatic temperature change by:
- Adding cold buttermilk, a cold egg, and ice cold water to the dough.
- Freezing or refrigerating the completed biscuits before putting them in the oven.
- Preheating your oven and making sure it is up to temperature before putting the biscuits in.
Here’s the skinny on biscuits: the dough is made up of moistened flour that has large pockets of butter (fat) sprinkled throughout. We want the fat to melt as slowly as possible in the oven so that the biscuit has time to rise and create its own structure. That way, when the butter is completely melted and absorbed into the biscuit, there is a little pocket of air left behind. These pockets of air, layered with the dough, are what we describe as “flaky.”

If your butter is halfway melted when it hits the oven, there is no chance for the dough to rise up around the butter and create a structure for where the butter used to be. It will all just melt together into a hard, rocky mass. And you will get sad, dry, tough biscuits, and even your regretful tears will not change their texture.
The reason we bake biscuits at a high temperature is so that they rise quickly when they hit the oven, creating that structure before the butter melts.
So: do whatever you need to do to make sure 1) the fat in your dough is as cold as possible so that it melts slowly and 2) your oven is as hot as possible to encourage a fast rise, which builds the structure for those flaky pockets where your butter used to be.
While researching biscuits, I read that some restaurants make their biscuit dough a day in advance and freeze them, shaped. They put them in the oven frozen solid. I haven’t tried it yet, but I bake cookie dough from frozen all the time so I’m pretty confident. You may have to bake longer. This would be a great make ahead option!
What difference does buttermilk make in biscuits?
Close your eyes and imagine that first bite of hot-out-of-the-oven biscuit breaking into flaky morsels on your tongue. Can you taste the hint of sour? The tart twist creating savory richness? That’s buttermilk. Those acidic overtones are what make a biscuit taste biscuity.
In addition to flavor, buttermilk is important for helping the dough to rise in the oven. Baking powder only does it’s job of leavening when it has an acid to activate it. Buttermilk is our acid MVP.
If you don’t have any buttermilk, you can make homemade cheater buttermilk. Add 2 teaspoons vinegar or lemon juice to a measuring cup, then fill to the ¾ cup line with dairy, the thicker and fattier the better: heavy cream, half and half, or whole milk will do.
And that’s it! Please, don’t wait your entire life to make homemade biscuits like my mom did. ;) These come together SO fast. The time is now! Seize the day!!
P.S. You should make Cinnamon Honey Butter to go with these biscuits. Oh my!!
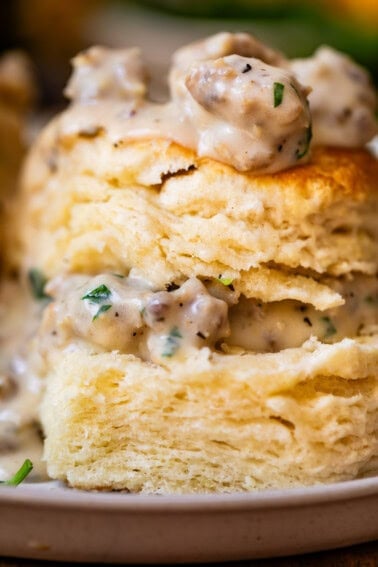
P.P.S. It would be a crime not to make Biscuits and Gravy for breakfast, brunch, or dinner sometime with these biscuits. Try it and tell me I’m wrong!
P.P.P.S. Come back later this week, we’re putting these biscuits on top of chicken pot pie. YES!
P.P.P.P.S. Want to guess how many times I’ve listened to Taylor Swift’s new song already? Whatever number you’re thinking, add 5. Fangirl in the hoooouuuse.
Frequently asked questions about biscuits
I’m going to risk my life here (don’t come after me angry biscuit lovers of the world): they’re usually the same thing. Most “southern-style” biscuits are made with buttermilk, and most “buttermilk” biscuits are southern-style, meaning that they’re flaky, high-rising, and cut out with a biscuit cutter. Now, some southern-style biscuit recipes do call for a lower-protein flour (like the Lily White brand), but most just call for all-purpose.
Just regular all purpose will do ya. You don’t want to use bread flour. It has more protein and will make your biscuits tough and chewy. A biscuit is more like a pastry, with lots of flaky layers, and so regular all purpose flour is your best option.
Butter makes everything better. No really. The flavor is incomparable, and Crisco adds nothing special here. I’m not anti-Crisco…I’m just pro-butter.
Other biscuity recipes you are going to love!
- The Best Scones I’ve Ever Made << If you love biscuits, you are going to LOVE scones. Talk about flaky!!!
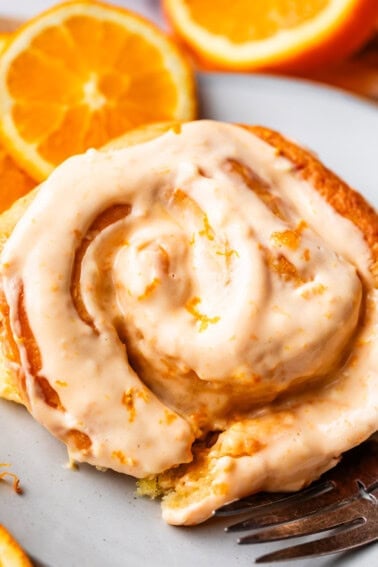
- Orange Rolls Recipe << ok, not biscuits. But absolutely delicious and one of my faves
- Chicken Pot Pie with Biscuit Topping << Yes, it’s this very biscuit recipe on top of savory carrots, peas and chicken. Home-cooked heaven!
- Classic Strawberry Shortcake Recipe << Biscuits are similar but not identical to shortcake. And who doesn’t love shortcake?!?
Facebook | Pinterest | Instagram
How to Make Flaky Buttermilk Biscuits
Ingredients
- 3 cups flour, spooned and leveled
- 1 & 1/2 teaspoons kosher salt
- 2 teaspoons sugar
- 2 tablespoons + 1 teaspoon baking powder
- 3/4 cup butter, COLD or frozen (1 and 1/2 sticks)
- 1 large egg
- 3/4 cup cold buttermilk*
- 1 to 2 tablespoons ice water
- 1 tablespoon butter, softened (for greasing pan)
- more buttermilk, for brushing
- honey and butter, for serving, or this Cinnamon Honey Butter ∞
Instructions
- Preheat the oven to 425 degrees F.
- In a large bowl combine flour, kosher salt, sugar, and baking powder.
- Use a pastry cutter to cut the butter into the flour. You can also use a fork, a butter knife, or your hands to work the butter into the dough. It should be crumbly with pea-size chunks. Stick the bowl in the fridge if you have any delays.
- Use a pastry cutter to cut the butter into the flour. You can also use a fork, a butter knife, or your hands to work the butter into the dough. It should be crumbly with pea-size chunks. Stick the bowl in the fridge if you have any delays.
- In a small bowl combine the egg and buttermilk. Beat with a fork. Add ice and water to a small bowl, and set a tablespoon nearby so it’s ready to go.
- Add the buttermilk mixture to the flour mixture. Use a fork to hydrate the flour. Do NOT over work the dough.
- Add ice water 1 tablespoon at a time. You don’t need much, this is just to help the flour absorb into the wet ingredients.
- Make as few strokes as possible to get your result: a very thick, slightly sticky dough. Switch to using flour-dusted hands for the last few kneads.
- Turn the dough out onto a lightly floured work surface (a pastry cloth works great, if you have one.) Use your hands to pat the dough into a rectangle, then use a rolling pin to roll the dough into a roughly 12×8 inch rectangle. It doesn’t have to be perfect.
- Fold the short sides of the dough into the middle, like a business letter. See photos.
- Turn the dough over (flouring your surface again if necessary) so that the seam of your business letter is down.
- Use your hands or the rolling pin to flatten the dough. This is the last step before cutting. Don’t roll it too thin! You want THICK biscuits. Think like at least an inch if not more. Flatten the dough enough to where you will be able to cut at least 6-8 biscuits on the first go.
- Use a 3-inch biscuit cutter (<these are the ones I wish I had!) to cut the dough. Do NOT twist the cutter. Firmly push it straight down, then pull up. Use your fingers to gently loosen the dough from the cutter.
- Continue with the rest of the dough until there are only scraps. Gather the scraps in your hands, gently press them together, then roll out again, remembering to keep the dough thick. Continue until the dough is gone.
- Prepare a 12-inch cast iron skillet** with 1 tablespoon softened butter (or melted.) Make sure to grease the sides.
- Place the biscuits in the pan. They should be touching each other, as this helps them rise in the oven.
- At this point, if you have time and space, I highly recommend freezing or at least refrigerating the pan of biscuit dough for 15-20 minutes. The butter in the dough has warmed up from your hands, and you want it hitting the oven as cold as possible to achieve Ultimate Flakiness Levels.***
- Just before you put it in the oven, brush the top of each biscuit with buttermilk. This helps it to get that pretty brown topping.
- Bake at 425 for 15-20 minutes, or until the tops are golden. If the tops are brown but you suspect they are not done, lift the edge of one biscuit to check the bottom. They are done when the bottoms are brown.
- If desired, brush the biscuits with melted butter. Or you could just eat them immediately, serving with soft butter, honey, jam, and/or this Cinnamon Honey Butter (<< I’m telling you guys, this stuff is legendary.)


I have been looking at various biscuit recipes and have noticed that most of the time a biscuit recipe with buttermilk uses both baking powder and baking soda. Why is that? I notice that this recipe only uses baking powder. What is the purpose of baking powder as opposed to baking soda?
Hi Dasme! There are huge articles online about the difference between baking powder and baking soda, but I’ll try to summarize to answer your question. Baking powder is just baking soda with acid added. When you’re using baking soda, you need some kind of acid (lemon juice or buttermilk, for example) to activate it, or it won’t work. Since baking powder already has acid in it, the recipe doesn’t have to use any additional acid.
You’re probably seeing recipes with both because the recipe creator is using baking soda to neutralize the acid, but baking powder for extra lift. In this recipe, the mild acid from the buttermilk doesn’t need neutralizing, so baking powder alone does the job of creating fluffy, high-rising biscuits. If you try this recipe, come back and let us know what you think!
Great biscuits, easy and quick.
Never made biscuits from scratch before but I gave it a go last night. My post-assessment is that it was time-consuming. I also need a better game plan prepping my ingredients, especially with keeping the butter cold. I did not have that fancy pastry thingy to mix the dough, although the fork recommendation worked. I also did not have a grater for the butter, but I did have a micro-planer (zester) and that took a while getting the butter shredded. Having said all that, the biscuits turned out surprisingly great! I was able to achieve the layers of flakiness, and I surprised myself that I actually did it. Key points to remember are to NOT overwork the mixing, and to keep the cold ingredients as cold for as long as possible. No cast iron, so I used a cookie sheet lined with parchment paper and grouped the biscuit discs. Left the tray of biscuits in the refrigerator for 20 minutes or longer just prior to baking as directed. My biscuits baked nicely and the height nearly tripled, and again, the flakiness…all kinds of goodness. I used the King Arthur flour, but I did not use kosher salt. Perhaps someone could explain the reasons for using that particular type of salt. I did fold the dough 2 to 3 times more in the envelope style. Thank you and high marks for the recipe.
Just Made! Will let you know when we eat’em up, If liked! Stay Tuned! They look amazing!
Holy moly, were these amazing! I followed all your tips and they turned out perfect. I quit making biscuits years ago because they would always turn out dense and dry – not these! I now feel like I have made my Southern ancestors proud! :)
I’m so happy to hear you gave homemade biscuits another chance Mandy!! Your southern ancestors are cheering you on!! 🖤 thanks for taking the time to comment, super helpful!
I made these today but they seemed not done after baking for 30 minutes. The inside was doughy. I had to add 4 T of water to make the dough stay together. Was it too wet? Not sure what I did wrong. I’m never successful with biscuits. Help!
30 minutes seems like a lot Linda! I’m wondering what it could be. 4 tablespoons is a full 1/4 cup extra liquid, I usually only add a tablespoon or two. But even then, I don’t know why it would take so long to bake! Always leave the biscuit in until the bottom of the biscuit have started browning (lift the edge to check). cover with foil if they are getting too brown on top. If the bottom is white, it’s not done. Eventually they will bake, even if it takes longer.
Do you have an oven thermometer? I’m wondering if your oven wasn’t hot enough? Sorry it didn’t work out, that’s a biscuit bummer!
I decided to make your biscuits tonight and freeze them for breakfast with my kids and their kids, but I have never made buttermilk biscuits with an egg, sugar and water… I always made mine with Crisco and buttermilk in the dough. I read the reviews and I had to try them and your cinnamon honey butter. It was a revelation! You have convinced an old dog that she could do a new trick! Thanks for the recipe!
I’m so glad the biscuits were a success Glenda! I will never say no to a Crisco biscuit, but it sure is fun to make them from scratch and see what all the fuss is about, right? So good. Thank you so much for taking the time to comment and leave a positive review!
OMG BEST BISCUITS I EVER MADE🤤🤤
These tasted really good but I think I did something wrong. They were golden brown on top but when we opened them the middle was more dense and heavy rather than flaky. Should they cool down before eating maybe? First time making biscuits so I’m a newbie!
Thanks
Hi HB! No eating them warm is the only way to go! It sounds like you overworked the dough. Try to make sure to only knead it until it barely comes together, then rolling out. also, make sure you are spooning and leveling your flour. Hope this helps!
Thank you, these were fantastic. So tasty and baked perfect from your wonderful instruction.
Do you suggest granulated sugar or confectioner’s sugar for this recipe?
Hi Amy! I use granulated sugar! Enjoy.
The absolute perfect biscuit recipe, I shared it with so many friends!! Thank you!
I don’t have a biscuit cutter or cookie cutter or anything like that. Is there something else I could use to cut the biscuits, a glass maybe? I’m not sure if that would be sharp enough? Can’t wait to try your recipe!
Hi Sarah! A glass is kind of blunt but it would work. You could also just try using a knife. Another idea I saw when I googled it just now was using an empty can. I think that might work best! Enjoy!
Best biscuits I’ve ever made. I think the grated butter makes the difference!
Thank you!
They turned out perfect, I baked half and the rest are in the freezer.
Beautiful flaky biscuits! Doubled it and the family still nearly ate them all!
I’m not sure if these biscuits are supposed to use unsalted or salted butter. I used salted butter and they were very salty. So maybe it’s supposed to be unsalted.
Hi Brittany! I always use salted butter. But unsalted butter will work just fine!
My daughter made these for breakfast on New Year’s Day. We all told her they were so good! She said they weren’t difficult and I asked for the recipe. (Our daughter is incredibly smart and is notorious in our family for finding the top-notch anything on the internet. She sent me the link to your posting.)
I found your post to be a delightful read! I will be making these easy-to-do biscuits today! It will be – like your mom- my first time in 33yrs making biscuits not using Bisquick. :)
Hi Charlotte! How fun is this! I’m so happy you enjoyed the recipe and happy to hear youre kicking the bisquick out on the curb ;) Thanks so much for chiming in, enjoy the biscuits the second time around!