
A super easy recipe for Homemade Pizza Dough, with all the tips and tricks you need to get a seriously flavorful crust on your pizza! This recipe is quick to make, with just a 20 minute rise (or an optional longer rise). I’ll show you how to make it step by step! Originally posted August 24, 2021.

Table of Contents
The Best Pizza Crust Recipe for beginners
If you come to my house on any given day, the bathroom will be cleanish. The kitchen will have been swept within the last day or so, and the dust will be relatively under control.
My computer, on the other hand, is a different story.
Eric is horrified by this. Every time he needs to do something on my laptop, he takes a moment to clean off the dust between the letters on the keyboard, and wipe the screen to clear it from all the smudges. “How do you even see what you’re doing??”
Shrug. What is it with men and their electronic devices, anyway? It would probably take Eric 6 months before he would notice that a toilet wasn’t getting cleaned. I don’t think he would EVER notice if I didn’t wash our sheets. But you get a tiny smudge on his phone? It’s a BIG DEAL.
Last week I got a new computer. Shiny. Immaculate. Not a speck on it.
And then I did what I always do: opened it right next to me in the kitchen, where I was doing one last test on my pizza sauce. Apparently I splattered oil and bits of garlic all over it in the process. I didn’t even realize it until I went to type something later and noticed actual grease on my fingers. This is a new low, even for me.
But what can I say. My quest for the perfect pizza overshadows any need for a clean computer situation. I’ve been working on my pizza recipe for months now! We have eaten so much pizza and it’s been glorious, because we all know that even bad pizza is good pizza. Today’s Pizza Dough recipe is partnered with this Pizza Sauce Recipe and this Homemade Pizza, be sure to check them out!
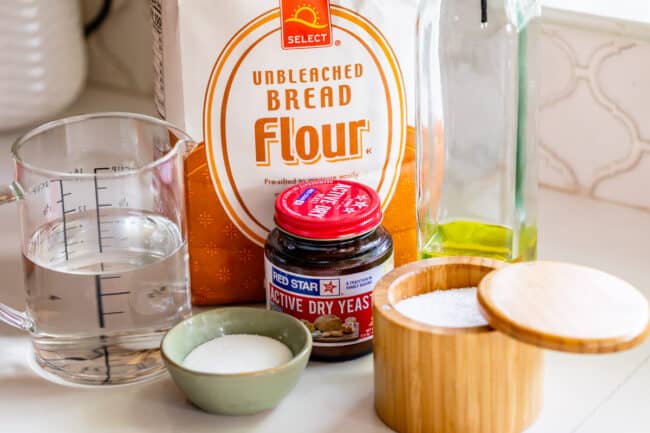
Ingredients for Pizza Dough
Here are the ingredients for today’s pizza dough recipe, to be baked between 475 and 550 degrees F:
- water
- yeast
- sugar
- oil
- salt
- flour. See below for extensive discussion about what kind of flour to use!
First things first: you need to know that the deliciousness of your pizza crust is directly related to the type of flour you use. Here are all the deets.
Best Flour for Pizza Dough
Here’s the short story: You want to use Bread Flour for pizza dough. All-purpose flour will work just fine. But it’s not as good.
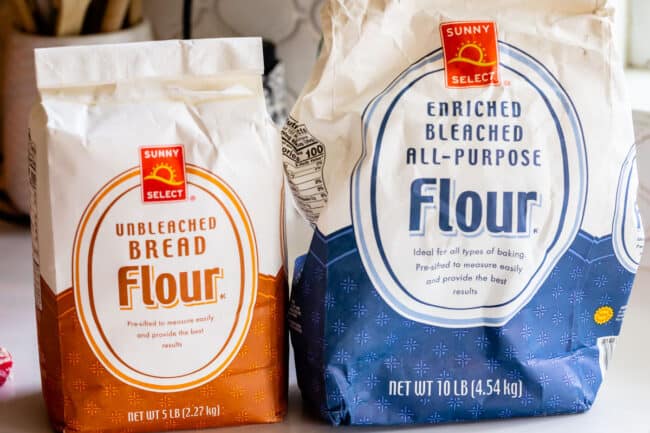
Bread Flour vs All Purpose Flour
Why? (have all the skimmers moved on? We are getting into it here) Bread flour has higher protein levels than All-purpose flour. Protein is what you need to form gluten. Gluten is this magical thing that forms when you knead flour and water together. Sheets of gluten trap and hold gases made by yeast. It is the framework that allows bread to rise. Without the framework of gluten, the gases from your yeast will escape and float away, and your bread (or pizza dough!) won’t rise. (This is why gluten-free baking is so tricky!)
But what the heck, pizza crust doesn’t even need to rise that much. It’s flat, right? Why are we using high protein flour?

Well, first of all, it DOES rise, at least for a little while, if you want it to taste good. Gluten development = flavor development.
But the other thing protein provides is strength.
Gluten is STURDY. Imagine eating a piece of pizza with a crust the texture of cake. It would fall apart, right? It wouldn’t even be able to hold up all that sauce and cheese! The more protein you have in your flour, the more strength your crust will have. We need a good sturdy pizza crust, not a wimpy sponge.
- Cake flour has the least amount of protein (9%) (that’s why we use it to make delicate, light cakes!)
- All-purpose flour has a middle amount of protein (11% ish). It’s good for most projects and can be used to make cake and bread (and pizza dough!)
- Bread flour has the most amount of protein (13%), meaning it can form the most gluten, which gives the final product a sturdier, chewier texture. Great for bread, which needs to rise super high. Great for pizza crust, which needs to hold up a bunch of toppings.
On top: pizza crust made with All-Purpose flour. Do you see how it’s all the same level? On bottom: pizza crust made with Bread flour. You can see that the edge crust puffed up way more than the chewy center part of the pizza. Maybe this is something you have to taste to understand!!
If you make pizza dough with All-purpose flour, what happens? You will get a totally passable pizza crust that is a little fluffier than what you are used to. It’s going to feel a little more bread-like, rather than pizza-like. Pizza crust should be chewy, textured, crisp-on-the-edge-and-bottom, and pillowy-tender (but thinner) in the middle. The only way to get this glorious texture is by having more protein. Use the Bread flour.
What about 00 Flour?
Can we make this flour discussion even more complicated please?
If you do any amount of research on pizza dough recipes, you will see many calling for “Double Zero” flour (00 Flour), a specialty Italian flour that is ground much finer than the kinds you find in the United States. (In the US, we differentiate flours by protein levels; in Italy, they differentiate flours by how coarsely they are ground.) 00 Flour actually has similar protein levels to American Bread flour.
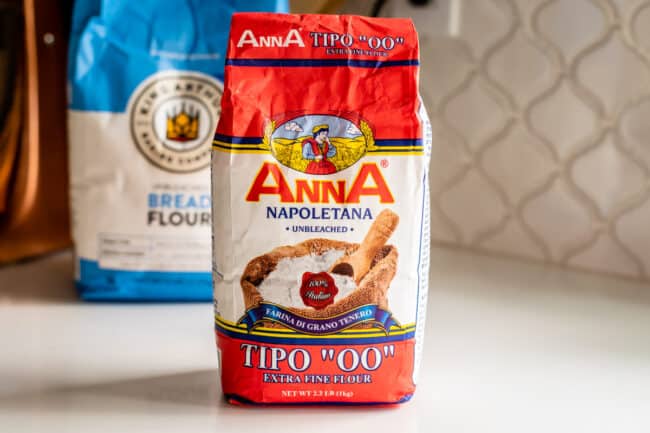
The finely ground texture of 00 Flour makes amazingly delicious “Neapolitan” style pizza crust. It is the kind of texture you will find at your favorite artisanal pizza place (as opposed to Dominos or Pizza Hut, no shade intended, I will eat pan pizza til the day I die.)
Sometimes when I am feeling extra, I will make today’s recipe using half Bread flour and half “00” flour. It definitely tastes amazing and has a different texture. I’m not calling for it in the official recipe because it’s not a common ingredient in American markets; you usually have to go to a specialty store or order 00 Flour online. But if you want to make your pizza crust totally next level, it’s worth the investment! See recipe notes for details.
How to make Pizza Dough
(See recipe card below for full instructions)
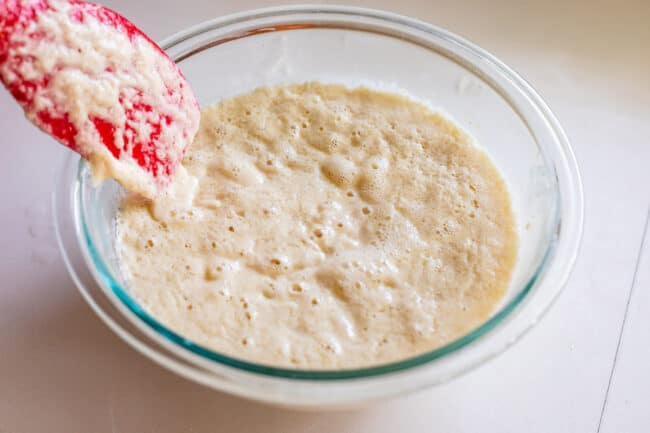
First we’re going to add our warm water and yeast to a large bowl. Make sure the water is not too hot! You don’t want to kill your yeast. It should be nice and foamy after a couple minutes. (if not, it’s dead!)

Here is the yeast just added to the warm water, and then on the right is a picture 5 minutes later. Nice and foamy. Not dead.
Homemade Pizza Dough: the Sponge Method
Have you ever heard of the Sponge Method for making bread (or in today’s case, pizza dough)?
It’s where you mix some (but not all) of the ingredients for your dough and let it sit for a while before adding the rest and kneading. In today’s recipe, you mix the water, yeast, sugar, and only 1 cup of flour. Then let it sit for anywhere from 30 minutes or up to 3 hours. That’s it!
This is different from the Straight Method (which is the most common way of making pizza dough or bread: mixing together all the ingredients and kneading them right away.)
Why sponge? It’s all about improving the flavor of your final crust. It also helps provide a more interesting texture for your pizza.
Time is key. Feeding yeast with warm water, sugar, and flour gives it time to ferment and produce even more yeast and natural sugars. Fermentation=flavor!
(People are always worried on recipes like this that they need to put their project in the fridge. NO! The whole point is that it’s fermenting. Coldness would slow it down. Americans are obsessed with refrigeration!)
Can you skip the Sponge step? Absolutely! I have instructions for both the Sponge Method and the Straight Method (the “normal” way) in the recipe below.
How to knead this Easy Pizza Dough
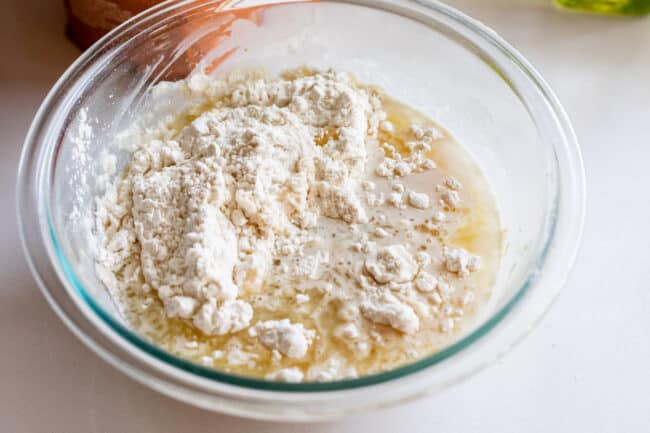
If you choose not to use the Sponge method, it’s even more simple. Once you have made sure your yeast is not dead, add in all the rest of the ingredients, adding the flour one cup at a time and stirring in between.
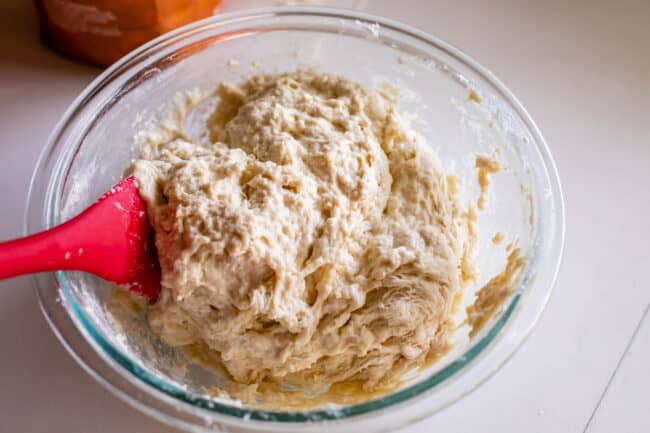
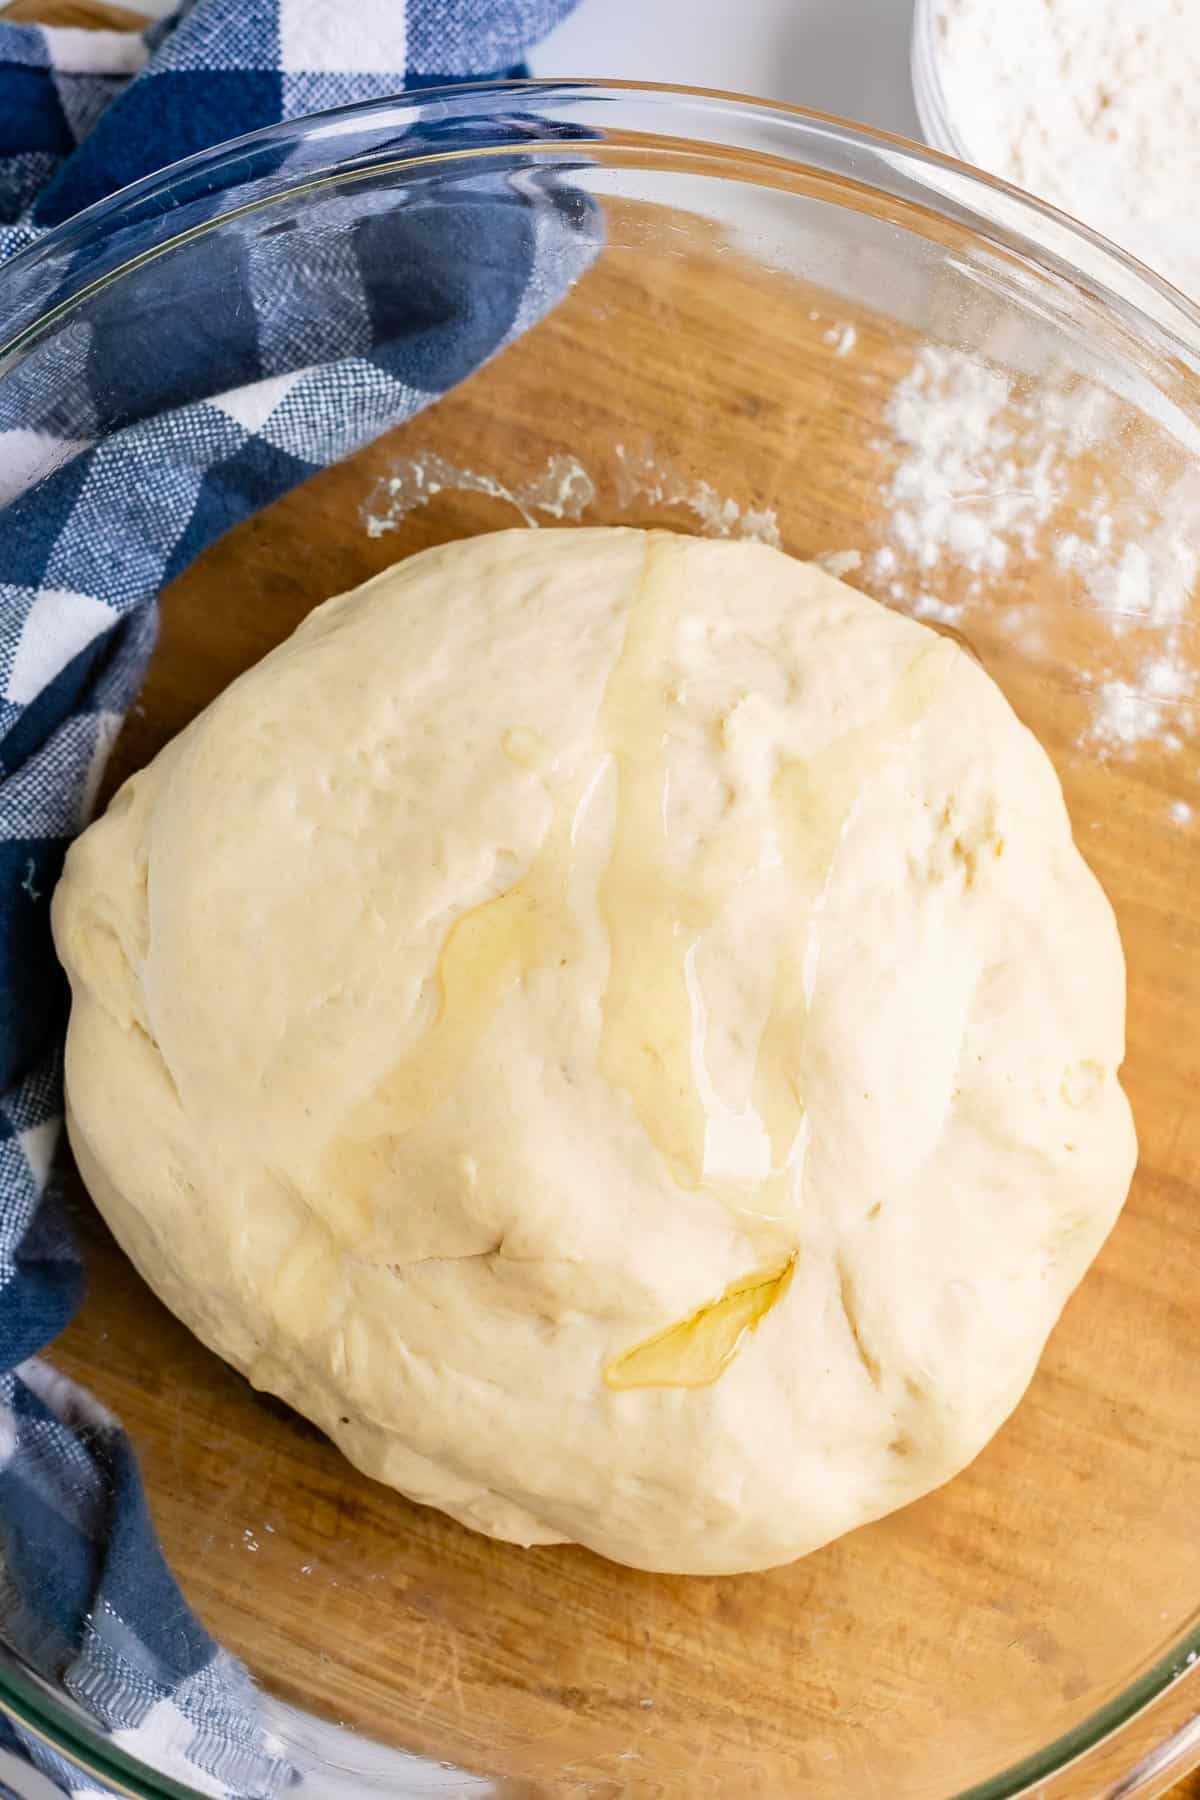
Here is the dough with about 3 cups of flour stirred in. At this point, if you are kneading in a stand mixer, switch to the dough hook. If you are kneading by hand, generously flour a work surface and use your hands to add the rest of the flour.
Knead the dough for about 5 minutes in a mixer, or about 7 minutes by hand. You want to make sure that the dough is constantly moving and folding back on itself; this is what helps mesh together all the protein in the flour with the water we’ve added, creating gluten! That magical thing.
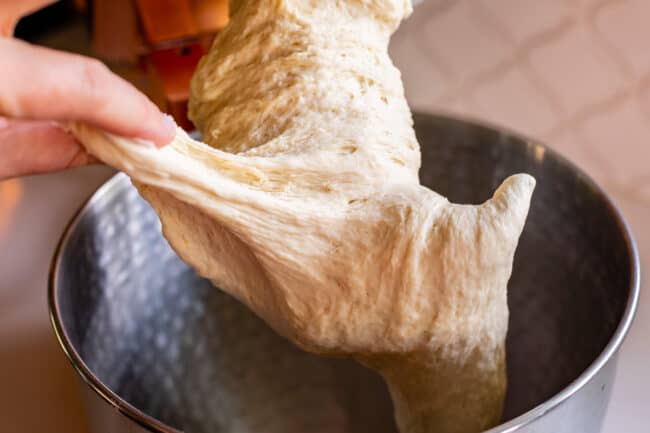
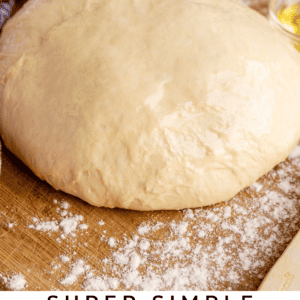
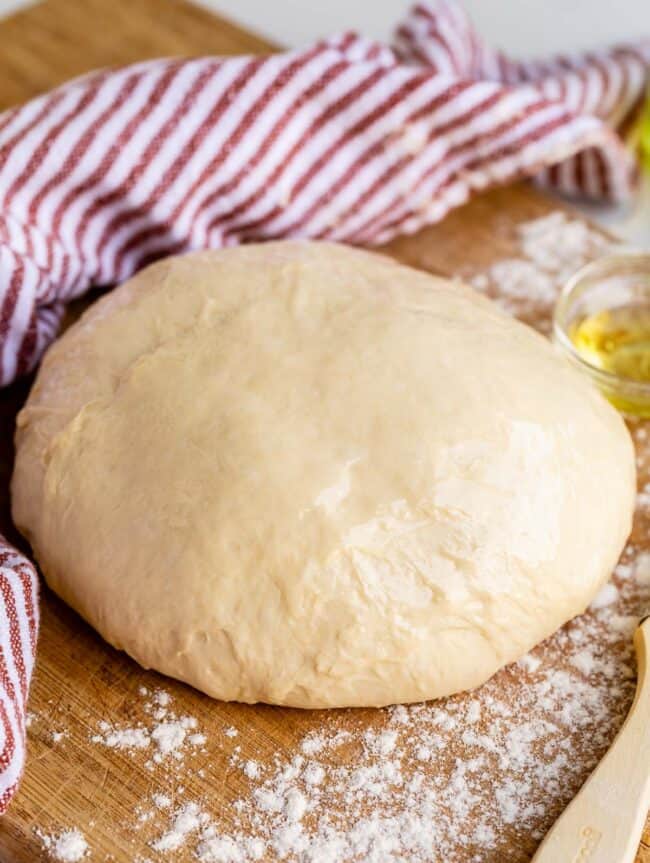
When you are done kneading, your finished dough should be smooth, elastic, slightly sticky, and soft. It should not feel tough. When you grab a piece and stretch it out, it should stick to your fingers a bit and stretch. If it is dry and breaks after just a short pull, you’ve added too much flour.
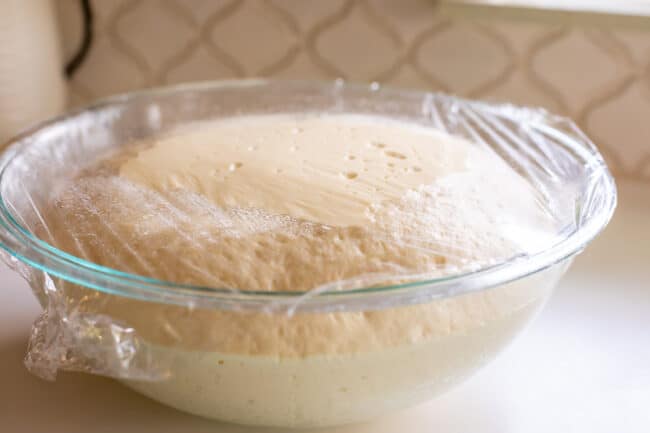
How long to let pizza dough rise: Flavor vs. Time
20 minutes. Or 12 days.
Here’s the thing about this pizza dough recipe: just like any classic, there are literally endless ways you can make it. Ask an Italian and they will tell you their 12 day process (I’m joking) (kind of). Ask Betty Crocker, and she will give you her 10 minute recipe. You are going to get pizza dough and a passable pizza crust at the end of both recipes. One is just going to taste a lot better!
Here’s what I want your takeaway to be on any pizza dough recipe: you can make it as short of a process or as long of a process as you want. Generally speaking, the longer you wait (sponging, rise time, etc.), the better tasting your resultant crust will be. Just check out this 4 hour Cast Iron Pizza recipe for proof. (It really tastes like Pizza Hut Pan Pizza. It’s amazing!)
Or you can go from zero to hot pizza in your mouth in ONE HOUR using today’s recipe, with just one 20 minute rise for the dough. (I promise, it’s delicious…even though it hasn’t realized its full potential!)
Or, you can take your time, use the Sponge method for 3 hours, let it rise for 2 hours, take it out to dinner, give it a nap, let it rise again, and then bake. Or, you can let it rest overnight in the fridge to develop flavor. All using this same recipe. It’s very forgiving and adaptable. Don’t let anyone tell you there’s only one way to do pizza dough.

I am a busy mom. Sometimes I skip the sponge step and only do a 20 minute rise because I got hangry people all around me. Sometimes when I’m on top of my game, I’ll start the process in the morning, do a sponge, then let it rise all day, punching down periodically. The longer you wait, the better it tastes.
How to roll out Pizza Dough
I like to do it by hand! It’s easier to shape the edges of the crust that way. But you can use a rolling pin if you want. I have lots of tutorial pictures for how to roll out the dough on my Homemade Pizza post.
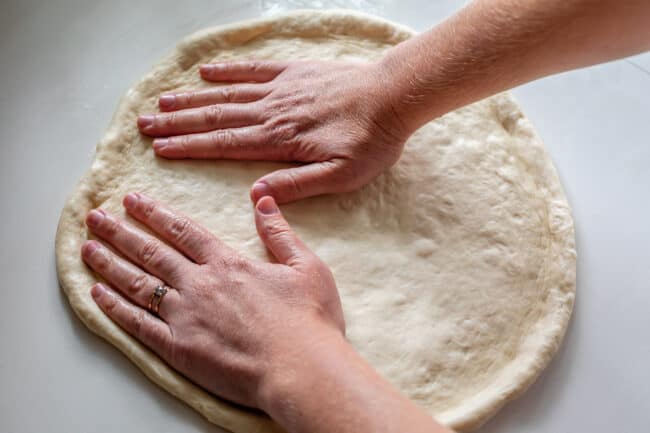
My one recommendation for rolling out pizza dough is to dust your surface with only a small amount of flour. Extra flour can make your dough tough. In fact, I like to rub my work surface with oil instead of flour. But either way will work!
My other tip is to partially bake (this is called par-baking) the dough before you add toppings. It makes a huge difference and gets you the crispiest crust! Check out this Homemade Pizza Recipe for all the details.
How to bake this Pizza Crust Recipe
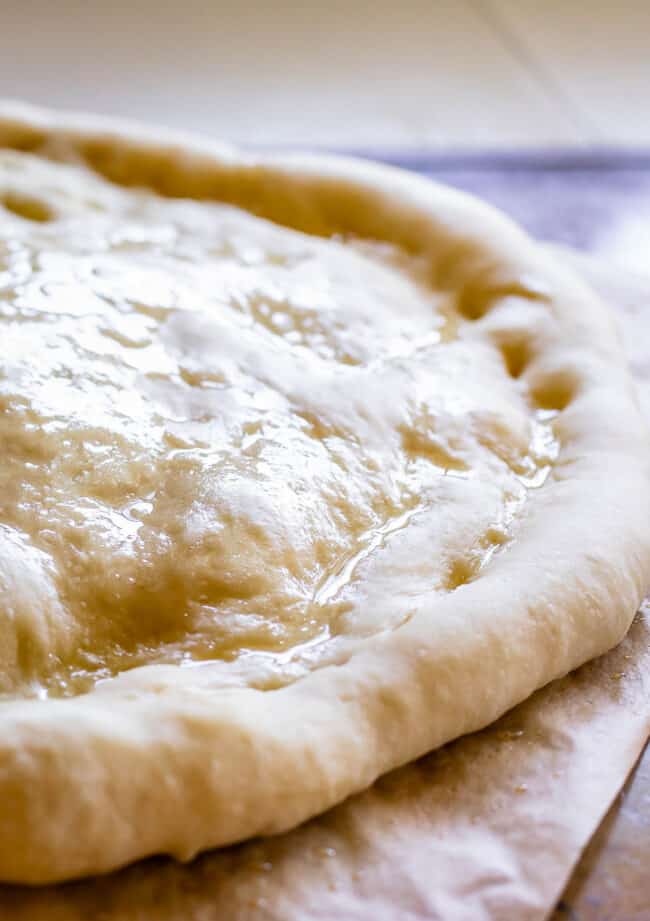
Par bake (Optional).
Once the oven is up to temperature, we are going to do a 1 to 2 minute par bake. This step is technically not necessary, but I never skip it. It guarantees not only a thoroughly cooked crust, but a nice and crispy one. Nobody wants a doughy pizza, yuck. (If you want to skip it, you can proceed with topping your pizza).
- Pulling on the edge of the parchment paper, slide your pizza dough onto your pizza peel or flat baking sheet.
- Open the oven and pull on the parchment paper again to slide the pizza dough and the parchment paper onto the hot hot pizza stone (or pizza pan). Your whole body is basically inside the oven during this procedure so please be careful and make sure there are no toddlers running around who could climb right in and burn to death (these are the thoughts that keep me up at night).
- Shut the oven door and par bake for 1-2 minutes, until the dough is slightly puffed. Set a timer, don’t walk away!
- Pull on the parchment paper again to transfer the half-baked dough back onto your pizza peel. Keep the oven door shut as much as possible so you don’t lose heat. Poke down any large bubbles on your crust and add your toppings.
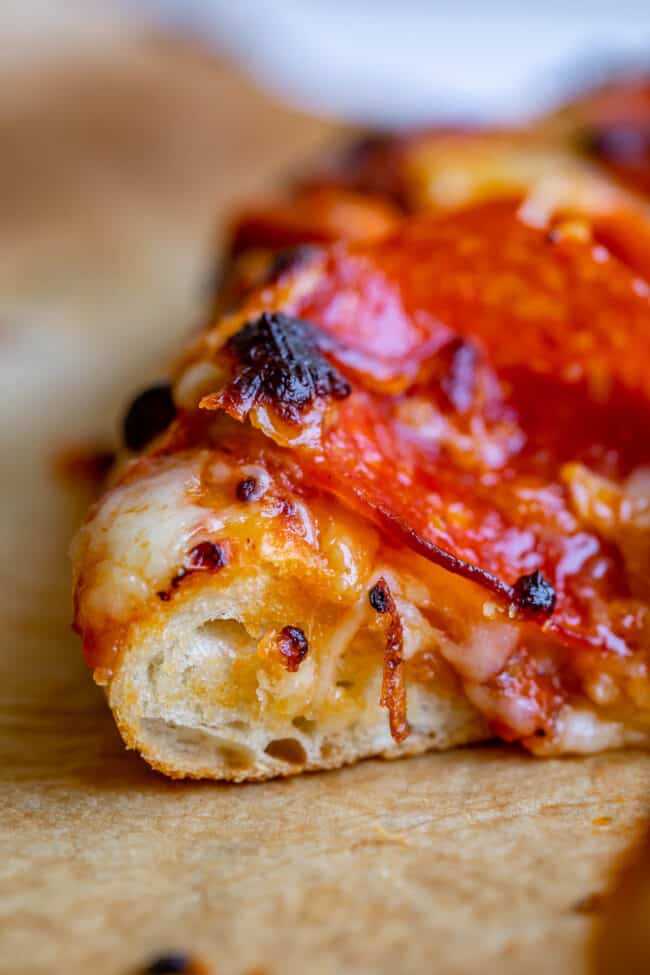
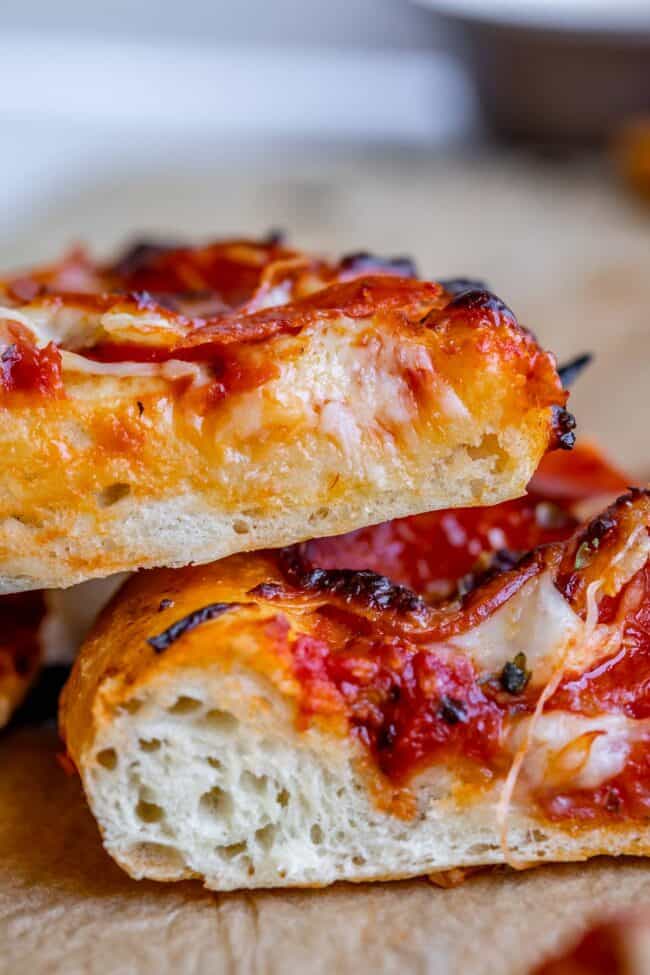
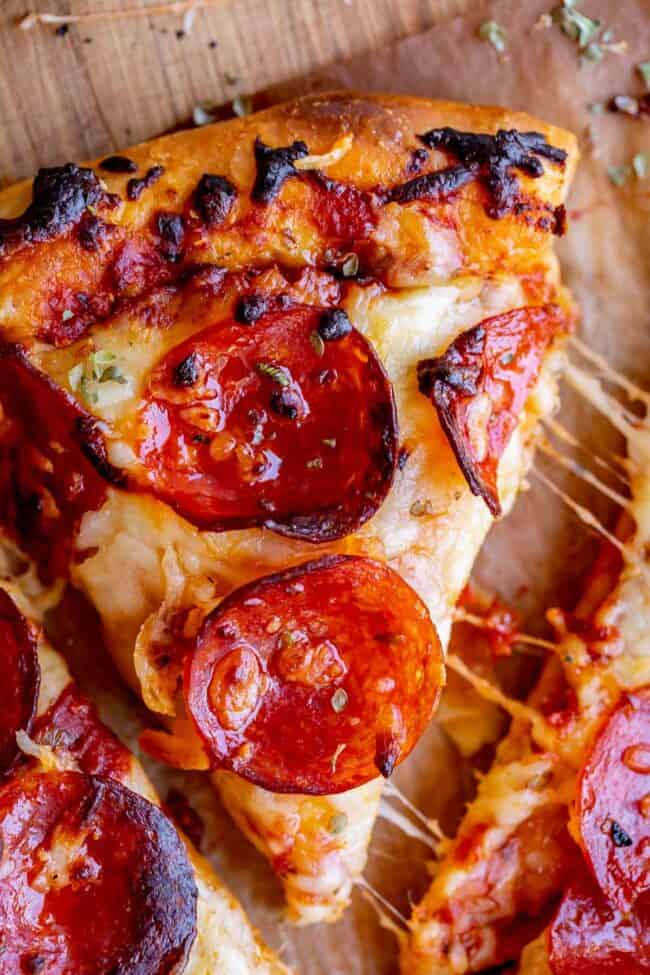
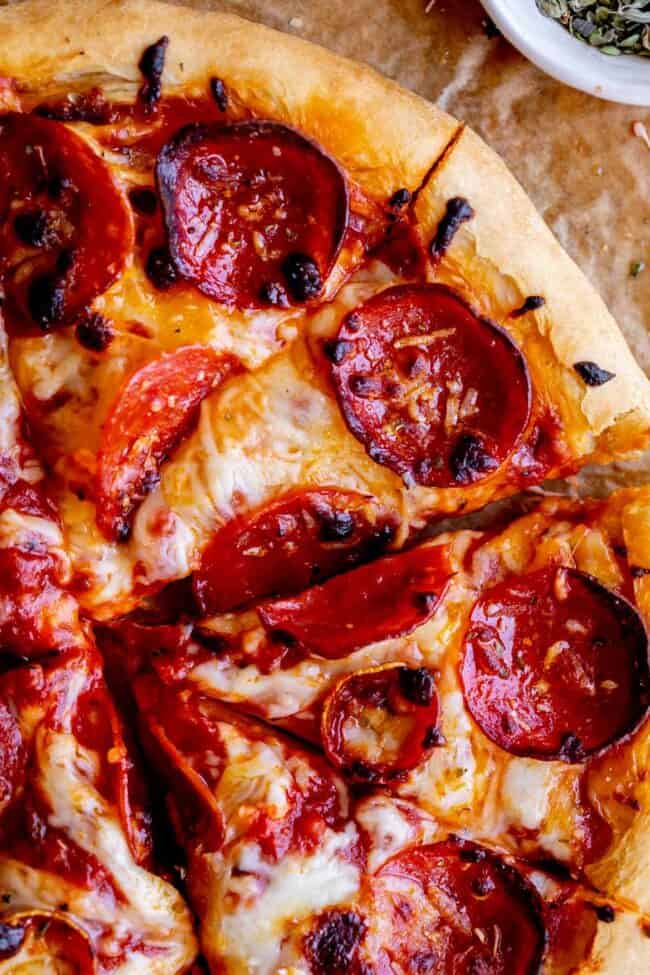
Bake.
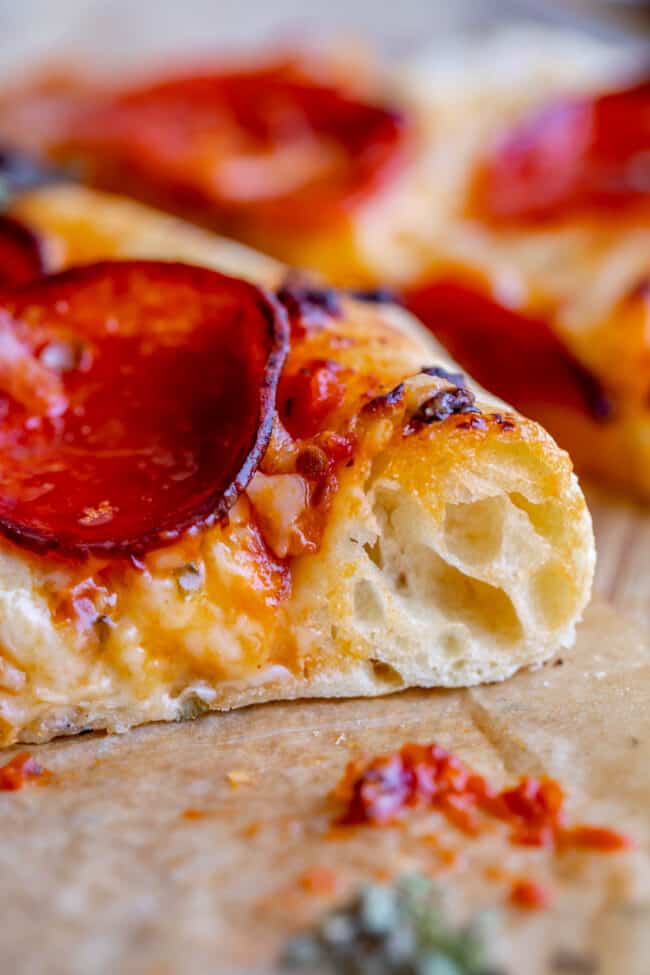
- Transfer the pizza onto a pizza stone (or pan), this time without parchment paper. You want the pizza to do its final bake directly on the stone. (The stone is porous and absorbs moisture, giving you a crispier crust.) Your crust is sturdy enough after the 1-2 minute par bake that it shouldn’t be too hard to push the pizza onto the stone without the paper.
- Bake the pizza for about 8-12 minutes. This is going to depend on how hot your oven is, and how thick your pizza is. The edges of the crust should be golden brown, and the cheese should be bubbly and also starting to lightly brown. If you don’t have a pizza stone, use a spatula to lift the edge of your pizza to make sure that it is browning all across the center on bottom. If the bottom is still white, you are looking at a doughy pizza. No thanks. Leave it in longer.
If the top of your pizza is browning too quickly but the bottom crust isn’t done, tent the top of the pizza with foil to slow browning
Best Pizza Dough Recipe tips
The best way to get a super flavorful pizza dough is to allow a lot of time for fermentation and gluten development, as discussed above. Here’s how to do it:
- Make a sponge and let it sit for up to 3 hours (yeast development=flavor)
- Knead your dough very well to help form gluten. Gluten=flavor.
- Let your dough rise once, twice, three times! See recipe. The longer it has to ferment, the more flavor there will be in your dough.
- If you are in a hurry and don’t have time for these steps, a last ditch effort to add flavor is to knead herbs into your dough (oregano, basil, thyme). You could even try adding a bit of parmesan.
- Another last minute idea: before and after parbaking your pizza crust, brush it with olive oil that you have mixed with a bit of garlic powder, oregano, and basil.
Pizza Crust Recipe storage
Can you freeze Homemade Pizza Dough?
Yes! I freeze pizza dough all the time. It works like a charm. Separate the dough into 2 balls (for faster thawing). Place the kneaded dough (no need to rise first) in 2 labeled ziplock bags and freeze for up to 3 months. See recipe for overnight pizza dough instructions!

How to defrost Pizza Dough
Let thaw on the counter or in the fridge. Once it is completely thawed, let rest at room temperature at least 1-2 hours before rolling out. (I’ve even tried the hack of putting the well-sealed bag of frozen dough in a bowl of warm water to speed up thawing. Works great. Just make sure once it’s completely thawed, you give it plenty of time to rest/rise.)
How to parbake pizza dough for grab-and-go make-ahead pizzas
If frozen pizza is your thang, you can totally make it happen with homemade dough.
Here’s how it’s done!
- Roll out the dough according to the recipe instructions and parbake it.
- Wait for the parbaked pizza dough to cool.
- Freeze on a sheet pan to maintain it’s shape
- Wrap it completely with plastic wrap. Then seal it in an airtight container or bag, 2-gallon ziplock bags would be perfect.
- Store in the freezer for up to 2 months.
- To bake a pizza from frozen parbaked dough, all you have to do is add toppings and bake as described. There is no need to thaw. Easy peasy! You might need to let your pizza bake a few minutes longer than usual.

Homemade Pizza Dough FAQs
Oil and sugar. Traditional Italian pizza dough is made with just flour, water, salt, and yeast. The pizzas are baked at like 12,000 degrees and give you this amazingly crispy experience. (just kidding, more like 900 degrees.)
Since most of us have ovens that go to 550 degrees max, we add a couple ingredients to the dough to help make it extra crispy:
Oil. Oil conducts heat. If you added oil to your dough and cooked it at 900 degrees, it would burn (oil conducts heat!) We are baking at 500ish. That heat-conducting oil helps our pizza crisp!
Sugar. Sugar is added to help the pizza get brown on the edges, and to help the dough crisp in the oven. Sugar does the same thing in chocolate chip cookies! (Of course, we’re not adding quite as much to our pizza dough.)
Rolling out the dough extra thin is another way to get super crispy pizza crust. Today’s recipe makes 2 pizzas, but if you like extra crispy crust, divide the dough into 3 and roll it out thin!
Yes, and it is a totally life saving option sometimes! I love to buy pre-made pizza dough at the store (Trader Joe’s has great pizza dough) and then take it through the rising process as described in the recipe. Just because you didn’t make it doesn’t mean you can’t give it a little spit shine. Okay, bad analogy, the point is you can make store bought pizza dough even better by following the rising, rolling, and par-baking steps described in the recipe.
Just don’t cheat every time. This dough is worth it!
The “shortening vs. oil” debate in pizza dough is a lot like the “shortening vs. butter” debate in cookies. Shortening can do some pretty impressive things texture-wise, but it’s not famous for flavor. I love the rich flavor that olive oil imparts to this pizza dough, and I’m not willing to give it up for some marginal gains in texture. Plus, if you want to pretend you’re in Italy, olive oil is your girl, no question about it!
There’s no one secret to the best pizza…but here are a few not-so-secret tips that’ll get you there.
– Make homemade dough! It’s easy, it’s cheap, it’s full of amazing flavor, and it’ll make you feel like spinning it up in the air like an Italian chef (don’t do it unless you’re way more talented than I am).
– Use a decent Pizza Sauce (here’s my recipe)
– Preheat your oven for at least 30 minutes. Yes, really, set a timer. I don’t care when your oven beeps to let you know it’s reached the right temperature. Wait 30 minutes.
– Par bake your pizza crust to make sure your pizza has a crisp bottom and a cooked center
– Use a pizza stone for crisp edges. Sorry, this is kind of non negotiable. Your oven sucks at pizza making. You need a hack.
– Follow my Best Homemade Pizza post for more tips on rolling out the crust, toppings, and more!
Apparently (I just looked it up) you can get prepared pizza dough from the store for like, 2-3 dollars (note, this is 2023 talking, if mutant zombie dolphins take over the earth or something, maybe it’ll be 2-3 HUNDRED dollars by the time you read this). We’re talking like Walmart store brand by the way, or Pillsbury. And purchasing the ingredients you need for pizza? Technically more expensive…if you are only going to make one pizza, and if you don’t already have some of the ingredients at home. I mean, sure you might not have bread flour and yeast just hanging around, but I bet you have sugar and olive oil.
But you’re not going to make just one pizza! You’re going to make many pizzas, because homemade pizza dough is so much better than pre-made pizza dough that there is really no comparison. Which you will now know, because you’re going to try it! And you break even on like, pizza #3. In the end it’s a solid financial choice and I promise you won’t regret it.
Easy Pizza Dough sister posts: the sauce and putting it all together
I hope this post answered all the questions you’ve ever had about pizza dough! Don’t forget to check out the two sister posts to this recipe: Easy Pizza Sauce and Homemade Pizza, where we put it all together. It was too many steps to fit all this info here! (Pizza is serious business.) The Homemade Pizza post picks up right where this one leaves off. I’ll show you all my rolling out the dough tips, discuss pizza stones vs. normal pans, talk toppings, and more!
More pizza to love:
- Cast Iron Pan Pizza << this tastes exactly like a Pizza Hut Pan Pizza. No lie.
- Blackberry Ricotta Pizza with Basil << it might be unconventional but I’m telling you, this pizza is legit.
- Easy No Cook Pizza Sauce << here is a really fast and easy pizza sauce recipe that requires no cooking or blending! Just dump and stir.
- Easy Pizza Casserole << all the flavors you love…in a pan!
- Hot Dog Pizza with Caramelized Onions << this recipe might sound weird but I’M TELLING YOU it’s so good!
- Thai Pizza with Zucchini and Pickled Onions << like the one at California Pizza Kitchen!
- Classic Stromboli Recipe << pizza, all rolled up and baked.
- Hawaiian BBQ Chicken Pizza from Pitchfork Foodie
- Cheesy Pepperoni Pizza Sticks from I Wash You Dry
- Pizza Quesadilla Recipe from The Girl Who Ate Everything
Homemade Pizza Dough
Ingredients
- 1 & 1/2 cups warm water, between 105-110 degrees F
- 2 & 1/4 teaspoons active dry yeast, this is one 1/4 ounce packet
- 1 tablespoon granulated sugar
- 2 teaspoons kosher salt
- 3 tablespoons olive oil
- 3 & 3/4 cups Bread flour, OR All-Purpose Flour, OR half Bread Flour and half "00" flour*, spooned and leveled, plus more, see notes
Instructions
- Add 1 and 1/2 cups warm water to a large bowl or stand mixer. The temperature should be like nice bath water: not so hot that you can't hold your finger in it comfortably. I like to check with my wrist, it is more honest than fingers when it comes to temperature.
- Add 2 and 1/4 teaspoons active dry yeast and 1 tablespoon sugar to the water. Wait about 3 minutes until you see bubbles forming. It should look slightly foamy. If no change has happened, you have killed your yeast. Murderer! Dump it and start over.
- OPTIONAL SPONGE STEP: You can skip this. I promise. But it sure tastes good to let your yeast ferment a little while. Here's how to do it: Add 1 cup of flour to your bowl of water, yeast, and sugar, and stir together. You don't need to get all the lumps out. Let rest uncovered on the countertop for 30 minutes, or up to 3 hours. It will foam and sponge and get all lovely and fermenty. Mmmm.After it has rested, continue with adding the remaining ingredients called for in the recipe (2 teaspoons kosher salt, 3 tablespoons olive oil, 2 and 3/4 cups flour added one cup at a time). Because that first cup of flour had a long time to absorb the water while it sat, it is likely that you will need to add an extra few tablespoons of flour to get your dough workable. Remember, don't overdo it. Stiff dough=tough pizza crust. You want a nice, softy, slightly sticky dough. Continue with step 5.
- STRAIGHT METHOD: Follow these instructions if you are skipping the Sponge step. Once you have added you yeast, warm water, and sugar to a bowl and you know for sure it's not dead (should be bubbly), add 2 teaspoons kosher salt, 3 tablespoons olive oil, and 3 and 3/4 cups of flour, 1 cup at a time.
- Once all your flour is incorporated into your dough**, it's time to knead for 5 minutes. You can do this by hand on a flour-dusted countertop (in which case you should knead more like 7 minutes), or using the dough hook on a stand mixer. The dough should be smooth, elastic, slightly sticky, and soft. If after a couple minutes of kneading, the dough has not come together in a ball (still sticking to the sides of the bowl) then it's time to add a bit more flour. See notes for more details.
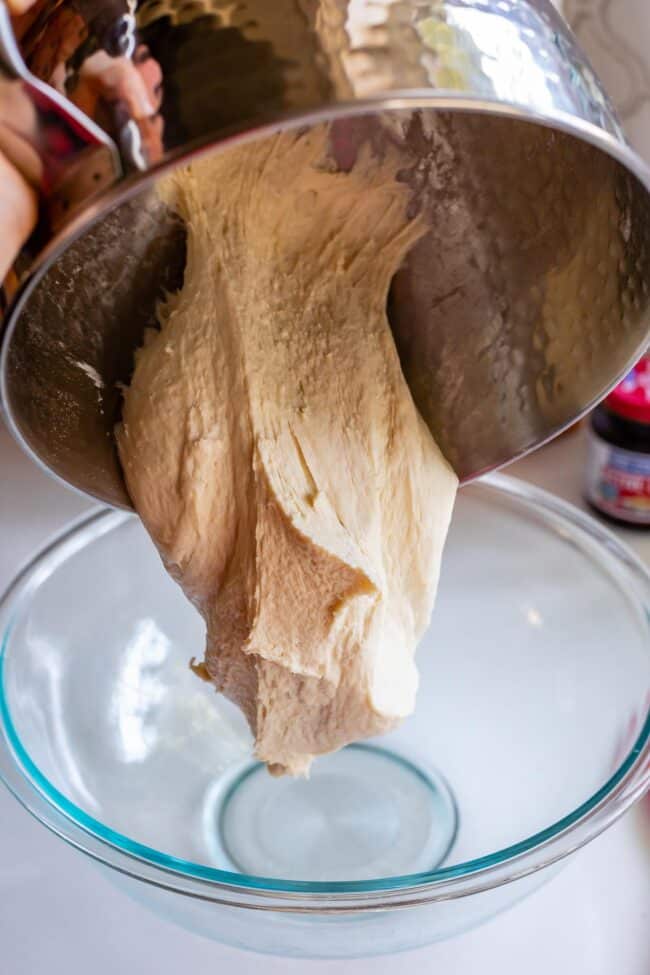
- Shape your dough into a ball and place in a large greased bowl, turning over once so the top of the dough is greased. Sometimes I cheat and just leave it in the bowl I kneaded it in, but know that it will stick to the sides (often I just lift up the dough, spray the bowl with nonstick spray, and set it back down. Spray the top of the dough too so it doesn't dry out.) You just need a nice spot for the dough to rise.
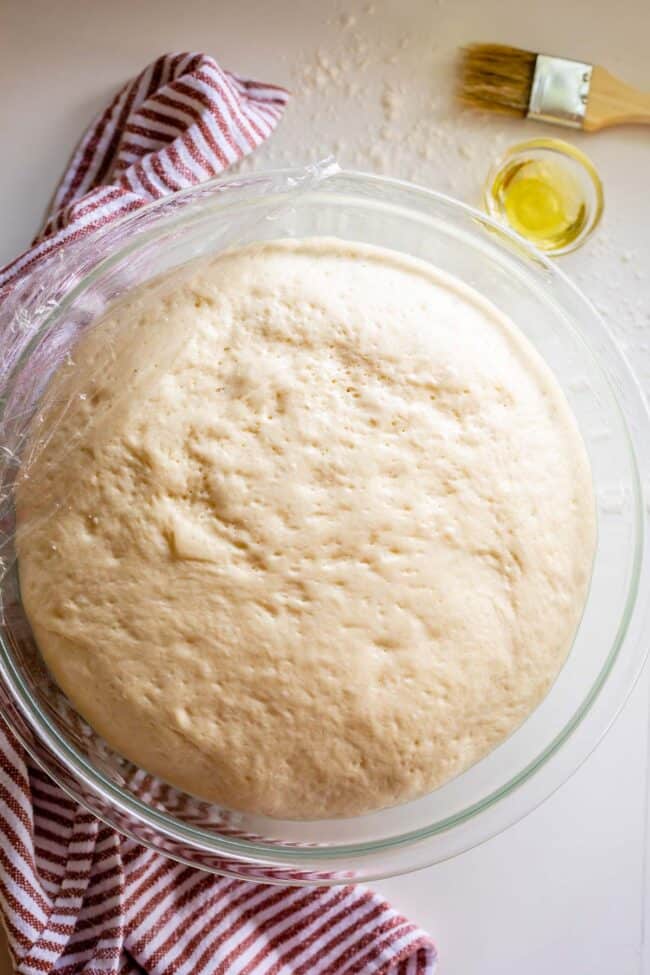
- Cover the bowl with a tea towel or plastic wrap and let rise in a warm place. I like to turn my oven on to 350 for about 45 seconds, then turn the oven off. This creates a nice warm environment for rising dough. If the oven racks are too hot to touch with your fingers, the oven got too hot, wait until it has cooled to put your covered dough in. (Make sure you remove dough before preheating your oven for pizza baking!!)
- Rising time: This is totally up to you. 20-30 minutes is the minimum if you are in a rush. (I do it all the time.) You can rise 1 hour. Or 2 hours if you want. You can let it rise 4 hours, or 8 hours, coming back every 2 hours or so to punch it down. The longer you wait, the more flavorful and textured your crust will be. See below for overnight instructions.
- Once your dough has risen, punch it down and separate into two balls to make two 12-inch pizzas. (Separate the dough in 3 balls if you like super thin crust!) Place each ball on a greased or floured surface and let rest, covered with a tea towel or plastic wrap, for another 5-20 minutes, whatever you have time for.
- Deflate each ball with your hands. Your pizza dough is ready to go! Here is my Easy Pizza Sauce Recipe, as well as my Homemade Pizza Recipe, with all the instructions you need for rolling out the dough and baking. That recipe picks up right where this one left off: it has all my rolling-out and baking instructions, plus so many tips.
- Overnight instructions: Place the kneaded dough (no need to rise first) in a large covered bowl or a gallon ziplock that is well sealed. Let rest overnight in the refrigerator. Punch down and let the dough rest at room temperature for at least 1-2 hours before rolling out.
- Freezer instructions: Separate the dough into 2 balls (for faster thawing). Place the kneaded dough (no need to rise first) in 2 labeled ziplock bags and freeze for up to 3 months. Let thaw on the counter or in the fridge. Once it is completely thaw, let rest at room temperature at least 1-2 hours before rolling out. (I've even tried the hack of putting the well-sealed bag of frozen dough in a bowl of warm water to speed up thawing. Works great. Just make sure once it's completely thaw, you give it plenty of time to rest/rise.)


This was my first time making pizza dough. I did the sponge step and let the dough ferment in the fridge overnight and it turned out so good! I used it to make neapolitan pizza in a cast iron pan and it was the best pizza I’ve ever made. I will definitely be using this recipe the next time I want to make pizza (which will be soon).
Oh I’m so happy to hear this Jem! Sounds like it was a labor of love that was worth it! Thanks so much for chiming in with your experience, that helps me out so much. Happy pizza night!!
Is it proportional increase in ingredients and same rest time if we want more than 2 pizza?
We need at least 6.
Yes, that’s right Diya! Same proportional increase in ingredients, same rest time. Enjoy all those pizzas!!
What happens if you do add too much flour and it does break off after a short pull? What then?
Hi Fio, it’s up to you. You can still go ahead with making your pizza, but it may be tougher than if your dough had less flour. I mean, it’s still pizza! Pizza is great like that :-) Hope your next one turns out perfectly!
Does the position in the oven matter (i.e., lower vs upper rack)?
Hi Colleen! To make sure you get the crispiest crust you can put the pizza on the lower rack. If you’d prefer to make sure your cheese is crispier, with those beautiful brown spots, the middle rack is good. I’d avoid the top rack because you’re likely to overcook the cheese and get a too-soft crust. Enjoy!
This dough came out so well. I used the sponge technique and cold proofed in the fridge overnight. I then divided the dough into two balls and refrigerated again until 2 hours prior to baking, so it could come to room temp. I used a pizza pan, and par baked for a few minutes at 475°, then added sauce and toppings. The crust puffed up a lot, and the bottom was cooked well and it held up. No flop. I added an Olive Oil, Italian seasoning and garlic powder mixture to the crust, to add a bit of flavor. I’ll definitely be using this recipe again.
I love love love this recipe! I may have even already commented on it. Just had a question of sponge time vs rise time. If you have a whole afternoon (4-5 hours) to split between the different times, would you do more sponge time or just do a short sponge time and leave the rest to the rise? Or half and half as in 2 hour sponge 2 hour rise? Obviously the great thing about this recipe is the flexibility, but I was just curious!
Hi! I am making this this afternoon to use this evening. After I let the dough rise (for a few hours) do I need to refrigerate it to be used tonight? If so, would I need to let it be room temperature later?
Hi Theresa! If you want to slow down the rising process, you can refrigerate it. If you are around the whole afternoon to punch it down every hour or so, I would leave it out on the counter!
I made this pizza dough for the first time. I completely forgot to remove the parchment paper during final bake; however, it all turned out ok. I will be making it again!
I just wanted to comment to say not only is this the best pizza dough I have made (I suck at baking), but this is also the first food blog I’ve actually read top to bottom without losing interest and just skipping to the recipe. You keep it entertaining and the way you write is very easy to follow. Ive never read a recipe from a blogger that spells it all out like this and for a baking recipe, we need it to be spelled out. Or at least I do. Anyway, thank you for your recipes and for the way your write them out for us. Making four of these pizzas tonight along with your pizza sauce recipe (delish!!) I made two of these pizzas this week and they got demolished by my teen boys. They only left me two pieces so this time I’m doubling the recipe. Thanks again you’re awesome and I can’t wait to try more of your recipes.
Can i leave the oil out if cooking at 900 and i am doing sponge method should i use the sugar thanks . made this before the best
Hi Kelly! Great questions!! If I ever buy an Ooni this will be the first thing I test, exactly as you said – leaving the oil and sugar out entirely. Sadly I don’t have an Ooni so I can’t try it. If you make this (continue with the sponge method as described) PLEASE tell me how it goes!! Does it get as crispy? does it brown nicely? those are the things oil and sugar are helping with in the recipe as written. Thank you for bringing this up!
Very good recipe, thank you! My first time ever making pizza entirely from scratch. The dough was delicious, the first one got very puffy so I poked the middle with a fork for the second one which helped. Just a learning curve! I also messed up my sauce by adding too much sugar, but this dough recipe was phenomenal.
I’m so happy it was a hit Dan!! There is nothing like a good homemade pizza dough! the best. Thanks so much for taking the time to review and comment, means the world to me! 💕
This bread bowl recipe looks incredible—crispy outside, soft inside, just the way I love it! I’ve been exploring all kinds of homemade dough recipes lately, especially ones perfect for soups and stews. Thanks for the inspiration—can’t wait to try this one at home!
Thank you for the recipe