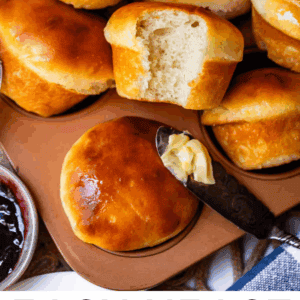


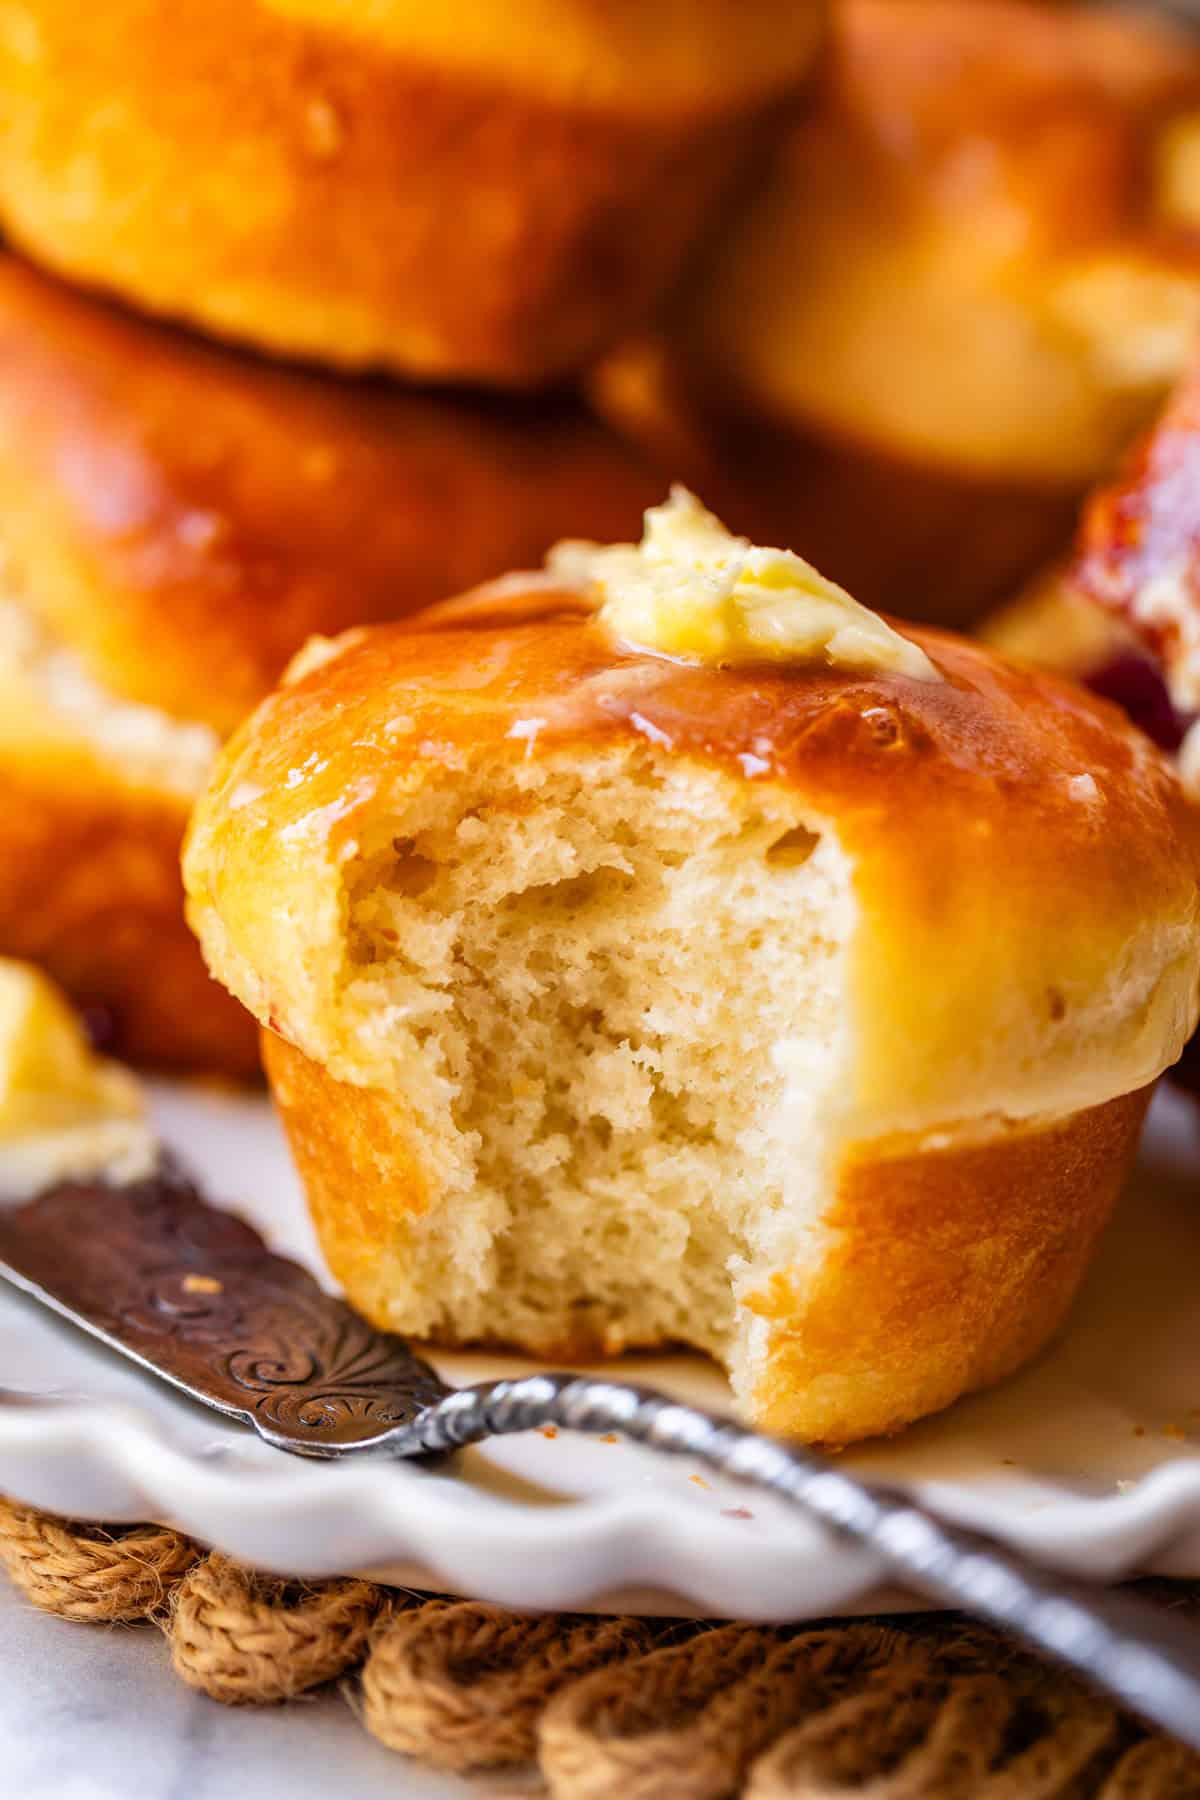
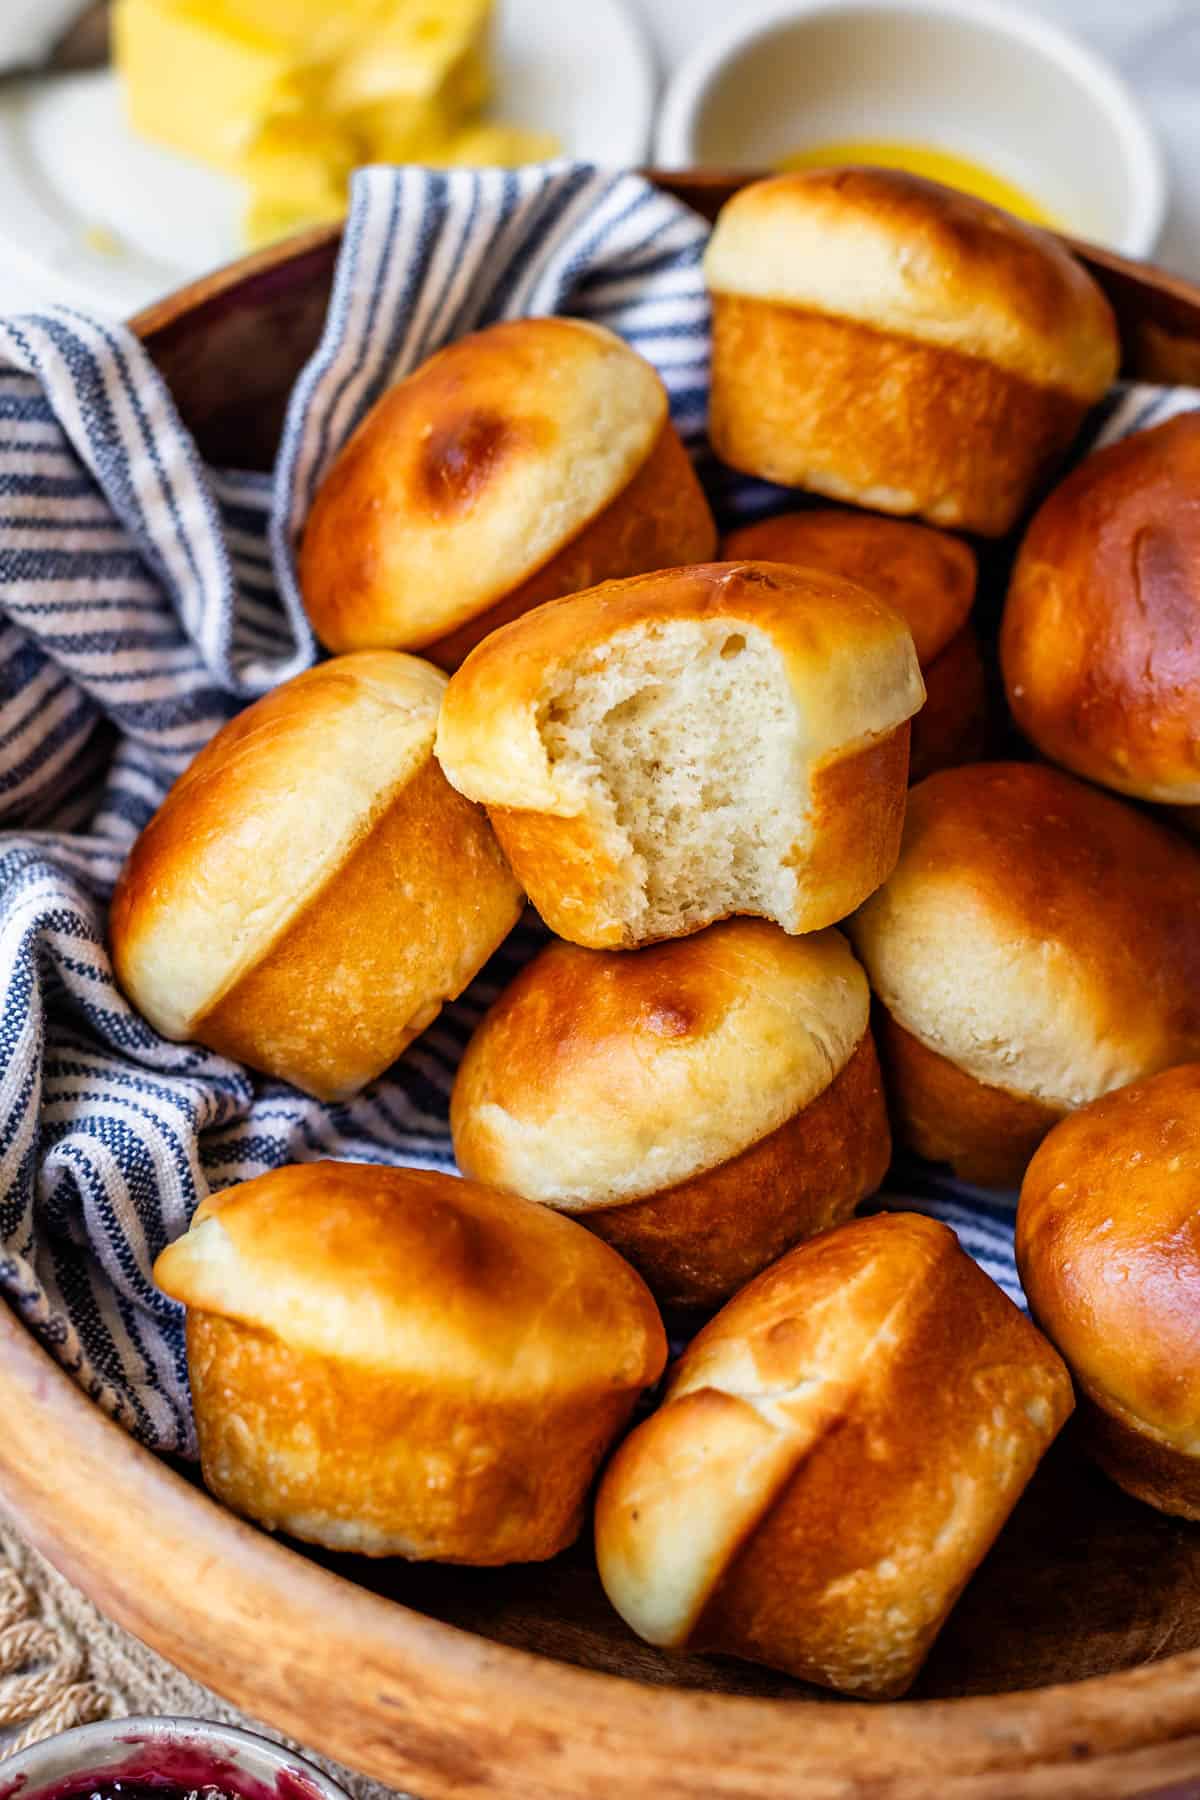
These easy yeast dinner rolls are about to become your new best friend! Make an easy 5-minute dough, slap it in a muffin tin, and bake. No kneading, no rolling, no shaping. By the time the rest of your meal is finishing up, these buttery beauties are coming out of the oven. The edges that pop out of the tin are delightfully crispy (it’s a feature, not a bug) They take just over an hour from start to finish. Originally published October 29, 2012.
Okay so at church last week my friend Jackie was THEE best friend and told me I had something stuck in my teeth. I immediately became self conscious and whipped out a mirror to check it then and there, but didn’t see anything. “Oh! I think it was a shadow!” Jackie says.
A couple days later I went to the dentist and they put fluoride varnish on my teeth, I don’t know if you’ve ever had this kind of fluoride, but it sticks to your teeth kind of like glue, and looks…like you have something on your teeth (because you do.)
Jackie came over later that night and again told me quietly that I had something stuck in my teeth. I was like, oh no, the dentist put on that fluoride stuff, what is it with you and my teeth anyway??
Then I go to the bathroom a minute later and smile at myself to see an ENORMOUS leaf of cilantro stuck directly between my two front teeth. Like I am telling you guys, this cilantro was the size of Texas. Comically massive. It was so big that you could tell it was cilantro and not parsley from the leaf pattern.
I started busting up laughing SO hard. Poor Jackie is just trying to be a good friend and I’m over here absolutely gaslighting her. “What, nothing to see here, move along!”
I definitely owe her some homemade bread at this point. Delivered closed-lip 😂
These rolls are stupid easy
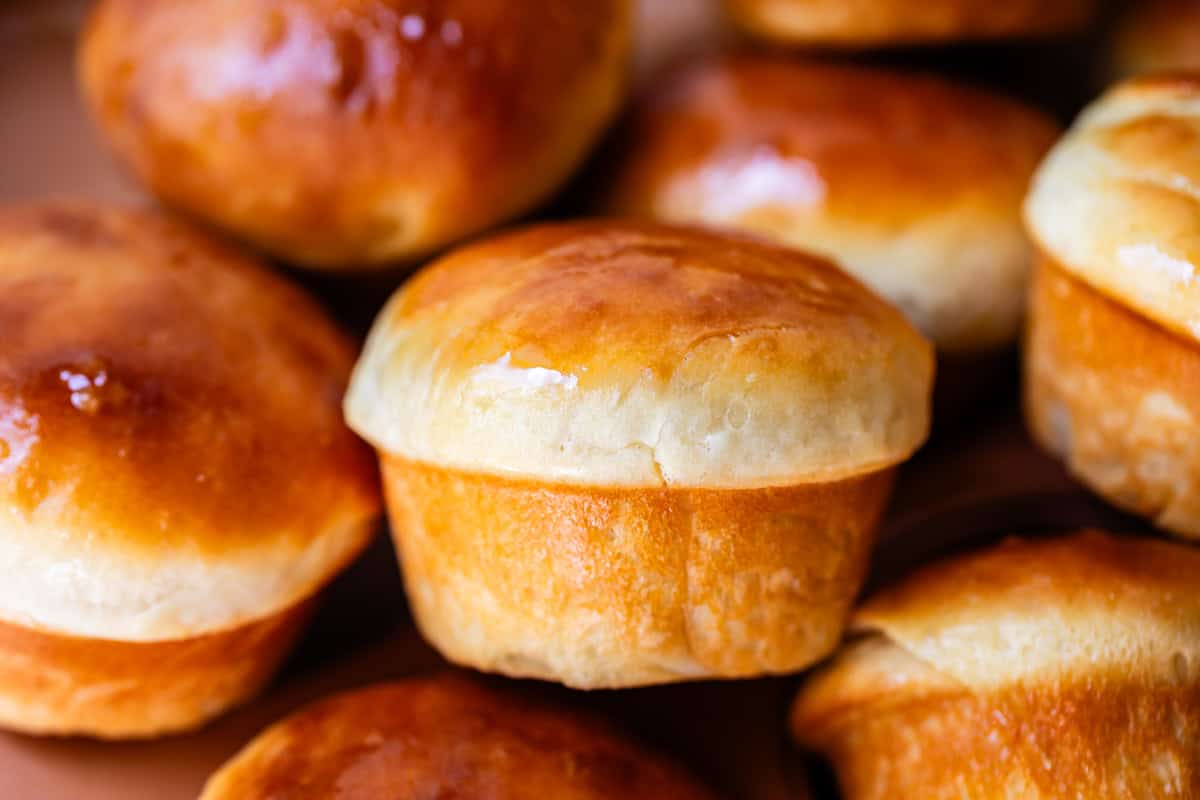
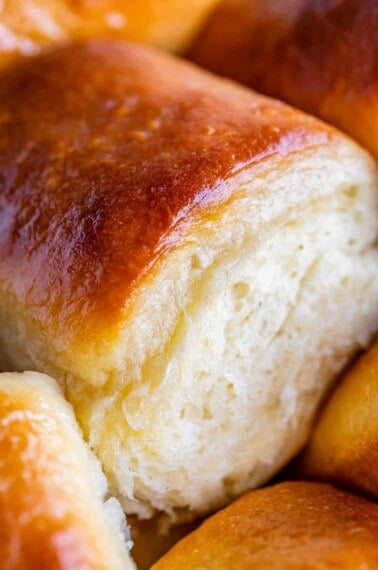
Okay I know you are thinking these are muffins, but don’t be fooled, THEY ARE NOT! They are real-deal yeast rolls with all the buttery, puffy flavor you love. They are made in a muffin tin, so share the muffin shape.
This recipe is your new best friend, if you love homemade rolls but don’t love waiting 2 hours and rolling and rising. They are done in one hour flat. No kneading. No roll-shaping. Just dump, stir, rise, bake, eat. Win, win, win. These rolls are soft and pillowy, and make you want to douse your entire life in butter.
My mother-in-law Kris has been making these rolls for the family for 40 years! Eric’s sister Reesy loved them so much growing up that everyone just calls them Reesy Rolls now.
Really they should be called Muffin Tin Yeast Rolls, because the muffin tin is the secret to getting them in the oven so fast. The dough is suuuuper sticky, and would never hold it’s shape on its own. It needs the structure of the pan. Let’s dive in!
Most important ingredients
- yeast is of course absolutely essential. You can use regular yeast (usually labeled active dry yeast) or rapid rise instant yeast! Both will work. The most important step is proofing the yeast before adding the rest of the ingredients. That just means testing to see if the yeast is alive, and there are step by step instructions in the recipe card!
- shortening is the best fat to make these rolls super pillowy soft. You can switch for butter, but keep in mind that shortening is 100% fat and butter is 80% fat so it will affect the softness of the rolls.
- adding milk and an egg also keep these rolls rich and soft, exactly what we want in a dinner roll!
How to make these rolls
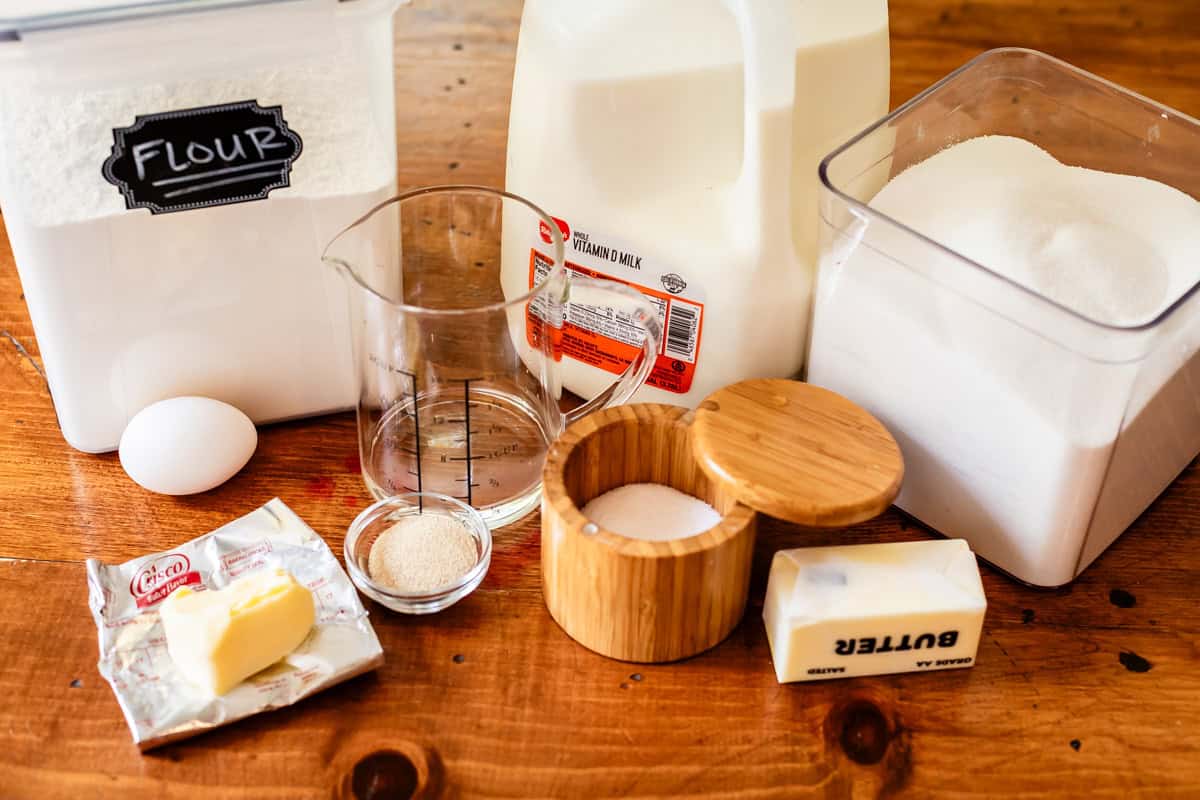
Here’s everything you need to make these! Super simple ingredients.
Start by adding your yeast to some warm baby water. Baby water, meaning you could dump this water over a baby’s head with no qualms. Not too hot, not too cold! If you’ve never had a baby, guess what, making yeast bread is a similar experience. Kind of 😂 You’re about to become a mother congrats!
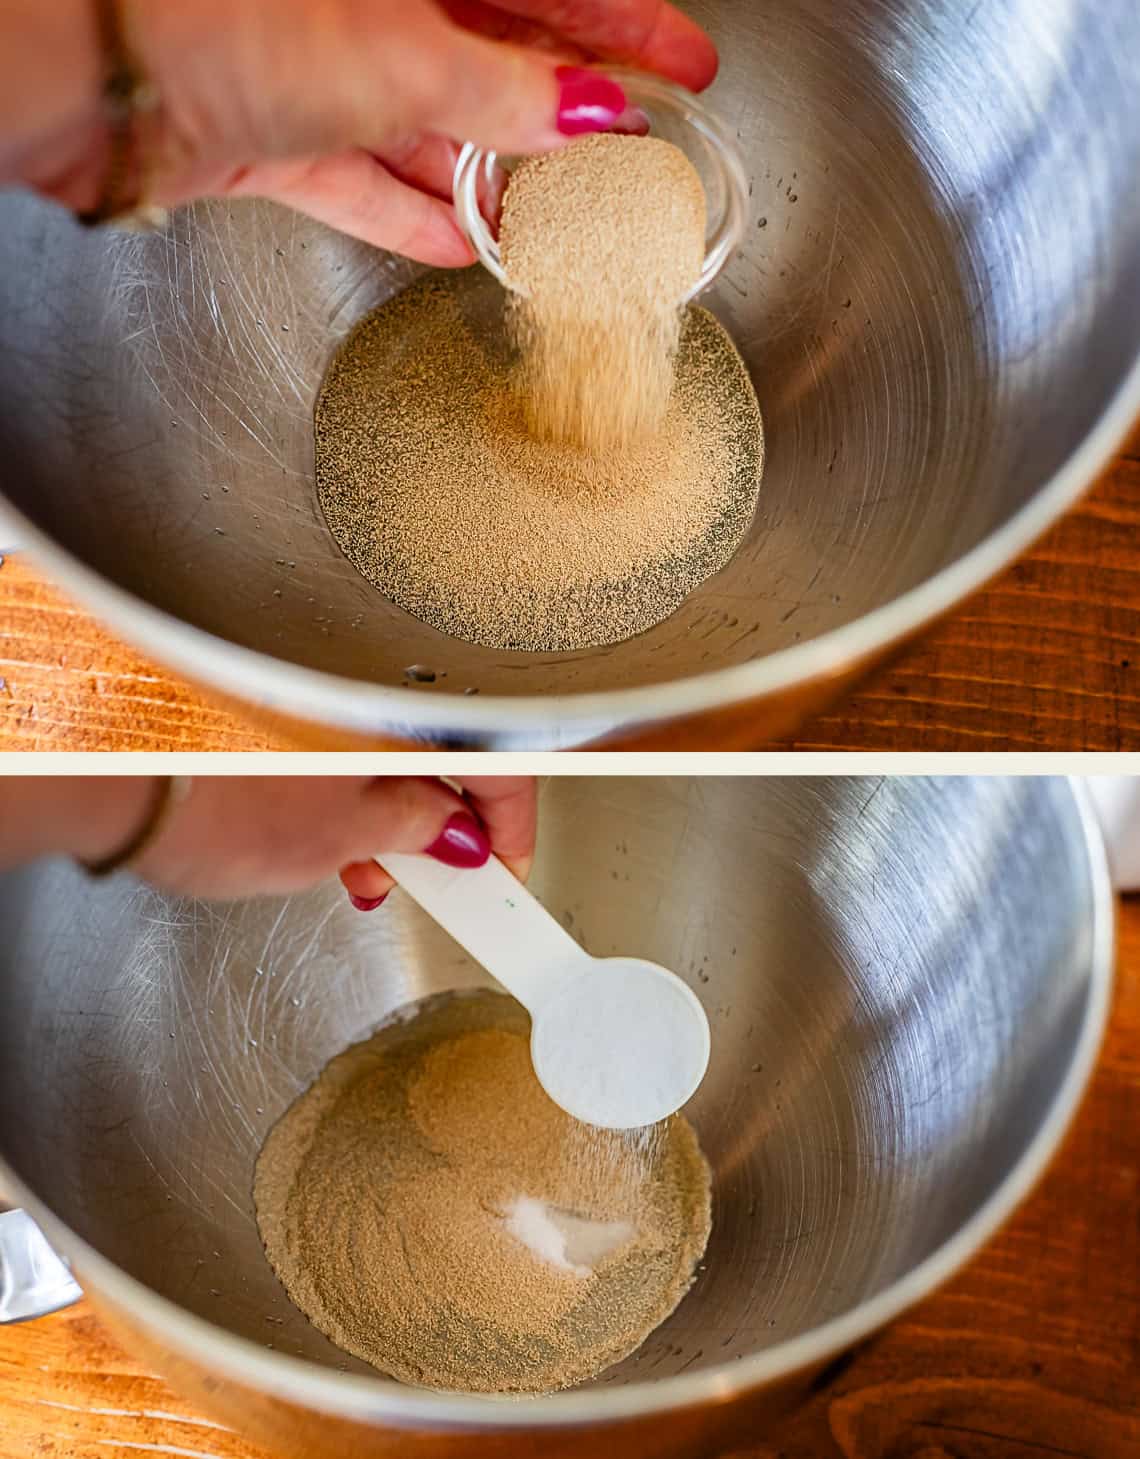
Add in some sugar to help give the yeast something to eat. See, you’re feeding your baby, this analogy totally works and is not weird at all.
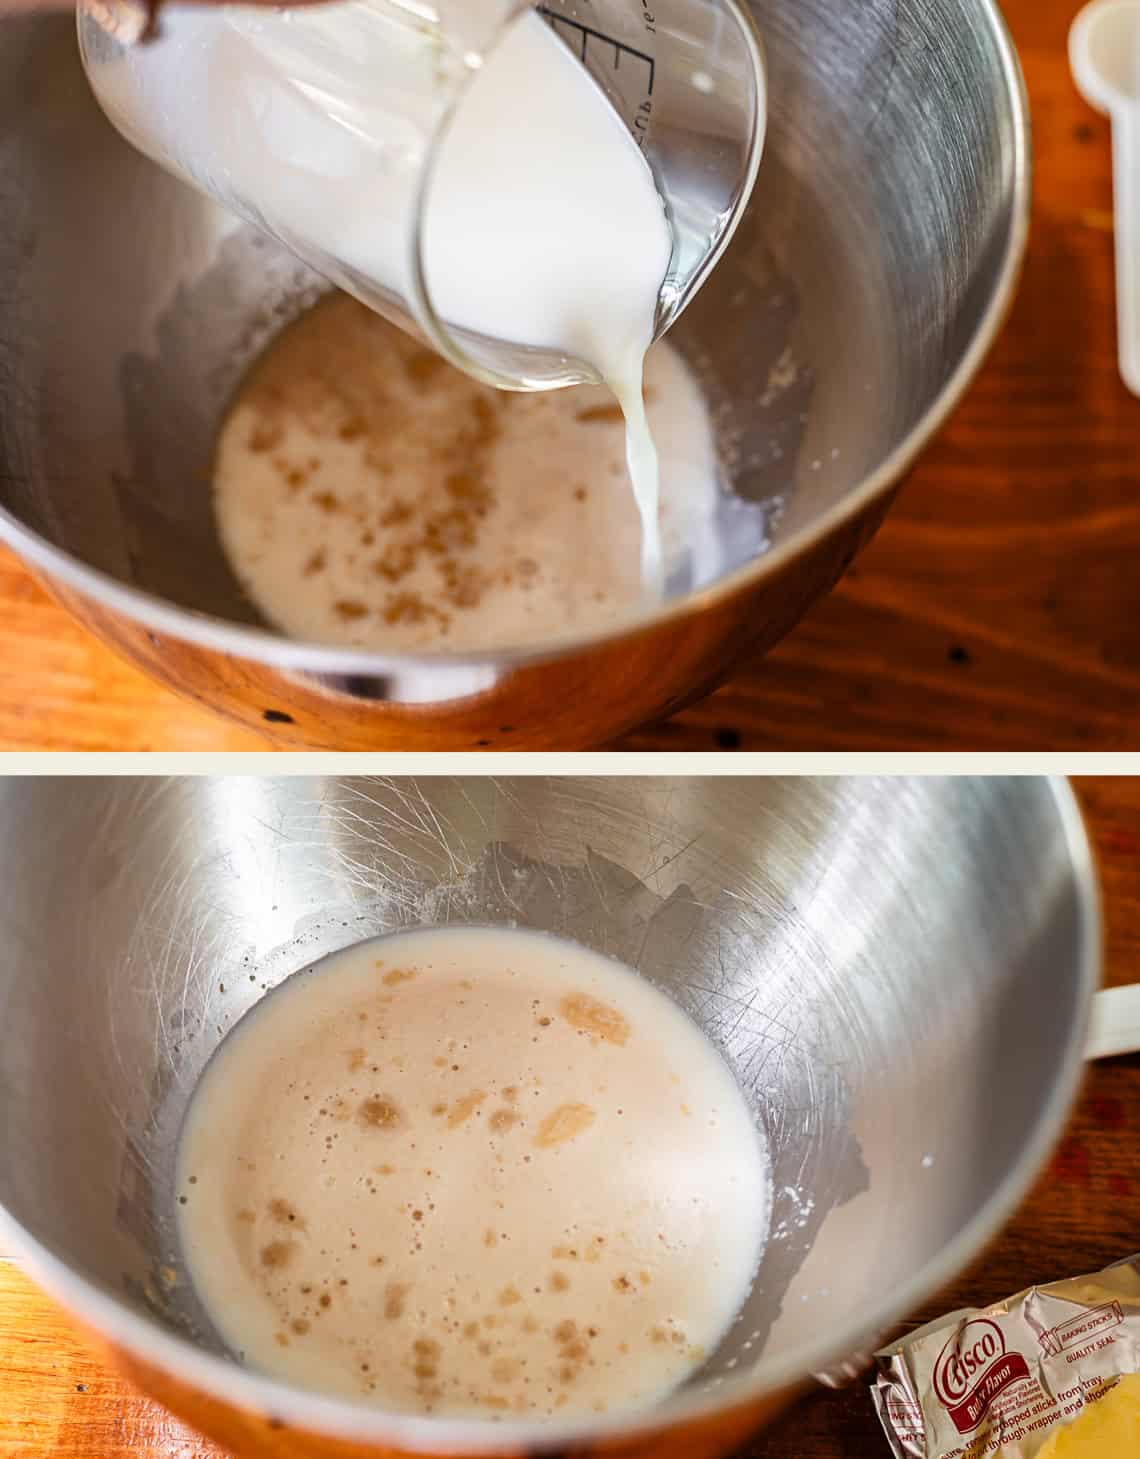
Add in some warm milk and wait a hot minute until you see SOME proof of life. These bubbles here are enough! You don’t need to wait for it to foam up (it will eventually). Any movement or bubbling means the yeast is not dead, and you can move forward.
Add in the shortening, kosher salt, egg,
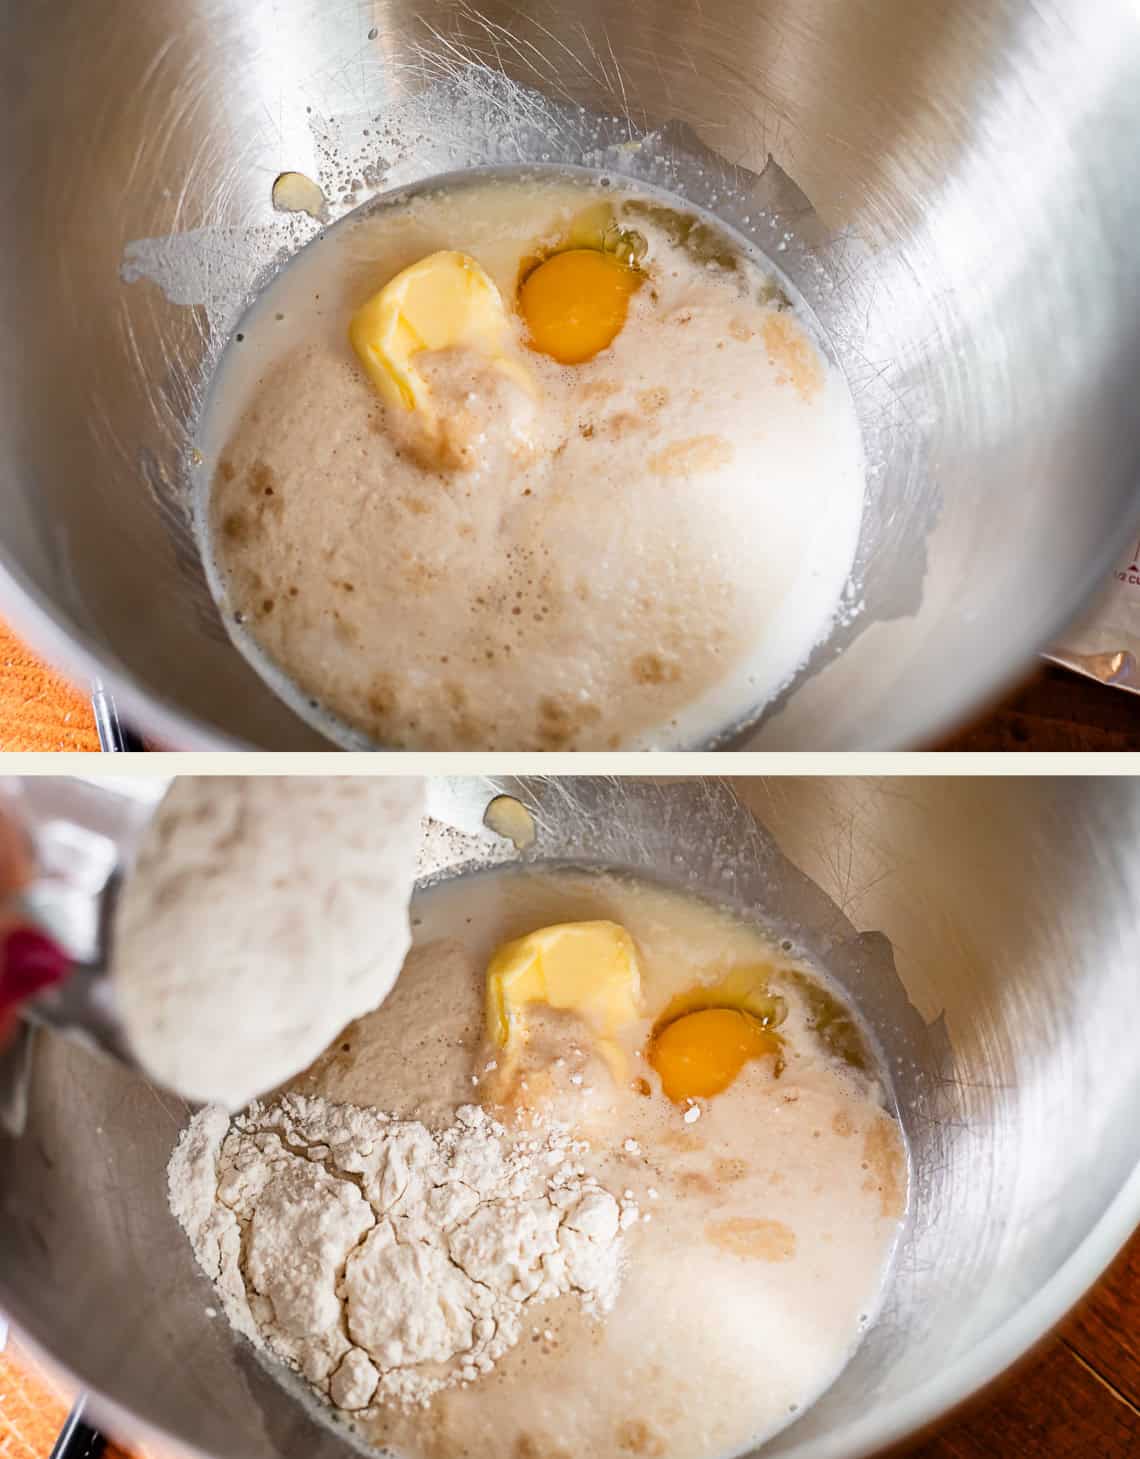
and just 1 cup of the flour. Mix it together until the shortening starts breaking up:
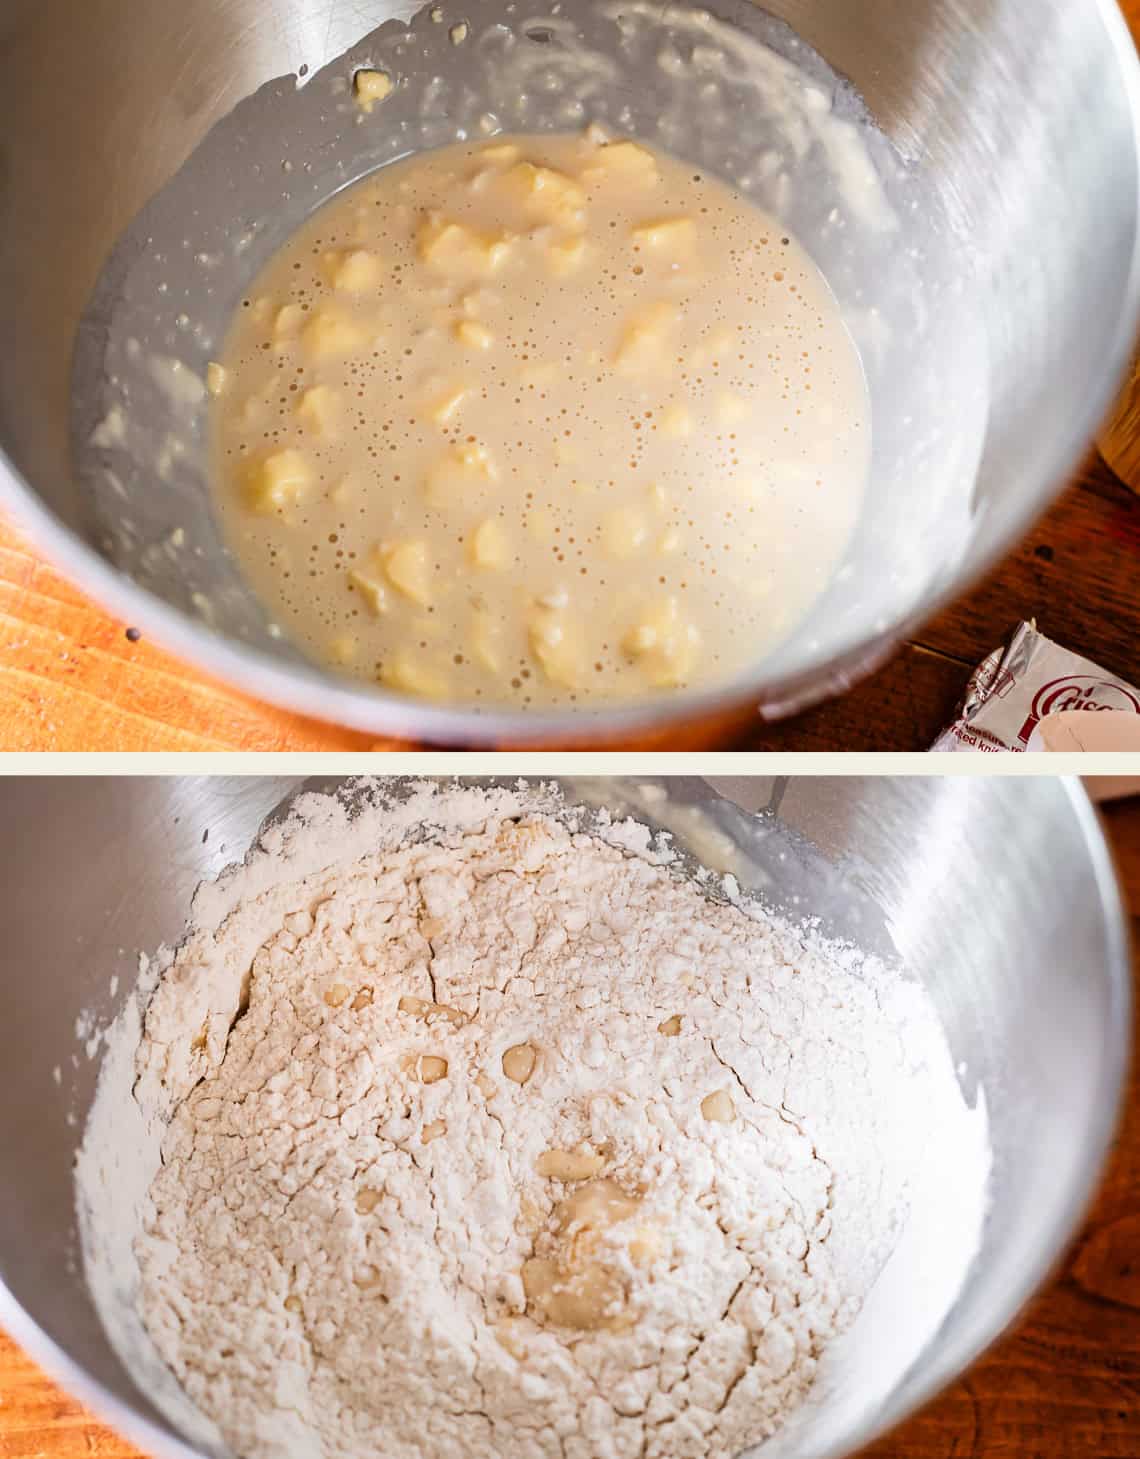
Then add in the rest of the flour. You can use the paddle attachment or the dough hook at this point. Beat it up for about 2 minutes until it looks like this. The dough should be cohesive but veeery sticky still.
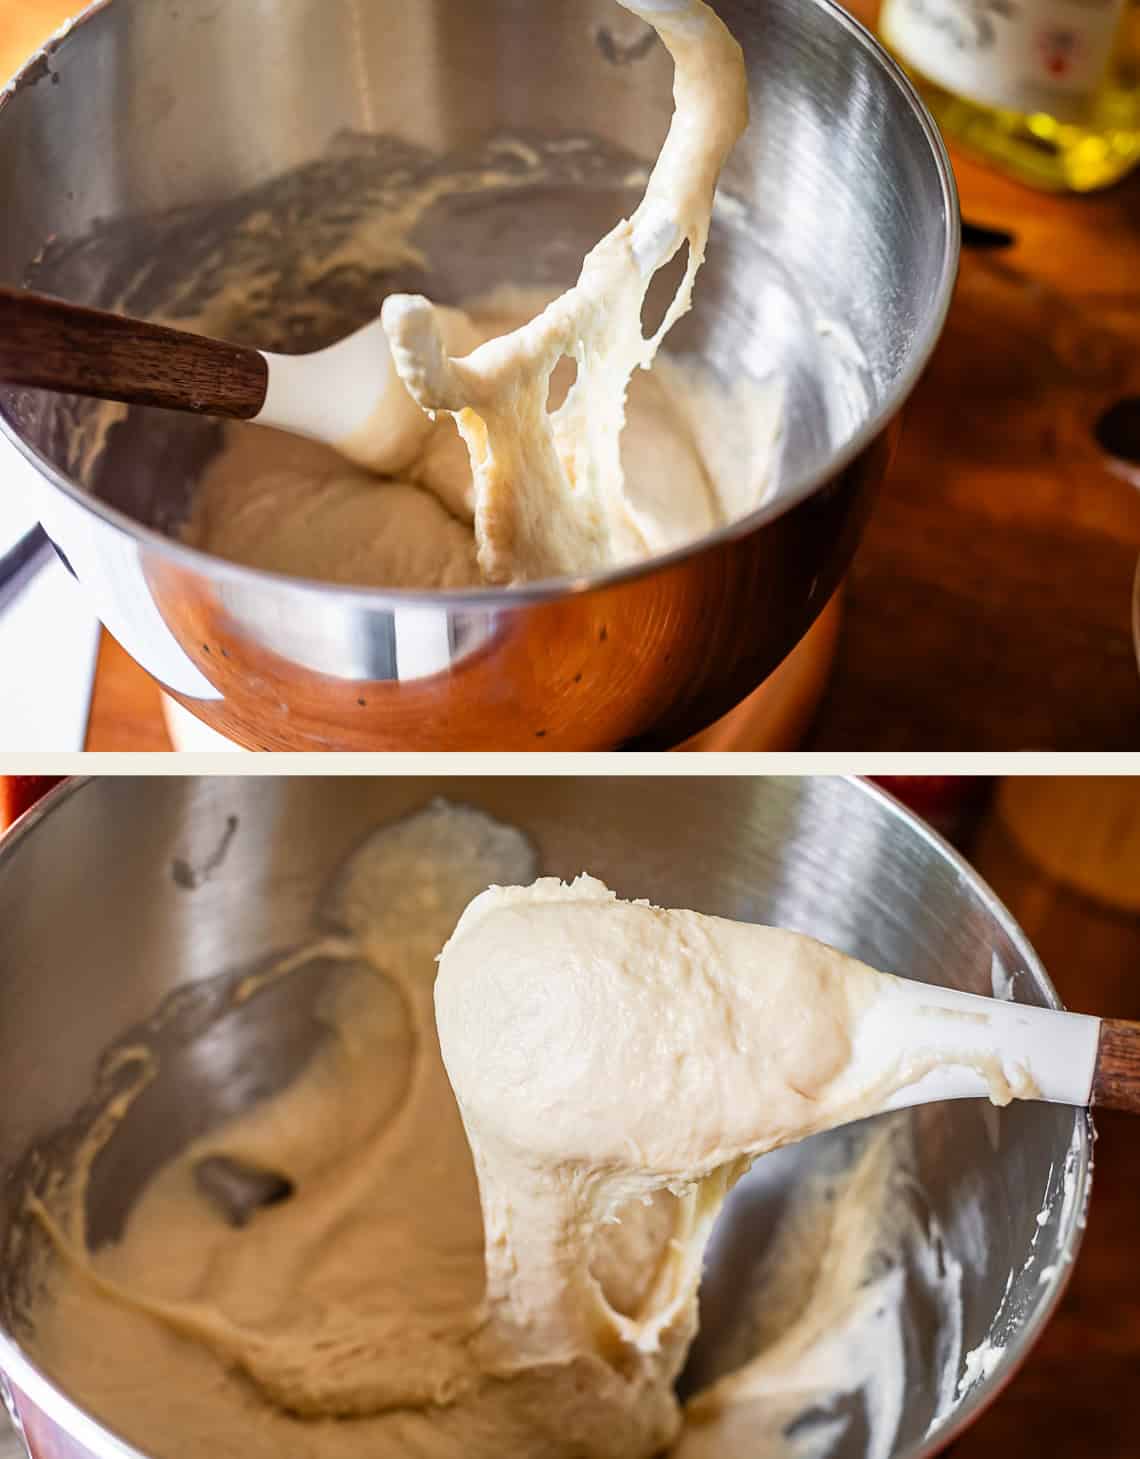
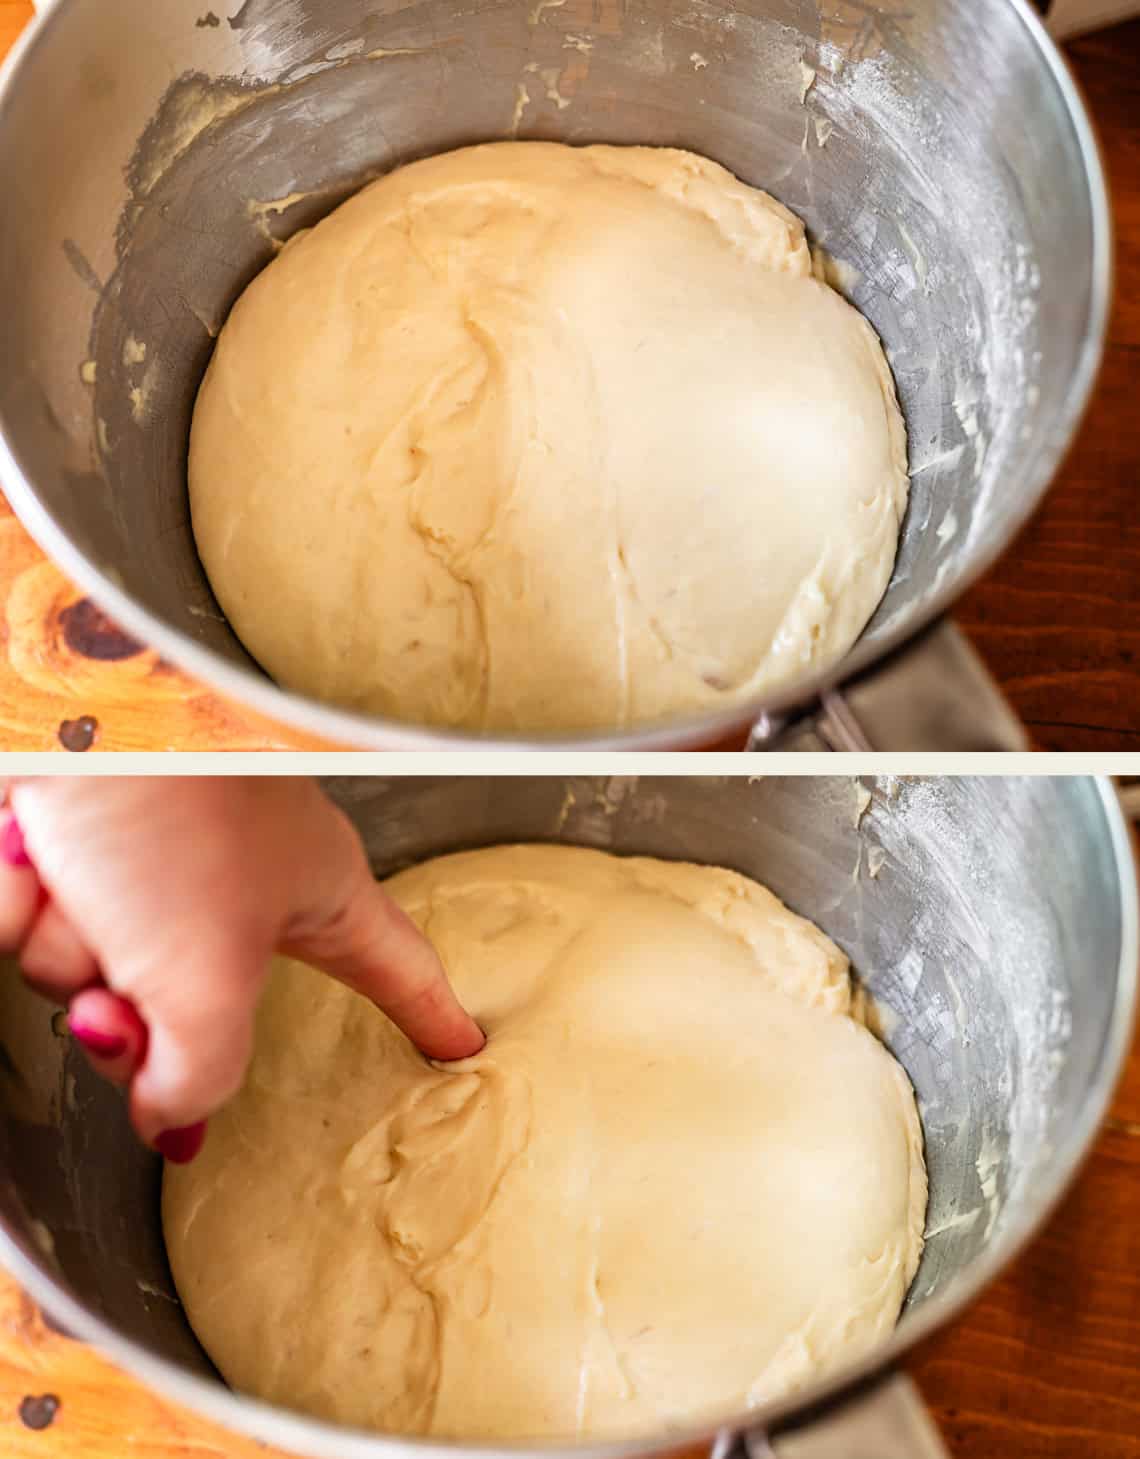
See? You won’t be able to work this dough with your hands. We aren’t moving it. Just cover it for a few minutes and let it rest for a while, right in the bowl.
Even after the rest, it’s still so sticky.
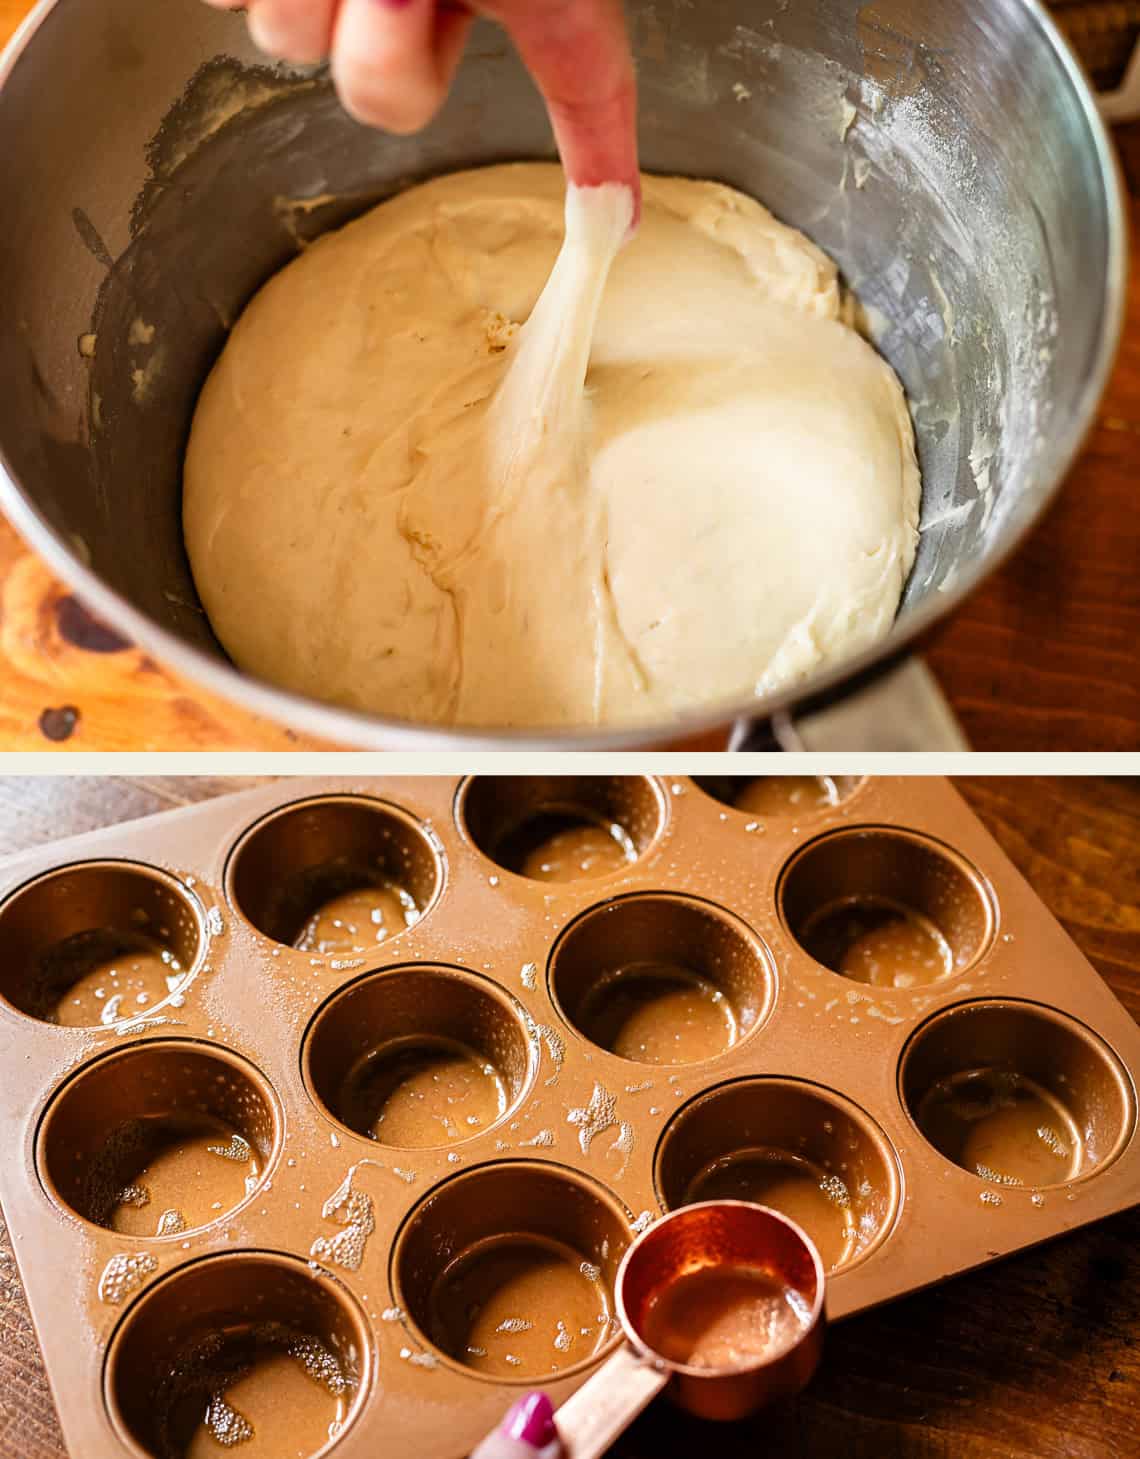
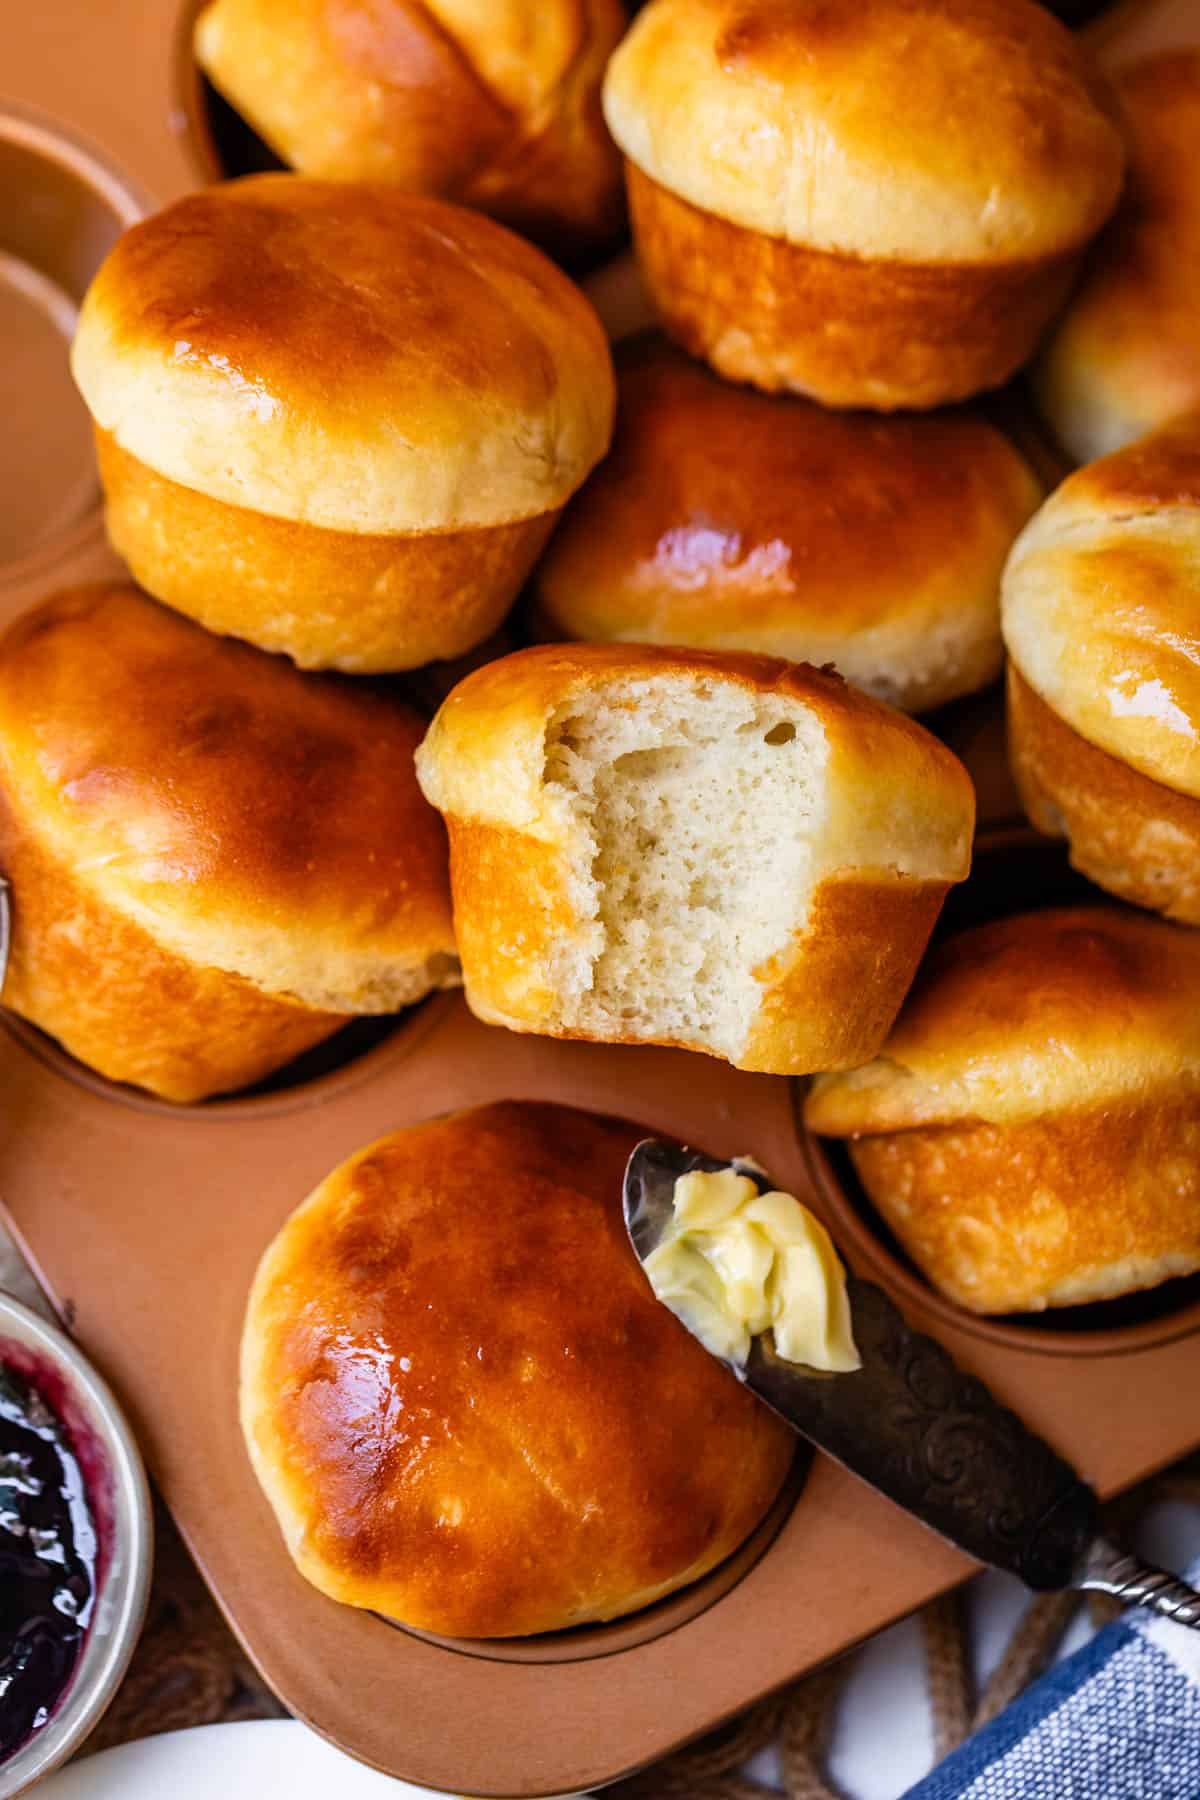
That’s why we are busting out the muffin tin. And the nonstick spray! (or butter, or oil) You need a hefty layer of fat in between the pan and the dough, or it will stick like you won’t believe.
Spray a 1/4 cup measuring cup with nonstick spray, or butter it up real good. Scoop up some dough…
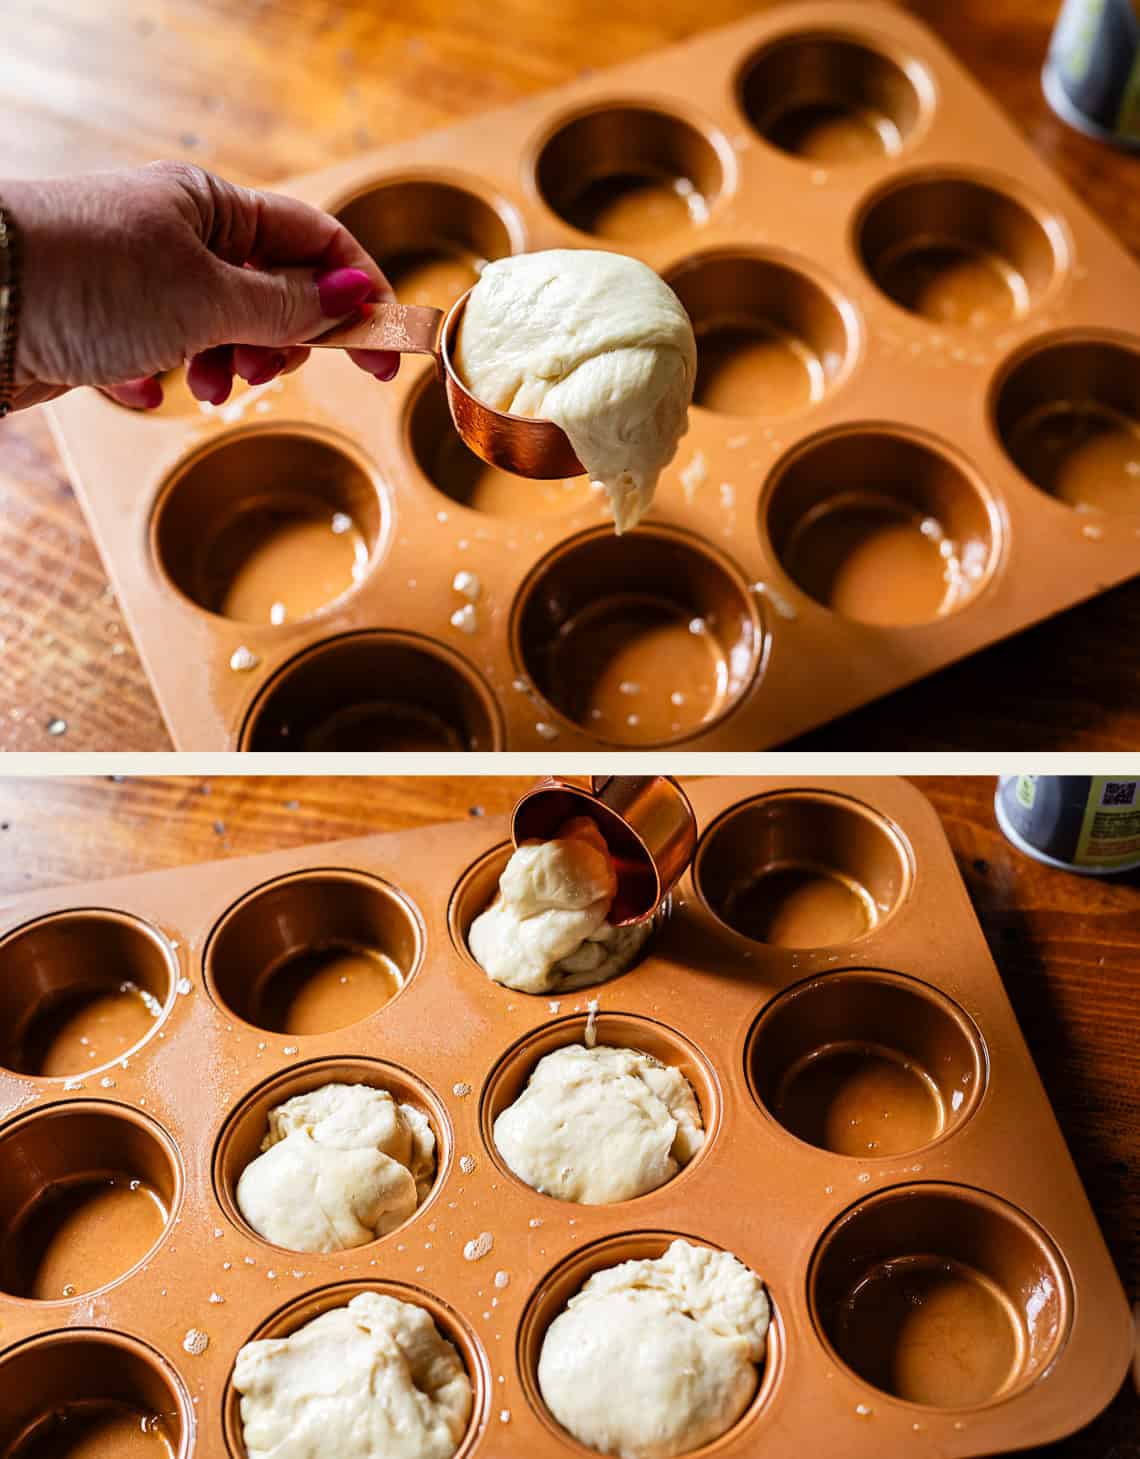
and plop it in the pan. Grease your fingers if that’s easier! This is the messiest part of the recipe.
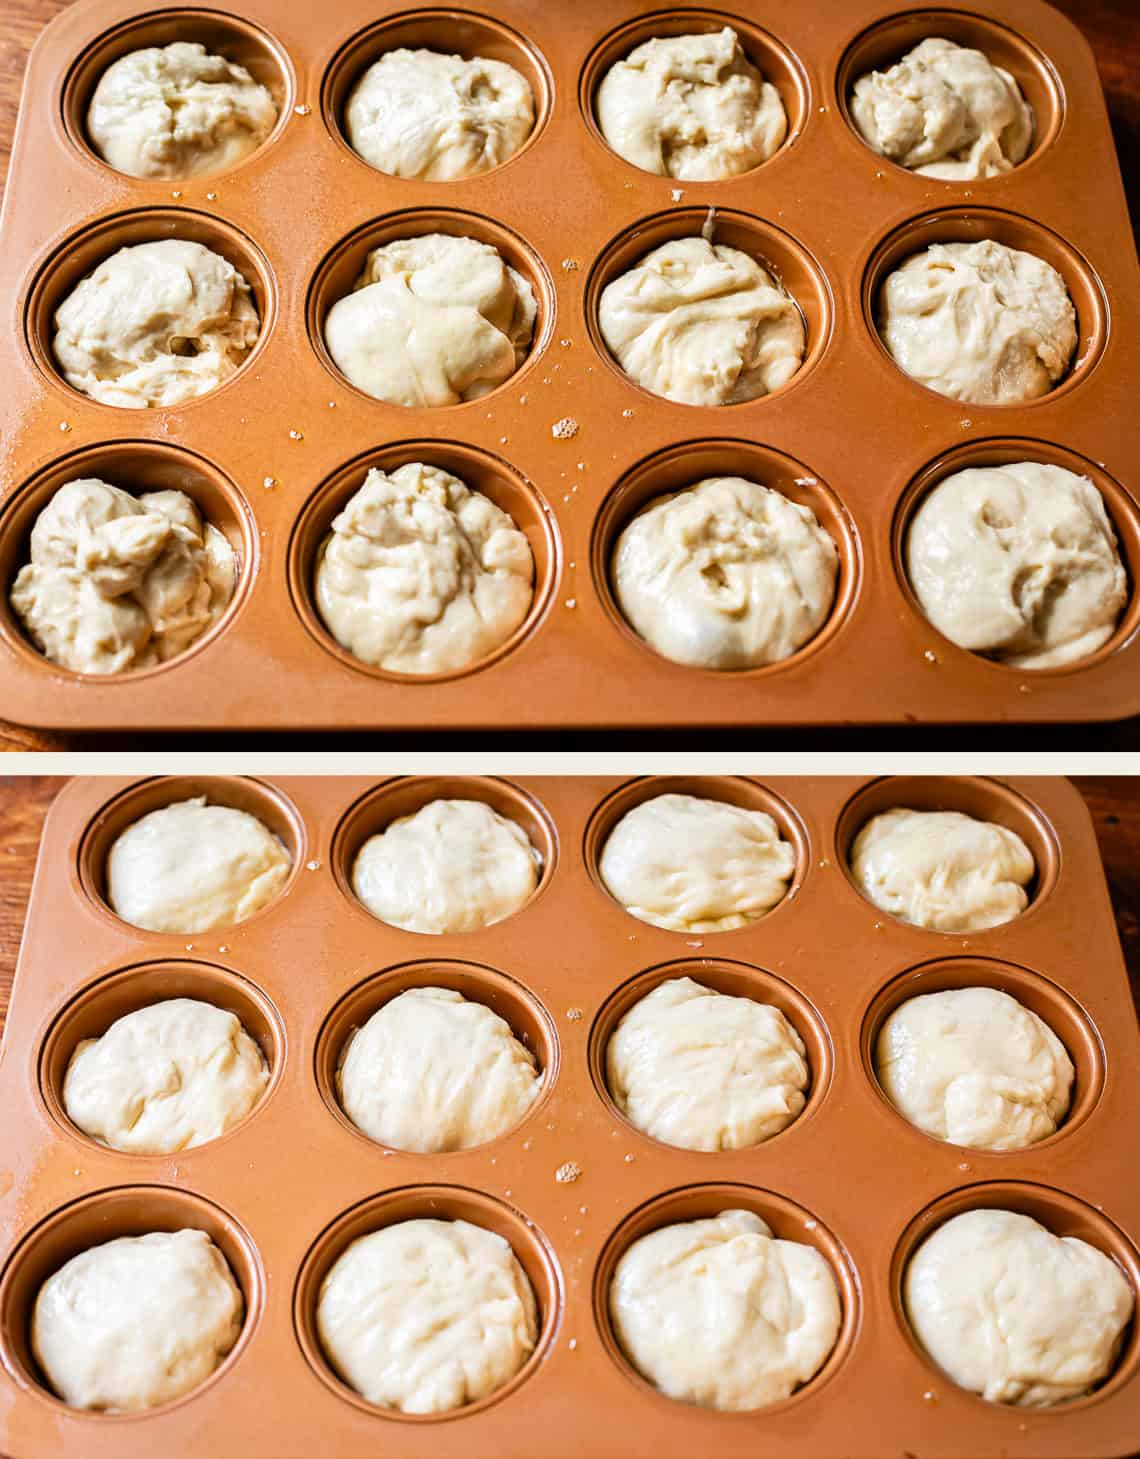
Then take a moment to use greased fingers to turn the dough over in each tin, or smooth out the top slightly with your hands. This makes the top rounder and smoother and prettier, and makes the rise more even.
Then spray a sheet of plastic wrap with nonstick spray (do a really good job so it doesn’t stick and ruin your rise!!) and cover it up.
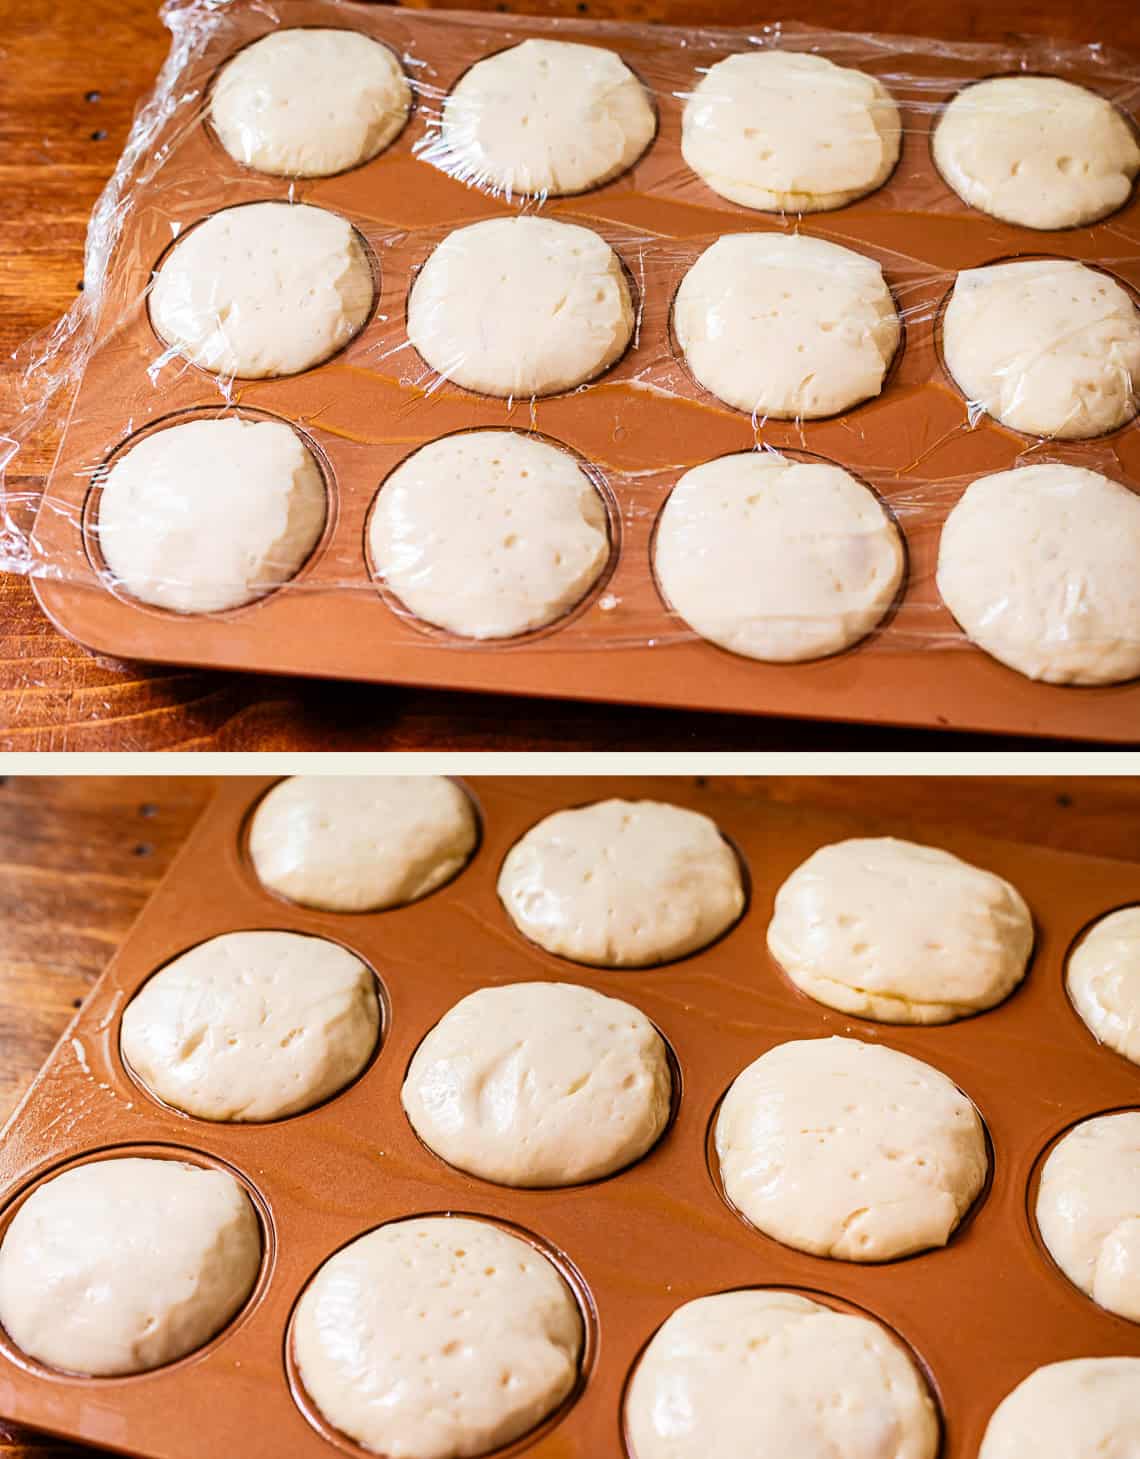
Let it rise for a few minutes in a nice warm spot. I like to put it on top of my fridge, or on top of the oven if you don’t have a wall oven.
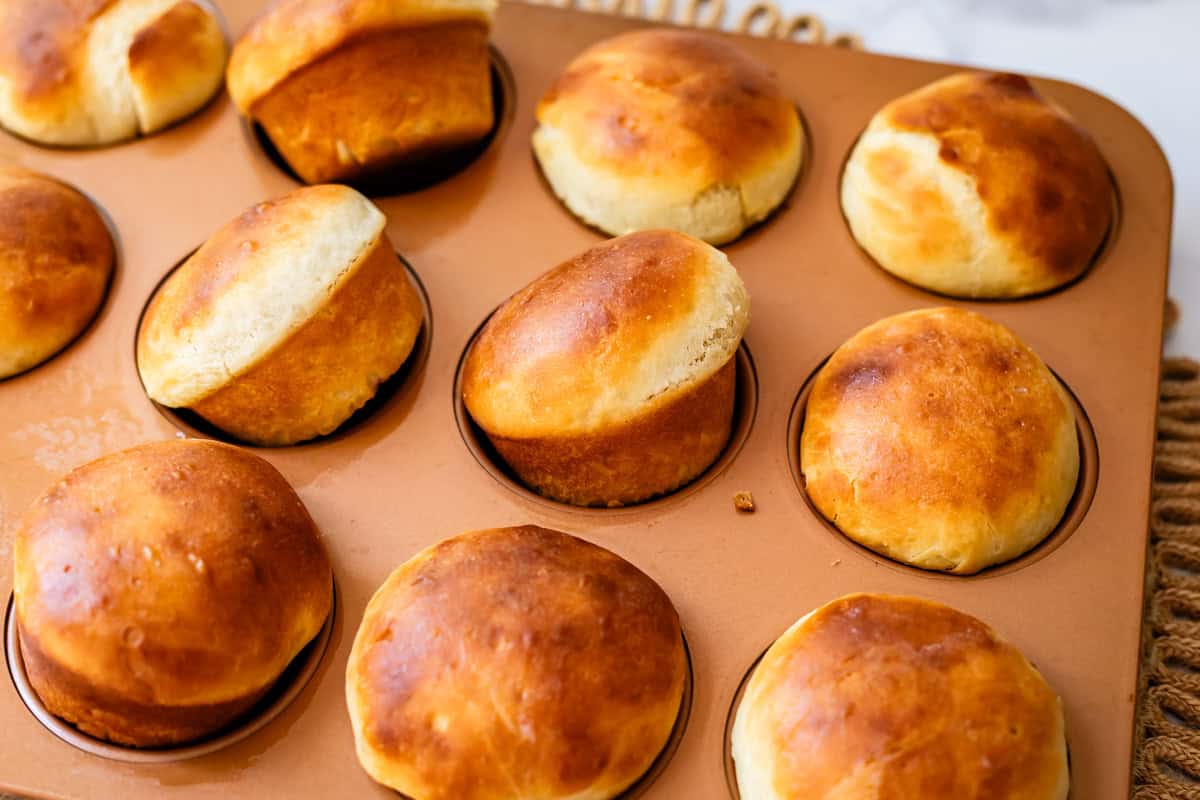
Bake until they are puffy and golden! Just a minute or so after you take them out of the oven, pop them out of the pan and let cool on a cooling rack. This keeps the bottoms from getting soggy, we want a nice crisp edge.
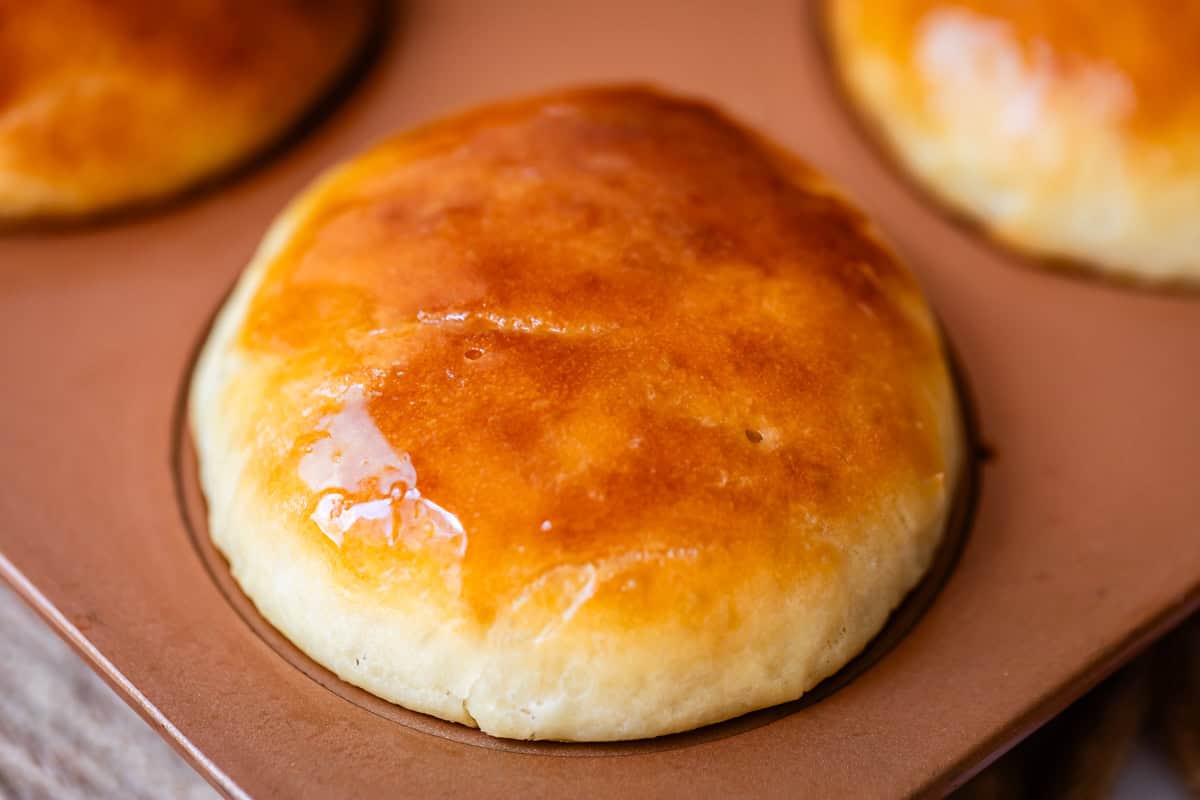
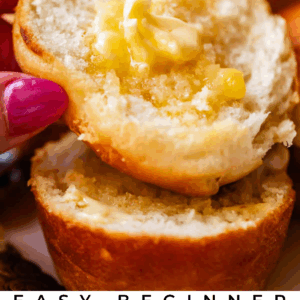
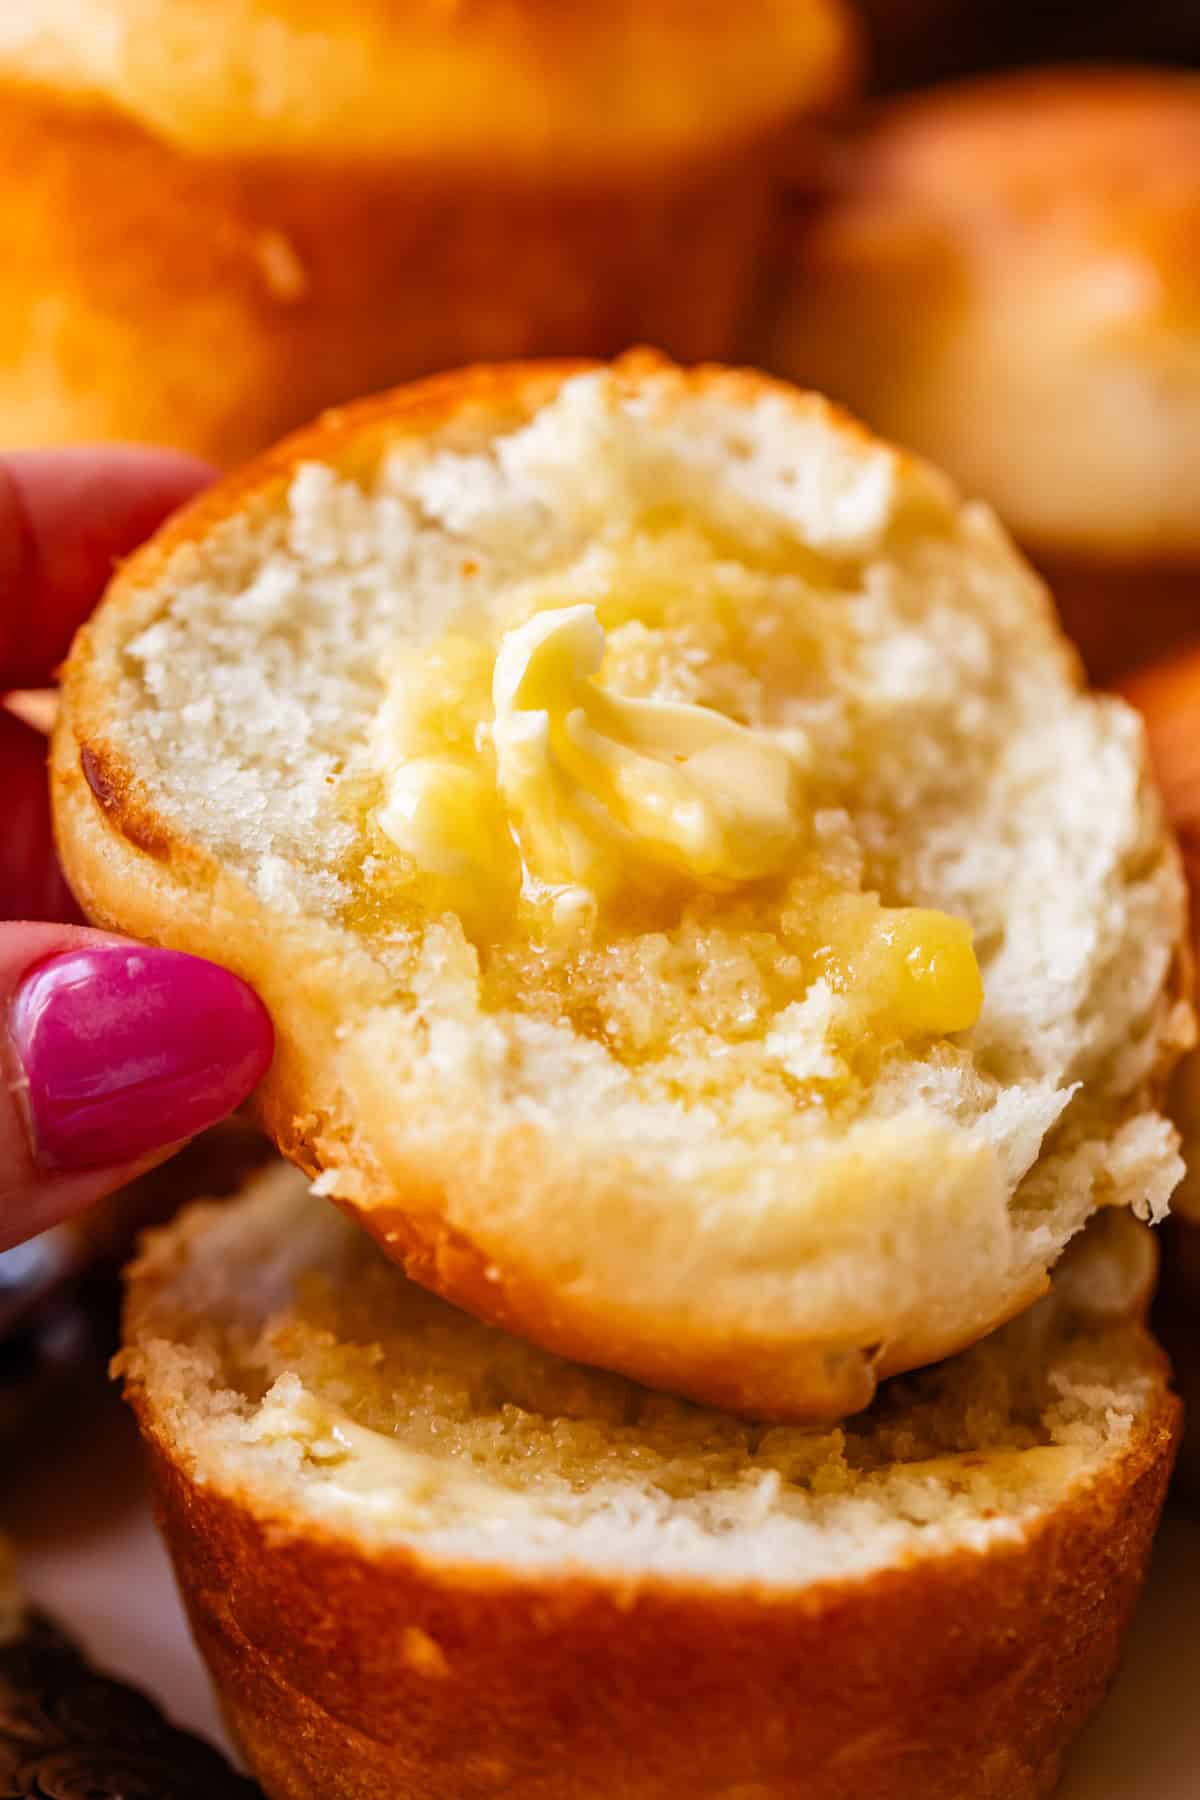
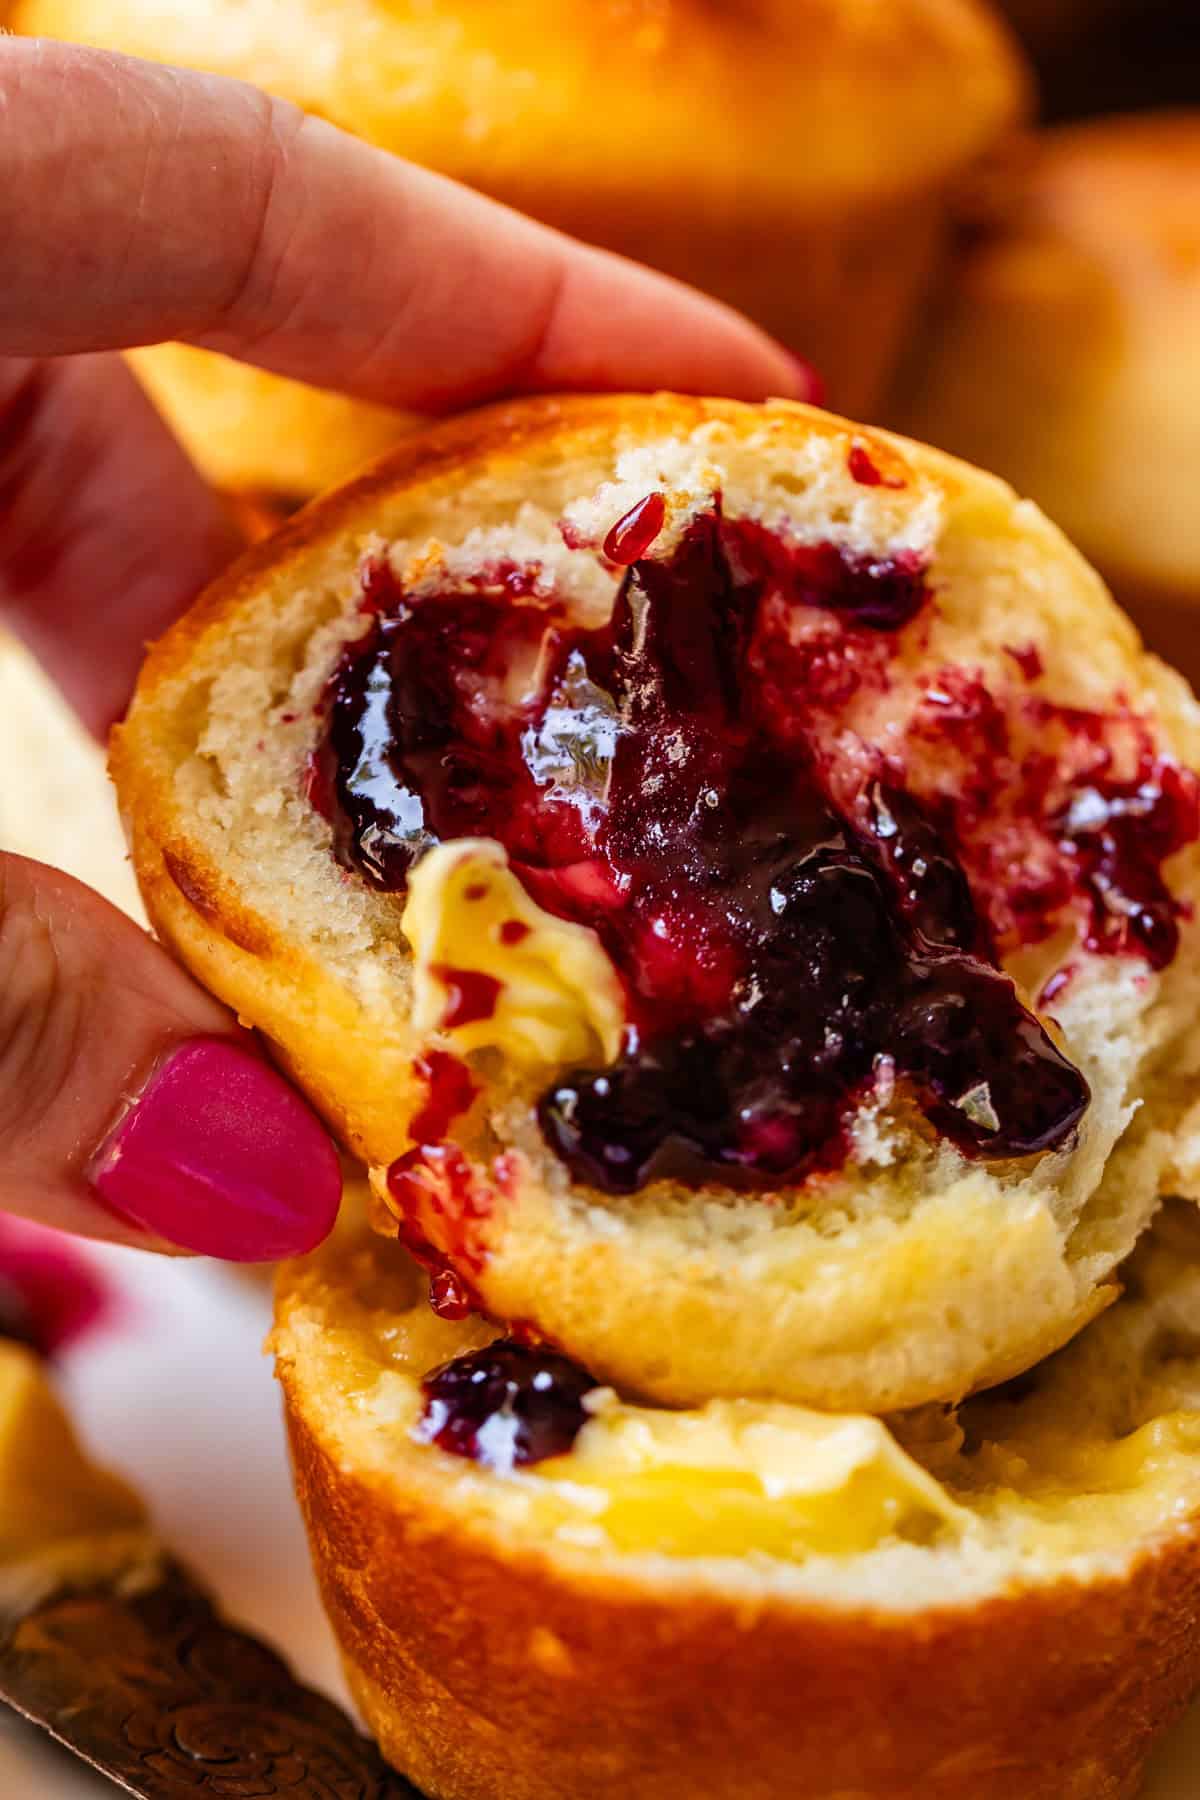
Don’t forget to top the rolls right away with butter! I usually rub a stick of butter right onto the rolls, but you can brush on melted butter, whatever is easy for you.
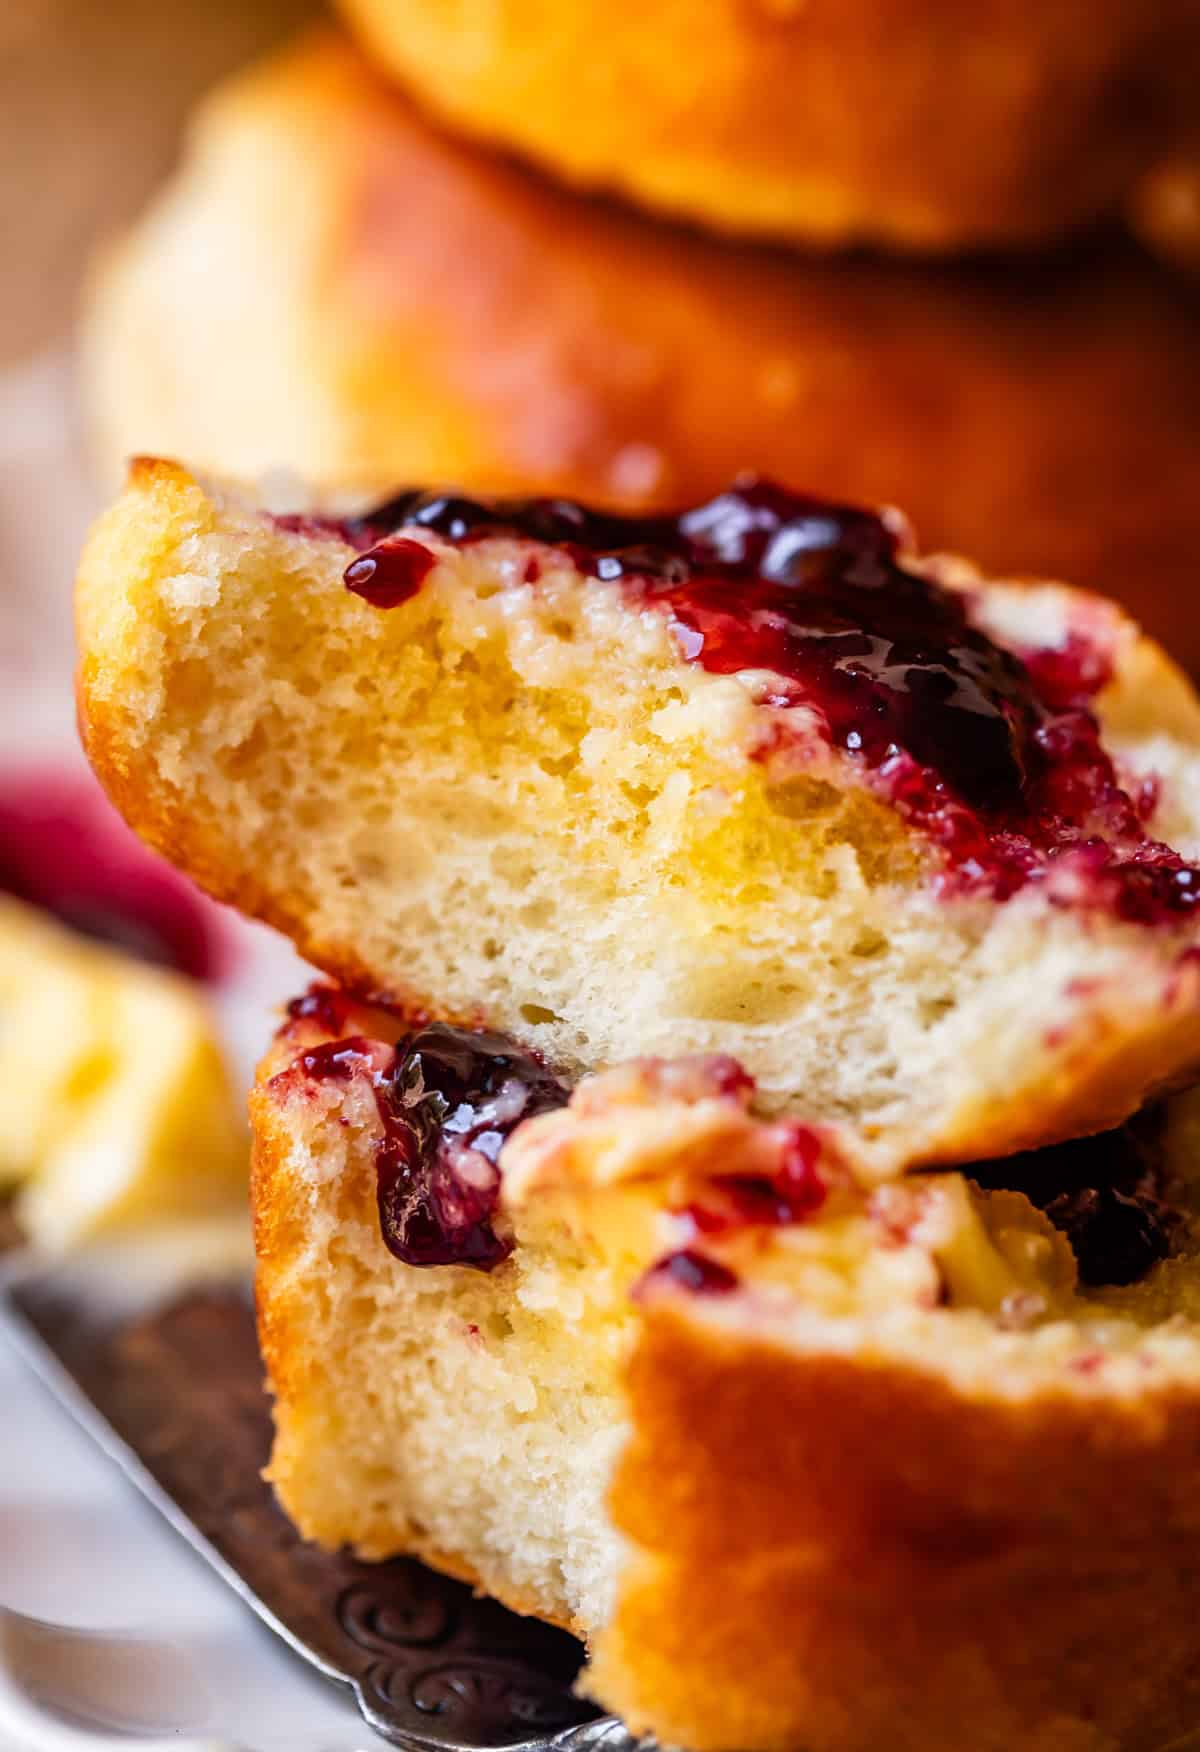
Then split, add more butter, and some jam if you know what’s good for you, and DEVOUR. Oh man I can eat 5 of these in a row don’t tell my calorie counting app.
Easy Dinner Roll Substitutions and Variations
Consider these rolls your blank canvas for creating a masterpiece. Here are some ideas!
- Gently stir in shredded cheddar cheese and chopped pickled jalapeño peppers for a cheesy, spicy dinner roll situation! Serve with Potato Soup.
- Substitute the sugar in the rolls with honey, then brush the tops of the rolls with honey butter after they come out of the oven. Serve with Chili!
- Brush the tops of the finished rolls with olive oil and sprinkle with a little flaky sea salt and chopped fresh rosemary, or your favorite herb. Serve with Lasagna!
Favorite main dishes to serve alongside these rolls
My favorite way to serve rolls is by putting them straight into my mouth as quickly as possible 😂 But when I’m exercising a little more self control, I love serving them with soup or as part of a nice dinner. Here are some of my favorite dishes to serve them with.
- Easy Broccoli Cheese Soup (30 Minutes) << while you’re at it with the easy rolls, why not make an easy soup? This one is done in 30 minutes.
- Crock Pot Beef and Barley Soup << you can make this one on the stove or in the crock pot. This is a winter time STAPLE at my house!
- Easy Fall-Apart Crock Pot Roast with Carrots (Slow Cooker) << if your mashed potatoes haven’t soaked up the pot roast gravy, let your rolls in on the party too.
How to store leftovers
Rolls can be stored in a Tupperware or ziplock on the counter for up to 3 days. If you’d like to freeze them, just make sure they’ve cooled completely, then flash freeze them on a baking sheet for about 30 minutes. Transfer to a freezer ziplock bag. They’ll last for about 3 months there, where you can pull them out on a busy day and still win dinner.
More of my favorite fluffy dinner rolls!
Christmas Recipes
Aunt Shirley’s Famous Homemade Dinner Rolls
Breads, Muffins & Rolls
Soft and Fluffy Parker House Roll Recipe

Breads, Muffins & Rolls
Crescent Rolls Recipe

Easter Recipes
Samoan Coconut Rolls (Pani Popo)
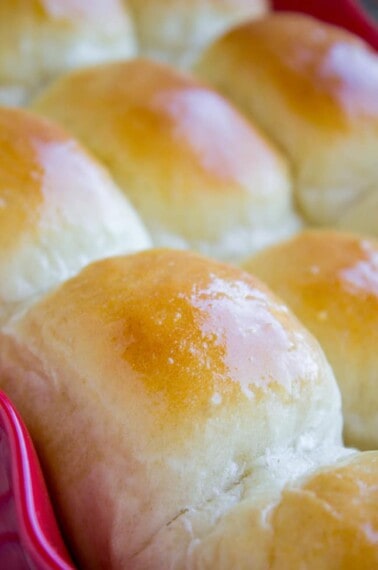
I posted this recipe in 2012
Here’s what was going on back then:
I was having trouble finding something to wear this morning. This is to be expected when you are pregnant and starting to show. (And by “show” I don’t mean that you look remotely pregnant. Instead you look like you just got done eating 5 lbs of Mexican food.)

Obviously my photography has improved, but man, this old picture still makes me want to eat these rolls!!
Facebook | Pinterest | Instagram
Easy Yeast Rolls
Equipment
- nonstick spray
- plastic wrap
- muffin tin
Ingredients
- 1 tablespoon yeast
- 1/4 cup warm water
- 1 cup warm milk
- 3 tablespoons sugar
- 1 and 1/2 teaspoons kosher salt
- 3 tablespoons shortening*, (I like Butter Flavored Crisco)
- 1 large egg
- 2 & 1/4 cups + 2 tablespoons all purpose flour
Instructions
- In a large bowl or stand mixer, dissolve 1 tablespoon yeast in 1/4 cup warm water (it should be around 105 degrees F. Warm tap water is usually perfect.)
- Heat 1 cup milk in the microwave until it is warm but not hot, like a baby's bath. (If you wouldn't dunk a baby in this milk, let it cool down. About 105 F.) Add the warm milk to the water and yeast.
- Add 3 tablespoon granulated sugar and stir.
- Let sit for 2 minutes until you can see bubbles forming from the yeast. (If the mixture is completely flat and there are no bubbles, game over! You killed your yeast with too-hot water. Start over! Better to realize now than later when your rolls don't rise!)
- Add 1 and 1/2 teaspoons kosher salt, 3 tablespoons shortening, and 1 egg.
- Add only 1 cup of the flour called for. Beat all this together (using the paddle attachment on your stand mixer, or use a hand mixer) until smooth. Scrape down the sides and bottom of the bowl.
- Add the remaining flour (1 and 1/4 cups + 2 tablespoons). Beat this mixture until smooth, scraping sides. Beat for another 2 minutes. The dough will be very sticky. Do not add more flour!! This is not a normal dinner roll recipe, we want this dough very loose.
- Cover the bowl and let rise 30 minutes.
- Preheat the oven to 400 degrees F.
- Coat a muffin tin with nonstick spray or butter, all over the flat top of the tin, and making sure to grease well in each cavity of the pan. Do NOT be skimpy here folks! You need a decent layer of fat between the dough and the tin, or those rolls are not popping out!
- Scoop the dough: Spray a 1/4 cup measuring cup all over with nonstick spray, or grease with butter. Scoop a portion of the dough with the measuring cup. Carefully drop it into the first muffin spot, coating your hands with oil if necessary.
- Continue spooning the dough into the muffin tins until they are equally filled. If you want them to look nice on top, take a moment to turn each roll over so the tops are smooth. Use a spoon or your fingers to smooth over the top. See photos.
- Spray a sheet of plastic wrap with nonstick spray. Cover the rolls with the greased plastic.
- Let rise 20 minutes in a warm spot, on top of the fridge is good. You can let them rise a little longer if you have time, to make them extra puffy. The rolls should rise up over the edge of the pan, but will not quite double in size.
- Bake at 400 degrees for 13-15 minutes, or until they start turning golden on top. Lift the edge of one muffin to see if the bottom is turning golden. Don't take the pan out until the bottoms are starting to brown.**
- Remove the rolls from the pan as soon as they come out of the oven, and let cool on a wire rack so the bottoms don't get soggy.
- Serve right away with butter and jam!
- Storage: Rolls can be stored in a Tupperware or ziplock on the counter for up to 3 days.
- Freezing: If you’d like to freeze these rolls, just make sure they’ve cooled completely before you put them in the freezer in a tightly sealed container or bag. They’ll last for about 3 months there, where you can pull them out on a busy day and still win at dinner!


I love these rolls so much and haven’t thought about them in a long time! Thanks for reposting! They are amazin and delicious and QUICK.
And, I have a complaint about the blog. Every time I go to look for a recipe I get sidetracked and read a bunch of posts, find myself laughing out loud and get distracted. And forget what I came for. 20 minutes later I remember! 😁
Ahaha Kris, thank you for the complaint 😂😂 Thank you again for sharing this amazing life changing recipe with me and the world!!
Fluffy and tasty. Don’t touch Crisco so, butter (I’m old enough that “shortening” to me is lard, used to use but would not now).
4 stars because it took 2 hours total *and* they’re difficult to get out of the pan. We don’t use aerosols so I greased with olive oil because I thought to reduce the butter…. Next time butter it is. But DH loves them and is already planning breakfast!
Hi LW! Thanks for your comment! I’m sorry these were tough to get out of the pan, I haven’t had issues with that before. layer on that olive oil, use plenty! Any grease will work fine. And butter is a great sub for the shortening! Lard would work well too!
Thanks so much for your reply! We just got back from a trip, had some of these left in the freezer and they were terrific reheated, so I’m going to make them again, greasing with *lots* of olive oil this time!
Yum, yeast.
Dousing my entire life in butter? What a great suggestion! I love butter like I think most women love sugar. I can overload on sugar. I don’t know if that has happened yet with butter.
Definitely making these tonight for the missionaries!
And good luck on your adventures with yeast bread, Janice ;-)
this is the recipe for me, i’m sure i can do this! can i use rapid-rise yeast, or just the regular stuff?
Yeah rapid rise will work just fine.
I’m in the rise for 30 minutes part of this recipe and my dough is NOT rising. My packet of yeast says it’s equivalent to 2 1/4 teaspoons. This was the only yeast available at my grocery store. Could it be because it’s not a full tablespoon of yeast? Or does it not really rise much in this process?
Hi Laura, sorry to hear your dough wasn’t rising. It’s important for this recipe that the dough is quite wet and sticky – meaning that not too much flour has been added – or the yeast won’t be able to do its work during the short rise time. Also, though the recipe does call for a packet of yeast, it also specifies that it should be a tablespoon. I recommend trying this again making sure to add a full tablespoon of yeast (from a larger container) and using the “fluff and scoop” method to measure the flour: fluff up the flour with a spoon, then gently scoop it into the measuring cup and level it off. I hope your next batch turns out perfectly!
Hi Laura (a year later),
I also thought the dough didn’t rise during the first 30 minutes but that’s because it doesn’t seem to “double in size” as most recipes say. When I decided to put it in the tins anyway I realized that it had risen, enough as it turned out. And I used a full Tbsp of yeast!