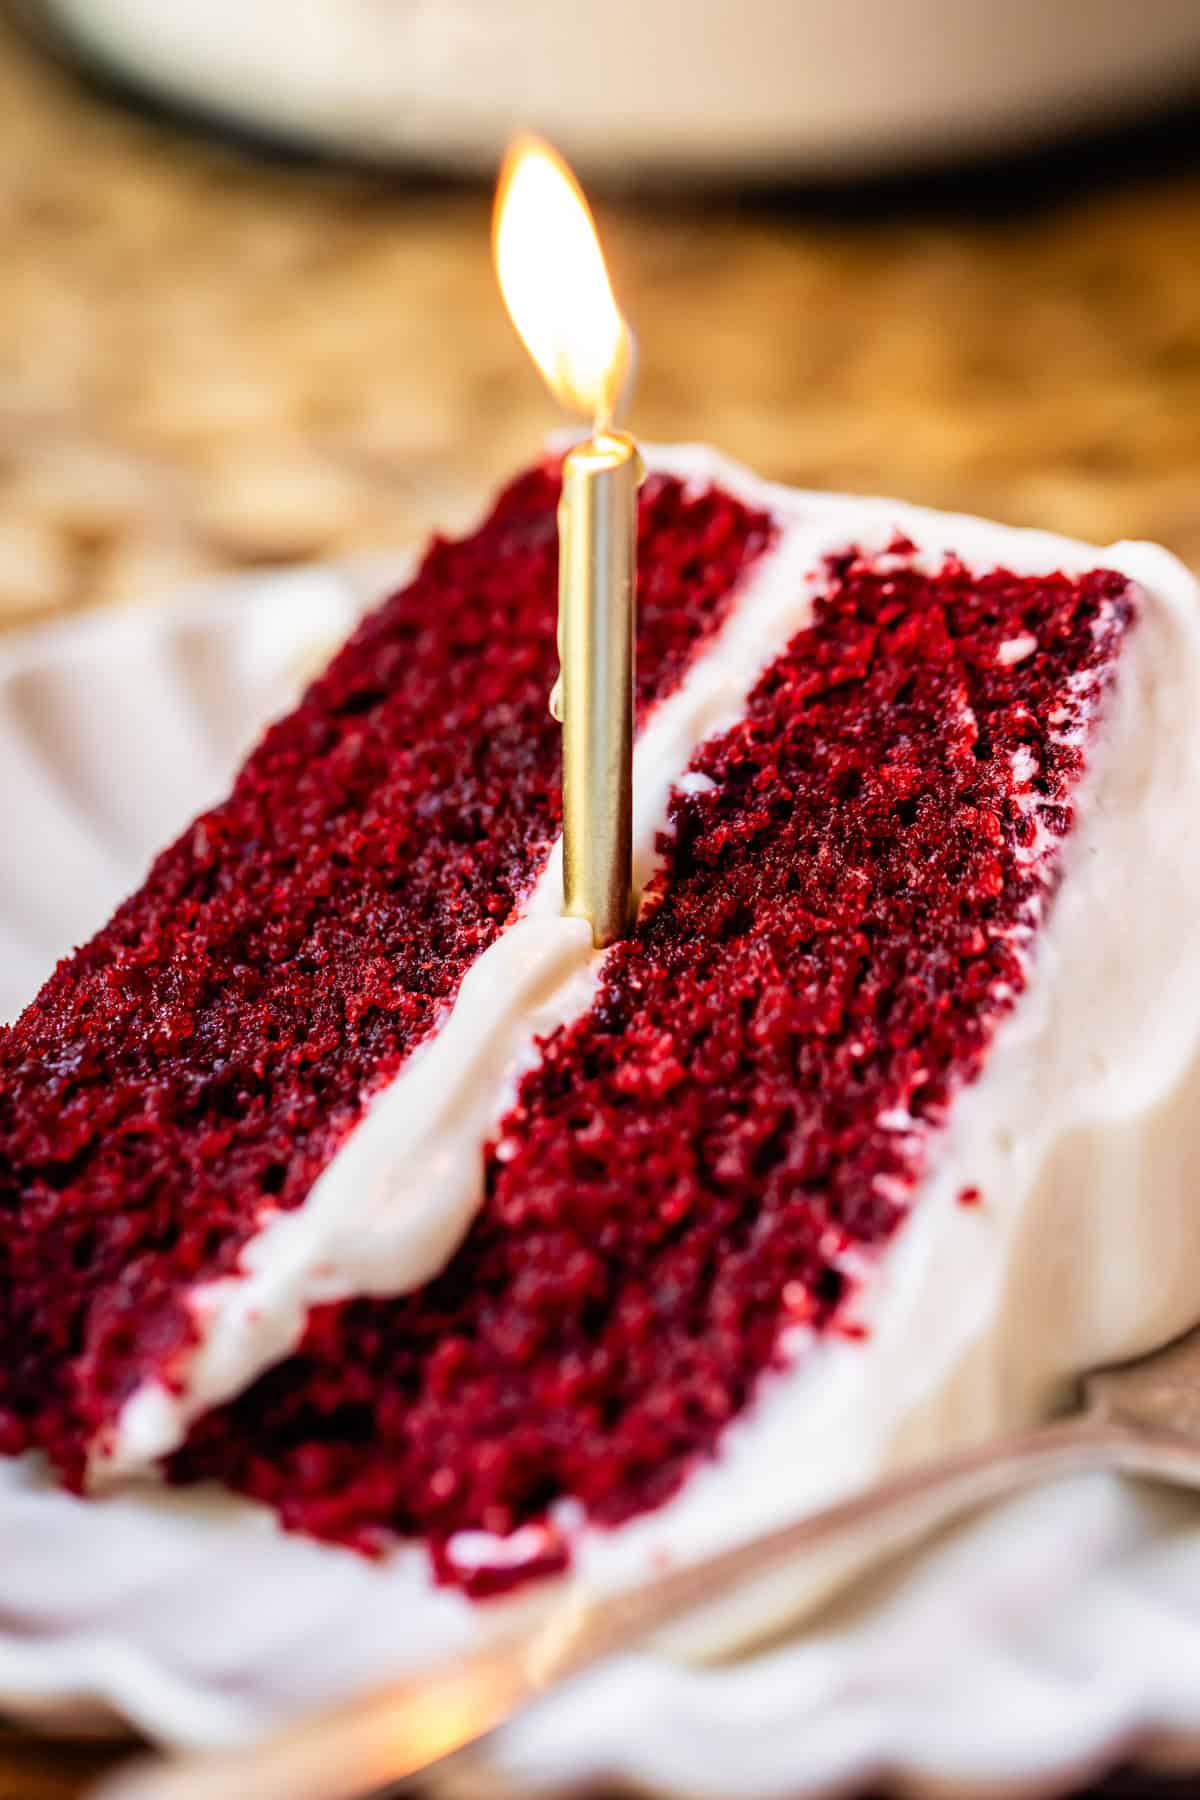
I used to think Red Velvet Cake was superfluous. Why would I want a dyed-red less-than-chocolate cake? But oh, my friends. I have been converted. When done right, Red Velvet is incredibly unique and indulgent. It’s not just a treat for the eyes! There is a reason this recipe has become a classic. The velvety texture of the cake paired with thick layers of Whipped Cream Cheese Frosting is unreal. Perfect for special occasions (like today’s anniversary :) birthday’s, or holidays. It doesn’t matter when you make it, Red Velvet always impresses a crowd!
Table of Contents
- Happy 14th Anniversary to The Food Charlatan!
- Anniversaries from yesteryear
- 14th anniversary: Red Velvet Cake
- What is red velvet cake?
- Flavor (via cocoa) VS red color
- But what if I want my cake to be vampire red?
- One red velvet cake to rule them all
- What you need to make this red velvet cake recipe
- How to make red velvet cake
- Red velvet cake tips
- How to store red velvet cake
- FAQs about red velvet cake
- More decadent cakes you’ll love
- Red Velvet Cake Recipe
When my best friend Sarah was in college, she volunteered to make her sister-in-law’s Red Velvet wedding cake, even though she’d never made a wedding cake in her life.
When they cut the cake, the bride gagged and spit it out. Sarah was mortified, thinking that they hated it.
Then, one day, TEN YEARS LATER: “It was really fun to bake your wedding cake, even though you hated it,” Sarah says.
“What even?? I didn’t hate it!”
“You literally gagged on it!!”
“Yeah, because my husband put a HUGE piece in my mouth and I was choking! The cake was so good!”
Ah, the assumptions we hold close to our hearts to make sure we can’t feel good about our accomplishments. Right??
Well, I haven’t made any wedding cakes in my time, but I HAVE finally mastered The Red Velvet to Rule them All. I’m super excited about this recipe!! More about the cake below, but first we need to celebrate!
Happy 14th Anniversary to The Food Charlatan!
Guess what, on October 4 The Food Charlatan turns 14 years old! I’ve hit “publish” on this blog 996 times over the last 14 years. (I really should have coordinated for that 1000th post, huh?? 😂)
My first post was a Pumpkin Oatmeal Cookie Recipe, where I tell the story about the time Eric and I brought cookies to our neighbor and he opened the door wearing nothing but a towel. True story.
This blog has brought me an immense amount of joy over the last 14 years! My blog is just an extension of my kitchen. Here’s what it looks like these days:
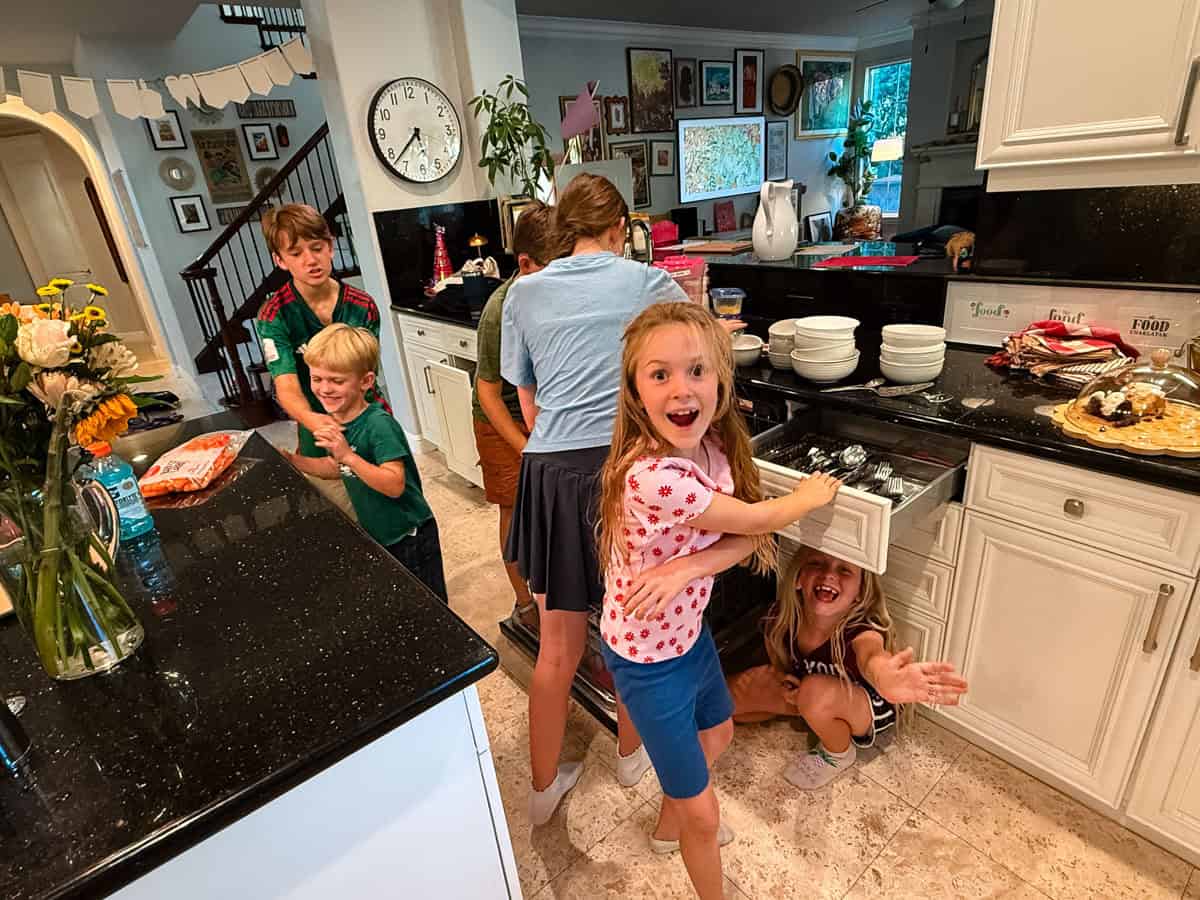
A little wild, a little messy, with the neighbor kids always over, shenanigans happening while I try to get them all to unload the dishwasher. You can see the art piece Eric got me for my 10th blog anniversary on the right, with all the iterations of The Food Charlatan logo. (hidden behind a pile of napkins that need to be put away 😅)
Running a food blog and a household with a pile of kids definitely has it’s ups and downs, but there are always more ups than downs. And I wouldn’t have it any other way!

I also could not do what I do without my amazing team (thank you Sarah, Laura, Niki, Laura A, and Sarah M.) and my equally amazing husband Eric, who sees it all.
I don’t know where people are going to be getting recipes in the coming years. Who could have guessed 30 years ago that we would all google to get recipes, instead of relying on the family binder and whatever cookbooks you purchased? In another 30 years, you will probably all have an Jetsons-level AI robot to spit recipes at you (or maybe just making you the food??)
But even then, I still think I will be plugging away here at The Food Charlatan. I just like it too much. I like the creative process, and I especially like the sharing process.
I can’t tell you how much your support of my blog and business means to me! A blog without a community is nothing, and I’m so grateful for all your comments, emails, photos, tags, etc. I LOVE to hear from you. It makes me so incredibly happy to think that people all over the world are making my family’s beloved recipes. What an honor! Thank you for being here.
Anniversaries from yesteryear
Every year I bake myself a cake for my blog anniversary. I love dessert more than anything, and it’s not a celebration without cake, if you ask me.
If you want to take a walk down memory lane, here is my first blog post, and then a list of all my anniversary posts over the years:
- The first blog post on The Food Charlatan (2011): Pumpkin Oatmeal White Chocolate Cookies
- 1st Anniversary (2012): Cake Mix Coffee Cake
- 2nd Anniversary (2013): Pumpkin Oatmeal White Chocolate Chip Cookies (I did a photo reshoot of my first recipe, which I totally regret!)
- 3rd Anniversary (2014): The Food Charlatan’s New Blog Design
- 4th Anniversary (2015): The Best Chocolate Cake I’ve Ever Had
- 5th Anniversary (2016): Death by Chocolate Bundt Cake
- 6th Anniversary (2017): Upside Down Almond Crunch Cupcakes
- 7th Anniversary (2018): Ginger Sticky Toffee Pudding Cake
- 8th Anniversary (2019): Sour Cream Coffee Cake, with a Ridiculous Amount of Streusel
- 9th Anniversary (2020): Homemade Spice Cake
- 10th Anniversary (2021): Classic Cheesecake (and an IRL party for 10 years! 🥳)
- 11th Anniversary (2022): Pumpkin Coffee Cake
- 12th Anniversary (2023): Picnic Cake with Buttermilk Glaze
- 13th Anniversary (2024): White Chocolate Brownies
14th anniversary: Red Velvet Cake
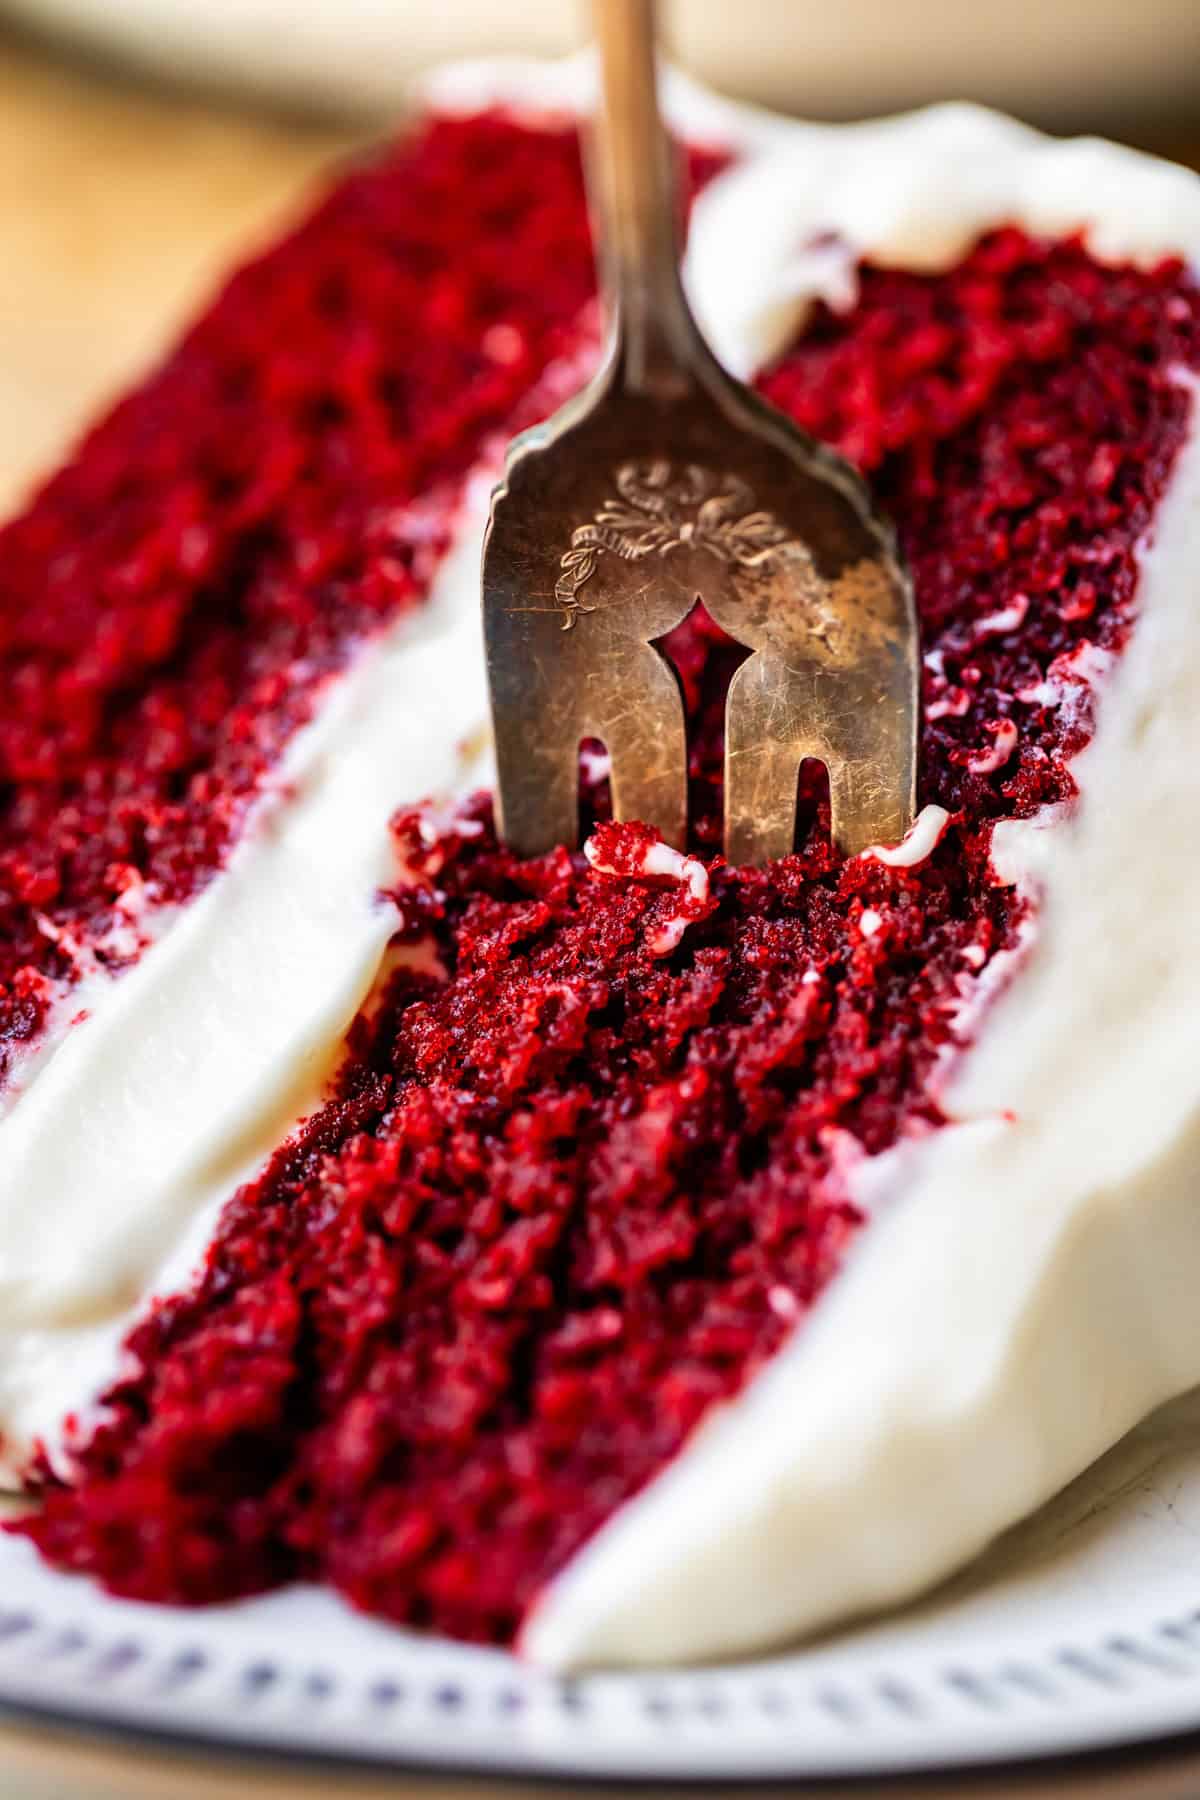
I’m celebrating 14 years with Red Velvet cake because it’s such a rags to riches story. I have NEVER liked red velvet cake. I would never make it at home, because why. It’s such a pointless flavor. I don’t like the taste of red. That was my only experience: Bakery cakes always taste like red food coloring to me. The only times I’ve ever eaten Red Velvet cake was as a medium to get Cream Cheese Frosting into my mouth (which is fair, in desperate times).
But I have learned so much. Red Velvet cake is INCREDIBLE when done right. What you need is to amp up the chocolate a bit (this cake is not as Elmo-red as some others, and that’s not an apology), use real butter to maximize flavor, and add in lots of moisture with buttermilk and sour cream and an extra egg yolk. It’s soft, it’s tender, it’s not spongey, but instead almost brownie-like in it’s flavor and consistency.
What is red velvet cake?
Let’s dive in to all things red velvet! Red velvet cake came about in Victorian times, when bakers realized that the acid in natural cocoa powder, vinegar, and buttermilk reacted with baking soda to produce a reddish tint. Ta-da! Red cake! In a time before food coloring, this was a big moment!
But even then, it wasn’t the most popular of cakes. It gained it’s modern mania from a company in the 1930s that started selling red food dye with a recipe for Red Velvet Cake on the box. That’s right folks: Red Velvet Cake today as we know it exists to sell you red dye 😂 I CALLED IT GUYS
I ain’t about to go roasting beets to get a red color for a cake that was only popularized in order to sell red dye in the first place. To all you people crushing blueberries to dye your Easter eggs, more power to you. Red Velvet is red because of the dye, and that’s basically the whole story.
I’m not anti-food coloring. It has it’s place in the world. What I don’t want is a flavorless cake (or worse, a dye-flavored cake), that needs the frosting in order to taste passable. I want a moist, deep cake that has incredible flavor, and also happens to be red. Red-ish, even.
Flavor (via cocoa) VS red color
Red velvet cake has always had some amount of cocoa in it. The problem is that when you add enough cocoa powder to make the cake taste great, it turns much too brown to get that BRIGHT RED color that is so iconic today. Most of today’s red Velvet cake recipes call for about 2 tablespoons of cocoa, which is basically a La Croix-level of chocolate flavor, amiright? It’s barely there.
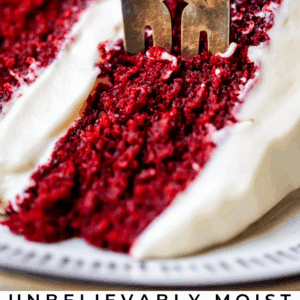
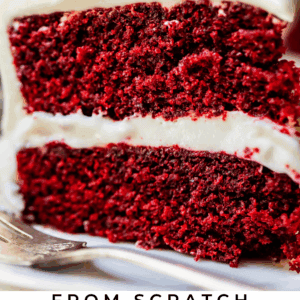
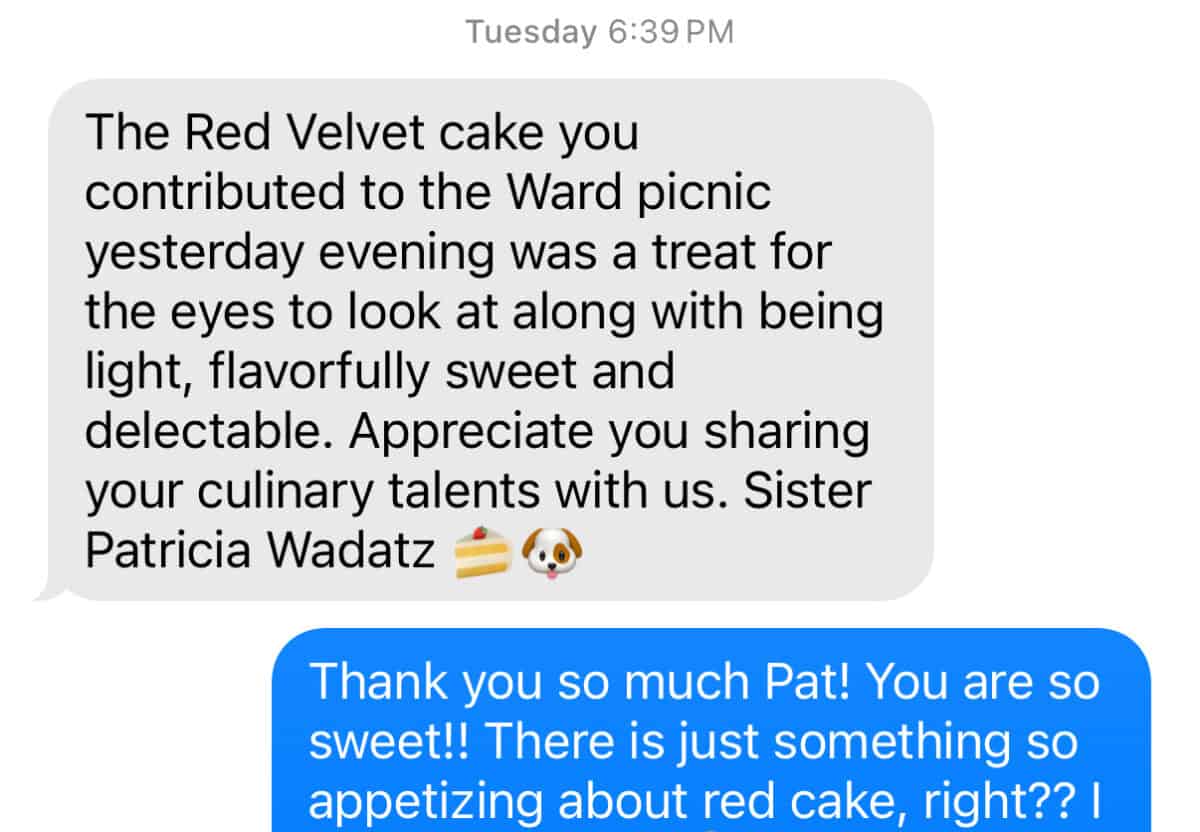
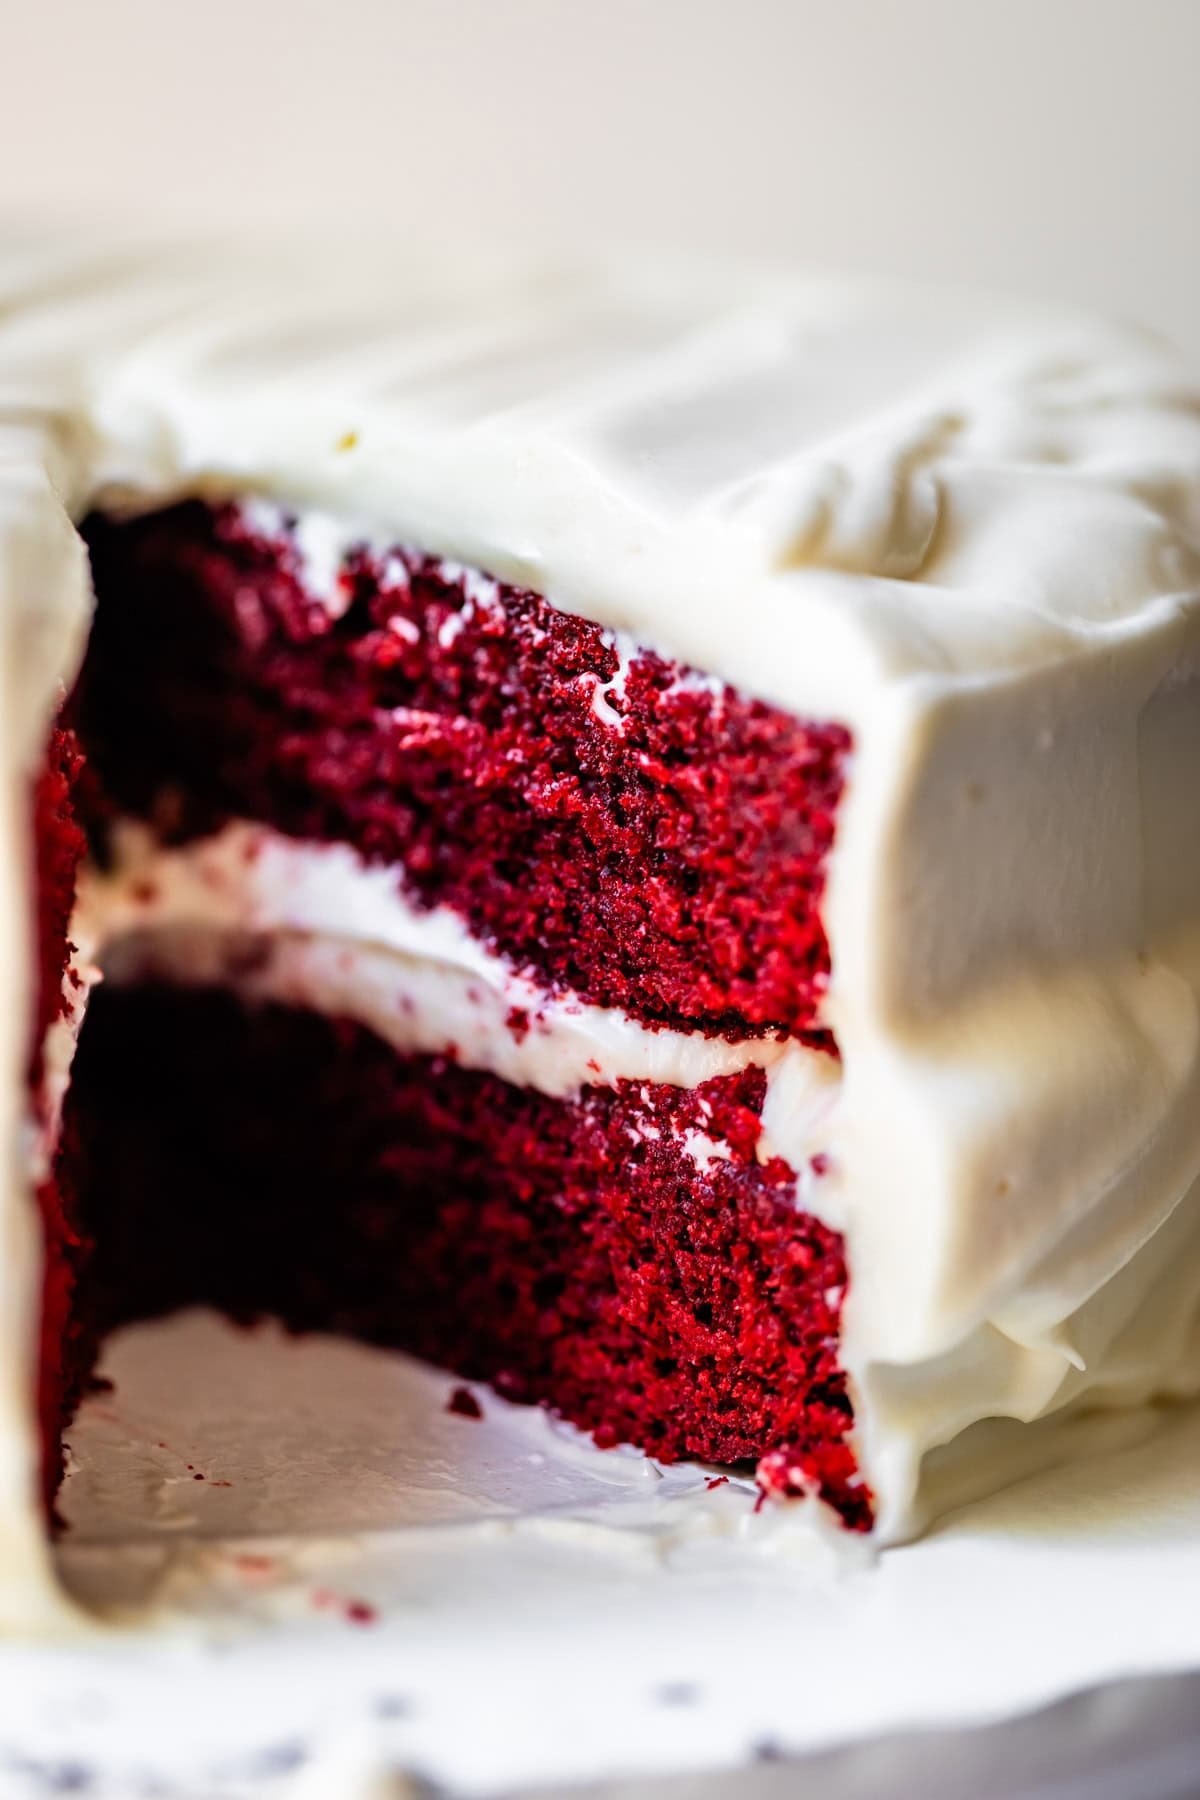
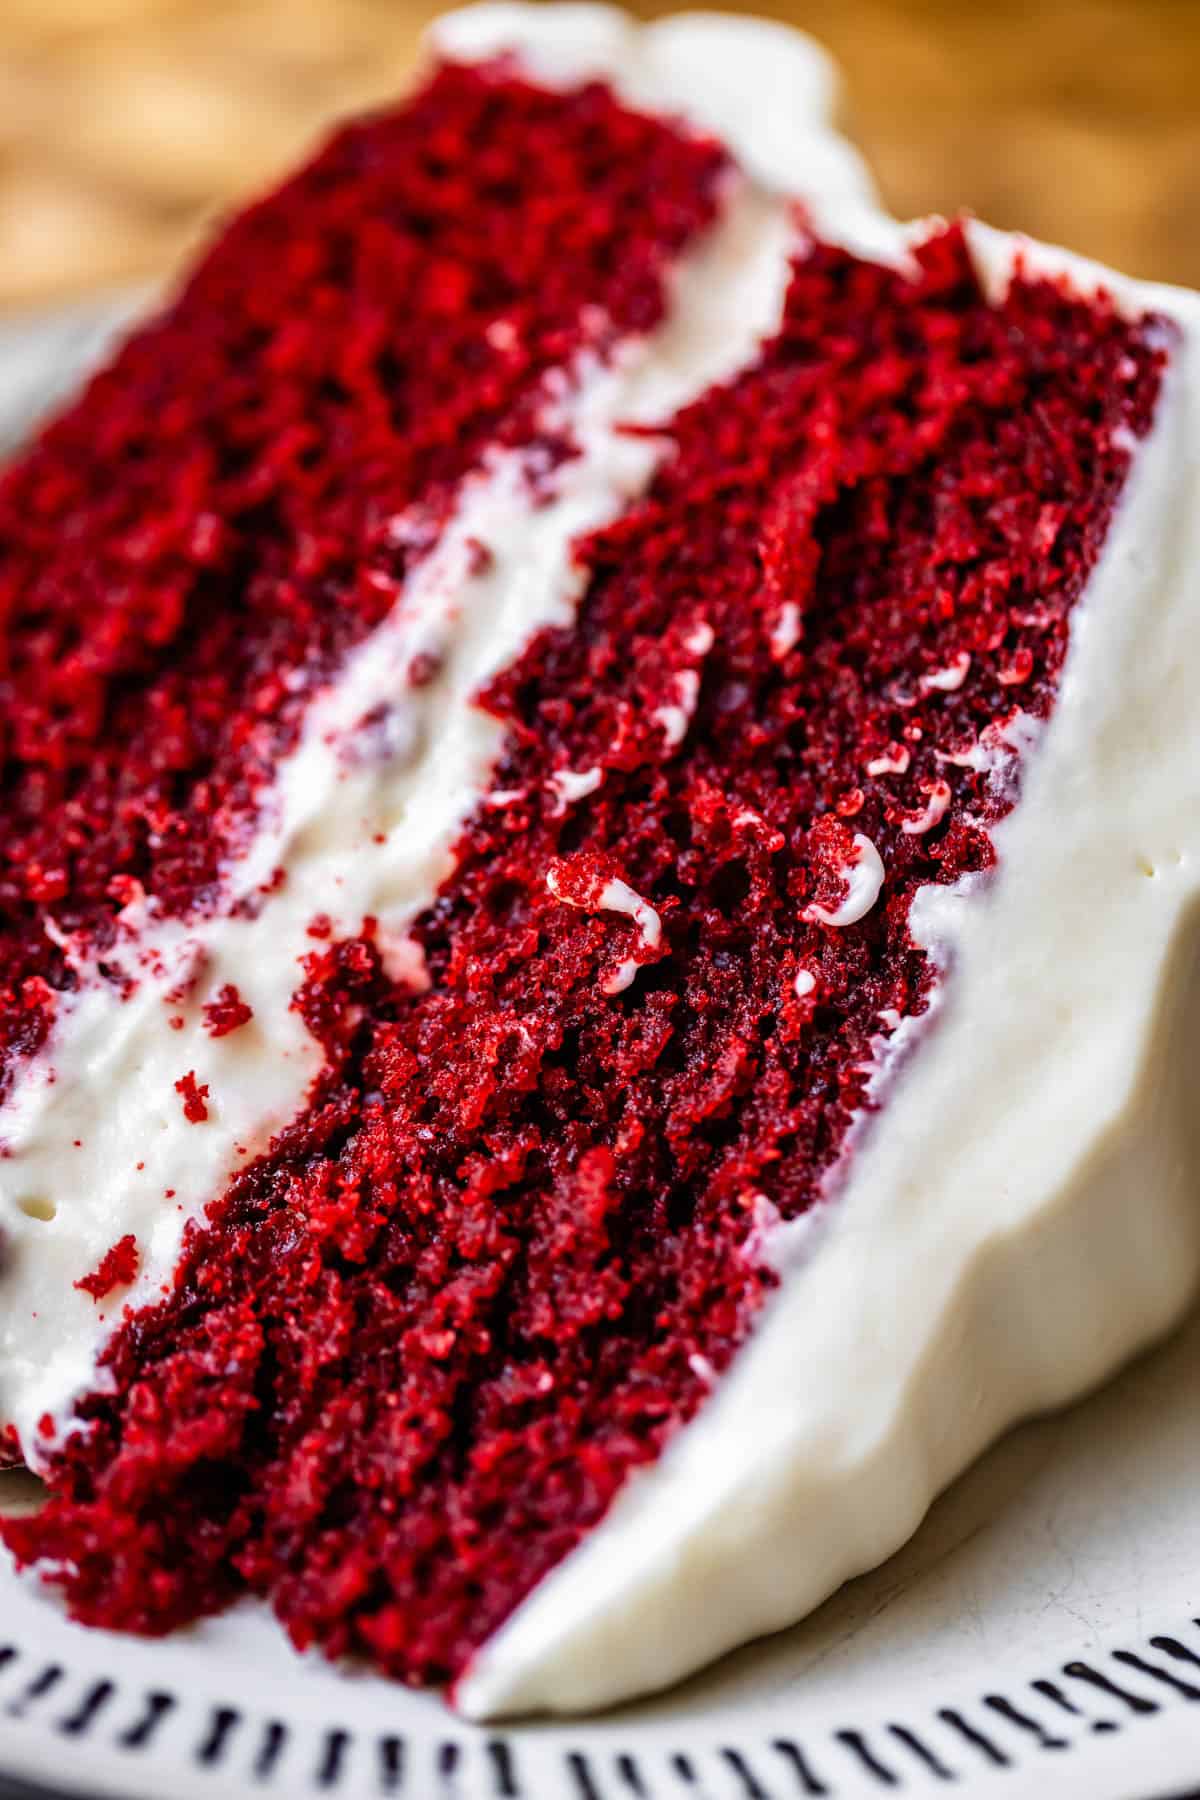
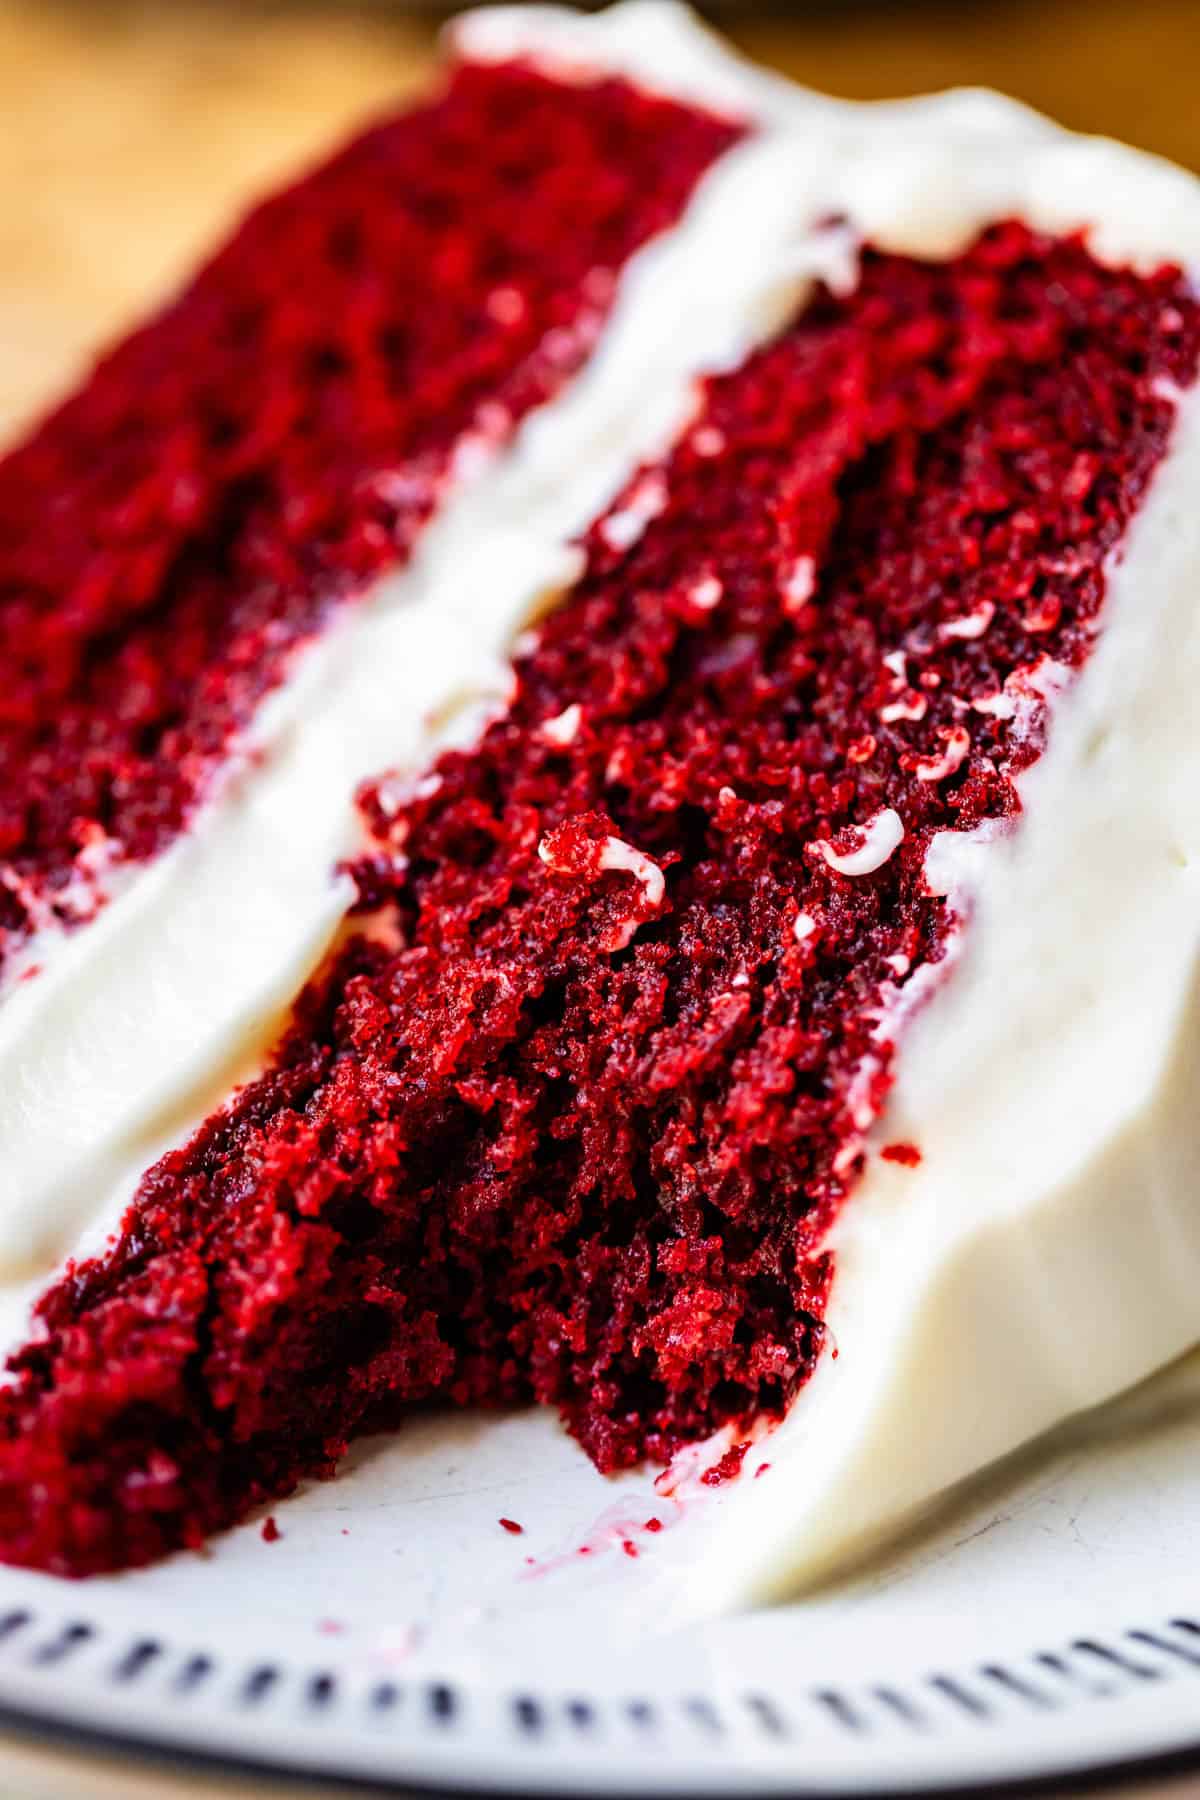
I decided to compromise a bit of the color in order to get a Red Velvet cake that didn’t taste like it was transported near a truck of chocolate. This cake has 1/4 cup of Special Dark Cocoa powder. It’s soooo good. It’s not as bright red as the Red Velvet sold at a bakery. What do you think of the photos? Does this cake pass as red velvet? My friends and family thought it definitely qualified as red.
I got this text from my friend Pat after bringing the final cake to our church picnic:
But what if I want my cake to be vampire red?
No problem kitten. If you want your cake to be SUPER red, you should still make this recipe. Just use half the amount of cocoa.
And no judgment if you are looking for a super red cake, even if it sacrifices a little flavor. If there is one thing I know for sure, it’s that we were all vampires in another life, and we want to eat RED food. It’s the reason McDonalds picked RED for their logo. (And Burger King, and Pizza Hut Dominoes KFC Wendy’s Jack in the Box, even Dairy Queen got the memo.)
RED sells. Red makes you hungry. RED CAKE makes you want to eat it. This one has the extra bonus of tasting phenomenal!
One red velvet cake to rule them all
I tested about 15 different variations of red velvet cake over the span of several months. I’ve been seeing red velvet behind my eyeballs when I rest my head at night. I’ve been having revelations in the shower (“WHAT IF I ADDED SOUR CREAM, ERIC?!” I shriek, naked, running to the kitchen) I’ve been talking about red velvet cake until all my friend’s eyes are glazing over. My fingers might be permanently dyed red but it was totally worth it. THIS cake is the one you guys. I will inscribe this recipe on the inside of a magical ring and make all of you believe the same thing. 😂
This red velvet cake is:
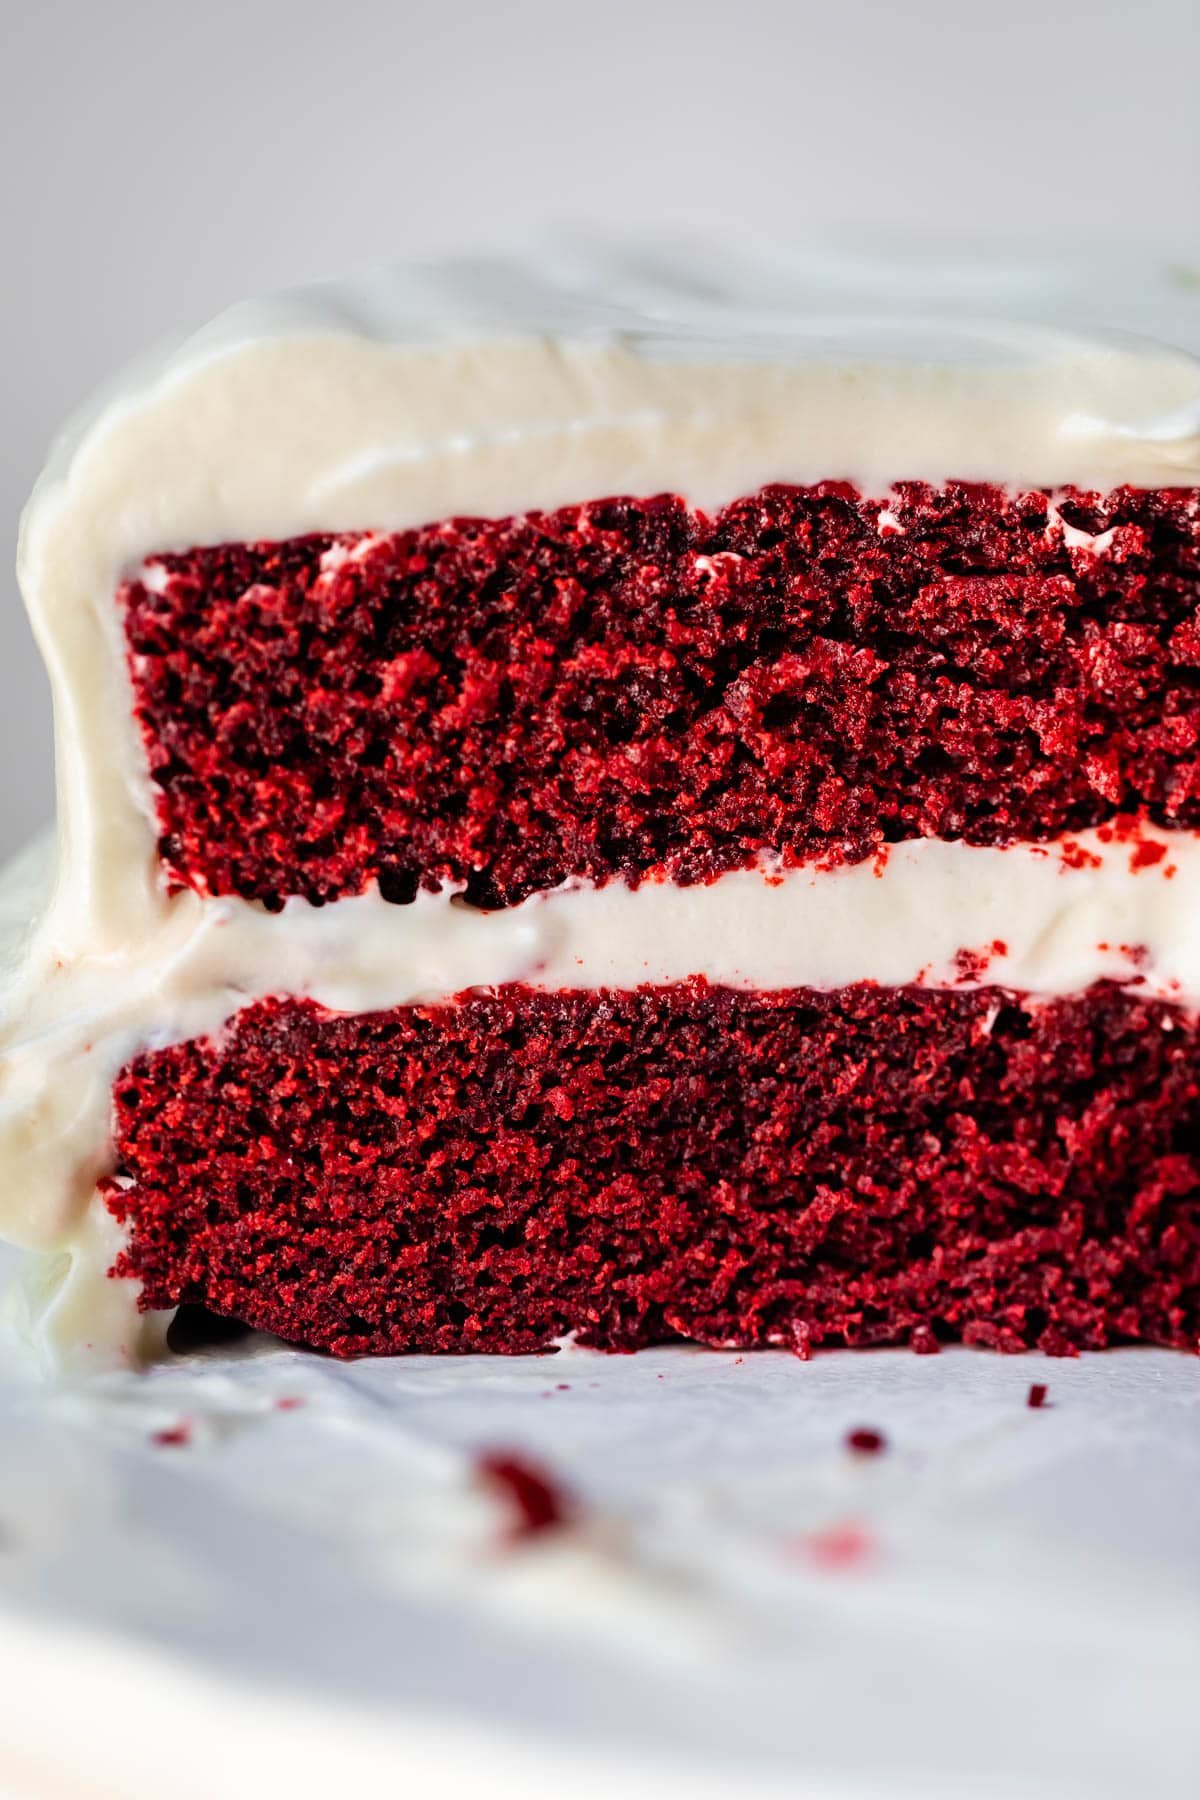
- Super moist and tender, almost brownie-like. It is moist and perfect. The edges are fudgy. It’s truly delightful. I absolutely hate red velvet cakes that feel like you’re chewing on a big red No.5 sponge, gah. This cake is not that!
- This cake is chocolatey, and that’s not an apology. This recipe uses special dark cocoa powder to amp up the flavor. It uses a lighter-than-usual amount of chocolate (my Chocolate Cake calls for double the amount). It’s not so little you can’t taste it, not so much that it turns into a chocolate cake.
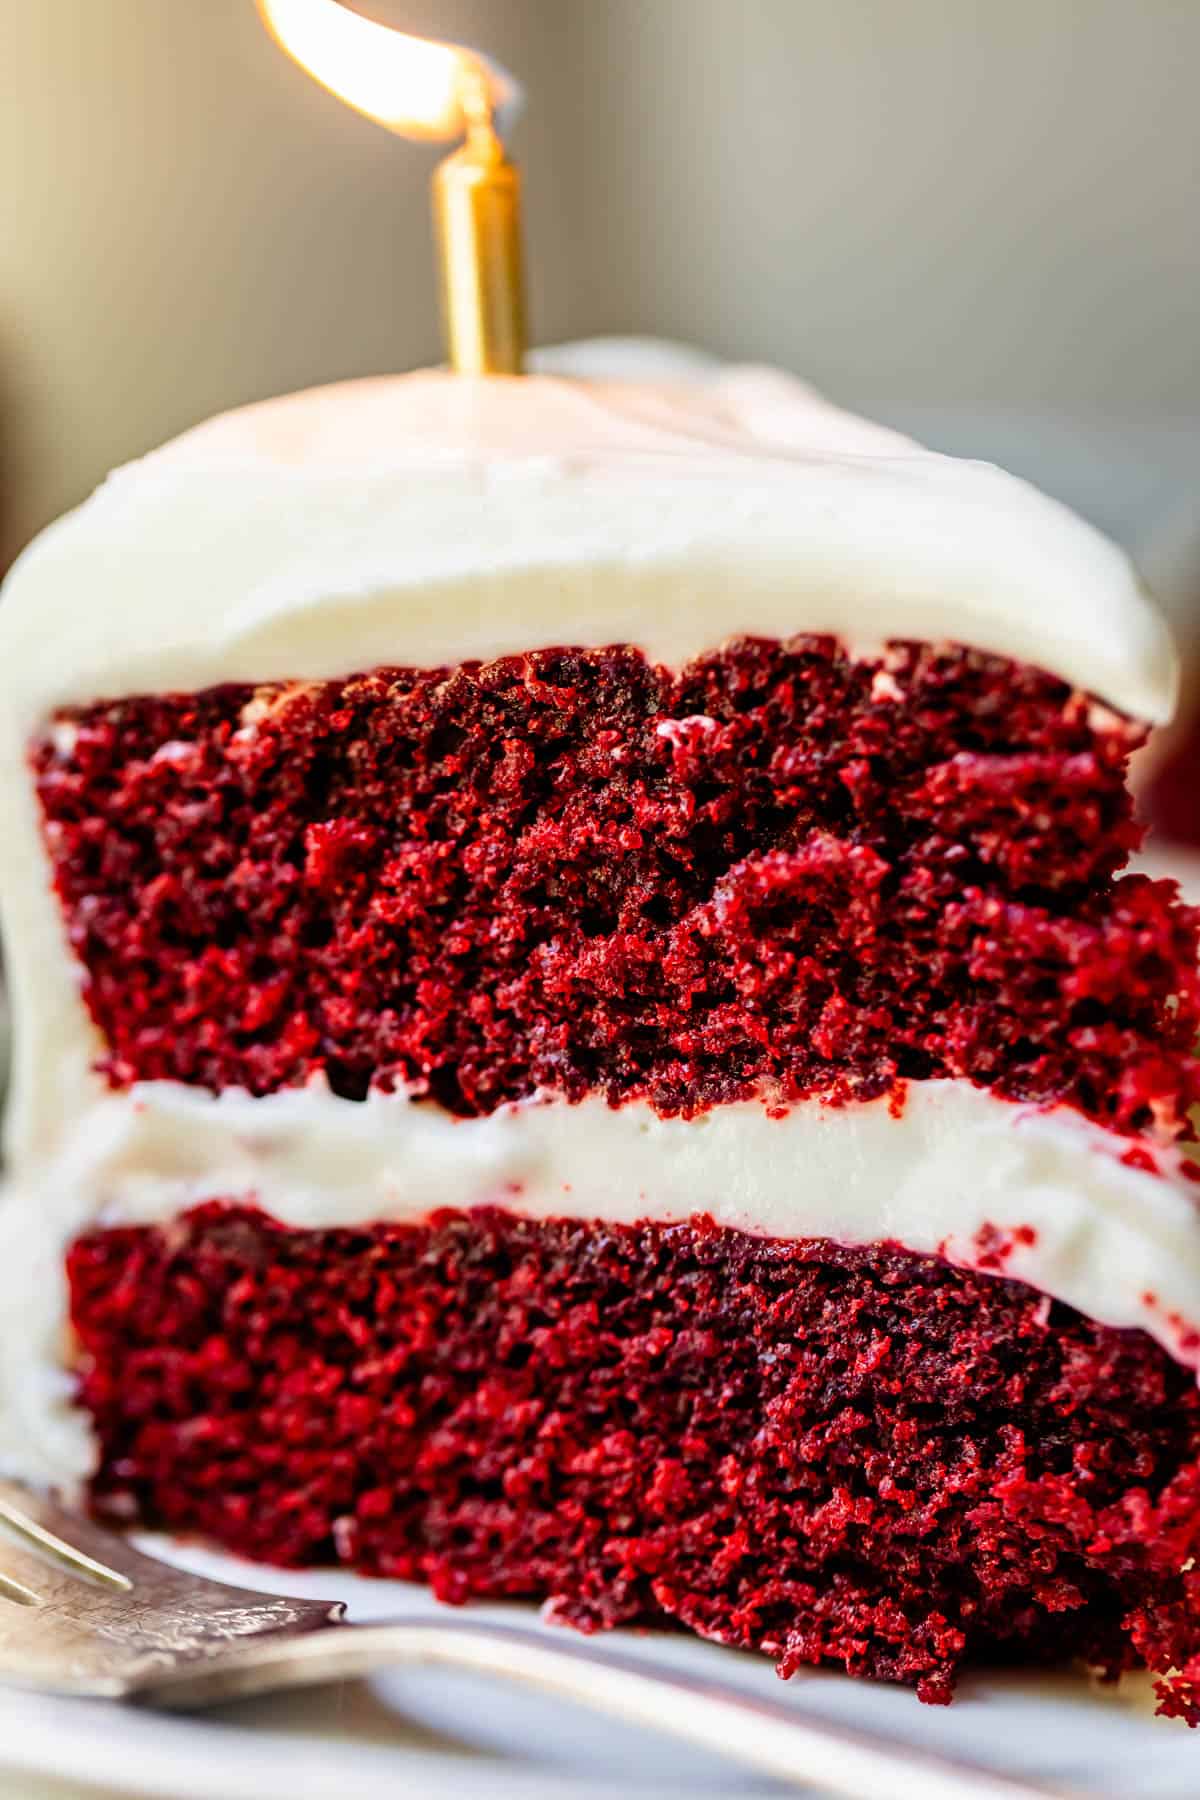
- This cake is a lovely shade of red, noticeable but not quite cherry-red. It is a darker brown than the red velvet Armadillo from Steel Magnolia’s. I feel like this is a win??
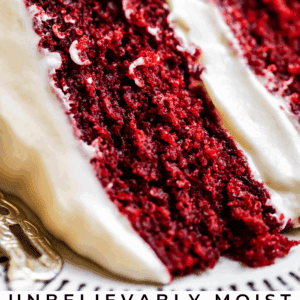
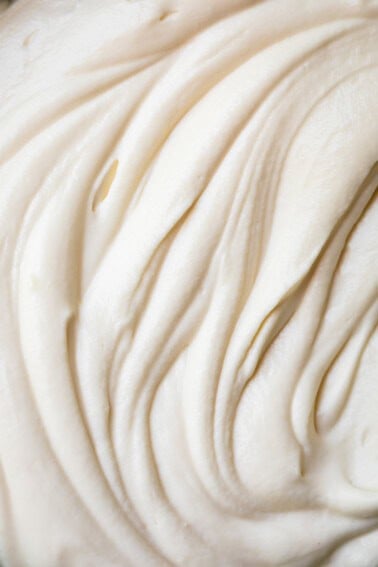
- And of course, it’s layered with Cream Cheese Frosting. I have recently discovered the MOST AMAZING cream cheese frosting recipe that I have never yet served to a group of women and NOT had at least 3 of them ask me for the recipe. It is light in texture, similar to whipped cream, but has all the tangy cream cheese oomph you are looking for. I’m literally obsessed.
What you need to make this red velvet cake recipe
Here’s a quick list of everything you need to make red velvet cake. Jump to the recipe card for complete details!
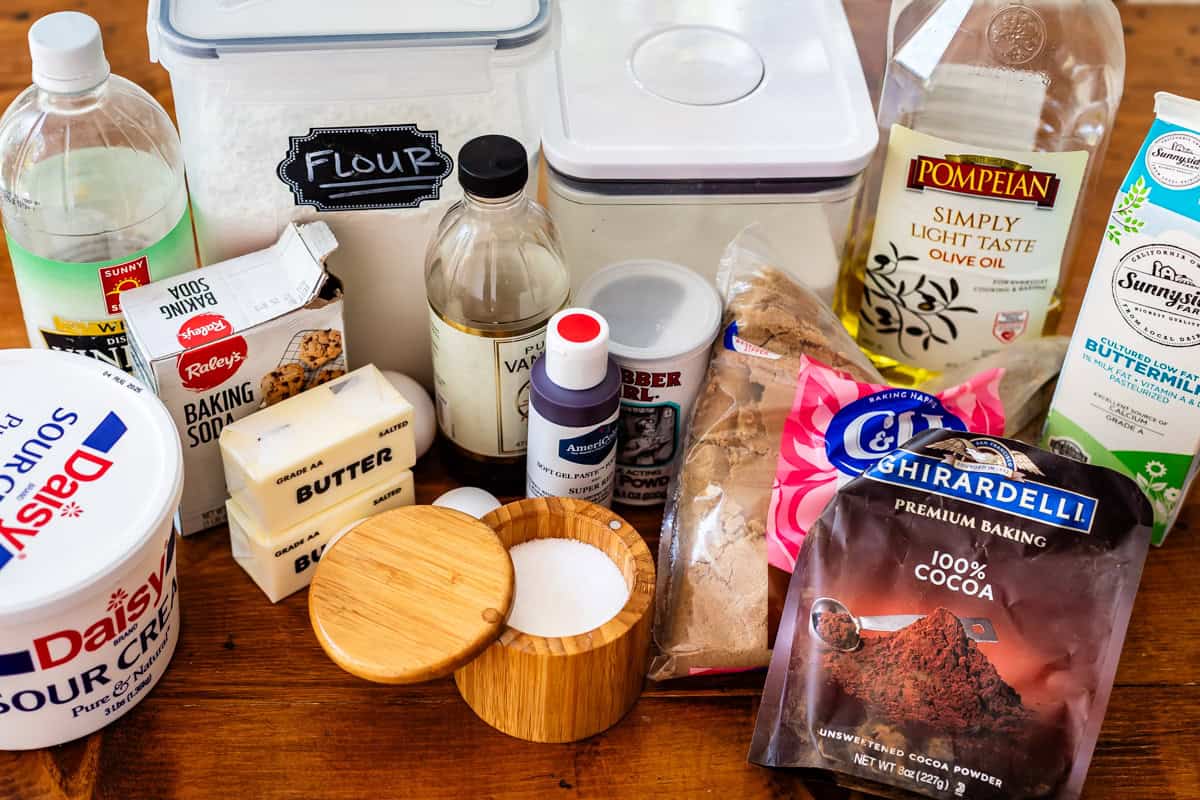
For the cake:
- melted butter
- baking soda
- baking powder
- kosher salt
- Hershey’s Special Dark cocoa powder (or any brand of natural cocoa powder is fine!)
- white sugar
- brown sugar
- vegetable oil
- eggs
- buttermilk
- sour cream
- vanilla extract
- red gel food coloring (I like AmeriColor brand. Do NOT use liquid food coloring, it won’t work.)
- white vinegar
- all-purpose flour
- Whipped Cream Cheese Frosting
How to make red velvet cake
Get started by doing your chores. Line your cake pans with parchment paper now! So you are not tempted to skip it later.
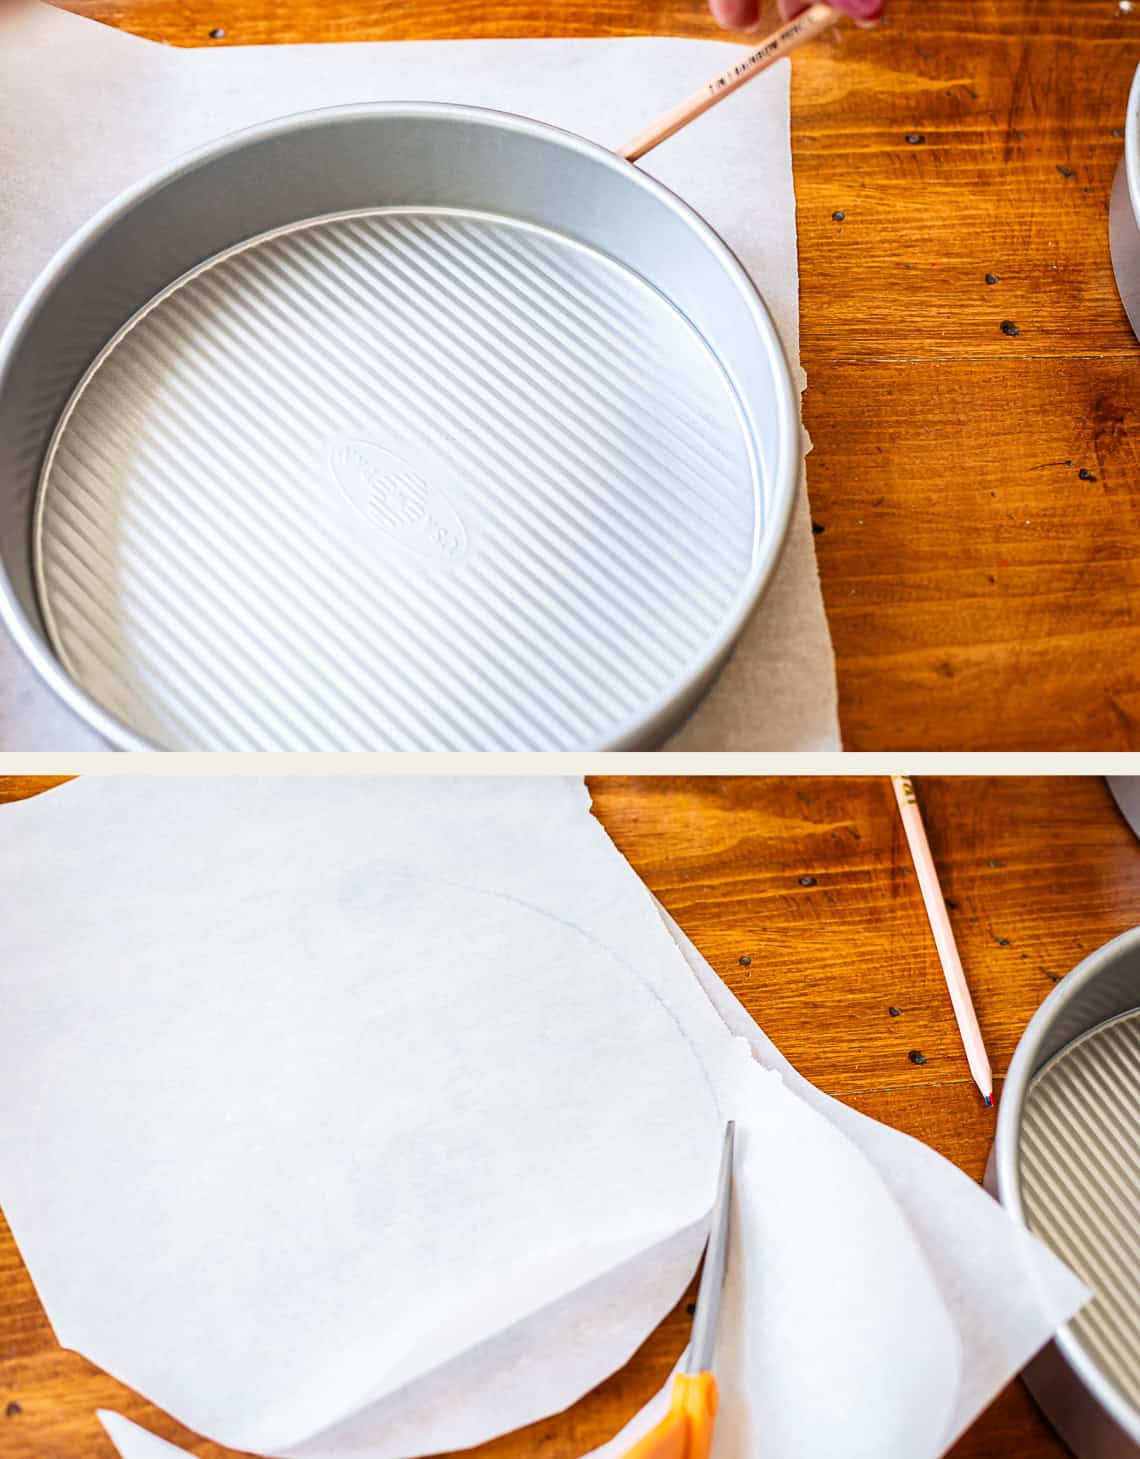
I NEVER make a round cake without parchment paper, I’ve had too many sad moments where the cake breaks coming out of the pan. So do your future self a favor! Trace the outline of the pans, then cut them out. Don’t forget, you still need to grease the pans, even with the paper!
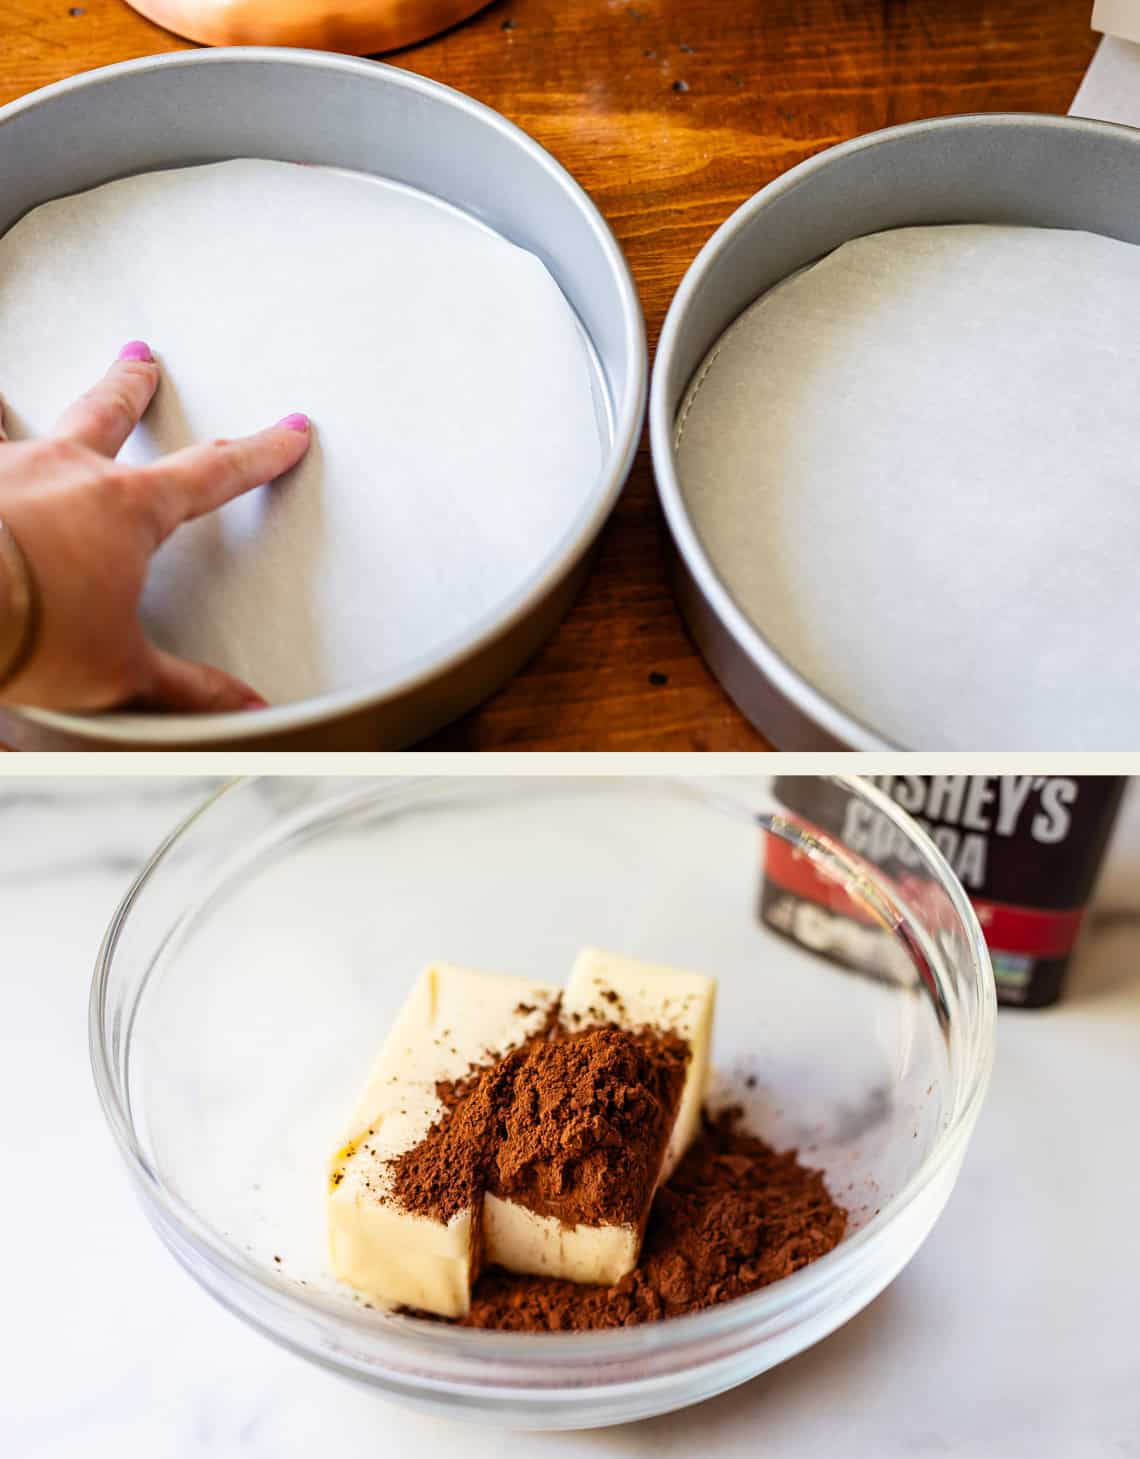
Now the cake makin’. First up, melt some butter, cocoa, and brown sugar. (I melted my butter and cocoa first and then remembered that I wanted to heat the brown sugar as well, so added it after the fact. But you can just toss it all in to the microwave together.)
Melted butter makes the BEST cake. Nothing compares to that fudgy, moist texture, in my opinion.
We are heating the cocoa in the microwave to help it “bloom.” Waking up the cocoa powder in hot liquid (butter, in this case) really helps to bring out the flavor.
And lastly, we’re adding the brown sugar in this step so that we get out any lumps that might be lurking. You know those brown sugar lurky lumps!!
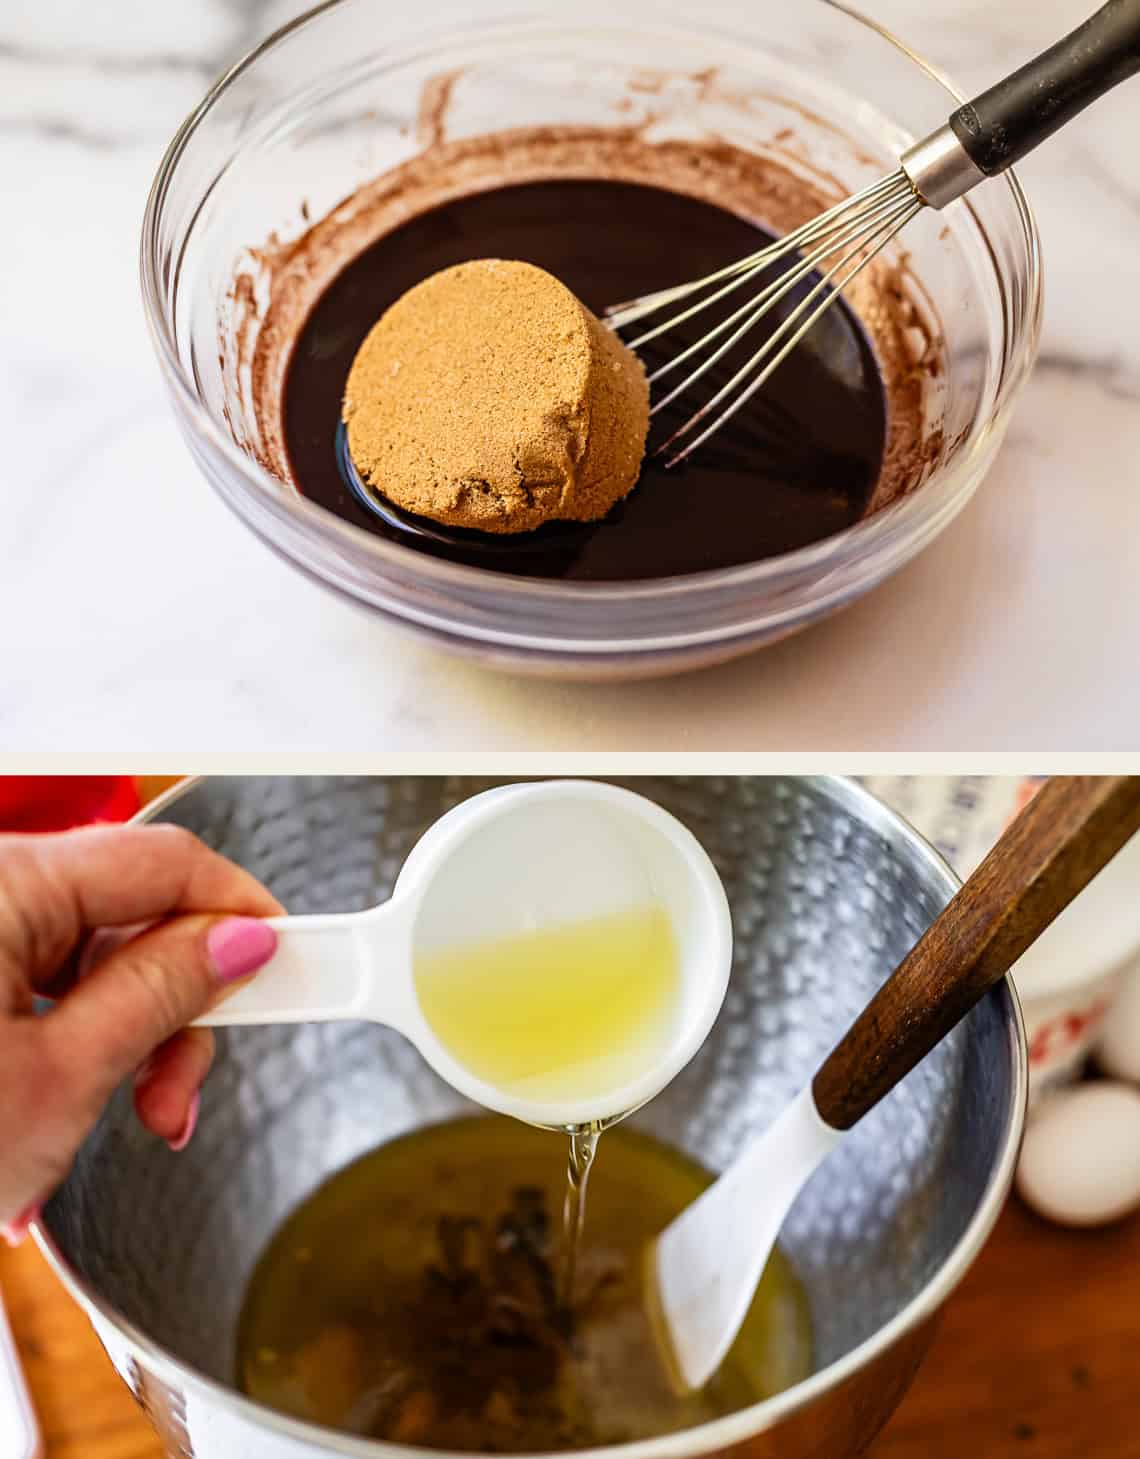
Transfer the mixture to a stand mixer, or bust out the electric beaters and keep it in the same big bowl.
Add the rest of the wet ingredients to a mixing bowl. Vegetable oil, eggs, an extra egg yolk just for good measure (and flavor!),
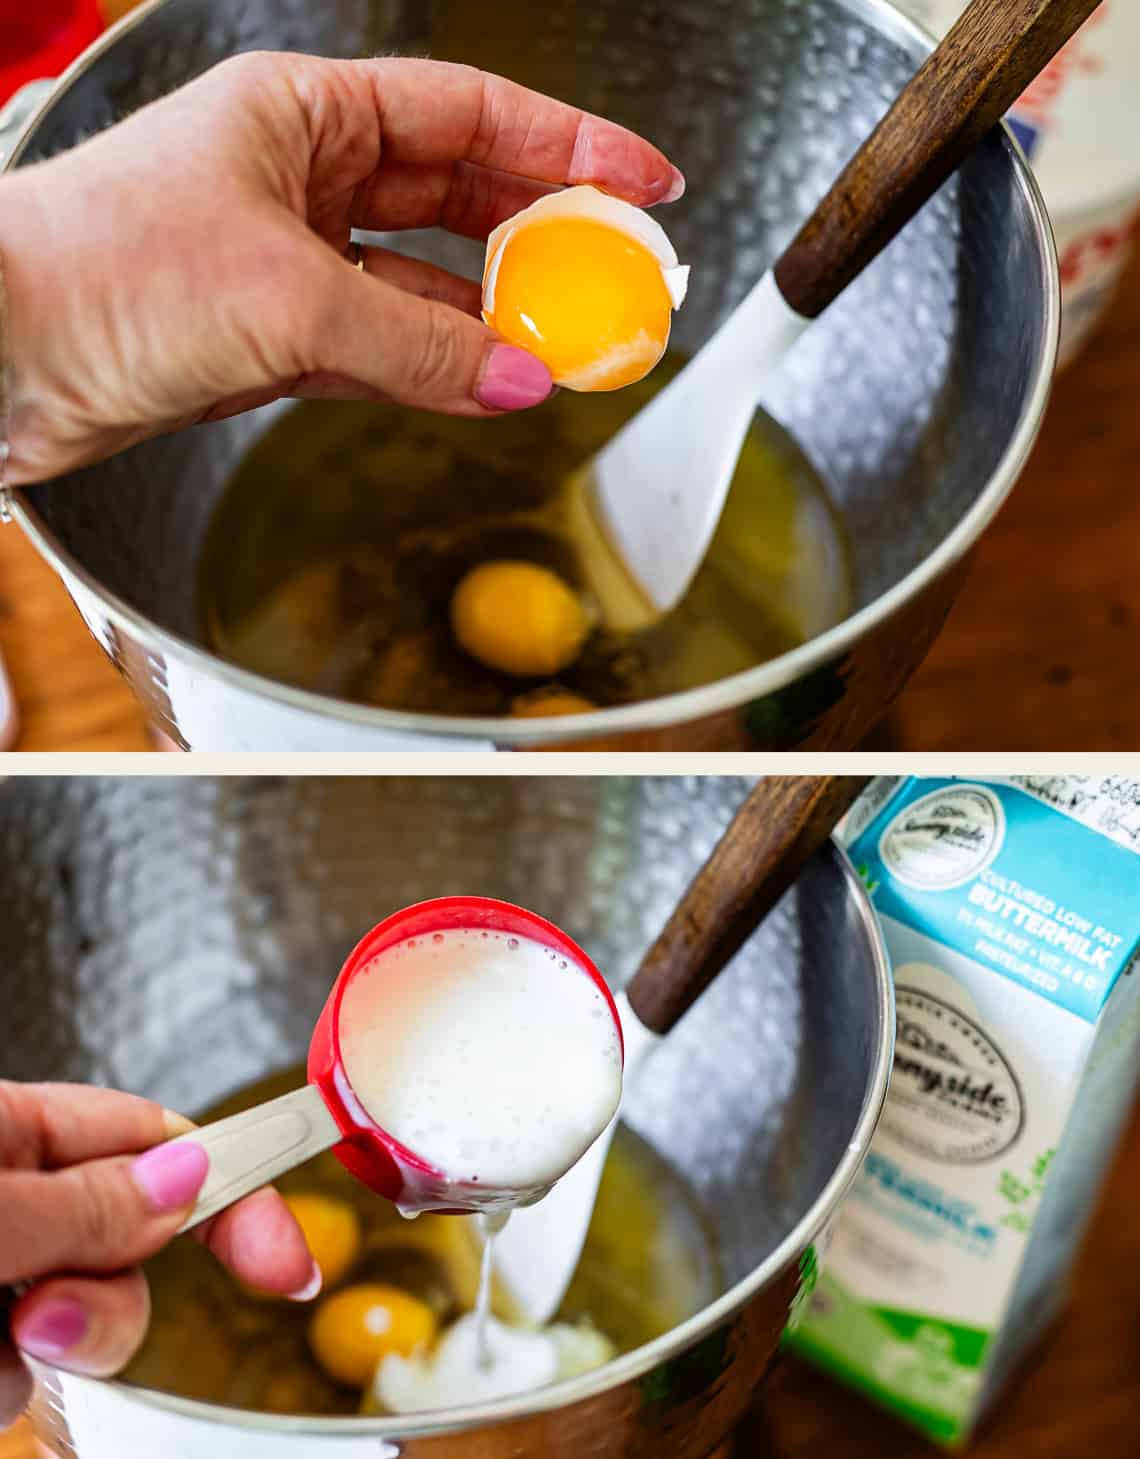
some buttermilk and sour cream,
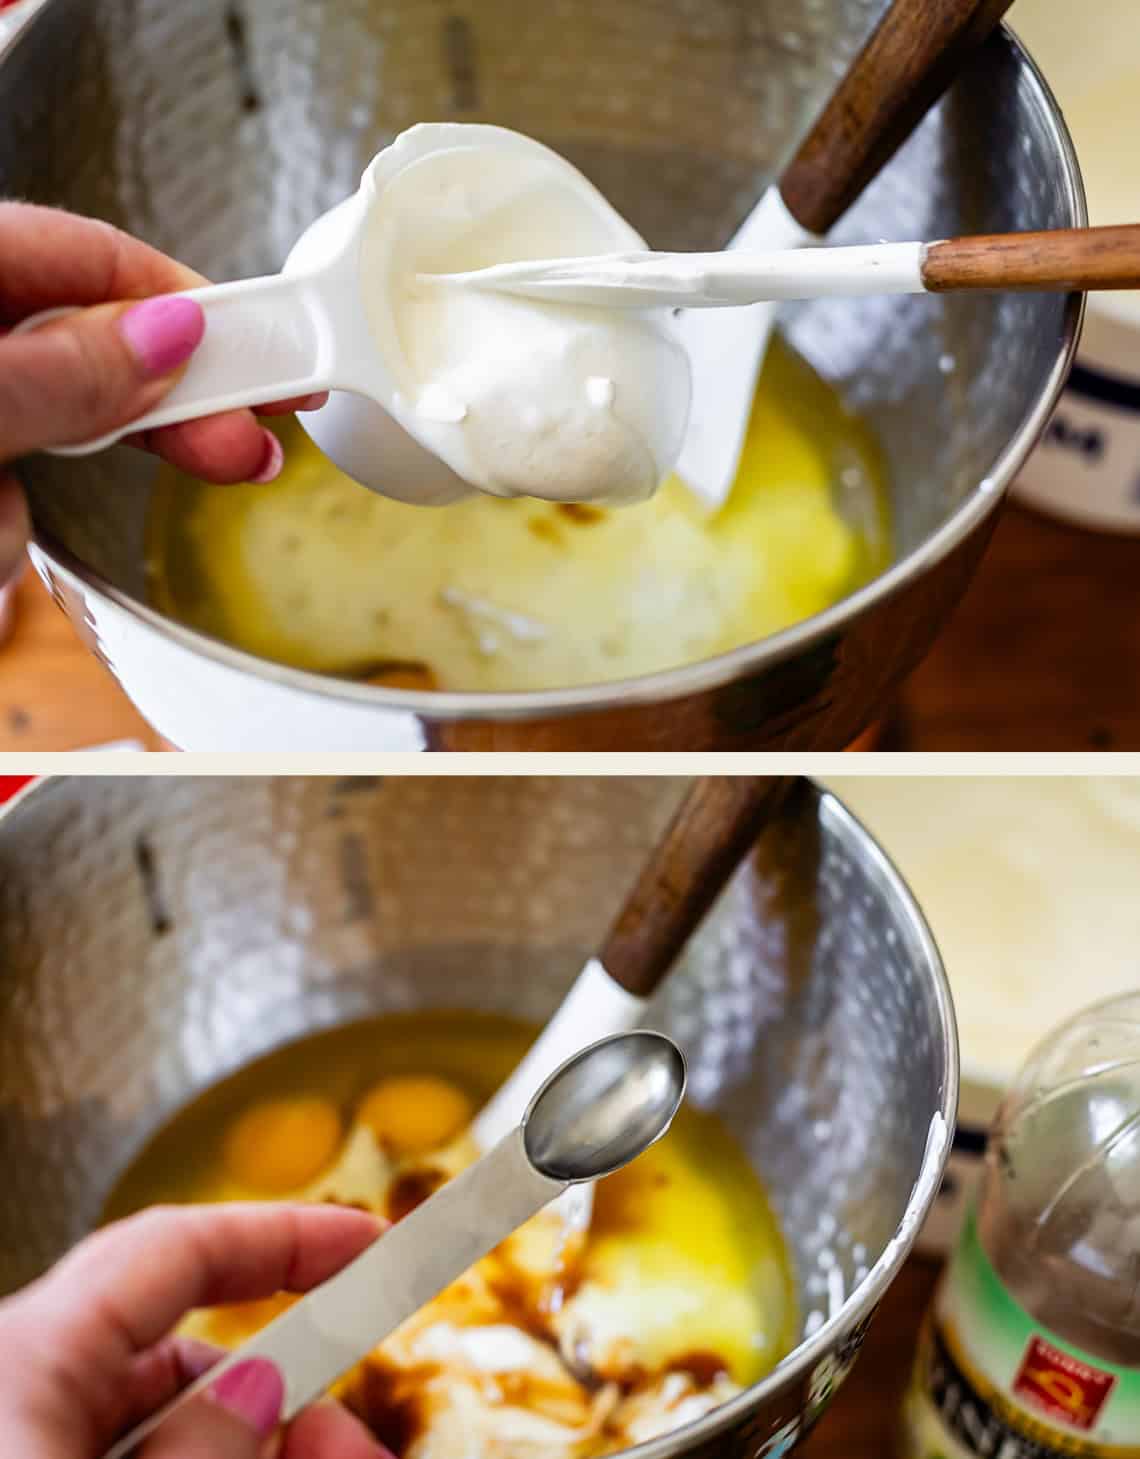
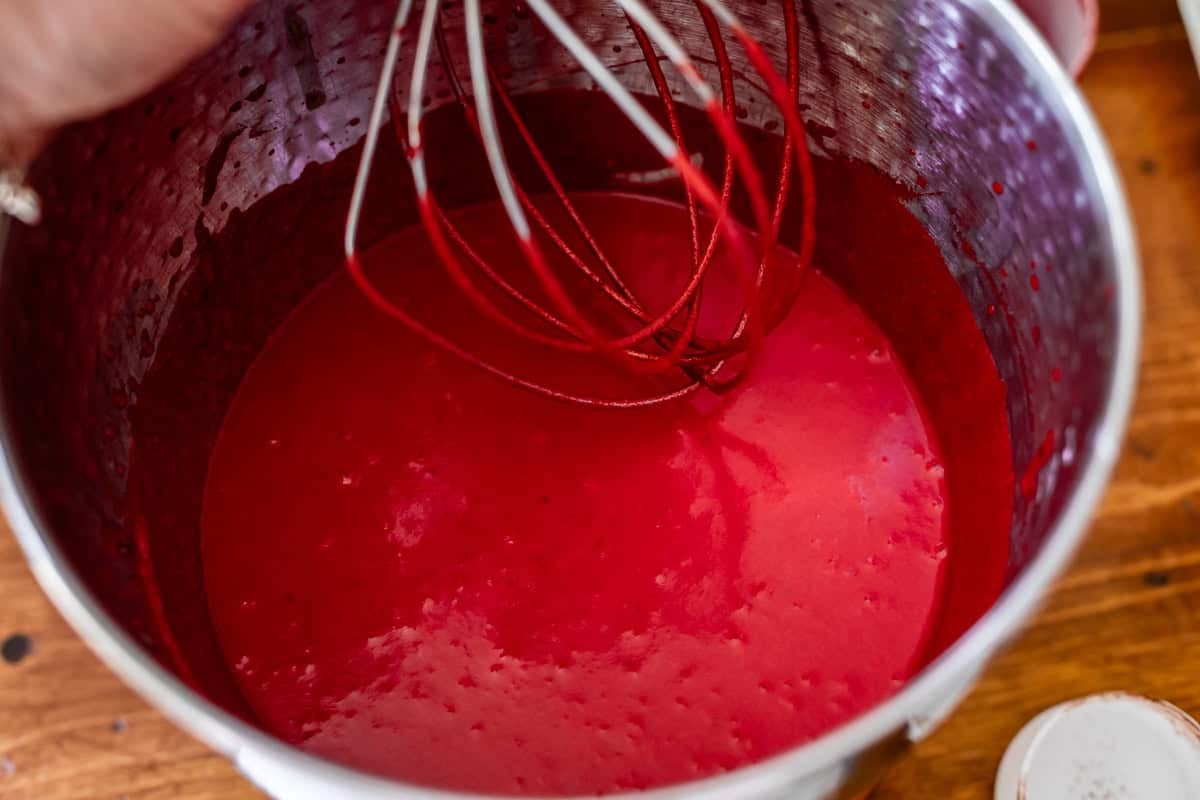
and don’t forget the vanilla, red dye, and a bit of vinegar. DO NOT use liquid food dye. You really need red gel food coloring for this recipe!
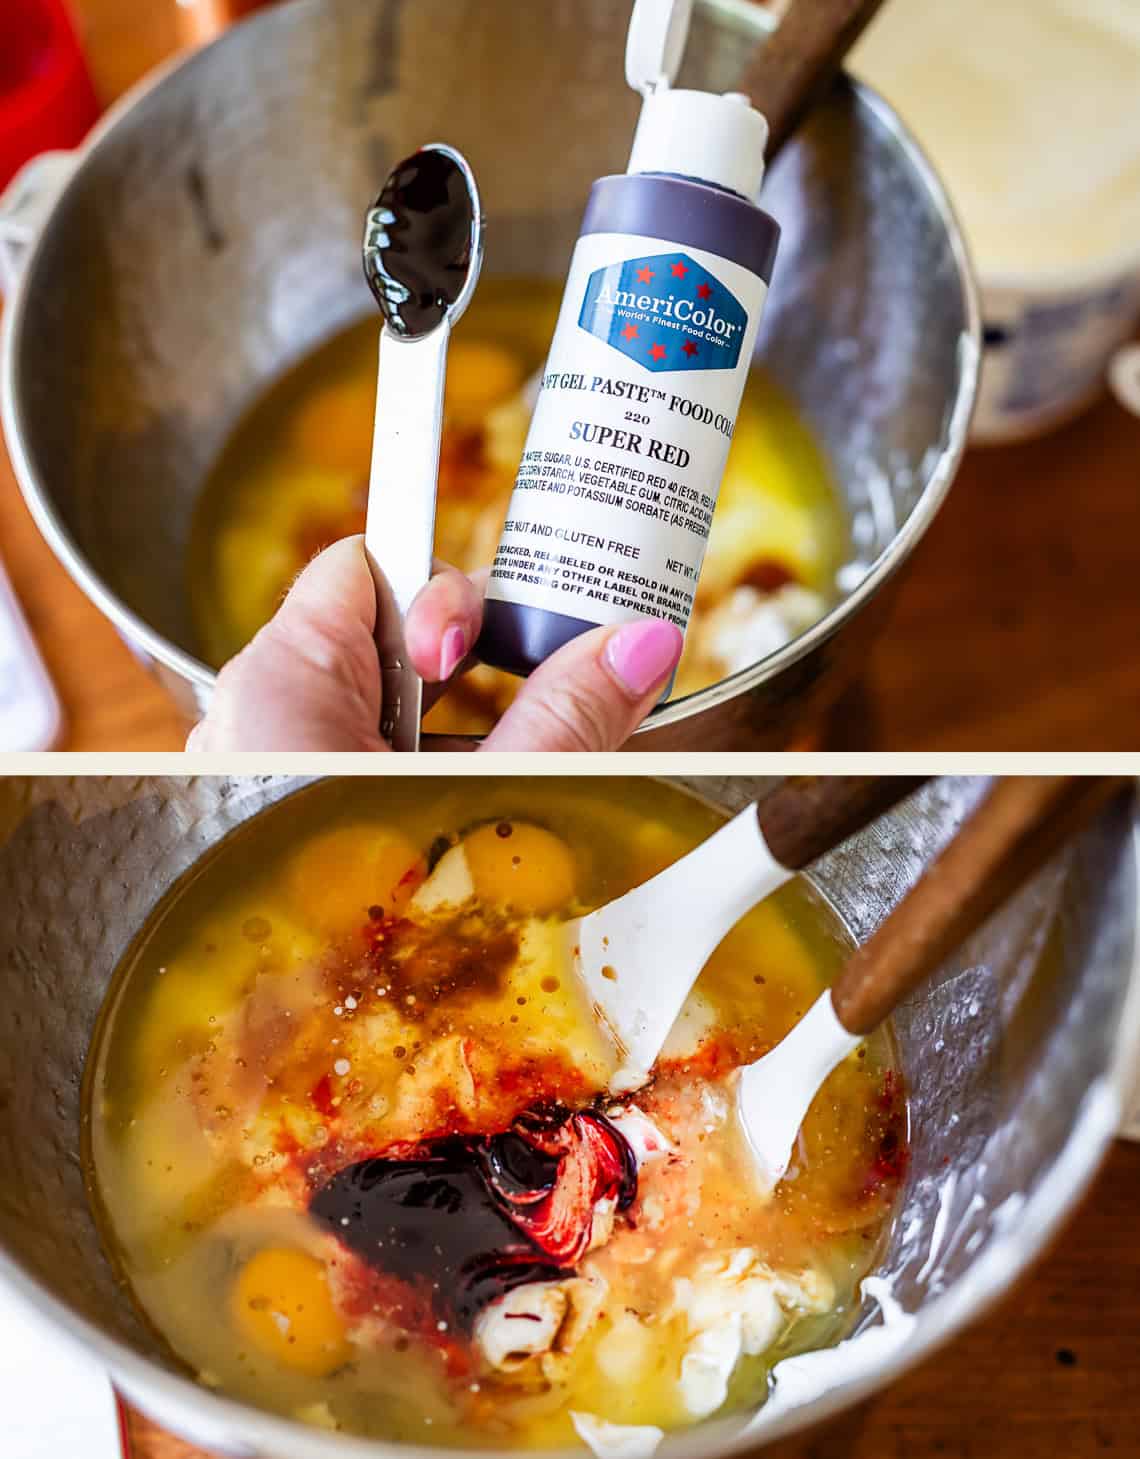
It will mix up to be RED.
Now for the dry ingredients. Here’s a refresher on how to measure flour correctly, by spooning and leveling. Ignore the oats in the background, these photos are borrowed from my Oatmeal Chocolate Chip Cookie post.
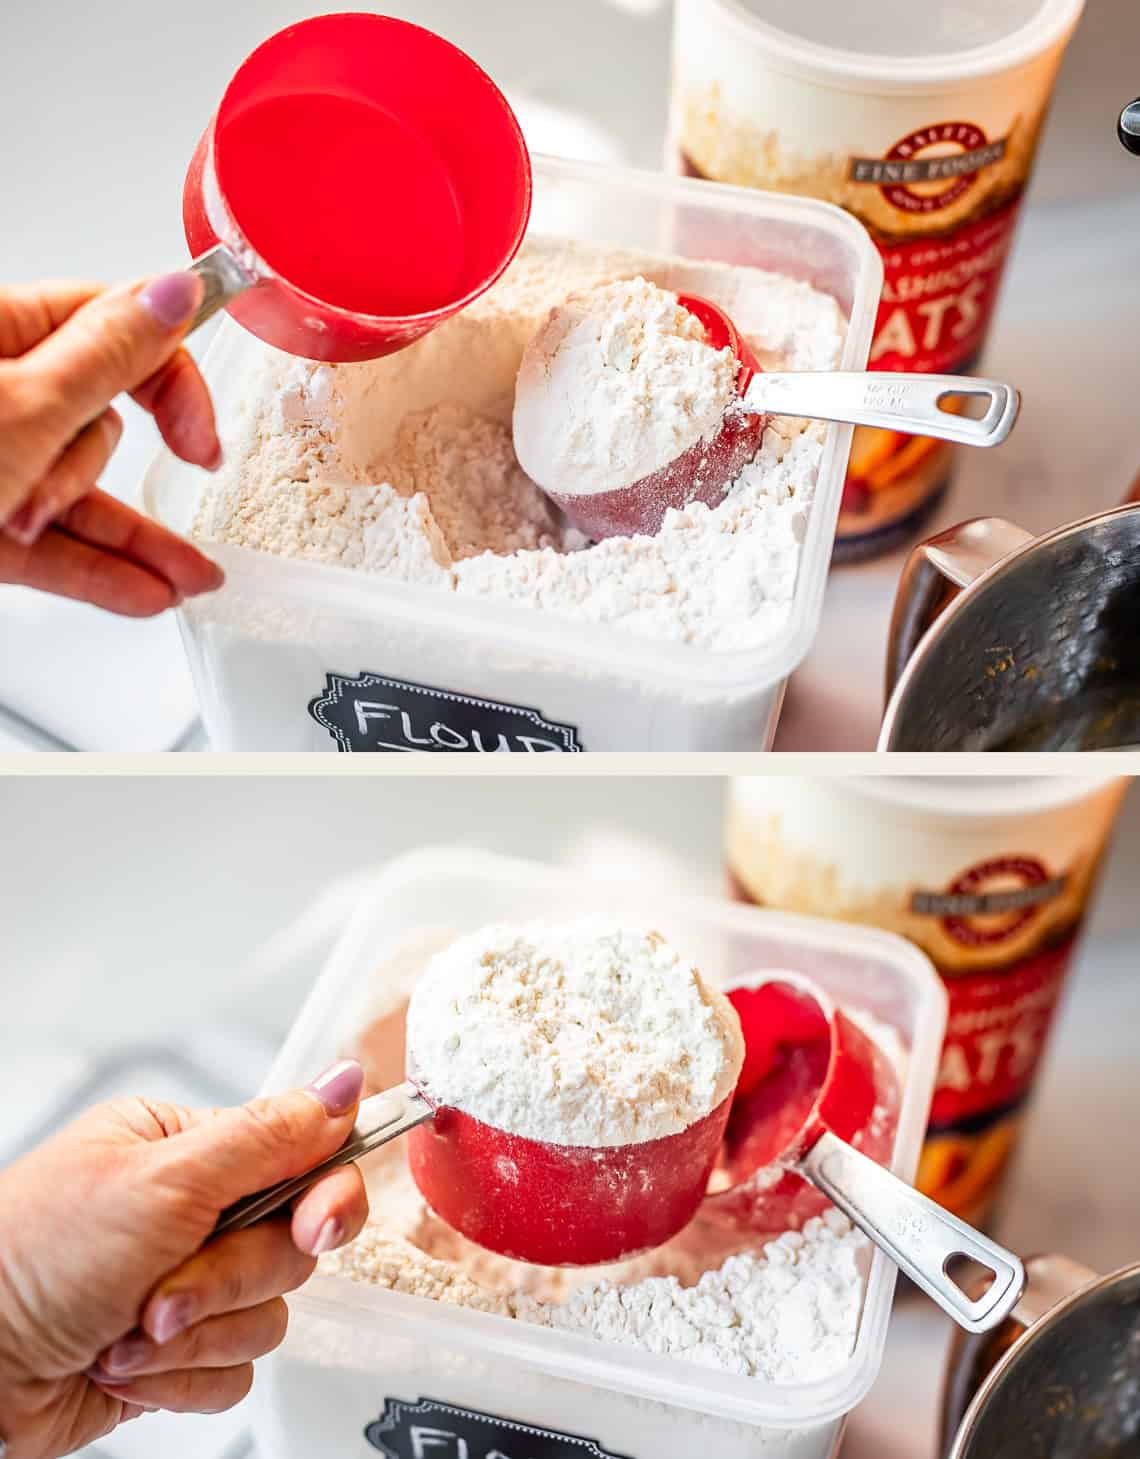
Scoop it into the measuring cup…
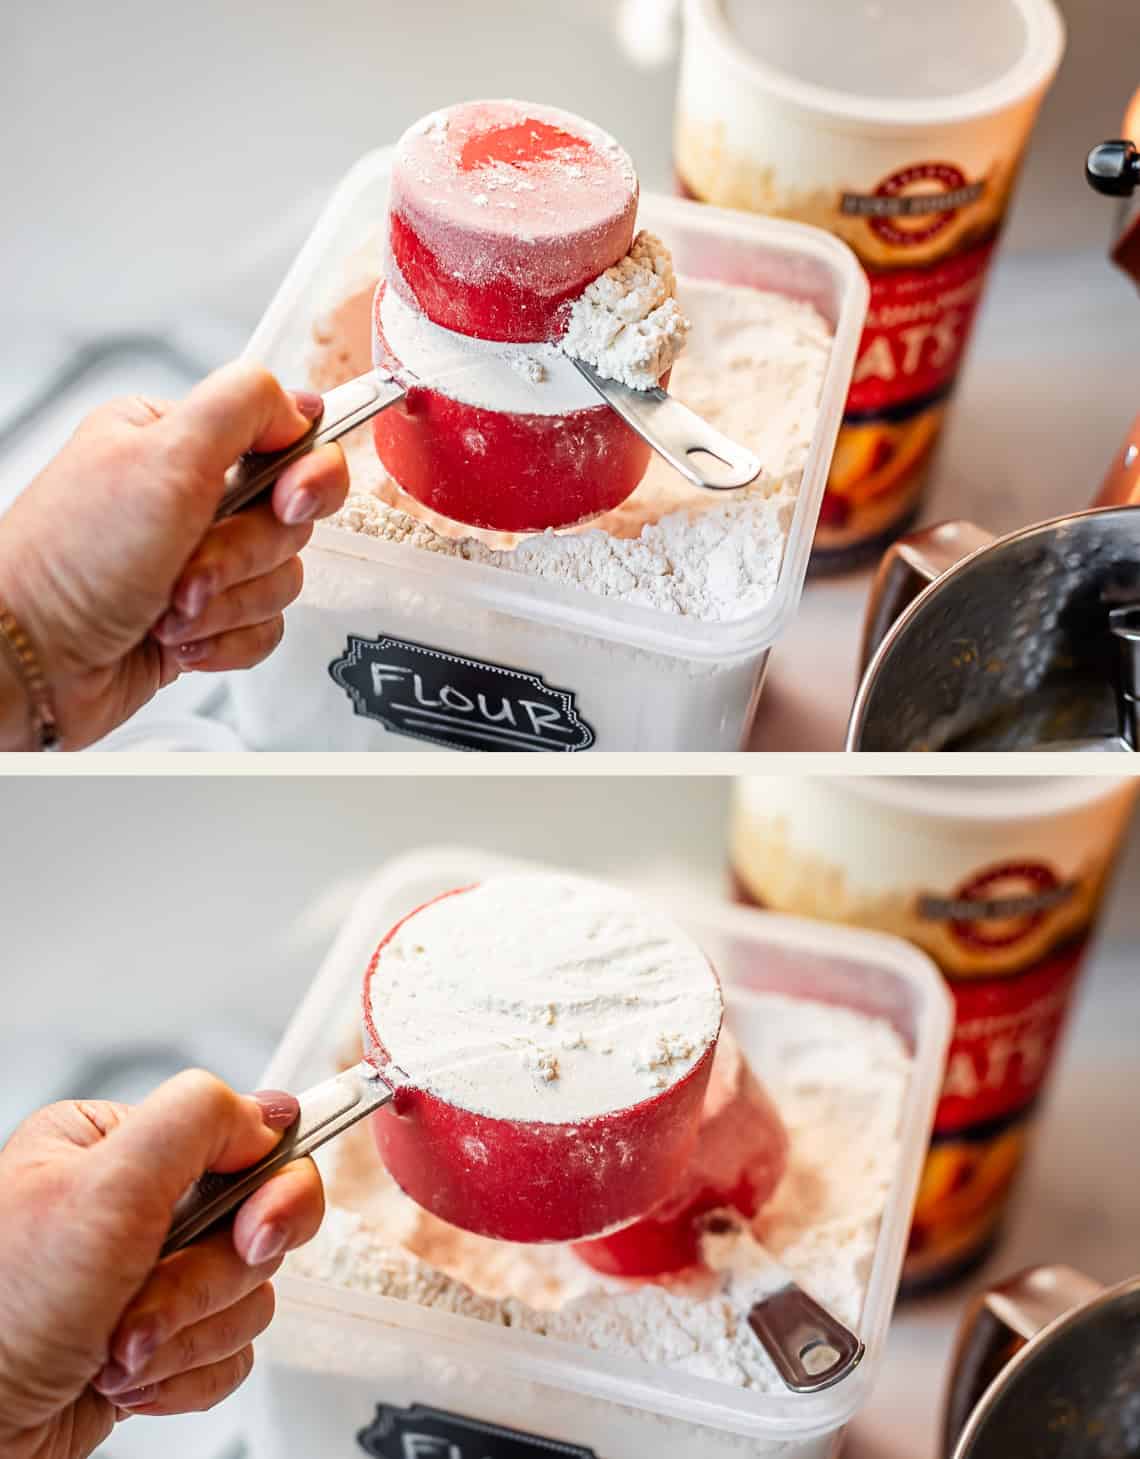
And then level it off. This step is SUPER important to make sure you don’t pack in too much flour.
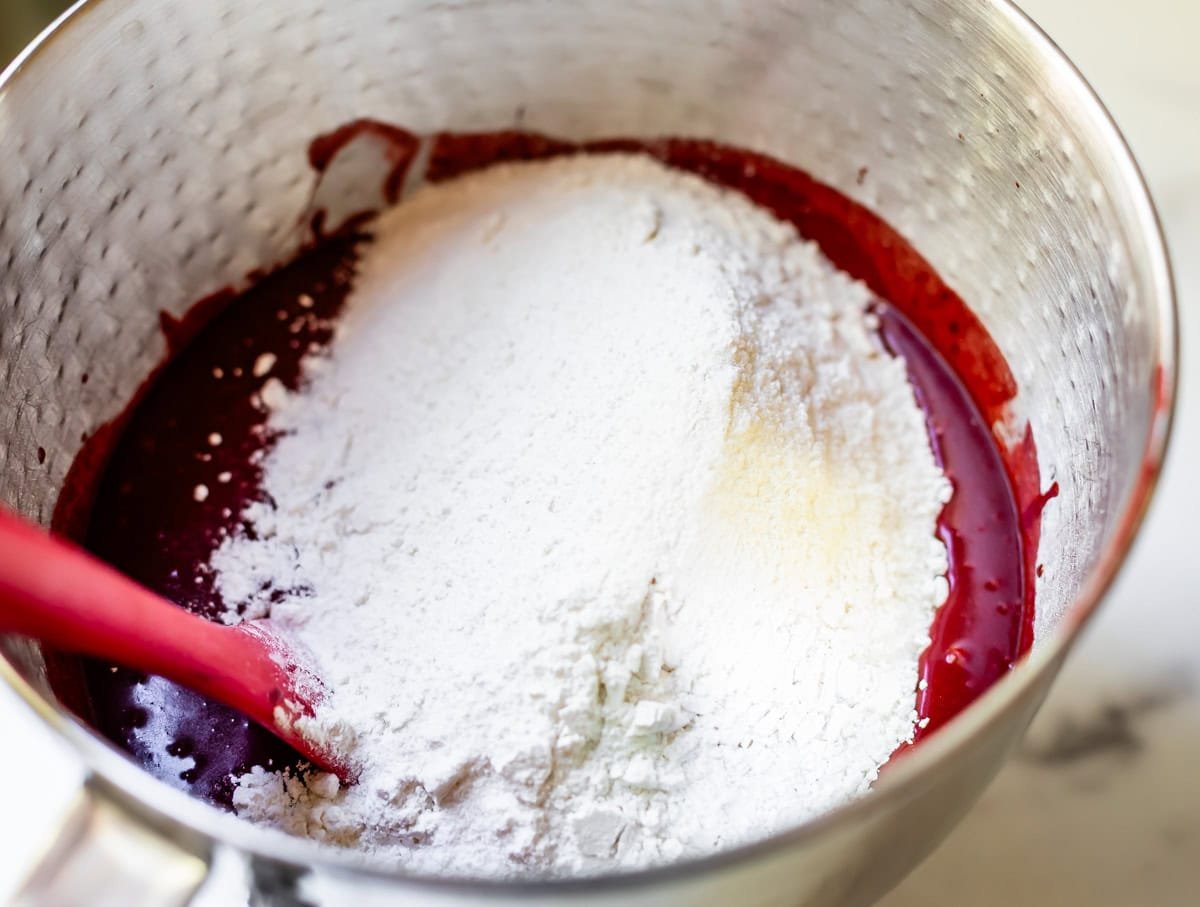
Add the rest of the dry ingredients, including the granulated sugar. Be sure to sift the flour! I’m sorry I didn’t get a picture of that step! Here is the final batter:
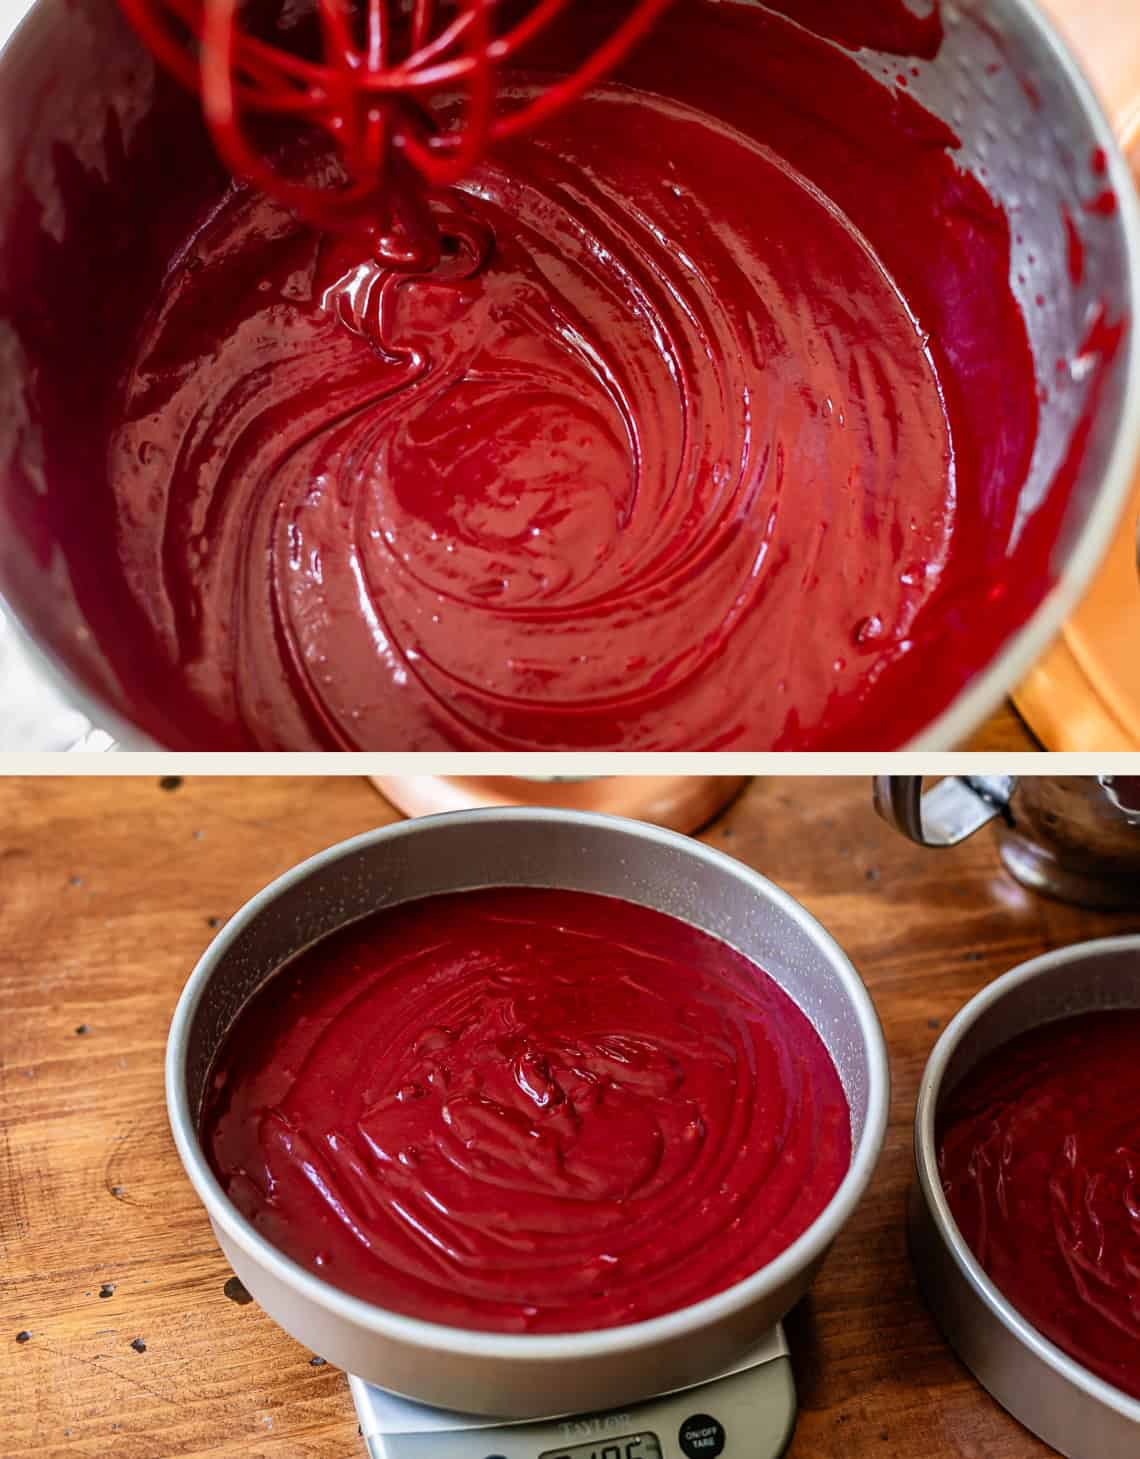
Add your batter to a cake pan, and try to make them even. I always use a scale for this step, but you can just eyeball it no prob.
Here is the final cake! You can tell it’s done when a toothpick comes out clean.
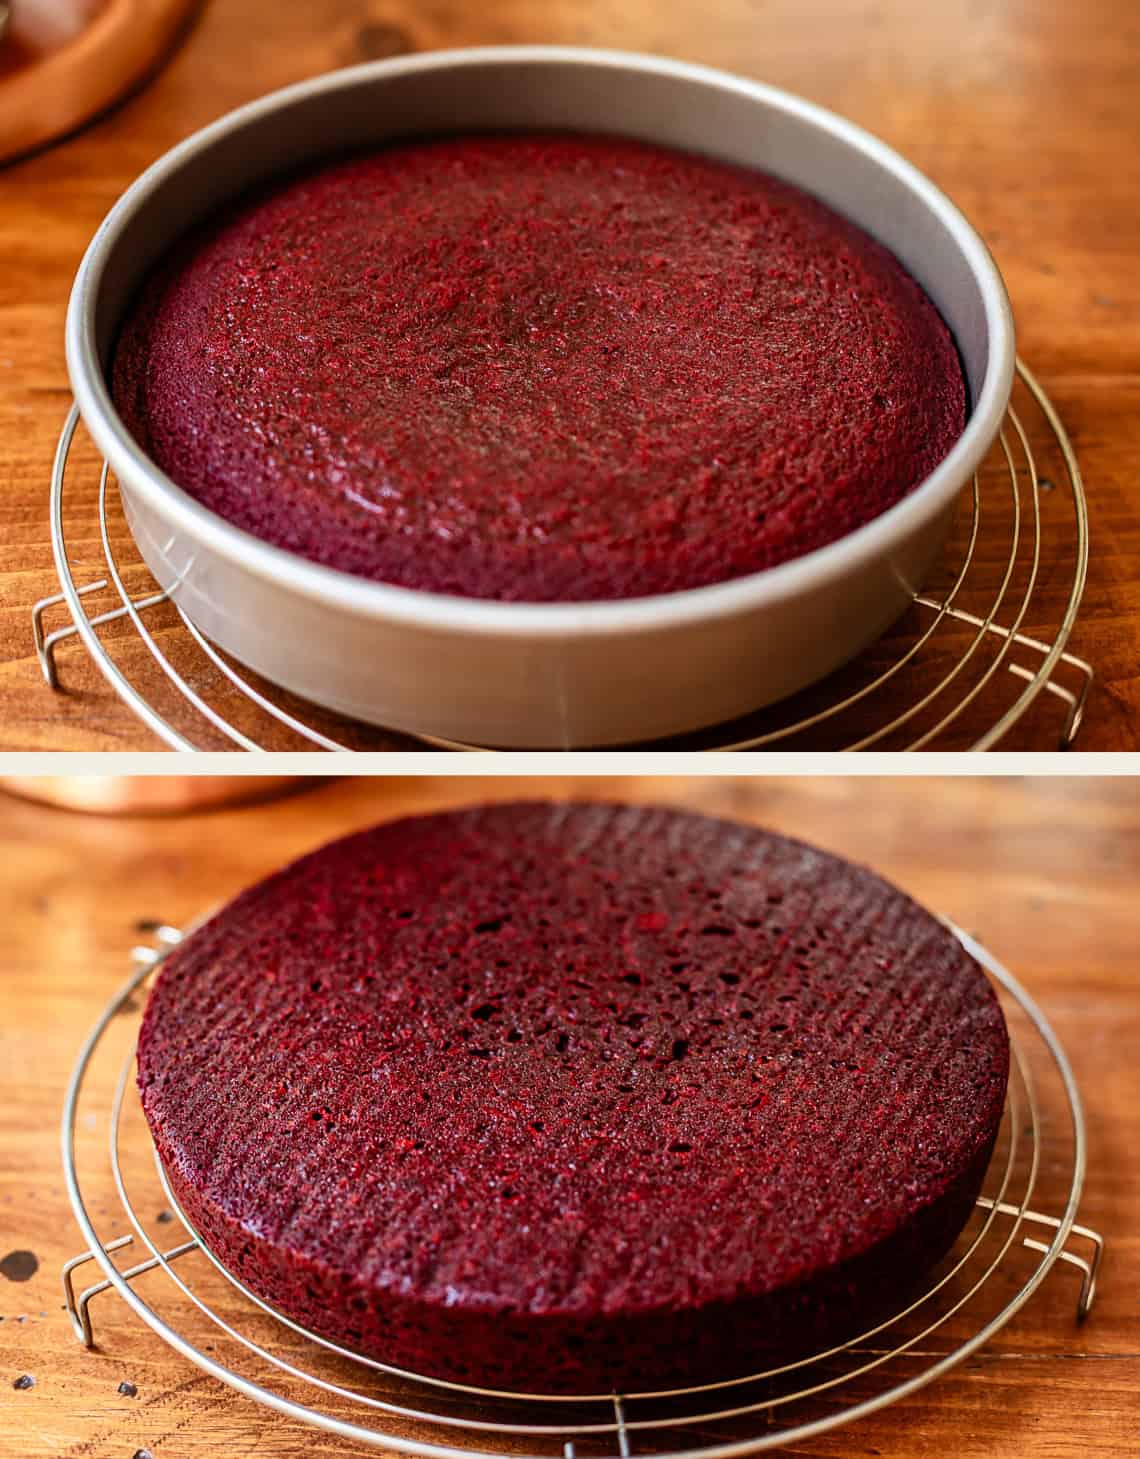
Turn ot onto a cooling rack and let cool completely. Then place one cake on a cake stand and top with Whipped Cream Cheese Frosting…
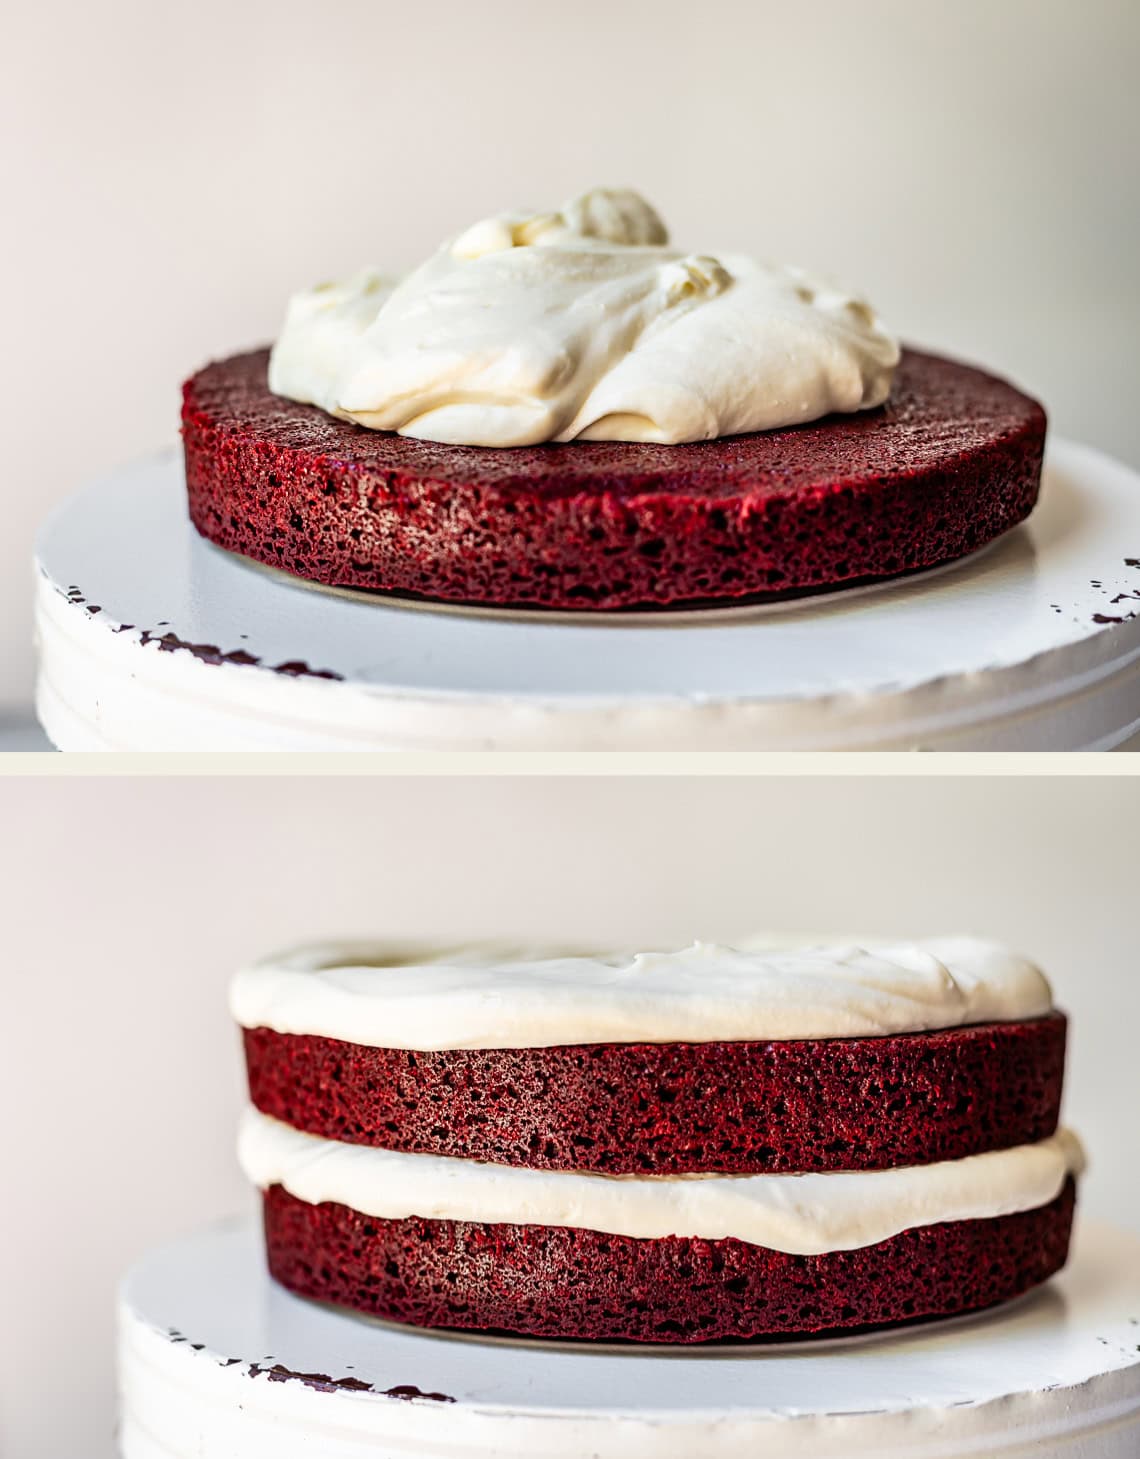
Then top with the other cake and finish adding the frosting.
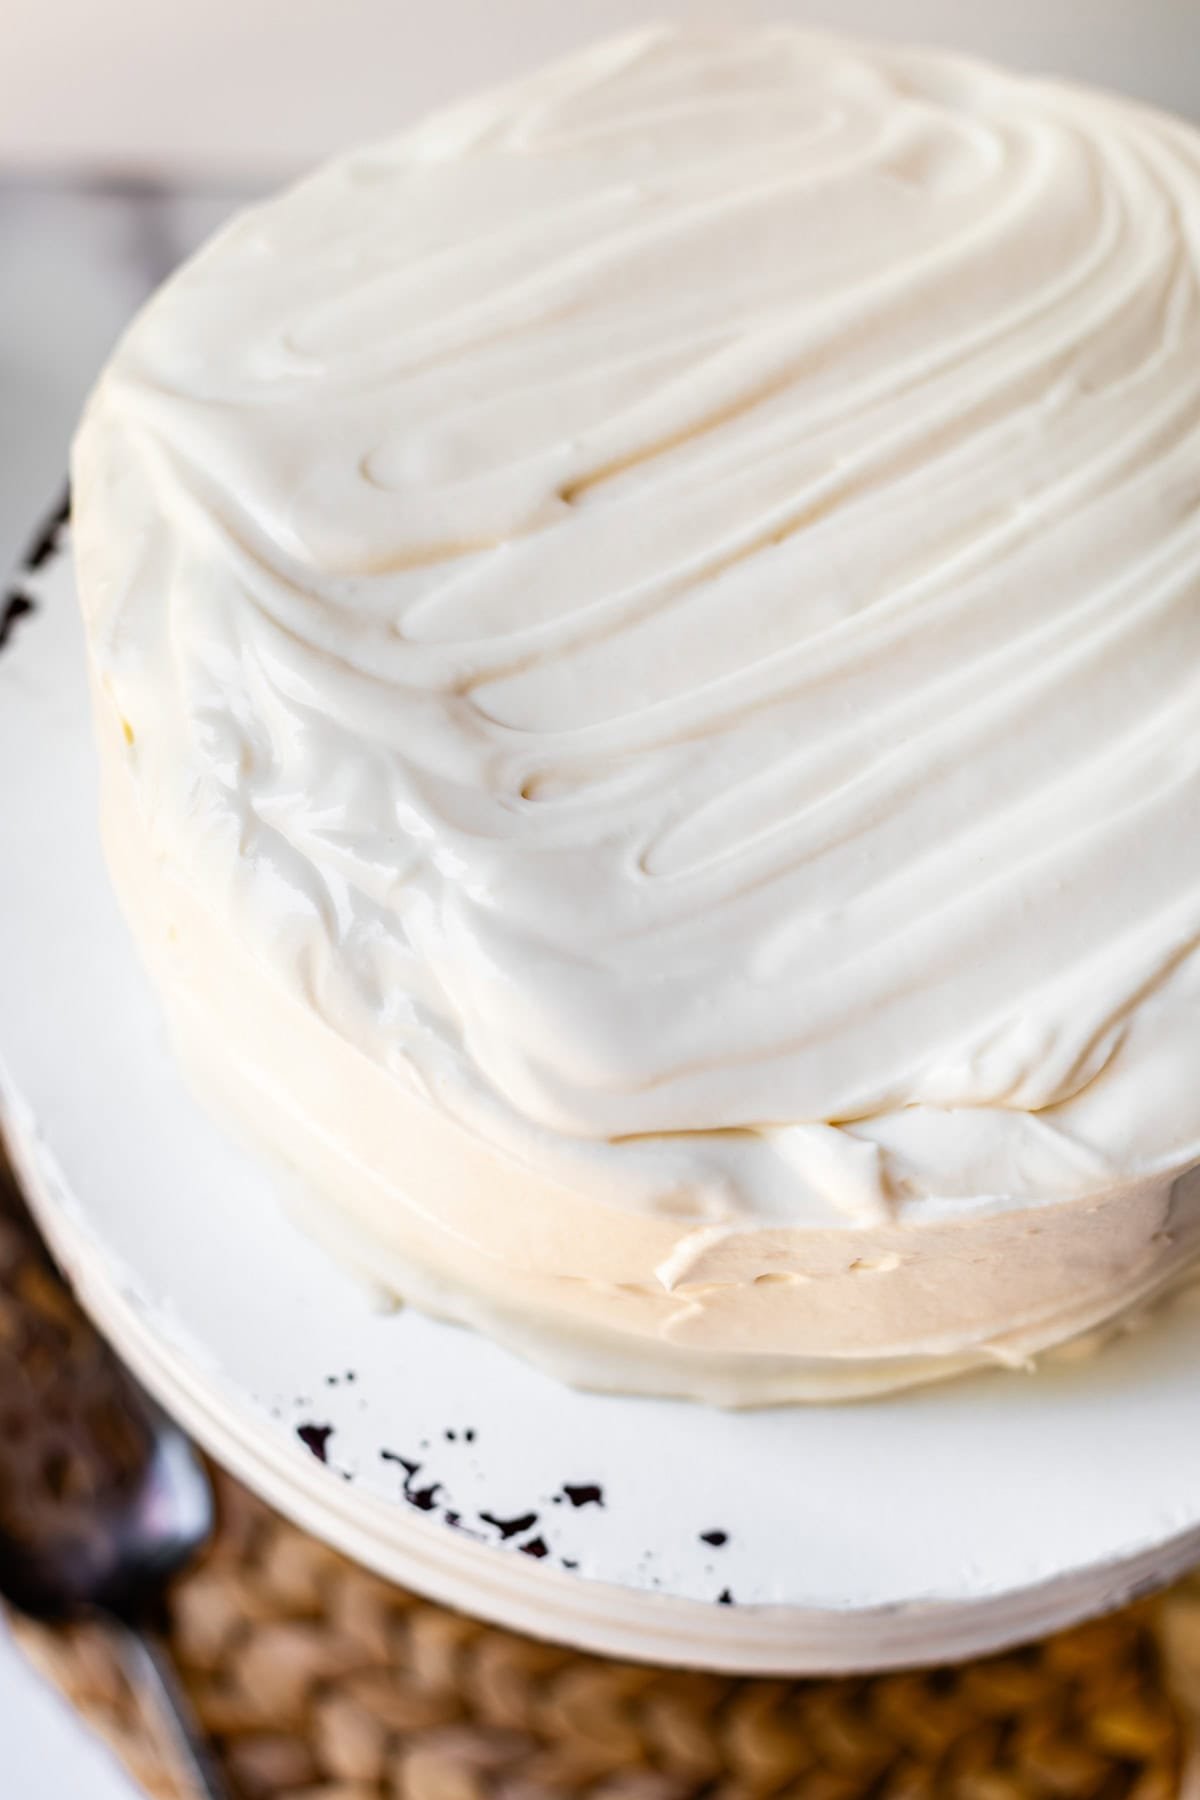
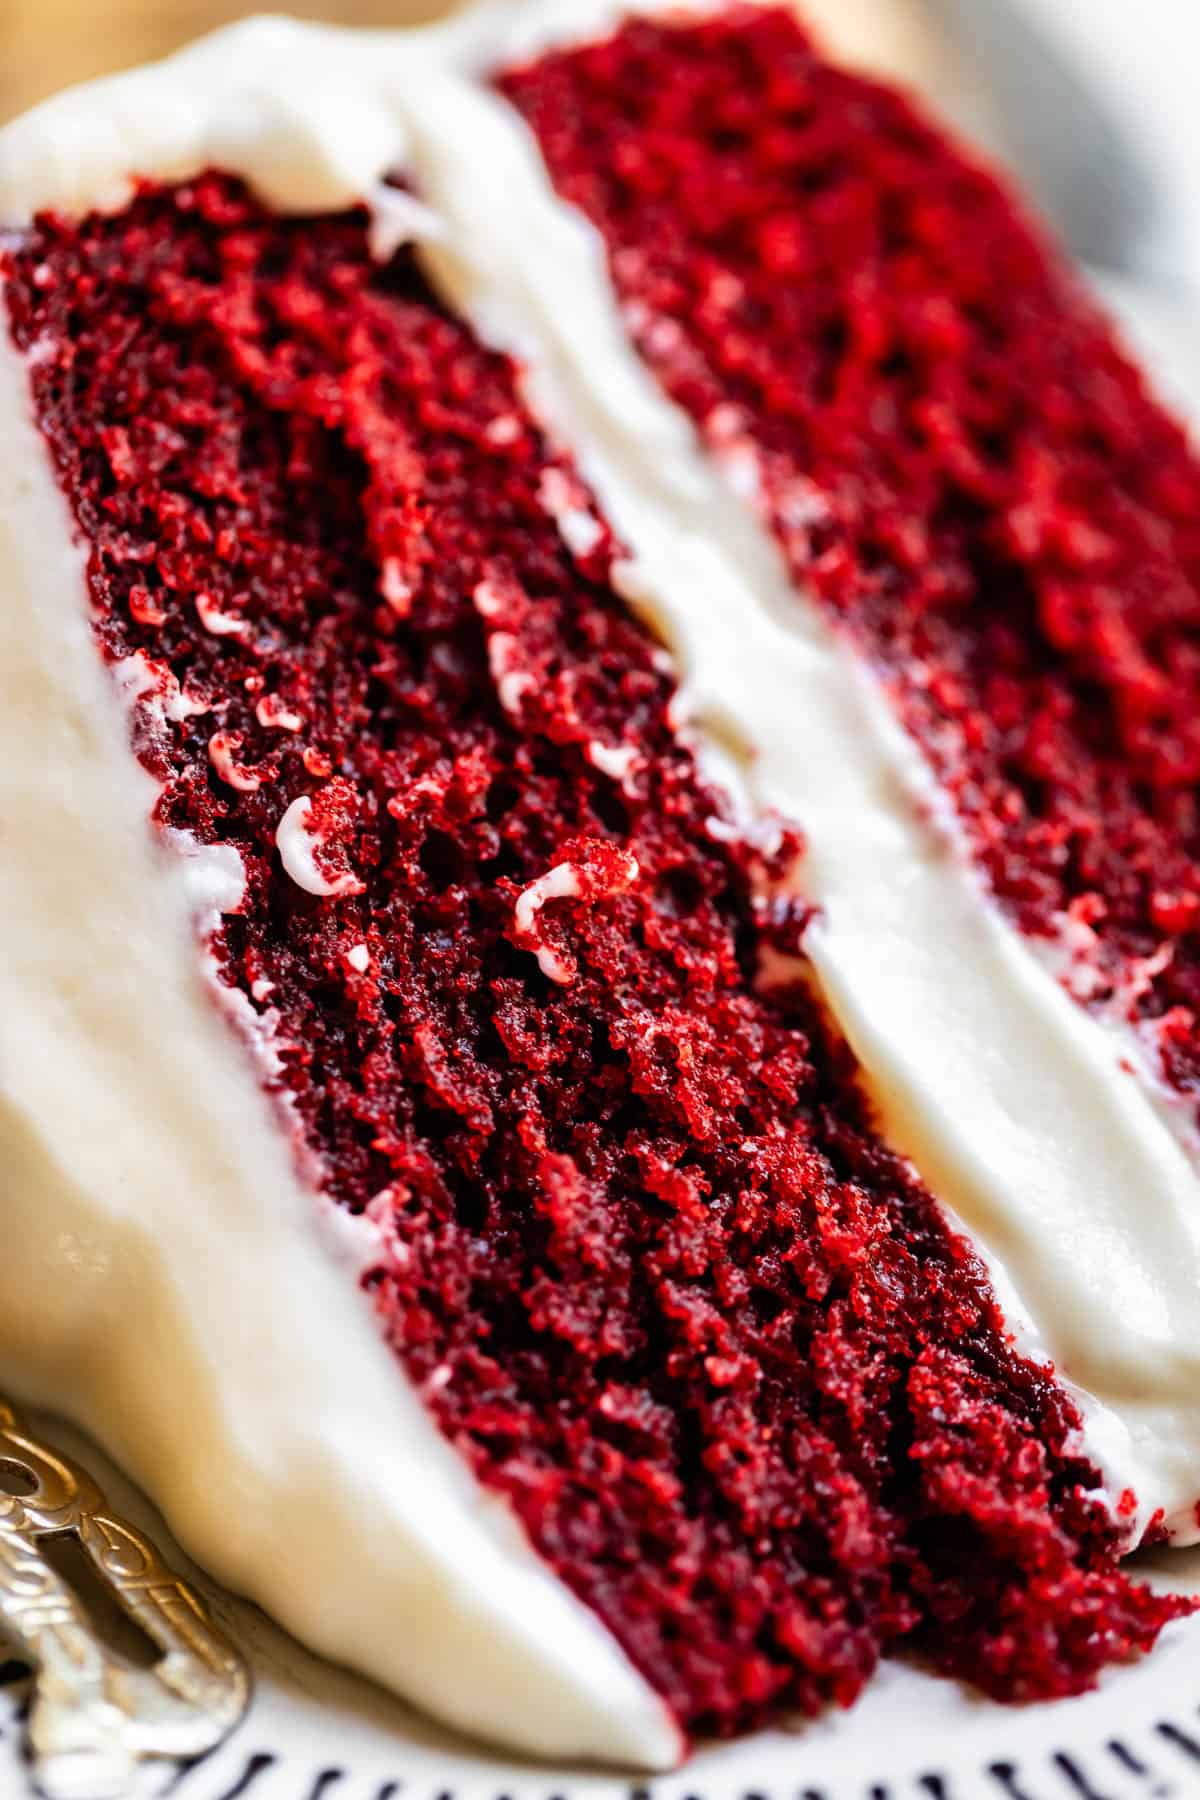
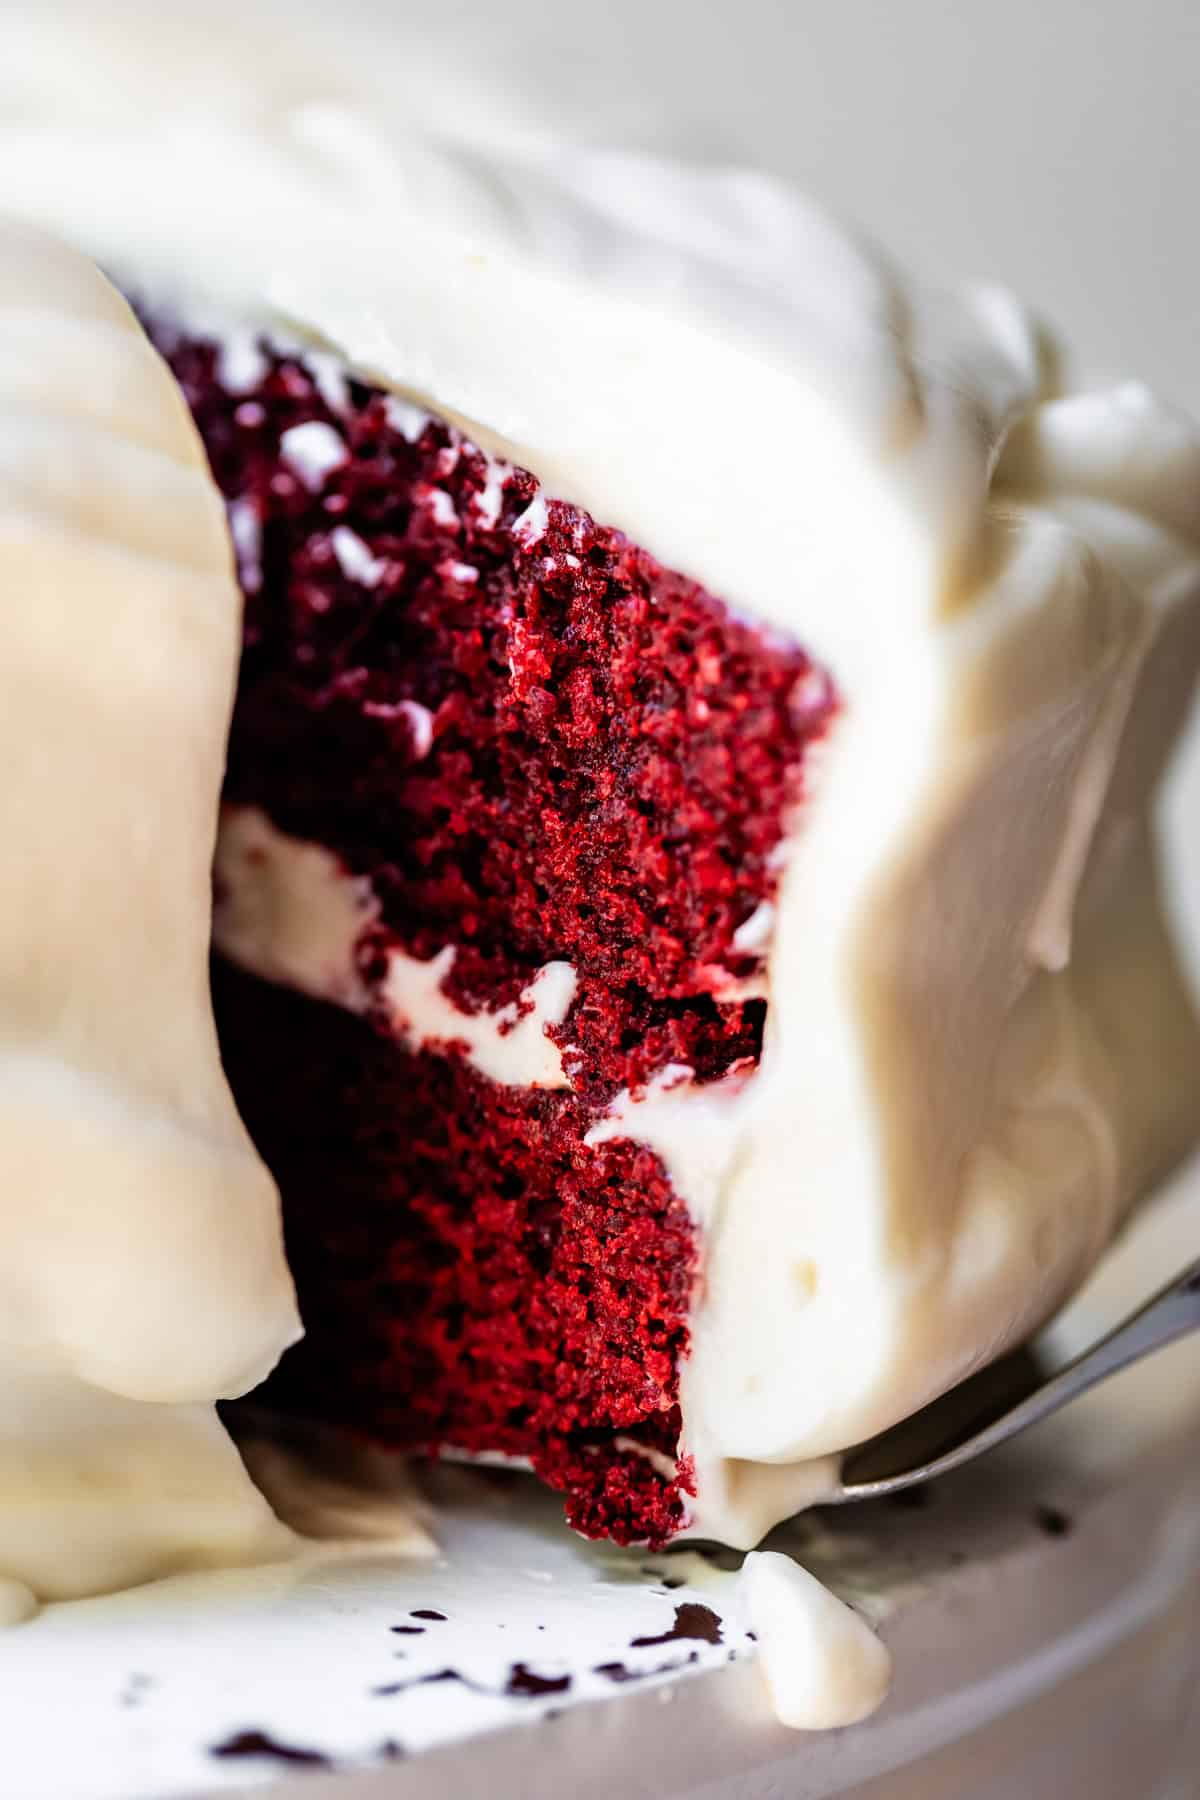
Then DEVOUR. Isn’t it so pretty? This cake needs to chill in the fridge because of the frosting, make sure it’s covered well!!
Red velvet cake tips
- You MUST use parchment paper and grease the cake pans. This is a m-o-i-s-t cake. It is tender, lovely, decadent, soft cake. It’s everything my cake dreams are made of, but it’s not coming out of that pan in one piece unless you do the work to make it happen. Skip this step at your own peril.
- Don’t expect a truly red cake unless you use artificial red food dye. In my tests, the science experiment of mixing cocoa and buttermilk and vinegar didn’t really produce a noticeable red color. Thank goodness for food coloring! If you want to leave it out, you can, but your cake will be light brown. If you want to avoid artificial dye but still want a red cake, you can buy a natural food coloring. Expect a much more muted color!
How to store red velvet cake
If you’ve frosted your cake with cream cheese frosting, it should be stored in the fridge and will stay fresh for up to a week as long as it’s covered or stored in a cake server. If you used buttercream, you can store it covered at room temperature for up to 5 days.
Can I freeze red velvet cake?
Yes! You can freeze unbaked cake layers, a whole frosted cake, or individual frosted cake slices. Your cake, frosted or unfrosted, will stay fresh for 2-3 months.
- To freeze unbaked cake layers: after they cool completely, wrap them in a couple layers of plastic wrap, then put them each inside a 1 gallon ziplock bag and seal it tightly (or put both in one of these big 2 gallon ziplocks, I love these). Defrost at room temperature or in the refrigerator.
- To freeze a whole frosted cake: start by cleaning out your freezer 😂 (okay fine, your freezer is not a terrifying Tetris of who knows what??) Put the uncovered cake in the freezer for 2 hours to chill the cake and set the frosting. Remove it and wrap with 2 layers of plastic wrap, then a layer of tin foil. Defrost in the refrigerator (if you’ve used cream cheese frosting) or on the counter (if you’ve used buttercream).
- To freeze individual slices of frosted cake: line a sheet pan with parchment and set the cake slices out, lying on their sides. Put the pan in the freezer for an hour to chill the cake and set the frosting. Remove the pan and wrap each slice in plastic wrap, then add them to a ziplock bag and seal it tightly. Defrost in the refrigerator (if you’ve used cream cheese frosting) or on the counter (if you’ve used buttercream).
Can I make this cake ahead of time?
Yes, but there are rules. Cake is at it’s best on day one, always. Try to serve the cake within 24 hours of making it. So the night before an event, for example, is totally fine (make sure you frost it to seal in the moisture)! If you need to make it more than 24 hours ahead, just follow the freezing instructions! Bake and cool the cake layers, then freeze them until you’re ready to assemble and frost your cake. Wrap the cooled layers individually in a couple layers of plastic wrap, then into ziplocks. Defrost them at room temperature or in the refrigerator.
FAQs about red velvet cake
While there is cocoa powder in red velvet cake, it’s not meant to be just a chocolate cake. It has a lighter chocolate profile than most chocolate cakes and has a slight vanilla flavor as well. There is a tang that is not usually in chocolate cake, thanks to the reaction of the cocoa powder with the vinegar and buttermilk, as well as the Cream Cheese Frosting. The combined flavors make red velvet cake unique!
Both red and velvet are in the name thanks to the effects of the cocoa powder in the recipe. The “red” comes from a chemical reaction between unprocessed cocoa powder mixed with the vinegar and buttermilk that turned the cake a reddish brown. That same chemical reaction helps break down flour proteins, which results in a much more tender and “velvety” cake.
More decadent cakes you’ll love
If you could eat cake, or watch dripping wet Colin Firth climb out of a lake, which would you choose? (It’ s a tough choice, but I’m going with the cake.)
- The Best Chocolate Cake I’ve Ever Had >> another dense, rich, brownie-like wonder, guaranteed to please the chocolate obsessed
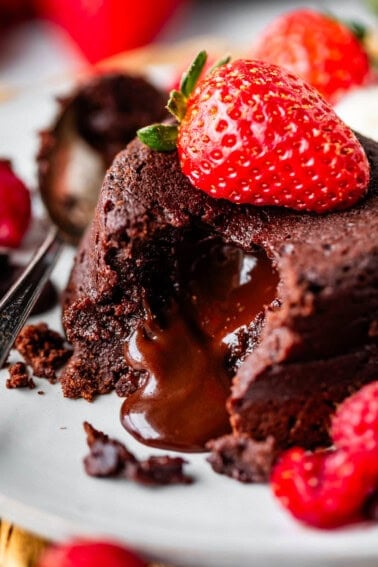
- Chocolate Lava Cake Recipe >> intensely chocolatey. with the creamiest, ooey-gooey center!
- Homemade White Cake from Scratch >> so much better than a mix
- Flourless Chocolate Cake >> true decadence
Facebook | Pinterest | Instagram
Red Velvet Cake
Equipment
- red gel food coloring
Ingredients
In a large bowl:
- 1 cup butter, melted
- 4 tablespoons* Special Dark cocoa powder*, SEE NOTE FOR RED COLOR
- 1/2 cup light brown sugar, packed
- 1/2 cup light olive oil, or any neutral vegetable oil
- 2 large eggs
- 1 large egg yolk
- 2/3 cup buttermilk
- 1/2 cup sour cream
- 2 teaspoons vanilla extract
- 2 teaspoons red gel food coloring
- 2 teaspoons white vinegar
Sift into a medium bowl:
- 2 and 1/4 cups all purpose flour
- 1 teaspoon baking soda
- 1 teaspoon baking powder
- 1 teaspoon kosher salt, use 3/4 teaspoon table salt, if that's all you have
- 1 and 1/2 cups granulated sugar
The frosting
- 1 large batch Whipped Cream Cheese Frosting
Instructions
- Preheat your oven to 325 degrees F.
- Line your cake pans. Trace the outline of two 9-inch cake pans** on parchment paper. Cut out the circles and place in the bottom of each cake pan. See photos. With the paper in the bottom of the pan, use nonstick spray to grease each cake pan very well, right on top of the parchment, in the corners, and all the way up the sides. No part of this cake batter should touch the pan without a layer of fat in between it.
- Wet ingredients: Add 1 cup butter (this is 2 sticks) to a large microwave-safe bowl. Add 1/4 cup special dark cocoa powder* and 1/2 cup packed brown sugar. Heat in 30-second increments, stirring in between, until the butter is melted. Whisk until completely smooth.
- (If you have a stand mixer, scrape the butter mixture into the metal bowl of your stand mixer. If not, continue add all the wet ingredients to the butter mixture.)
- To the butter mixture, add all the remaining wet ingredients: 1/2 cup neutral vegetable oil, 2 eggs, 1 egg yolk, 2/3 cup buttermilk, 1/2 cup sour cream, 2 teaspoons vanilla extract, 2 teaspoons red gel food coloring, and 2 teaspoons white vinegar. Use an electric mixer (or the stand mixer with the whisk attachment) to beat this all together thoroughly on medium speed until there are no lumps. Scrape the bottom and the sides of the bowl and mix again. It will be bright red!
- Dry ingredients: Spoon and level your flour. (Spoon it into the measuring cup , then level off the top; don't scoop it.) Sift 2 and 1/4 cups all purpose flour into a medium bowl. I like to shake the flour through a large strainer. Sift in 1 teaspoon baking soda and 1 teaspoon baking powder. Set the strainer aside. To the flour, add 1 teaspoon kosher salt and 1 and 1/2 cups granulated sugar. Whisk the flour and sugar together thoroughly.
- Combine wet and dry. Add the dry ingredients to the bright red wet ingredients and beat (with the whisk attachment, if you have one) until combined, scraping down the sides of the bowl. Do not over mix. You want to make sure that all the ingredients are mixed and there are very few (if any) lumps. Stop beating as soon as this happens; over-beaten cake batter makes for a tough chewy cake.
- Pour the batter evenly into the 2 parchment-lined and greased cake pans. I like to use a scale to make sure each cake is even.
- Bake at 325 degrees F for about 27-30 minutes total, BUT, stop to rotate the cakes about 20 minutes into the bake time. Read on:
- Rotate the cakes: When you can see that the tops of each cake have started to solidify (meaning they are not completely liquid all the way across the top), open the oven to rotate the cakes. If they are side by side on the same rack, swap their places. If one is on top and one on a bottom rack, switch their places. Don't move the cakes until you are certain that shifting them around will not cause them to collapse in on themselves.
- After rotating, continue baking for another 7-10 minutes. The total bake time is about 27-30 minutes.
- Check for doneness: You will know the cake is done when a toothpick inserted in the center comes out with no wet batter on it. When tapped gently, the top of the cake will spring back immediately, instead of sinking in.
- Set the cake pans on a cooling rack for about 10-15 minutes.
- Release from the pans. Run a butter knife around the edges of the pans and carefully turn the cakes out onto your hand, then settle them onto the cooling rack. Let them cool completely.
- Frost. When the cake is completely cool, lay one cake on a cake stand or flat plate. Top with about 1 cup of Whipped Cream Cheese Frosting. (The frosting recipe as written covers all of a 2-layer cake, but if you like a lot of frosting, make the version in the notes that says "Scaled up".) Top with the second cake, then frost the top and sides with the rest.
- Storage: This cake is fine to leave out at room temperature, but the Whipped Cream Cheese Frosting needs to be refrigerated. Make sure it's covered well so it doesn't dry out! See notes about make ahead and freezer options.
Notes
How to freeze:
You can make this cake 2-3 months in advance. amazing right??-
- To freeze unbaked cake layers: after they cool completely, wrap them in a couple layers of plastic wrap, then put them each inside a 1 gallon ziplock bag and seal it tightly (or put both in one of these big 2 gallon ziplocks, I love these). Defrost at room temperature or in the refrigerator.
-
- To freeze a whole frosted cake: Put the uncovered cake in the freezer for 2 hours to chill the cake and set the frosting. Remove it and wrap with 2 layers of plastic wrap, then a layer of tin foil. Defrost in the refrigerator overnight. (if you are doing the whole cake and it’s not in a sealed container or ziplock, I would only freeze for about 1 week.)
-
- To freeze individual slices of frosted cake: line a sheet pan with parchment and set the cake slices out, lying on their sides. Put the pan in the freezer for an hour to chill the cake and set the frosting. Remove the pan and wrap each slice in plastic wrap, then add them to a ziplock bag and seal it tightly. Defrost in the refrigerator (if you’ve used cream cheese frosting) or on the counter (if you’ve used buttercream).


I’m a huge fan of your cakes but I am disappointed that in your recipe, you called for 1/4 cup of cocoa powder against 2 teaspoons of red food coloring as that ratio turns the cake batter a purplish-brown. I see where it’s noted at the bottom to adjust but the picture vs the reality of the recipe per this ratio is misleading.
Hi Dee! So sorry you were disappointed! And I’m sorry you didn’t see the note. It just comes down to personal preference. You can leave the cocoa out entirely (replace the amount with flour) if you want a really bright red cake. I always choose flavor over appearance, and I enjoy the cocoa flavor so much in this cake. That’s why I included the notes about this in the recipe! I talked about this extensively in the post as well. Have you baked the cake? How did it taste? I hope you enjoyed it!
Happy 14th anniversary to the website! I’m looking forward to trying the Red Velvet cake recipe. I’m like you; I’ve never been impressed with Red Velvet cake. Based on all the recipes I’ve made of yours, it will be DELICIOUS! There honestly hasn’t been a recipe of yours that I’ve tried that I didn’t like. Congratulations on 14 years!
Collette, thank you so much!! I appreciate all your support over the years! So happy to hear you’ve had such success with all my recipes 💕💕 Here’s to another 14 years! Oh and yes, PLEASE try the Red Velvet, it’s a gamechanger!