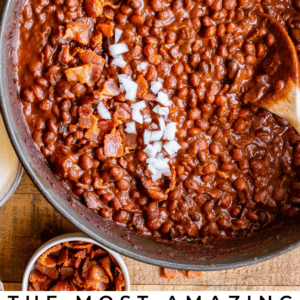


These Santa Maria style Pinquito Beans are the perfect summer barbecue side dish! Originally created in Santa Maria, California to be served alongside Grilled Tri Tip, these beans are smokey and sweet with the perfect blend of spices. Eat them with tri tip or serve alongside whatever else you are barbecuing this summer! Originally published July 7, 2020.

Table of Contents
- What are Pinquito Beans?
- Our Favorite Pinquito Beans with Tri Tip
- Santa Maria Beans ingredients
- Pinquito Beans Recipe variations and substitutions
- How to Make Santa Maria Pinquito Beans
- How to serve Santa Maria Beans
- How to store Pinquito Beans (Santa Maria Style)
- Pinquito Beans Santa Maria FAQs
- Santa Maria Pinquito Beans Recipe Recipe
I saw a man at Target the other day, meandering through the junior girls section with his two pre-teen daughters. He noticed the lackluster looks on their faces as they checked out the clothes and he said, “I can always take y’all back to Walmart.” I snorted and told him that that is a pretty serious threat, and we laughed.

But really, though, I feel for those girls! Target is slim pickins these days. I don’t know if it’s because of supply chains being impacted by Covid or because Target is the only place people are shopping these days (it’s the only place I go besides the grocery store!), but stock is low for whatever reason. Anybody else noticed? Come on Covid vaccine, we’re rooting for you!

Although I think I’m the reason Covid is still spreading. On that same trip to Target I felt a sneeze coming, so what did I do? Whipped off my mask and sneezed into my elbow. Doh!! You guys, I’m the worst! I apologized to the empty aisle around me but I don’t think anyone heard.
How was everyone’s Fourth of July?? We headed up to Montana to visit Eric’s parents and had so much fun. There is just something about Montana in the summer that is very nostalgic, even though I didn’t grow up there. It’s so beautiful. And it was definitely nice to get out of the house!
What are Pinquito Beans?
And now it’s time to talk BEANS. Who else here is a bean fanatic? These Tejano Pinto Beans and classic Red Beans and Rice are two very popular recipes on my site, so I know I’m not the only one who loves a slow cooked bean dish.

Have you heard of Pinquito beans? They are small pink beans that grow on the coast in central California. They are a cross between a pink bean and a small white bean. I have yet to learn of another location where they are grown and harvested. They are hearty little beans with a meaty flavor. They keep their shape when you cook them, which results in this amazing texture for your final bean dish. They are soft and tender but not mushy. They are nutty and earthy and oh so creamy!

I was perusing the comments on one of the sites that sells these beans (more on that below) and stumbled on this review for pinquito beans: “These are my favorite “eatin’ beans” – beans that I just cook up in a pot with a little bit of onion/garlic/pig/chicken broth. I love the just-right texture and oh, that pot liquor [pronounced POT LICKAH]. These don’t need much to be delicious.” Hear, hear!
Where to find pinquito beans
Sadly pinquito beans are kind of tough to find outside of California, or even in California! I live in Sacramento and couldn’t find them at my store. You have two options: you can buy them online from California bean companies like Susie Q’s, Rancho Gordo, or Lompoc, (I bought them in bulk from Susie Q), or you can substitute a small white bean like a navy bean.
It won’t be quite the same because pinquito beans have their own very unique flavor that you will be missing out on, but you will still get a really wonderful bean dish at the end of the day. Don’t use pinto beans or kidney beans. Although they are related to pinquito beans, they are just not the right kind of bean for this dish; a nice small white bean will get you closer to the flavor and texture of pinquito beans.
Our Favorite Pinquito Beans with Tri Tip
Pinquito beans are traditionally served alongside grilled California Tri Tip, another local specialty here in California. I grew up eating Tri Tip for Christmas dinner every year. It was not Christmas if there was no Tri Tip! It wasn’t until I was an adult and left California that I realized not everyone knew what it was.

We always ate tri tip with traditional holiday food: mashed potatoes, dinner rolls, Seafoam salad, and maybe a vegetable or two if we were feeling healthy. But really it was all about the tri tip.
After posting my recipe for How to Cook Tri Tip (which is now one of the top recipes on my site), I started to hear more about a dish called Santa Maria Pinquito Beans. I’d never heard of it but discovered that it is the traditional side dish served alongside tri tip in Santa Maria, where the tri tip craze got started.

So I got to work. Tri tip will forever and always be my favorite when it comes to barbecue, so how could I miss out on its long time sidekick??
Santa Maria Beans ingredients
Here’s a quick shopping list to help you gather your ingredients. See the recipe card below for the full ingredients and instructions!
- Dry pinquito beans (1 pound)
- Ham hock
- Bacon (1 pound)
- 2 fresh Anaheim chiles (or a 7 oz can of fire roasted green chiles)
- White onion
- Garlic
- Ancho chile powder
- Brown sugar
- Dry mustard
- Paprika
- Tomato sauce
- Worcestershire sauce
- Sour cream (garnish)
Pinquito Beans Recipe variations and substitutions
Your biggest question is probably, “What can I use instead of pinquito beans??”
The short answer is, you should just buy pinquito beans online from California bean companies like Susie Q’s, Rancho Gordo, or Lompoc.
You can also substitute a small white bean, like a navy bean, but it won’t be quite the same because pinquito beans have their own very unique flavor that you will be missing out on.
Don’t use pinto beans or kidney beans. Although they are related to pinquito beans, they are just not the right kind of bean for this dish; a nice small white bean will get you closer to the flavor and texture of pinquito beans.
If you don’t want to roast and peel your own Anaheim chiles, you can replace them with a 7 ounce can of green chiles; buy the fire roasted kind if you can find them. Drain the chiles and add it at the same point in the recipe as the fresh ones.
How to Make Santa Maria Pinquito Beans
Boy am I glad I figured out a recipe guys. These beans are GOOOOOOD. If you are a fan of slow cooked beans, you have got to try these pinquitos!

The recipe is a little untraditional because it’s made in two pans. Normally when I make beans I throw everything into a pot and simmer until it’s tasty. But quite a few of the recipes I found had you cook the pinquito beans in water separately, then add it to a sauce made in a different pan. I was dubious at first, but I tried it both ways, and the two pot version is indeed more flavorful and hearty, so I’m sticking with it.
First throw the beans and water into a big pot with a ham hock. I love the smokey flavor that ham hocks add to the final dish! Plus there is a little bit of smokey ham left on those hock usually, that I like to chop up and add to the beans when they’re all done cooking.
Cook the beans at a low simmer for a couple hours, until they are nice and tender. They won’t be falling apart like pinto beans, they will remain as they are when you started cooking: tiny cute pink beans. Don’t add salt; salt inhibits a bean’s ability to absorb water and will just slow down your cooking time.

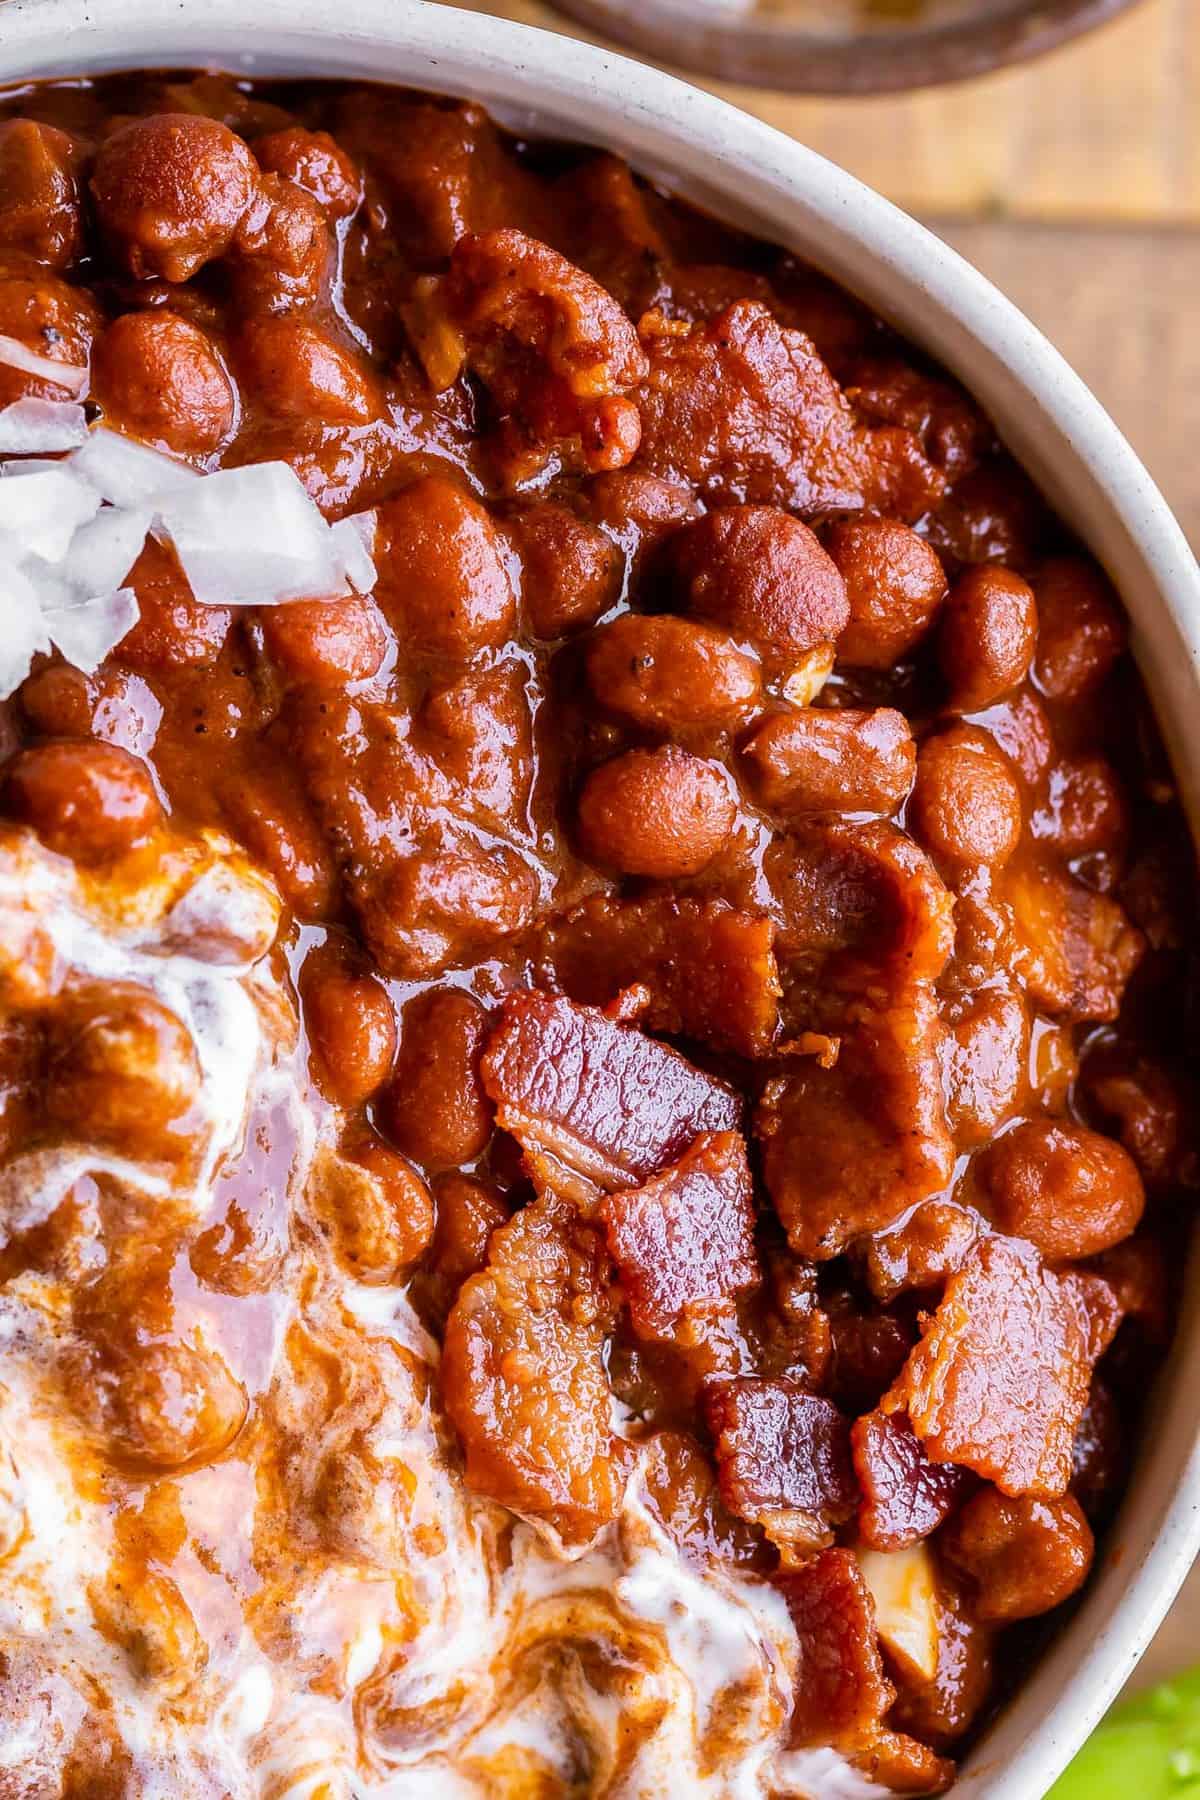
Meanwhile, put together your bean sauce. Start out with a full pound of bacon. (See, I told you this was good stuff.) Crisp up the bacon, then add in a white onion and some roasted Anaheim chiles.


I love the flavor that fresh roasted chiles adds to the final dish, but I get that roasting peppers is annoying, and some of you might not even have Anaheims at your store. You can use a can of diced green chiles if you must. See notes for details.

Next add in some tomato sauce and spices: paprika, mustard, and ancho chile powder are the most important spices in traditional Santa Maria Beans. Oh, and garlic. Don’t forget the garlic!! Simmer the sauce over low heat for a few minutes and then add in the beans. You can add as much of the “bean juice” (pot lickah!) that you want. I added most of mine in but use your best judgment to get the consistency you want.

Then serve these beans alongside some Grilled Tri Tip! It’s heaven! In Santa Maria, the full traditional meal includes Grilled Tri Tip, Santa Maria beans, mild tomato salsa, garlic bread, and a cold relish tray. YUM.

And there you have it! Santa Maria style pinquito beans made in your very own home. It’s taken the last 70 years for the tri tip phenomenon to slowly make it’s way across the country, let’s spread the news about pinquito beans starting now! They are so delicious! Enjoy!
How to serve Santa Maria Beans
You guys know I’m going to recommend the tri tip! These two are just a match made in heaven (and by heaven, I mean the Santa Maria valley, where they clearly know how to cook).
Honestly though, anytime you’re grilling (chicken! ribs! brisket!) these beans make an amazing side.
You could also serve the beans with a big pot of rice, or Spanish cauliflower rice.
How to store Pinquito Beans (Santa Maria Style)
Santa Maria beans can be stored in the fridge for 3-4 days and reheated in the microwave or a pot on the stovetop whenever you want them.
Can Santa Maria Pinquito Beans be frozen?
Yep! If you find the whole batch is too much for you at one time, you can freeze the finished beans for up to six months. Perfect for pulling out any time the pinquito cravings hit!
Pinquito Beans Santa Maria FAQs
Pinquito beans will seem familiar if you like pinto beans. They’re a smaller, pinker cousin with a pretty similar flavor. They keep their shape when you cook them (unlike pinto beans), which results in this amazing texture for your final bean dish. They are soft and tender but not mushy; They are nutty and earthy and oh so creamy!
Santa Maria Pinquito beans are exclusively grown in California’s central coast, in the Santa Maria Valley. If you’ve never had them you are in for a treat!
More delicious beans and summer recipes you will love!
How to Cook Tri Tip (Grilled or Oven Roasted) << essential dish to serve with these Santa Maria Beans!
Traditional Tejano Pinto Beans (Slow Cooker) << this recipe is from my brother-in-law’s Tejana grandmother.
Red Beans and Rice << these are so creamy and good, and seriously even better than Popeye’s (and I love me some Popeye’s!)
Cowboy Pinto Bean Soup << this recipe also has bacon and tomatoes and chiles in it! Such a great combo!
Bacon Baked Beans << what can I say, bacon makes the world go round.
The Best Chili Recipe I’ve Ever Made << Beans in chili forever. Sorry Texas.
Caribbean Rice and Beans from Immaculate Bites
The Best Baked Beans from Oh Sweet Basil
Southern Pinto Beans from Grandbaby Cakes
Facebook | Pinterest | Instagram
Santa Maria Pinquito Beans Recipe
Ingredients
In a large pot
- 1 pound pinquito beans, dry
- 1 ham hock
- 10 cups water
In a 12-inch high sided skillet
- 1 pound bacon, chopped
- 2 Anaheim chiles*
- 1 large white onion, chopped
- 4-5 cloves garlic, smashed and minced
- 1 & 1/2 teaspoons kosher salt
- 1/2 to 1 teaspoon ancho chile powder
- 1 teaspoon brown sugar
- 1 teaspoon dry mustard
- 1 teaspoon paprika
- 1 (15-oz) can tomato sauce
- 1 cup water
- 3 tablespoons Worcestershire sauce
- sour cream, to garnish
- white onion, chopped, to garnish
Instructions
- Cook the beans. Rinse the pinquito beans under water and pick out any stones or debris. Add the beans to a large stock pot along with the ham hock, and about 10 cups of water. The water should cover the beans by at least a couple inches, the water amount doesn’t have to be exact. Cover the beans and turn the heat to high. Bring to a rolling boil. Lower the heat to a simmer, usually this is about medium-low heat but every stove is different. There should be a slow bubble in the center of the pot. Simmer for about 2-3 hours. Check the water level and add more hot water as necessary to keep the water at least 1 inch above the beans. Make sure you bring it back to a simmer if you add water. The beans are done when they are tender but still firm. They will keep their shape but should not be chalky.
- Roast the Anaheim chiles. Place the 2 chiles on a foil-lined baking sheet. Turn the broiler up to high heat and move the oven rack up as high as it will go. Place the chiles directly under the flame and roast for about 7-10 minutes, checking the peppers every 1 minute. Don’t walk away! I can’t tell you how many times I’ve had something I’m broiling burst into flames because I forgot about it. Set a timer and stay nearby. After about 3-4 minutes, the skin of the peppers closest to the flame will turn black. Remove from the oven and use tongs to turn the peppers over. Broil the green sides of the peppers until they are black. Rotate again as necessary to make sure all sides of the peppers are roasted and black. Remove from the oven and immediately seal the peppers so they can steam: place them in a sealed ziplock bag, place them in a bowl with plastic wrap tightly over the top, or place them on a flat counter top and place a bowl directly over the top. Just make sure the steam can’t escape. Steam for 20 minutes. After 20 minutes, carefully peel off the waxy outer layer of skin. Discard the stem, seeds, and membrane. Use a knife to chop the green fleshy roasted chiles into half inch pieces and set aside.
- Make the sauce. Chop the raw bacon into bite size pieces. In a 12-inch high-sided skillet, add the bacon and cook over medium high heat for 8-10 minutes until quite crisp. Drain most of the grease from the pan, leaving about 1 tablespoon bacon grease behind in the pan. (Save the excess bacon grease for making pancakes!)
- Add the chopped white onion to the pan with the bacon. Saute over medium heat for about 5 minutes, then add in the roasted and chopped Anaheim peppers and 4-5 cloves of smashed and minced garlic (about 2 tablespoons).
- Add 1 and 1/2 teaspoons kosher salt, 1/2 or 1 teaspoon ancho chile powder, 1 teaspoon brown sugar, 1 teaspoon dry mustard, and 1 teaspoon paprika. Saute for another 2 minutes until the garlic is fragrant and the spices smell toasty.
- Add a 15 ounce can of tomato sauce, 1 cup water, and 3 tablespoons Worcestershire sauce. Bring to a boil over medium high heat, then lower to a simmer over about medium low heat, there should be some slow bubbles in the middle of the pan. Let simmer for about 30 minutes until slightly thickened. If your beans in the other pot aren’t tender yet, turn off the heat on the sauce while the pot of beans finishes up.
- When the beans in the other pot are nice and tender, drain the beans (but don’t you get rid of that bean juice! Hang onto it.) Take out the ham hock, chop up any meat that’s left on it and throw it into the sauce.
- Add all the beans to the sauce and turn the heat back on to medium. Add the water you saved from cooking the beans a little bit at a time until it is a consistency you like. I actually ended up adding all of my bean juice (or should I say pot lickah!!) but you really need to use your best judgment here. You don’t want to water down your beans.
- Let the beans simmer in the sauce for a few minutes before devouring! Garnish with sour cream and raw white onions if you want. But please, if you know what’s good for you, serve these beans with juicy Grilled Tri Tip!


I’m actually from Santa Maria and I’ve never seen them made this way.
Fantastic!!! I added more ancho chili powder and only a couple of cups of the bean water (pot likker). SO yummy!
Can I use canned pinquito’s with a little ham base? I can’t find the dry pinquito’s or dry pink beans where I live.
Hey Karen! I think that would work great! You wont need to cook them for as long, obviously! Tell me how it goes!
I want to cook these in a slow cooker. Will that work and suggestions for how long?
Hi John! We haven’t tried this in the slow cooker yet. But: if you want to cook the beans and ham hock in water in the slow cooker, it would work just fine. Cook it on low for about 6-8 hours or until the beans are nice and tender, then combine with the sauce made as described in the recipe, adding as much of the bean liquid as you want to get the consistency you like. If you try it, come let us know how it turns out!