

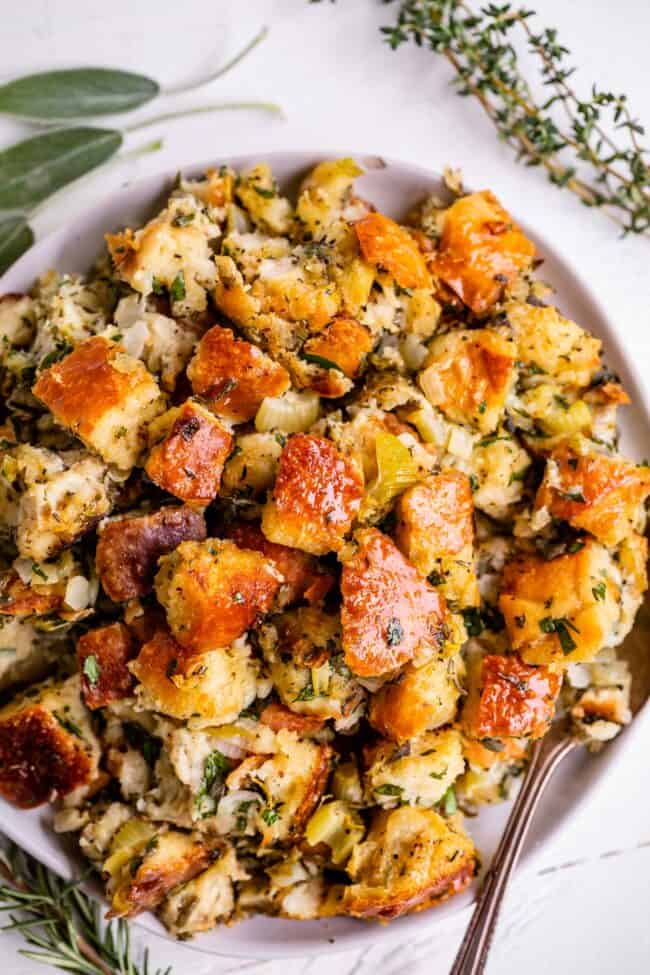
I love this traditional Thanksgiving Stuffing Recipe! It is easy, has the BEST buttery flavor, and the most irresistible crispy edges. Celery and onions are put together with all the herbs you love, sing it with me now: parsley, sage, rosemary, and thyme. Sometimes you just want it to taste exactly like grandma’s homemade masterpiece. This recipe is it! Originally published November 19, 2021.
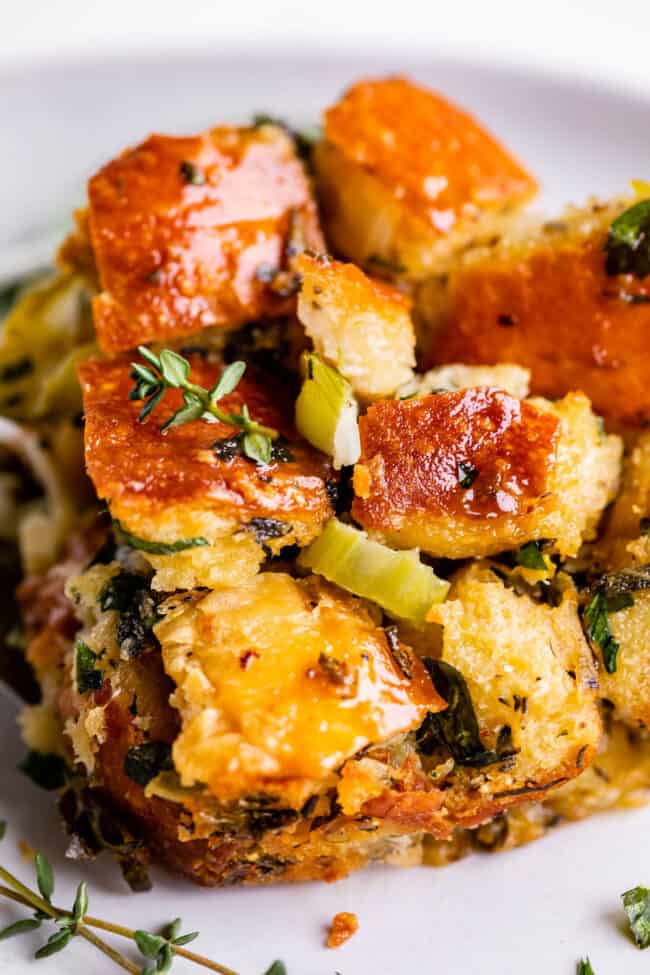
Table of Contents
- The Perfect Traditional Stuffing Recipe
- Traditional Stuffing Recipe Ingredients
- How to make homemade stuffing
- Toasty bread is not the same as stale bread
- Butter: the secret to a great stuffing
- Can you put this stuffing inside the turkey?
- Tips for making the Best Thanksgiving Stuffing
- Traditional Stuffing Recipe Variations
- You can make the Best Thanksgiving Stuffing ahead of time
- How to use Leftover Thanksgiving Stuffing
- More Thanksgiving side dishes you are going to love!
- Stuffing Recipe Thanksgiving Recipe
You guys! It’s almost the Wednesday before Thanksgiving! Am I the only one who gets excited about this??
I feel like we should have a special name for this day, kind of like Christmas Eve. Christmas is such a big deal that even the night before gets a title. (The Brits even have a name for the day after!) Well what about Thanksgiving, HMM??

I just googled what to call the day before Thanksgiving and found out that some people call it Blackout Wednesday. I thought at first it was a precursor to Black Friday shopping (which by the way, did you see that last year Old Navy was trying to rename it a “Big Friday Sale”? Psh. Stop trying to make fetch happen, Old Navy.)
Anyway, apparently Blackout Wednesday refers to people getting drunk and blacking out because of the holiday the next day. L-A-M-E. Can’t we do better than this?? Crazed college students should not get to dictate the festivities for WBT. (Wednesday before Thanksgiving, come on, keep up.)
I feel like Thanksgiving Eve is a little too predictable. Any ideas? What about Pie day? That’s the day everyone makes their pies, right? Oh wait March 14 is Pi Day. Shoot. (Although I do have one friend who throws a pie night party every WBT, because everyone is always too full on actual Thanksgiving to eat all the pie they really would like to have. Genius.)
I have another friend who has a party every Wednesday before Thanksgiving, where everyone brings appetizers because no one feels like doing any real cooking after all the Thanksgiving prep. (We always ordered pizza growing up!)
Maybe we should just call it Cram day, where we all try to eat enough to enlarge our stomachs in preparation for the Big T.
If we follow tradition in my family, we would call it Stay-Up-Until-1:30-AM-Finishing-All-The-Pies-Day. Thank you, mom, for all your lessons in procrastination. The tradition lives on!!
Well, enough of that. Whatever you call WBT, in my book it’s practically a holiday. What else do you call a marathon cooking day? The best kind of day!! (This is why I’m a food blogger I guess!)
The Perfect Traditional Stuffing Recipe
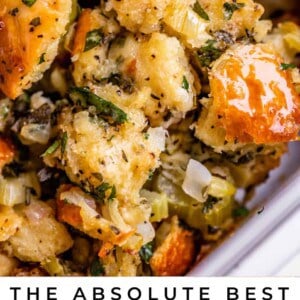
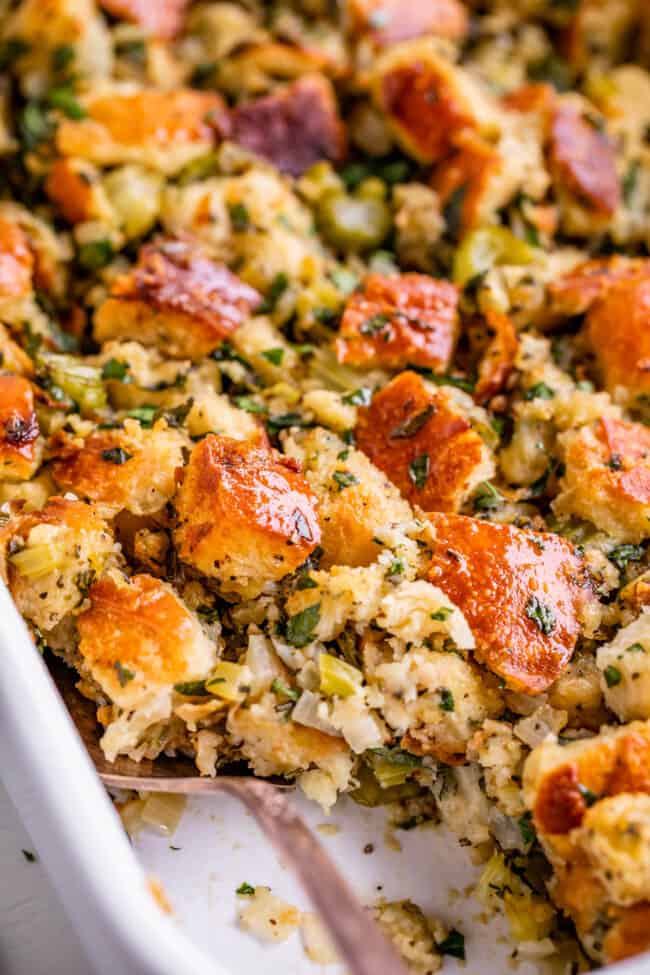
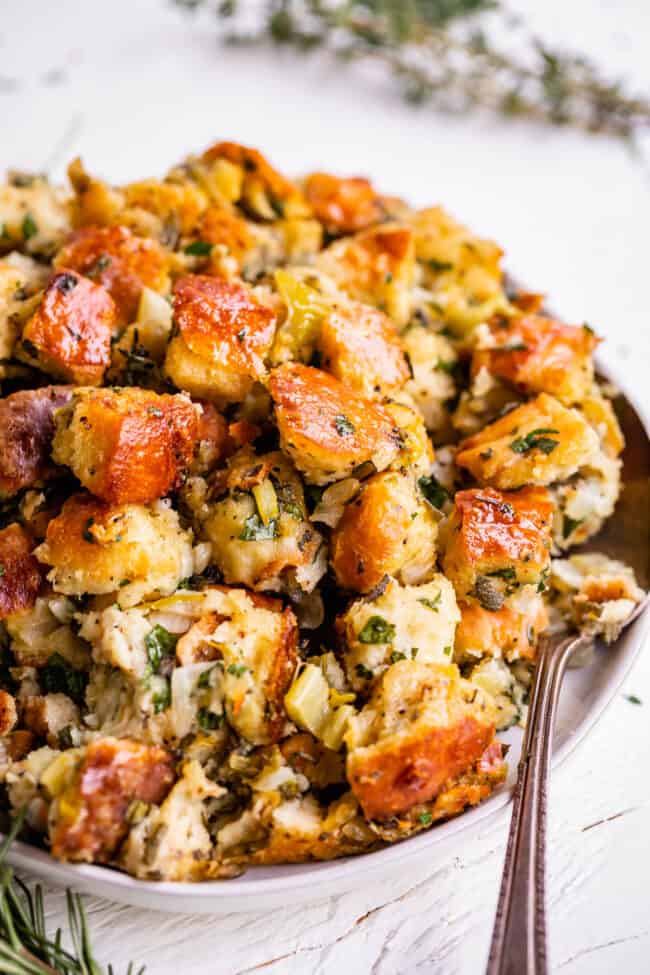
Today I have a stuffing recipe for you. BUT NOT JUST ANY STUFFING OH NO. I’ve been working on this recipe for over a year now and I’ve finally got it down. It is buttery. It is herby. It is soft and tender in the middle while being irresistibly crispy on those glorious edges. Once you start, you really can’t stop until it’s gone. As a former stuffing hater (just like Sweet Potato Casserole! What is it with me and all my childhood Thanksgiving menu hate!), I bring you the best of the best that surely will convert the masses.
This recipe is just like grandma’s. Please save your sausage, your cranberries, your cornbread, and your walnuts for a fancier day. This is hometown comfort food, just butter and herbs and onions and good homey bread. Let’s do this!!
Featured Comment
“I will never go back to box stuffing – this is even better than Mom used to make. I hid some from company for dinner the next night!”
– B.

Traditional Stuffing Recipe Ingredients
Here is everything you need! Amounts and instructions given in the recipe below!
- 1 loaf of bread (1 pound)
- butter
- onion
- celery
- fresh parsley
- fresh sage
- fresh rosemary
- fresh thyme leaves
- high quality chicken/turkey broth
- kosher salt
- black pepper
- eggs

Best Bread for Stuffing
The most important thing to remember is that whatever bread you choose, you WILL taste it in your stuffing. If you choose sourdough, your stuffing will be tart. If you choose a baguette with a super chewy intense crust, guess what, your stuffing is going to be chewy.
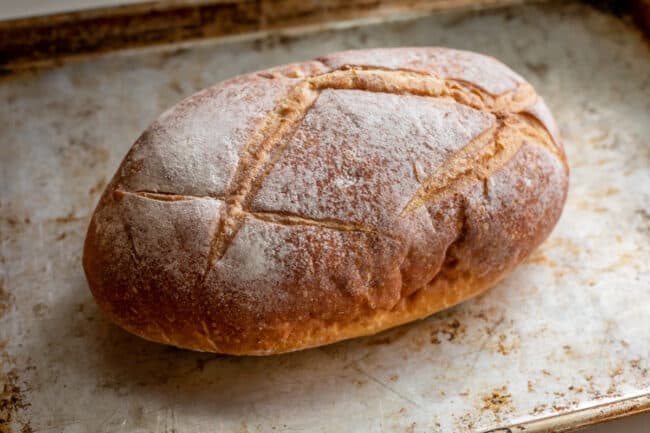
I have made this stuffing with ciabatta, French bread, and white bread. You can use sourdough, an Italian loaf, baguettes, or whatever you want! Sky is the limit here. I tend to prefer simple white bread, with a relatively soft crust (that is not too chewy) so that the stuffing just melts in your mouth. You can also try using two different kinds of bread in your stuffing for variety of texture!

How to make homemade stuffing
Here is the step by step process so you know exactly how to make the best stuffing ever! The first step is choosing your bread. This is KIND OF A BIG DEAL.
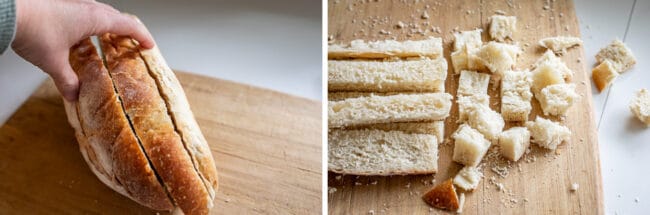
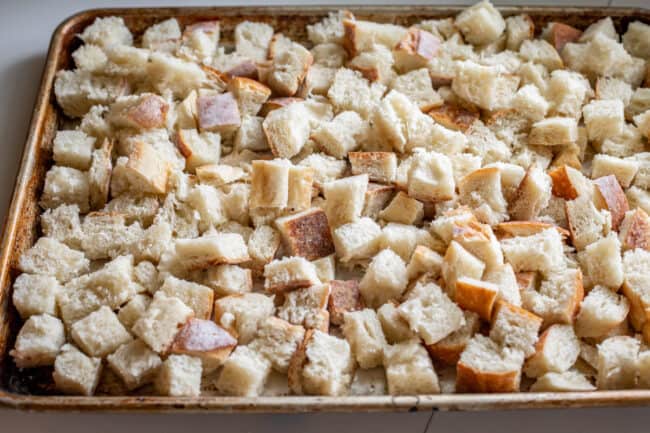
Tear or cut your loaf of bread into pieces. I have tried both tearing by hand and cutting into cubes, and I prefer cubing. If you tear by hand, the bread tends to break down into crumbles easier once you add the broth later. I like my bread to maintain it’s shape a bit. (Hack: You can also use plain toasted bread cubes from the store that they usually sell this time of year!)
Toasty bread is not the same as stale bread
Toast your bread. Note that I did not say “dry out” your bread. Day old bread may have been how stuffing originated way back when, but we have grown older and wiser than our grandmothers. Or something like that.
Many stuffing recipes call for cutting or tearing up your bread and simply leaving it out overnight. To me, this just makes bread STALE. Stale bread is tough and leathery, and STILL does not absorb as well as toasted bread. See this Panzanella recipe from Serious Eats for a detailed discussion about this!
Instead, we are going to TOAST our bread. This makes for bread pieces that are crisp yet still TENDER and melt in your mouth. All it takes is about an hour in the oven, set to 250 F. We don’t want it to brown or get burned: just nice and light and crispy, ready to absorb all that flavorful chicken broth in our stuffing, without being leathery or overly chewy.
Butter: the secret to a great stuffing
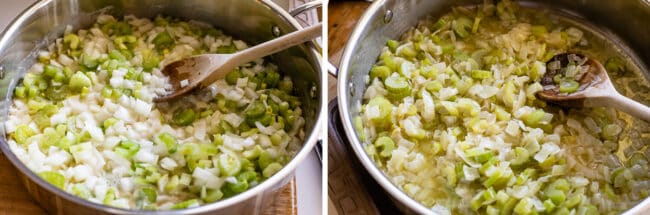
Set aside your bread and melt a whole buncha butter in a large pan, a whole cup. I used to not be a stuffing lover, until I grew up and realized that it’s basically butter soaked in bread and crisped. What’s not to love here. Bring on the butta.
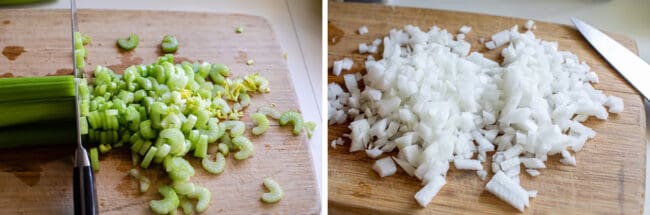
Chop up your celery and onions. I like to use about 2 cups of celery, and about 3 and 1/2 cups onion. One really large onion should be enough, or two small onions. Don’t go too crazy (“I’ll just throw it all in!”) because you don’t want to mess with the ratio of bread to veggies. Let the crispy buttery bread have it’s moment, okay people.
Saute the veggies in the butter once it’s melted. Normally when you’re sauteing onions and celery, you only need a little bit of butter or oil, but here we’ve got a cup, so it’s practically swimming in it. That’s a good thing. We need all that butter to soak into our toasty bread! Saute the veggies for about 7-10 minutes, until they are soft but not browned. Usually I am all about a bit of caramelization but not for stuffing.
While that cooks, chop up all your herbs. I LOVE these Simon and Garfunkel herbs, so I like to use about 1/3 cup parsley, 1/4 cup sage, and 1 tablespoon each rosemary and thyme. You can definitely change the amount and ratio of your herbs if you like.
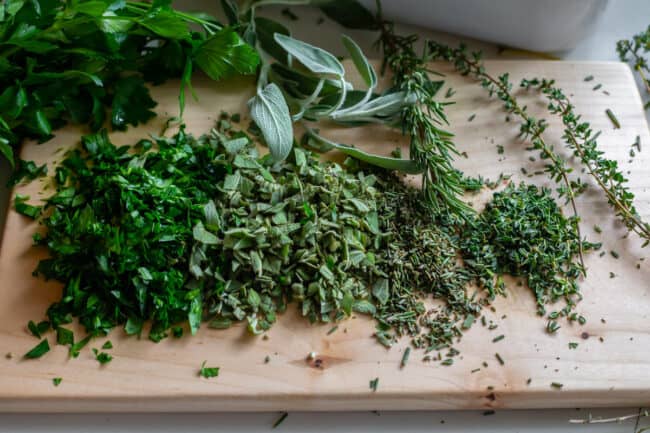
Just keep in mind that there IS such a thing as too many herbs. If you go too far, your stuffing is going to taste like Pine-Sol. No thanks. So use fewer herbs if you want, but I wouldn’t use too much more than the recipe calls for. (Parsley is the only one I would say you could do more of, up to 1/2 cup.)
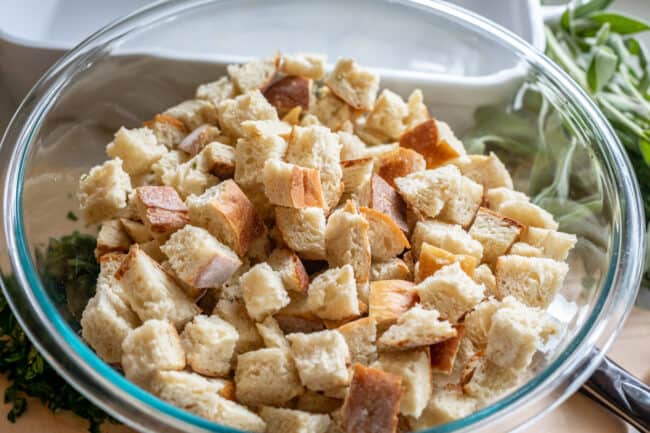
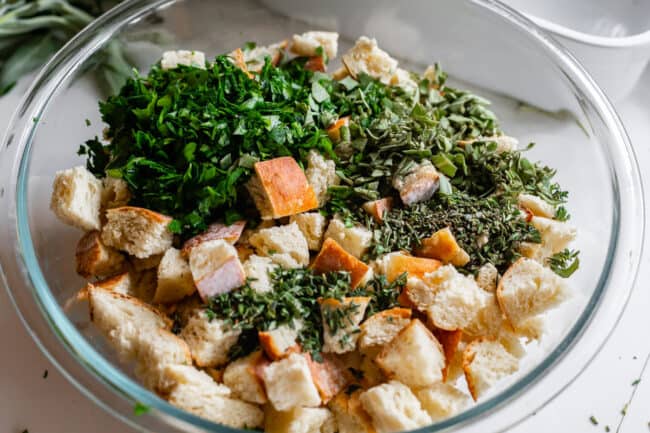
Add all the fresh herbs to the toasty bread in a big ol bowl.
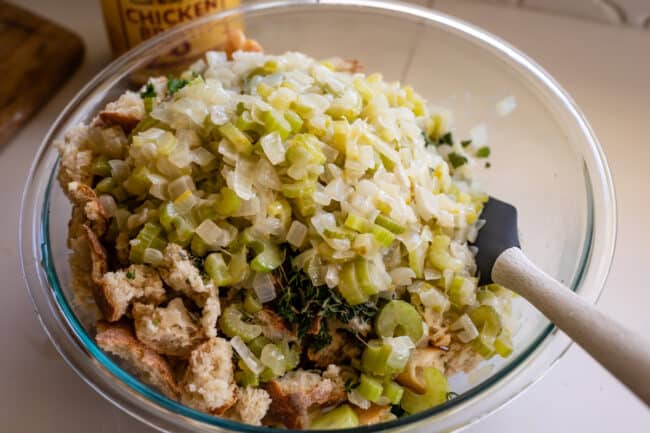
Add the veggie mixture on top of the moistened bread and stir it all together. Get all that butter distributed!
Add in some salt and pepper.

Now here is the part that will make or break your stuffing, my friends. We are mixing up 2 eggs with 2 cups of chicken broth and stirring it into our bread mixture. BUT. The amount of liquid you need is going to depend on a variety of things:
- the amount of bread you have (more bread=more broth necessary).
- How toasty is your bread? Ultra toasty means you are maybe going to need a bit more liquid. If you left your bread to get stale overnight, it’s still holding onto some moisture and you need less broth.
- The amount of onions/celery you added (did you measure it, or just throw some in? No judgment here, but if you have lots of extra veggies, you need less broth)
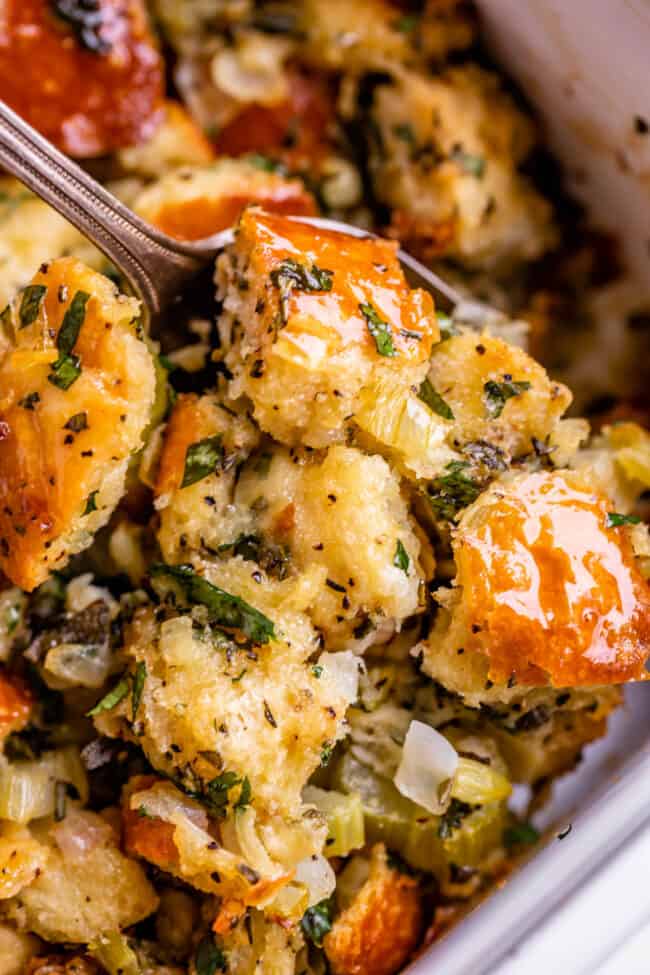
You are going to have to use your best judgment and your hands. Yes, mix your stuffing with your hands. It’s the best way to feel and know if you have enough liquid.
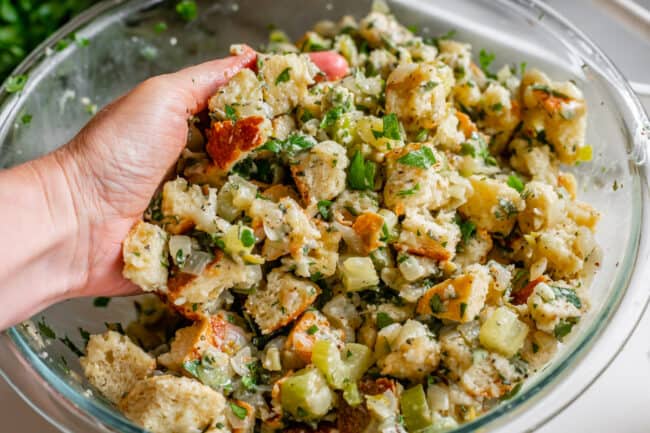
The bread should be moist but not soaked. Squeeze it to test. There should NOT be liquid pooling at the bottom of the bowl. You might need up to a half cup of extra broth. BUT! You might not even need all the broth/egg mixture in the first place. You definitely should be using most of it, but don’t be worried if you have a couple tablespoons leftover if your stuffing is feeling quite moist.
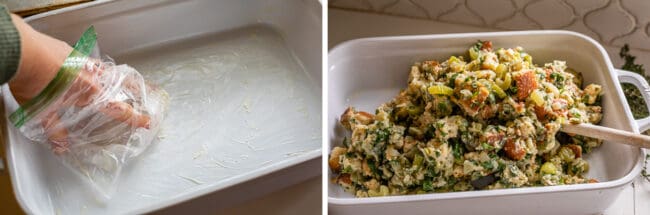
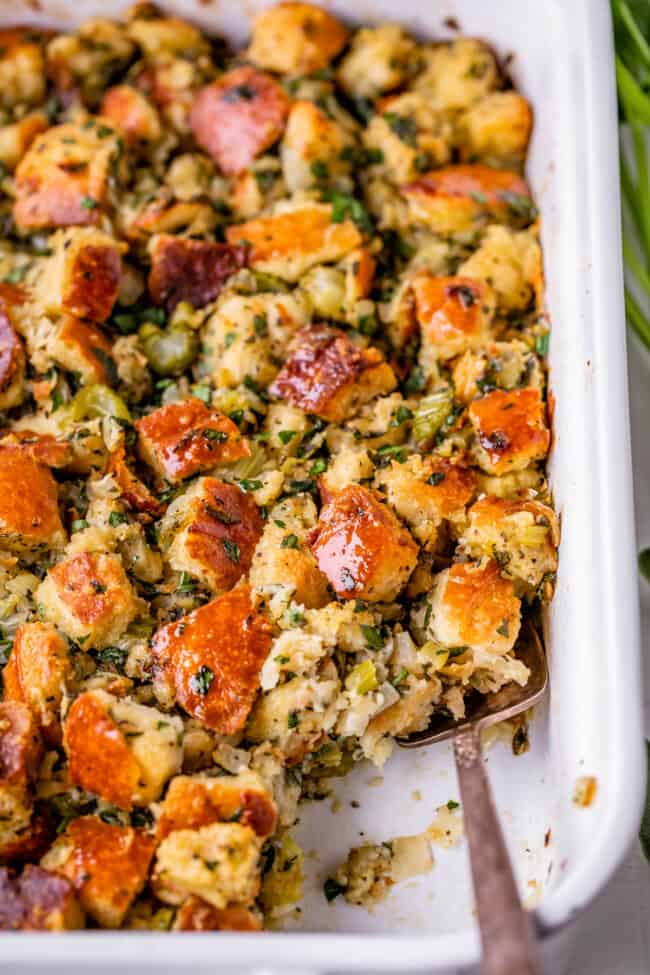
Once you feel you have reached the perfect stuffing moistness level, it’s time to get it in a pan. First butter it up with some softened butter. You can spray too if you like, just remember, butter is going to help get you those ultra crispy edges of glory. In fact, I don’t have one, but if I did I would totally make stuffing in one of those Brownie Edge Pans! I love center brownie pieces so the pan’s intended use seems like an abomination to me, but I can totally get behind using one for stuffing. Bring on the crispy edgessss!!!
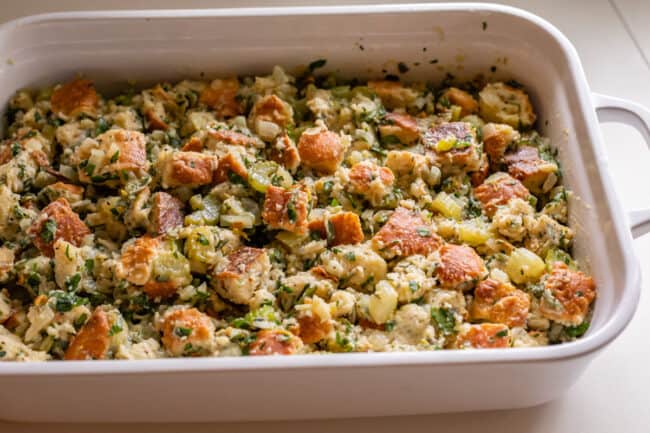
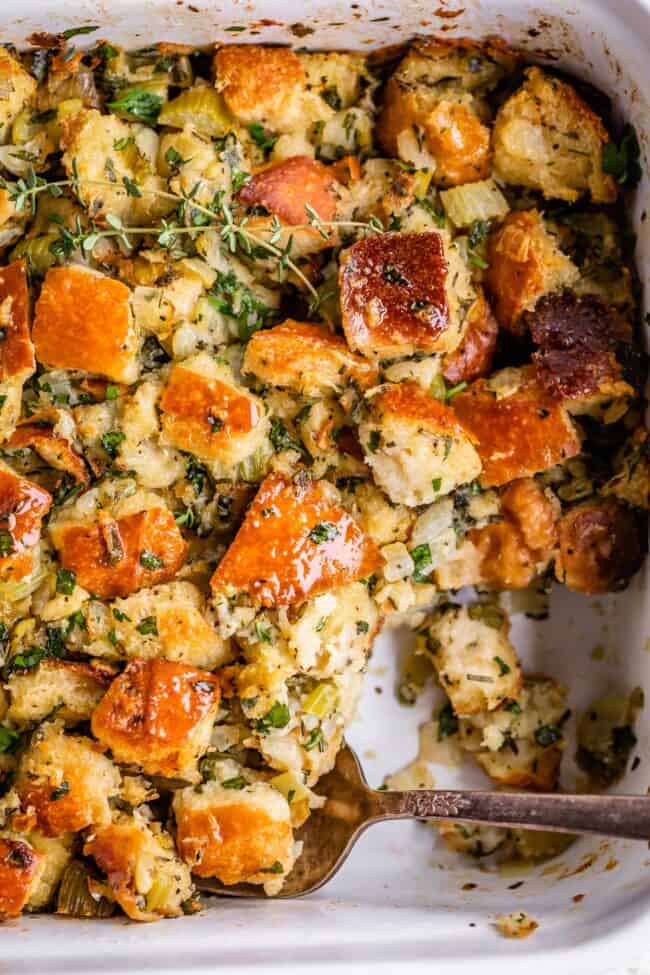
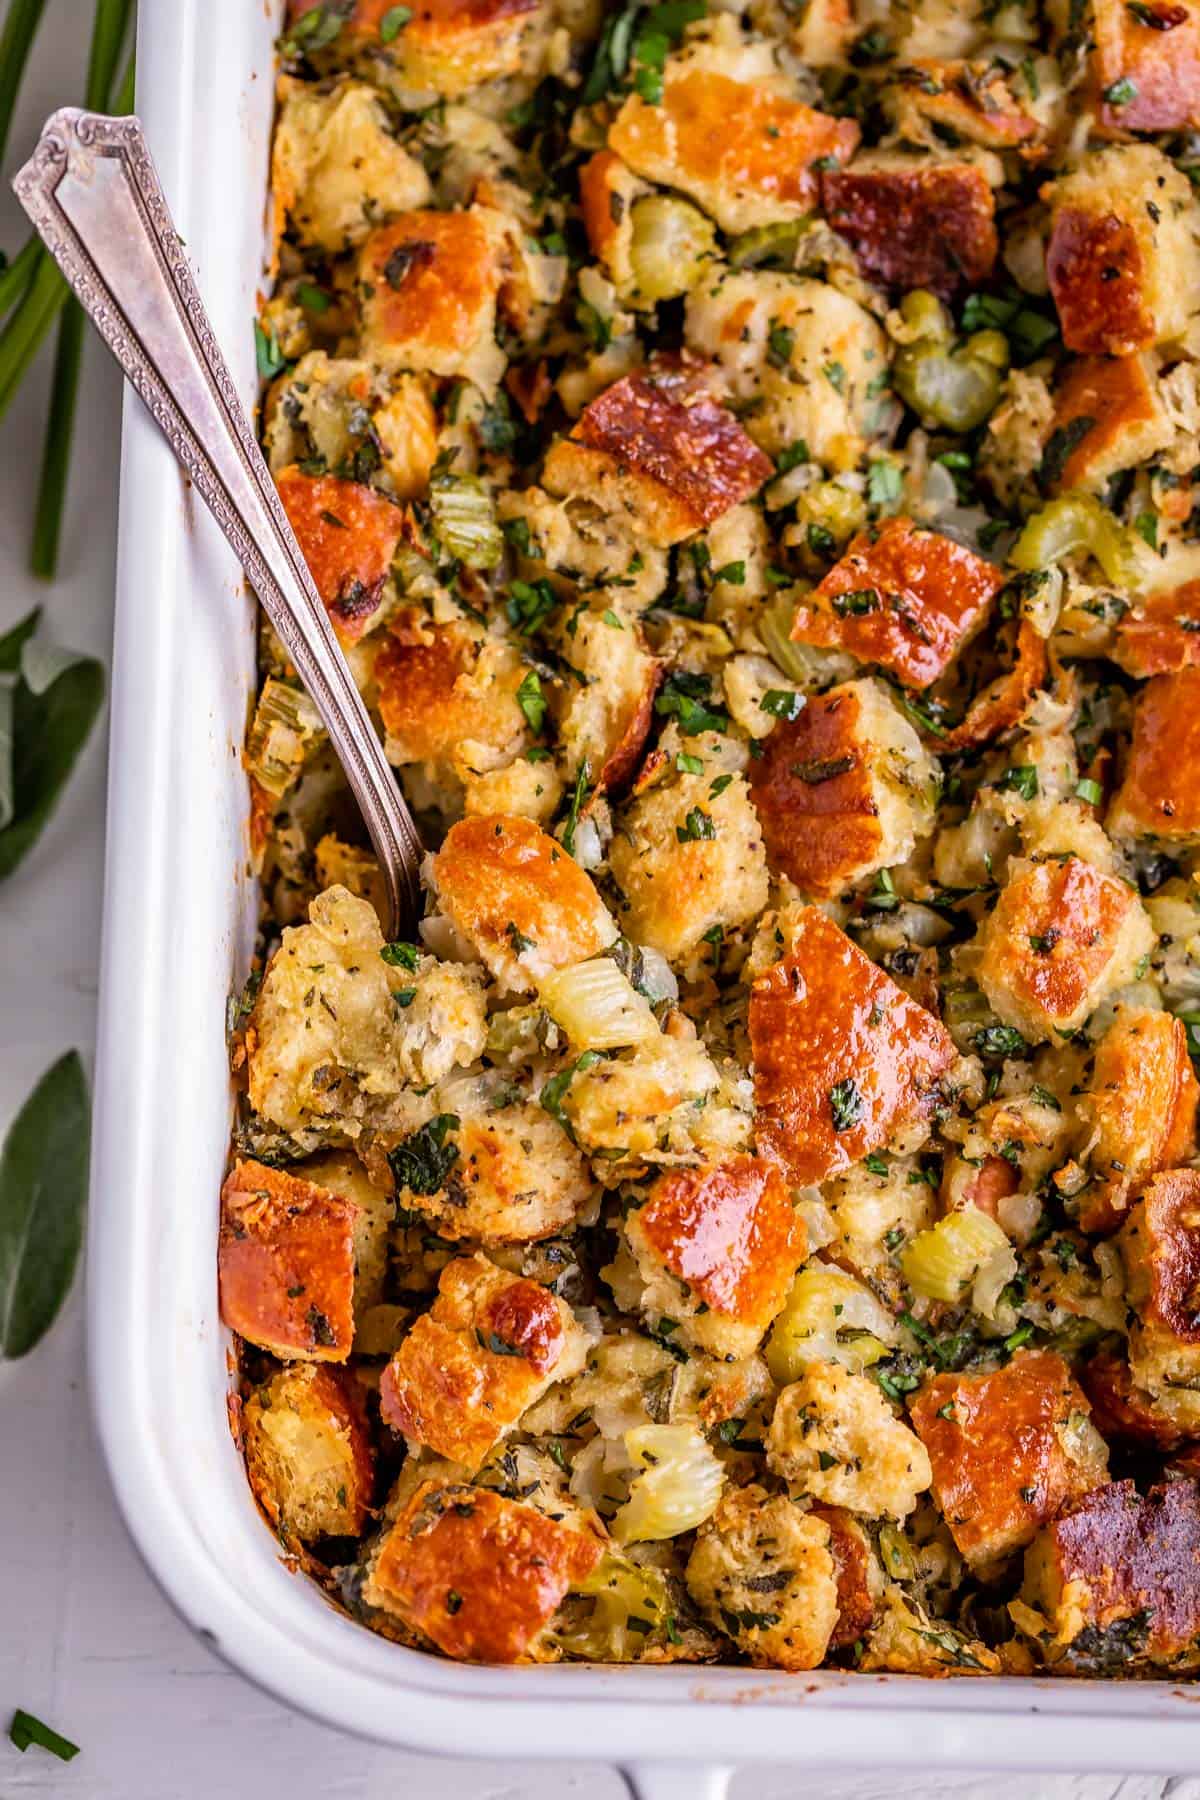
And here she is all ready for the oven! A thing of beauty!! Bake it covered at first, to keep in the moisture, then remove the foil for the last 20 minutes or so to get that gorgeous crispy topping.
Can you put this stuffing inside the turkey?
Yes you totally can! Make as directed, but instead of putting it into a buttered pan, stuff it in your turkey. Just make sure the stuffing reaches a temperature of 160 degrees F before eating!
Tips for making the Best Thanksgiving Stuffing
I’m going over everything in detail below, but here are all my tips in one handy list for the BEST, crispy, buttery stuffing of your life:
- Choose the right bread
- Don’t stale your bread by leaving it out overnight. That just makes it tough. Toast bread in the oven instead.
- Use lotsa butter
- Use discretion adding broth. Don’t add too much or your stuffing will be soggy (Don’t add too little or it will be dry!)
- Chop herbs small. You are not a rabbit. We want flavor, not leaves.
Traditional Stuffing Recipe Variations
Can you substitute dried herbs for the fresh herbs?
Yes! It won’t be quite the same but all the butter in this recipe kind of makes up for it anyway ;) Use about 2 tablespoons parsley, 2 teaspoons sage, 1 teaspoon thyme, and 1 teaspoon rosemary. (Add dried herbs to the onions and celery in the pan with the butter to give them a chance to toast and wake up.)
You can make the Best Thanksgiving Stuffing ahead of time
Yes, you really can make stuffing (any stuffing!) ahead of time! Hallelujah!
Overnight Stuffing Instructions: Follow the instructions through adding the unbaked stuffing to the buttered pan. Wrap it tightly in plastic wrap to lock in moisture, then store in the refrigerator for up to 24 hours. To bake the overnight stuffing, preheat the oven, remove the plastic wrap, and follow the baking instructions as usual. (Be sure to cover with foil for the first half of the bake.) If you plan on baking more than 24 hours after preparing the stuffing, I recommend freezing the stuffing instead, as it will start to dry out in the refrigerator air over time.
Freeze before baking: Uncooked stuffing is really easy to freeze and definitely the best method in my opinion because there is less chance of drying out the stuffing. Just toss the raw stuffing into the buttered dish you plan to bake it in (needs to be freezer and oven safe, of course), wrap it well with foil AND plastic wrap. If you have 2 gallon ziplock bags ( I love these!!) then put the wrapped stuffing in that too! The stuffing will be good in the freezer for about 3 months. If you don’t want one of your dishes stuck in the freezer, use a disposable foil pan.
When you’re ready, preheat the oven, take the tray out of the freezer, remove any plastic wrap, cover tightly with foil, and bake according to normal instructions. Don’t thaw it out first, that will make it super soggy! You may need to add 10-15 minutes to the total bake time, just keep an eye on it.

Freeze after baking: You can make your stuffing from start to finish and freeze it for the big day! Make the stuffing in the dish you plan to freeze and reheat it in. Take the stuffing out of the oven about 10 minutes earlier than usual (so that when you reheat it’s less likely to dry out). Wait until the stuffing is completely cool. (If you put it in the freezer warm, it will form large ice crystals that ruin the texture, so be sure to wait! Patience!)
Then wrap your dish well in both foil and plastic wrap. If you have 2 gallon ziplock bags ( I love these!!) then put the wrapped stuffing in that too! The stuffing will be good in the freezer for about 3 months.
To reheat, pull the stuffing out of the freezer and let sit on the counter for about 15 minutes, or 30 minutes if you used a glass pan. Preheat the oven to 350. Remove any plastic wrap. Cover the stuffing with foil. Bake at 350 for about 45 minutes, then remove the foil and bake another 10-15 minutes, until crisp and warmed throughout. Because it’s already been cooked, be careful to not bake too long or it will dry out for sure!
How to use Leftover Thanksgiving Stuffing
Oh my gosh, so many options!
- Add some to your leftover turkey sandwiches. Made with Buttery Dinner Rolls, of course. And a bit of Cranberry Sauce too! Yes please!
- Crisp leftovers up in a skillet and eat as a hash with eggs for breakfast!
- Use chopped stuffing in place of the breadcrumbs/oats in meatballs or meatloaf.
- Stuffing Waffles: Add a bit of broth to make it more wet, then crisp up in a waffle iron. Serve with a fried egg and gravy/cranberry sauce. I love this idea!!
- Add leftover stuffing to bell peppers and bake! See my Classic Stuffed Peppers recipe for reference.
- Make Zucchini Boats! Fill zucchini with stuffing, top with cheese and bake. Serve with gravy!
- Stuffing Shepherds or Pot Pie: layer stuffing, leftover turkey, and leftover vegetables in a pie dish, pour on a layer of gravy, and then top with either mashed potatoes (Shepherds Pie) or a pie crust (Pot pie)

More Thanksgiving side dishes you are going to love!
I’ve listed a few of my favorites here, so check them out. You can also look at these 20 Recipes for a Traditional Thanksgiving Dinner!
- Easy Homemade Cranberry Sauce Recipe >> it’s a classic for a reason
- Homemade Green Bean Casserole >> a version of the classic that you’ll actually like
- Sweet Creamed Corn Casserole << It’s not Thanksgiving without the corn casserole!
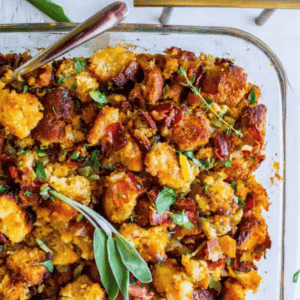
- Cornbread Stuffing with Bacon and Sage << if you have never made cornbread stuffing, you are missing out!
Facebook | Pinterest | Instagram
Stuffing Recipe Thanksgiving
Ingredients
- 1 pound bread , white bread, ciabatta, Italian, baguette, etc.
- 1 cup butter, 2 sticks
- 1 large onion, about 3 and 1/2 cups chopped
- 2 cups celery, 1/4 inch dice
- 1/3 cup fresh parsley, chopped (I like Italian flat-leaf)
- 1/4 cup fresh sage, chopped
- 1 tablespoon fresh rosemary, chopped very fine
- 1 tablespoon fresh thyme leaves
- 2 teaspoons kosher salt
- 1 teaspoon black pepper
- 2 cups high quality chicken/turkey broth, plus 1/2 cup more if necessary
- 2 large eggs
- 1 tablespoon butter, softened, for greasing pan
Instructions
- Begin by tearing or cutting your loaf of bread into bite size pieces, about 1-2 inches. Spread pieces onto a dry pan and bake at 250 F for about 1 hour, stirring occasionally. You don't want to brown the bread; just get it nice and toasty (the better to absorb broth!)I don't recommend letting your bread sit out overnight. It turns stale and tough; we want crispy and toasty bread, to get that perfect texture stuffing.
- While your bread is toasting, prep the veggies. Chop the onion, using 2 small onions if you don't have a large one. You need about 3 and 1/2 cups chopped onion. Onion brings the flavor, so don't skimp.Chop the celery into about a 1/4 inch dice. Usually I like tiny celery pieces, but not for stuffing. You need it to be a little more substantial. I love the flavor or celery leaves, so I always chop starting from the end of the whole head of celery (see photos), but you do you.
- Preheat your oven to 350 degrees F.
- Add 2 sticks of butter (1 cup) to a large skillet and set over medium heat. When the butter is melted, add all the celery and onions. Saute over medium heat for about 7-10 minutes, until they are soft but not browned. Normally when you're sauteing, you only need a little bit of fat, but here we've got a full cup, so it's practically swimming in it. That's okay. We need all that butter to soak into our toasty bread!
- Meanwhile, chop up all your herbs. Chop 1/3 cup parsley, 1/4 cup sage, and 1 tablespoon each rosemary and thyme. **
- Add all the toasted bread pieces to a large bowl. Add the chopped herbs: parsley, sage, rosemary and thyme. Add all the onion and celery mixture to the bowl with the bread.
- Sprinkle with 2 teaspoons kosher salt (use about 1 and 1/2 teaspoons if you have table salt) and 1 teaspoon black pepper. Stir it all together and make sure all that butter is distributed. Give it a taste and adjust seasonings if you like.
- In another bowl or large glass measuring cup, add 2 cups high quality chicken broth. Whisk in 2 eggs. Slowly pour this mixture over the bread in increments. Use your hands to squeeze and moisten the bread, making sure it all gets absorbed and mixed together. The bread should be moist but not soaked. There should not be liquid pooling at the bottom of the bowl. You may not need to use all of the liquid; it depends on how much bread there is and how toasty it is. Stuffing is an art my friends, so use your best judgment. Add 1/2 cup more broth if necessary.
- Meanwhile, grease the sides and bottom of a 9×13 inch pan* with about 1 tablespoon softened butter. Pour the stuffing into the pan and spread to the edges.(At this point you can cover tightly and refrigerate overnight. See notes!)
- Cover the stuffing with foil and bake at 350 for about 40 minutes. Remove the foil and continue baking for another 25-35 minutes until it is as brown and crispy as you like.
- Store leftovers in the fridge. Baked leftovers can also be successfully frozen, see notes!


Will this work cooked inside the turkey? My family likes stuffing in the bird.
Can you use store bought, already dried bread pieces? Instead of chopping and cooking your own and how would it change to recipe?
Hi Whitney! We haven’t tested this with store bought pre-dried bread pieces. My guess is that it would work, just know that you won’t use using a pound of the dried bread since it’s lighter with the moisture removed. If you try it, let us know how it turns out!
Delicious! Everyone had a fit over it. I used ciabatta bread. I will be making this every year from now on!
I have a fit over this stuffing too Peg! Thanks so much for sharing your review, it means so much and we always love hearing from you.
This was so yummy! I used one loaf of Italian bread and one loaf of white bread, definitely a good mix.
Best stuffing ever! Definitely going on my favorite recipes list.
Best stuffing ever! Been using it for multiple years! I go above and beyond and even make my own homemade bread specifically for the stuffing because it’s so good!!
I’ve made this recipe twice already. It’s my absolute favorite!! I’ll never need another stuffing recipe again!
Coming back for the 3rd year to say this is my GO TO stuffing. It’s so delicious, and I will never go back to store-bought! I was always too intimidated to make stuffing from scratch, but not anymore! I also make my own white bread loaf for this recipe, and feel like it makes it extra special to have everything made from scratch. Thank you for sharing!
Omg homemade white bread! you are the QUEEN Danielle! love this. This is the stuffing that made me a stuffing lover, so I totally feel you. Thank you so much for taking the time to review!! Means the world to me! Happy Thanksgiving 💕
Planning to make this for Thanksgiving. Wondering if prepping 2 days ahead and then baking on Thursday would be okay, vs day before.
hi Laura, I think of this every year but have never bitten the bullet to try it haha. I’m too nervous that it will dry out or lose flavor. lmk if you try it and how it goes!
Can you substitute using store-bought dried stuffing bread cubes? Have you tried this before?
Hi Stephanie! Yes, you can totally use store bought stuffing cubes! Tell me how it goes, enjoy!
Can I make this in a crock pot?
Hi Nancy! We haven’t tested this recipe in the crock pot, but if you do, come back and share your tips with us. We love to hear from you!
Do you think I could add sausage and Bells seasoning to this recipe?
Hi Jennifer, I’m sure you could! We haven’t tested it yet, but if you do, come back and let us know what you think of the results, we love hearing from you :-) Never had Bell’s Seasoning before but it sounds amazing!
This is THE perfect stuffing. I make this every year, but I also throw in a couple handfuls of golden raisins. They don’t seem quite as sweet as regular raisins, but add a very slight sweet note every few bites, when my gang likes.
Golden raisins!! I love this Peggy! What a fun idea. Thanks so much for sharing your rating and review! You’re a star 🤩