

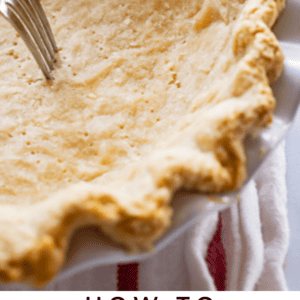
I will show you just how easy it is to blind bake a pie crust! This means pre-baking the empty crust to fill later with cream filling or fresh fruit filling. There are a few important details you need to know to avoid a bottom crust that bubbles up, and edges that stay tall and firm instead of slumping down into a sad mess. Chilling the crust and using pie weights are essential! Originally published October 7, 2020.
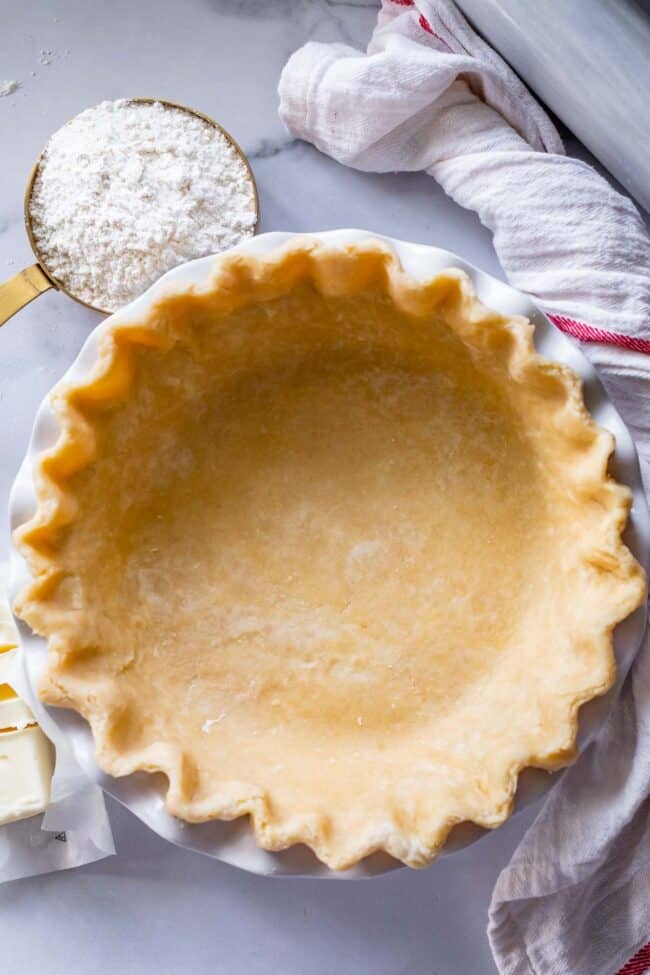
Table of Contents
- What is a blind baked pie crust?
- What is a par-baked pie crust?
- How to blind bake pie crust – step-by-step instructions
- Chill the crust
- How to keep pie crust from shrinking
- What to use instead of pie weights
- What are the best pie weights to use?
- What temperature to bake a pie crust?
- How long to blind bake a pie crust
- Double bake your blind baked pie crust
- Can I blind bake pie crust without weights?
- How to par bake pie crust
- Double bake a par-baked crust for just 2-3 minutes
- Pies that use a blind bake pie crust
- Blind Baking Pie Crust Recipe
Blind baking a pie crust without making a sad mess eluded me for years! Does anyone else have this issue??
Even with pie weights, my edges were always sagging. So sad! Nobody wants saggy pie!
So I finally sat down to research it, baked a whole buncha pies, and came up with these great tips so that I never have to deal with slumpy pie crusts again. Bring on the pie!
What is a blind baked pie crust?
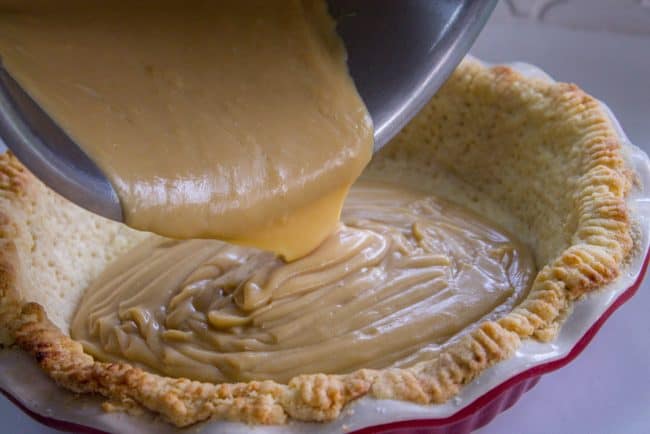
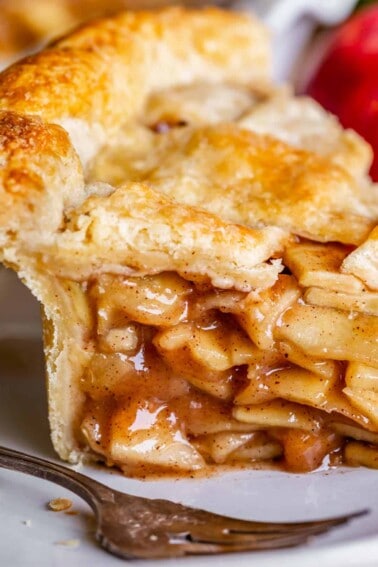
A blind baked pie crust is a pie crust baked all by itself, without a filling in it. A blind-baked crust is fully baked until cooked and toasted all over. This is perfect for cream pies (like Chocolate Cream Pie) and glacé (fresh fruit) pies (like this Blackberry Glace Pie). These pies won’t be going back in the oven, so the pie crust needs to be fully cooked.
What is a par-baked pie crust?
I will also show you how to par-bake a pie crust. This is when you blink bake a crust but not quite as long, for recipes that need to go BACK in the oven to finish baking. Examples include Pumpkin Pie and Sweet Potato Pie!
This method ensures that you won’t end up with a soggy bottom crust, who wants that? I’m firmly in the anti-soggy-bottom-club.
How to blind bake pie crust – step-by-step instructions
It’s really easy to do! There are just a few things to remember:
- double bake. This means bake once, remove the weight, then finish baking
- chill your pie dough before baking
- fill with pie weight to prevent bubbling, and to keep the edges from slumping down
Start by rolling out your pie dough and transferring it to a pie pan. You can use my recipe for homemade flaky pie crust or you can use store bought crust. (If you make my recipe, be aware that it makes enough for two blind baked pies. Make two pies, halve the recipe, or freeze the second crust for later!)
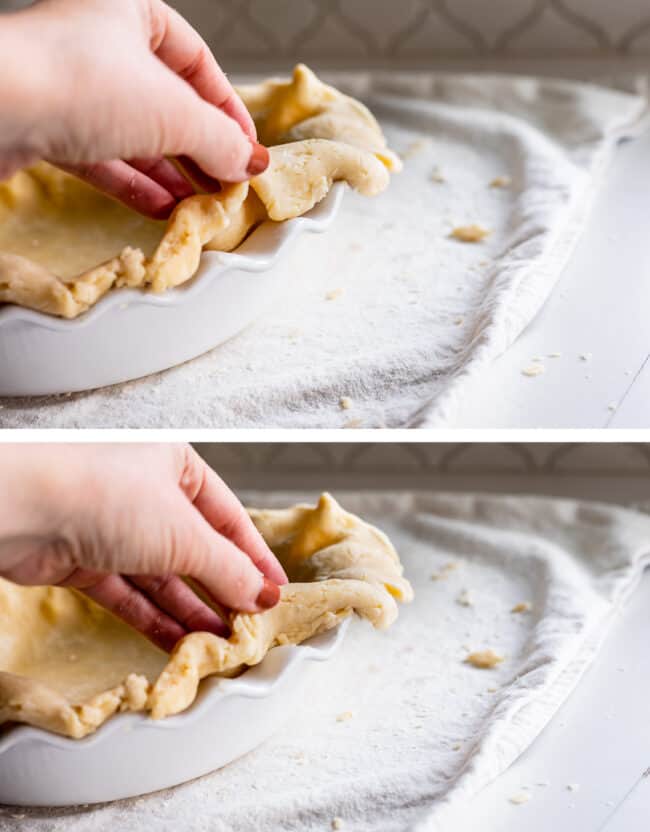
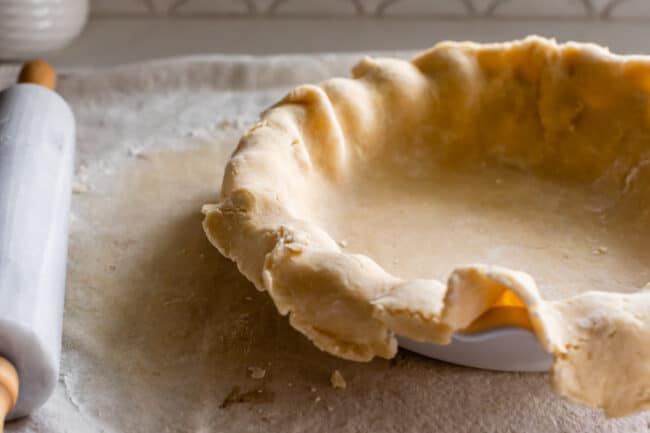
Tuck the edges of the dough underneath itself so that it lines up with the pie pan. Lots of people will tell you to trim the pie crust, but why waste delicious crust? Just fold it under! If it is crumbly, smooth the dough together with your fingers, like you are playing with play dough. Dip in ice water if necessary.
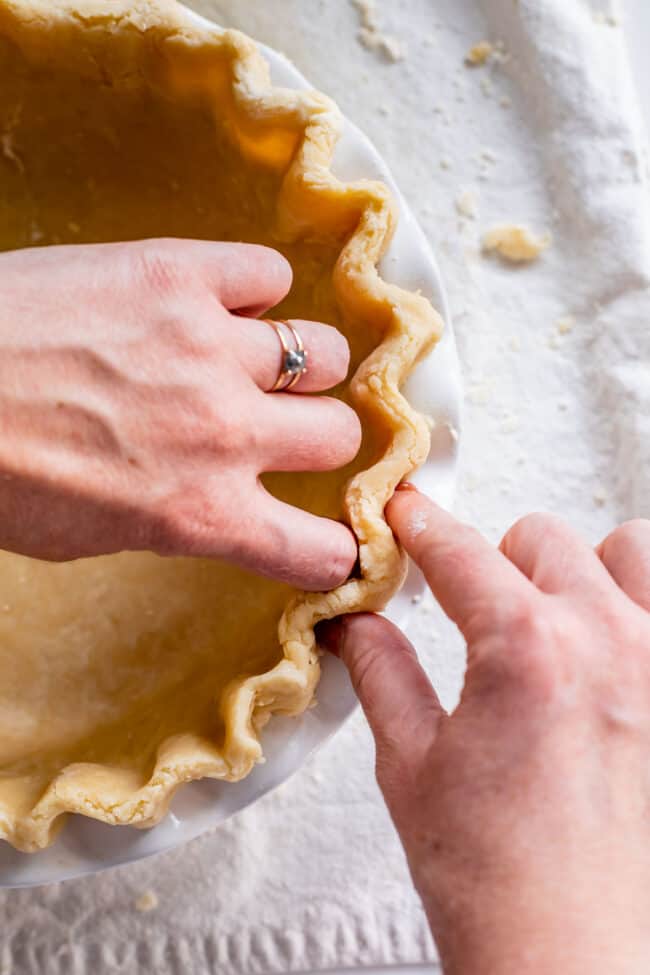
Next, use your fingers or knuckles to flute the edges of the pie crust. You can also crimp with a fork if you prefer!
Chill the crust
Next, chill your pie for at least a half hour. A full hour is better. Cold, cold pie dough going into a hot hot oven is the way to get those flaky layers you want!
Next, chill your pie for at least a half hour. A full hour is better. Cold, cold pie dough going into a hot hot oven is the way to get those flaky layers you want!
How to keep pie crust from shrinking
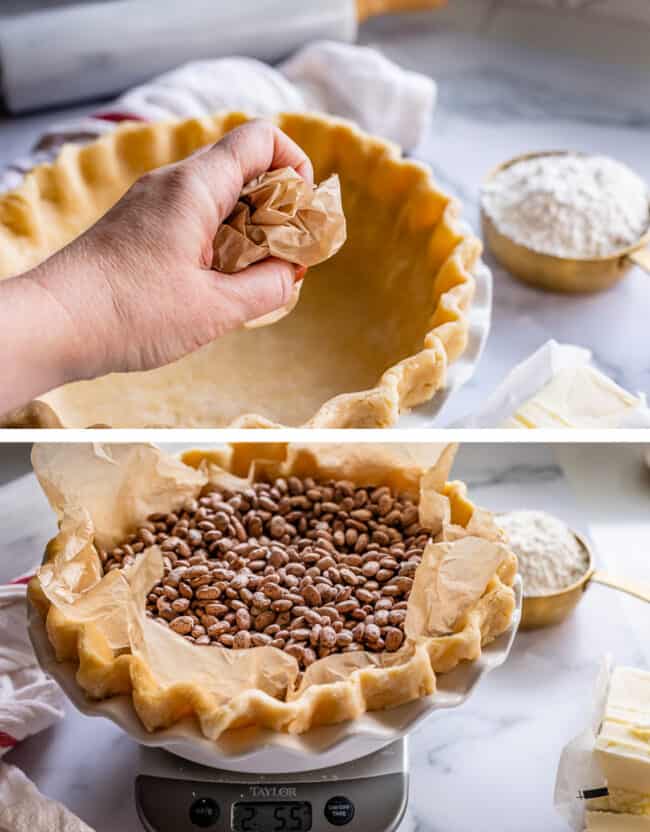
Once your crust is cold, crumple up some parchment paper or foil to make it smooth and layer it on top of your crust. (You don’t want any jagged edges tearing your crust. Make sure it’s large enough that you will be able to lift out the weights later.
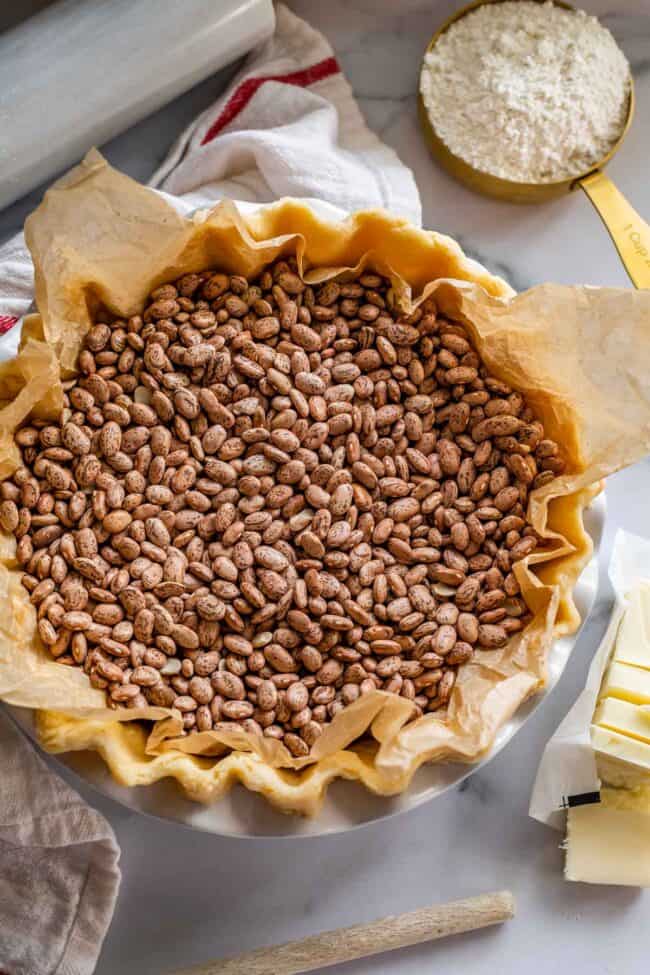
Next add in your weights. Not using enough weights is why I had saggy pie crusts for so many years. I would add pie weights, just like all the recipes say, but not enough. I was focused mostly on keeping bubbles from coming up on the bottom. But the pie weights also serve the purpose of adding weight and structure for the edges of the pie, so that they don’t melt downward. You can see that I used 2 and 1/2 pounds of beans here for this pie. Don’t be skimpy! Fill ‘er up!
What to use instead of pie weights
Pie weights are nice if you bake a lot of pies. But they´re not really necessary. You can also use:
- marbles
- loose change
- dry rice: you can use the rice after you use it as weights. It will have a nice toasty flavor!
- dry beans: set aside the beans you use and designate them as your pie weights. Beans get a weird chalky thing going on after you bake them a couple of times so you won´t want to eat them. But they last forever–I’ve been using the same beans to weigh down my pies for probably 7 or 8 years!
- sugar: sugar fills out your pie very evenly. It will lightly caramelize the sugar, you will see just a little browning. You can still use the sugar! It will have a slight caramel flavor. How could this be bad?
- or anything that won’t be bothered in the oven.
What are the best pie weights to use?
The best pie weights are the pie weights you already have. You don’t need to buy them! I use dried beans (and I’ve been using the same ones for a decade, since they get chalky after baking dry and aren’t really good for eating anymore). You can use rice, loose change, granulated sugar, or anything else that won’t catch fire, melt, or cause trouble for your pie or your oven. The important thing is using ENOUGH of whatever you choose that it helps the pie crust to hold its shape.
What temperature to bake a pie crust?
We are cranking up the heat! It doesn’t take long either, which is so nice. We start off at 425 with the pie weights in for about 15 minutes, (until the edges of the crust are light brown) then remove the weights and bake another 10-12 minutes to finish cooking the bottom crust. (For par-baking, only bake 3 minutes after removing the weight.)
Exactly how long you bake will depend on how hot your oven is, the position of the pie in the oven, the crust recipe you used, and what you’re using the crust for, so read through all my notes and instructions to get the ideal blind baked crust.
How long to blind bake a pie crust
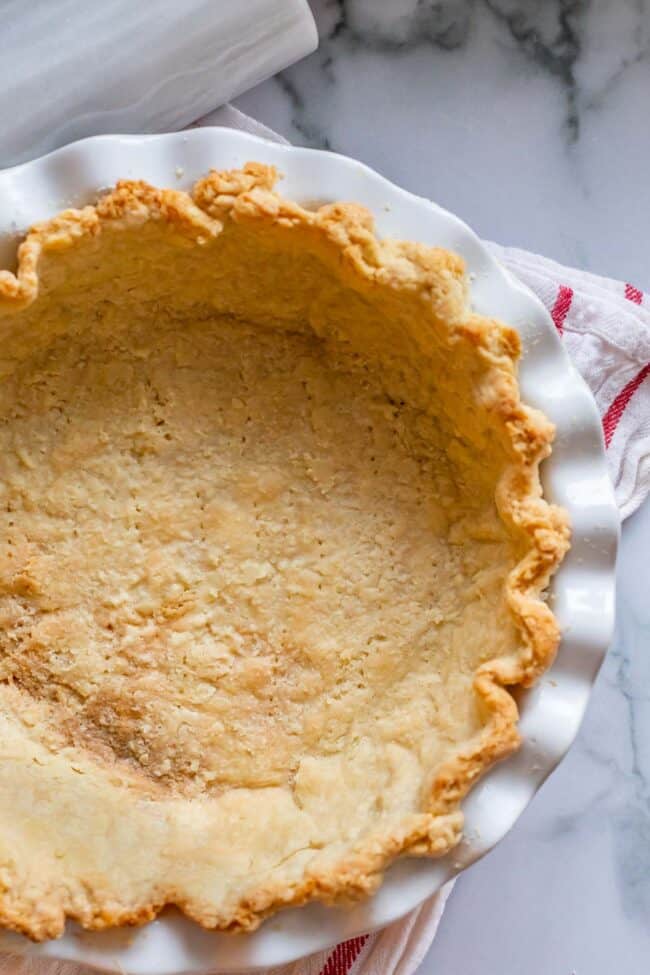
Bake your pie crust at 425 for about 15-18 minutes, until the edges are just starting to turn light golden. Take it out of the oven and carefully lift out the pie weights. The center of the pie crust will look shiny and raw, but that’s okay!
Use a fork to prick the bottom of the crust so that it doesn’t bubble up.
Double bake your blind baked pie crust
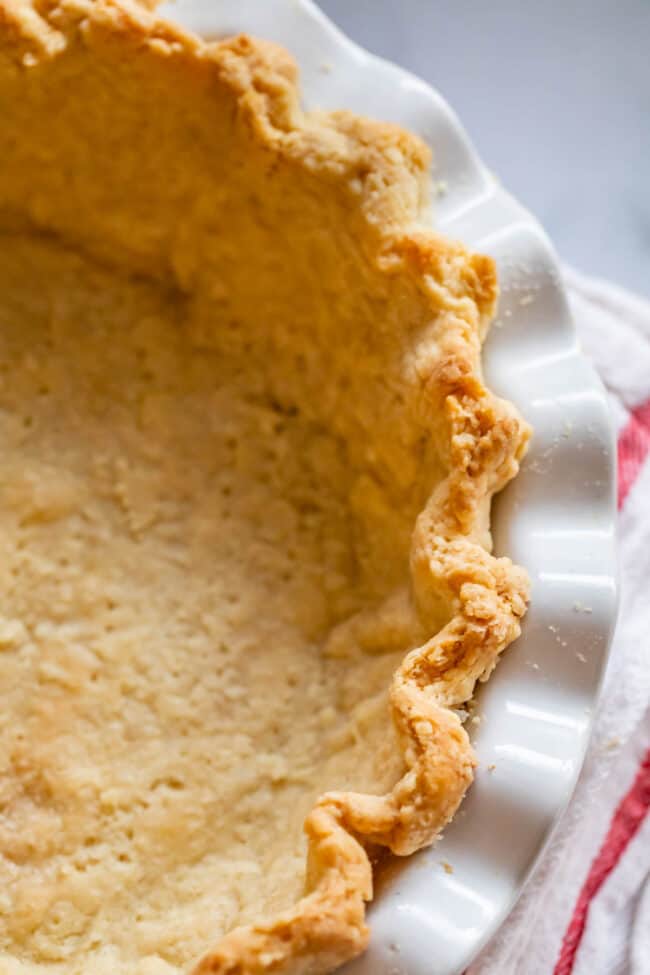
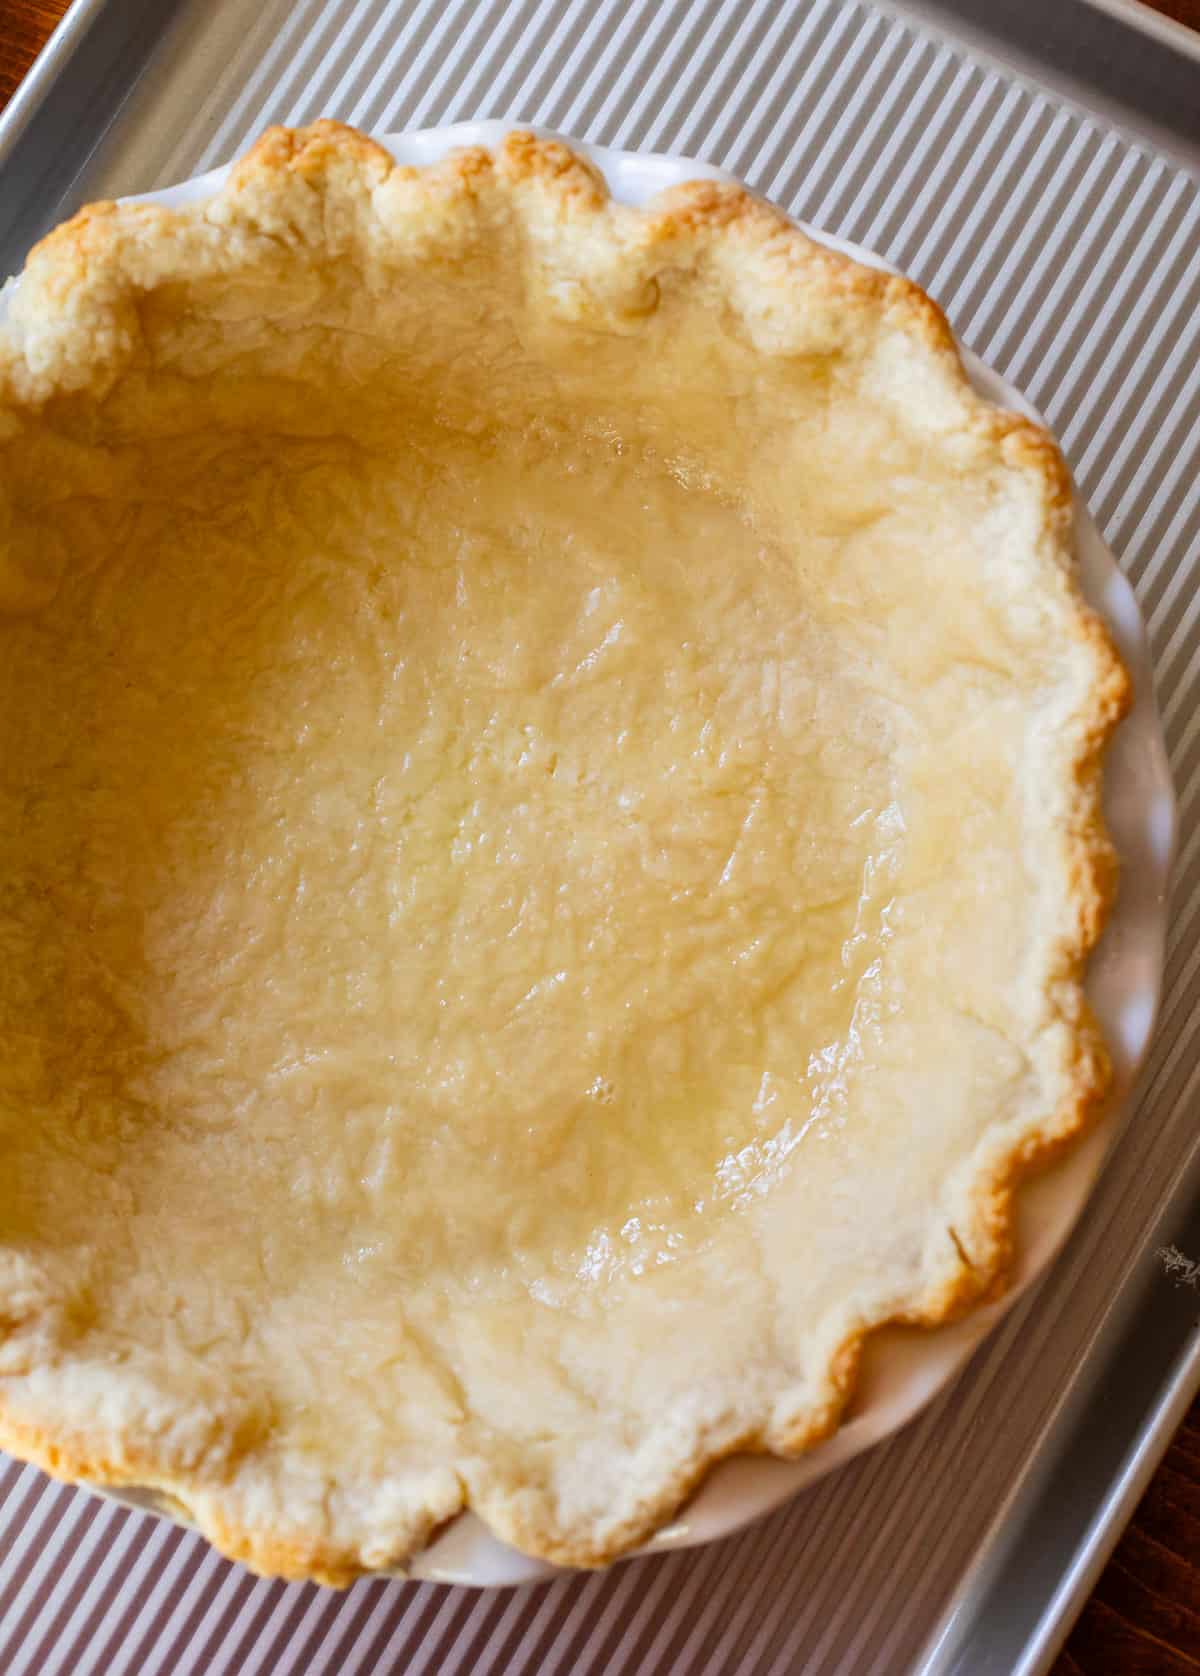
Keep the temperature at 425, then pop it back in the oven for another 12-18 minutes for a FULLY baked pie crust. How long you bake it the second time depends on what type of pie you’re making. For any pie crust that’s not going back in the oven again (like a cream pie, fresh fruit pie, or French Silk Pie), you will want to bake it until the bottom is a nice golden color to make sure it’s nice and crispy. This is a full blind bake.
Here is my crust after 15 minutes in the oven right after taking out the weights:
Do you see how it’s totally uncooked on the bottom? Pop it back in at 425 for about 3 minutes until it looks like this:
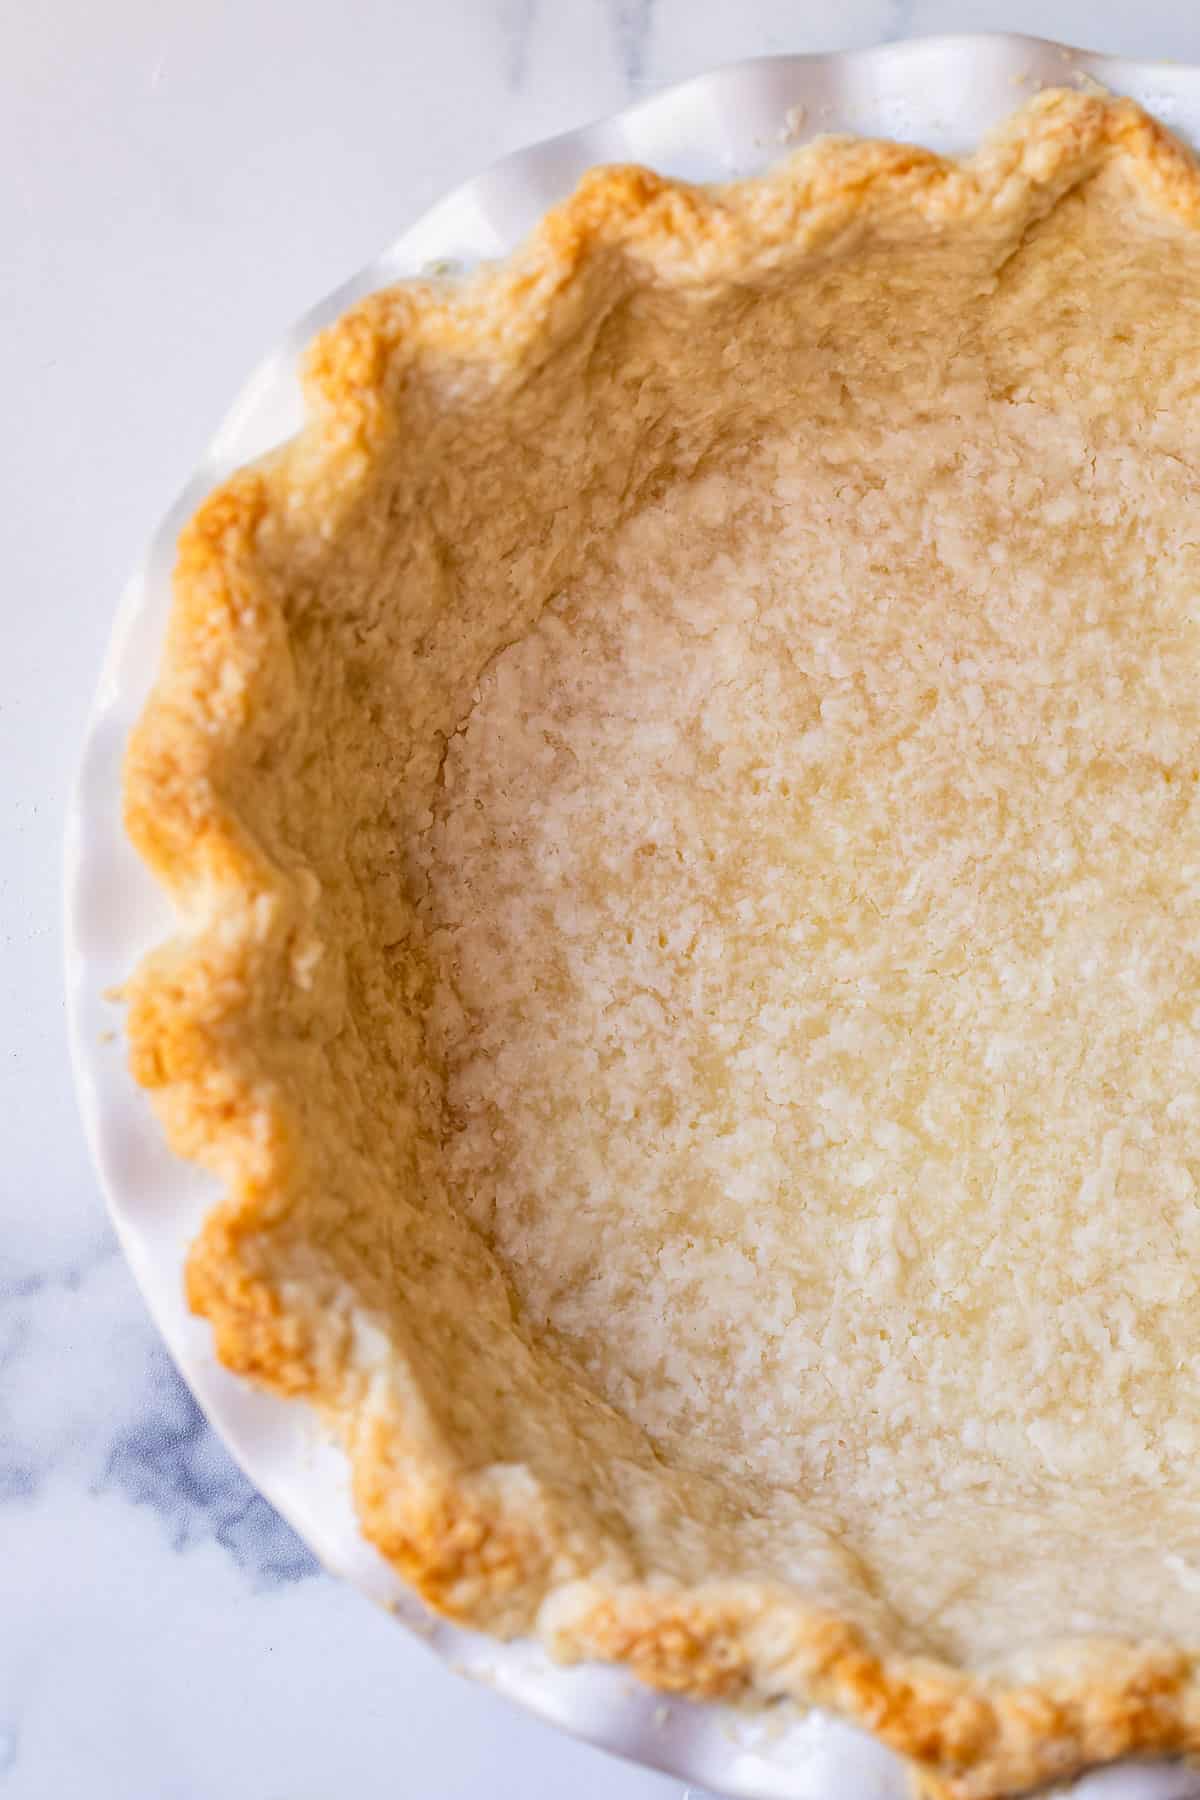
You are looking for a blonde color (NOT brown) and for the crust in the bottom of the pan to be matte, no longer shiny.
This Butterscotch Pie with Meringue Topping goes back in the oven after filling, to bake the meringue. For the second bake after removing the weights, I only baked 3 minutes. The center was not browned. Then I added the filling.
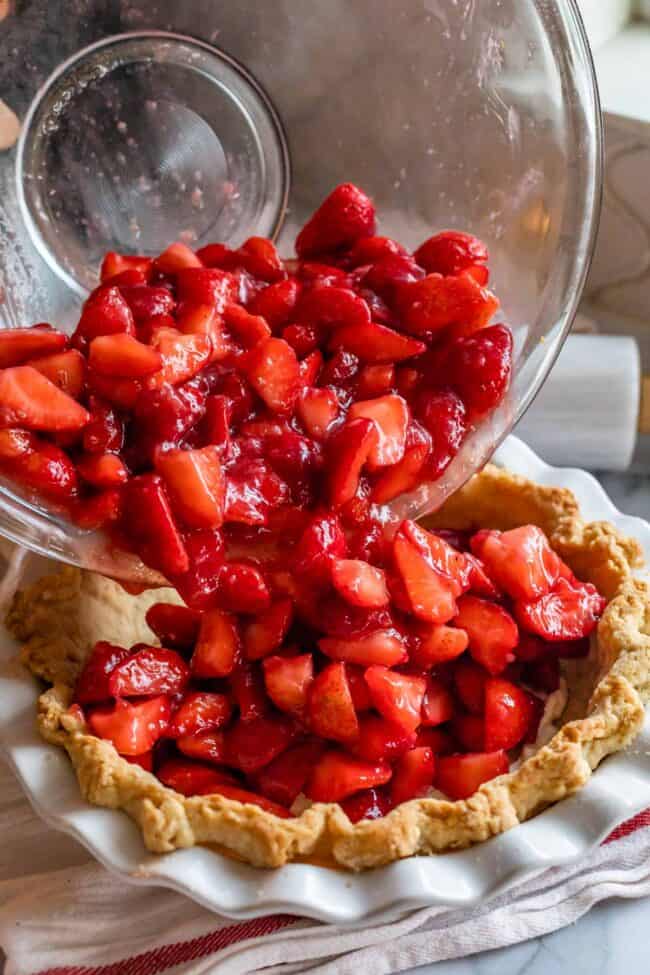
I made sure to fully blind bake the crust for this Fresh Strawberry Glace Pie until it was nice and brown in the center (12-18 minutes after weights are removed), because it’s not going back in the oven once the fresh strawberries are added.
Can I blind bake pie crust without weights?
The answer is yes, but there are risks. The way to do it is by “docking” your crust, which is a fancy way to say that you prick it all over with a fork.
Can you see how I pricked it all over, even the edges?
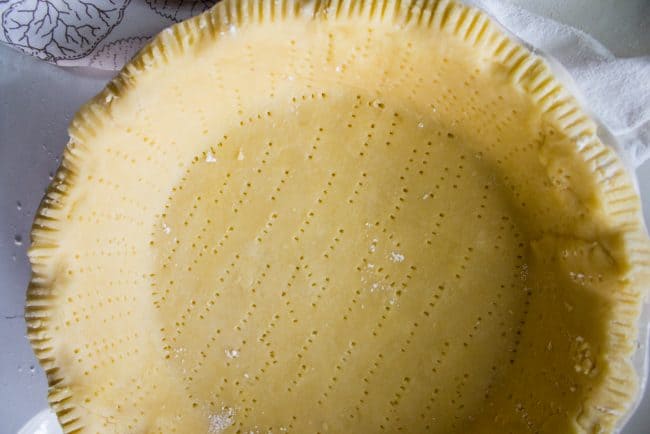
This allows steam to escape while the crust is baking. It is essential to chill the crust completely if you want to use this method. Without weights, you always run the risk of your pie crust shrinking and the sides slumping down the edges of the pan. I much prefer using weights, but don’t let some food blogger tell you what to do.
How to par bake pie crust
You need to par-bake (partially bake) a pie crust in certain situations to ensure the best texture and structure. Remember, par-baking is necessary when making custard or cream pies or egg quiches. Really, any pie with a liquid-heavy filling needs to be par-baked as the crust can get soggy if baked raw. And you know how much I hate soggy bottoms.
To par bake your pie crust, you´ll follow the same instructions as above (roll it out, chill the dough, use your pie weights), but when it´s time to bake that crust, you want to cut that time down to about 10 minutes–just enough to set the crust.
Double bake a par-baked crust for just 2-3 minutes
If you are pre-baking (a.k.a. par baking) your pie but the filling ALSO needs to bake for a while in the partially-baked crust (like for Lemon Meringue Pie, or Sweet Potato Pie where you need to put it back in the oven to bake again), you need to make sure the edges are golden and the center of the crust is matte and not shiny. This only takes about 3 minutes!
And that’s it! Now let’s make some pie!
How to Make Flaky Pie Crust >> here is my favorite pie crust recipe!
How to Make a Lattice Pie Crust >> such a pretty way to do a double crust pie.
Pies that use a blind bake pie crust
- Butterscotch Pie with Meringue Topping >> pudding pies are so amazing on a hot day!
- Pumpkin Pie >> definitely benefits from a par-baked crust
- Sweet Potato Pie >> is also a good candidate for par-baking
- Lemon Meringue Pie >> I need to update these photos, but this is a family favorite! Par-bake thatcrust!
- Fresh Strawberry Glace Pie >> one of the best summer pies out there! (Do a full blind bake)
- Fresh Blackberry Glace Pie >> just like the strawberry version, but with blackberries! (Do a full blind bake)
- Chocolate Cream Pie >> so rich!! The filling has the PERFECT texture (do a full blind bake)
- Cream Pie from Preppy Kitchen
- Buttermilk Pie from Lil Luna
- Maple Cream Pie from Cooking with Carlee
These recipes call for a graham cracker crust, but they are delicious in a flaky pie crust too!
- French Silk Pie >> Can’t beat this chocolatey classic!
- The Best Zesty Key Lime Pie >> So, so tart.
- No Bake Cherry Cream Cheese Pie >> I love this pie and it’s so easy to make!
- Dulce de Leche Cream Pie >> Have you ever made your own dulce de leche? It’s so easy! Turn it into a pie!
- Coconut Cream Pie with Caramel Layer >> toast the coconut for a rich, nutty flavor
Facebook | Pinterest | Instagram
Blind Baking Pie Crust

Ingredients
- 1 pie crust, half this recipe or a store bought pie dough
- parchment paper or tin foil
- pie weights, dry beans, dry rice, loose change, etc.
Instructions
- First do yourself a favor and make a homemade pie crust. (Or a store bought pie crust is fine!) Check out my post for How to Make Flaky Pie Crust. This recipe makes 2 crusts; you can either halve the recipe or make both and save the second one in the freezer for next time (it will keep for several months).
- Roll out your pie crust and transfer it to a 9 inch pie plate. See pie crust post for details on rolling out the crust.
- Gently fold the trim hanging over the edges underneath itself so that it lines up nicely with the pie plate. You can trim it if you want, but I prefer to just fold it under. If your dough is crackly, that's okay. Use your fingers to mold the dough back to a smooth edge, dipping your fingers in ice water if necessary. Pretend it's play dough. Smoosh it together until you have a nice non-jagged edge.
- Use your fingers or knuckles to flute the edges of the pie. See photos. You can also press the edge with a fork. It looks pretty and it's super easy!
- Refrigerate your pie crust for 1 hour for best results. If you only have 30 minutes, that's okay. The longer you chill, the colder the fat in your pie crust will be when it hits the hot oven, making a tender, flaky pie crust. I like to drape plastic wrap loosely over the top of the chilling pie so it doesn't dry out.
- Preheat your oven to 425 degrees F for at least 20 minutes, to make sure it's nice and hot. Place a pizza stone or a metal baking sheet in the oven while it preheats. (Baking on a really hot surface helps cook the bottom edge of the crust.)
- Line the crust. Get a large square of tin foil or parchment paper. Crumple it up so that it is nice and soft, you don't want to tear your pie crust. Smooth it out and lay it in your pie crust. (Make sure there is enough overhang that you will be able to lift the heavy weights out of it when the crust is baked.)
- Fill with weights. You can use pie weights, marbles, loose change, dry rice, dry beans, anything that won't be bothered in the oven. You can even use sugar. Make sure your weights go up the sides of your pie crust. You are not just preventing bubbles from forming on the bottom of the crust; you want to keep the edges of your pie crust from slumping down into a sad droopy mess. You need to hold them up with the weights, so be sure to use plenty. I used about 2 and 1/2 pounds of beans.
- Bake your weighted pie at 425 degrees F for 15 minutes, until the edges of the crust are a very light golden color. Don't take it out until you see some color on the edges of the crust.
- Remove the pie crust from the oven and shut the door. Carefully lift the parchment paper or foil to remove the weights.The bottom of the crust will look shiny and raw on the bottom (because it is).
- Prick the bottom of the pie crust with a fork to prevent bubbling.
- Make a tin shield for a full blind bake pie crust: I like to use a pie crust shield to line the edge of the crust so that the edges don't get too brown. Get a square of aluminum foil a little bigger than the size of your pie. Fold it in half, then in half again so that it's in quarters. Then use scissors to cut out the middle section. When you open it, you will have a square of foil with a circle cut out from the center. Mold this around the edges of your pie.
- For a full blind bake pie crust: Place the pie crust back in the oven at 425 for another 12-18 minutes, until the bottom of the pie is starting to turn golden light brown. (Bake this long if your pie crust is NOT going back in the oven at all)
- For a par-baked pie crust: There is no need to make a tin foil crust shield. Place the pie crust back in the oven at 425 for another 3 minutes, until the bottom of the pie is matte and no longer shiny. It will be blonde and not golden at all. (Par-bake if your pie crust is going back in the oven to finish cooking the pie filling.)
- Remove from the oven and follow the instructions on your pie recipe for filling. Most recipes call for letting the crust cool completely.


Hello! What level in the oven do I put the pie to bake ?
Hi Michelle! The middle rack of the oven is great. Enjoy!
Hi, Karen– I really enjoy and appreciate how you instruct us. It’s always with humor and sound advice. Your recipes are great and you are VERY MUCH APPRECIATED!!!
I’m wondering if I’ll need to bake the bottom of the crust if I’m making your tomato pie? Don’t want it soggy. Thanks for all your help.
Hi Shery! Yes you need to follow the instructions for Par-baking the crust, as described in this post, for the Tomato Pie. Enjoy!
Thank you so much for these tips!! I never had enough weights in my crust either. Now it makes sense why it would still shrink. Plus I never froze it before baking, but will definitely give it a whirl. I bake many pies for our big family Thanksgiving, and I only have to blind bake the crust for the French Silk pie. It always looked so sad. Can’t wait to try this, thank you!!
Slumpy pie crusts really are the saddest thing right Trudy? Even if they taste good! Hopefully these tips will help you get the picture perfect pie! happy Thanksgiving :)
Would I be able to make and parbake these pie crusts, then freeze them about a week before I use them? I want to make pies for thanksgiving and hoping to get the crusts done in advance so it’s not so overwhelming to make all of them at once.
Hi Amy! Yes, you absolutely can blind bake your pie crusts and freeze them in advance. When you thaw them, you can put the filling in immediately without thawing the crust at all. Great idea on getting started in advance! Enjoy :-)
You indicated you weighed it with 2.5 lbs of beans, but the scale shows 2.55 with the pie dish, crust and beans. Do you recall how much just the beans weighed?
Hi Cathy, this is an example of me being very dumb and forgetting that 2 and 1/2 pounds would read 2.8 on that scale, not 2.5. haha!! The scale speaks the truth, anywhere between 2 and 2 1/2 pounds is going to be just fine :) thanks for pointing out my idiotic mistake hahaha!!
I’m excited to try this- I’ve had many a sad, melty pie crust over the years. Not that this stopped me from using them :)
Same mom, haha! I learned from you I guess, slumpy pie is still pie, lol. But no longer! We will have perfect blind baked pie crusts every time! :)