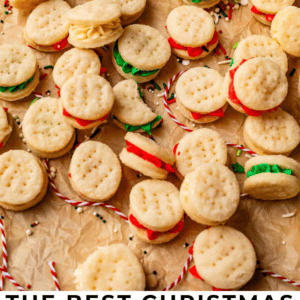

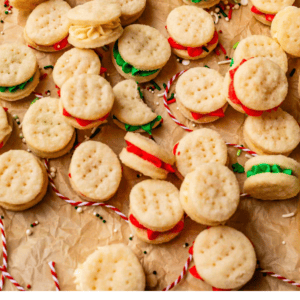

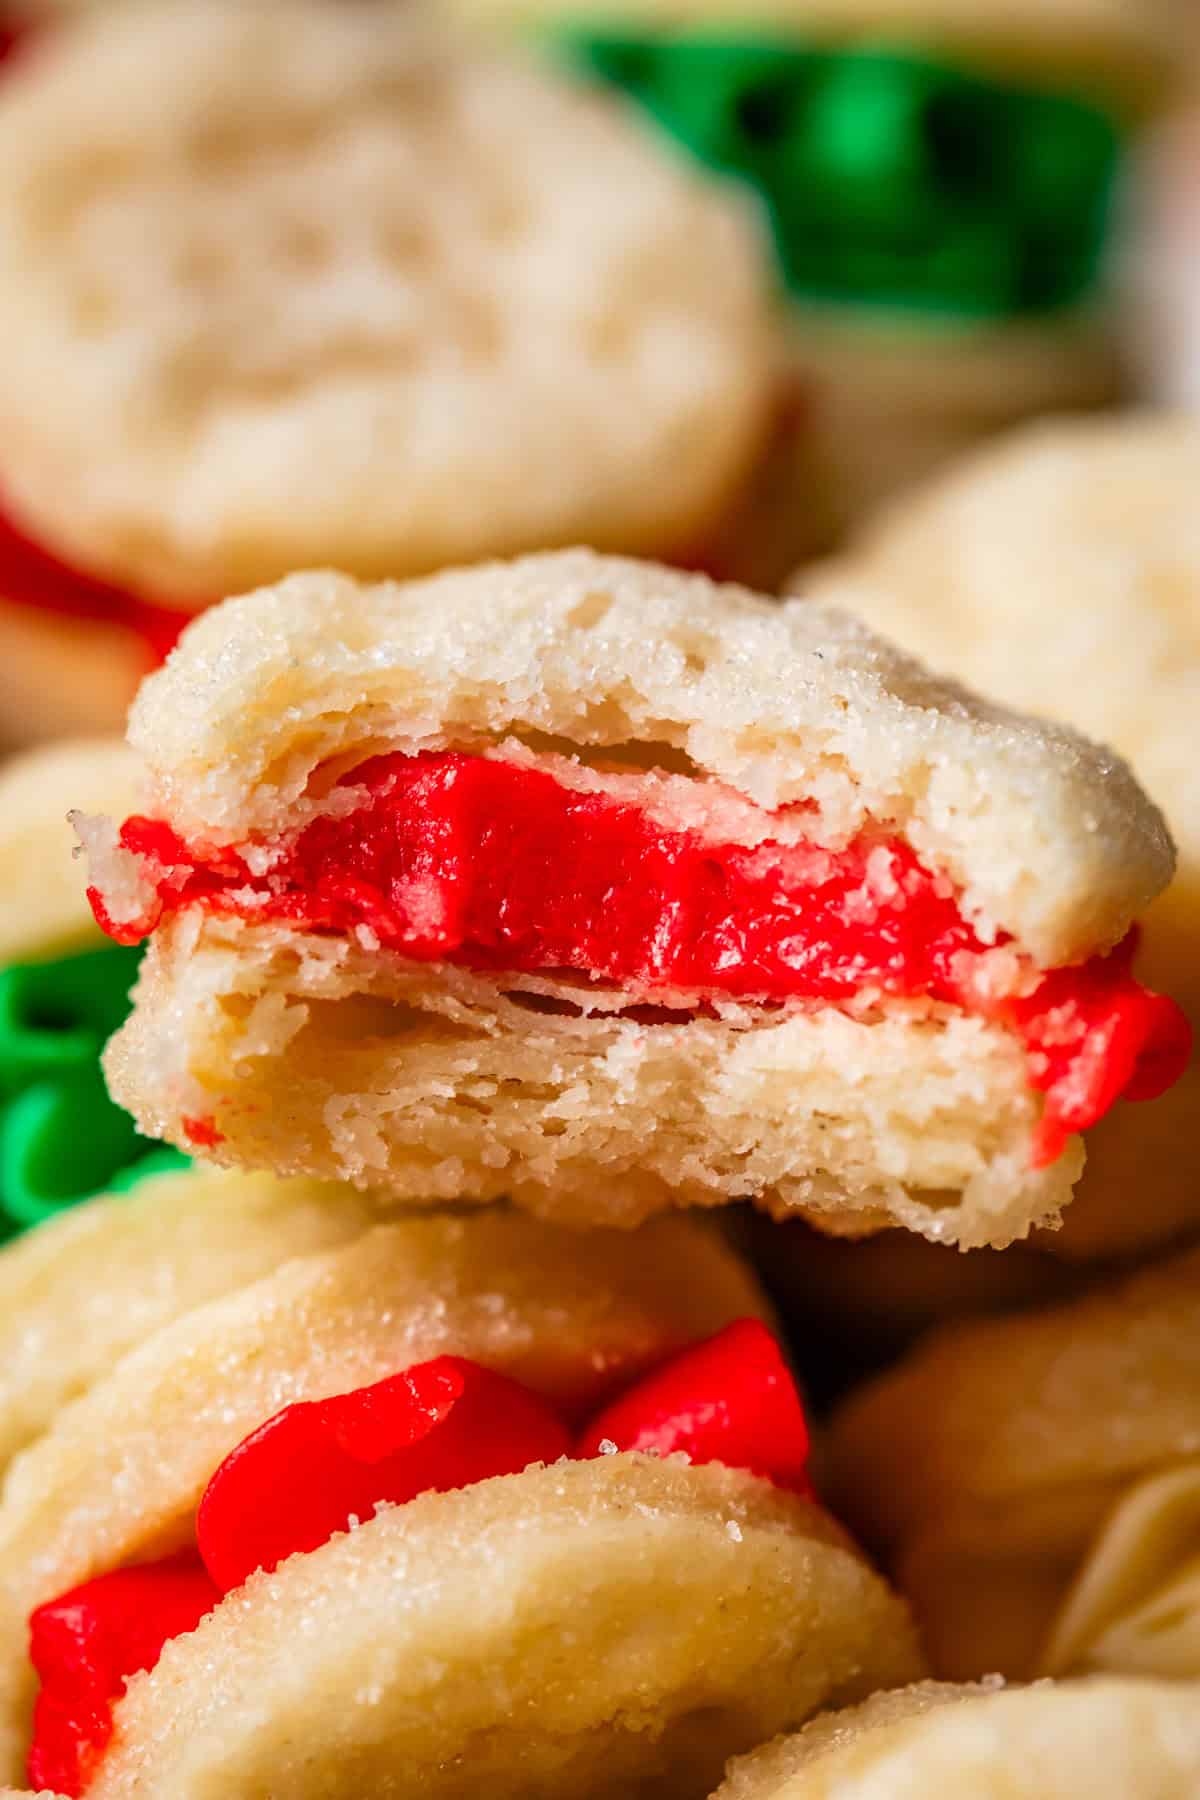
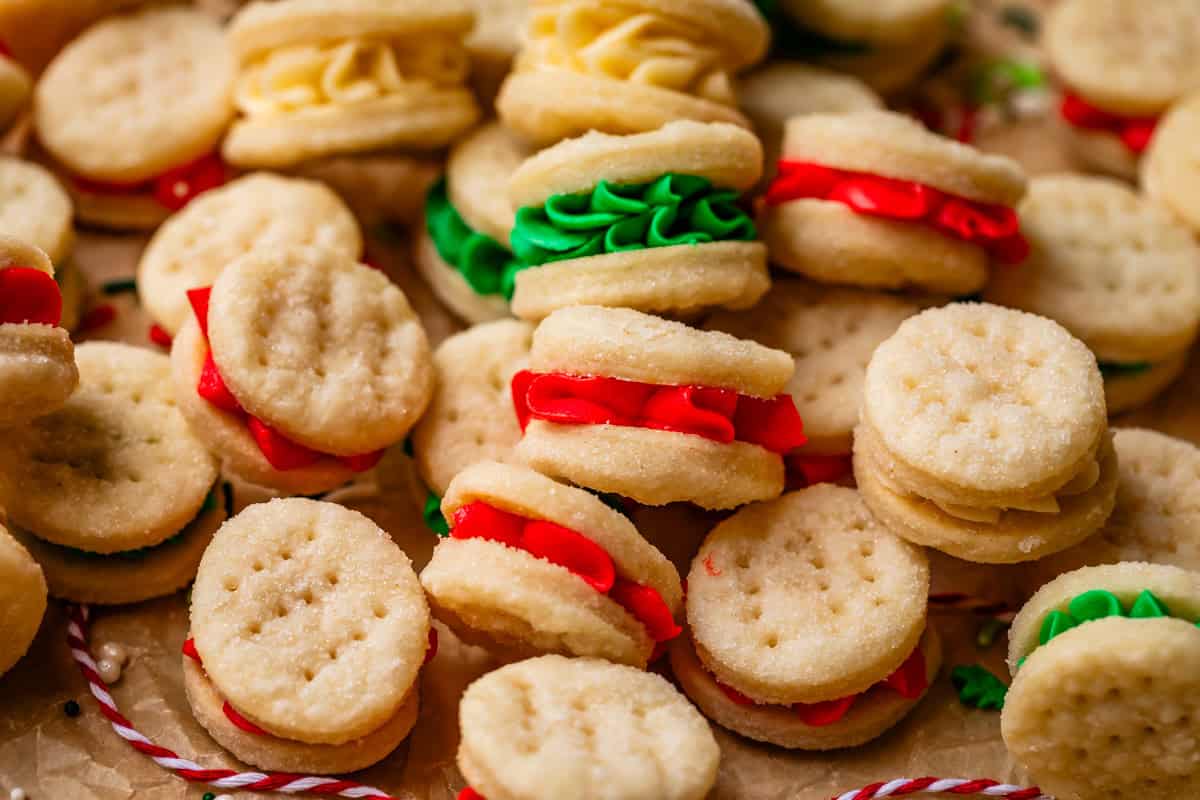
I am O B S E S S E D with these Swedish Cream Wafer Cookies, you guys!! (Pariserwafiers? Vanilla Cream Cookies?) This is a recipe the world forgot, and I’m still mad about it. How could the previous generation have let us down so hard?? Perhaps because until you taste them, they look unexceptional: two tiny cookies sandwiched with buttercream frosting. Sounds like your average sugar cookie, right? NOPITY NOPE NOPE. These cookies are flaky, buttery, crispity-tender discs of bliss. In combination with the super RICH buttercream (thank u, egg yolk 🥹), these cookies are an unstoppable combination of everything you ever wanted for Christmas. I cannot eat less than 4 at a time.
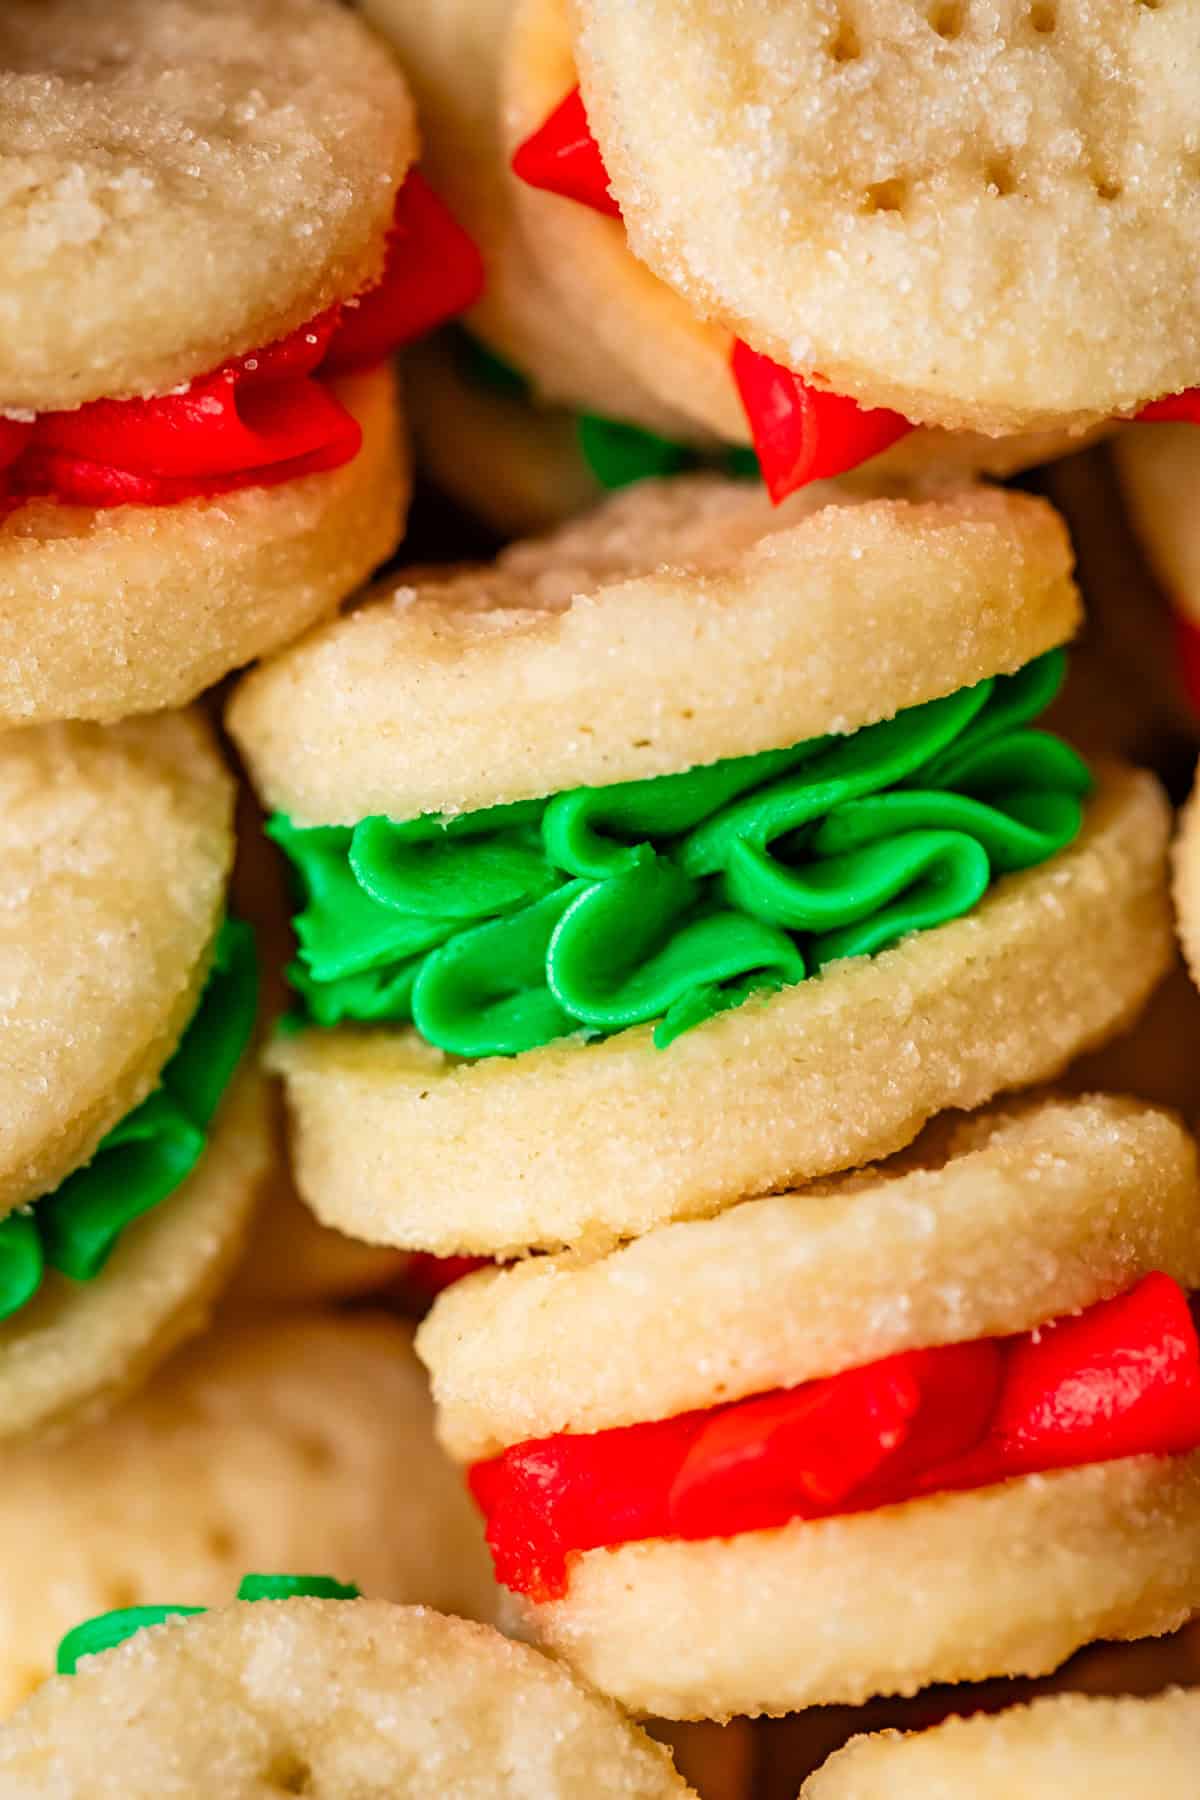
Table of Contents
If you see me in person anytime soon, prepare to have me whisper-yell at you, without any subtly, “WHAT ARE YOU GETTING YOUR HUSBAND FOR CHRISTMAS???”
I don’t know if you’ve noticed but we’ve got less than two weeks until Christmas day. I know this, not because I have some delightfully charming advent calendar feeding me chocolate everyday, but because there are little red signs flagging the products on Amazon: “Ships before Christmas!”
Music to my ears, yet I know time is running out. It doesn’t matter how far down the rabbit hole I go, Eric still does not want a custom flask or beard oil or socks that say “Trophy Husband” on them. Go figure.
I know that December sometimes feels like one giant long list of to-do’s, but I love every minute. (This makes sense, actually, because I totally swoon over a tight little to-do list 🤣) But even with all the hustle and bustle, it’s my absolute favorite time of the year. I wish the “feeling” of Christmas could be bottled up.
I got this email from reader Anita a few weeks ago:
Karen,
I was searching online whether it was ok to put honey in hot chocolate and one of the first things that came up was your blog with hot choc w honey. I saw at the end of your blog (it was from way back 2015) that you mentioned Our Lord as the reason for the season – I was floored and always over the moon when any writer of anything on the net gives glory, honour and acknowledgement to Our Lord and Savior, I wanted to thank you for that.

Isn’t that the sweetest note? Thank you, Anita, for helping me to remember the reason for the season! It made me want to share a really cool video I found from last year, when my church made all the screens in Times Square in New York go dark, and then shared a nativity sequence. It’s only 2 minutes long, but it’s so incredibly cool! You should definitely watch it! I wish I could have been there! It was so impactiful seeing everyone in the busy square just stop and stare at Mary, Joseph, and the baby Jesus. I hope you get a few minutes to yourself to stop and breathe for a moment, to remember Jesus and what he’s done for us. He’s why we make all these cookies in the first place! 🤣 I’m so grateful for Him.
Pariserwafier Cookies
Where have you been all my life, Pariserwafier cookies?? (I pronounce it “Parees-er-wafer” cookies.)
One day last January my friend Danielle dropped off a plate of these tiny sandwich cookies. I assumed they were sugar cookies of some kind and didn’t think much of it. Then I ate one…and my brain exploded.
I called her for all the details. “WHAT are these cookies, who made them, where did you get the recipe, why are they so good??” I was practically blubbering, I swear.
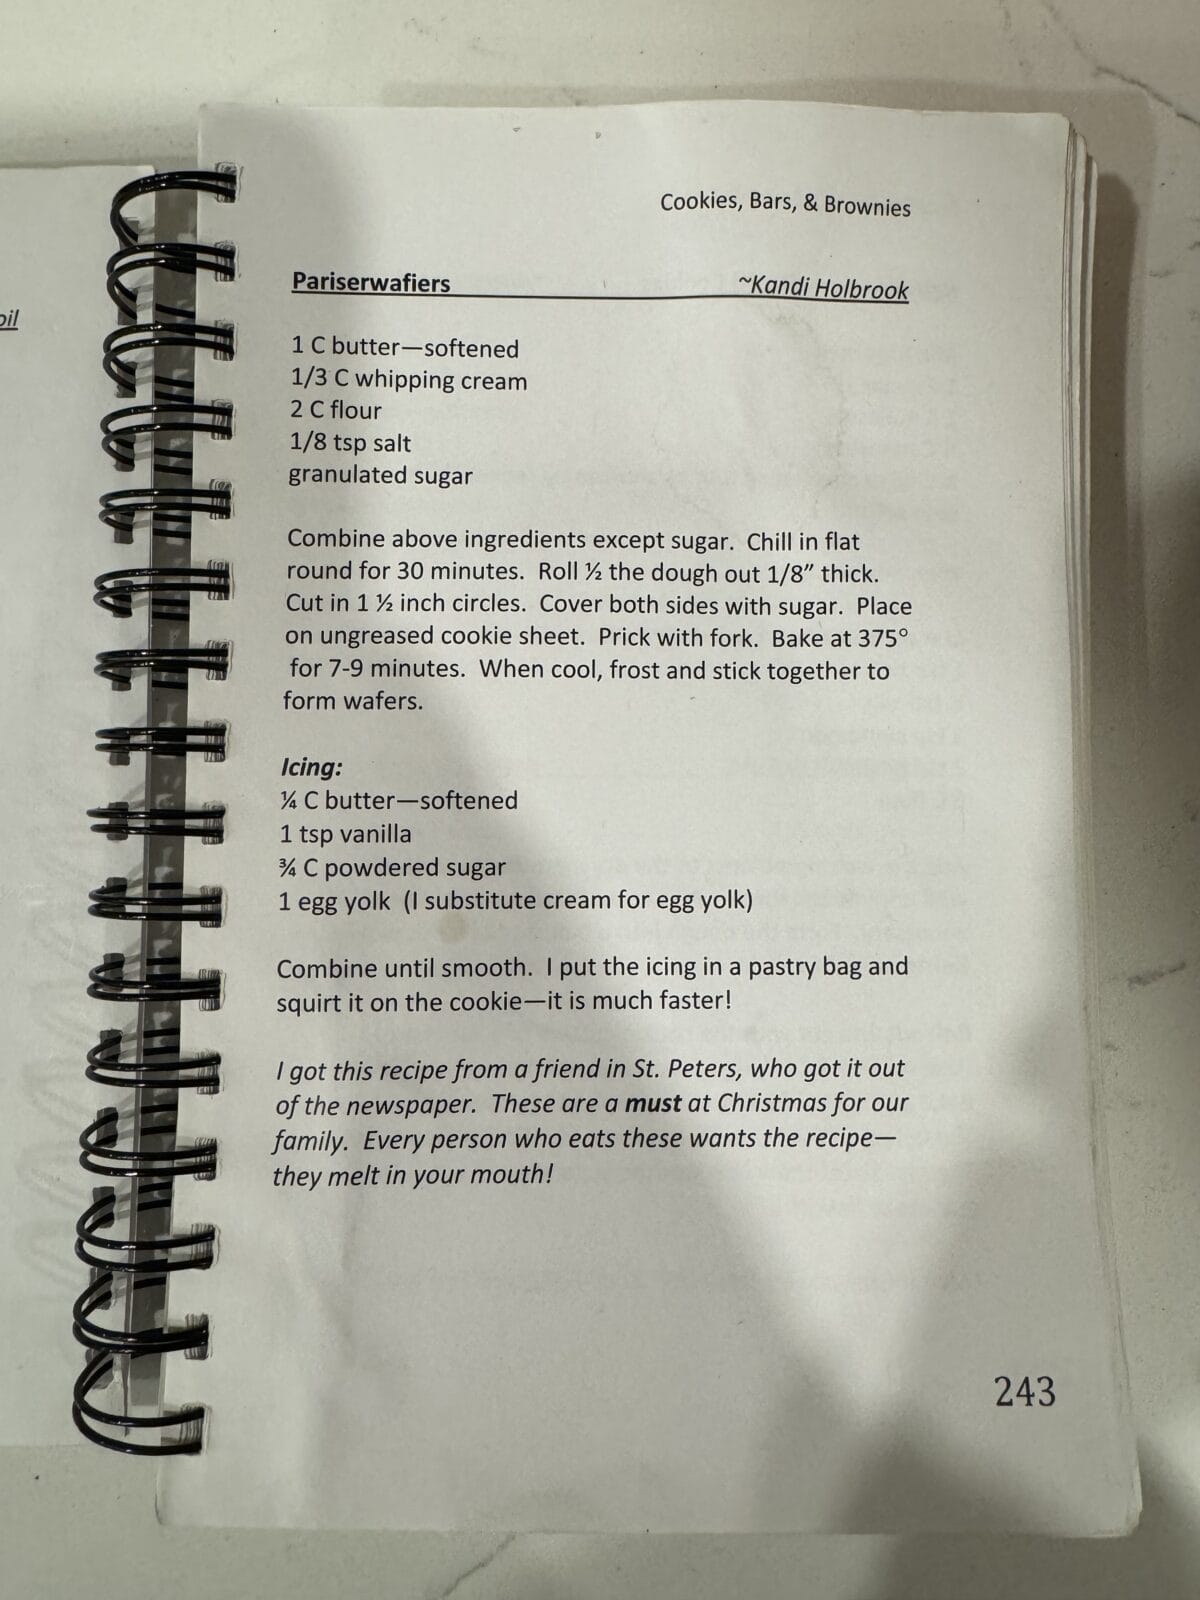
She told me these are THE cookie in her husband’s family. Her mother-in-law, Kandi, got the recipe from a friend, who had clipped it from the St. Louis Post Dispatch in 1984.
I made the cookies, added more salt (I always add more salt😂) and texted Danielle:
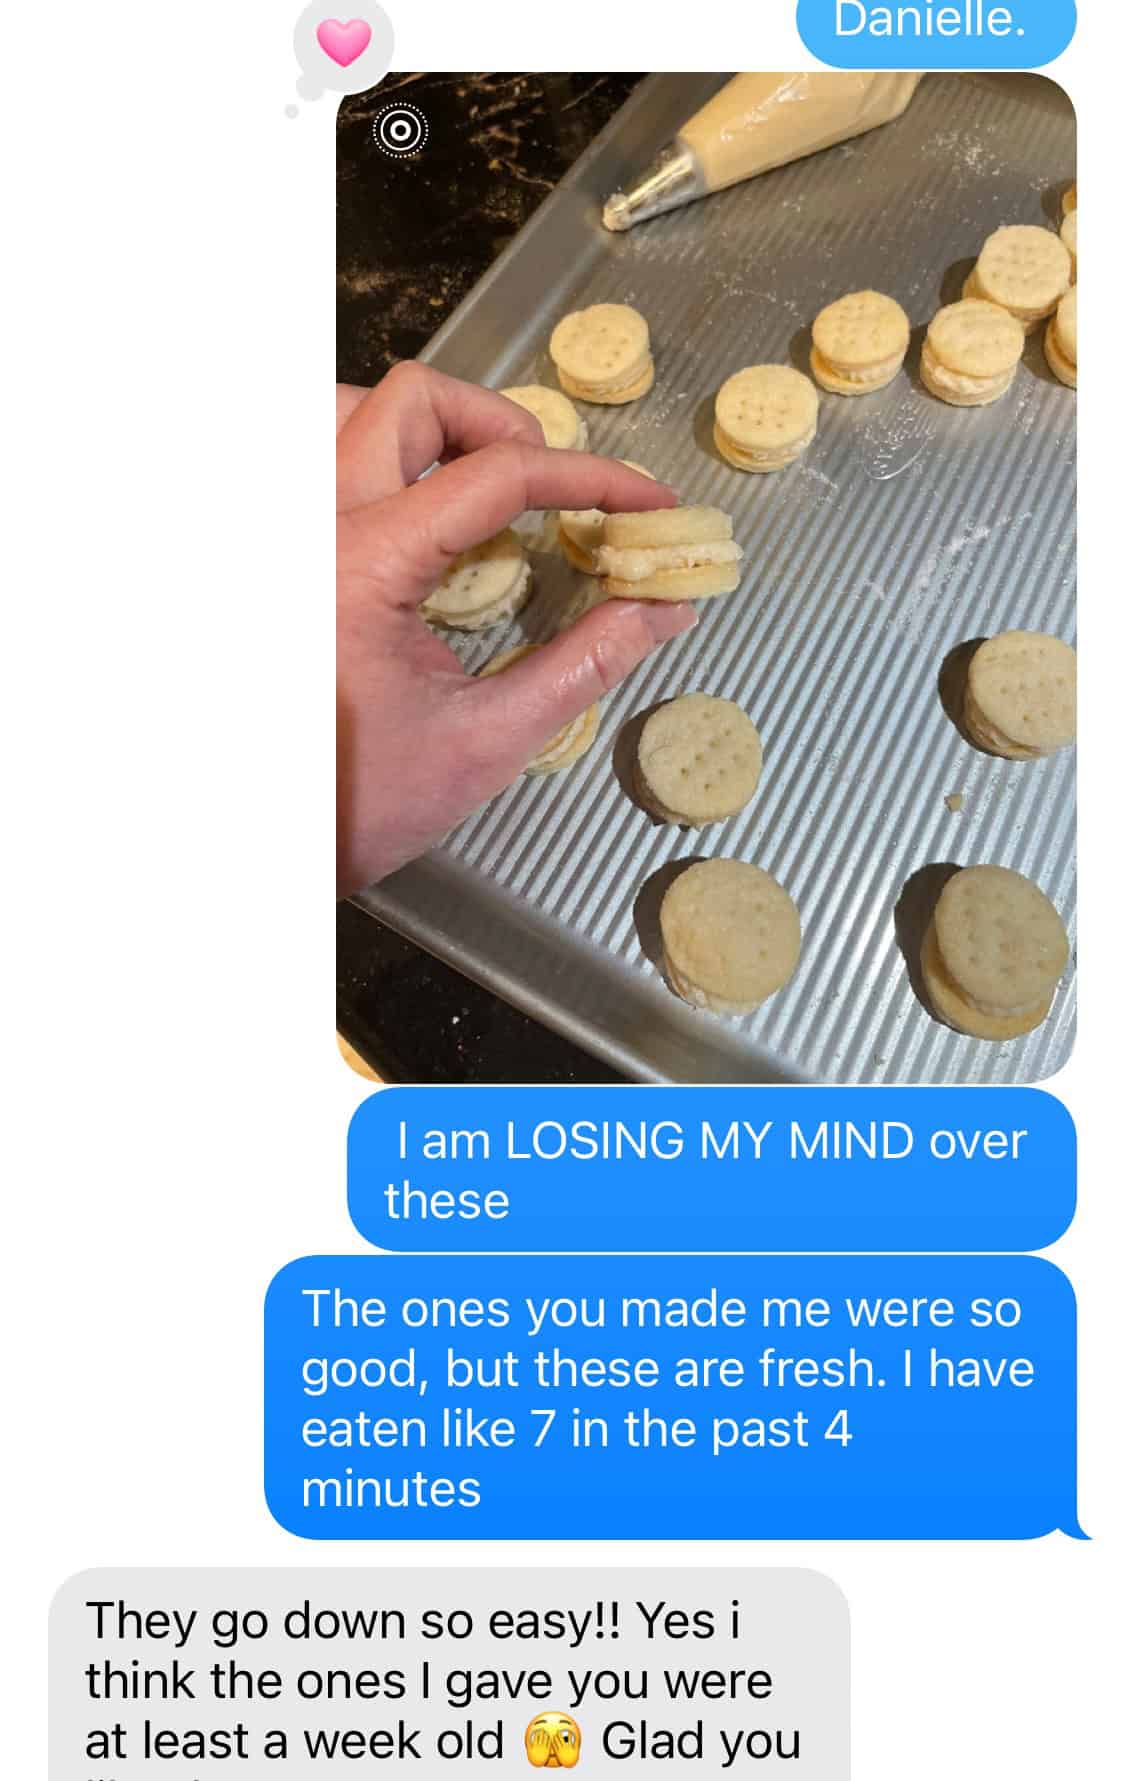
And nothing has changed, every time I have made these over the past year, I eat them in alarmingly high numbers. You can pop one in your mouth like it’s nbd, and then all the sudden you’ve had 7 in 4 minutes 😂.
What makes them so good? Well, they are nothing like the normal cookie base we are used to that starts out with a whole lotta sugar. This cookie dough has NO sugar in it, not even a teaspoon. Kind of like my Swedish Sour Cream Twists. (The Swedes are onto something! Although I’m pretty sure this isn’t actually a Swedish recipe…more on that later)
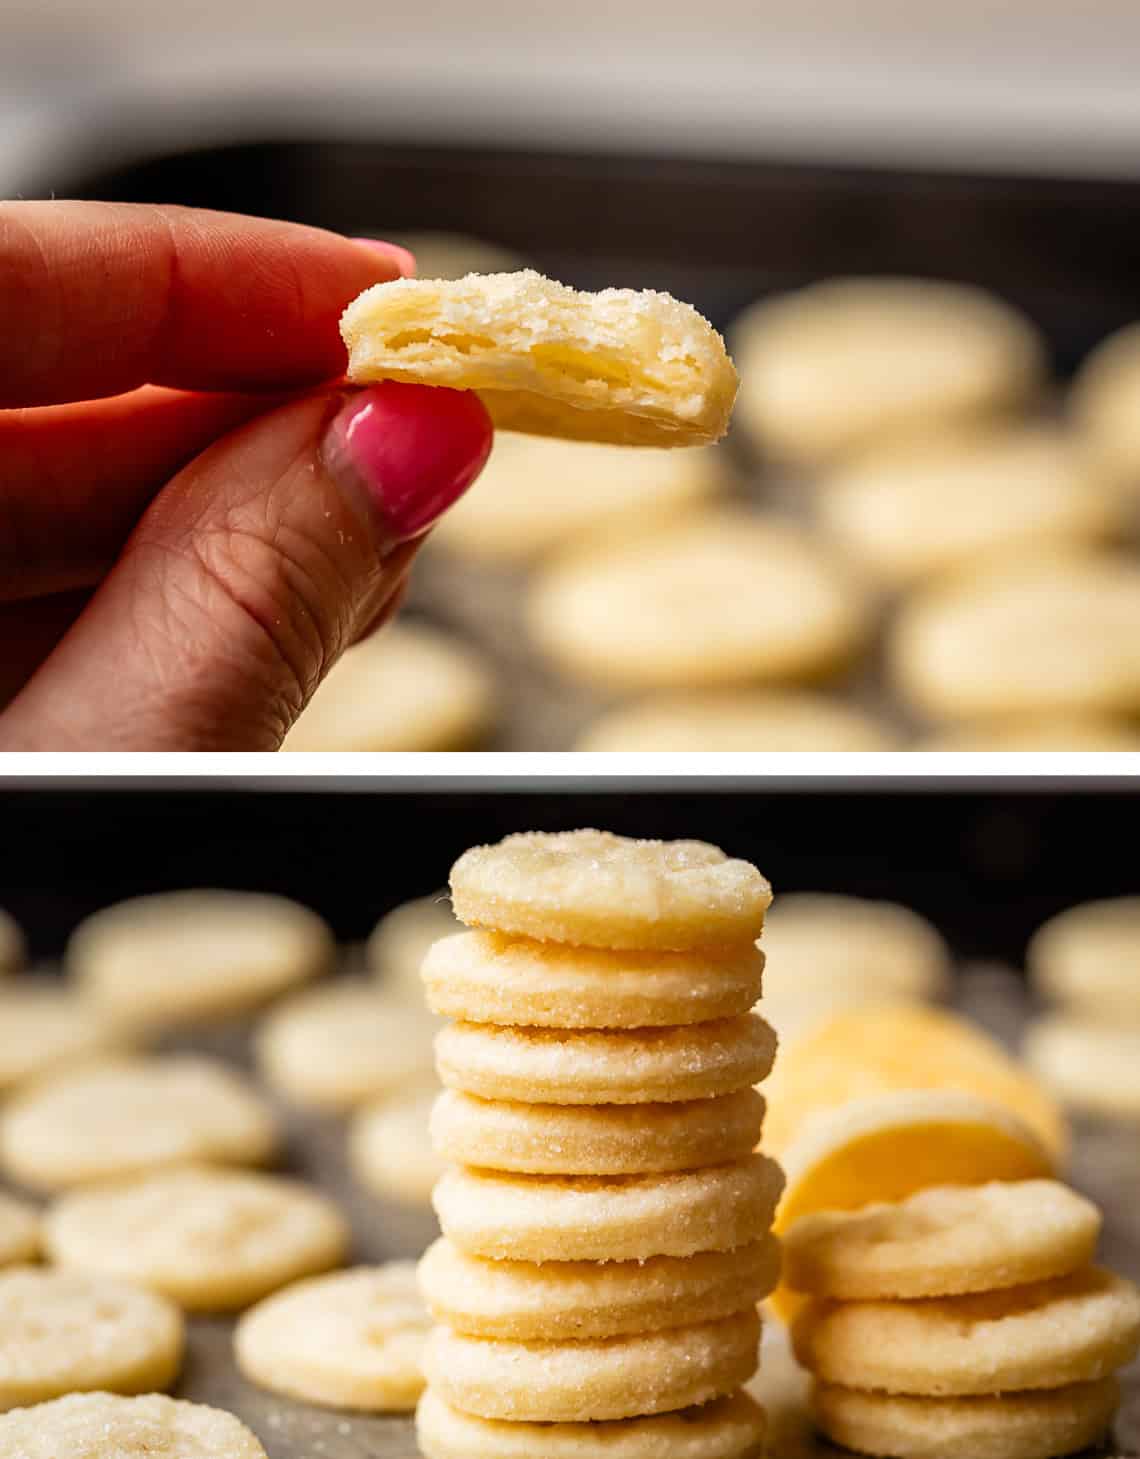
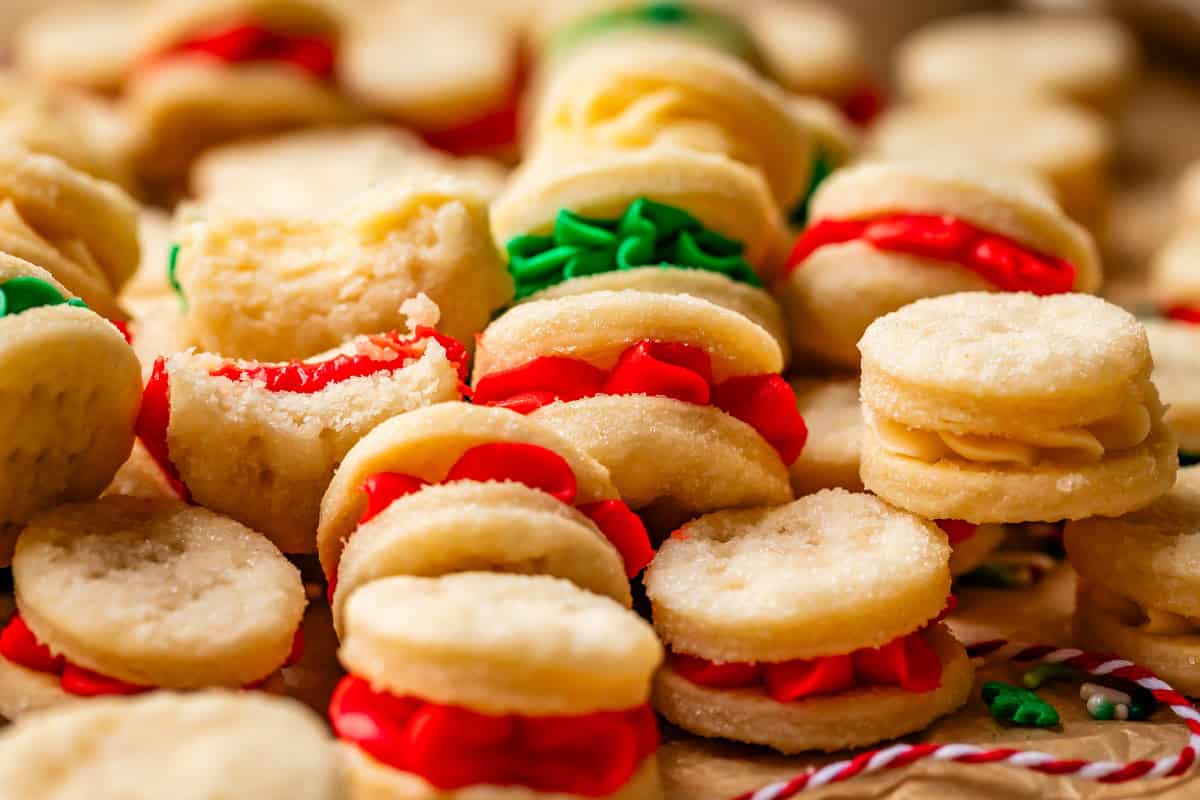
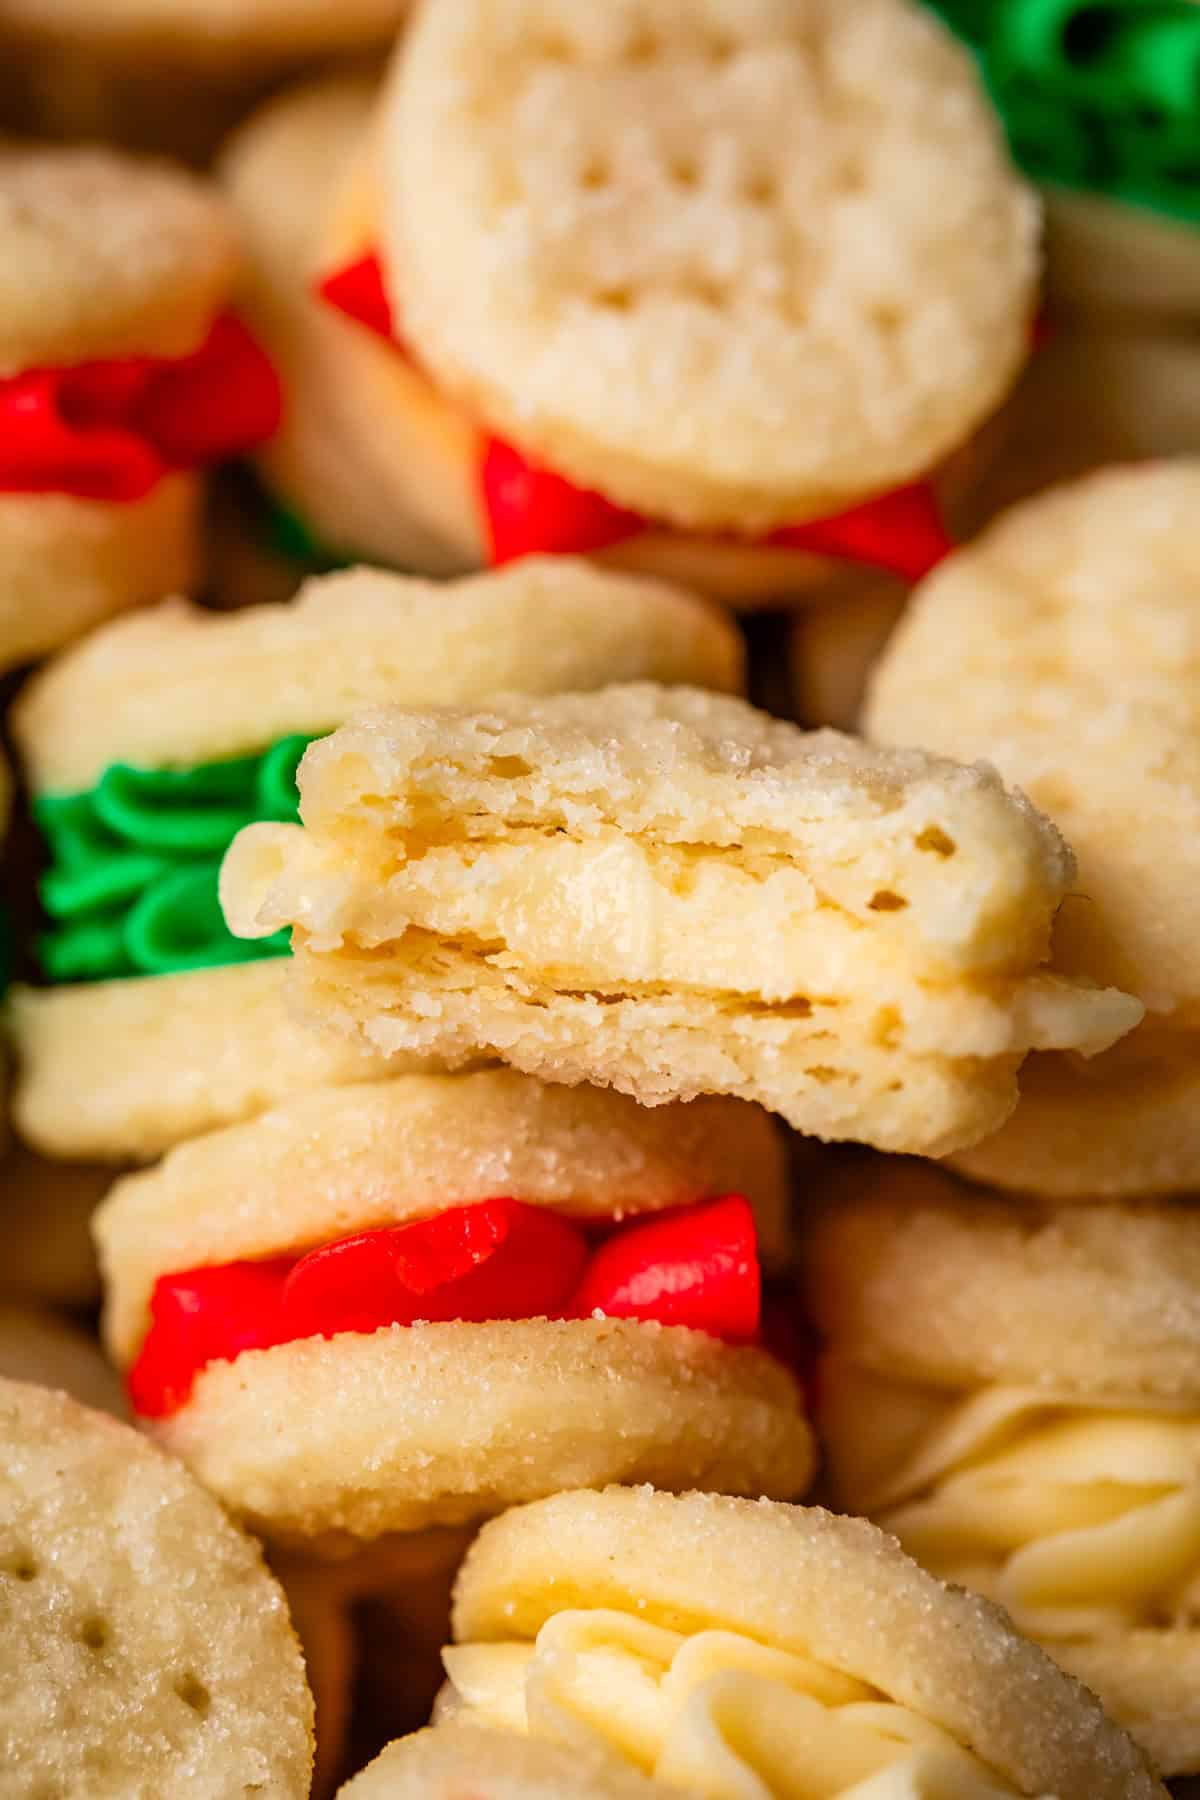
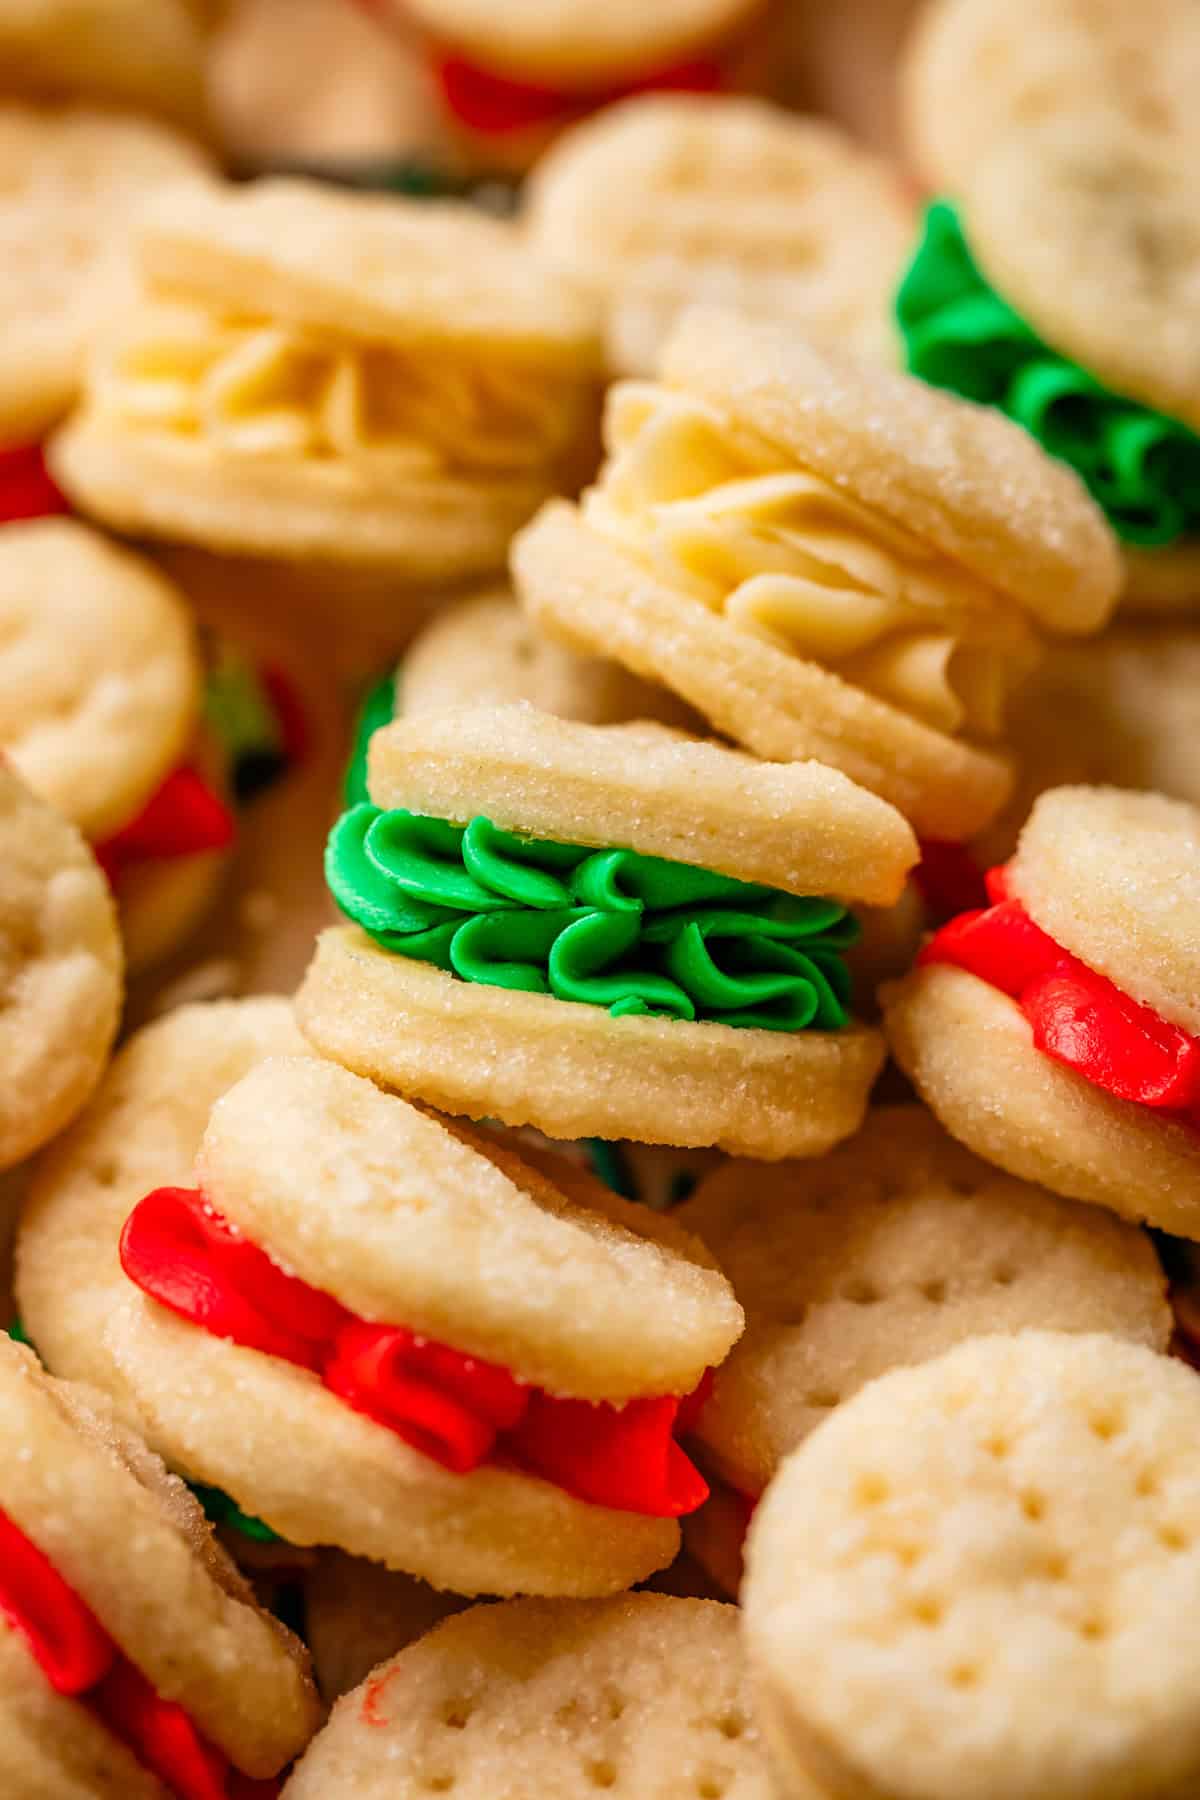
The cookie dough resembles pie dough a lot more than a traditional cookie. It behaves like a pie dough, too: it’s flaky and crisp (but not TOO crisp), intensely buttery, and puffs up into the lightest, airiest, flakiest morsels that shatter into a hundred buttery melty pieces in your mouth when you bite into it. They are phenomenal.
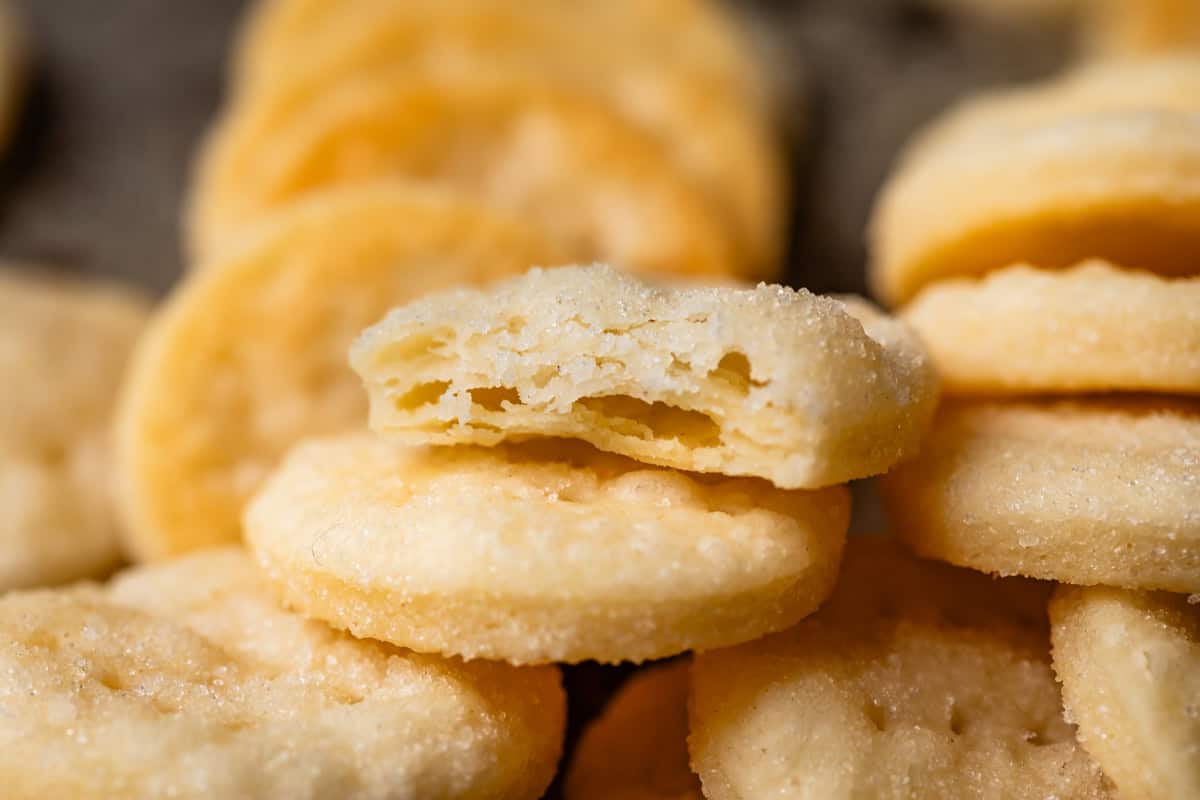
Look at all these layers!! As with many exceptional recipes, the process and ingredients are deceptively simple. You will look at these pictures and glance over this ingredient list and think, MEH. Looks like every other cookie recipe. But oh, are you wrong. These cookies are flaky to the max, light and crispy, yet tender and soft in the center.
And then, we go and smash them together with buttercream frosting. That’s where the sweetness comes in. But not just any buttercream, oh no. The frosting is made with an egg yolk in it, which makes it even more rich and creamy. If this makes you squeamish (it is completely raw) then you can use a couple tablespoons of cream in it’s place.
Where did these cookies come from??
Ever since Danielle shared these cookies with me, I have been on the hunt for more info. It is surprisingly NOT easy to come by! It seems that this recipe is treasured in the hearts of the very few who remember it, and who understand that these are NOT your average sugar cookie.
From what info I could find, I learned that these claim to be Swedish cookies that are called “Pariserwafier”. Or, translated to English, Paris Waffles. However, turns out there isn’t really a history of these cookies in Sweden that I could actually track down. Instead, the recipe seems to have appeared in America sometime in the mid 20th century. It just feels so American to me to have a recipe for a supposedly Swedish cookie claiming to be a French cookie that isn’t really either. ‘Merica!
6 months after I made these the first time, I found this “Parisian Waffles” recipe in this Swedish cookbook…printed in the US in the midcentury 😂
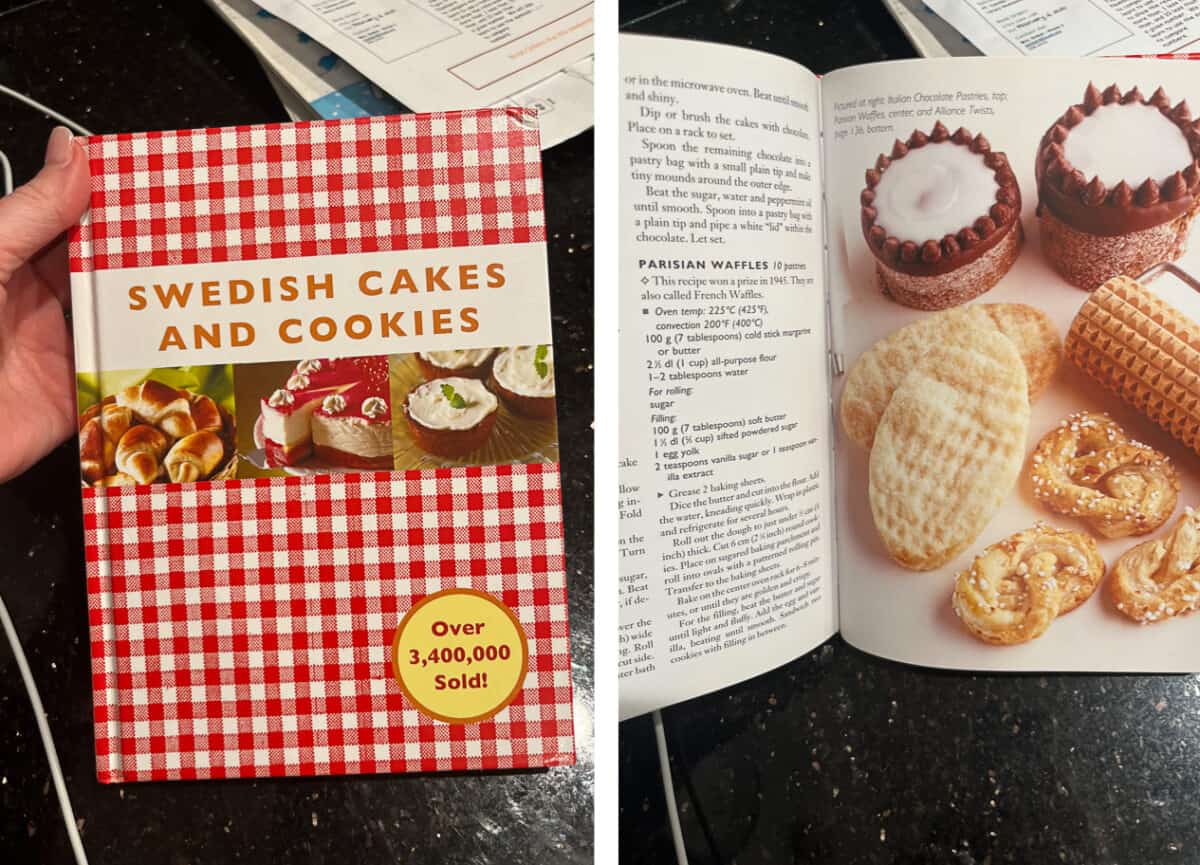
Same recipe! Except they used water instead of cream, no thank you. Look at how large they rolled them out in the photo on the right! And the pattered rolling pin they used. It looks a lot more like the vanilla cream wafer sandwich cookies that you can buy at the store. This shape helped me understand a little better where the store bought version of these is coming from: the airy texture, the crispy edge with the soft frosting insides, the long, flat shape. The homemade version, as always, is ridiculously superior.
Ingredients you need
These cookies have really simple ingredients, many of which you may already have on hand. Look through the list, but be sure to check out the recipe card below for full ingredient amounts and instructions.

For the cookies
- butter
- cream
- flour
- kosher salt
- granulated sugar for rolling
For the frosting
- butter
- vanilla
- powdered sugar
- egg yolk, or cream
- food coloring, optional
How to make cream wafer sandwich cookies
First start out with a heck ton a butter, just as any good cookie recipe does. Beat it until it’s smooth and creamy. We’re going to skip the sugar step! No sugar in these cookies! Instead, add in some heavy cream.

The cream and the butter will combine to make a sort of curdle-y looking mixture that looks a little too wet. Never fear, this is normal. Just keep beating it together, scraping the sides, until it is combined. Don’t go TOO far, or your butter will start to form a mass with a puddle of liquid at the bottom (in other words, if you beat too long it will turn into butter and buttermilk!)
Add the flour and salt. It will look crumbly at first, but scrape the sides and keep going.
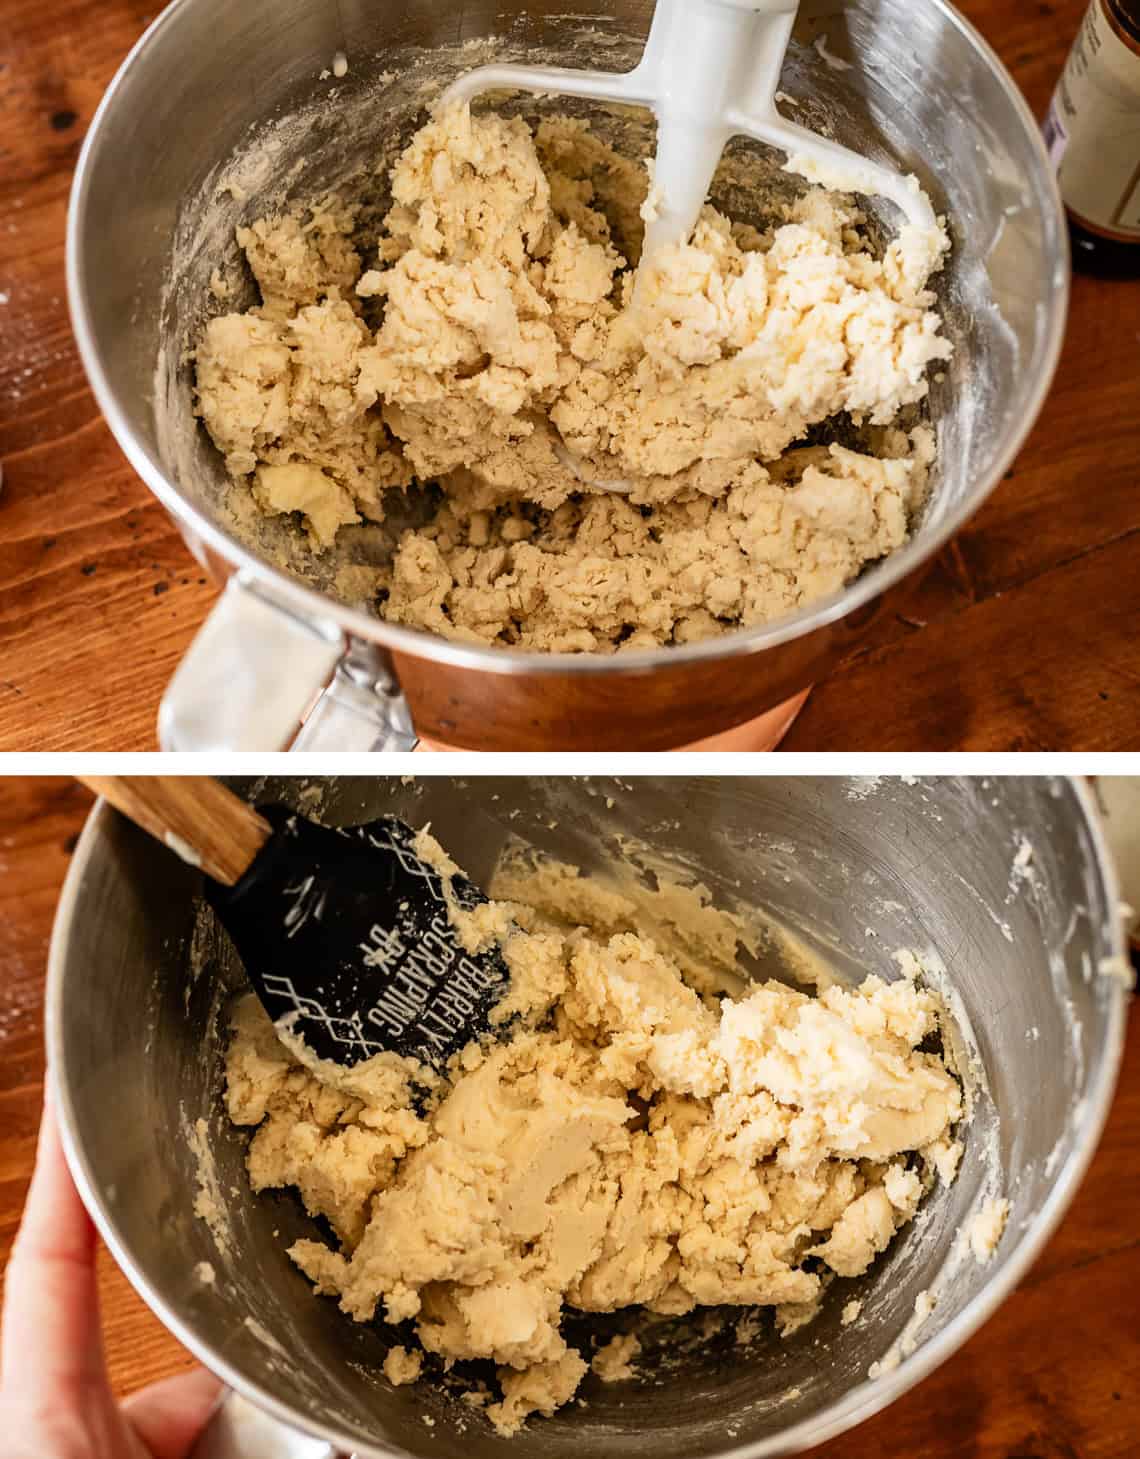
It will come together in a ball like this. Don’t over mix!
Divide the dough in half and lay it out on two sheets of plastic wrap.
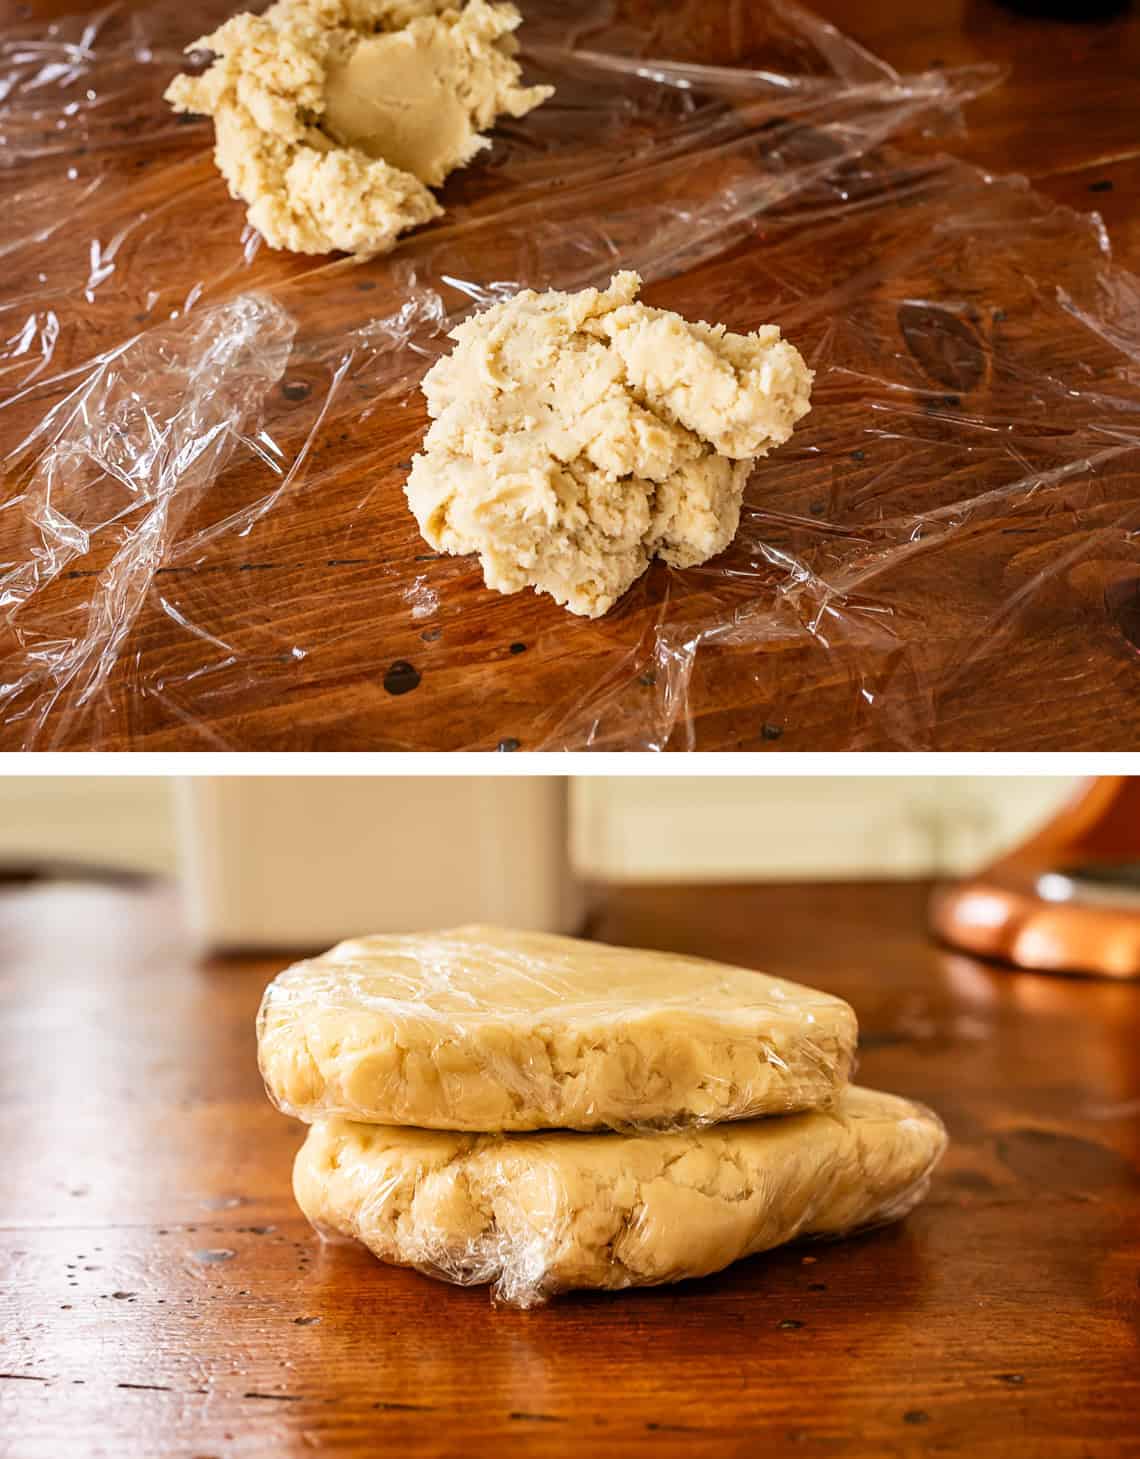
Form each one into a flat disc and toss it in the fridge. A half hour later, roll it out.
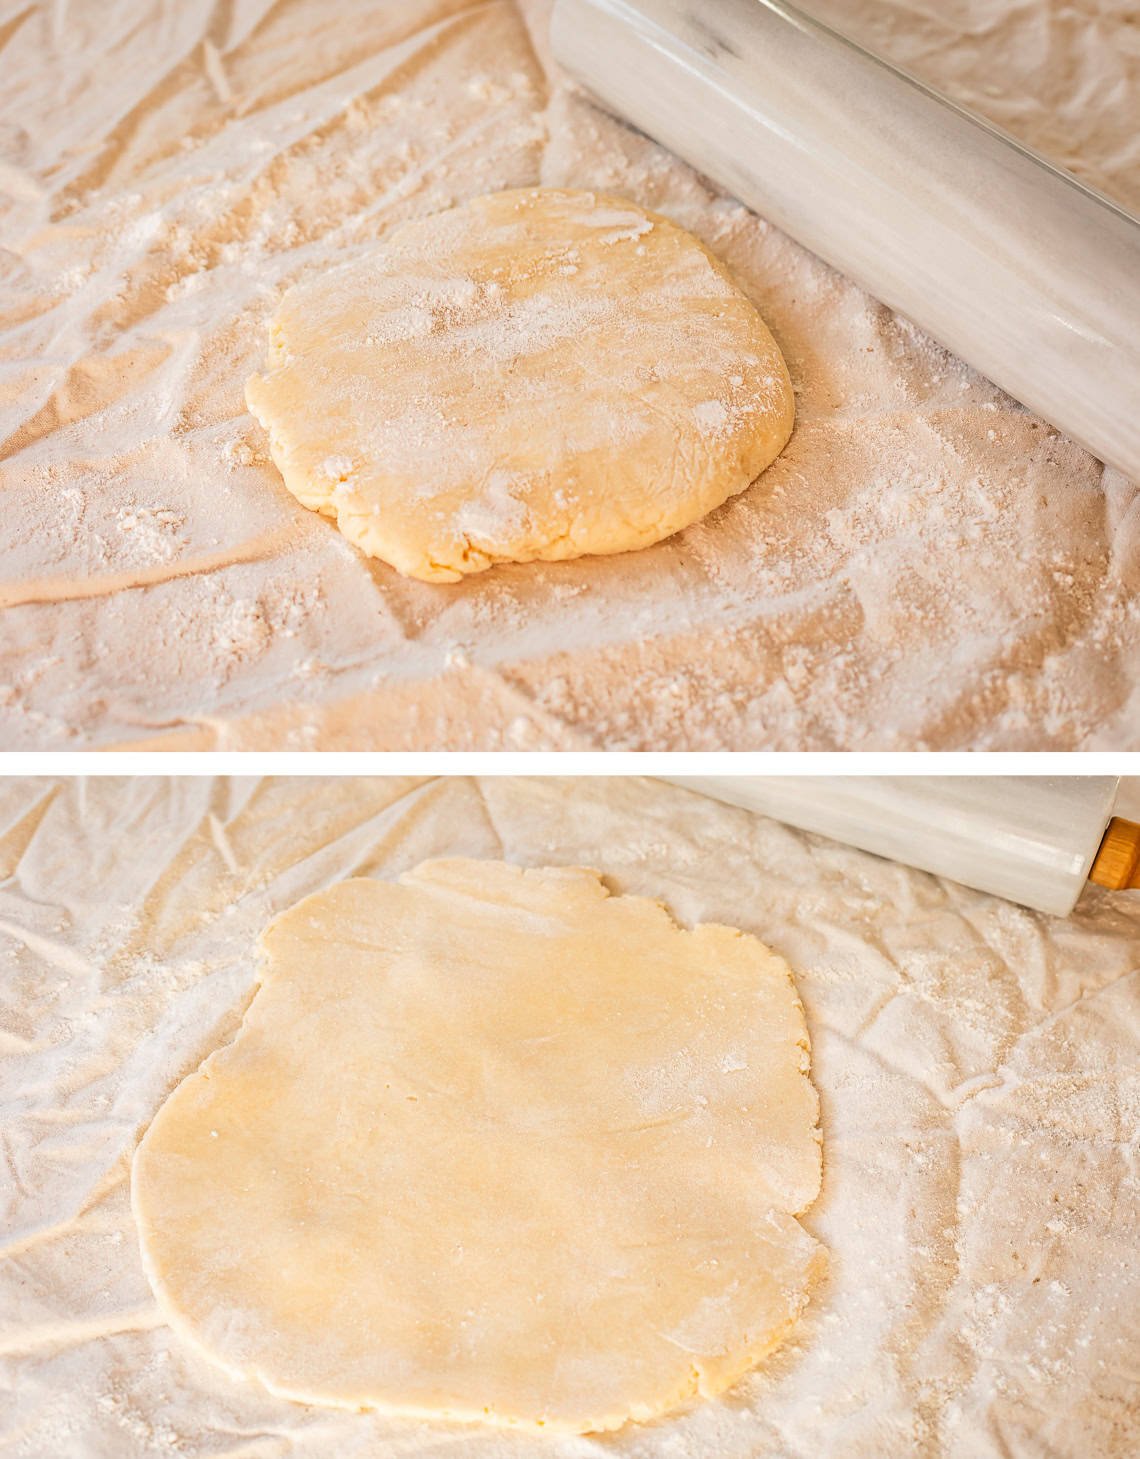
Use flour sparingly, and roll it out suuuuper thin, like 1/8 inch. These cookies PUFF and flake just like pie dough, so we want them rolled nice and thin, the better to shatter delicately in your mouth!
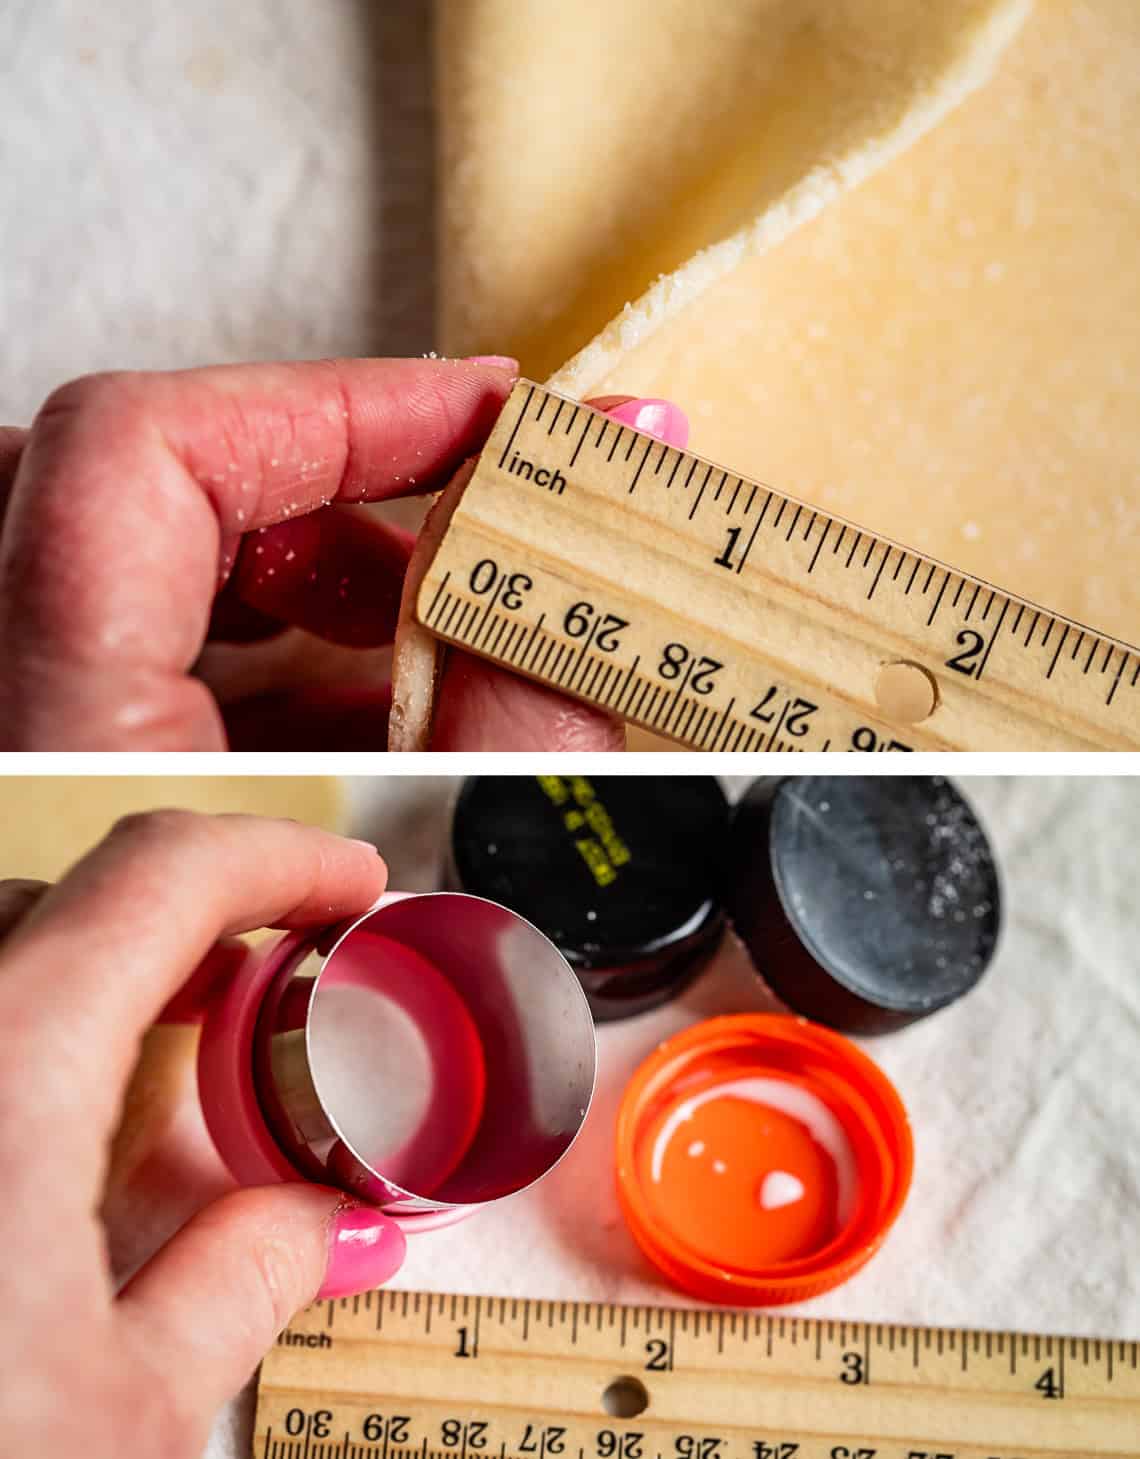
Grab a 1 and 1/2 inch round cutter. If you don’t have one, don’t sweat it, I dug in my pantry for these bottle lids that were about the same size, and a milk jug lid is about the same size too. Use what you’ve got!
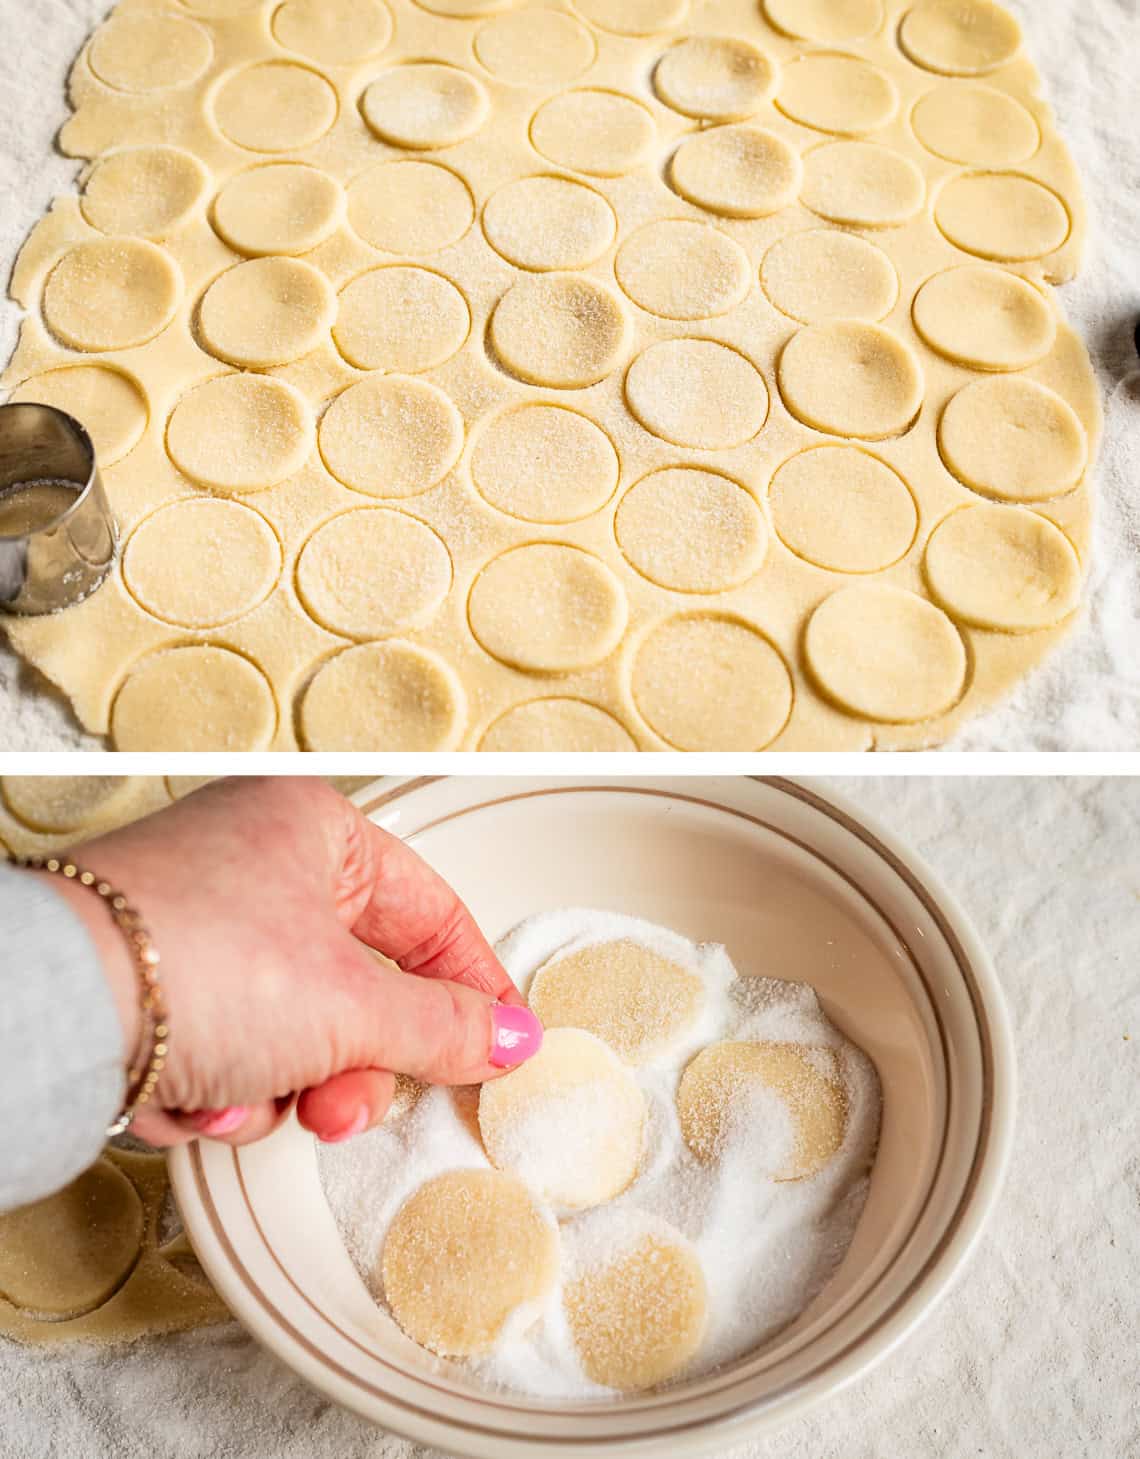
Cut out the dough, and then toss each piece in a bowl of granulated sugar. Make sure each piece of dough is coated really well! This step not only gives our cookie a nice sparkly finish, but it sweetens the cookie (remember, there is no sugar in the dough) AND helps to crisp the cookies in the oven.
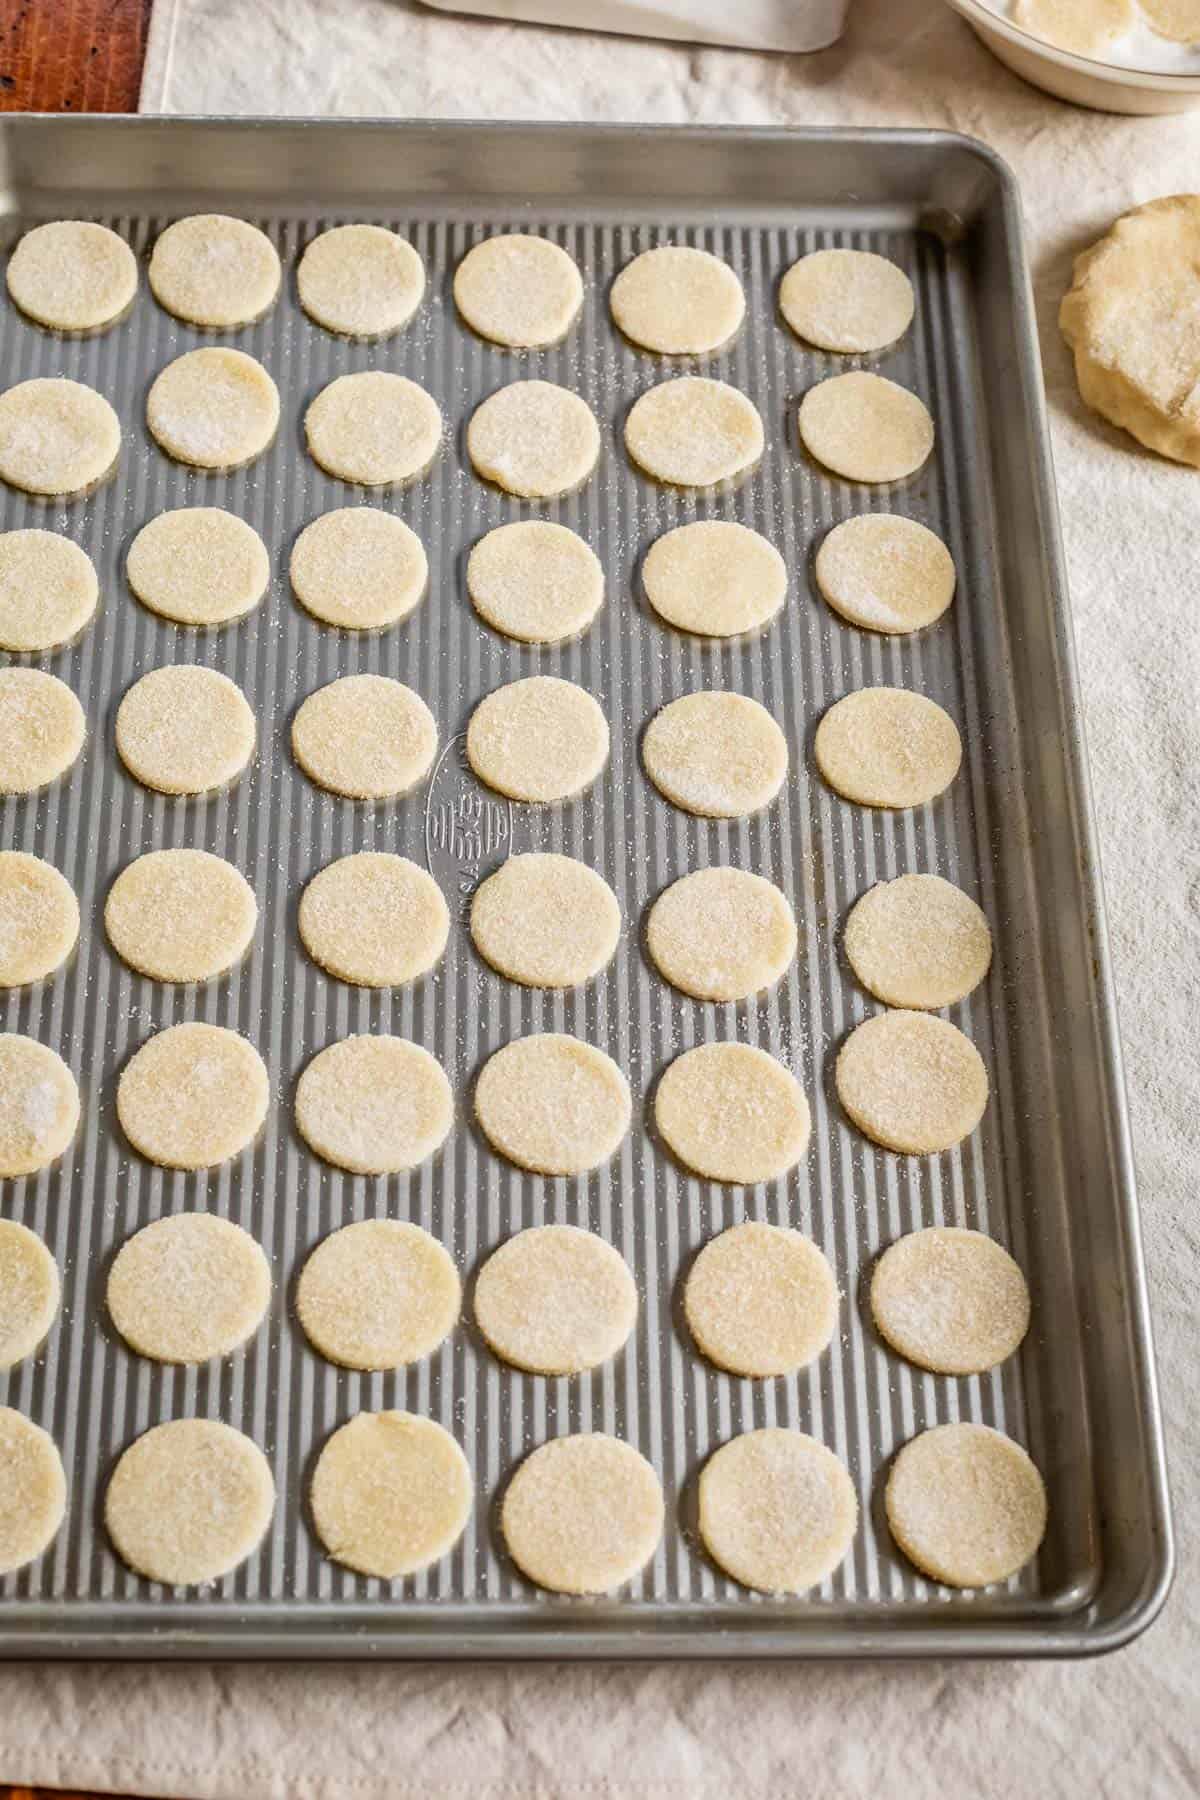
Line up your cookies right on the pan, no parchment paper needed.
Then use a fork to prick each cookie 3 times. Get your kiddos to help with this! This step is kind of annoying (these cookies are a labor of love ❤️ ) but you can’t skip it! It’s not for looks; it’s to keep the cookies from rising too much in the center. The same way you prick a pie crust or use pie weights when Blind Baking a pie!
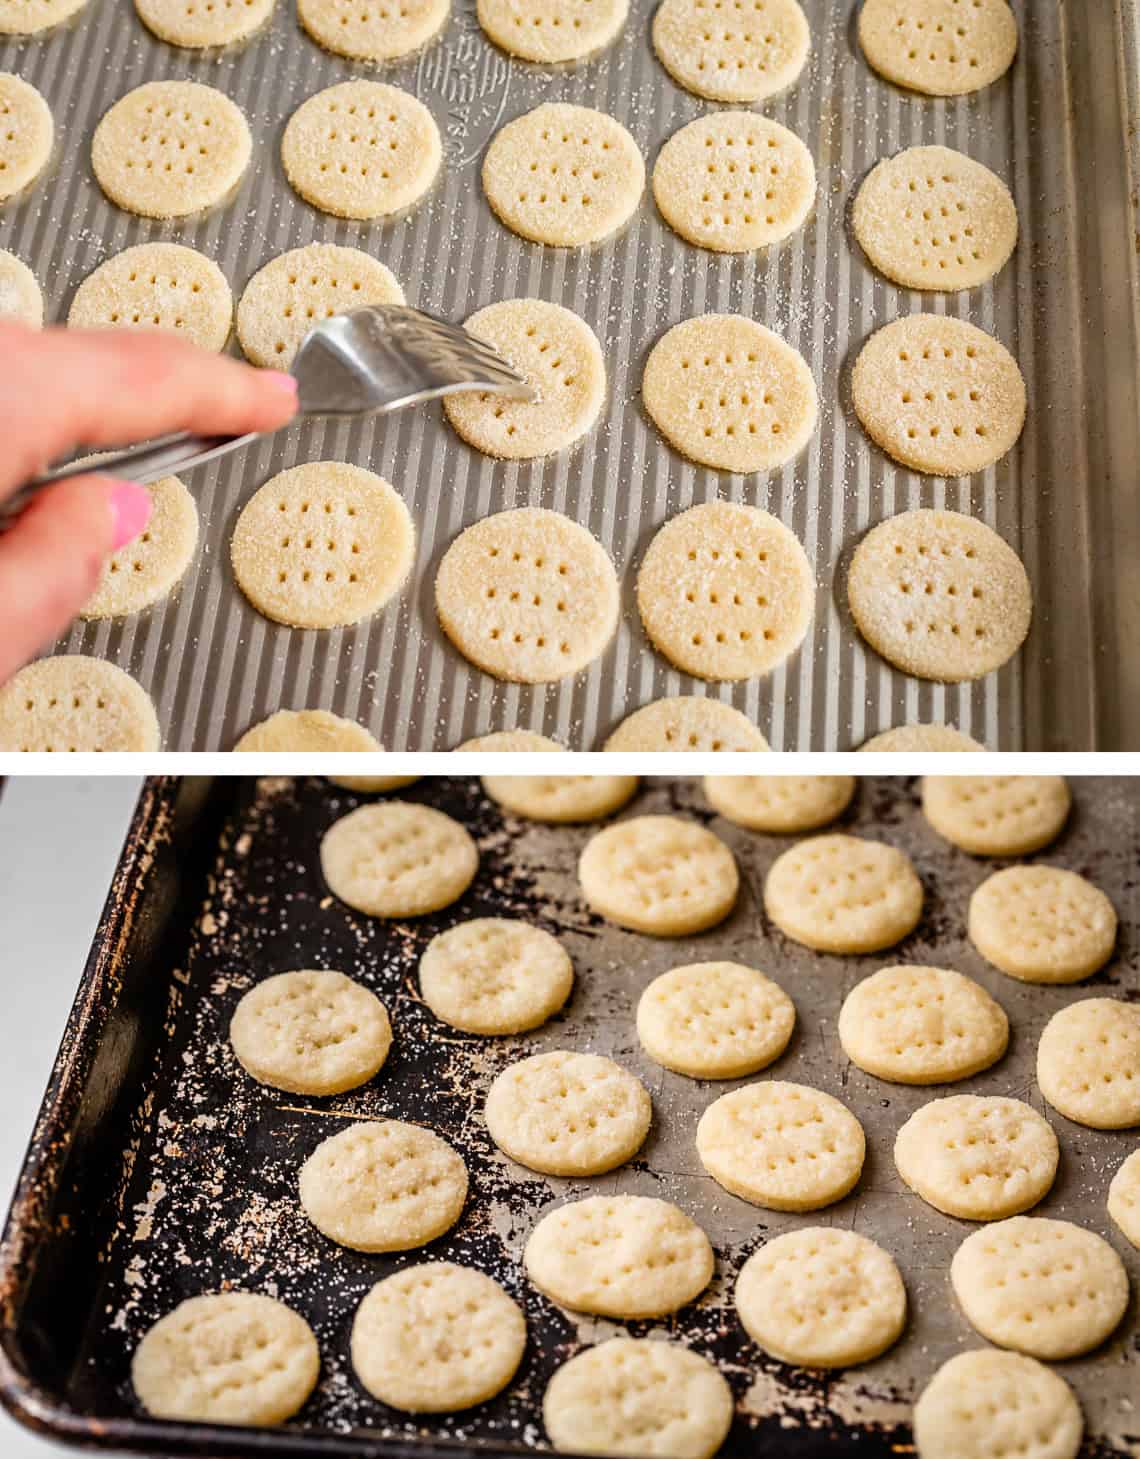
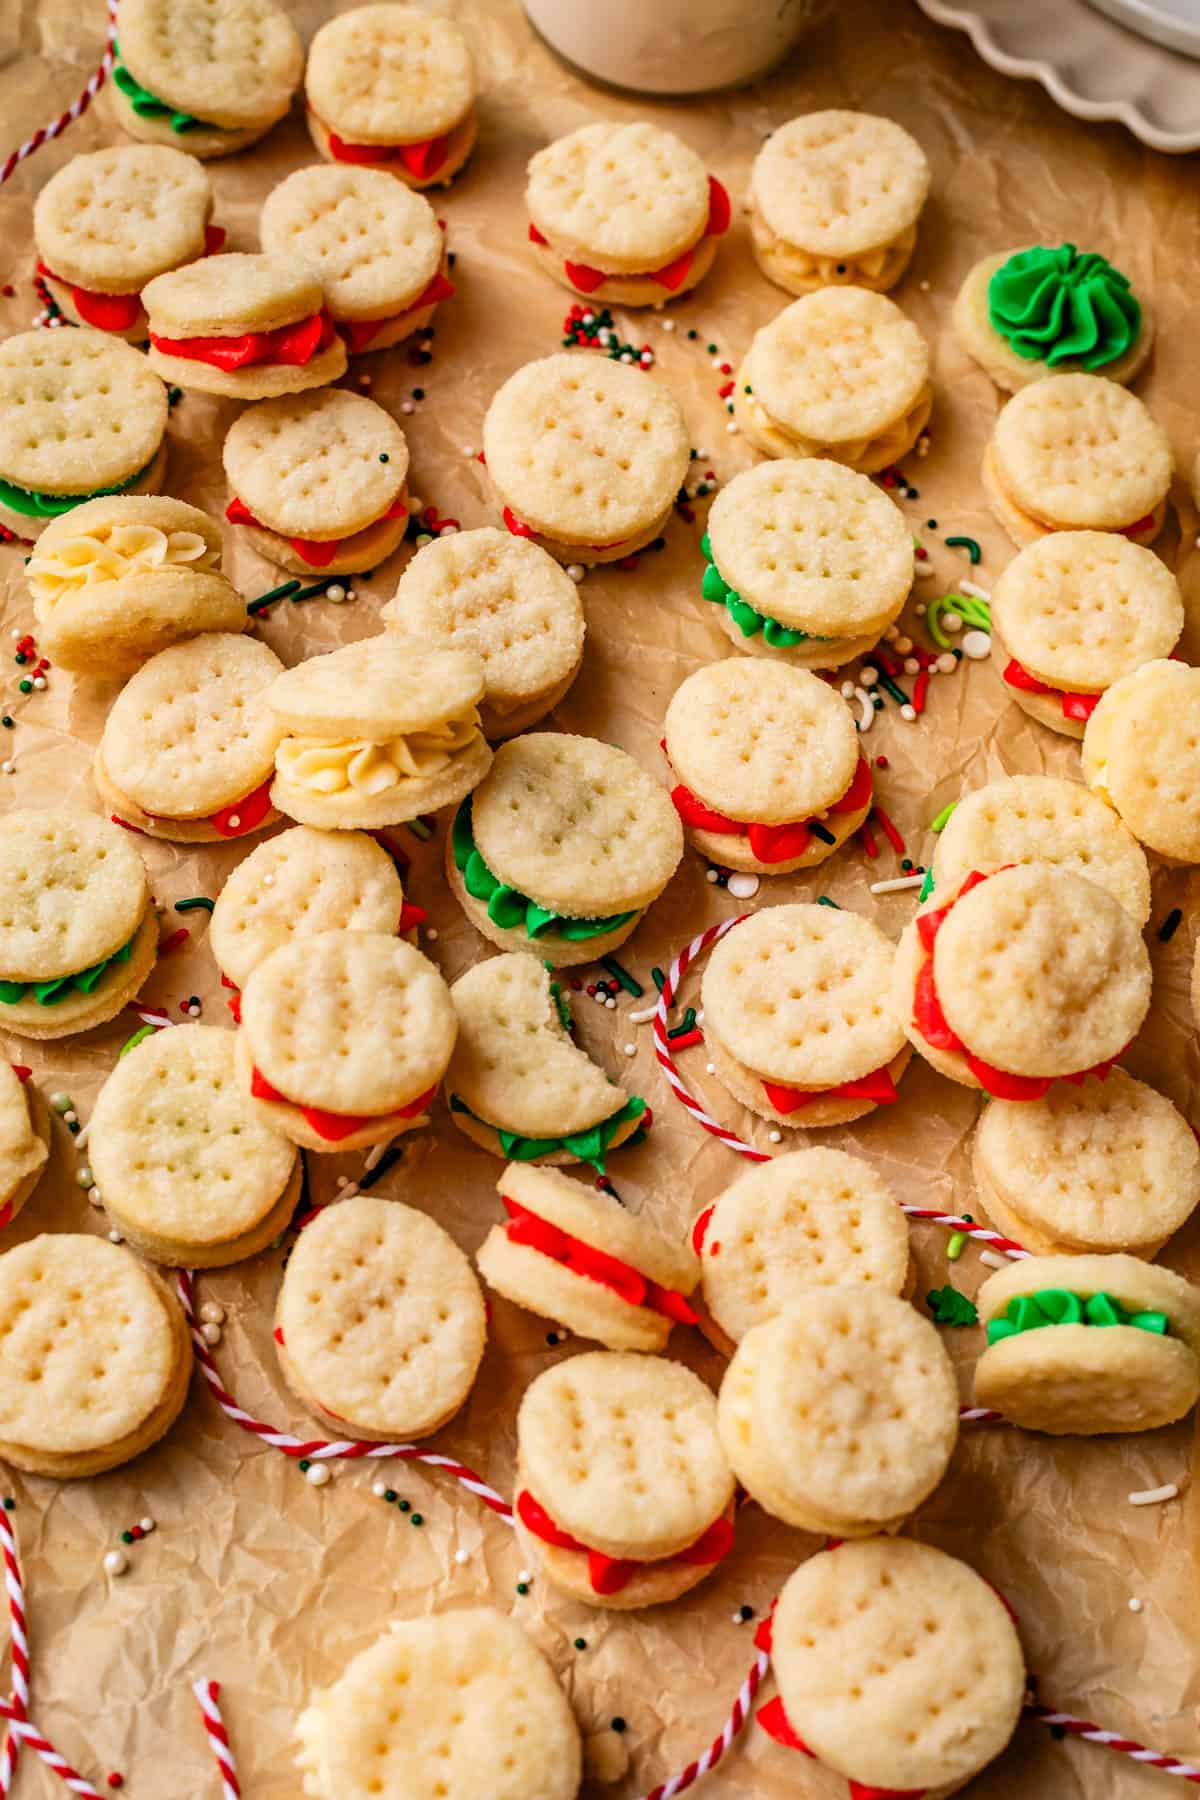
Just look at these baked cookies!! So puffy and good!! Layers for dayzzzzzz
We could stop here…but where’s the fun in that. It’s frosting time!
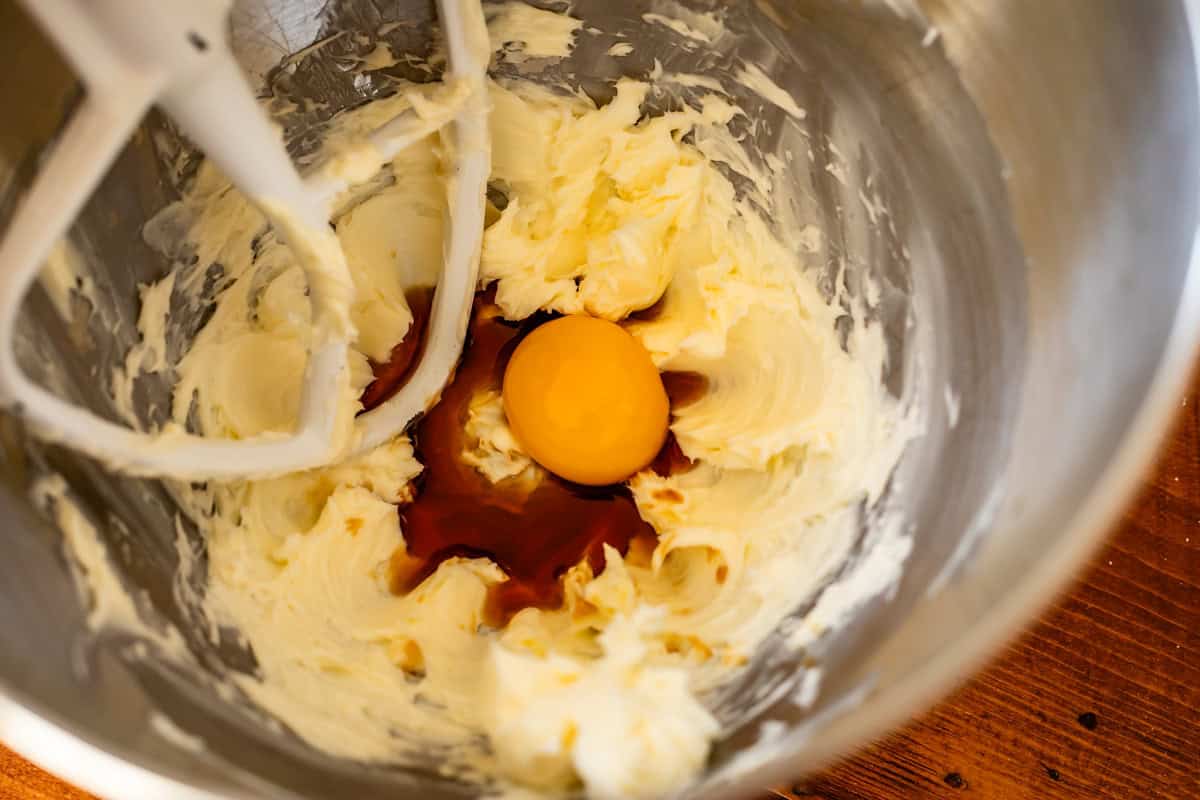
Beat up a stick of butter until it’s smooth and creamy. Then add in an egg yolk and vanilla. If this makes you feel weird, don’t worry, just add 2 tablespoons cream instead. The egg yolk brings a unique, rich flavor, but regular cream is delicious as well.
Once the egg/cream is incorporated, add in your powdered sugar and beat until fluffy. Then, place a piping bag in a glass, so that it’s easy to add the frosting to it:
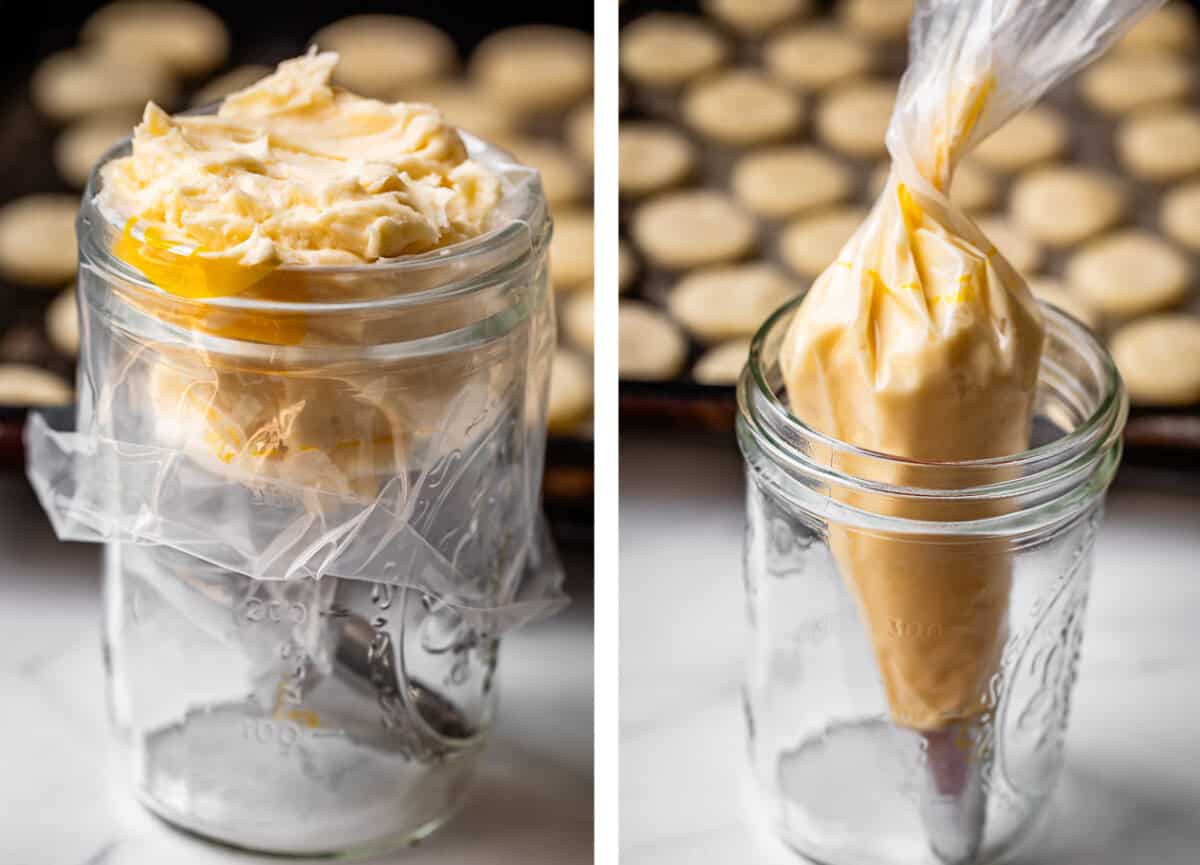
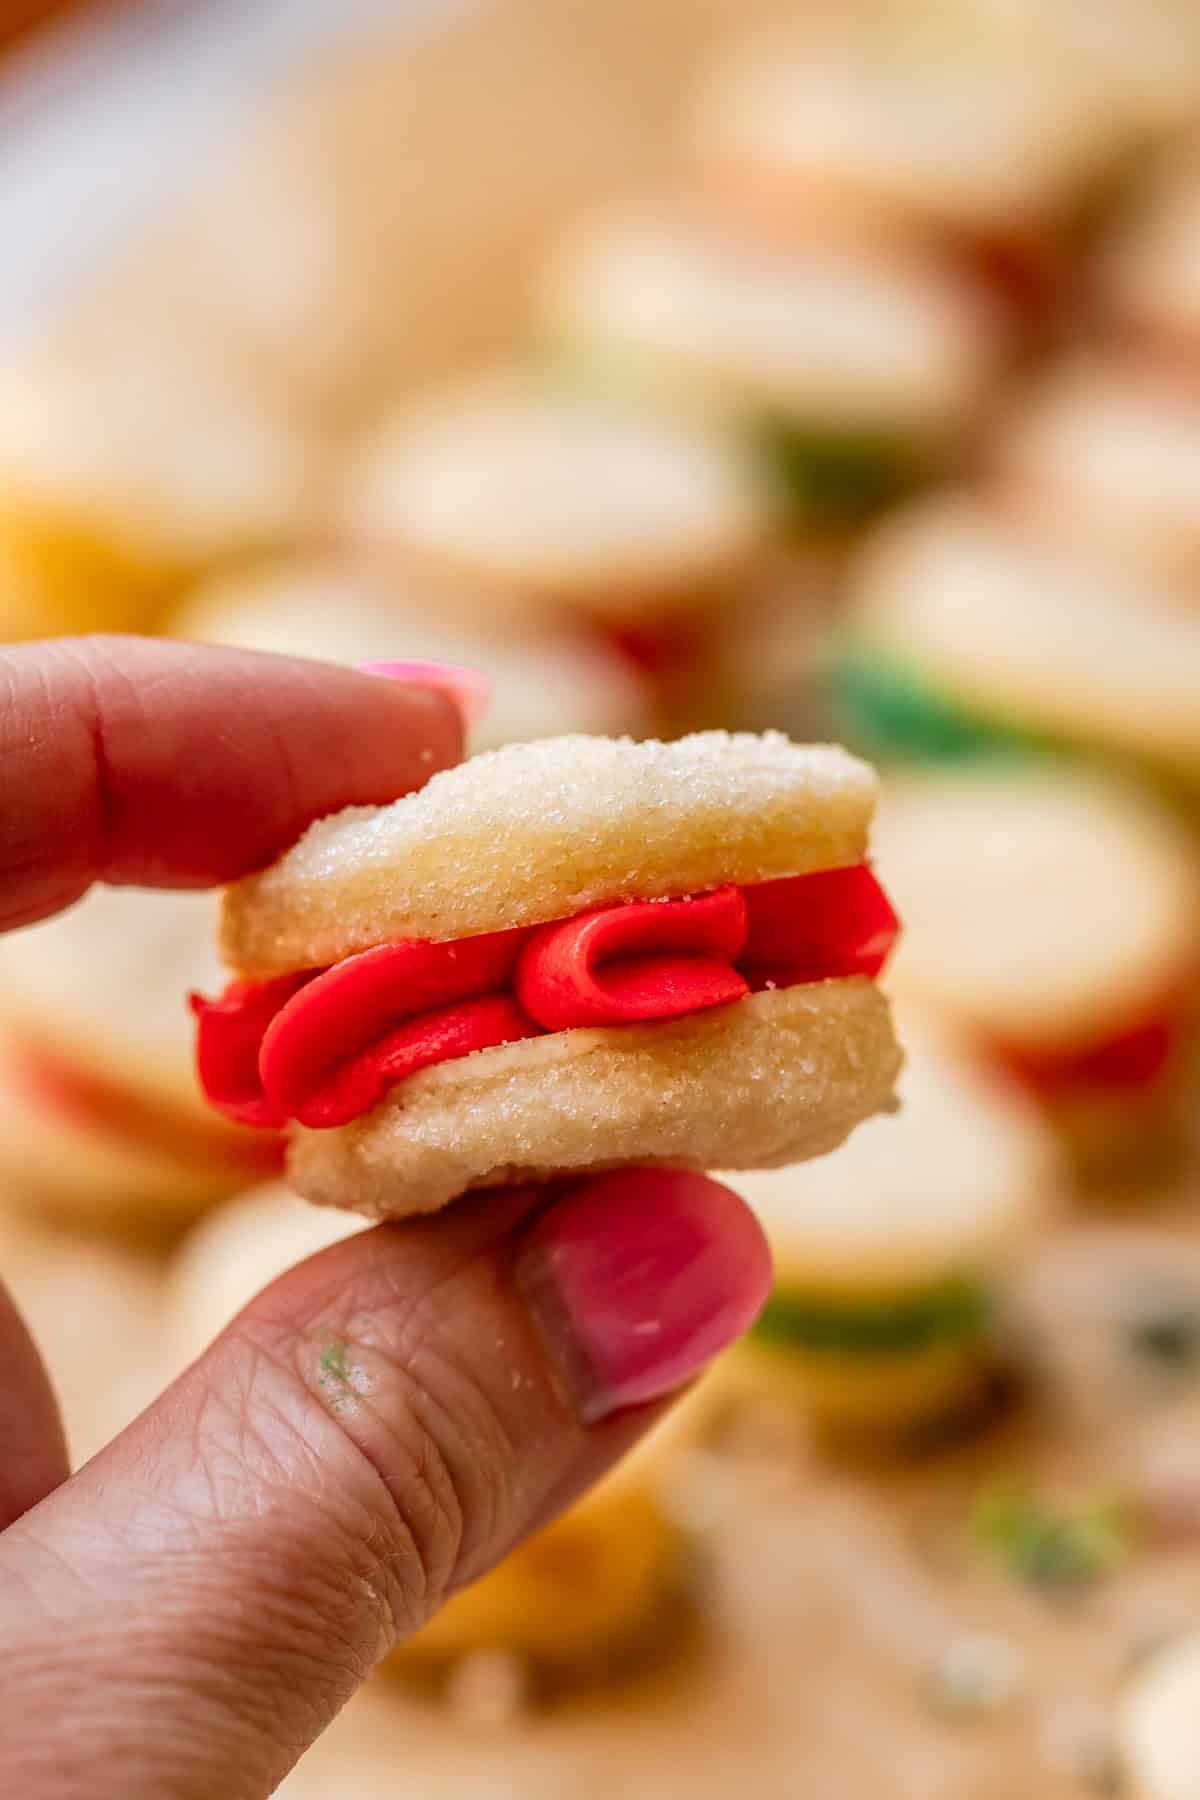
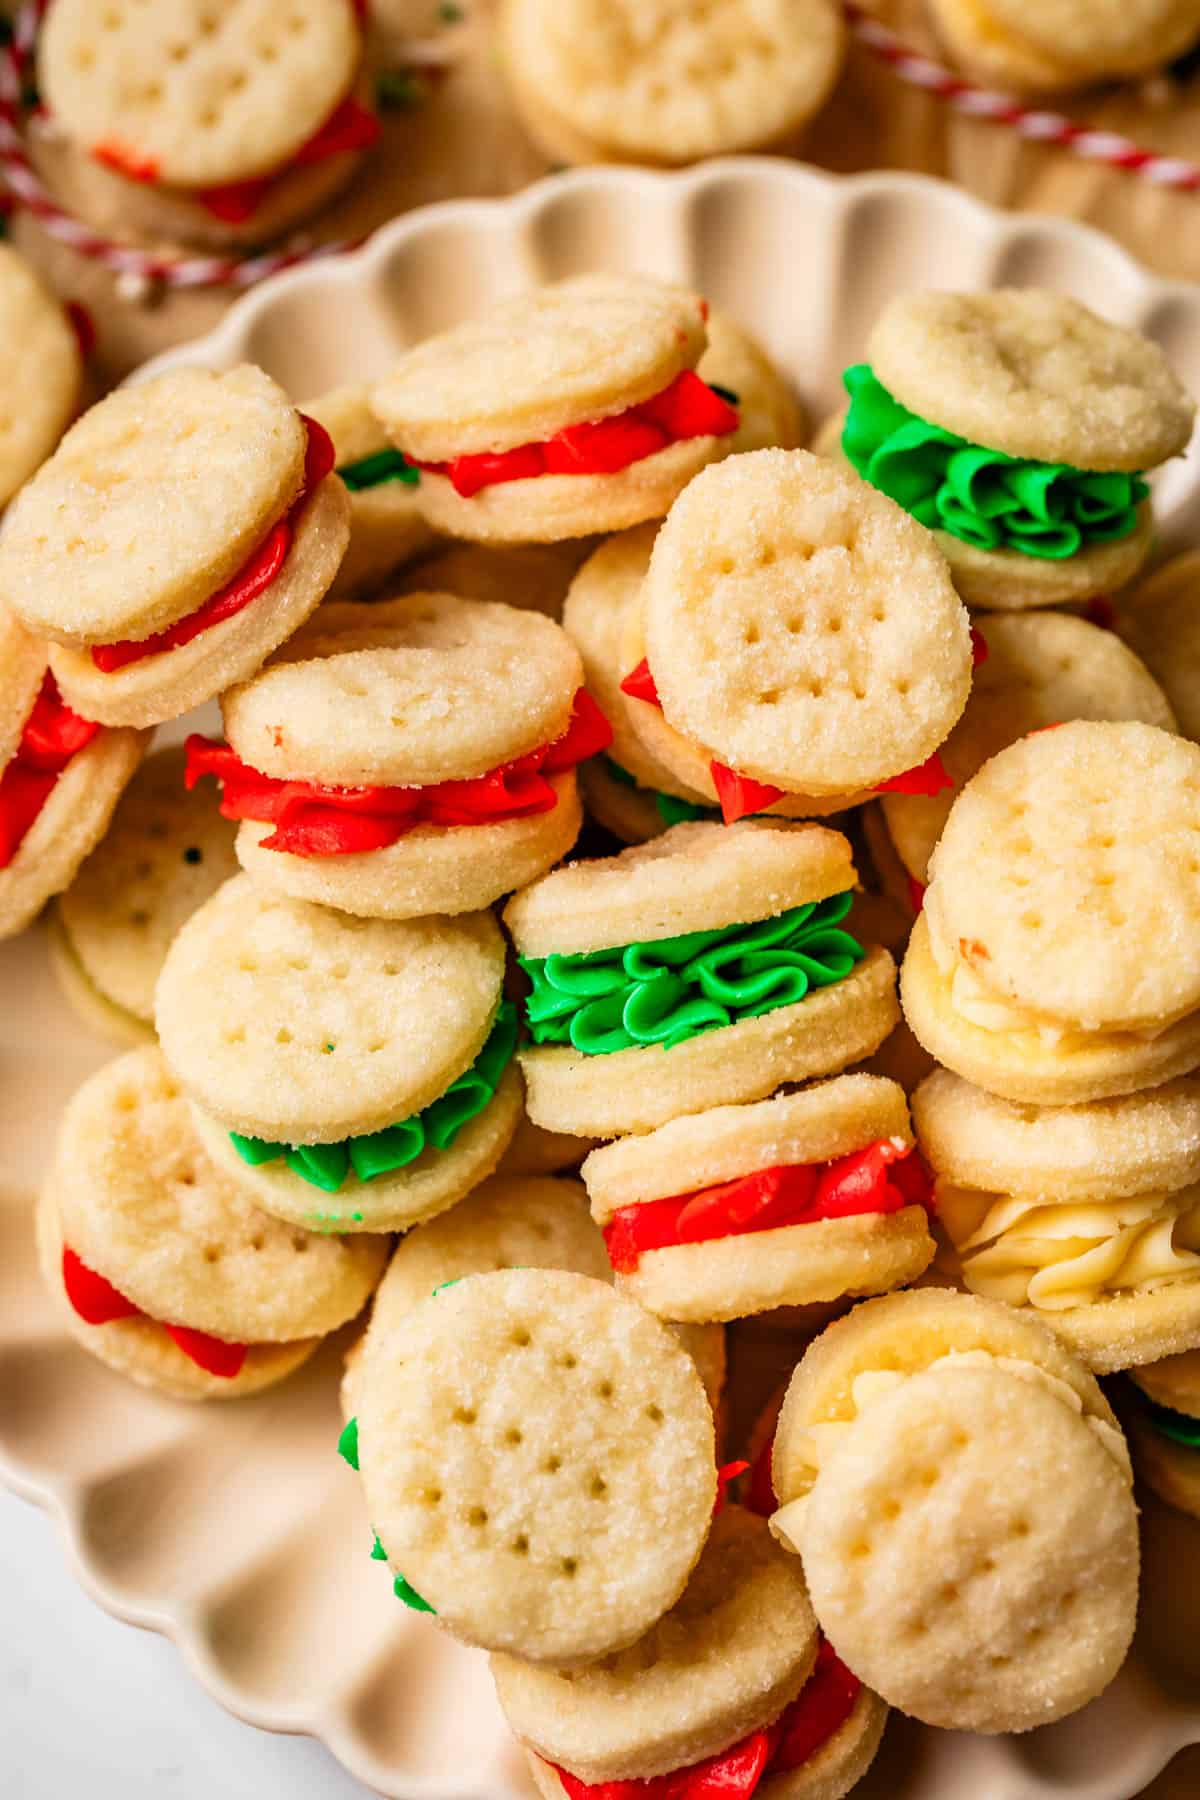
Twist the top and you are ready to start filling the cookies. You can split the frosting and tint it whatever color you want. I love these bright red ones!!
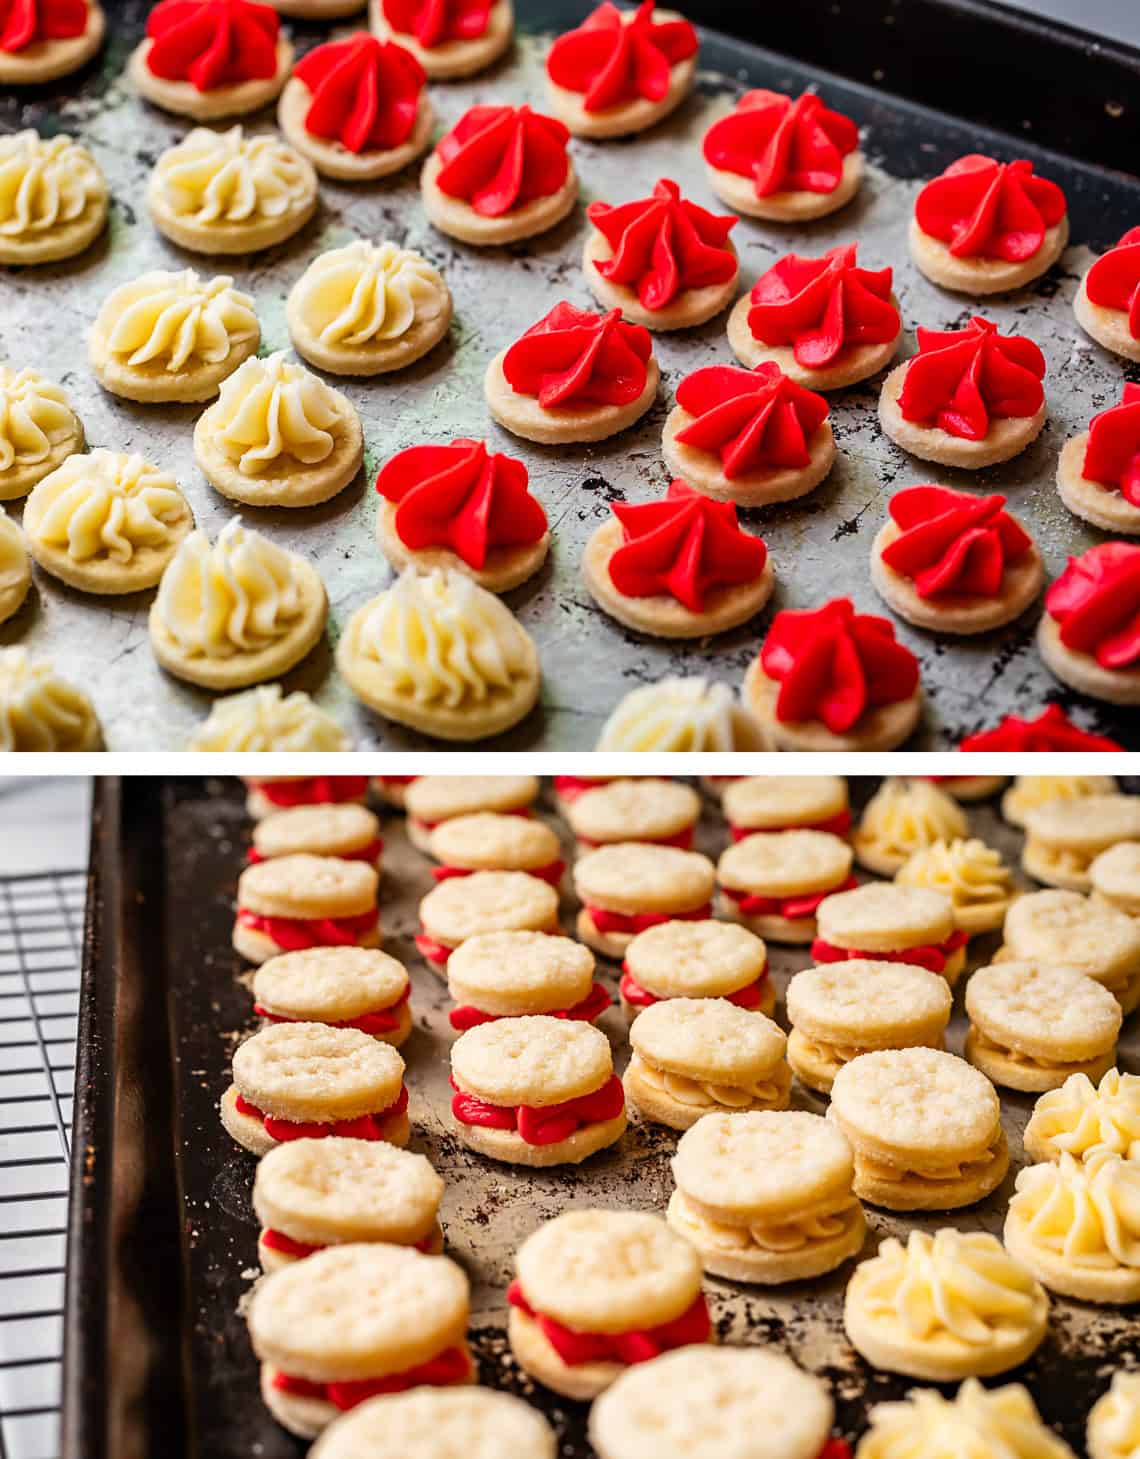
And then top with another cookie. Then try not to eat 15 at a time!!!
Other fillings
In my reading about these cookies, I came across a few options for filling the cookies other than buttercream frosting. Here are a few options I saw, plus additional fillings I think could be fun to try!
- melted chocolate (which then hardens as it cools)
- ganache
- jam or jelly
- nutella
- marshmallow fluff
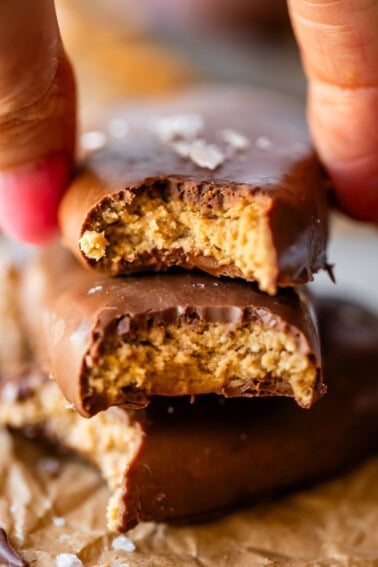
- peanut butter frosting like in these Peanut Butter Sandwich Cookies
- different types of extracts to flavor the buttercream frosting instead of or in addition to vanilla – almond, orange, mint, etc.
How to store and freeze Swedish wafer cookies
It’s so easy! Just pop them into an airtight container, and they’ll be good on the counter for up to a week. You can store the baked cookies and buttercream frosting separately as well if you prefer. If you don’t think you will use them up within a week, the best option is to freeze them.
To freeze already baked cookies, place them on a baking sheet and put the sheet in the freezer to flash freeze for about 30 minutes. Transfer the cookies to a ziplock freezer bag, try to remove as much air as possible, and seal. The cookies and frosting can also be frozen separately. Cream wafers will last 2-3 months in the freezer. To use them, place the whole bag or as many cookies as you like out on the counter until they’re soft enough to eat.
These are great make ahead cookies. You can roll out the dough and cut into individual pieces. Flash freeze the unbaked cookies as described above, then add them all to a ziplock freezer bag. To bake, follow the baking instructions in the recipe card but add an extra minute or two to bake time. The buttercream frosting can also be made ahead and frozen in a ziplock bag or made the day you want to make sandwiches. Frozen frosting will need to sit out in the bag for an hour two before it will be soft enough to use.
Swedish cream cookies frequently asked questions
Cream wafer cookie sandwiches have two parts, the cookies and a buttercream frosting. The cookies are very simple: flour, butter, and whipping cream makes a stiff dough that is then rolled in sugar before baking. A basic buttercream of butter, powdered sugar, vanilla, yolk or cream, and optional food coloring is then placed between two baked cookies to form the sandwich.
More cookie recipes you’ll love
I am all about cookie plates for neighbors at the holidays, and you can bet your bottom dollar these will be featured on the plates this year. With the dyed frosting they’re especially festive! I’m leaving you with some of my other cookie favorites for gifting during the Christmas season, but be sure to check out all the recipes on my Cookie Recipes page!
- Ginger Molasses Sandwich Cookies with Buttercream Frosting >> these are an absolute MUST for me at Christmas!
- Perfect Linzer Cookies >> light and buttery, with a picture-perfect cutout window into jammy goodness
- Biscotti For People Who Thought They Hated Biscotti >> definitely NOT just for old ladies like I ised to think. These make amazing dippers for cocoa or coffee!
- Grandma Prudy’s Spritz Cookie Recipe >> a truly Swedish recipe, handed down straight from Eric’s Swedish great-grandma
- Gingersnap Cookie Recipe >> crispy yet chewy, with lots of butter and lots of spice. Yum!
- Unbelievably Soft and Chewy Gingerbread Man Cookies (No Spread!) >> finally, a gingerbread cookie that you actually want to eat – it’s soft, chewy, and oh so delightfully decoratable
- Thumbprint Almond Raspberry Cookies >> if you had to pin me down I *just* might say these are my favorite cookies ever
- Mexican Wedding Cookie Recipe (Russian Tea Cakes) >> there are so many names for this cookie, and it’s because they’re a huge hit no matter where in the world you go
- Zimtsterne (German Cinnamon Stars) from Christina’s Cucina
Facebook | Pinterest | Instagram
Pariserwafiers (Vanilla Cream Cookies)
Ingredients
For the cookies
- 1 cup butter, softened (2 sticks)
- 1/3 cup cream*
- 2 cups all-purpose flour, spooned and leveled
- 1/2 teaspoon kosher salt, use less if all you have is table salt
- granulated sugar, for dipping the rolled cookies
For the frosting
- 1/2 cup butter, softened (1 stick)
- 1 large egg yolk, optional; add 2 tablespoons cream as a substitute
- 2 teaspoons vanilla
- 1/8 teaspoon kosher salt
- 1 and 1/2 cups powdered sugar
- pink, red, or green food coloring, optional
Instructions
- Make the dough. In a large bowl or stand mixer, add 1 cup butter (2 sticks). I used salted butter, but unsalted works great too! Beat the butter until it is smooth and creamy, scraping down the sides and bottom of the bowl.
- Add 1/3 cup heavy cream.* Beat together until the mixture looks slightly curdled. It won't look like it's completely coming together, that's okay. Don't over mix, or the butter will all lump together in a ball. We want it choppy, shaggy.
- Spoon and level the flour. Use a spoon to add flour to a measuring cup, then level off the top with a knife. Add 2 cups flour to the butter mixture. Add 1/2 teaspoon kosher salt to the flour and gently stir the salt it into the flour.
- Use the beaters to mix the flour into the butter. Mix until it is just combined. Scrape the sides and bottom of the bowl. See photos. You don't want the dough to be over mixed, it will just make your cookies tough. As soon as all the ingredients are incorporated, turn off the mixer.
- Form into discs. Lay out two large sheets of plastic wrap on the counter. Divide the dough in half and place each half on the plastic wrap. Fold the plastic over on itself and press the dough through the plastic to create a disc. You can press the dough even flatter with your hands a bit (it will chill faster). Repeat with the other half of the dough.
- Refrigerate the discs of dough for 30 minutes.
- Preheat the oven to 375 degrees F. Get out 2 half baking sheets.
- Lightly flour a work surface. I love to use a pastry cloth.
- Roll out the dough. Place the first disc of (unwrapped) dough on the flour, and dust with a little more flour. Use a rolling pin to make even strokes, and roll the dough out to about 1/8 inch thick. It's quite thin! Like pie crust.
- Cut the dough. Use a 1 and 1/2 inch cookie cutter (or any shape of a similar size) to cut the dough into several dozen rounds.
- Roll the cut out dough in sugar. Place the rounds of dough in a bowl of granulated sugar. Toss them around a bit and get the top and bottom of each cookie round completely coated in sugar.
- Line up the rounds on two ungreased cookie sheets. No parchment paper needed for these cookies. These cookies don't spread much at all, so you can put them pretty close together, but they should not be touching.
- Prick the cookies 3 times with the tines of a fork. This is an important step, it's not just for looks! (although it is adorable.) This makes it so the cookie doesn't puff up in the center.
- Freeze or chill. If you have time and space, place your baking sheets in the freezer or fridge for a few minutes before baking, until they are very cold (5 minutes in the freezer, 20 minutes in the fridge). Super super cold fat in the dough going into a screaming hot oven is what makes these cookies the MOST flaky. If you don't have time or fridge space, move as quickly as you can through the rolling and sugaring and pricking process.
- Bake the cookies at 375 for 7-8 minutes until they are just setting up. They should NOT be brown or even golden on the edges, but they should not be shiny on top either. If you tap the edge of one, it should be firm and not feel mushy or wet.
- Take the cookies out of the oven and let them sit on the pan for about 5 minutes before removing to a wire rack to cool completely.
- Make the frosting. Meanwhile, add 1/2 cup (1 stick) of butter to a clean large bowl or stand mixer. Beat the butter until it is smooth and creamy, scraping the sides and bottom of the bowl.
- Add 1 egg yolk, 2 teaspoons vanilla, and a pinch of salt to the butter. Beat well, scraping down the sides a few times, until it is smooth and creamy.(If you don't want to use the egg yolk, add 2 tablespoons cream.)
- Add 1 and 1/2 cups powdered sugar to the bowl and beat well, until all the powdered sugar is incorporated, scraping the edges of the bowl. If the frosting seems really stiff, add 1 extra tablespoon of cream.
- Place a piping tip (any kind) in the end of a pastry bag. Place the bag in a tall glass and fold the edges up over the sides (see photos; the glass is just to provide structure, to make the bag easier to fill). Use a spatula to add all the frosting to the bag, then twist the top of the bag to close it. (If you don't have tips or pastry bags, add all the frosting to a ziplock bag and snip the corner!)
- Frost the cookies. When the cookies are completely cooled, use the pastry bag to pipe a teaspoon or two of frosting onto HALF of the cookies. Top the frosted cookies with the remaining cookies.
- See if you can eat just one. Go on, honestly, I'd like to see you try.
- Storage: Store these cookies in an airtight container on the counter. These cookies are best on day one, when the cookies will still be ultra flaky. The frosting will eventually soften the cookies. If you are planning to serve them on day two, wait until the last minute to frost them. Store the pastry bag in the fridge (let it sit out a few minutes to come to room temperature before piping the frosting.)
- Freezing. You can freeze these cookies, I do it all the time! You can freeze the completed, frosted cookies, or you can freeze the cookies and the frosting separately. To freeze already baked cookies, place them on a baking sheet and put the sheet in the freezer to flash freeze for about 30 minutes. Transfer the cookies to a ziplock freezer bag, try to remove as much air as possible, and seal. Cream wafers will last 2-3 months in the freezer. To use them, place the whole bag or as many cookies as you like out on the counter until they're soft enough to eat.
- Make ahead. These are great make ahead cookies. You can roll out the dough and cut into individual pieces. Flash freeze the unbaked cookies as described above, then add them all to a ziplock freezer bag. To bake, follow the baking instructions in the recipe card, checking to see if they need one extra minute of bake time. The buttercream frosting can also be made ahead and frozen in a ziplock bag or made the day you want to make sandwiches. Frozen frosting will need to sit out in the bag for an hour two before it will be soft enough to use.


I have been making these since I was eight years old. I am now seventy two. The recipe I use in the Betty Crocker cookbook under the name Butter cream Wafers.
Hi Ken! So happy to hear these are a lifelong favorite of yours! Thank you for the info about the title and where you found them. They are beloved, for sure! I love these cookies so much! Thanks for chiming in 💕
Do you use unsalted butter?
Hi Carrie! This recipe was developed using salted butter, but if you’re used to using unsalted you might prefer it in these cookies. Try it and come back to tell us what you think, we love hearing from you :-)
Wow, what a flashback! My mom used to make these in the late 70’s/early 80’s and I completely forgot about them until I saw this post. I used to love eating these! She would make them with mint in the frosting but they were so light and easy to eat! Definitely going to try this recipe sometime. Thank you!
I made these this weekend as a test run for a cookie exchange and they were the most unexpected, delicious cookie. We inhaled them. Thank you for sharing!
Unexpected!! Precisely the word Tevi!! You nailed it thank you for sharing your review and that perfect word. SO happy you loved them! Thank you!! I’m so glad to not be the only one excited about these over here!! 💕
This is the most thorough overview of these delicious cookies! Question on the pricking the rounds — do you pierce through the cookie, or just barely puncture the surface? I’m trying to figure out why mine are puffing up so much and losing their shape.
Hey Lauren! Thank you so much that’s a huge compliment!! I prick all the way to the bottom basically. I’m not gentle with my fork and just poke away with reckless abandon. Don’t be afraid to show these cookies who’s boss! 😂😂 Enjoy Lauren, thanks for the question, this will help others!
This recipe is in my Betty Crocker cookbook I recieved from my mother at my wedding shower in 1975. I made them once, they are very good. In the cookbook the recipe name is Cream Wafers.
Thank you for this helpful report Beth!! I would be willing to give a lot to know the origin of all the Betty Crocker/BHG recipes throughout the years! I hope you get to try them again soon!!
i have another clue as to the origin. I love these!! Like you, mind blown by how delicious they are. But I was NOT let down by my mom’s generation. Our friend Cathy made these for our wedding dessert buffet table in 1995, and she brought me a plate of these delectable treasures as a gift when we celebrated 25 years! I found the exact recipe in the cookbook by mom got as a wedding gift. 1961 Betty Crocker. Pg 203. In it they state that “Mrs. G. C. Olson of Lake Minnetonka, MN brought this recipe with her from Sweden when she came to the country as a bride.”
YAY!! Thanks for adding in this bit of history Spring! I love that you had these at your wedding, and Cathy is so sweet to have brought you these on your 25th! What a great friend. Love the story about Mrs. GC Olson! That’s so cool! Thanks for chiming in 💕
So, there is no sugar in the cookie dough? Is it a savory biscuit topped with sweet frosting? The recipe doesn’t incorporate the sugar as posted. Even though it’s listed on the ingredients.
Hi Suzie! Nope, no sugar in the actual dough! It’s kind of like pie crust. Then you cut the dough into rounds and dip each round in a bowl of sugar, as described. Let me know if you try them out! they are so different and soooo good!
Well, if this isn’t a truly authentic Swedish cookie, it sure should be! It definitely feels like it would be, ie Cardamoms, Sour Cream Twists, Fattigman, Berlinerkranser, – all cookies Prudy made with lots of butter and little to no sugar. I can’t wait to try these!