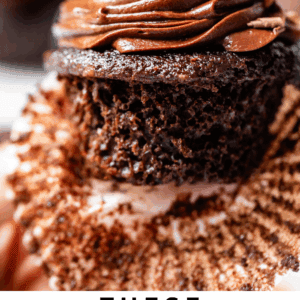
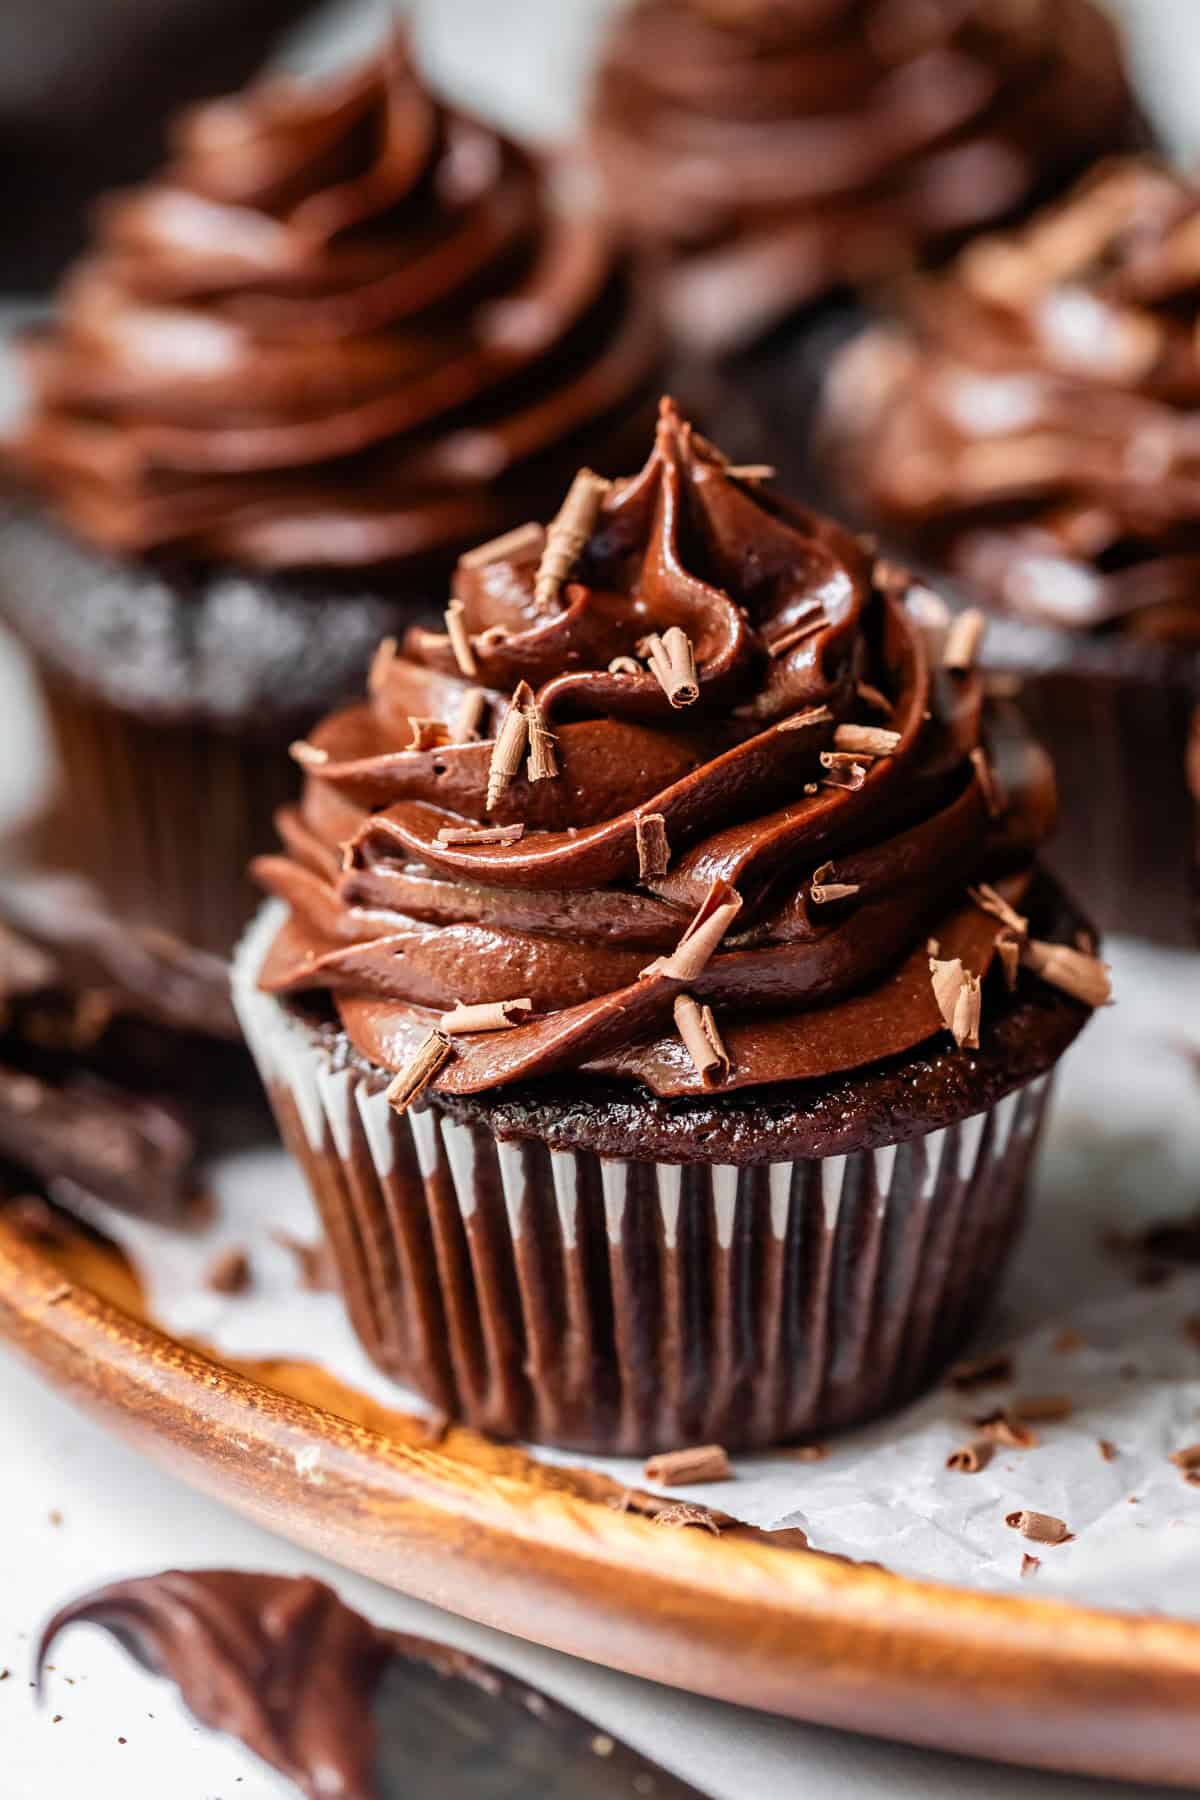
EUREKA! These are the Chocolate Cupcakes of my dreams!! I’ve never been a cupcake person, but I have found my forever recipe after a lot of trial and error. This cupcake is moist and full of rich chocolate-y flavor, with perfectly soft, fluffy texture. Honestly, it’s good all on it’s own, but just you wait til you pair it with Creamy Chocolate Buttercream…heaven! I’ve got step by step photos to show you exactly how to make them!
My daughter Charlotte started seminary this school year. My other daughter Valentine, who is 8, asked what seminary means. So we looked up the etymology and found out seminary means “seed bed.”
I told her, Oh, that makes sense, young people learning basics of the gospel, they are growing like little seedlings. And Valentine’s like, yeah, the dirt is also where you bury dead people, so it all fits!
I was like ummmmm hold up WHAT?? Are seminary and cemetery the same word for you? What, did you think Charlotte was going to a GRAVEYARD every morning before school?? Learning about Jesus amongst the headstones…😂 haha. Kids. The world must seem so crazy to them sometimes.
We are finally getting into our school-time-groove. Charlotte is adjusting to high school and Edison is adjusting to kindergarten and I’m adjusting to crying about it every day. You know, just to keep equilibrium in the universe. They can’t just GROW UP. Someone has to PAY for this. (Turns out, it’s me.) I read my kids Peter Pan every night and try to convince them to come to Neverland with me, but they say it’s not real, and then I cry all over again.
Well guys. At least there are still cupcakes. MOIST ONES. That are SUPER CHOCOLATEY. I’m shouting it from the rooftops.
I don’t like cupcakes. There, I said it.
Most cupcakes are dry as a bone. Tell me I’m not wrong here. I usually don’t bother with cupcakes at all, because I’m an old lady who has to think about calories. Why eat dry cupcakes when you could be eating a cookie?
I have exactly 8 cupcake recipes on the blog, which might sound like a lot, but after almost 14 years of blogging, it’s not (I have over 100 cookie recipes, in comparison.) I love all my cupcakes recipes that I have posted, but have yet to find a go-to chocolate cupcake that satisfies my moistness standards.
I’ve always assumed that most cupcakes are simply over baked. Why else would ALL of them taste like cardboard to me? No matter the cupcake source?
But I’ve finally figured it out. There is a fundamental problem with cupcakes. (It’s not just my own snootiness. I really did feel snooty, which is unlike me, because I eat Taco Bell on the regular, and if that doesn’t grant you immunity from the food snob label, I genuinely don’t know what would.)

My quest for the best chocolate cupcake recipe
Anyway, here’s the deal. Cupcakes are handheld, by nature. That’s what makes them so cute and snarf-able. Handheld means they have to be sturdy enough to be picked up, unwrapped, and eaten…WITHOUT falling apart.
Once I realized this (after a few rounds of testing) it all made sense. I can just keep adding MORE and MORE and MORE fat and liquid to the recipe in an attempt to make them softer and more tender, but this naturally makes them more delicate and apt to fall apart. This explains why I would always prefer one of my own cakes above anything: they are much too soft and tender to be picked up and eaten by hand, especially under the weight of Homemade Buttercream Frosting.
But I’ve found the perfect balance. This cupcake is sturdy enough to eat handheld while still having the highest percentage of fat and liquid that I could get away with before they started to fall apart.
They are not the MOST sturdy cupcakes in the world, I will say that. They probably wouldn’t hold up if you played Hot Potato with them. They would not work for a game of Hackey Sack. They might not even be the best recipe for a children’s birthday party, not gonna lie (but why are you making anything besides a box mix for those wild animals anyway??).
But I will say this: they are the best chocolate cupcakes I have ever put in my mouth. And I use my hands to eat them, not a plate and a fork. So surely there is a place for them in this world??
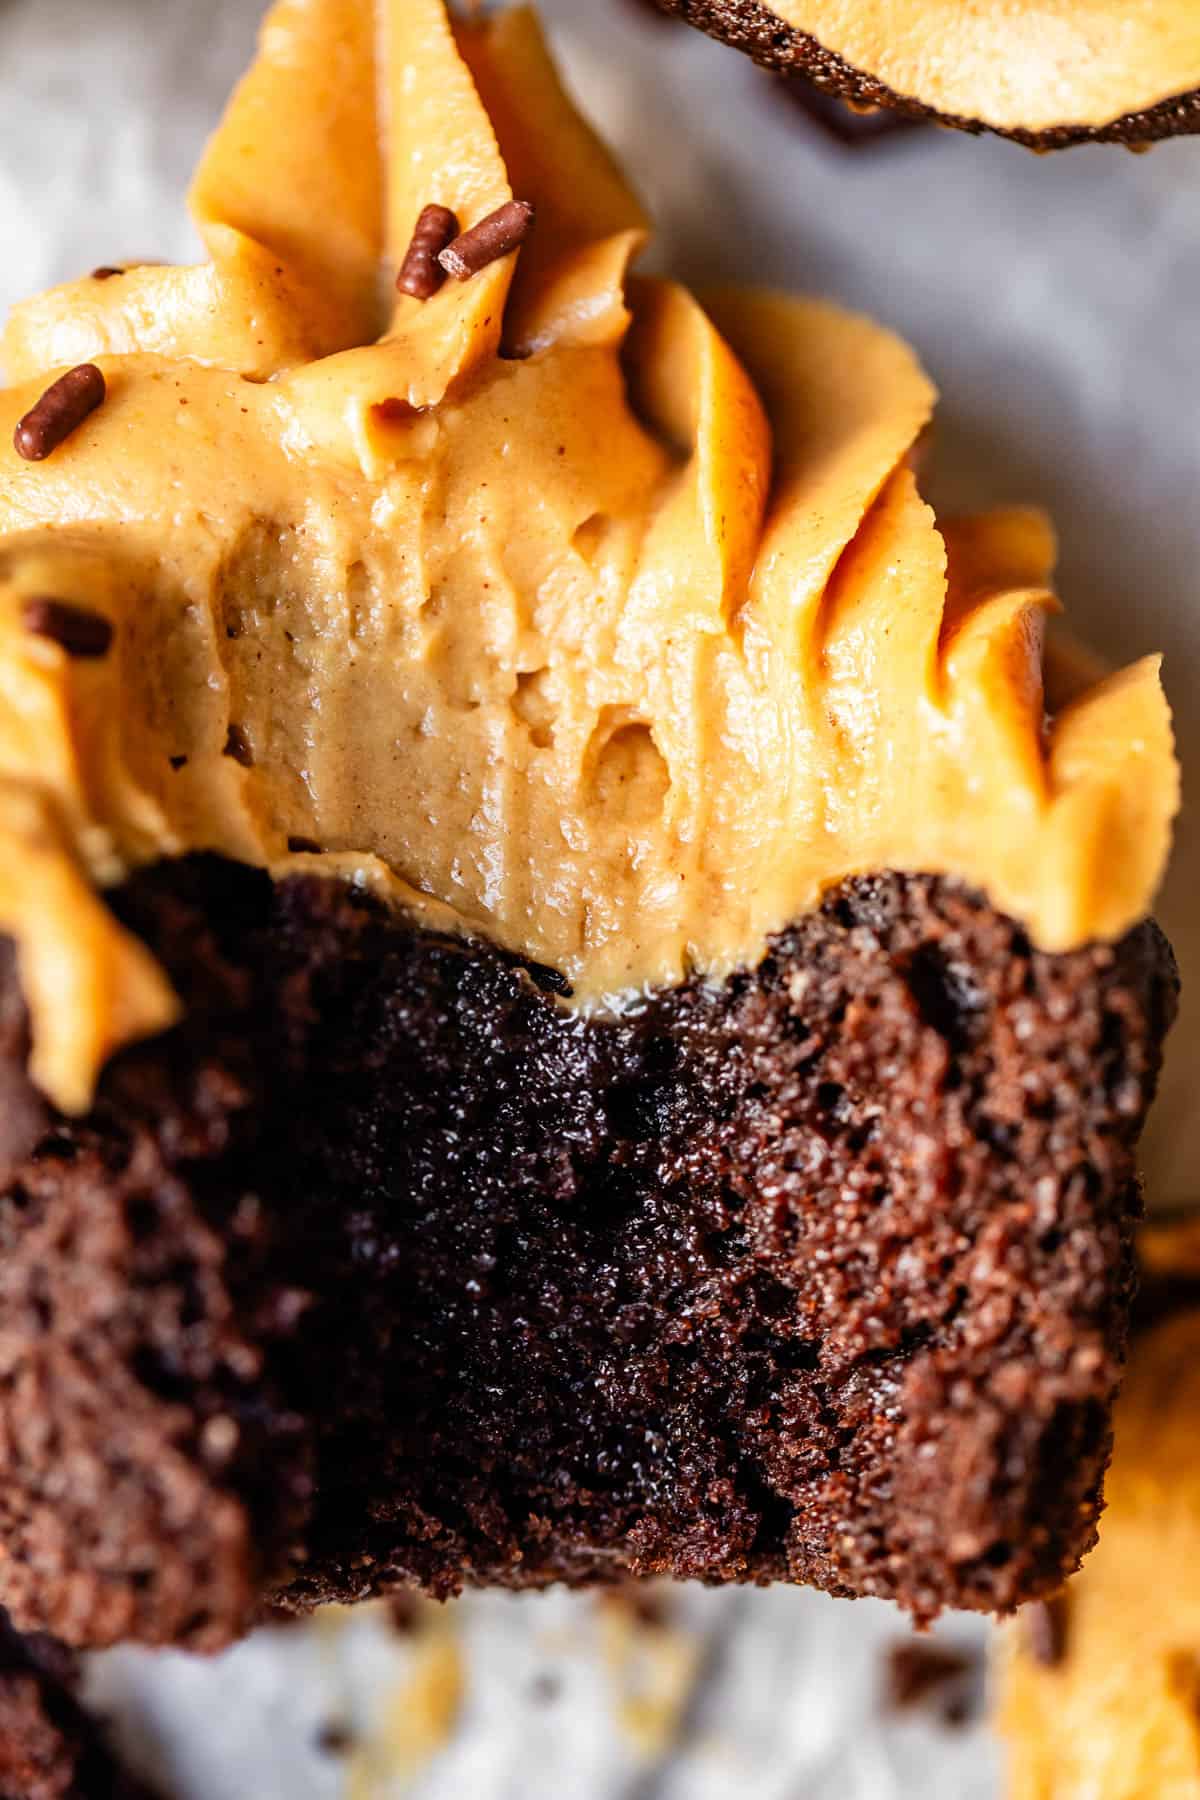
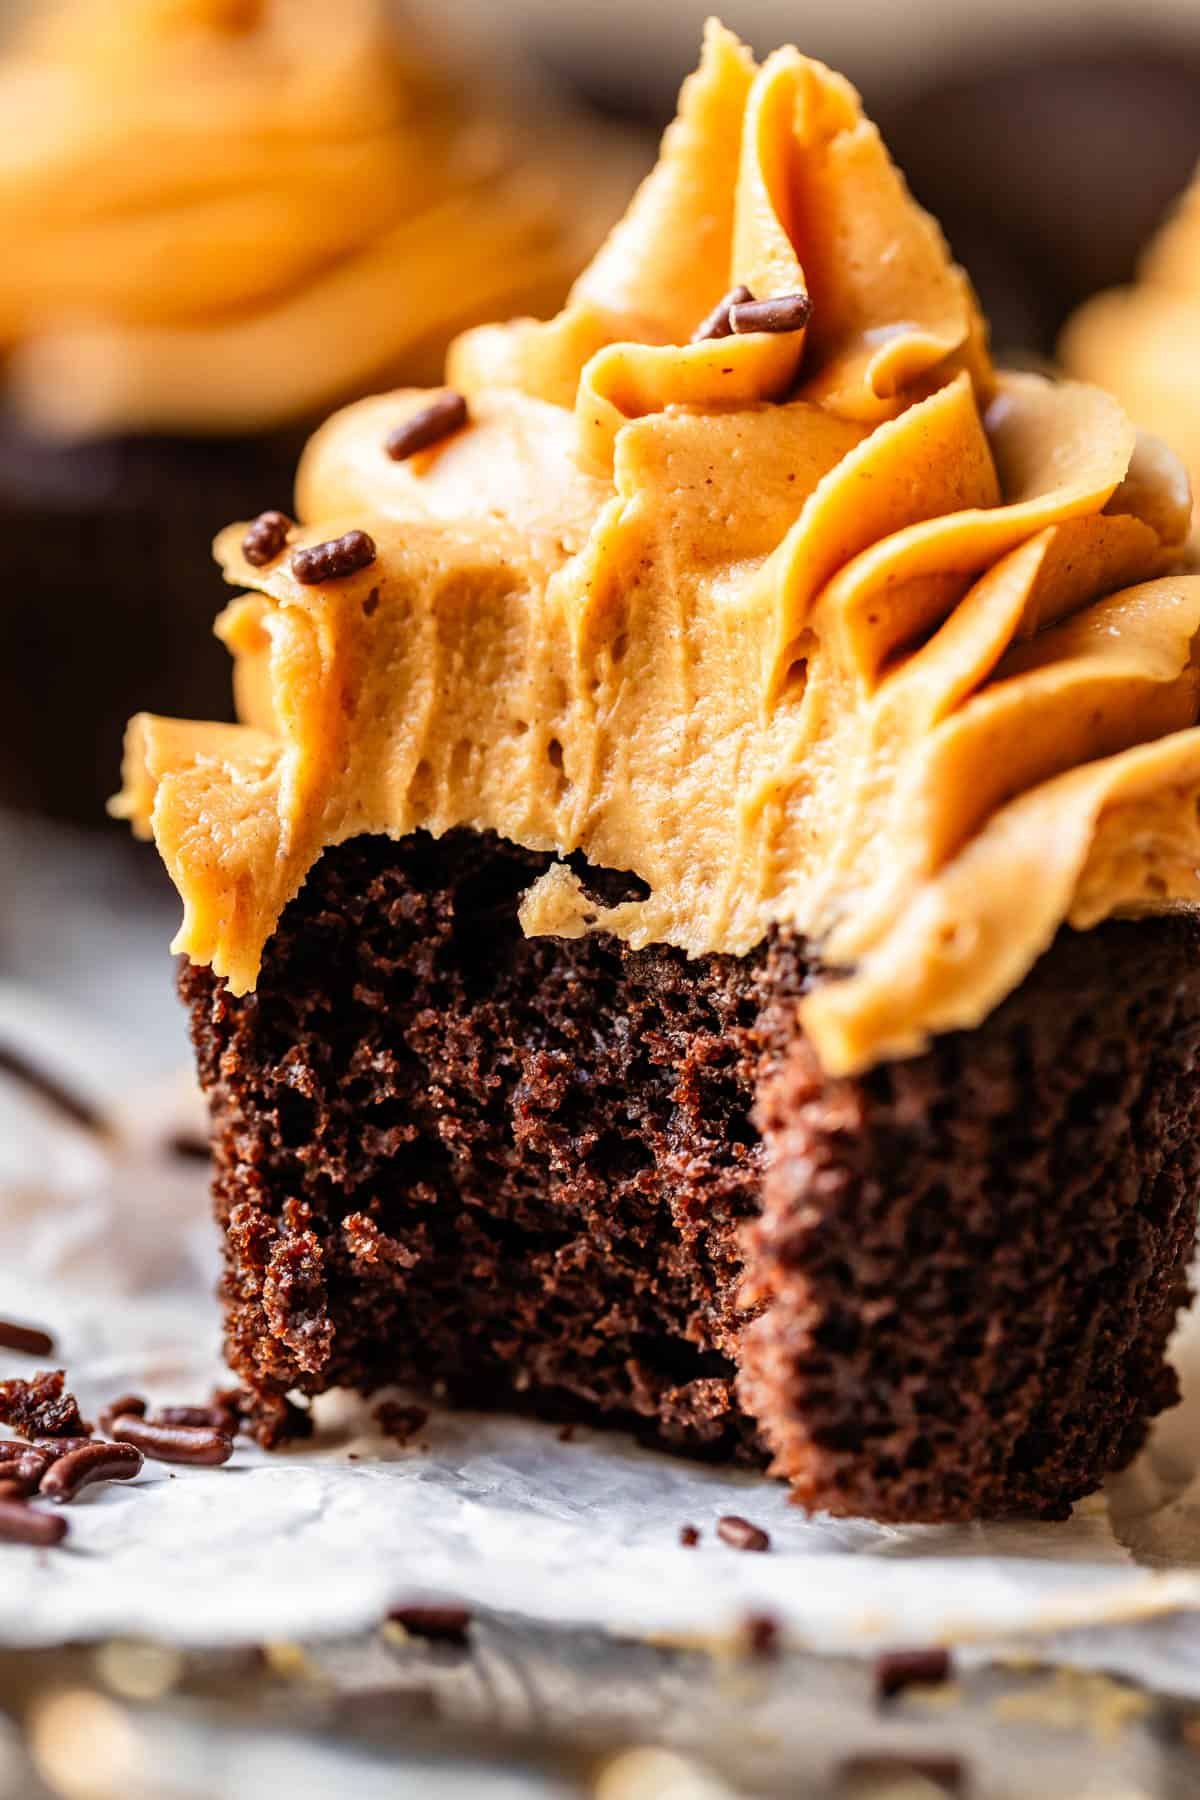
Here is our cupcake topped with Whipped Peanut Butter Frosting, recipe coming soon.
This cupcake is perfect.
Here’s the short list for why:
- you cannot beat the flavor boost from dark brown sugar. Don’t skip it! Essential for moistness and flavor. Light brown sugar is ok too.
- REAL melted dark chocolate to add that creamy depth of flavor
- lots of cocoa powder, which is a flavor powerhouse, even more so than the bar of chocolate, actually. Cocoa brings flavor in a way that a melted chocolate bar (with its added fat and milk) can’t, and helps develop that rich chocolate flavor we want
- one of the KEY ingredients in these cupcakes to make them super moist: sour cream! The fat in the sour cream adds richness and so much moisture. The tang adds a unique flavor that leans in to the fruity component of chocolate.
- this recipe has the highest amount of fat and liquid-to-flour ratio that I felt I could get away with. Any more, and the baked cupcakes were so delicate they would start to fall apart while trying to eat them by hand.
Chocolate cupcake recipe ingredients
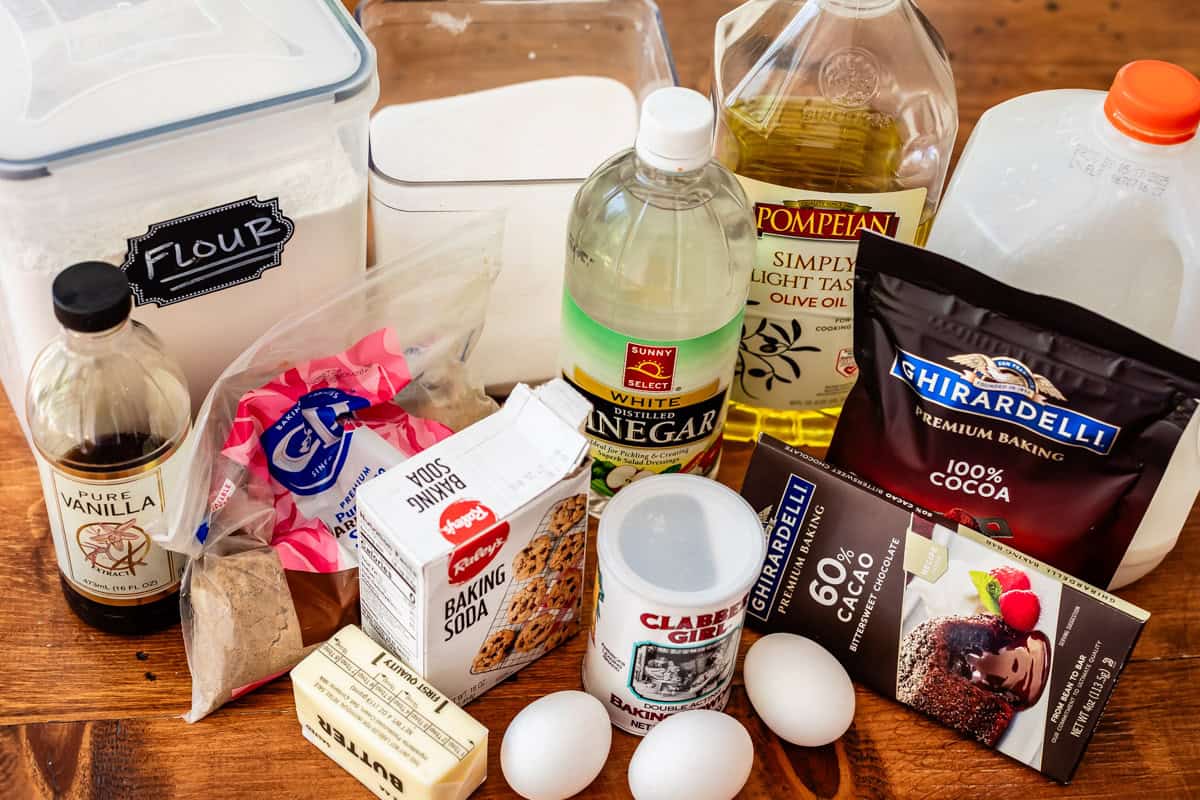
If you like to keep your pantry stocked up like I do, chances are you can make this cake right this very minute with what you have on hand. And if you don’t have everything, all items are easily found in your normal grocery store. Take a look at the list to see what you already have or may need, but be sure to use the recipe card at the bottom of the post to make the full recipe.
- cocoa powder
- butter
- vegetable oil
- dark brown sugar
- 60% bittersweet chocolate
- whole milk
- vanilla
- white vinegar
- eggs
- all purpose flour
- baking soda
- baking powder
- granulated sugar
- kosher salt
- sour cream
How to make chocolate cupcakes
First we are going to “bloom” our chocolate. Have you heard of this? It’s one of my favorite techniques for waking up cocoa. We COULD just add this cocoa in with the flour and other dry ingredients. But something magical happens when you heat cocoa in liquid. It intensifies the flavor significantly!
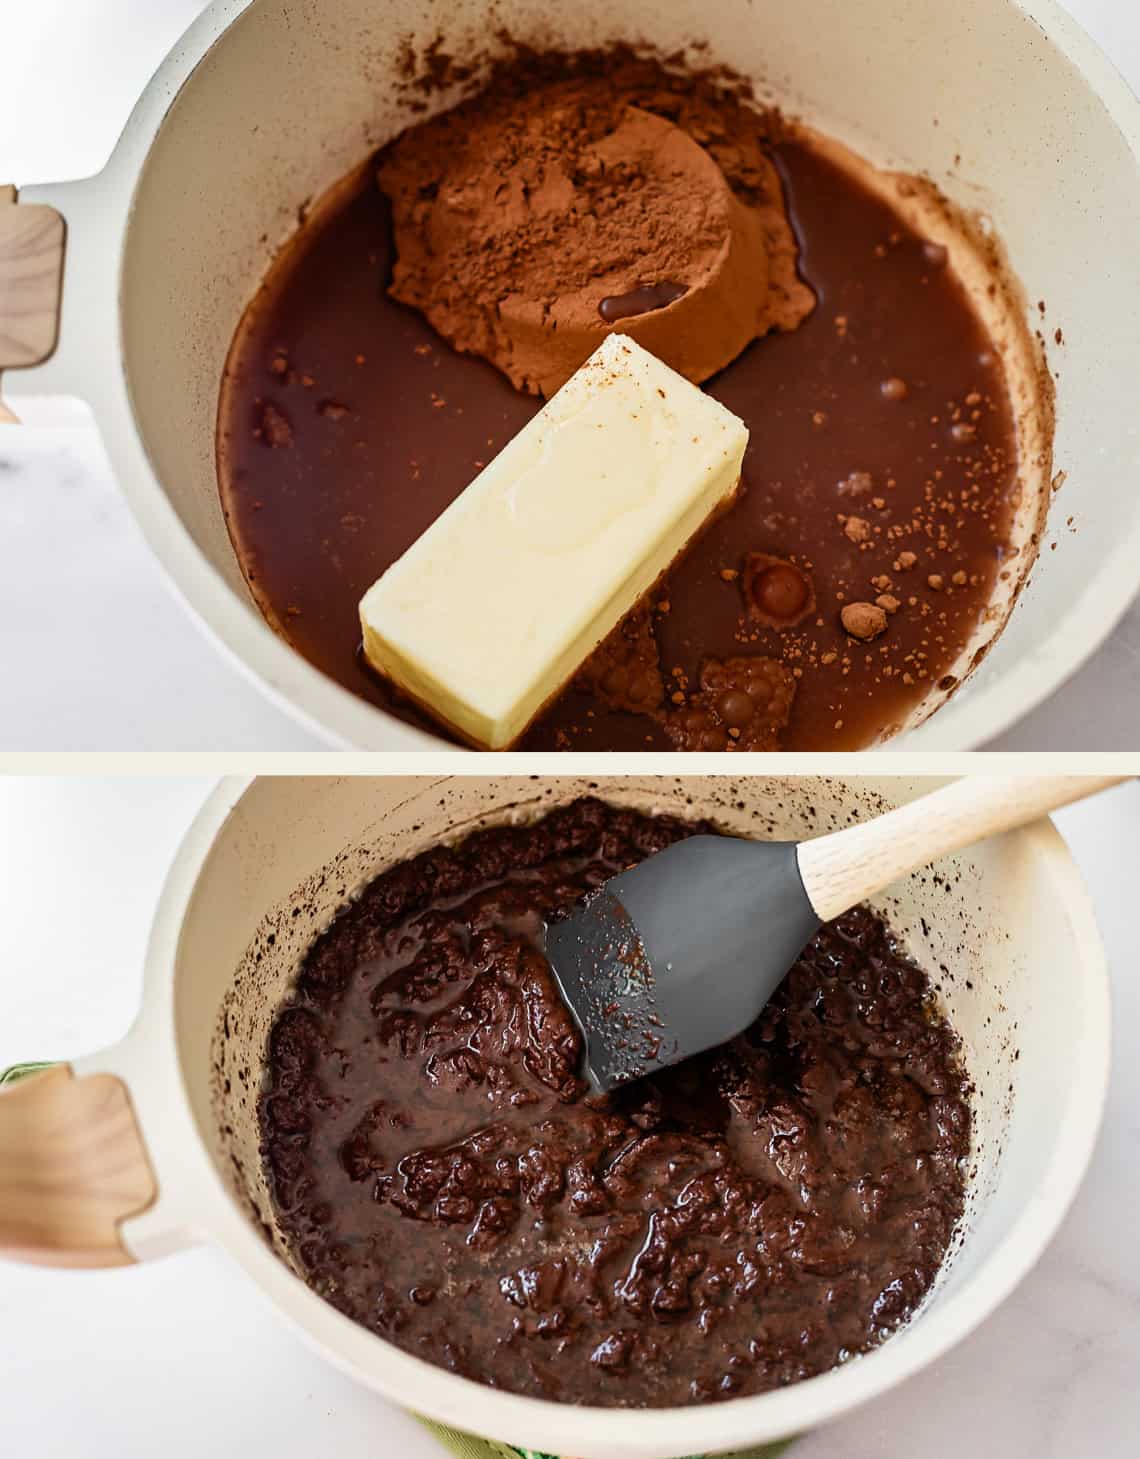
So melt the butter with some water and the cocoa, just like a Texas Sheet Cake.
Once it’s melted, add in a 4-ounce bar of semi-sweet chocolate. I told you, we are not messing around when it comes to the chocolate flavor in these cupcakes! I also like to add the brown sugar here, so it heats up a little bit and we have less chance of brown sugar lumps.
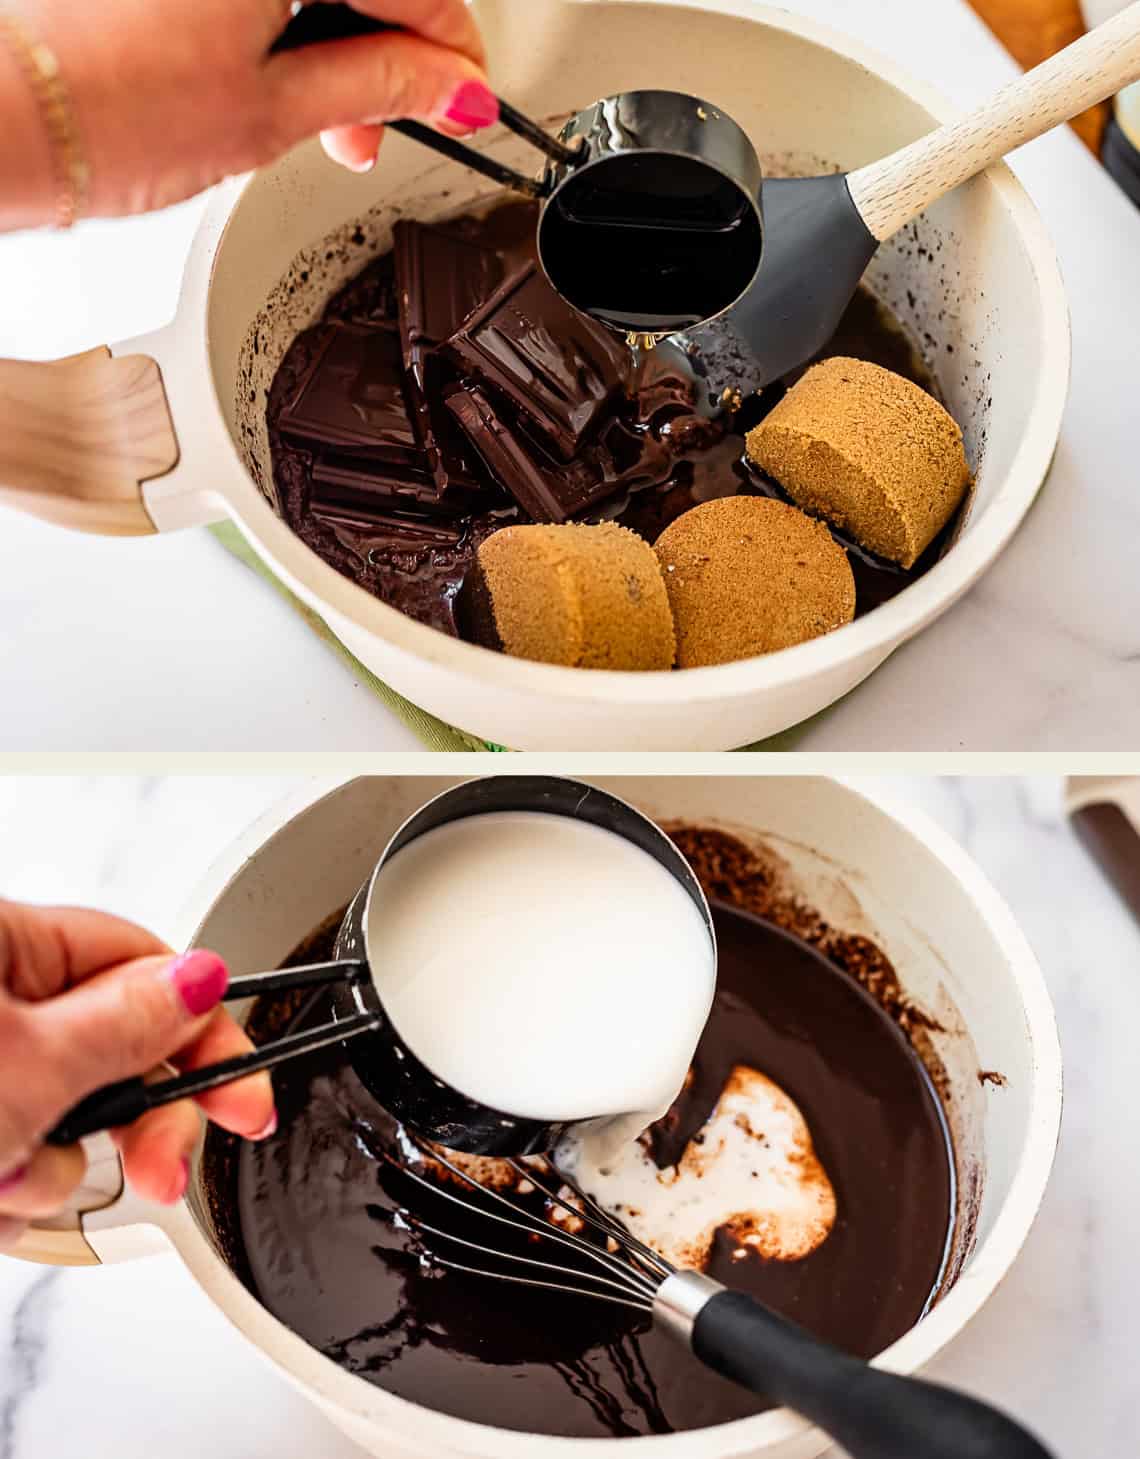
Add in the milk, vanilla, and vinegar. Why vinegar? Vinegar is an acid that helps the baking soda react, giving our cake more LIFT and helping it to rise more.
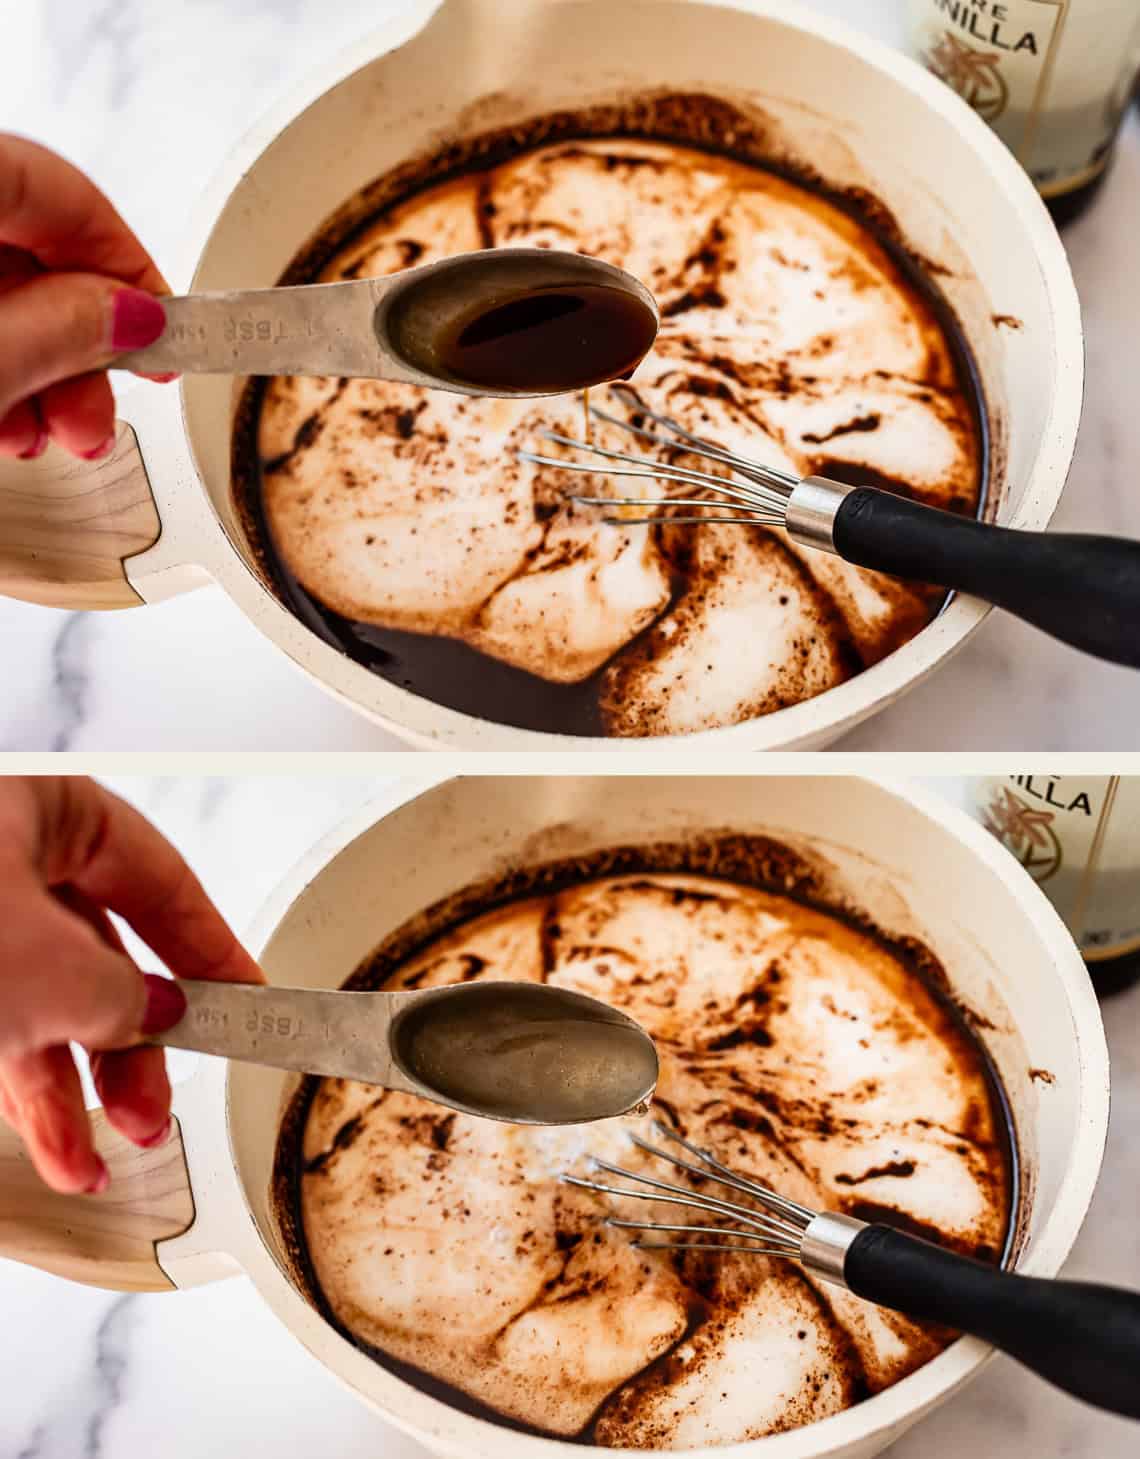
Vinegar ALSO inhibits gluten production in the flour. Of course there is still gluten, but it’s not going to have the same strength that it would have had without the vinegar. Gluten strength = chewy, sturdy texture. (Exactly what we want for bread and pizza crust. But we want our cupcakes LIGHT and delicate!)
Add in the eggs…
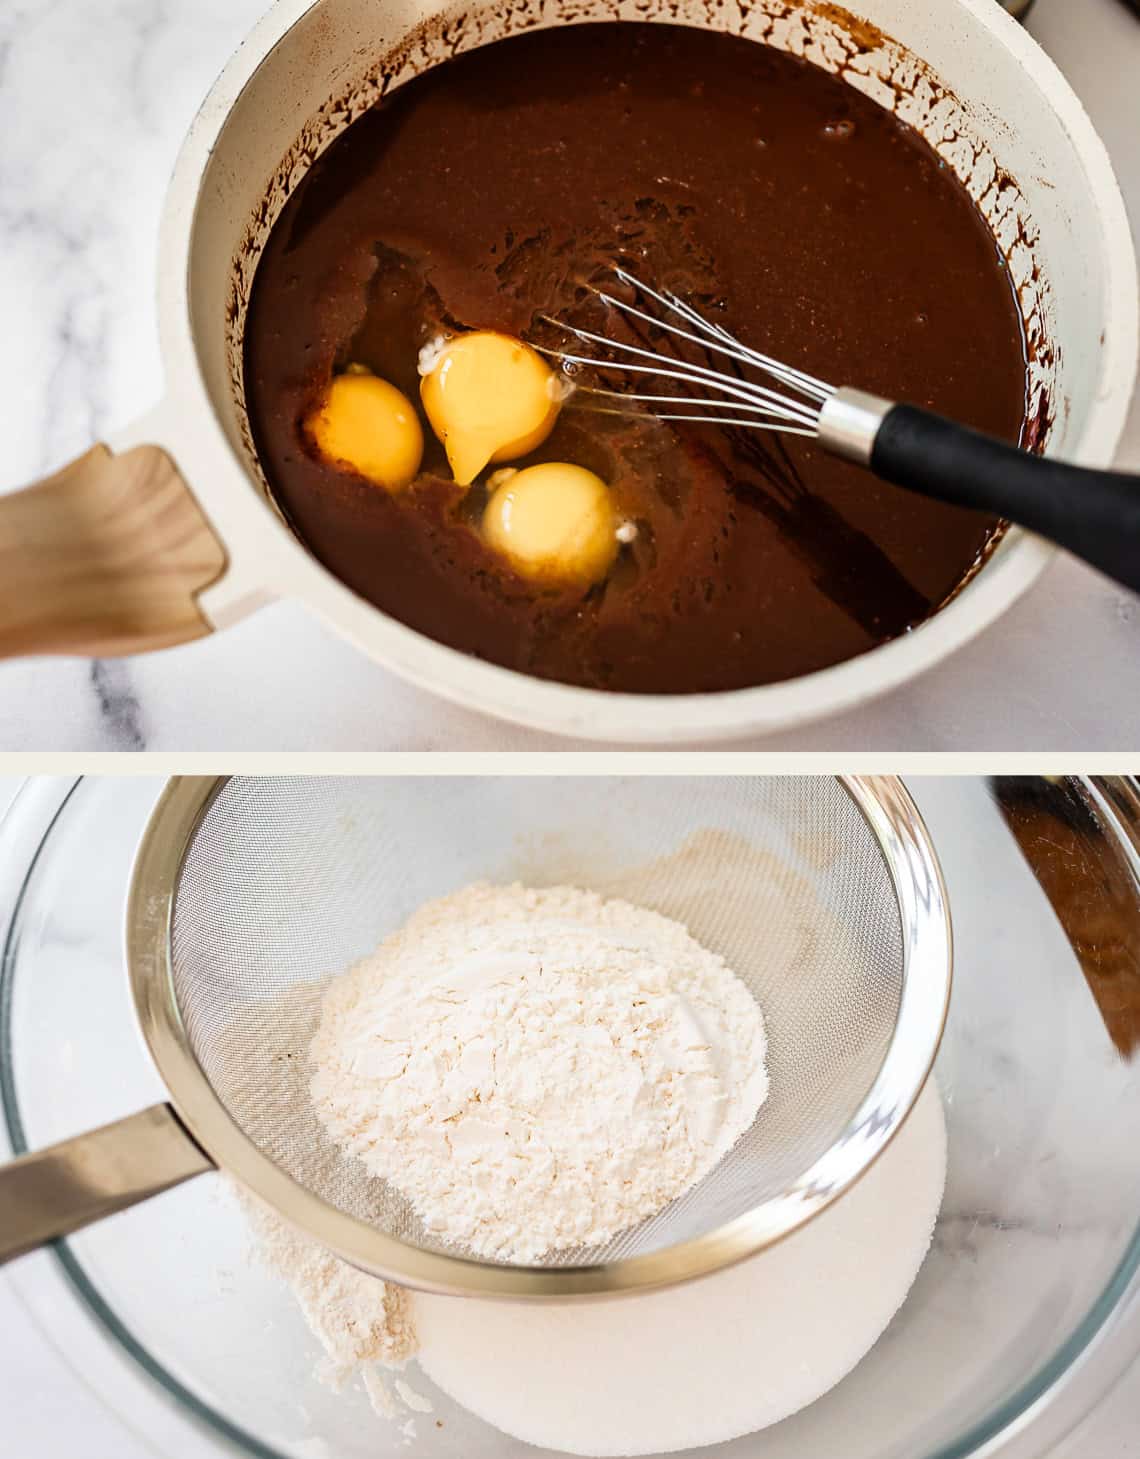
Then take a hot minute to sift your flour and all the other dry ingredients. This helps make our cupcakes delicate! Texture is EVERYTHING when it comes to cake.
Combine it all together, and then last thing, add in the sour cream.
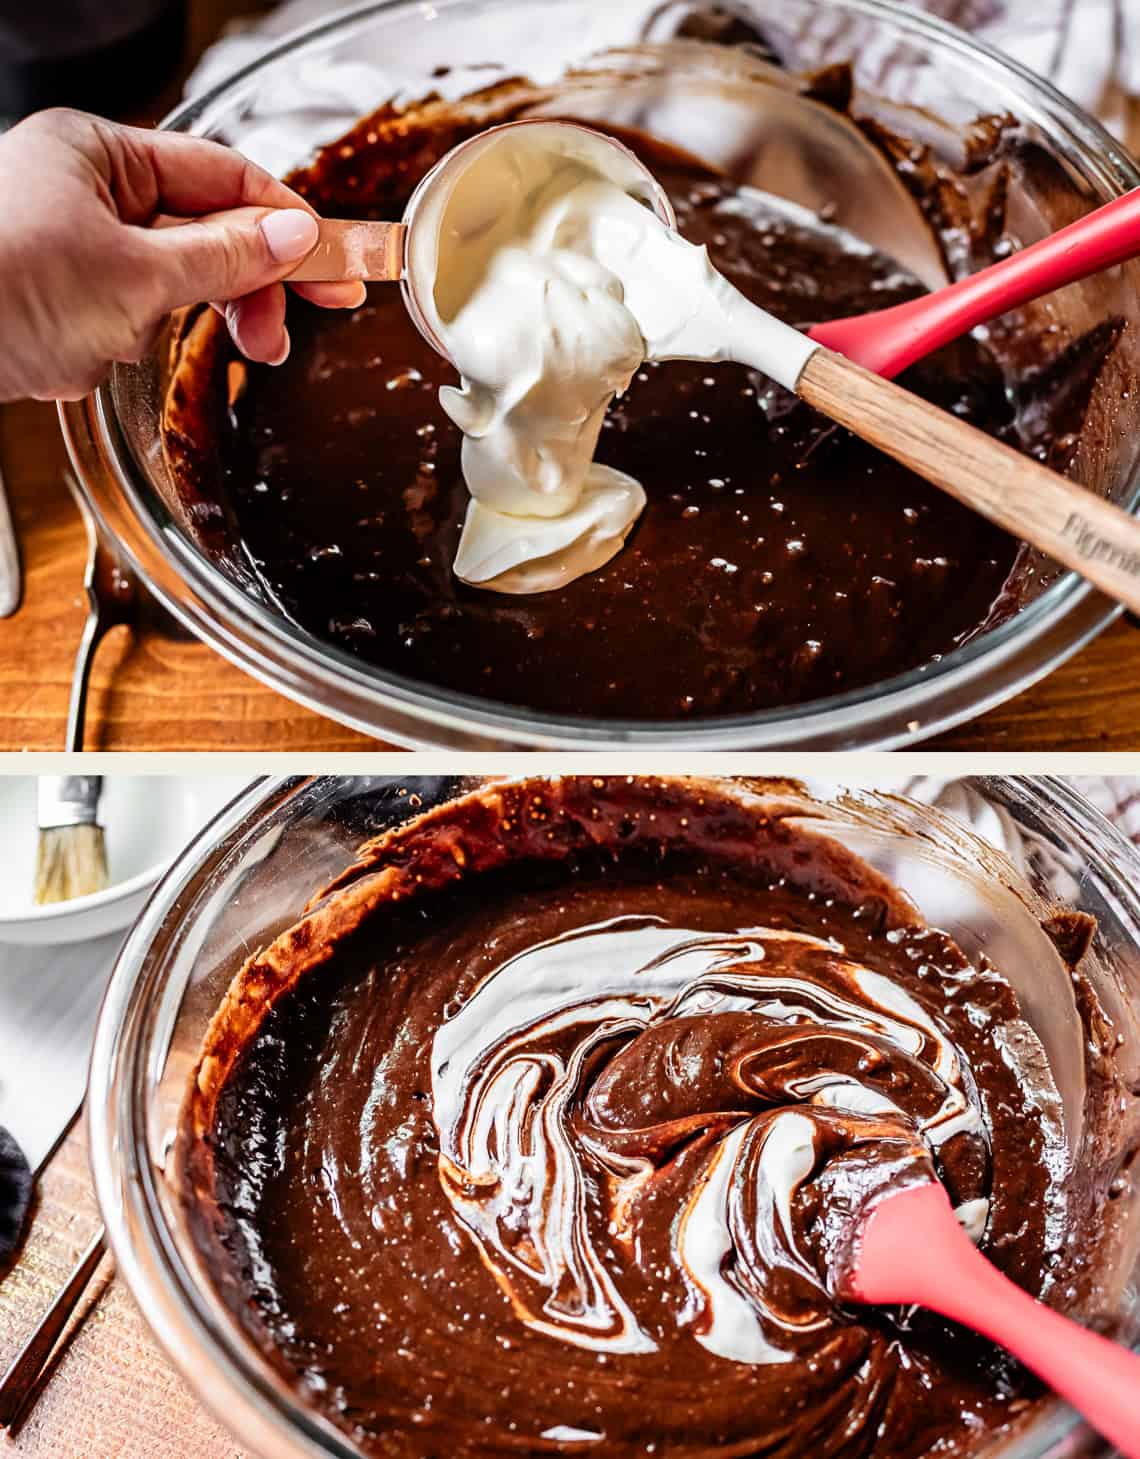
Sour cream is the secret to almost all of my cakes. It adds essential moisture, plus a delightful tang that compliments the fruity side of dark chocolate.
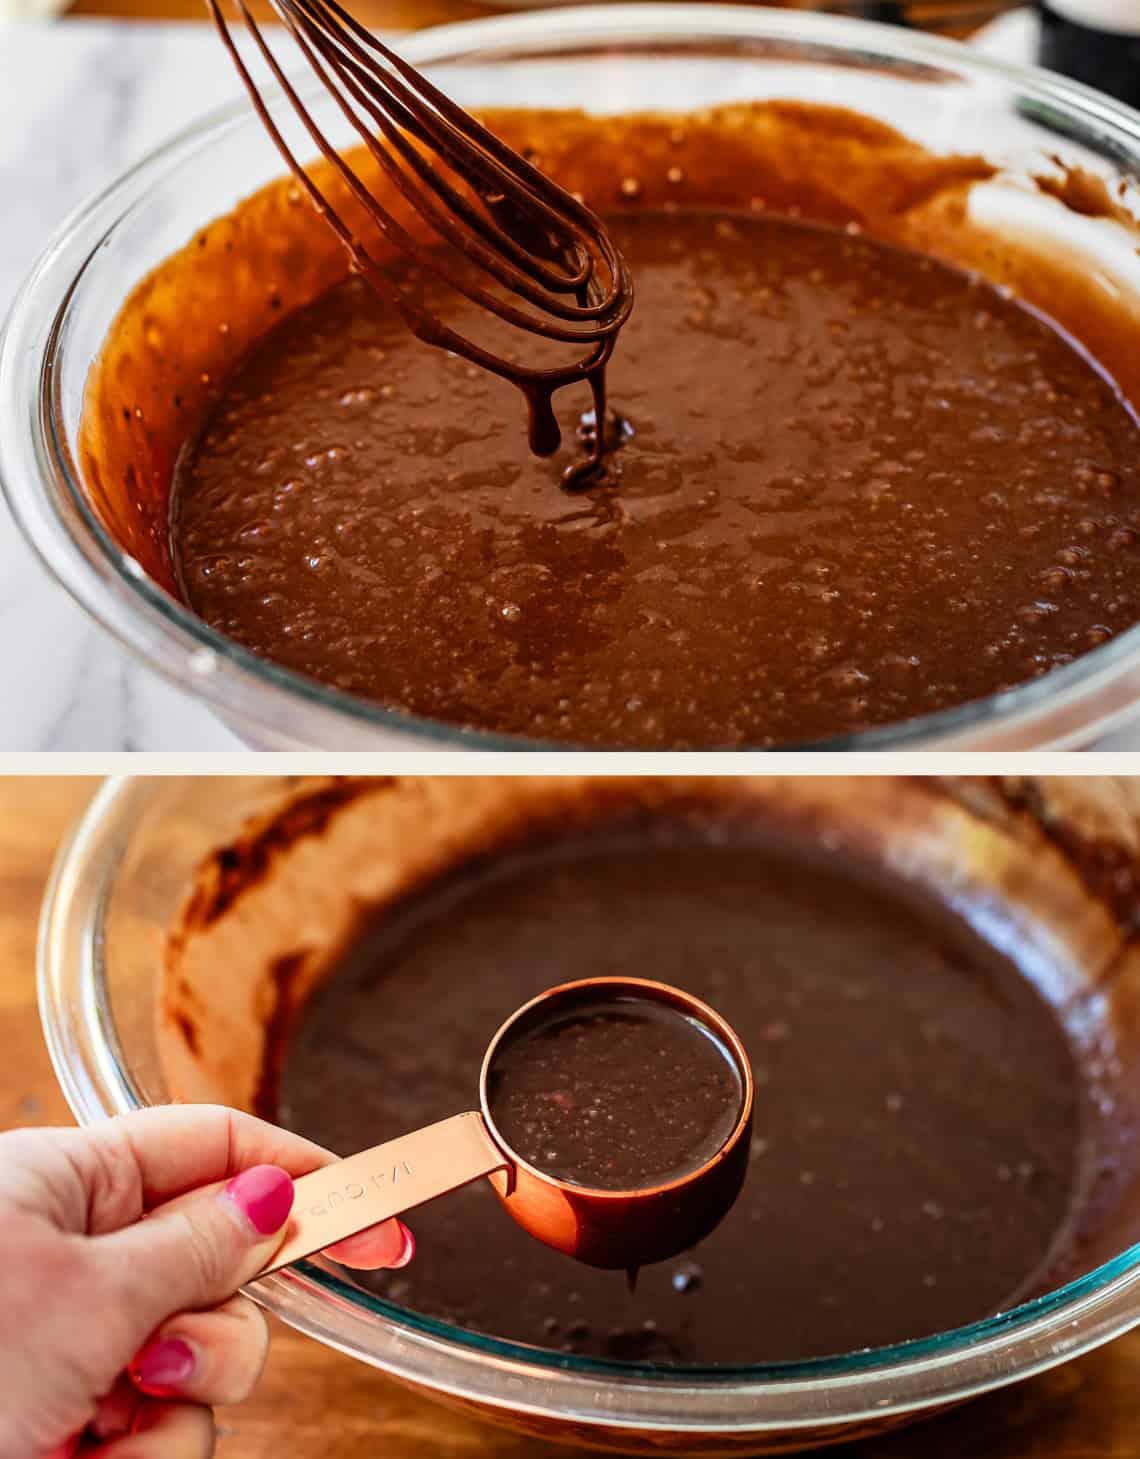
Here’s what the final batter looks like. Pretty thin.
Now I’m about to get really bossy. There are a couple techniques for cupcakes that took me YEARS to figure out. Probably why I have such a rocky history with the poor things…I was always messing this part up.
Use a 1/4 cup measuring cup to add batter to the cupcake lines, but don’t fill it all the way. You want about 3 and 1/2 tablespoons batter per cupcake.
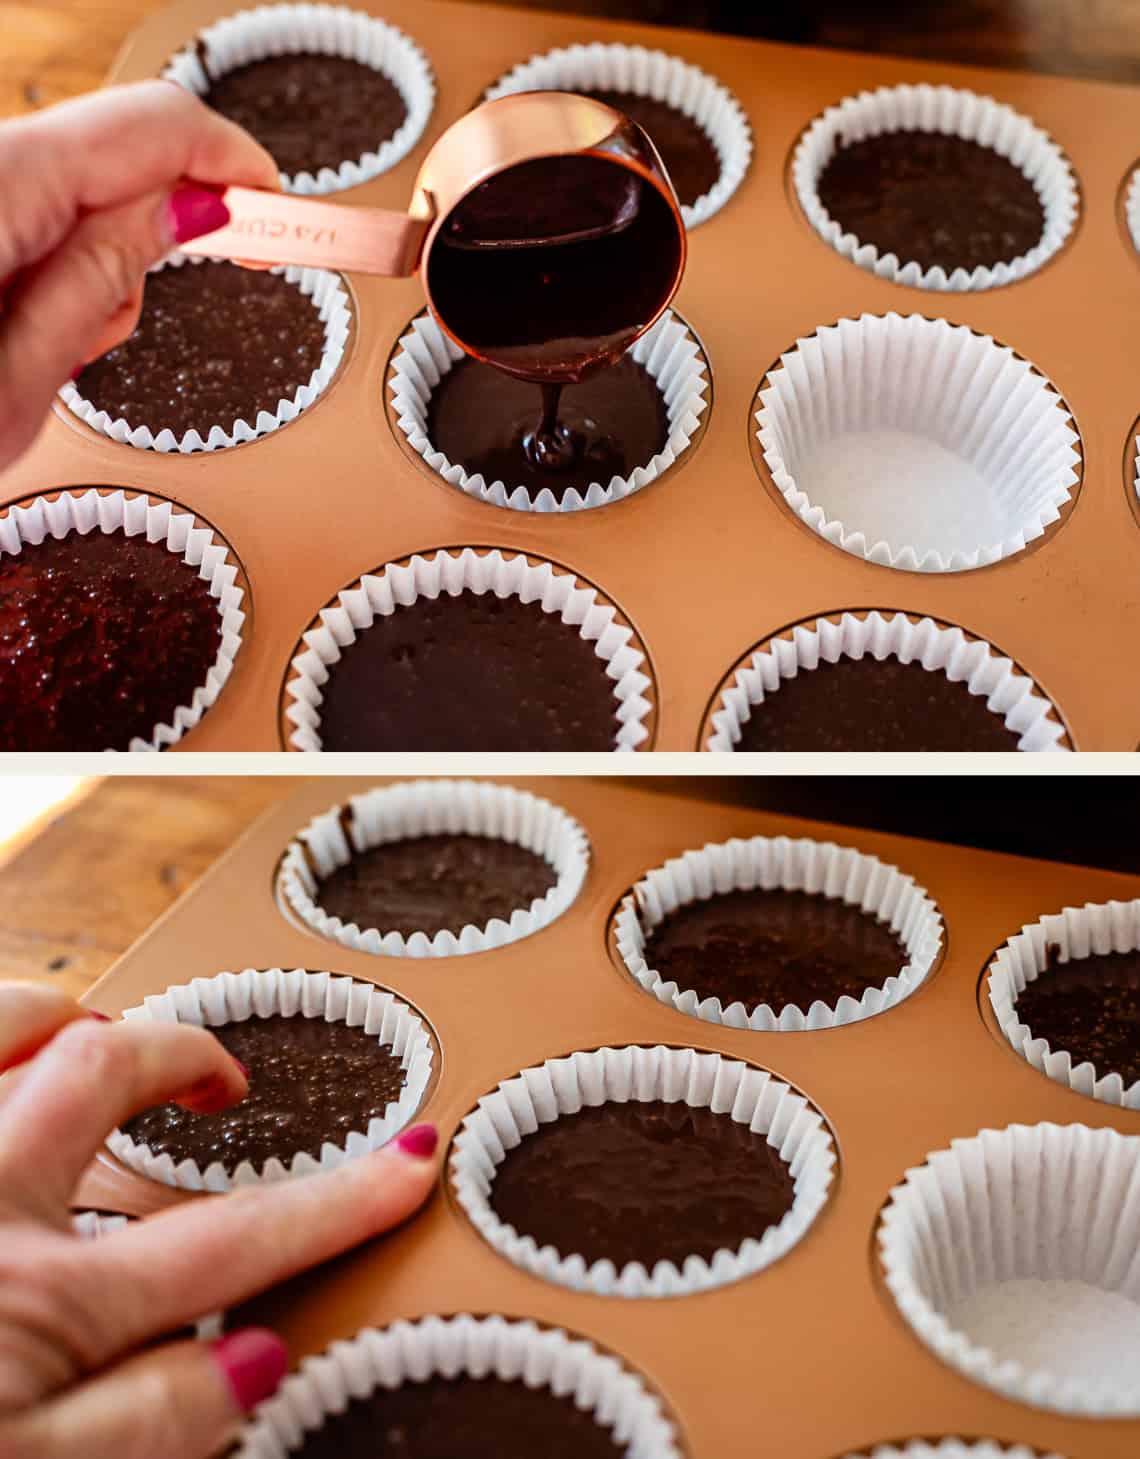
Here is my finger, there to show how much space should be empty at the top of each cupcake. You need space for the cupcake to rise.
Even then, you’re never going to get it 100% perfect. I want cupcakes that rise JUST to the top of the liner, not too much over the top, but definitely not underneath. That just looks sad.
But sometimes this means that a cupcake that was a little overfull spills over the edge onto the pan. THIS is why it’s so important to grease the TOP of the cupcake pan, just in case you have some spillage like this.
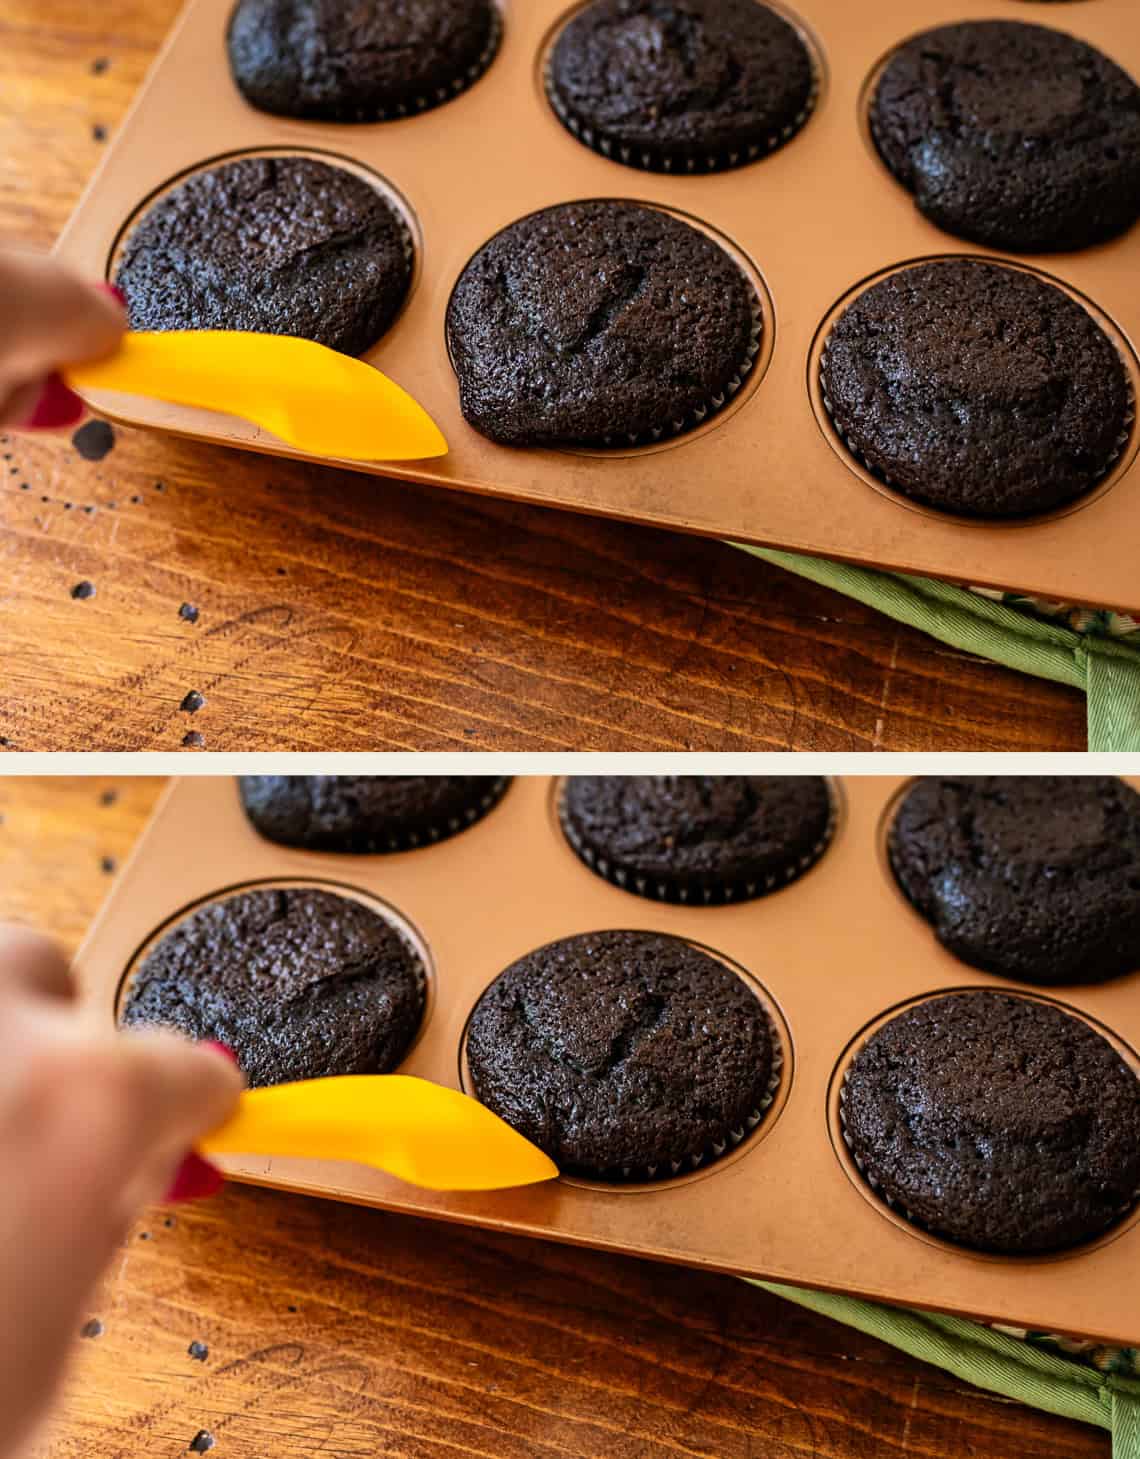
The beauty of baked goods is that they are not quite set up when you take them out of the oven. You have about 1 minute after taking them out of the oven to reshape them. Use a spatula or a spoon to gently nudge any misshapen cupcakes back into place.
See?? That one in the middle is perfect after a tiny nudge:
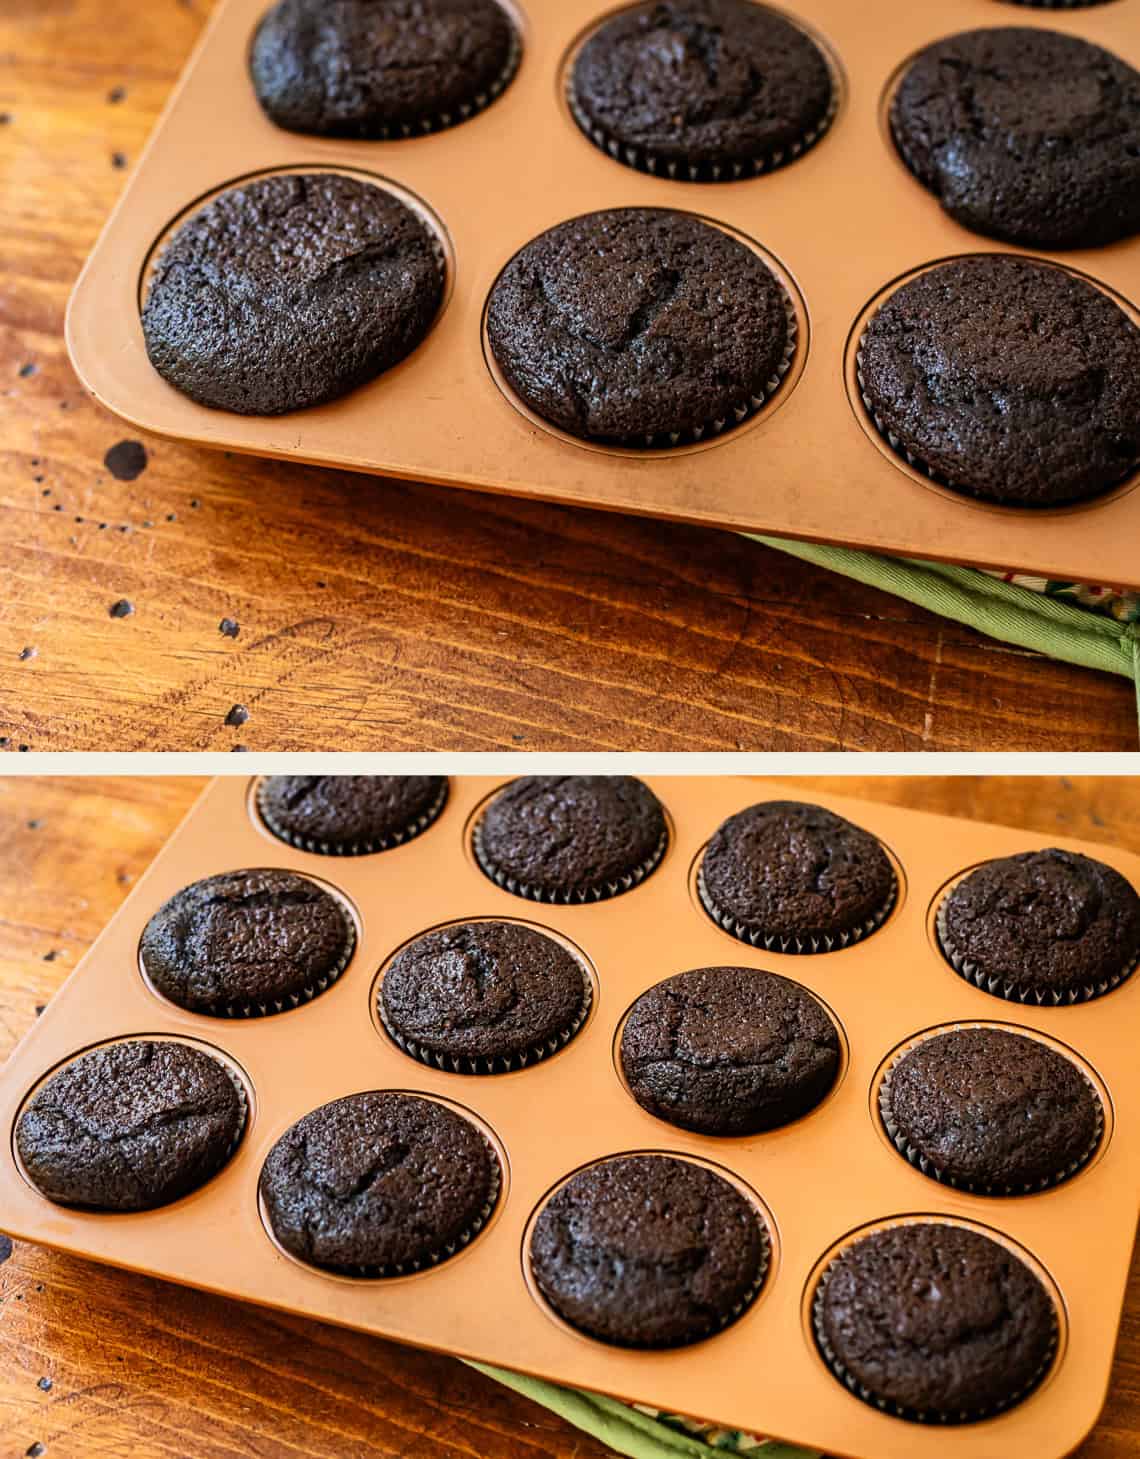
Here they are, all rounded. I use this same technique with my cookies. I call it the “spoon trick” 🤣 Read more about it on my Chocolate Chip Cookies post. It’s a game changer technique!
And finally, my last tip:

Get those cupcakes out of the pan ASAP after they come out of the oven, anywhere between 2-5 minutes after taking them out. This helps the cupcakes cool off quickly, so they won’t get over baked. It also helps them not get soggy sitting in their own steam from the hot pan. So be careful not to misshape the sides and bottoms as you pull them out, but try to transfer them to a cooling rack. Don’t burn your fingers!!
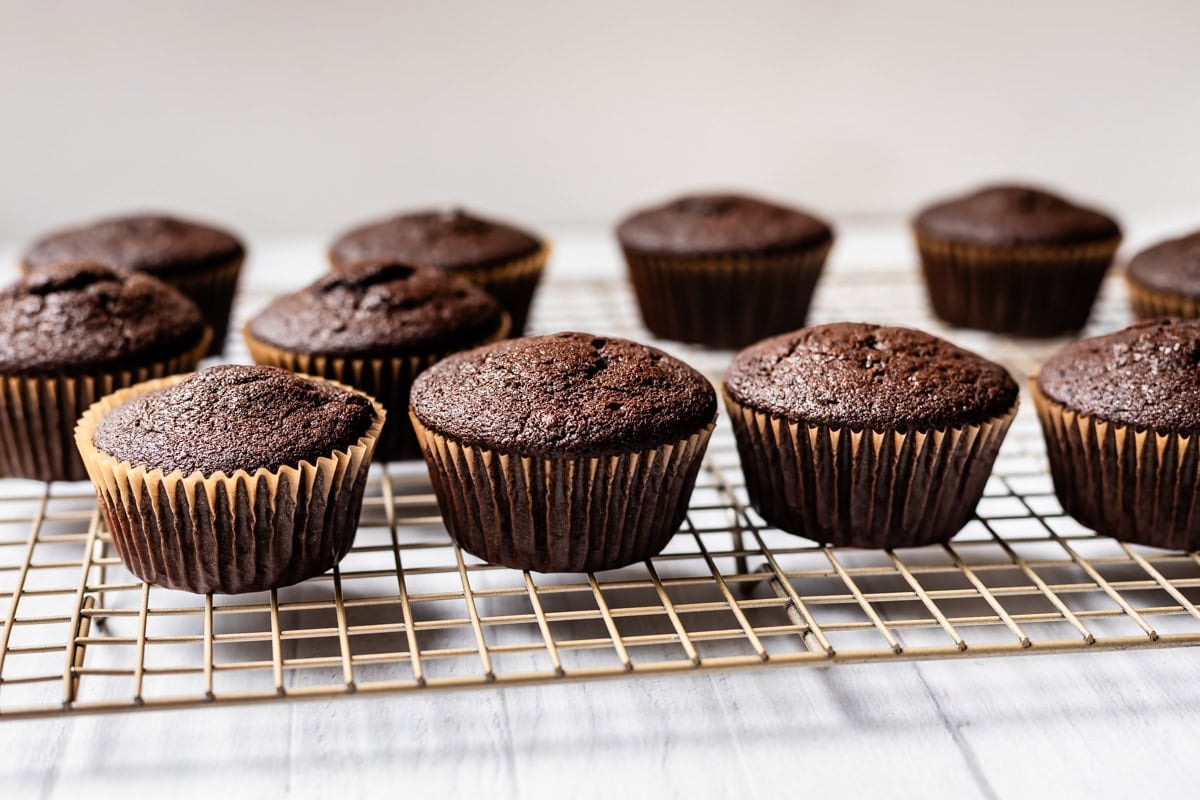
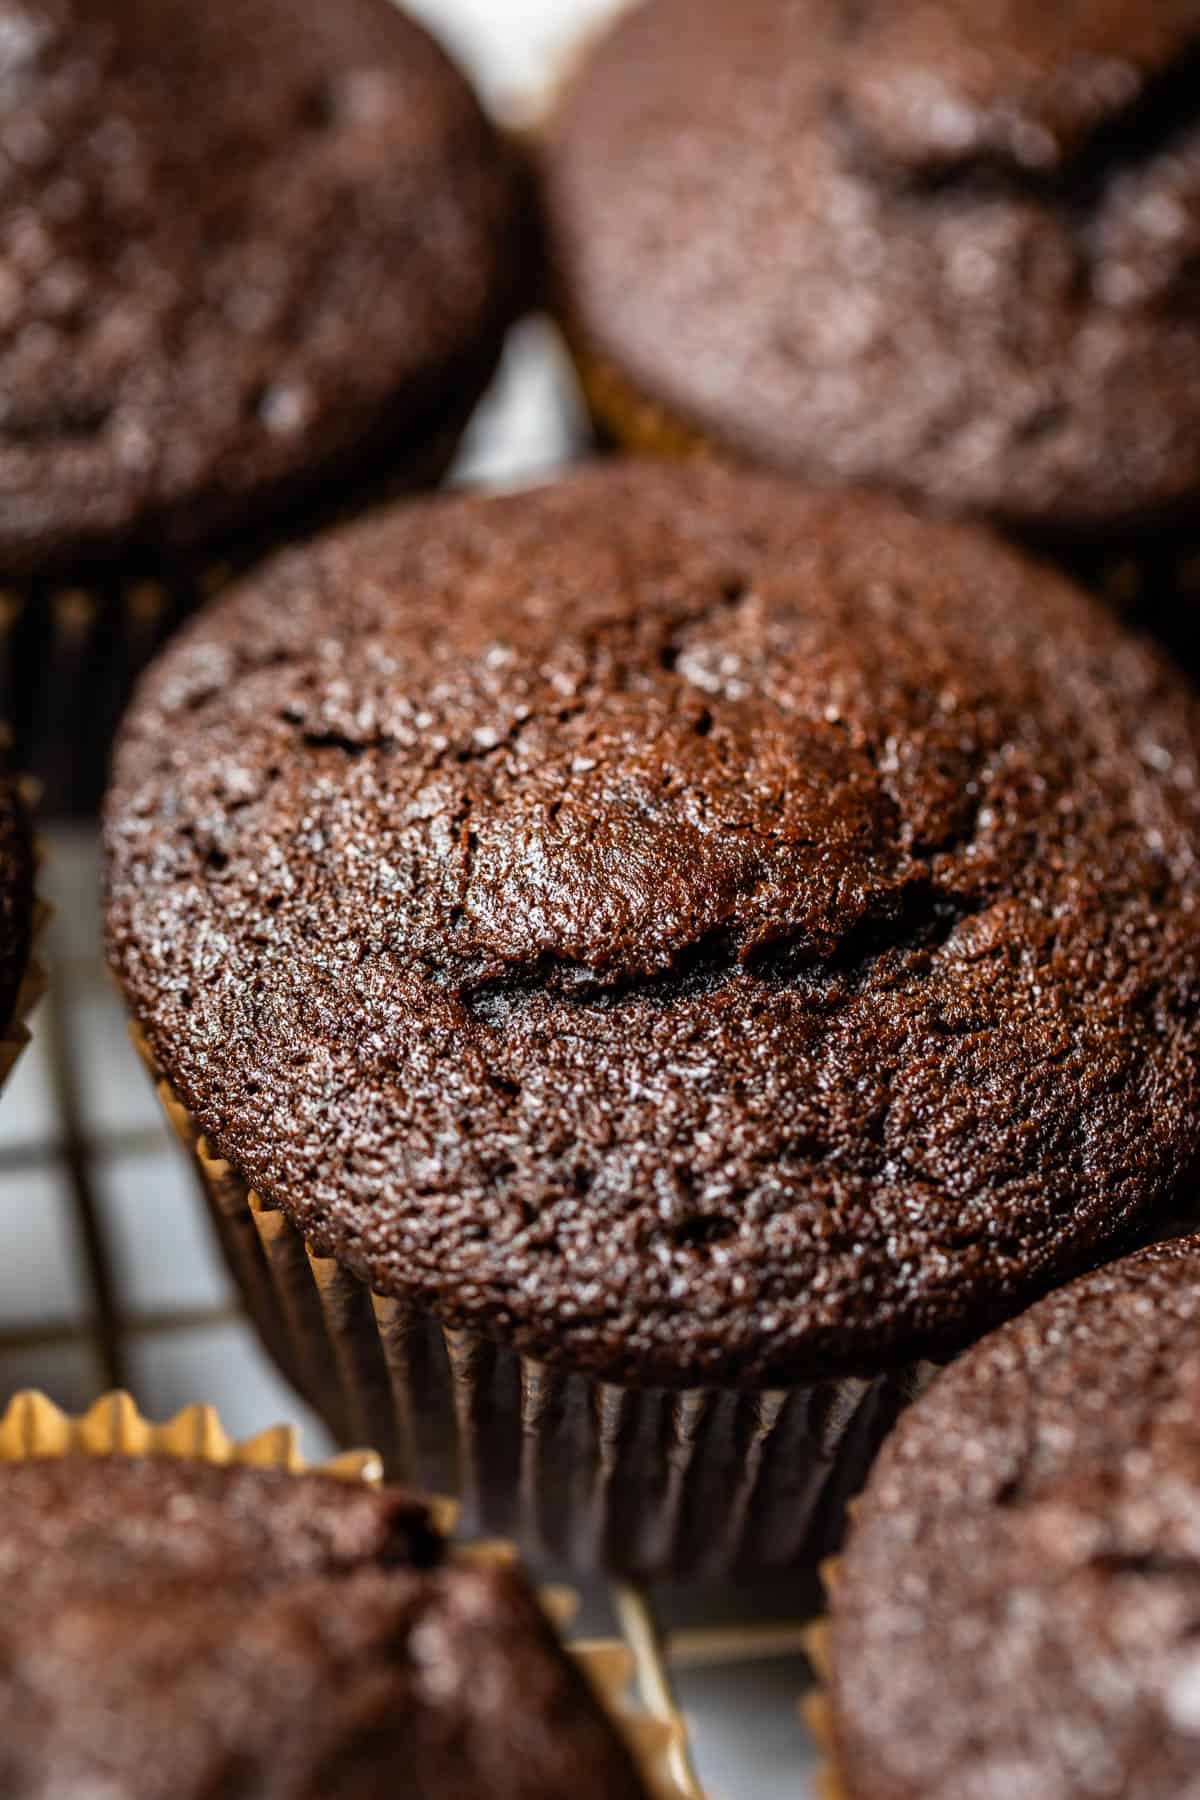
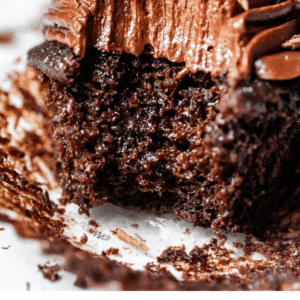
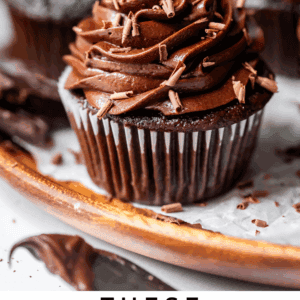
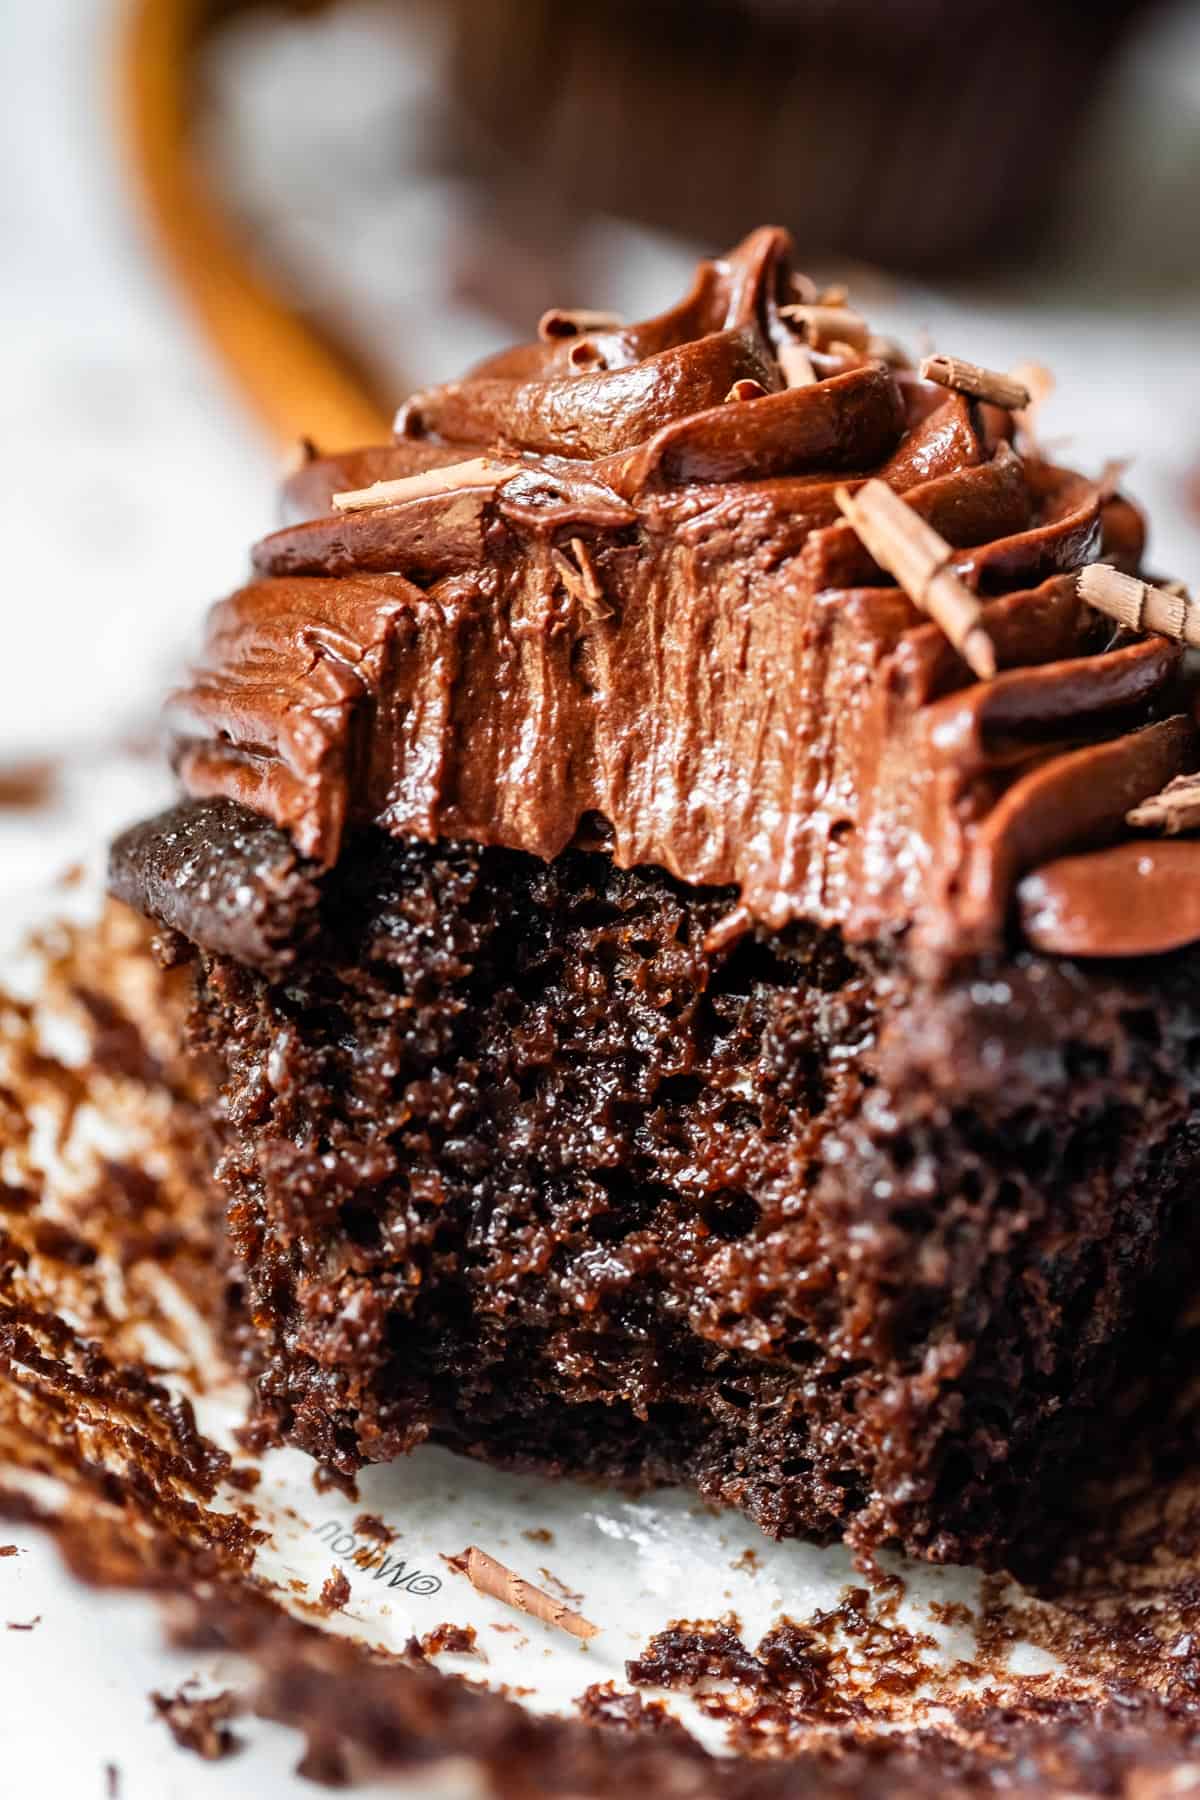
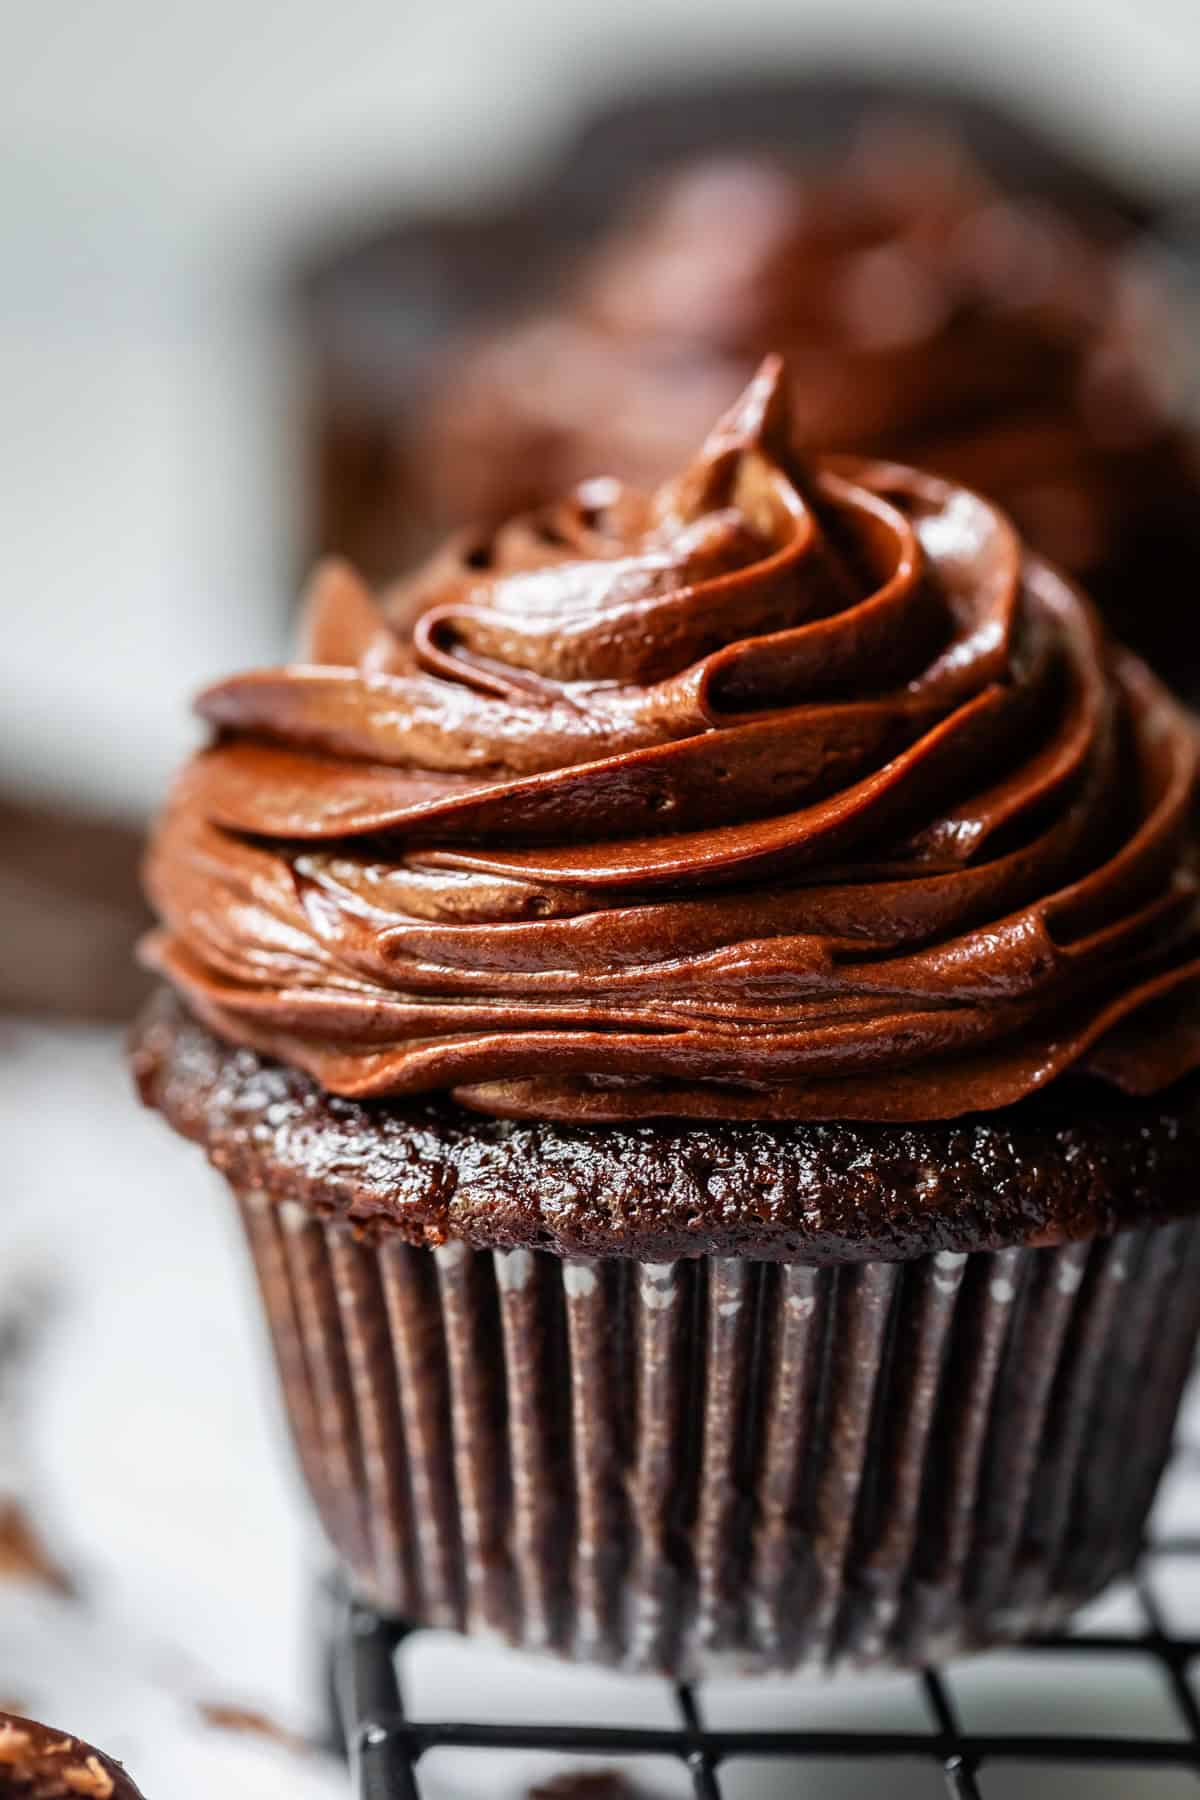
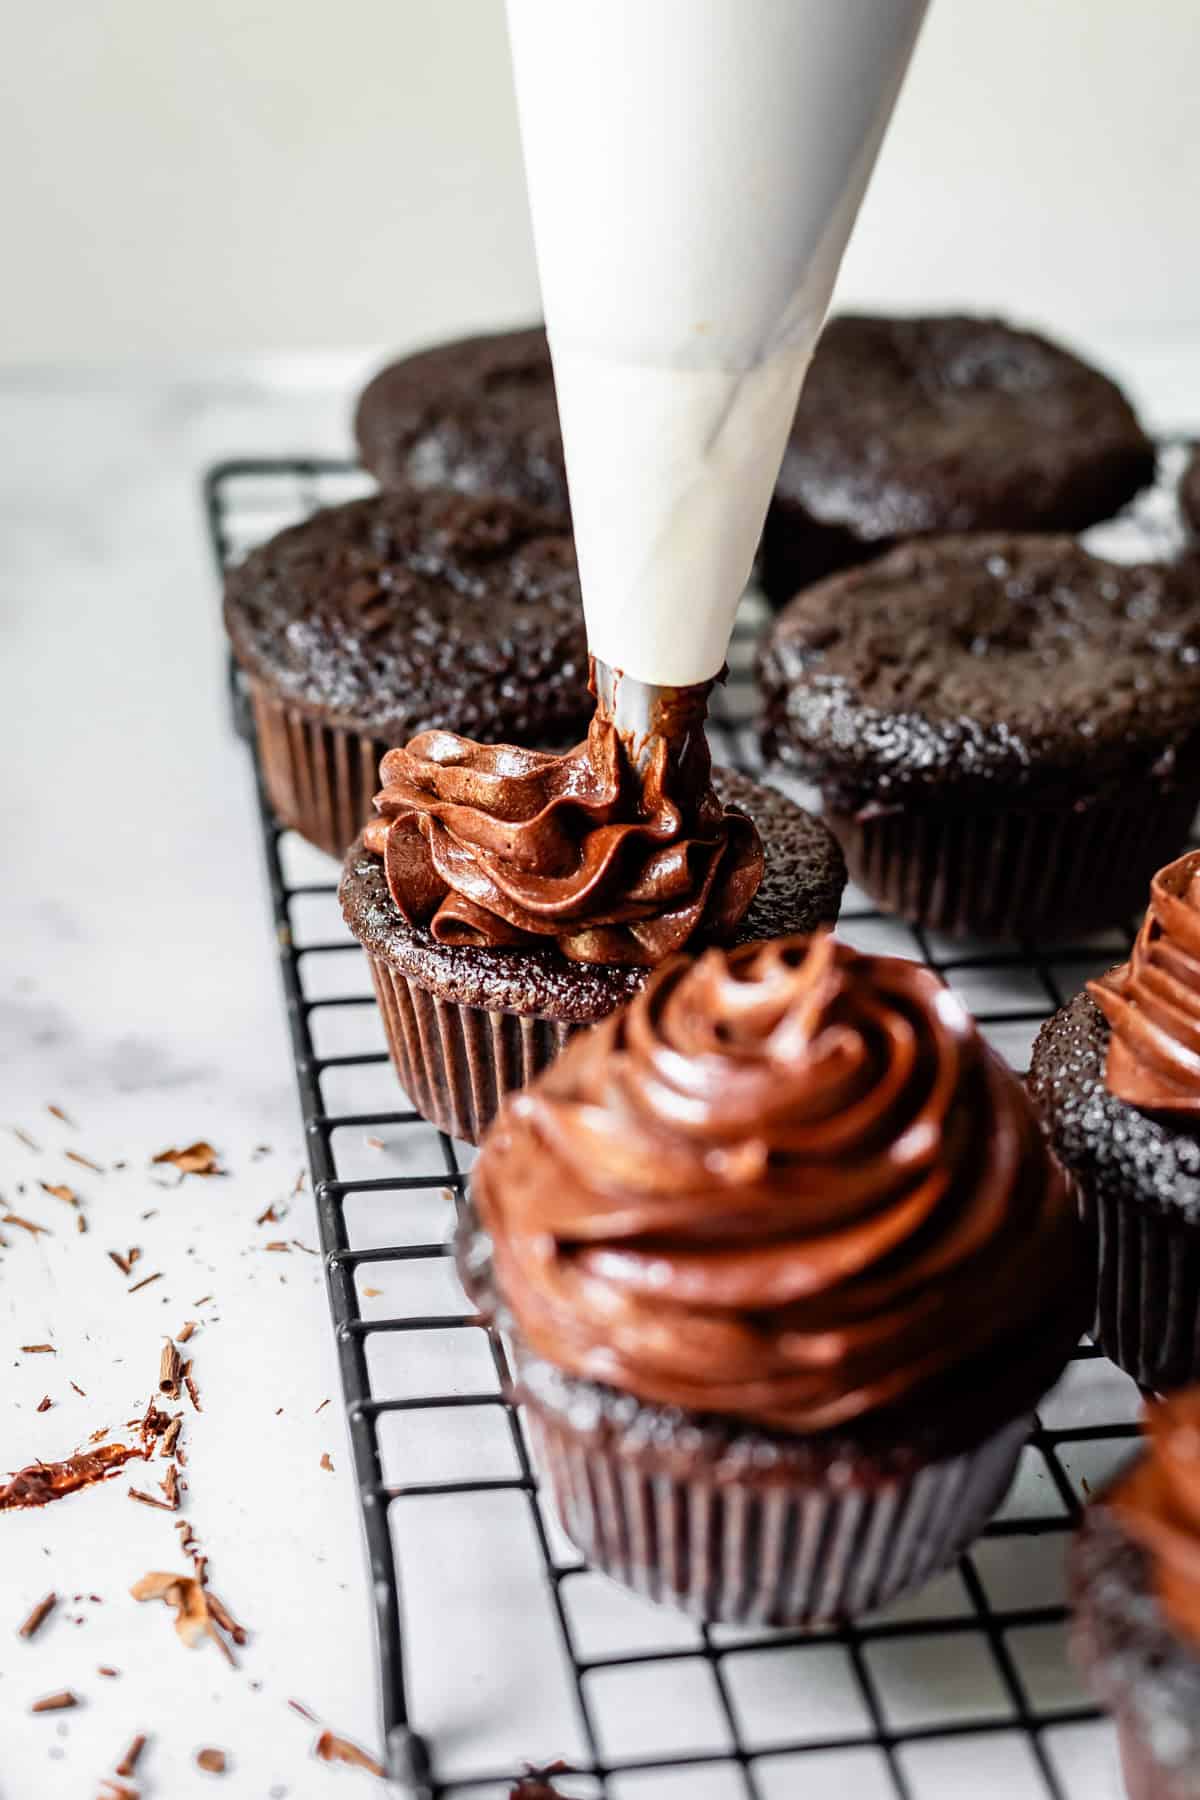
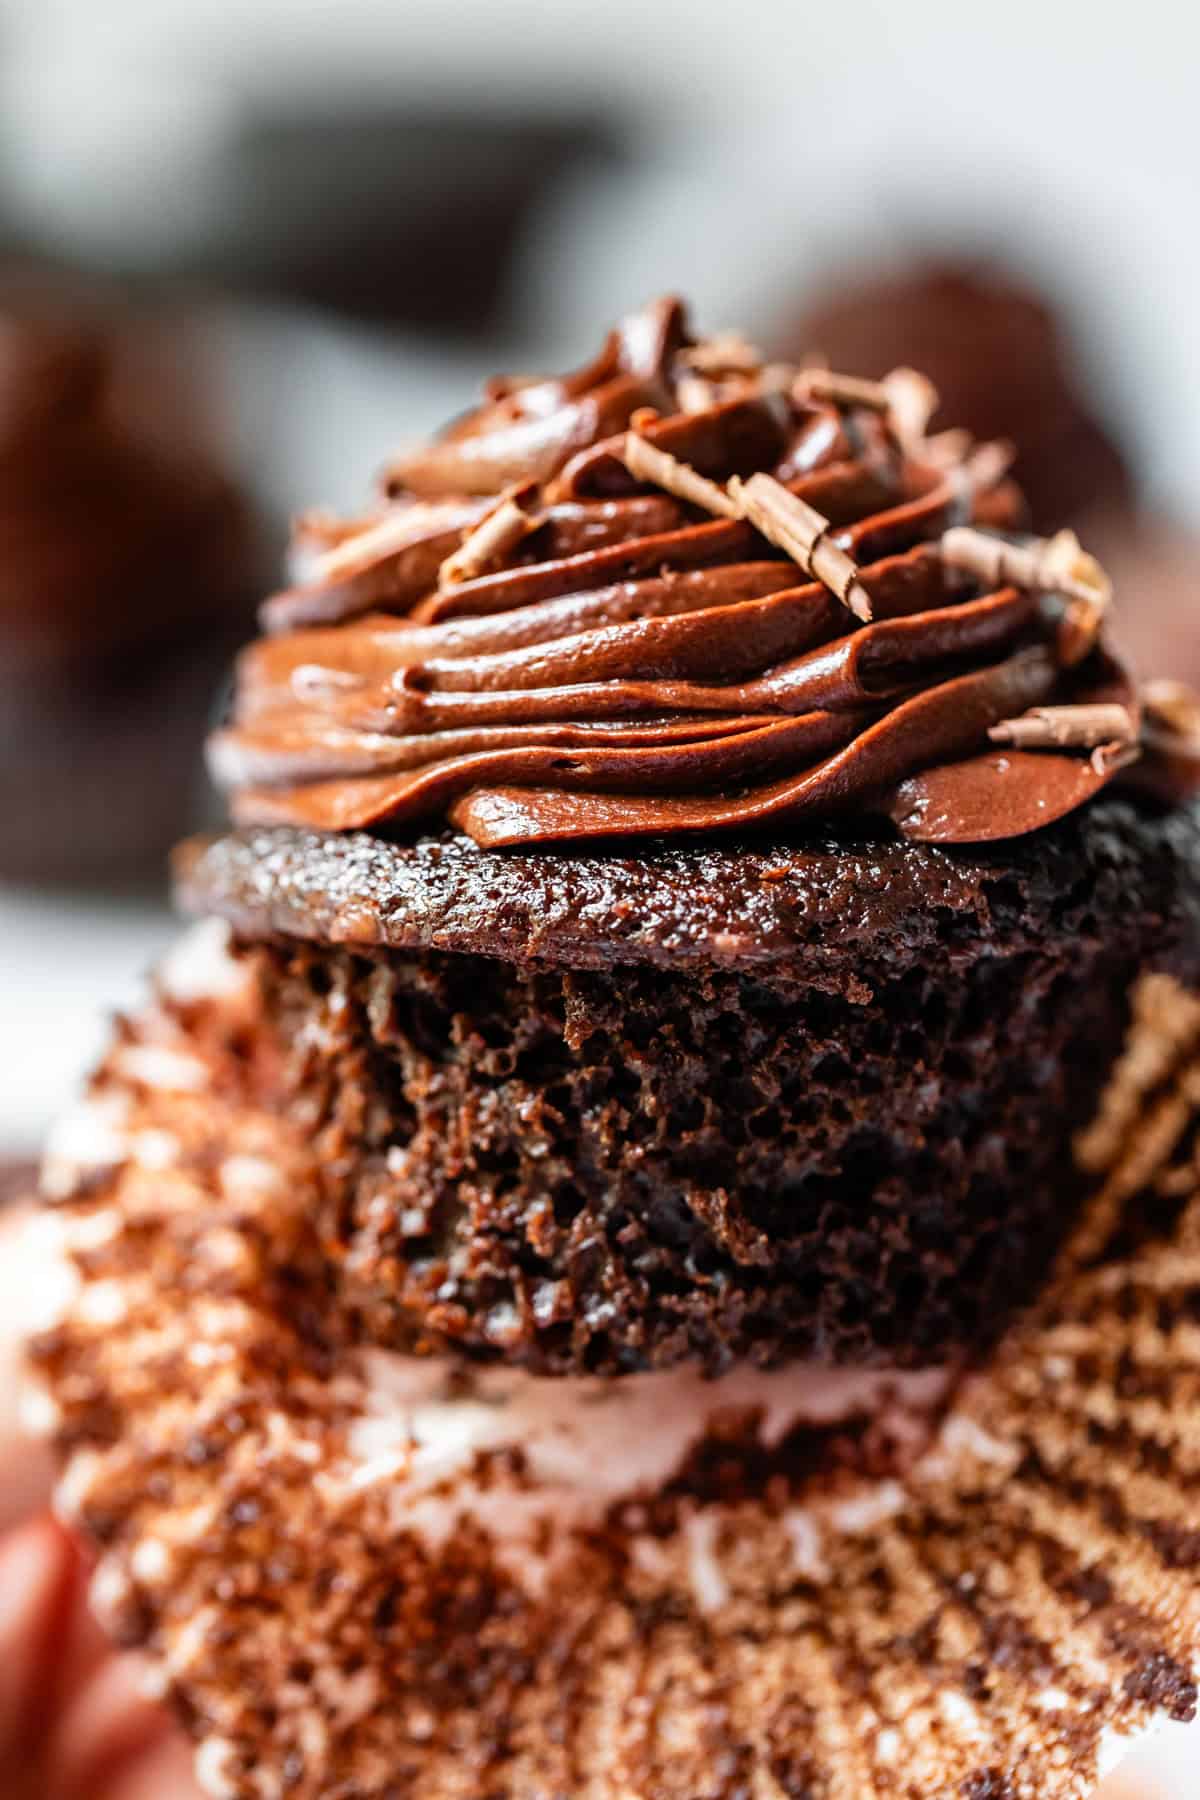
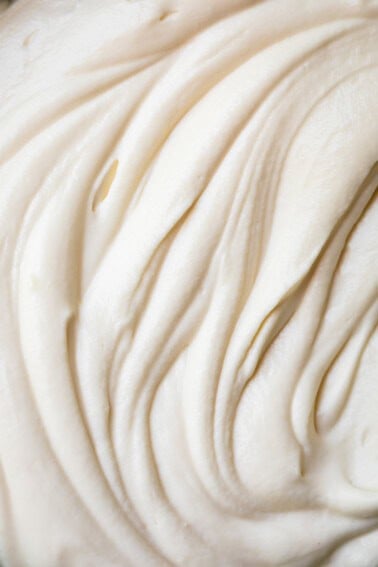
Ta-daaaa. Here she is! All moist and perfect. Do you see that crackly fudgy top? Almost like a brownie. They are so good by themselves, I swear. But add the Chocolate Buttercream Frosting…oh my goodness. SO good.
Top if off
Are you a chocolate on chocolate kind of person? Or do you like a good cream cheese tang to offset the chocolate? Here are some of my favorite frostings you can try on top of these chocolate cupcakes. All of them are amazing, it just depends on your mood!
- Creamy Chocolate Buttercream Frosting You’ll Want to Lick Off the Spoon >> rich, smooth, and CREAMY! A chocolate lover’s dream come true for sure
- The BEST Buttercream Sugar Cookie Frosting Recipe >> not just for sugar cookies, this is my go-to buttercream recipe for cakes and cupcakes too!
- Best Recipe for Cream Cheese Frosting >> a classic recipe that goes with just about every flavor
- Maple Frosting Recipe with Pecans >> the maple and the pecan balance each other perfectly!
- Whipped Honey Butter Frosting >> um, yes please! I love how unique this honey flavored frosting is
- Cream Cheese Frosting that Has the Texture of Whipped Cream >> COMING SOON!
- Peanut Butter Frosting >> COMING SOON!
- Easy Homemade Fondant from Sugar Geek Recipes
- Orange Glaze from Three Olives Branch
How to store leftover cupcakes
Both frosted and unfrosted cupcakes need to be stored in a container with an airtight lid, or at the very least covered as well as possible with plastic wrap. These cupcakes are super moist, but no cupcake can handle exposure to air for very long before getting dry. Once wrapped or in a container they can stay out on the counter for 3-4 days. But good luck keeping them around that long!
Can you freeze chocolate cupcakes?
Yes! Unfrosted chocolate cupcakes freeze quite well. Line the baked cupcakes on a sheet pan and place the pan in the freezer to flash freeze. After 30 minutes, transfer the cupcakes to a freezer ziplock bag, remove as much air as possible, seal, and place back in the freezer. Already baked goods to tend to dry out faster than unbaked goods, so plan to eat them within 1-2 months max. I don’t recommend freezing already frosted cupcakes, so only frost what you need, or plan to gift the rest (your friends will love you)!
Chocolate cupcake frequently asked questions
There are so many different kinds of cakes and cupcakes, so what is added to keep them moist will really vary. In these cupcakes, we’re relying on a few big hitters to provide that rich, moist texture. First, melted chocolate. A chocolate bar has fats and milks added to the chocolate to give that velvety smooth taste and mouth feel, and we’re just passing that along to the cupcakes. Sour cream has good fat and acidity, which add moisture and help tenderize the cupcake. The cupcakes also have butter, oil, whole milk, and vinegar, which do the same as the sour cream. The end result is a cupcake that is about as rich and moist as it can be without having to eat it on a plate with a fork!
There is no one standard bake time for every cupcake recipe. This recipe calls for baking the cupcakes at 350 degrees for about 14-17 minutes. Put a toothpick into the middle of the cupcake. It should come out clean, and the top will not look shiny or wet. You can also check the spring of the cupcake by pressing your finger gently into the top of the cupcake. If it springs back right away and leaves no imprint, it’s ready! DO NOT over bake these cupcakes! They will start to dry out and get sad, so be sure to use all your cues to get them out once just fully baked.
Most cake recipes, whether from a box or homemade, can be put into cupcake liners and made into cupcakes. It will definitely work! That being said, cake recipes are designed to be cakes, not cupcakes, and the result when baking into mini versions can give a much drier result than if baked as a whole cake. Cupcakes also tend to dry out faster in general since they’re exposed to so much more air than a cake. That’s why I developed this recipe specifically to be a cupcake recipe, to add more moisture that will help them bake moist and stay that way for longer than the average chocolate cupcake!
Let them eat cake
Cake and cupcakes all day long! I think there are about as many different kinds of cakes and cupcakes as there are events to celebrate with them. I’ve listed some of my favorites below, but you can look through the Cake & Cupcakes page on the blog for even more great options!
Cupcakes
- Black Bottom Cupcakes >> chocolate cupcakes similar to today’s recipe, but with a delicious surprise cheesecake filling!
- Homemade Hostess Chocolate Cupcakes >> just like your childhood, but EVEN BETTER than you remember
- Cookie Dough Cupcakes >> when you love cookie dough so much, you turn it into the most amazing cupcakes
- Pumpkin Cupcakes with Maple Pecan Frosting >> a fall favorite, and the frosting is to die for
- Mini Flourless Tortes from Baker Bettie
Cakes
- The Best Homemade White Cake Recipe >> this is my favorite white cake EVER because it is actually moist with tons of rich flavor
- The Best Chocolate Cake I’ve Ever Had >> this cake has been my go-to forever!
- Brown Sugar Yellow Cake with Chocolate Frosting >> this cake has so much buttery flavor, and is a huge fan favorite
- Death By Chocolate Bundt Cake >> more chocolatey goodness in a bundt cake with a rich and creamy ganache topping
- Authentic Sacher Torte Recipe Austrian Chocolate Cake from Not Quite Nigella
Facebook | Pinterest | Instagram
Chocolate Cupcakes
Ingredients
In a saucepan
- 1/2 cup water
- 1/2 cup cocoa powder
- 1/2 cup butter
- 1/4 cup vegetable oil
- 3/4 cup dark brown sugar, packed
- 4 ounces 60% bittersweet chocolate, I use a 4-oz Ghirardelli bar
- 1/2 cup whole milk
- 2 teaspoons vanilla
- 1 tablespoon white vinegar
- 2 large eggs
- 1 large egg yolk
In a large bowl
- 1 and 1/4 cups all purpose flour, spooned and leveled, sifted
- 1 teaspoon baking soda
- 1 teaspoon baking powder
- 1 cup granulated sugar
- 3/4 teaspoon kosher salt, use 1/2 teaspoon table salt
- 1/2 cup sour cream
Instructions
- Preheat the oven to 350 degrees F. Spray the tops of 2 muffin tins with nonstick spray (not so much the wells, focus on the flat top, just in case there is any overflow). Line each cavity with cupcake liners. Set aside.
- In a 3-quart saucepan, add 1/2 cup water, 1/2 cup cocoa powder, and 1/2 cup butter. Melt over medium heat, stirring with a whisk. Make sure to moisten all of the cocoa powder; don't let it stick to the sides of the pan. Bring to a low boil; once you see it bubbling, remove it from the heat.
- Add 1/4 cup vegetable oil, 3/4 cup dark brown sugar, and 4 ounces of bittersweet chocolate. Let the mixture sit for a couple minutes so the chocolate melts, then whisk until smooth.
- Add 1/2 cup whole milk, 2 teaspoons vanilla, 1 tablespoon white vinegar, 2 large eggs, and 1 egg yolk. Whisk for at least 2 minutes. When you lift the whisk, there should be no globs of egg sticking to it. Make sure the eggs are well incorporated.
- Place a strainer over a large bowl. Add 1 and 1/4 cups all purpose flour, spooned and leveled. Add 1 teaspoon baking soda and 1 teaspoon baking powder. Stir until it's all been sifted into the bowl.
- Add 1 cup granulated sugar and 3/4 teaspoon kosher salt to the flour. (use 1/2 teaspoon table salt). Whisk it all together.
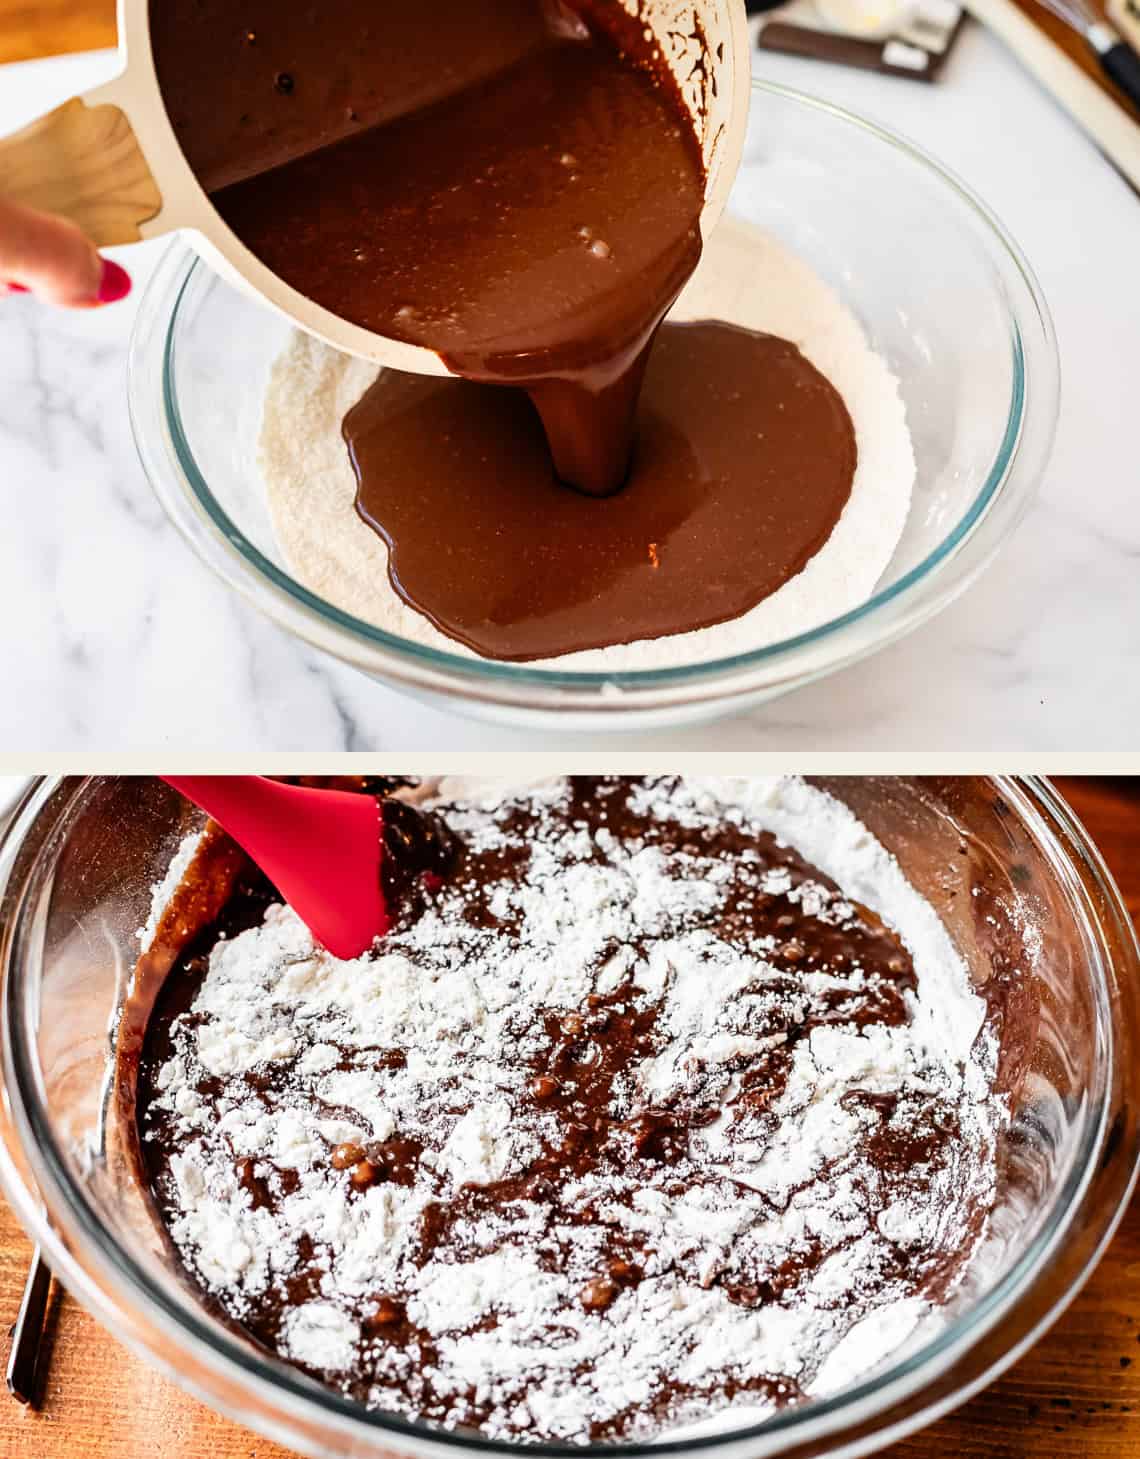
- Carefully pour the dry ingredients into the saucepan with the chocolate mixture. (Then wipe out the bowl and put it in your cupboard.)
- Whisk the dry ingredients into the wet ingredients until most of the lumps are gone, then stop right away (over mixing can make your cupcakes tough.)
- Whisk in 1/2 cup sour cream. Stir until it's fully incorporated with no streaks. The batter will be very thin. This is ok!
- Use 1/4 cup measuring cup to spoon batter into the cupcake liners. The 1/4 cup doesn't have to be completely full, just use 1/4 cup as your scoop. Divide the batter evenly between 24 cupcake liners.
- Bake the cupcakes at 350 degrees F for a total of 14-17 minutes. See notes for baking both pans at once.* You will know the cupcakes are done when a toothpick inserted in the center comes out with no wet batter on it. The top of the cupcake will no longer be shiny and wet. When you press your finger gently into the side of a cupcake, it will spring back right away, leaving no indentation. DO NOT over bake these cupcakes! Take them out as soon as you can, following these cues.
- Remove the cupcakes from the oven and within 30 seconds, use your fingers or a rubber spatula to gently press any cupcakes together that aren't perfectly round (in the case that any cupcake was overfilled).
- Cool on a wire rack for about 3 minutes. After 3 minutes, use your fingers or a rubber spatula to gently lift the cupcakes out of the muffin tin. If you let them cool in the pan, they will get soggy. Let the cupcakes cool on the wire rack.
- Let the cupcakes cool completely until room temperature. If you have some down time in between when they are cool and when they will be frosted, cover the cupcakes loosely with plastic wrap.
- Frost** with Creamy Chocolate Buttercream Frosting, or the lighter, more whipped Chocolate Buttercream. Head to my Chocolate Cake recipe and follow the recipe for the frosting.
- Storage. Store the unfrosted cupcakes covered loosely with plastic wrap. Store frosted cupcakes covered in a tupperware. They can be left on the counter for 3-5 days, after that (how??) stick them in the fridge.
- Freezer instructions. Line the baked cupcakes on a sheet pan and place the pan in the freezer to flash freeze. After 30 minutes, transfer the cupcakes to a freezer ziplock, remove as much air as possible, seal, and place back in the freezer. Already baked goods tend to dry out faster than unbaked goods, so plan to eat them within 1-2 months. I don't recommend freezing already frosted cupcakes, so only frost what you need or plan to gift the rest (your friends will love you)!


Oh my word. These were incredible. I live at 6000ft. elevation- High Altitude baking is typically not an easy task! So, I did make a couple of adjustments to this recipe, but kept everything else the same: REDUCED sugar by 4 TBL, REDUCED baking powder by 1/4 tsp, ADDED 3 TBL buttermilk and used cake flour instead of AP flour- that’s it for changes. And these were so moist, with a very tender, light crumb. Everyone wanted one to take home! And I bet if you live lower in elevation than I do, they’re even easier to make:))