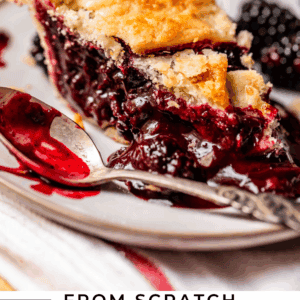
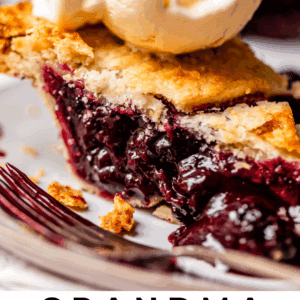
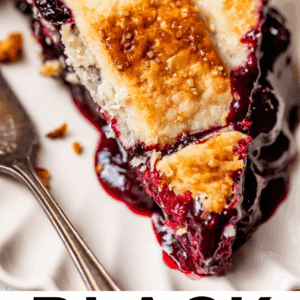
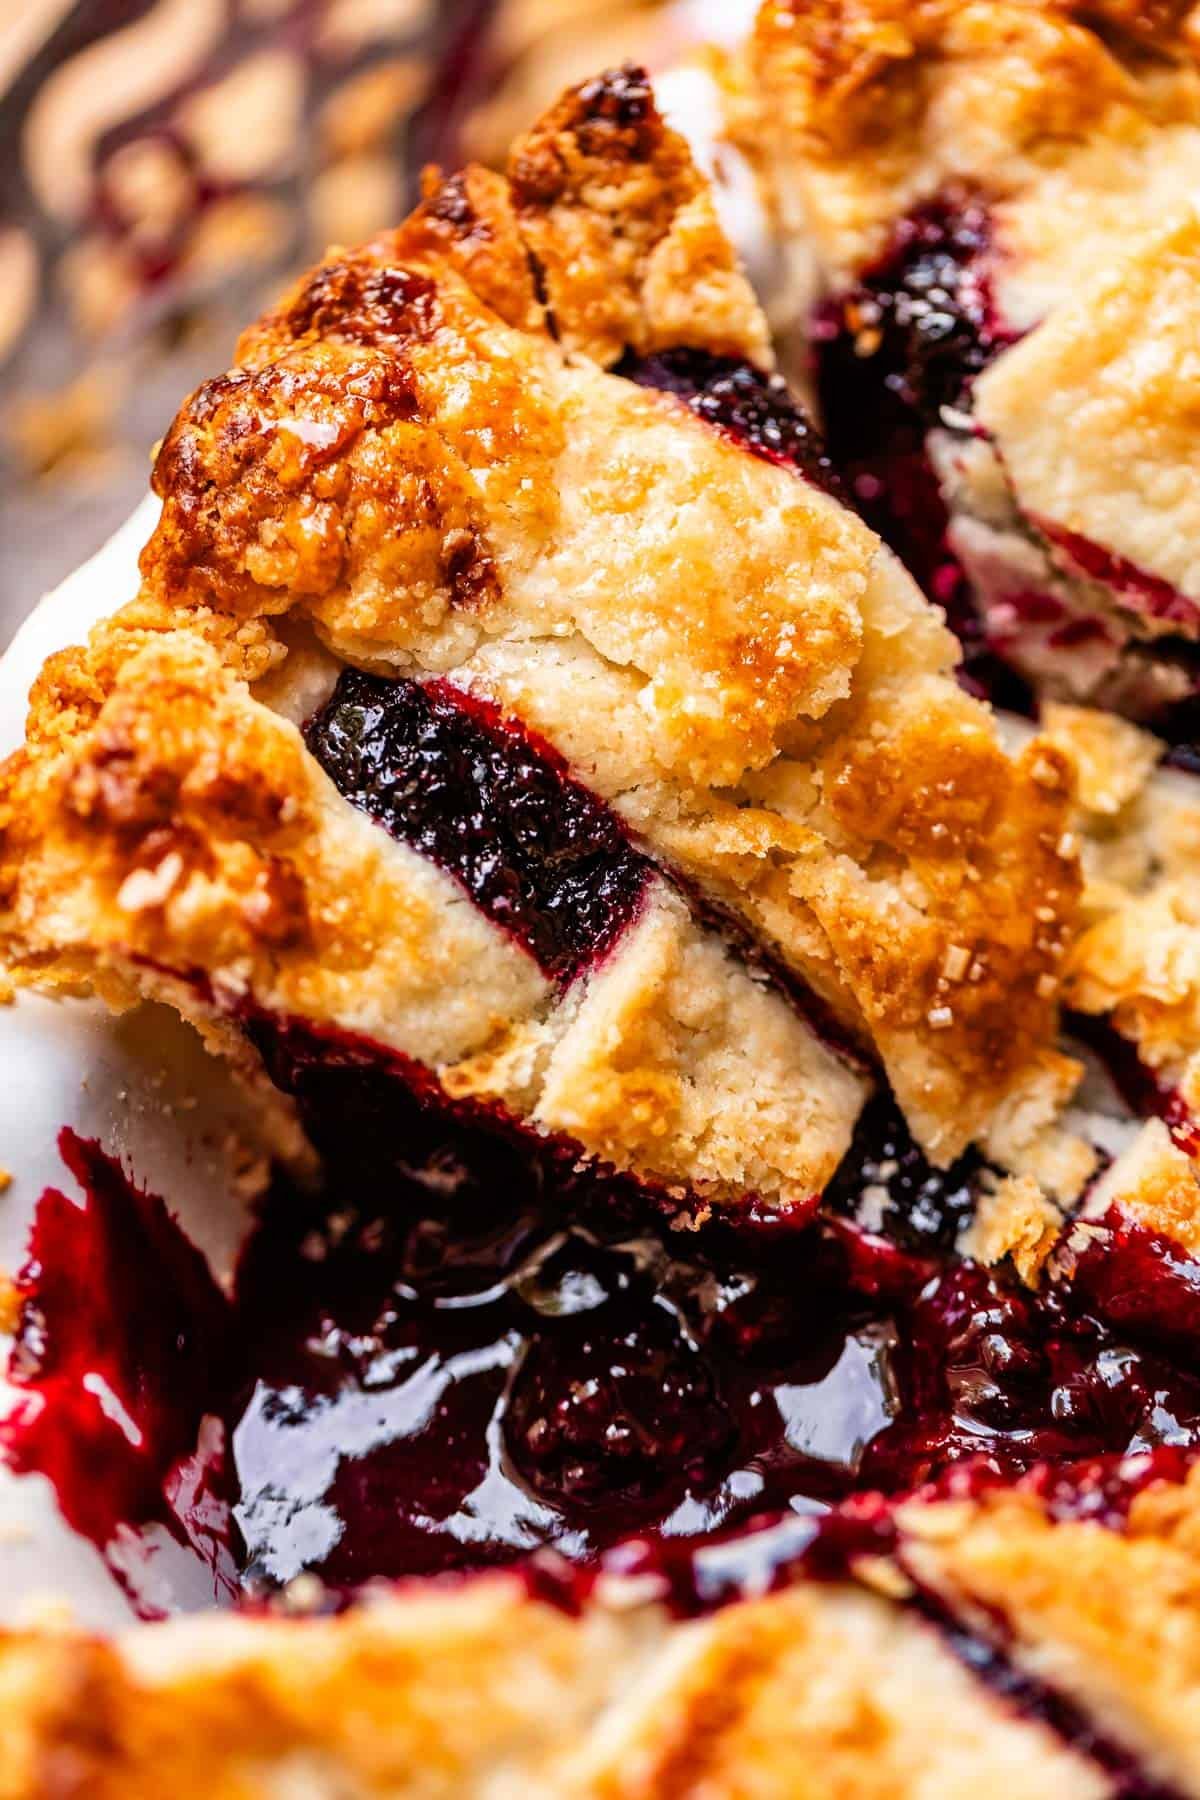
No pie will ever top this Blackberry Pie, not for me, and not for anyone in my family. This is Grandma Georgia’s pie, and she was famous for it. Fresh OR frozen blackberries are crushed and cooked on the stove, then added to a Flaky Homemade Pie Crust and baked to perfection. Cooking the filling ahead of time may sound like a pain, but the consistently juicy, saucy, tart, impossible-to-resist berry pie filling is worth the extra effort. This recipe is for the generations! Originally published May 28, 2012.
Table of Contents
- The homemade blackberry pie of your dreams
- Here are the things I need you to know about my Grandma’s homemade blackberry pie:
- I prefer to make this pie with frozen berries
- Let’s talk about blackberry pie filling
- Easy blackberry pie recipe ingredients
- How to make blackberry pie
- How to store leftover pie
- Can you freeze blackberry pie?
- Frequently asked questions
- Pie for everyone
- Blast from the past: I posted this recipe in 2012
- Grandma Georgia’s Blackberry Pie Recipe Recipe

108° hot sun. Prickly vines. Drippy sweat. Bleeding fingers. Ants everywhere. A 9×13 metal pan in my arms used as a collection tin.
THIS was the scene in our backyard every late June. Those blackberries didn’t just pick themselves. The biggest effort on the harvest? That was Dad, who could out-pick all of us, any day. The complaining? Mostly came from the children. The pie making? Grandma Georgia, and later Mom.
The moans of pleasure when that first bite of Blackberry Pie hit our mouths? Oh, that was ALL of us.
The homemade blackberry pie of your dreams
This pie represents all of my most iconic childhood memories. The recipe is from my Grandma Georgia, Grandma Georgia of the classic Chicken and Dumplings, and Chicken and Rice Casserole.
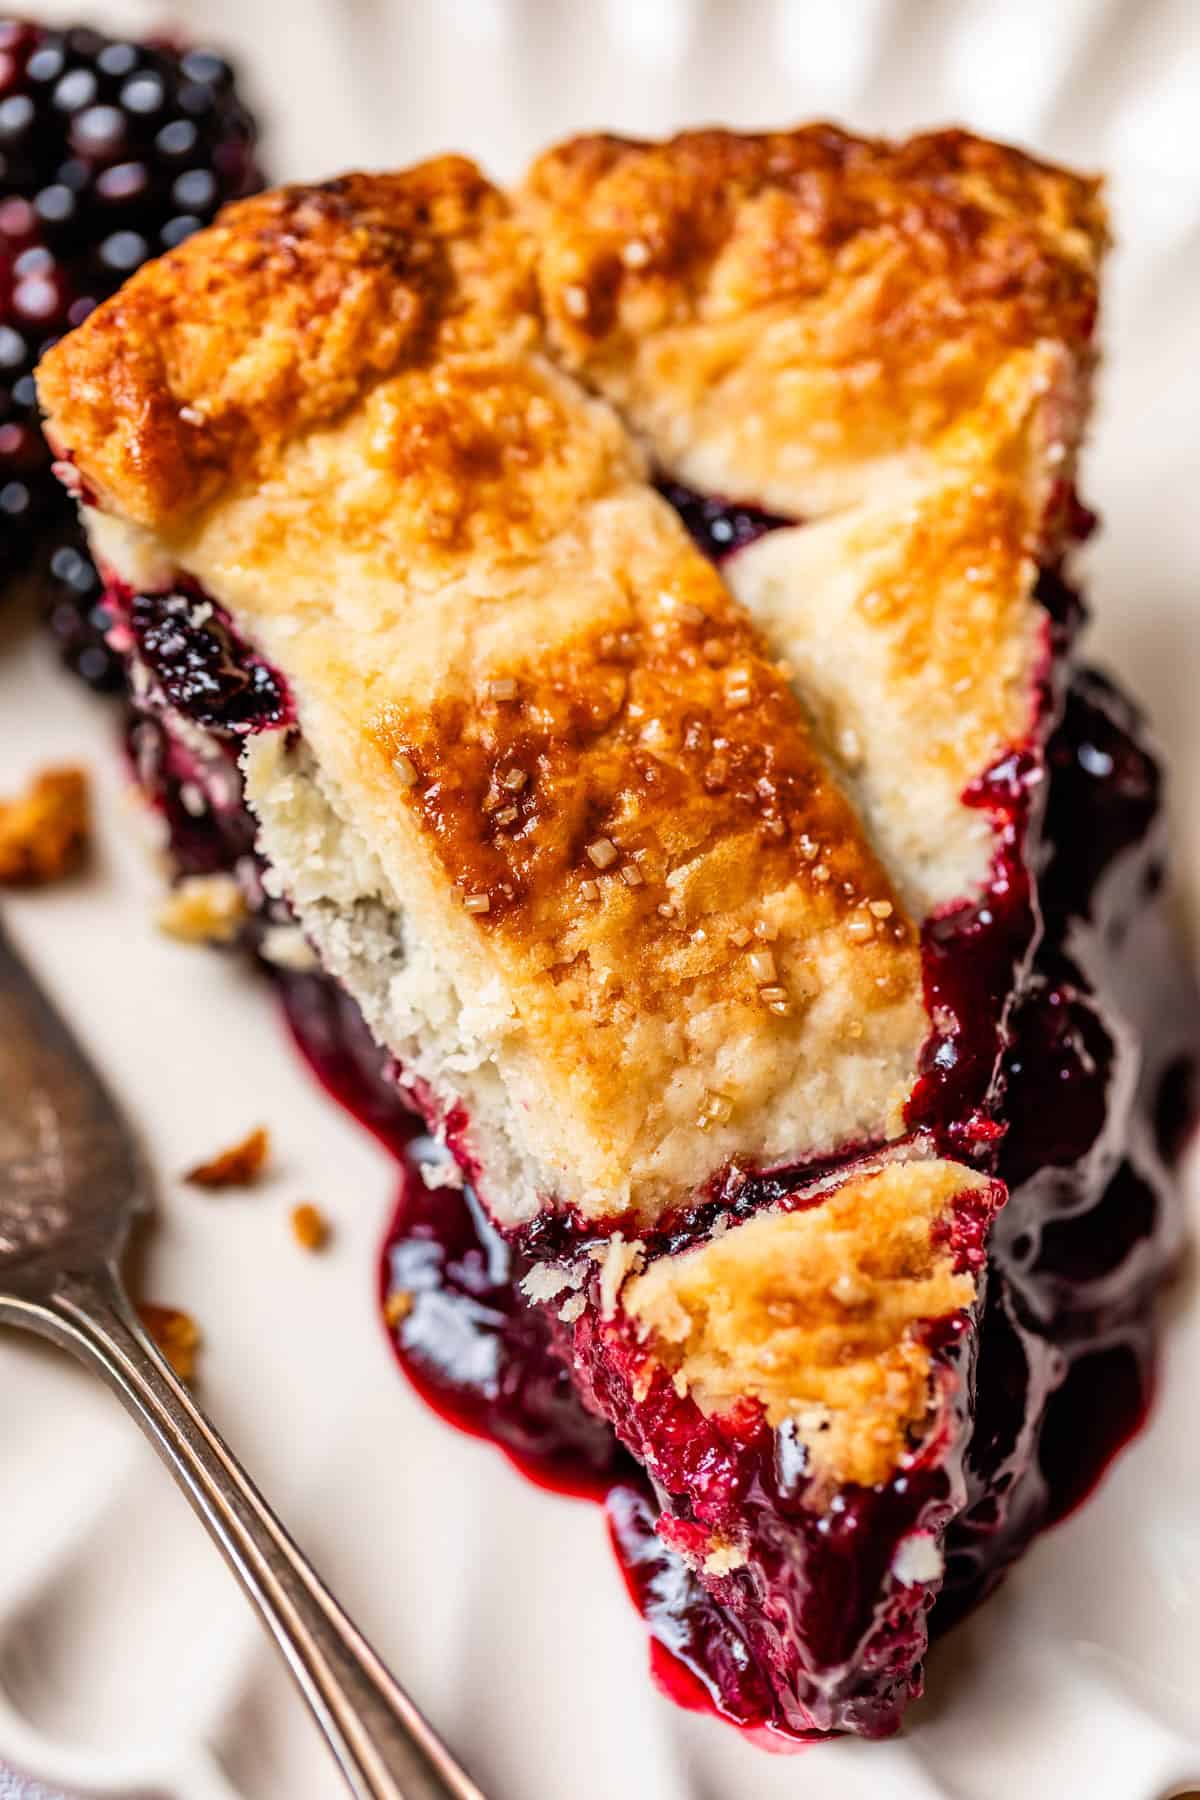
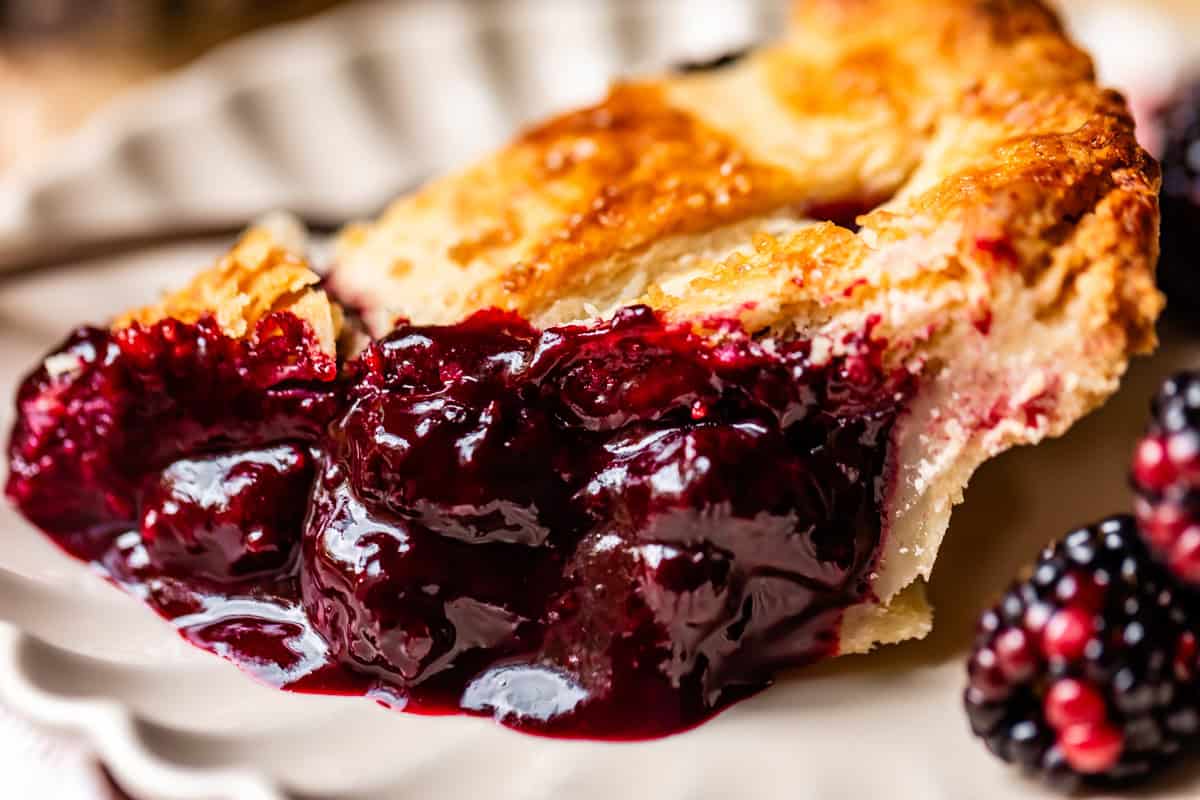
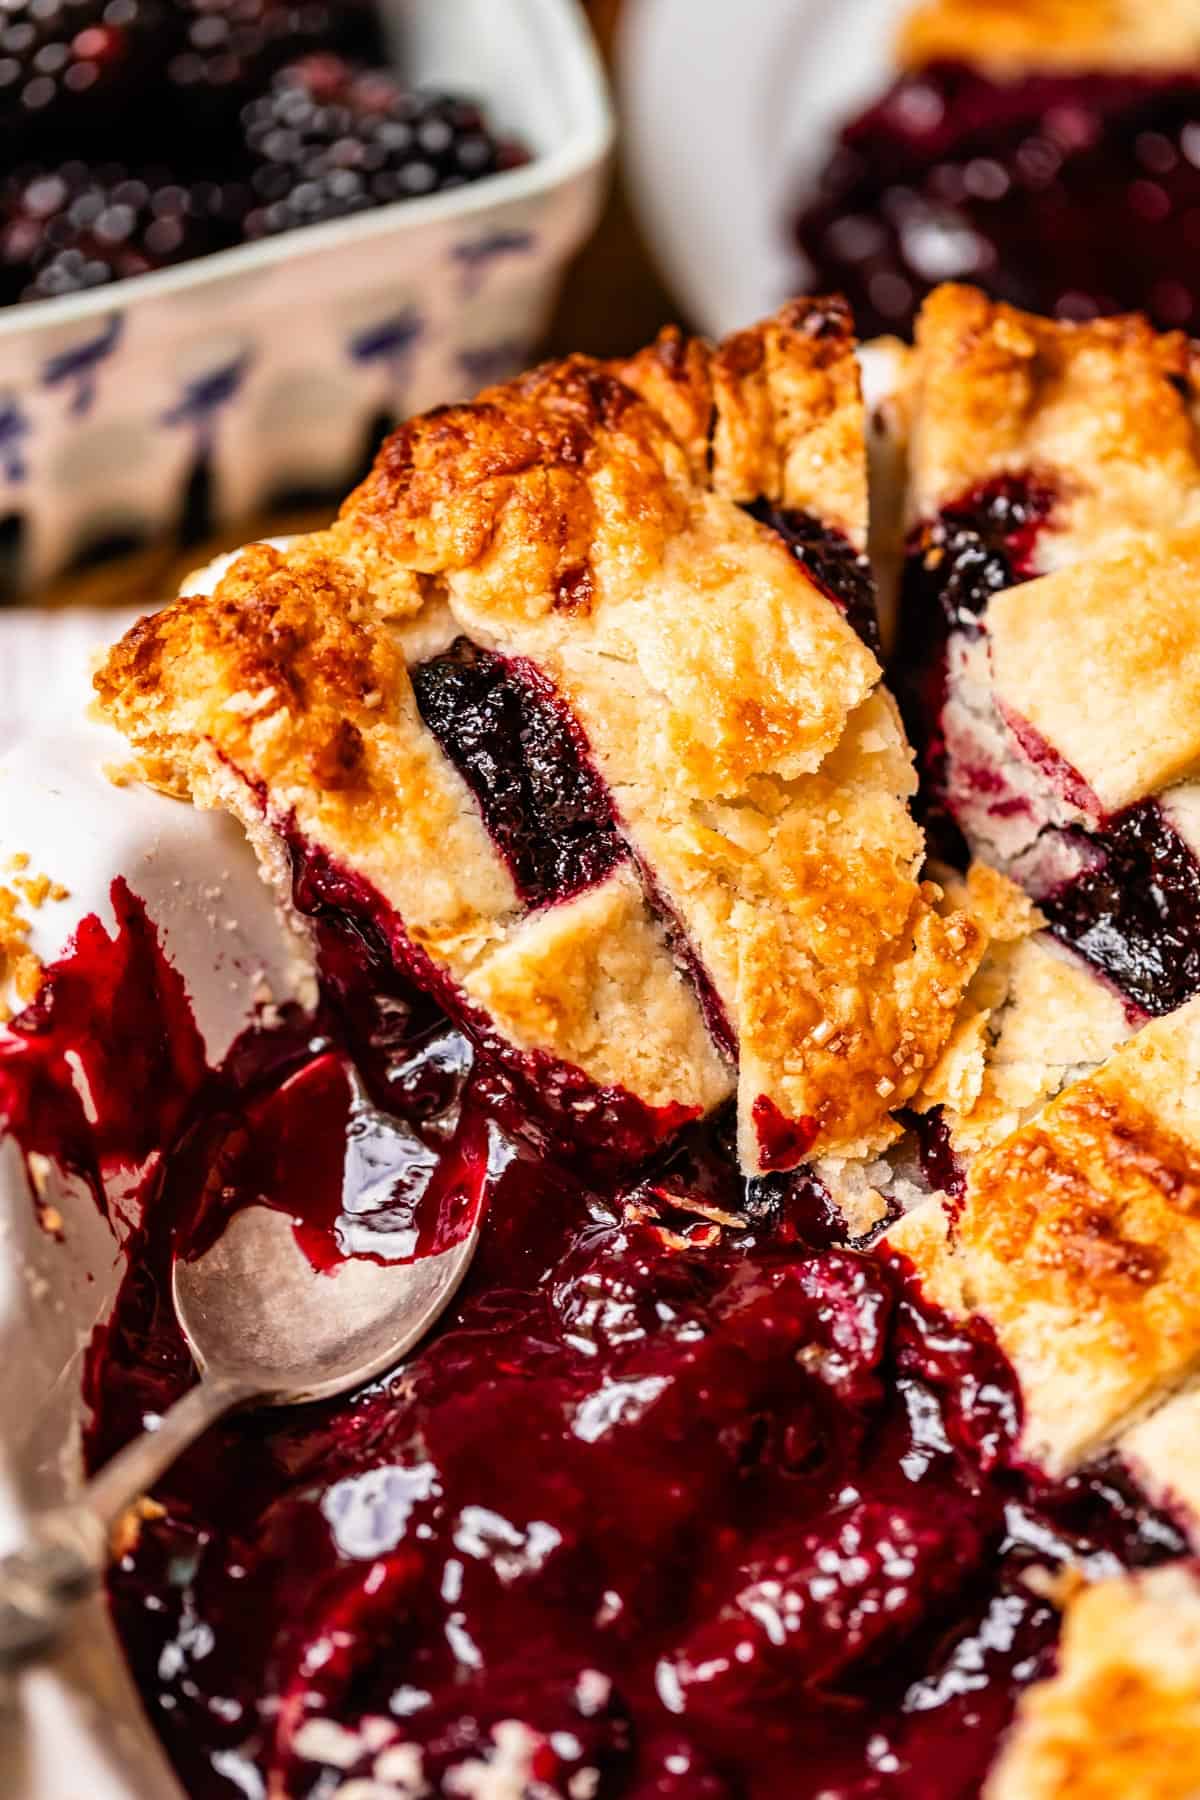
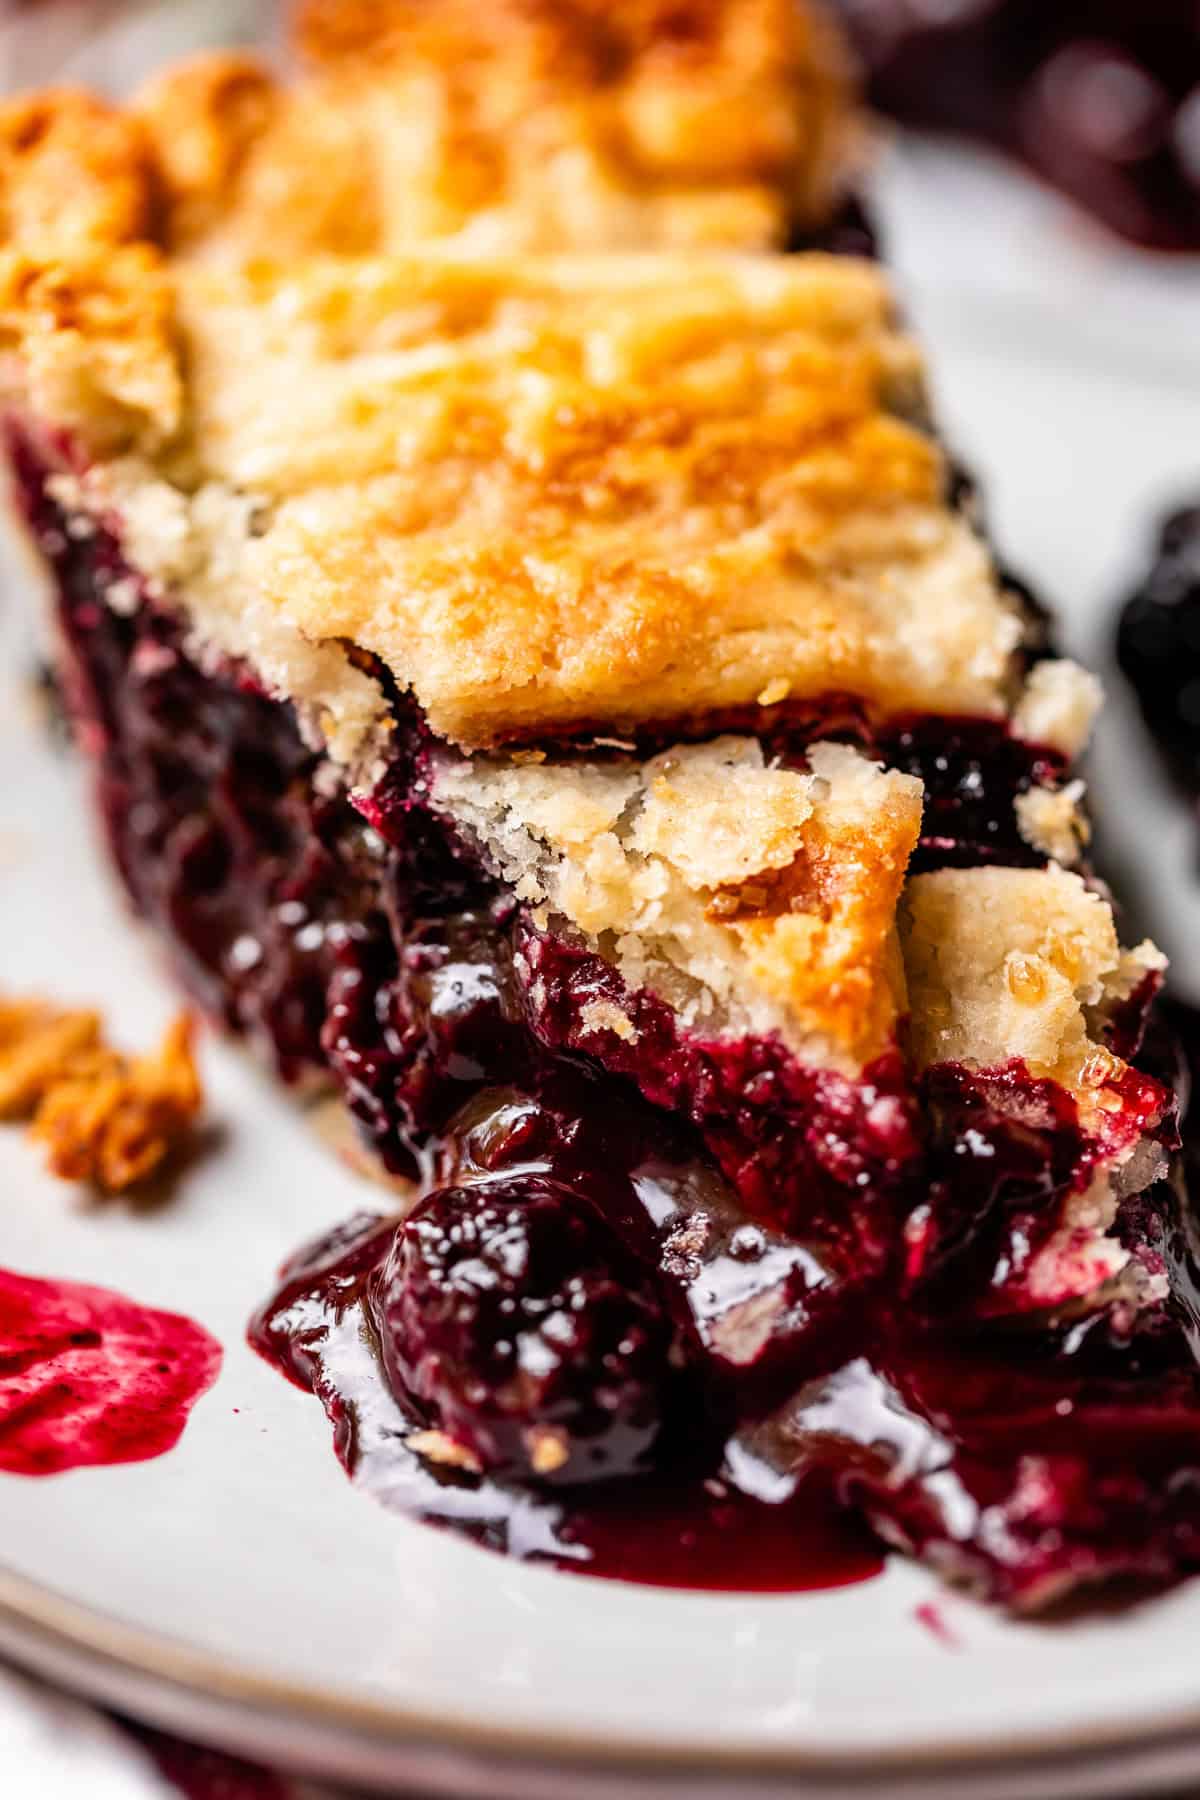
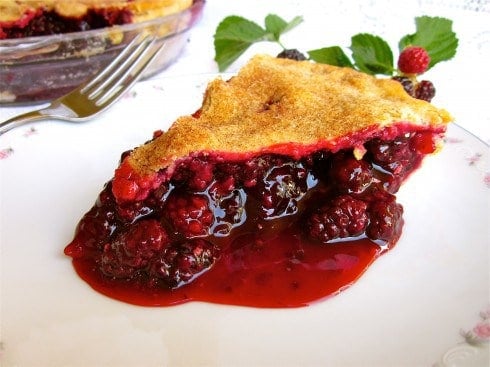
Perfectly sweet-tart blackberries, tenderly encased in a buttery, flaky pie shell, and if you know what’s good for your, a scoop or vanilla ice cream or dollop of whipped cream on top. Nothing compares, nothing I tell you!
Grandma Georgia perfected it over the years to use up her yearly bumper crop of blackberries, grown in her own backyard in Stockton, California. Later, my dad grew up and planted his own vines in our backyard, and my mom got the recipe. The rest is history.
When you have row upon row of fresh blackberries, you can’t eat them all at once. That’s what freezers are for. Ziplock bags full of freshly-frozen beautiful vine-ripened blackberries lined my freezer growing up. When we had dinner at Grandma’s house (which was pretty regularly), there was a good chance blackberry pie would show up as dessert. We were rich.
The invention of the freezer is the reason that blackberry pie is an iconic memory from EVERY holiday to have ever happened in my family. Easter? We eat Blackberry Pie. Dad’s birthday? We eat Blackberry Pie. Thanksgiving and Christmas? We make TWO Blackberry Pies because one would never be enough for all those people.
This is definitely one of those dishes that means SO much more than “just a recipe!!” Do you have a family meal like that? There is nothing that makes you feel more secure and at home.
Here are the things I need you to know about my Grandma’s homemade blackberry pie:
- It’s literally the best pie you will ever eat.
- You MUST make a Homemade Pie Crust. You MUST. This pie is simple, and all the components must be exceptional.
- You have to cook the filling before it goes in the oven. GAME CHANGER. I also use this method on my Blueberry Pie.
- I actually prefer to make this pie with frozen blackberries. 😱
I prefer to make this pie with frozen berries
I know, whaaaat. Doesn’t fresh beat everything? Well, not always.
Berries you buy at the store are not that fresh. Depending on where you live, of course. But they could be 5 days past picking by the time they reach you.
Frozen berries, though? Those go straight from the vine to a factory where they are frozen immediately. They don’t sit around on a truck getting transported. So although they have been frozen, they were frozen at a fresher point than the fresh berries you buy at the store.
Another plug for making this pie with frozen berries: The frozen berries INSTANTLY cool the hot filling you must cook on the stove. You can then fill your pie crust immediately and get it in the oven sooner. If you make the pie with room temperature, fresh berries, you will have to wait for the filling to cool.
Let’s talk about blackberry pie filling
I have some strong opinions about pie crust (be sure to check out my extremely detailed post on How to make Pie Crust from Scratch!) But right now let’s talk about how to get the BEST blackberry pie filling. No goopy, liquid-y mess or over baked, mushy berries ’round here, thankyouverymuch. Stick to the rules!
- Blend some of the berries to make a puree
- Cook the puree on the stove to make it the perfect thickness level, BEFORE it even goes in the oven
- Add whole berries (that don’t get crushed) into the sauce. THEN add it to the pie. Whole berries in EVERY BITE.
- You MUST wait for the filling to cool before adding it to your pie crust. You will utterly destroy the texture of your pie crust if you don’t follow this step. COLD COLD pie crust going into a HOT HOT oven makes for the flakiest, butteriest pie crust!
Easy blackberry pie recipe ingredients
This is a pretty short list as far as pies go. The main ingredient is berries, and a whole lot of them! Scan the list here to give you an idea of what you’ll need, but definitely use the recipe card for exact measurements and detailed instructions.

- one batch Flaky Pie Crust. There is not a lot to this pie. A homemade crust is a huge part of what makes it awesome.
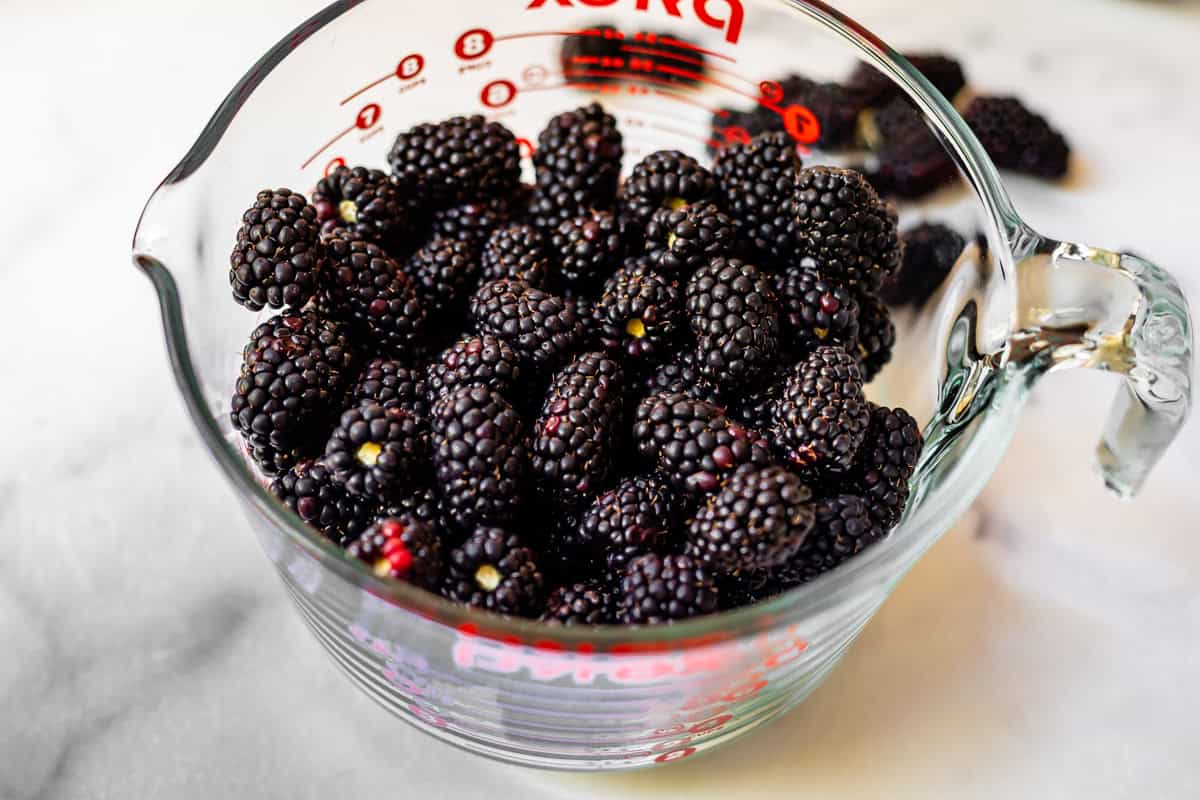
- blackberries, fresh, frozen, whatever you have, you just need a lot.
- granulated sugar, you can adjust this to taste!
- cornstarch, to thicken the berry sauce in the pie. This ingredient needs to be adjusted for fresh vs frozen berries. Check the recipe notes!
- flour, a thickener that tastes better than cornstarch, so we use a combo (cornstarch is more powerful, so we can’t skip it entirely)
- cinnamon, just a little bit, we don’t want a spicy pie, just a hint. It helps round out the tartness of the berries.
- kosher salt, acts like a megaphone for other flavors
- milk, just for brushing on the crust
- raw sugar, for sprinkling on top crust, or I actually love to use cinnamon-sugar.
- vanilla ice cream, or whipped cream, for serving, NOT optional 🤣
How to make blackberry pie
Let’s dive in, it’s pie time! Always a good day. Start by making your homemade crust, please! Blackberry pie is such a simple recipe that a stellar crust really has room to shine. Let it have it’s moment! Pie crust is not as hard as you think, and I break down the entire process in my How to Make Flaky Pie Crust post. Tap on that link for tons of photos!
You can make this pie with either FRESH or FROZEN berries, and the process is so similar that I’m doing a photo journal of just the frozen version, with a few shots of the fresh berry pie process shots inserted throughout.
If you have frozen berries, add about 2 and 1/2 cups to a bowl, and microwave until they are mostly thawed and starting to make liquid at the bottom.
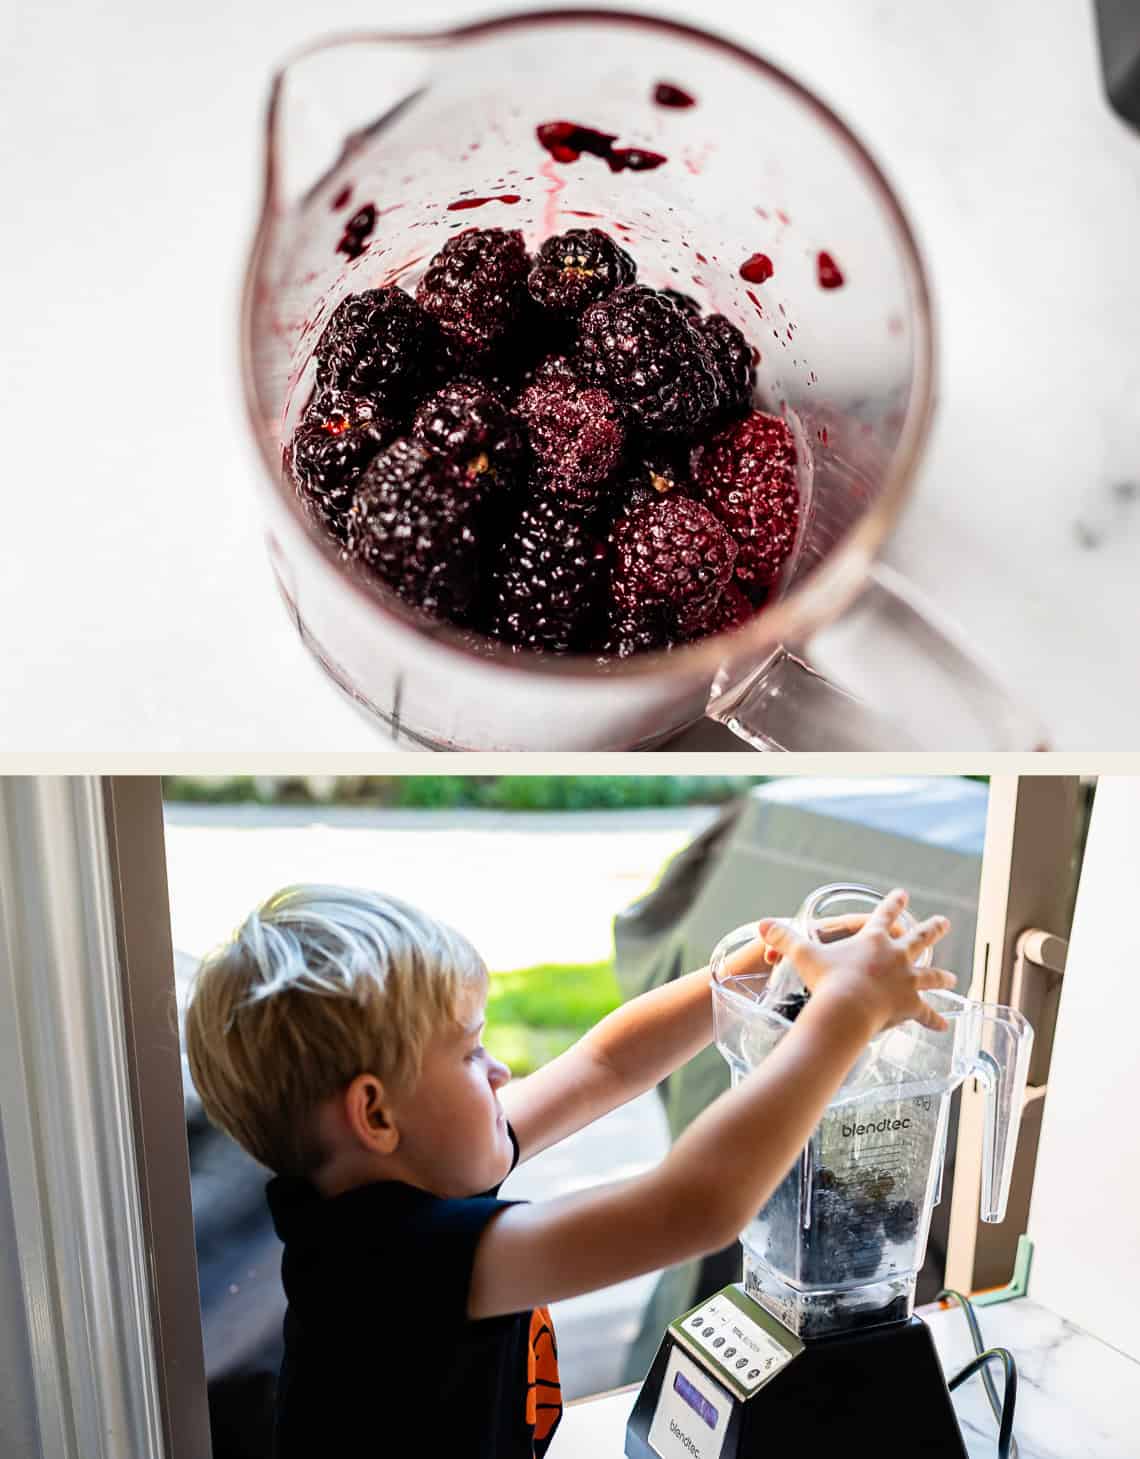
If you have fresh berries, just add them straight to the blender. Get your cute 5-year-old to help, if you can.
Now it’s time to make a berry smoothie. What??
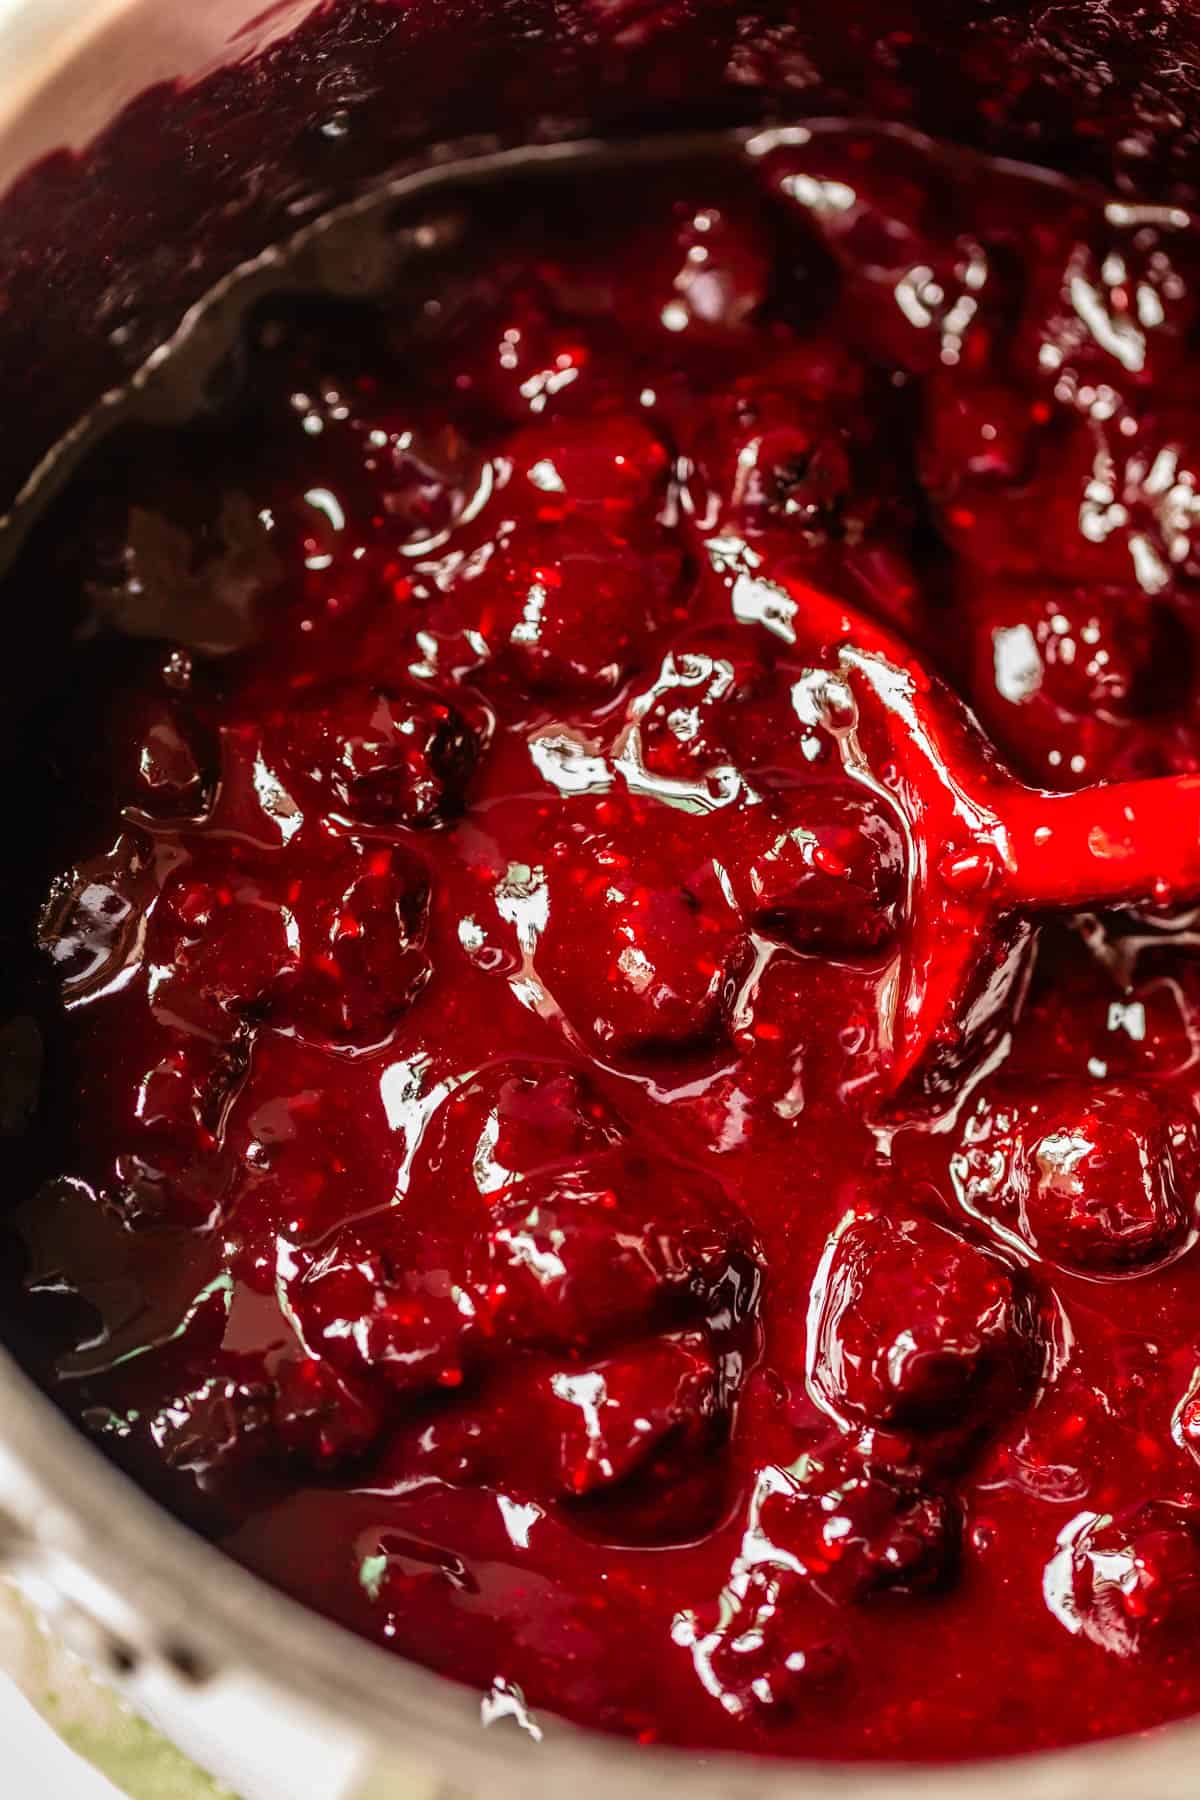
Hear me out: blending up some of the berries give you a great sauce for your pie. Cooking it ahead makes for a much more controllable outcome when it comes to liquid levels of your final pie. This is the greatest tip that my Grandma Georgia ever gave us when it comes to fruit pie! It might seem like a pain, but I promise you, it’s worth it.
Grandma actually never blended; she mashed it right in the pot with a potato masher. I like how smooth it gets in the blender.
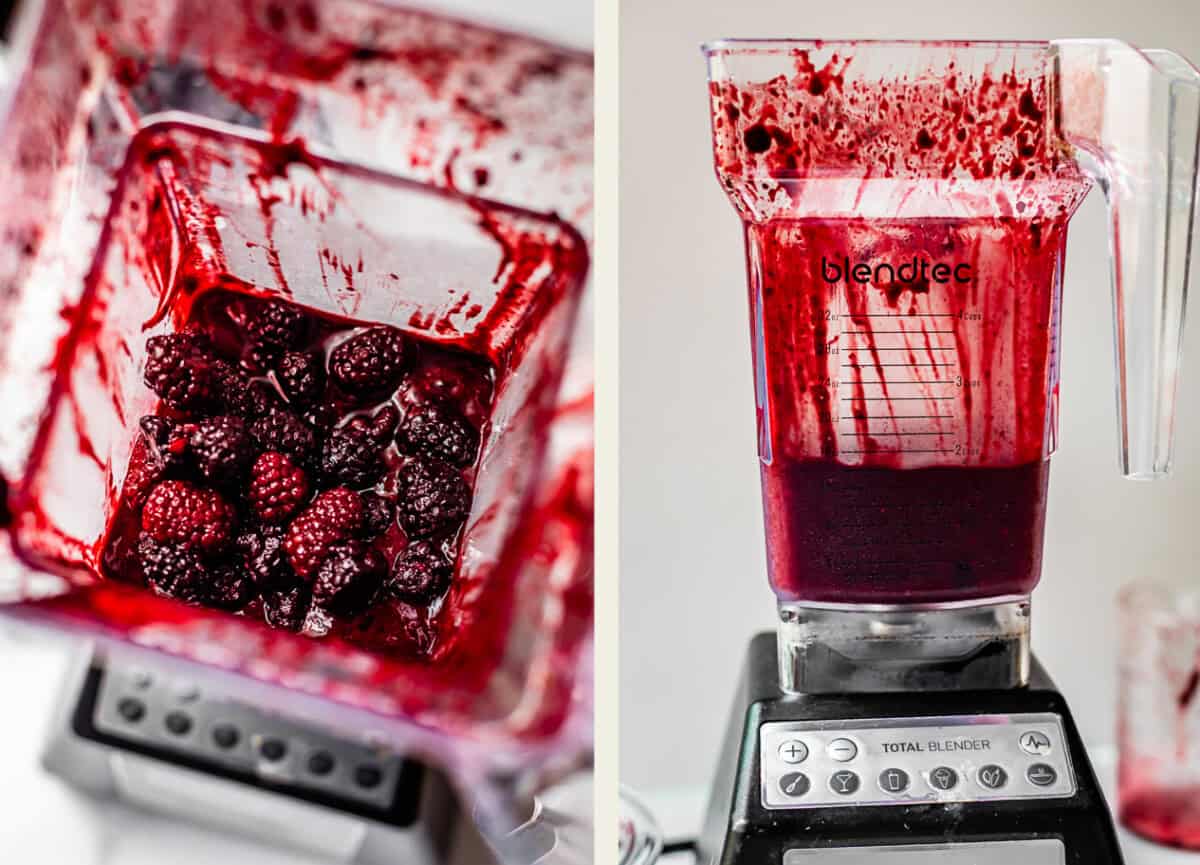
However you do it, smash up enough berries to make 1 and 3/4 cup liquid.
Meanwhile, in a turned-off pot on the stove, add all the dry ingredients: sugar, cornstarch, flour, cinnamon, salt. Whisk it all together until smooth.
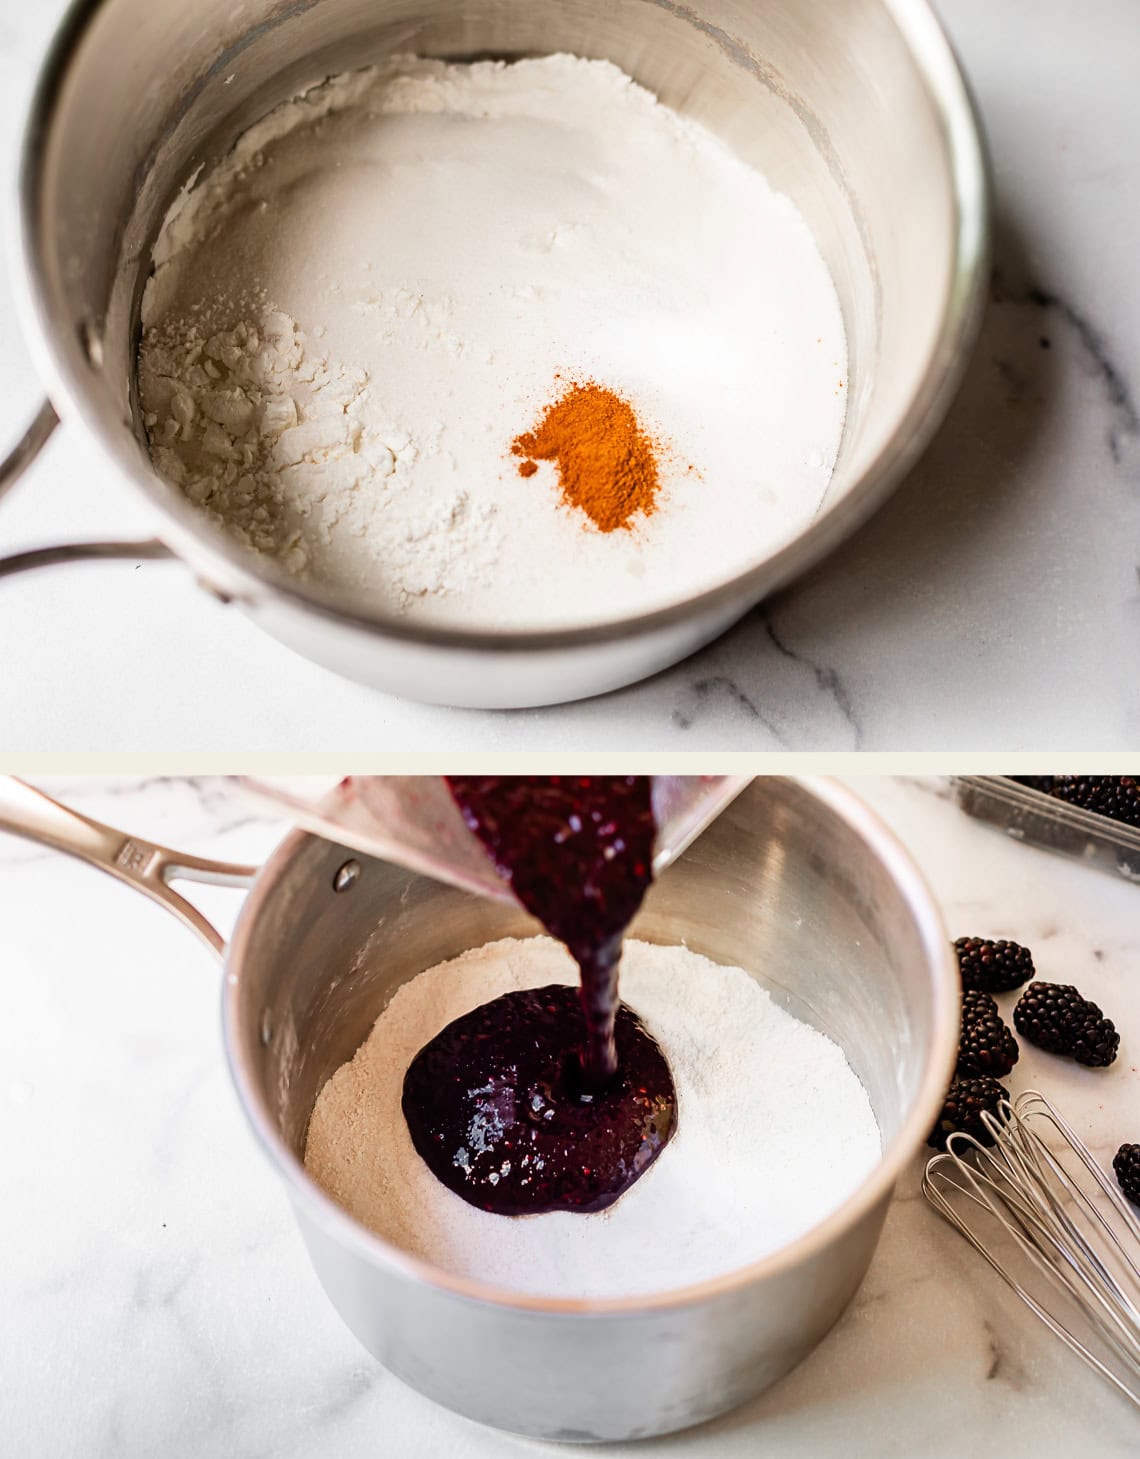
Add in the liquid from the blender.
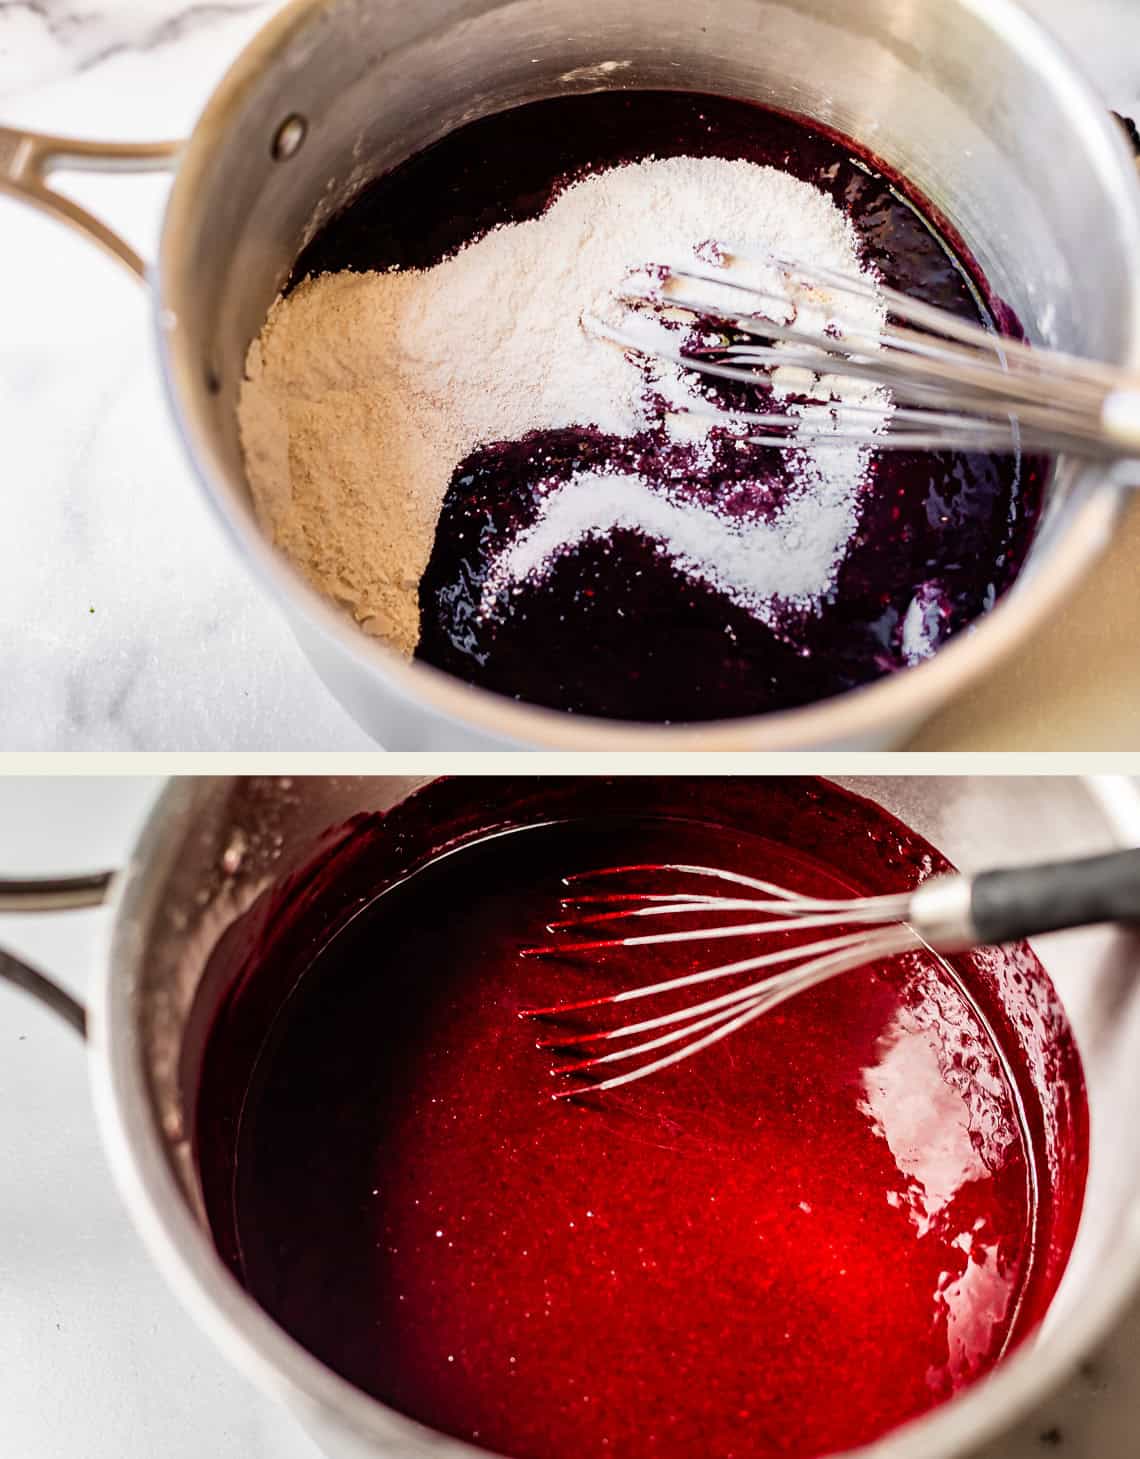
Whisk out all the lumps BEFORE you turn on the heat!
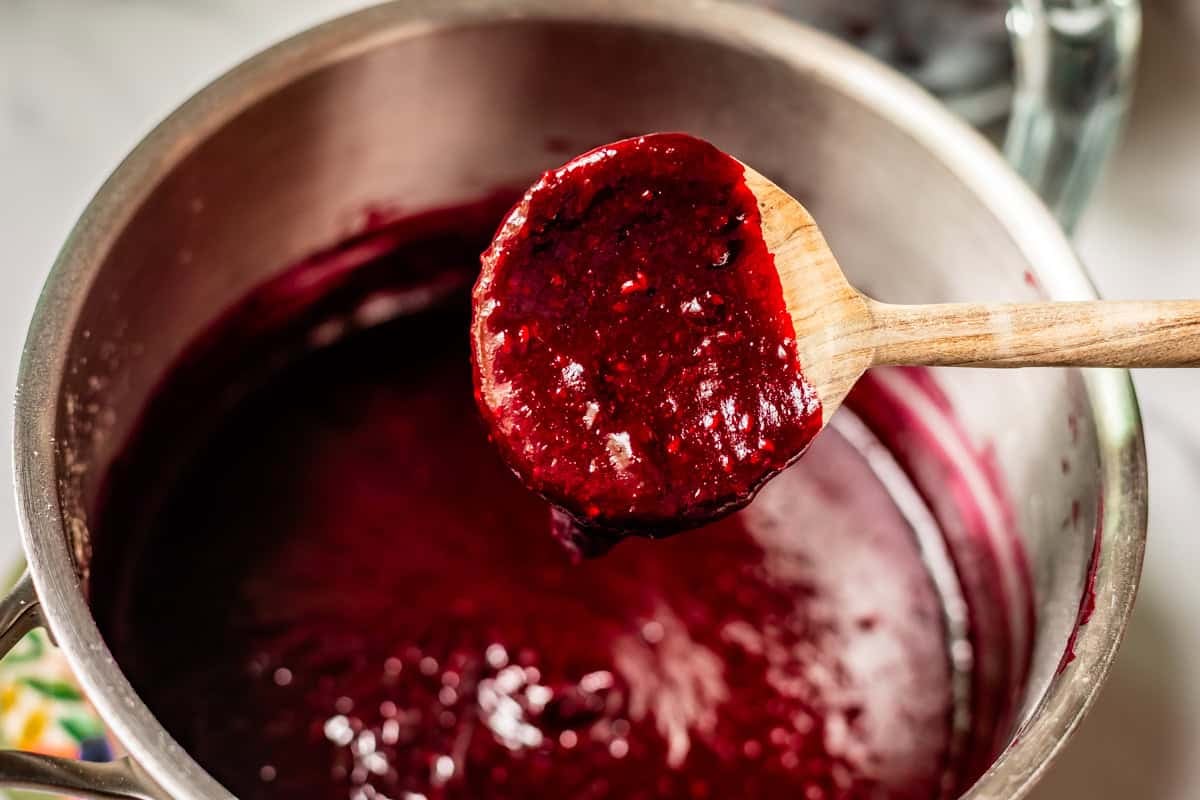
Cook it over medium heat for about 5 minutes, until it’s just started to bubble and boil. It should be thickened like this. Take it off the heat!
If you have frozen berries, add them in completely frozen!

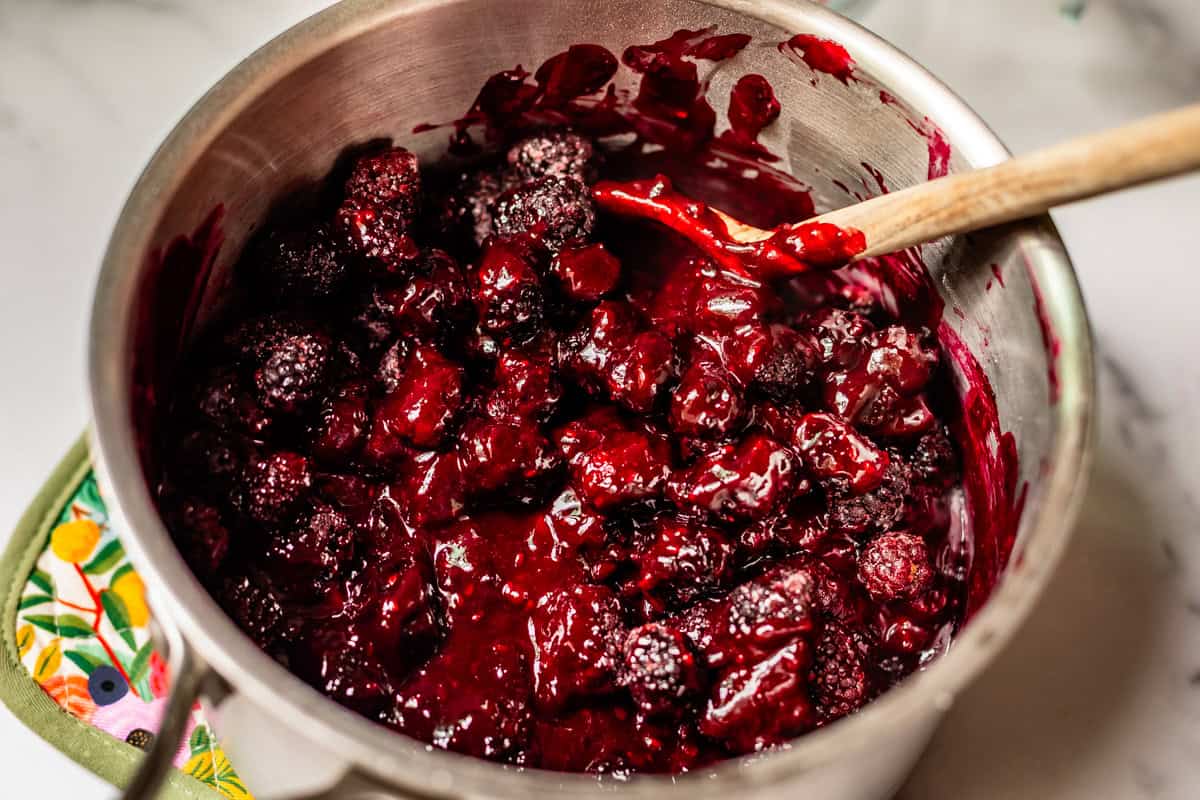
I love to make this pie with frozen berries. When the frozen berries are added in this step, it instantly cools the sauce. You don’t haven’t to wait at all before adding it to your pie crust.
Here are the same steps for working with fresh berries:
When you add fresh, room temperature berries to the sauce, the whole mixture will be hot. You will need to take at least 30-45 minutes to chill your filling before you can add it to your pie crust, or it will absolutely ruin the crust. Don’t do it! I’ve put the cooling filling in the freezer before to hurry this up, stirring every few minutes.
Once your pie filling is cooled, it’s ready to go into the pie crust! Snag a bite, obviously. Sometimes I get really stuck on this step 😂
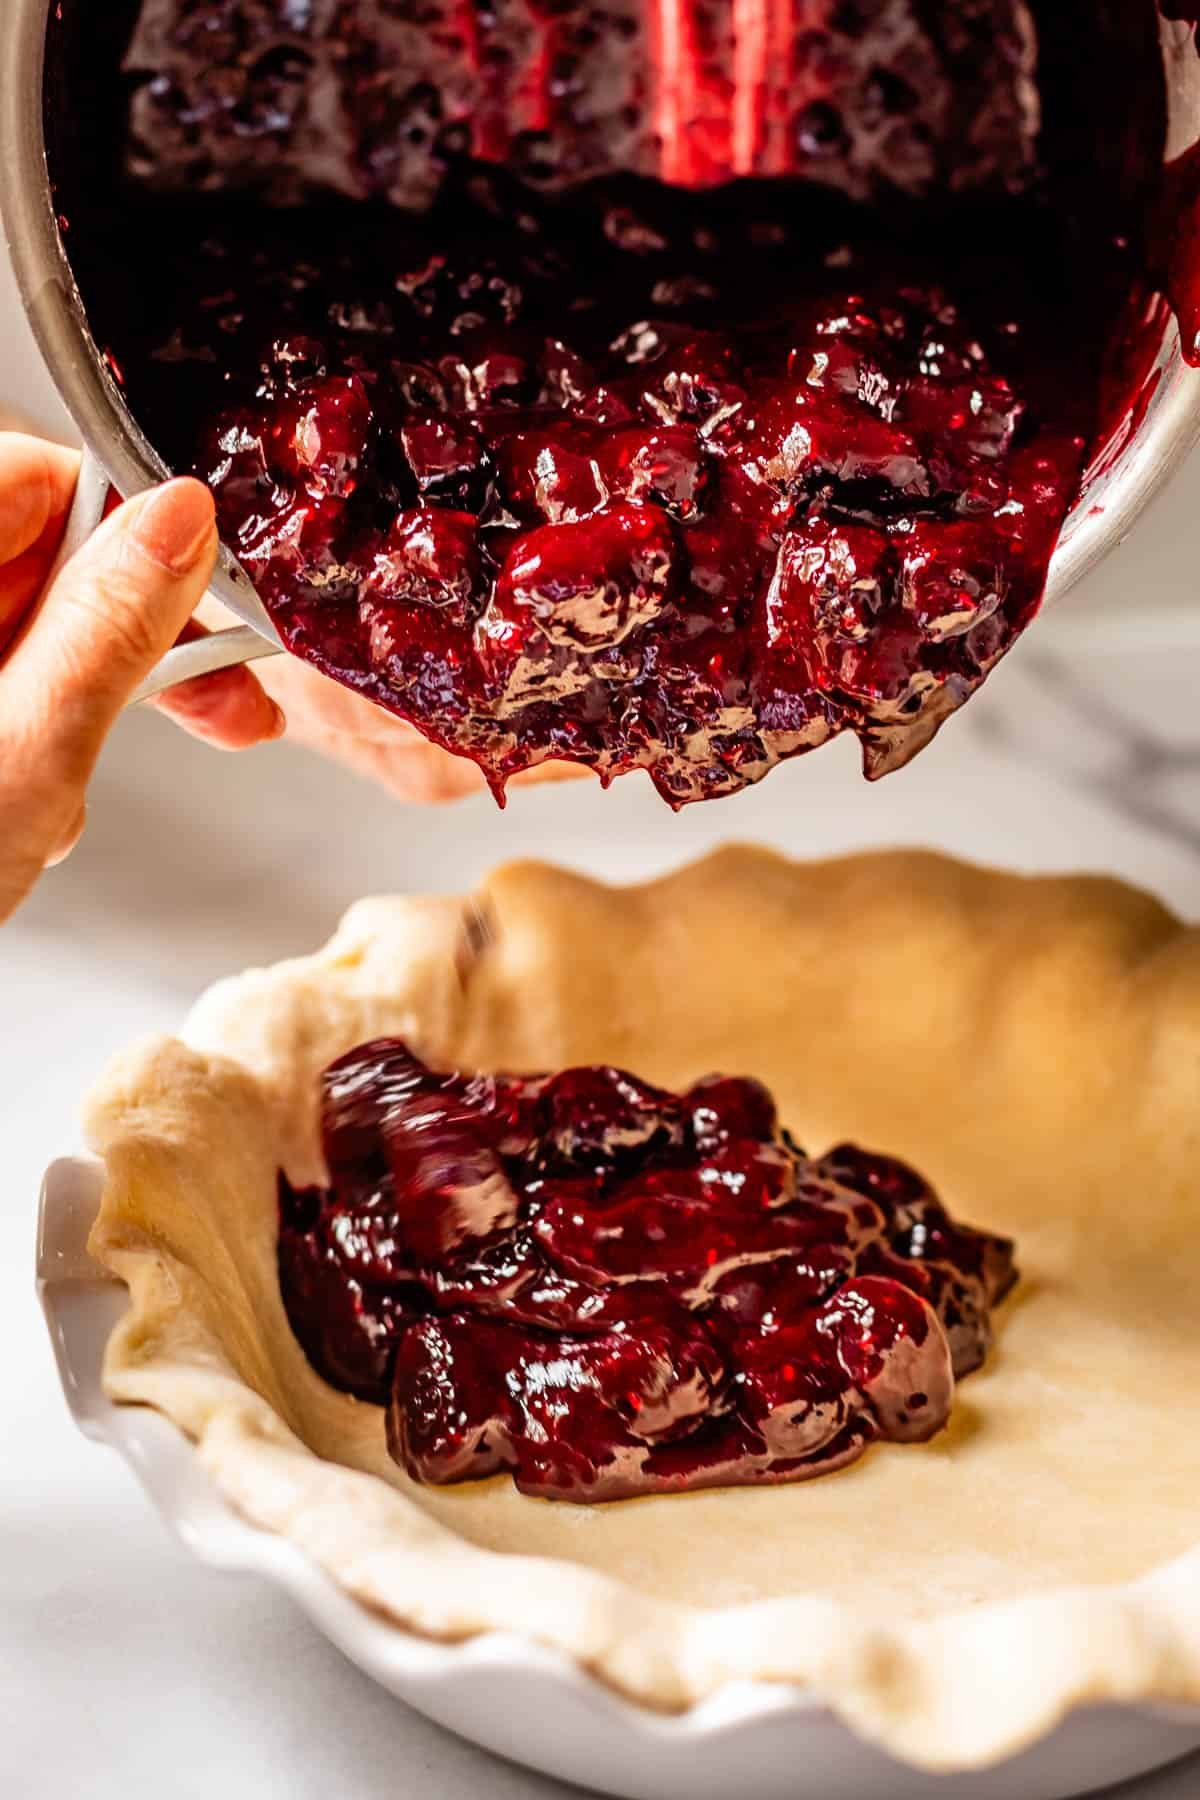
Your pie filling should go all the way to the tippy top.
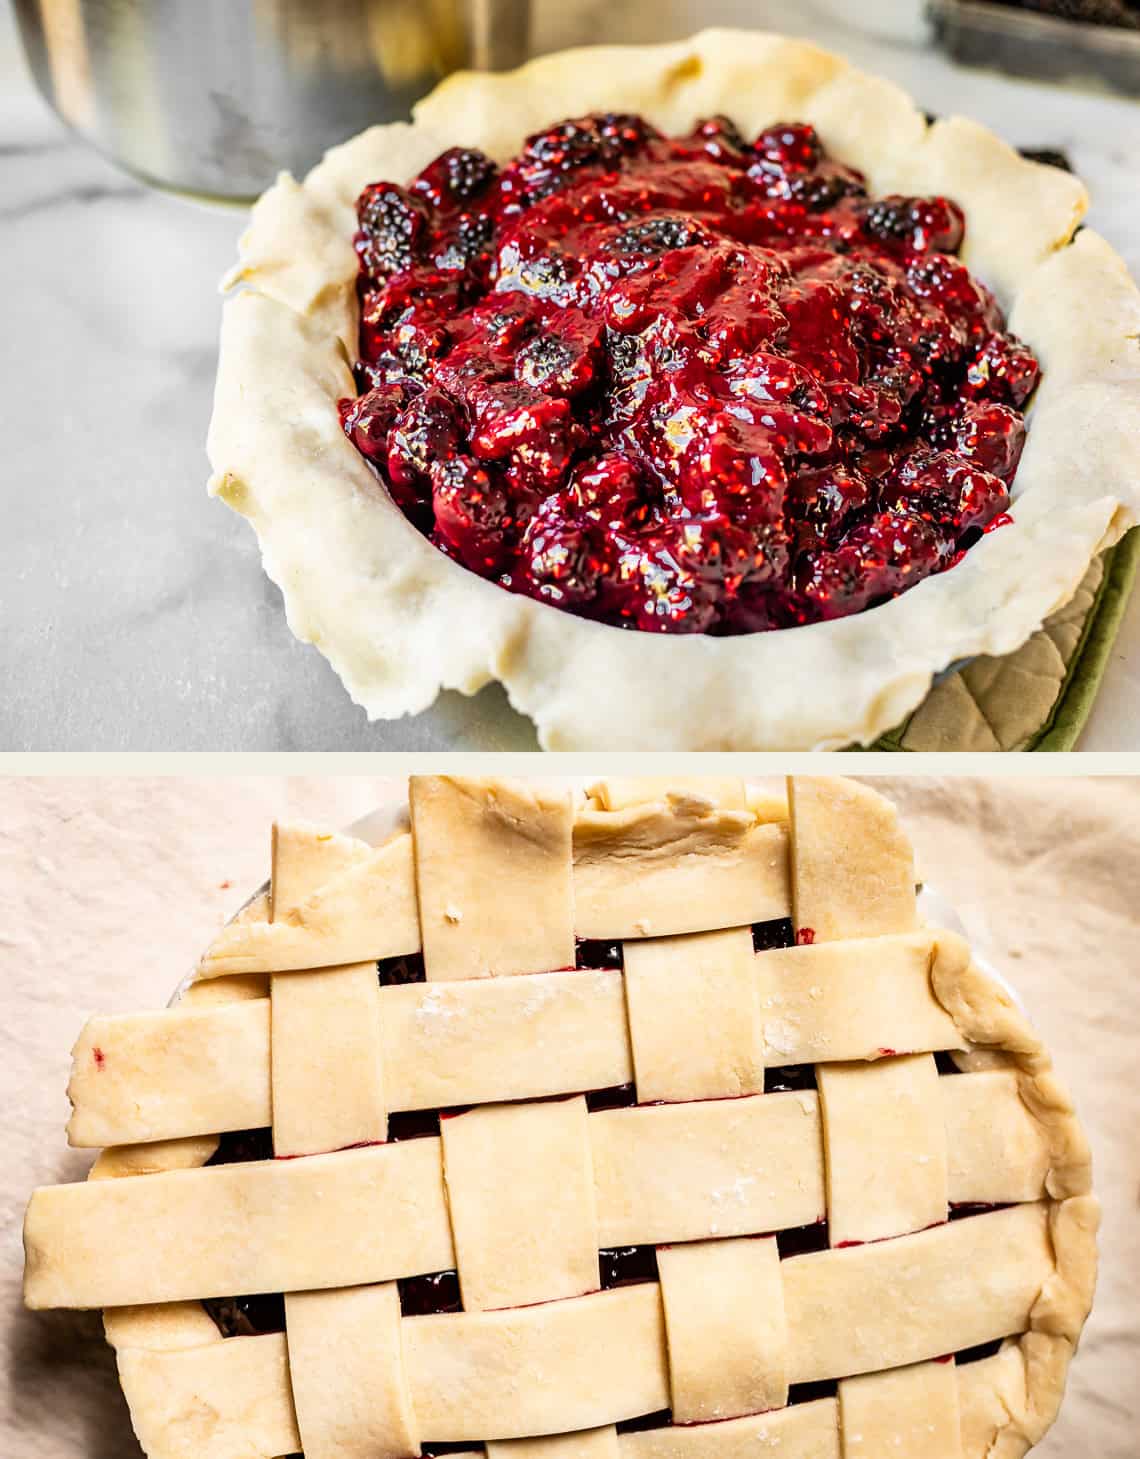
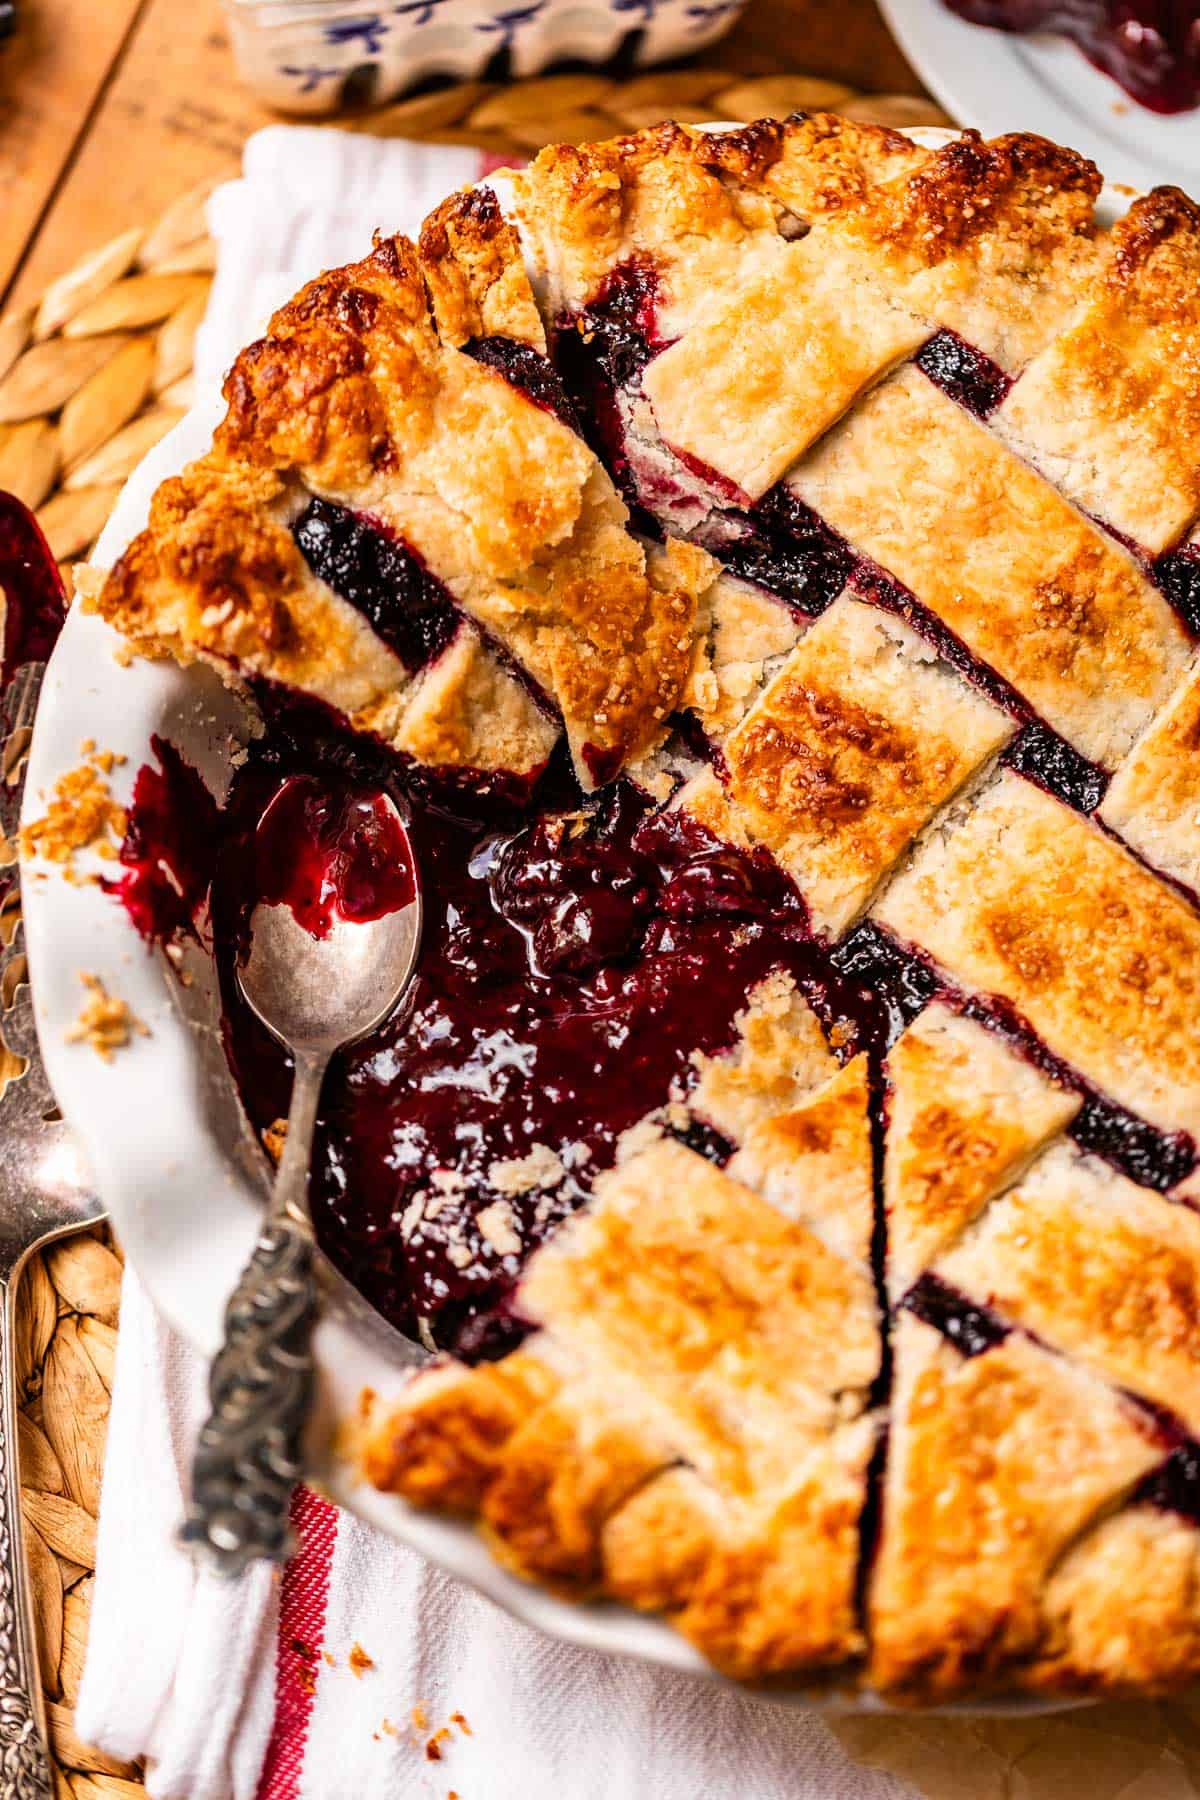
Top with a Lattice Crust, if you want to be fancy! It’s so fun! Tap the link for all the details and pictures. (I still can’t make a lattice crust without checking these photos, haha.)
Crimp the edges and brush the top with a bit of milk, to help with browning. Sprinkle with sugar (or my favorite, cinnamon-sugar!) and pop it in the oven at 425 for about 15 minutes.
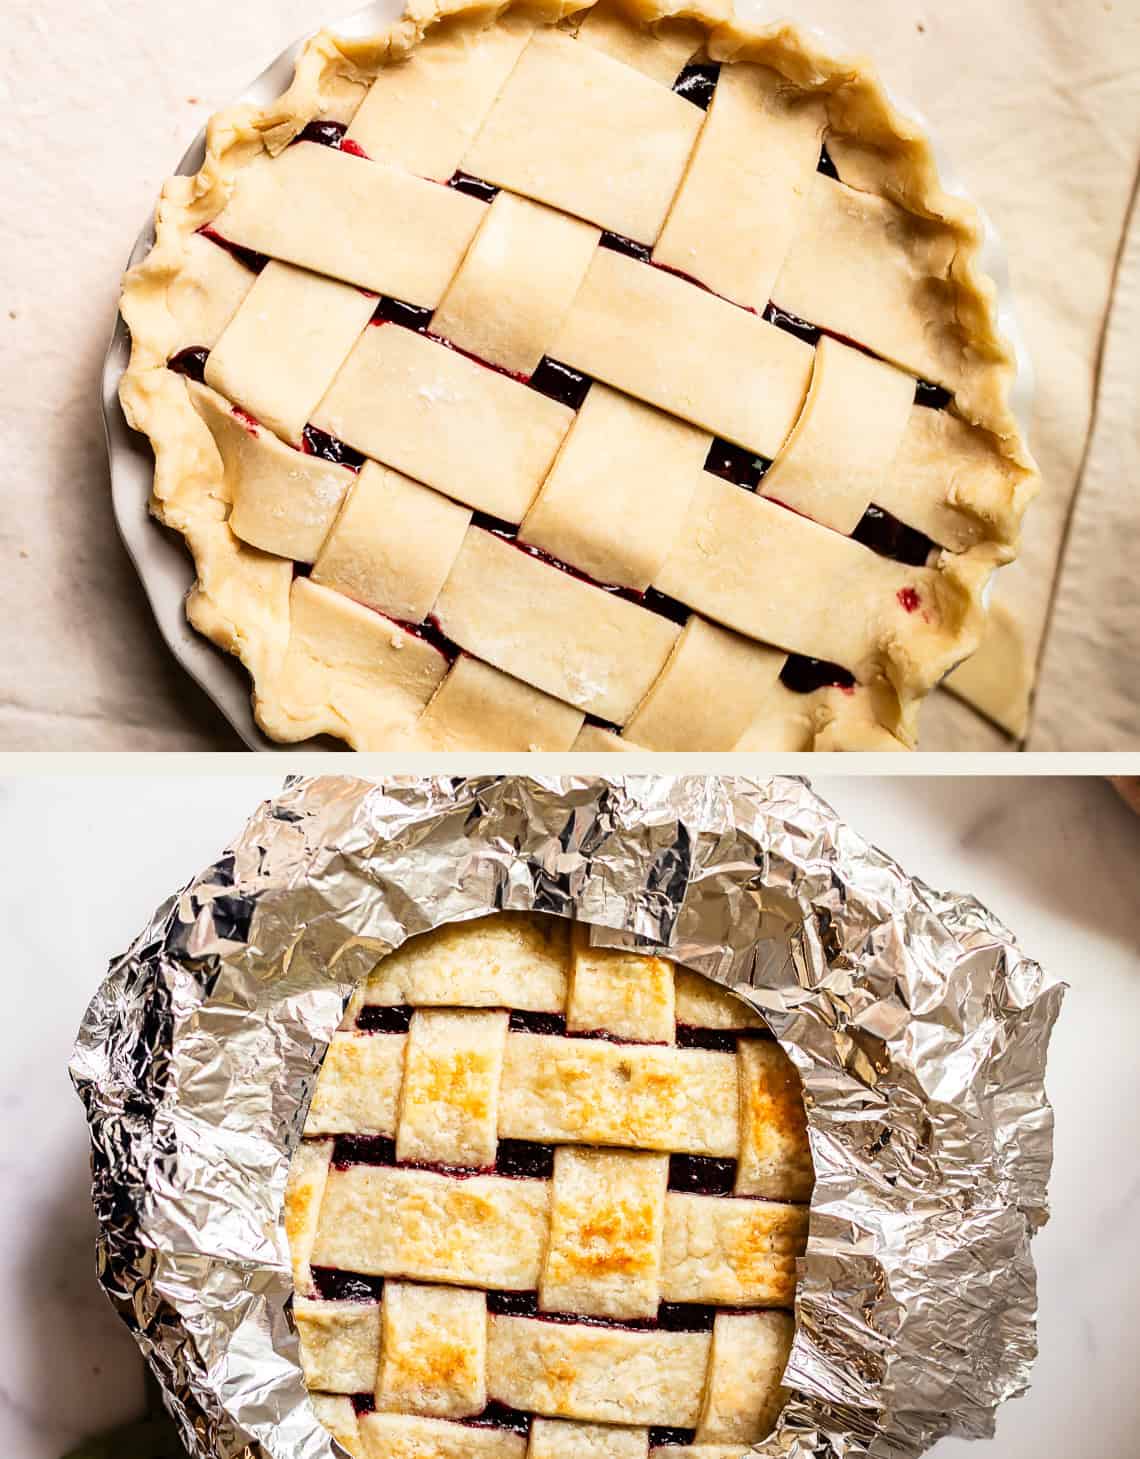
Then, carefully take it out of the oven and cover it with a tin foil pie shield. We just want to cover the edges of the pie, so it doesn’t get over baked. You can buy a fancy pie shield, but I actually prefer foil. It’s lighter and doesn’t crush the crust, plus you can mold exactly to the shape of your pie. I show how to make one in my Pie Crust post.
Pop it back in the oven at a LOWER temperature (350). Bake for another 45 mins or so!
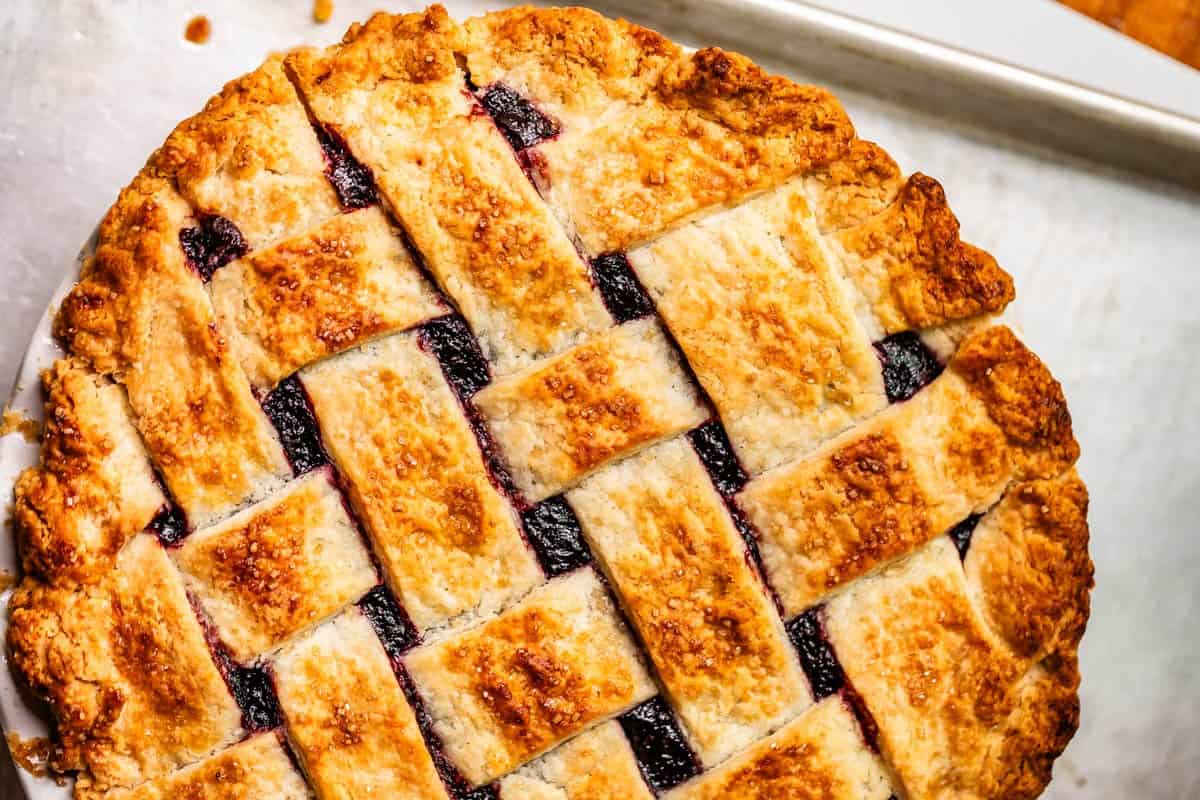
And voila!! Make sure the top gets nice and brown and crispy! Now the hard part…waiting a few hours to cut into it. If you cut into it now, it will be too juicy and won’t hold it’s shape. I know, I know!! You are so hungry. haha. I always stick mine in the freezer for an hour or two to speed it up.

How to store leftover pie
Blackberry pie will do best at room temperature for a couple days. Just cover the pie pan with plastic wrap (loosely, so the crust doesn’t get soggy) or if you have one of these cool pie covers, that’ll work too.
If by some miracle you still have leftover pie sitting on your counter after two days, you have way more self control than I do and you should transfer the covered pie to the refrigerator. It will keep there for another day or two. Please note that while the pie will not spoil, the longer is sits, the soggier the crust (especially the bottom of the pie) will get over time. Pie is best eaten within 24-48 hours of baking, in my opinion!
Can you freeze blackberry pie?
You CAN freeze an entire unbaked blackberry pie, and it is such a great way to get all the prep work out of the way if you’re making this for Thanksgiving or any other big event or holiday! Top the fruit with the second crust, but don’t brush with egg/milk or sprinkle with sugar. Put the pie dish in the freezer for an hour to flash freeze, add a layer of plastic wrap, then wrap it a second time. Then wrap in foil. Make sure it’s sealed as best you can! Toss it in a 2 gallon ziplock to seal completely, if you have it. Freeze for up to 3 months.
Bake it straight from frozen. Brush with egg/milk, sprinkle with sugar, and pop it in the oven according to the recipe. Same temperature, same times. Look at the recipe notes to make sure you are using the right kind of pie pan to go straight from the freezer to the oven!!
Freeze an already baked pie? Naw
While you can freeze already baked whole pies (cool completely, then follow the same wrapping instructions as above), the crust tends to shrink and the crust will definitely get soggy, so I recommend freezing before baking.
Freezing the pie crust: a great make-ahead hack!
You sure can also make and freeze the crusts and the filling separately. Follow the instructions in my Pie Crust post for how to freeze the crust.
Freeze the berry pie filling!
You can totally freeze the berry pie filling! Add the cooked and cooled filling to a ziplock freezer bag and seal. The filling will last a long time in the freezer, like 5-6 months. If you grow blackberries in the summer you can definitely make this while they’re fresh and freeze it til the holidays. My grandma and my mom did this every year! It’s why Blackberry pie is a classic Thanksgiving dish in our family.
Frequently asked questions
This pie actually has two thickeners, both flour and cornstarch. In general, cornstarch creates a shiny, silky thickening without affecting flavor. Flour naturally has more protein in it, which adds more richness, flavor, and a creamy mouth feel. In short, cornstarch is more effective, but flour tastes better and has a better texture. So we are using both!
It is possible to use either one exclusively, but you would have to play with the recipe to get the right consistency. You cannot just swap them out 1-to-1 in this recipe or you will end up with a filling that is either too liquid-y (all flour) or too thick (all cornstarch). SEE NOTES for instructions on how to make this pie with frozen berries, you need to adjust the cornstarch amount!
The trick is to keep the spices simple and really let the taste of the berries shine. This recipe calls for salt to bring out the natural flavors in everything, and then a tiny amount of cinnamon (only 1/2 teaspoon in the whole pie!) to add a layer of spice without overwhelming the pie. You can add more seasonings if you prefer a spiced pie. Try upping the amount of cinnamon or adding other spices like cardamom, allspice, or nutmeg. Keep in mind they are strong spices and a little goes a long way. Happy spice adventures!
Pie for everyone
One of the best parts of the holiday season (besides all the cookies) is all the pie, and there are so many fun flavors to choose from! Tiny slivers of as many as possible for my plate, please. I’ve listed below some of my favorite pies, as well as some reader favorites. You can also peruse the Pies, Pastries & Tarts page on the blog for even more ideas!
- Fresh Blackberry Glacé Pie >> the sister to today’s recipe. It’s a gloriously fresh, unbaked filling with a surprise cream cheese layer to balance the sweetness, you’ll love it
- Best Apple Pie >> one of my most popular recipes of all time!! I’m telling you, you’re going to be in love with this pie. (PS, you could also make Dutch Apple Pie if that’s your preference!)
- Strawberry Rhubarb Pie >> one of my absolute favorite pies of all time, and that’s saying something
- Homemade Blueberry Pie Recipe >> this pie is based on Grandma’s blackberry pie, and it’s the only blueberry pie I’ve ever liked
- Sweet Potato Pie with Salted Caramel Whipped Cream >> the dessert of all your southern dreams
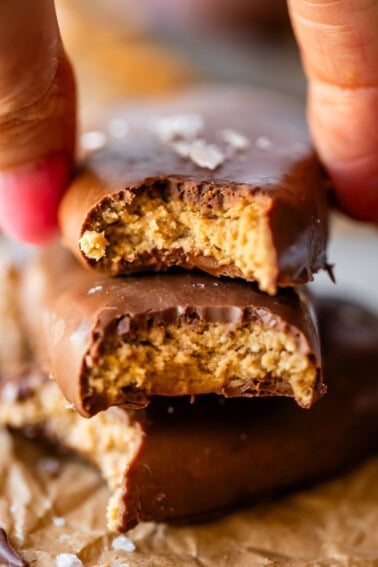
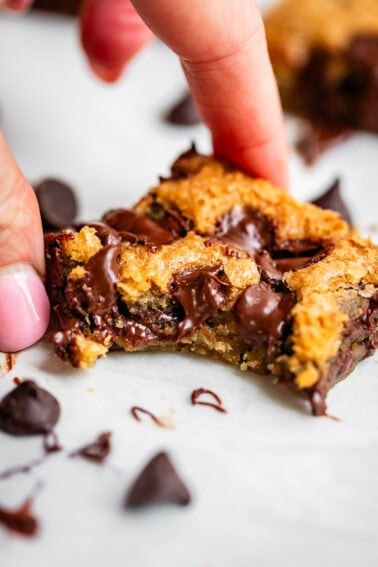
- Gooey Chocolate Chip Cookie Pie >> like a giant, warm chocolate chip cookie in a pie shell, YUM
- Best Key Lime Pie >> if you’re looking for tart, this pie is your best bet. Not to mention it has the right amount of custard (get outta here with thin custard, please)!
- Hoosier Sugar Cream Pie from State of Dinner
- Chess Pie from Grandbaby Cakes
Blast from the past: I posted this recipe in 2012
Here is what was going on back then. Charlotte was just a baby!
Eric and Charlotte and I took a trip to the Grand Canyon this weekend. It was of course awesome. Except the whole time I was freaking out that we would accidentally drop Charlotte down the 1-mile canyon, or that she would run right off the edge. Irrational fears, yes, but that’s what mom’s are for right?
My dad visited the Grand Canyon with his family when he was very young, just 3 years old. His mom, Grandma Georgia, used to tell me the story about when they were stopped at a beautiful viewpoint. The only thing separating them from the canyon was a fence consisting of poles in the ground every few feet, with chains hung between them.
She turned from looking at the view to see her little 3-year-old sitting on one of the chains, swinging back and forth, having a great time, oblivious to the 5,000 foot drop right behind him. Obviously he lived to tell the tale, but I’m pretty sure my poor Grandma just about had a heart attack.
Grandma Georgia (and now my mom) is famous for this Blackberry Pie. The back wall of our garden is covered with blackberry vines, and I have many fond (at least now they are fond) memories of picking blackberries with my siblings in 108 degree weather, trying not to gouge myself with thorns. It was always worth it because this pie was a guaranteed fruit of our labors. It is really good with whipped cream or homemade ice cream.
Grandma Georgia’s Blackberry Pie Recipe
Ingredients
For the crust
- 1 batch Homemade Flaky Pie Crust, tap for the recipe
For the filling
- 3 cups fresh blackberries, to puree (see note for frozen blackberries)
- 6 cups fresh blackberries, to leave whole (see note for frozen blackberries)
- 1 and 1/2 cups granulated sugar, packed
- 1/4 cup cornstarch, SEE NOTES if using frozen berries
- 2 tablespoons flour
- 1/2 teaspoon cinnamon
- 1/2 teaspoon kosher salt
- 1 tablespoon milk, for brushing on pie
- 1 tablespoon raw sugar, for sprinkling on top crust
- vanilla ice cream, or whipped cream, for serving, not optional ;)
Instructions
- Make the pie dough. If you have never made pie dough, read through my Flaky Pie Crust post. Lots of helpful photos for beginners!*
- Make the filling. (See notes for frozen blackberry instructions) Add 2 cups of fresh blackberries to a blender. Blend until liquified. You should end up with about 1 and 3/4 cup blackberry pulp. Add a few more blackberries and blend again if it's not enough. (If you don't have a blender, add 2 cups blackberries to a large glass measuring cup. Use a potato masher to crush the berries into a pulp.)
- Add 1 and 3/4 cup pureed blackberries to a 3 quart saucepan. Add 1 and 1/2 cups sugar, 1/4 cup cornstarch, 2 tablespoons flour, 1/2 teaspoon cinnamon, and 1/2 teaspoon kosher salt. Whisk together until thoroughly combined, making sure there are no lumps of powder.
- Turn the heat to medium. Whisk the mixture occasionally for about 3-5 minutes until it comes to a very light boil. As soon as the mixture has thickened (you may not even see bubbles), remove the pan from the burner.
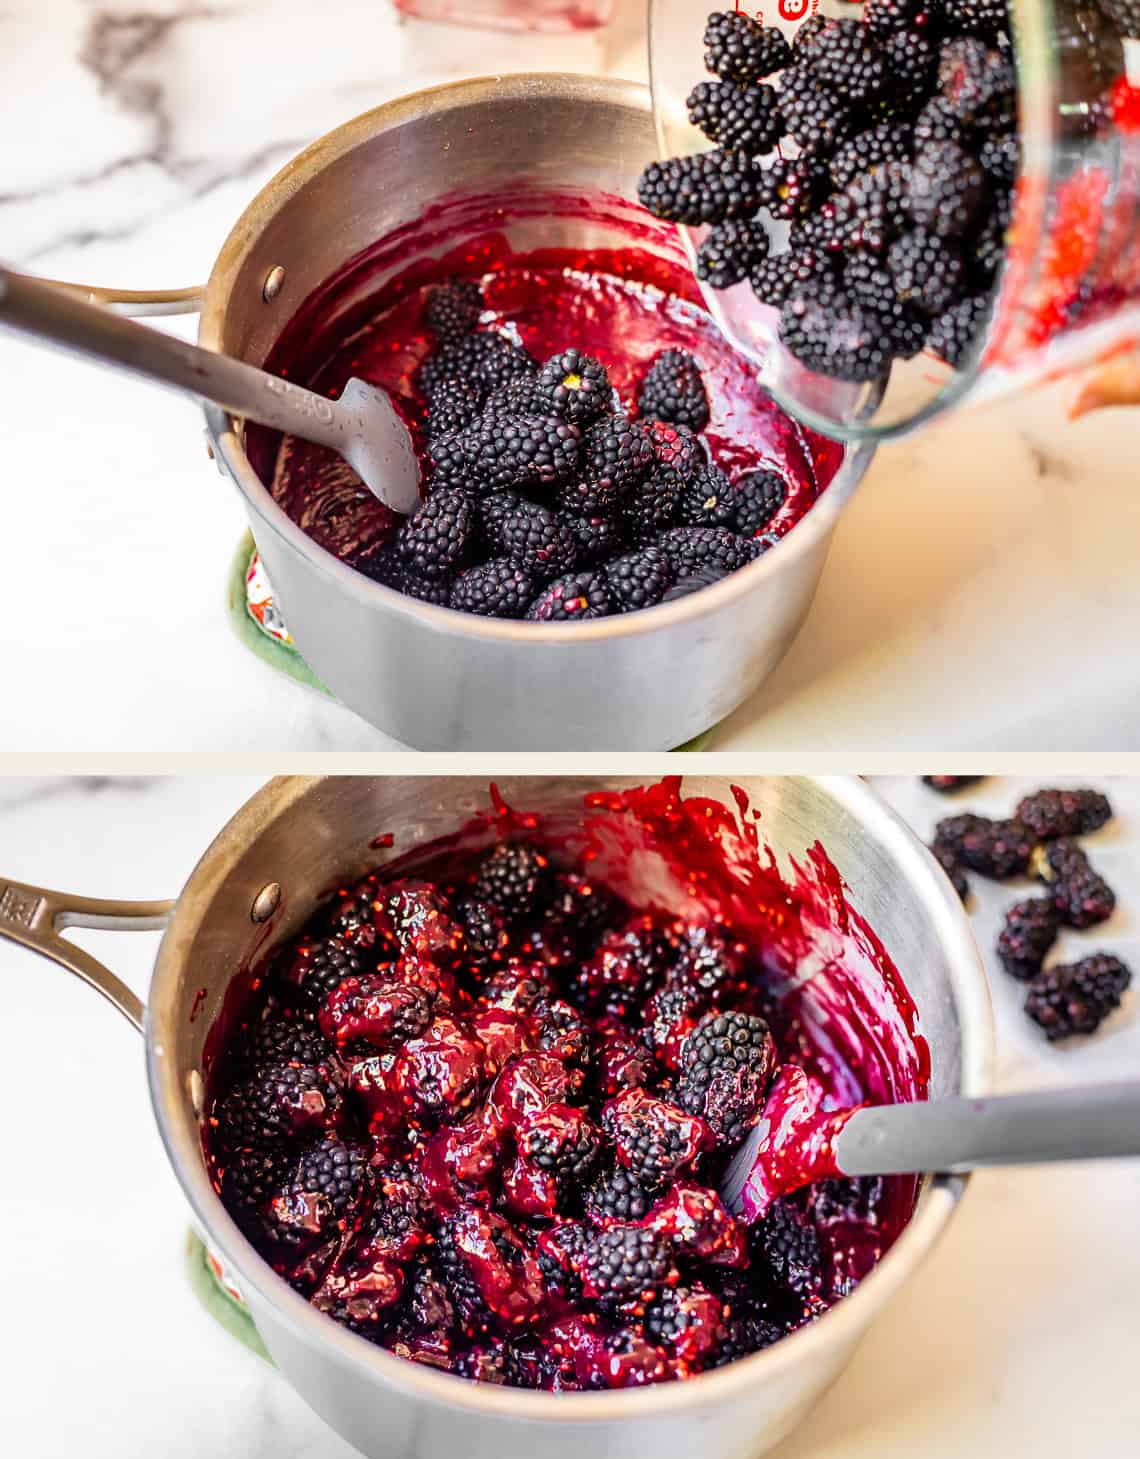
- Add 6 cups whole blackberries to the mixture in the pot. Stir it all together. Give it a taste! If it's too sweet, add a few more blackberries if you have them. If it's very tart, add in an extra tablespoon or two of sugar.
- Chill. This is very important: let the blackberry mixture cool completely. I like to stick it in the fridge to speed this up. If you dump hot hot pie filling into your pie crust, it will end up gummy on the bottom and won't be flaky. (If you use frozen blackberries, the frozen whole berries will instantly cool your filling. It's actually faster to make this pie with frozen berries! See notes)
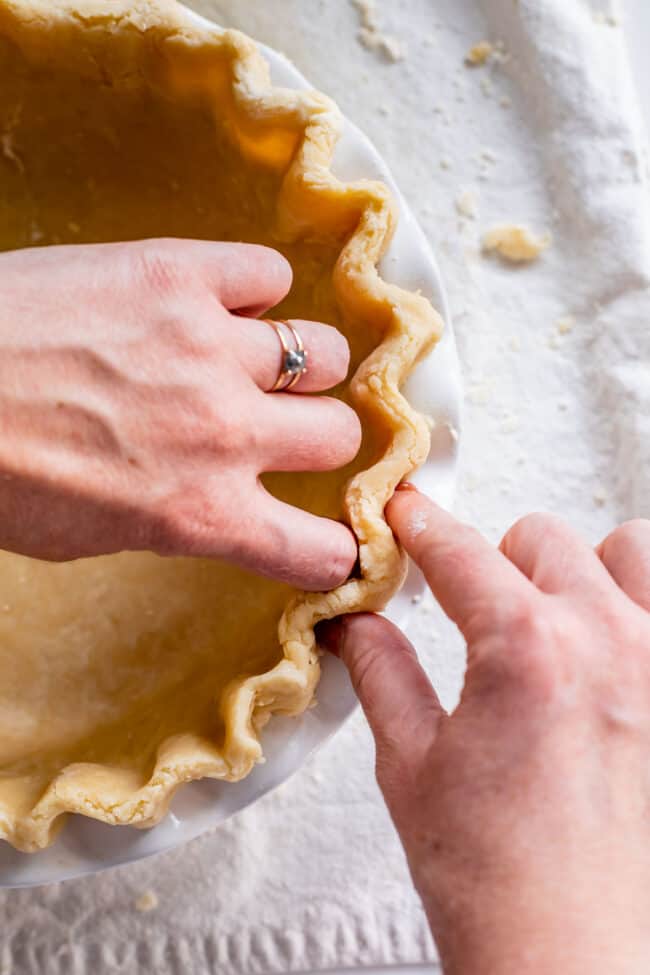
- Roll out the pie crust. On a well-floured work surface or pastry cloth, roll out one disc of the pie dough, keeping the other one chilled. Place the rolled out pie crust into a 9 inch pie pan, letting the edges hang over the sides. If the pie dough has warmed, place the whole pie pan into the fridge or freezer for about 15 minutes. Cold pie dough is essential.
- Add the chilled blackberry filling. Pour the cold blackberry pie filling into the rolled out crust, leaving it mounded in the middle.
- Roll out the second pie crust. Make it into a lattice crust if you like, here is my Lattice Pie Crust tutorial. Or you can place the pie crust on top as one whole piece. (If you do this, be sure to use a sharp knife to make a few cuts into the top pie crust. This vents the pie and allows steam to escape.)
- Trim excess pie dough so there is only about an inch of the top and bottom hanging over the edges. Fold the overlapping pie dough underneath on the edges, and crimp the edges with your thumb and fingers, sealing the edges.
- Preheat. Place a baking sheet in the center rack of your oven and preheat to 425 degrees F. Let it heat up for at least 20-25 minutes to make sure it’s really hot.
- Freeze the pie. While the oven heats, place the entire pie in the freezer for 20 minutes, or the fridge for 30 minutes if you don't have freezer space. Chilling makes your crust SUPER flaky.
- Brush the top of the pie. Right before putting your pie in the oven, brush the crust of your pie all over with about a tablespoon of milk. Sometimes I like to use 1 tablespoon milk beat together with 1 tablespoon beaten egg that I have leftover from making the crust. Milk will help your pie crust brown but will stay matte; egg will add gloss and shine to your pie crust.
- Sprinkle the whole pie with 1 tablespoon raw sugar, or regular sugar is also great. My mom always sprinkles her pie with cinnamon-sugar, that is my go-to!
- Bake. Place the chilled pie onto the baking sheet*** in the oven and let bake at 425 degrees for 15 minutes. The crust on the edge should be turning light brown.
- Meanwhile, get a square of tin foil that is the same size as your pie. Fold it in half, then in half again. Cut out the center. Open it up again. You should have a square of foil with a circle cut out of the center. See pie crust post for photos.
- Reduce the heat to 350 degrees F. Remove the pie from the oven (shut the door!) and place the foil on top. Loosely crimp it around the crust on the edge, making sure it's all covered but the center of the pie crust is exposed. This will protect the edges from burning.
- Don’t forget to lower the oven temperature to 350. Place the pie back on the baking sheet in the oven and bake at 350 for 40-50 more minutes. You will know the pie is done when the edges are brown and the center of the crust is light golden brown. The crust should not look at all wet on top.
- Let the pie cool on a wire rack for about 4 hours. I know, this is killer. But if you cut into it now, the juices will be lava hot and way too liquid-y. You have to wait for it to cool to room temperature to get the right texture for the filling. Pie! A lesson in patience indeed.
- Once the pie is completely cool, slice and serve! A word to the wise: Blackberry Pie is nothing, NOTHING, without a scoop of vanilla ice cream. Or at least some whipped cream. Treat yoself right.
- Store the pie on the counter for up to 2 days, covered with plastic wrap. After that transfer it to the fridge.
- Freezing: You CAN freeze an entire unbaked blackberry pie, and it is such a great way to get all the prep work out of the way if you're making this for Thanksgiving or any other big event or holiday! Top the filling with the second crust, but don’t brush with egg/milk or sprinkle with sugar. Put the pie dish in the freezer for an hour to flash freeze, add a layer of plastic wrap, then wrap it a second time. Then wrap in foil. Make sure it’s sealed as best you can! Toss it in a 2 gallon ziplock to seal completely, if you have it. Freeze for up to 3 months.Bake it straight from frozen. Brush with egg/milk, sprinkle with sugar, and pop it in the oven according to the recipe. Same temperature, same times, maybe just a couple minutes longer to get browned on top.
Notes
- Use a total of 6 tablespoons cornstarch when making this pie with frozen berries.


I’ve made this pie twice this week and it’s fantastic!! I did just a few things differently; substituting the shortening for butter in the crust and using nutmeg instead of cinnamon. Absolutely fabulous recipe and the ‘cold’ suggestions/instructions are crucial and helpful. Frozen berries never tasted so good!!
I have always used Minute tapioca in my fruit pies as the thickener. I want to try your recipe, and am hoping you have suggestions for making this change. Thanks, Karen!
Hi Beckie! This thickening business is really the key to making a successful pie. Even teaspoons matter when it comes to the amount of cornstarch, flour, or minute tapioca you use! So unfortunately I’m not confident giving you an amount that I haven’t personally tested. The only pie I use minute tapioca for is this Rhubarb Custard pie, (which I also claim as my favorite pie in that post, haha, it’s honestly a tie for me between blackberry and Rhubarb) so you can reference that post for an idea of how much tapioca to use. But blackberries are a LOT juicier than rhubarb! So you might need a bit more? I can’t say without testing. Let me know how it goes!
Karen,
I baked a couple of these blackberry pies over the weekend, taking one to an early Thanksgiving gathering with friends and family and it was a monster success! There were a number of ‘homemade’ dessert dishes brought to the get-together from pumpkin pie to pumpkin cheesecake to cupcakes and the blackberry (YOUR blackberry) smashed them all….gone in seconds! Just walking around the room and marveling at the look on everyone’s faces as they relished in the flavor made my weekend! Fantastic recipe and sure to be a future ‘fixture’ in my household for years to come!!
Awesome David!! I’m so glad it turned out. That look on people’s faces is why I cook. For real. People think I cook to feed my kids and I’m like, nah, mostly it’s the food coma induction high. Happy Thanksgiving!
Perfect Karen. I just made a blackberry pie on AllRecipes.com that turned out pretty good, although the recipe called for a flour/sugar mixture rather than corn starch (which I prefer as I use your mixture in my cherry pies), that I didn’t much care for. Going to try your recipe this weekend as it looks like something more in line with what I’ve made before. Can’t wait!!!
Woohoo! Blackberry pies are the best! I grew up on these, my mom made them all the time from the vines out back. I hope this one works out for you! Thanks for the comment!
I remember picking peaches in our tree and the fuzzies made me so itchy. It’s funny how those terrible things we did as children some how become fond memories.
this may be your dad’s all-time favorite pie! i made a blackberry cobbler yesterday that he said was ‘almost as good as blackberry pie’ – a high compliment :)
I believe it. Blackberry cobbler has it’s place in the world, and that place is directly after blackberry pie.