


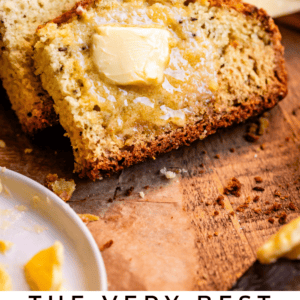
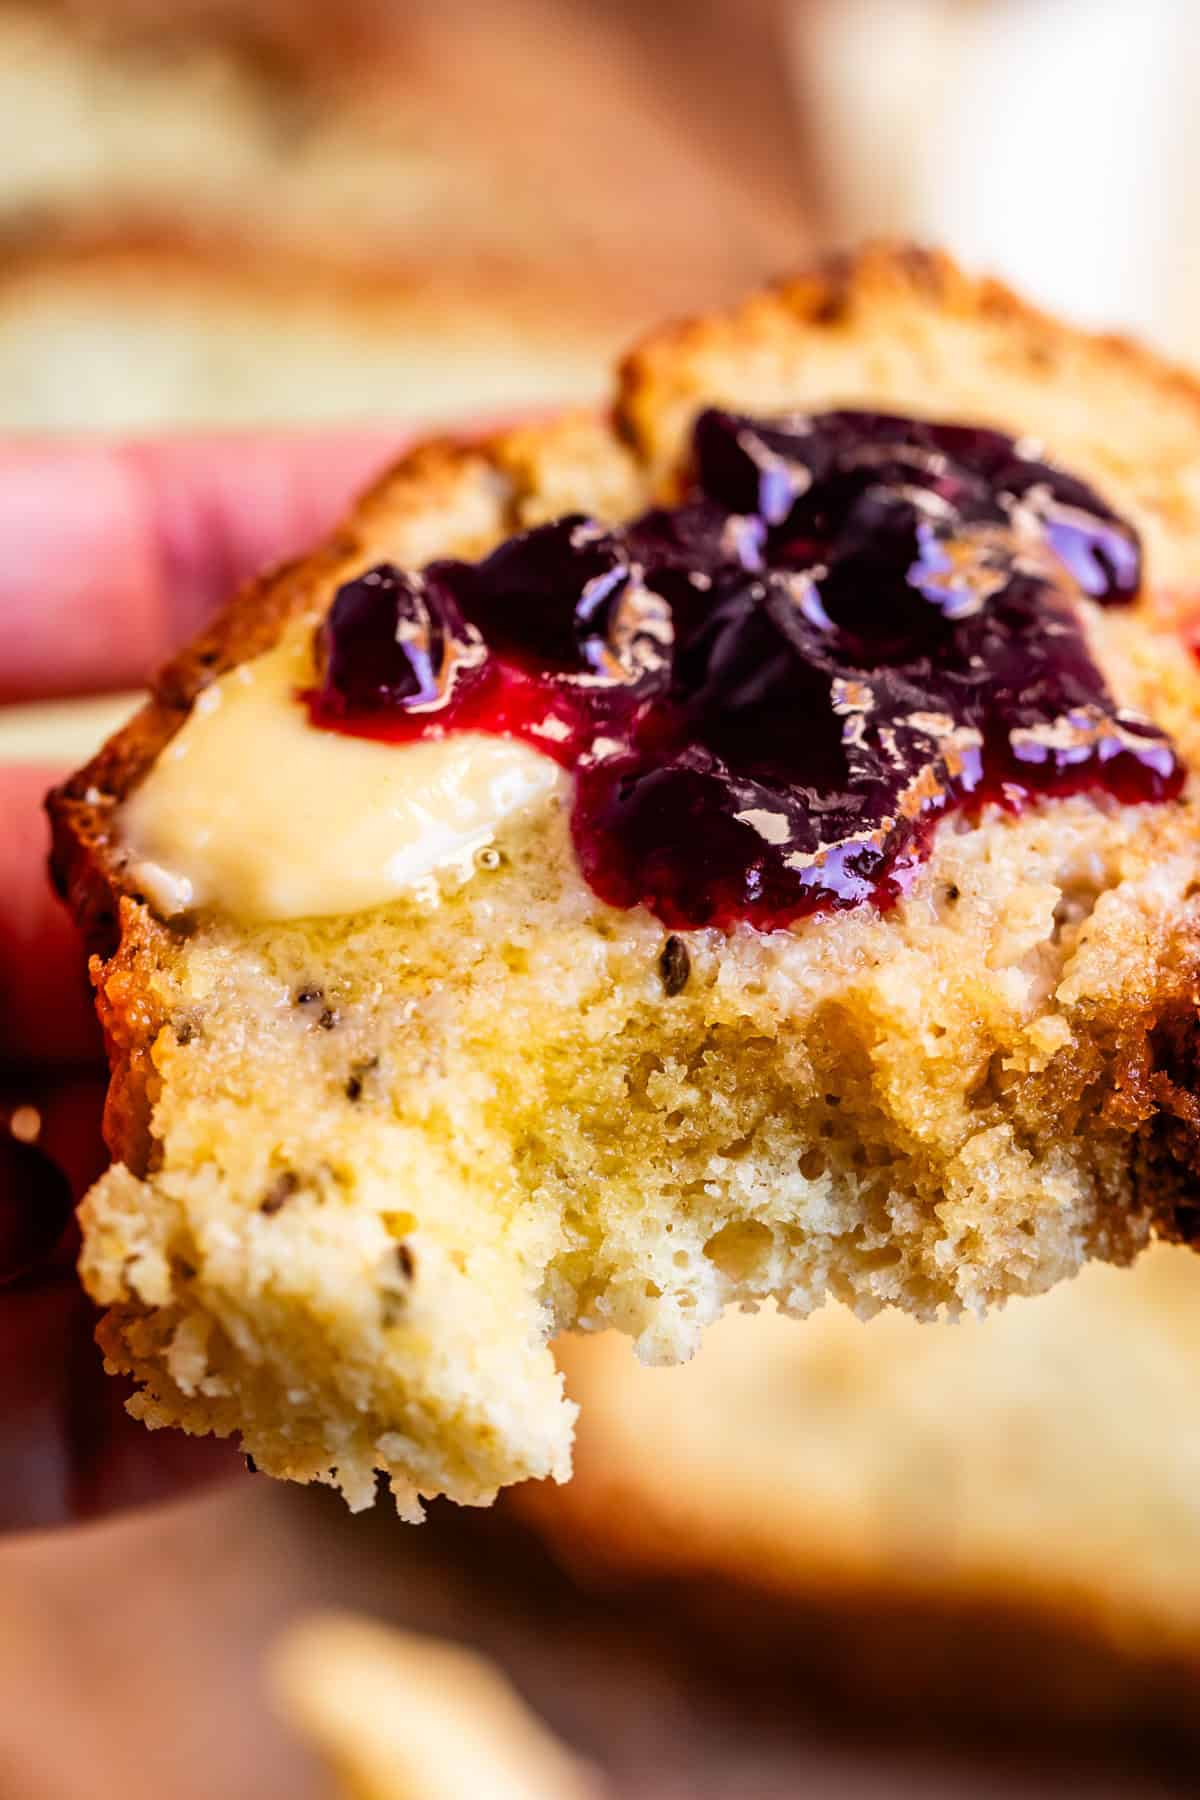
You guys, I’ve finally cracked the code on this crusty old bread. Irish Soda Bread at it’s worst is bland and dry as a cotton ball. I’ve been trying for YEARS to fix this recipe up a little bit, and finally landed on a secret ingredient (hint: oil) that transforms this humble loaf into something to write home about, especially when spread generously with butter and jam. It also goes perfectly with Corned Beef and Cabbage and Horseradish Sauce. Enjoy this traditional bread for dinner or with a cup of tea! Originally published March 14, 2012.
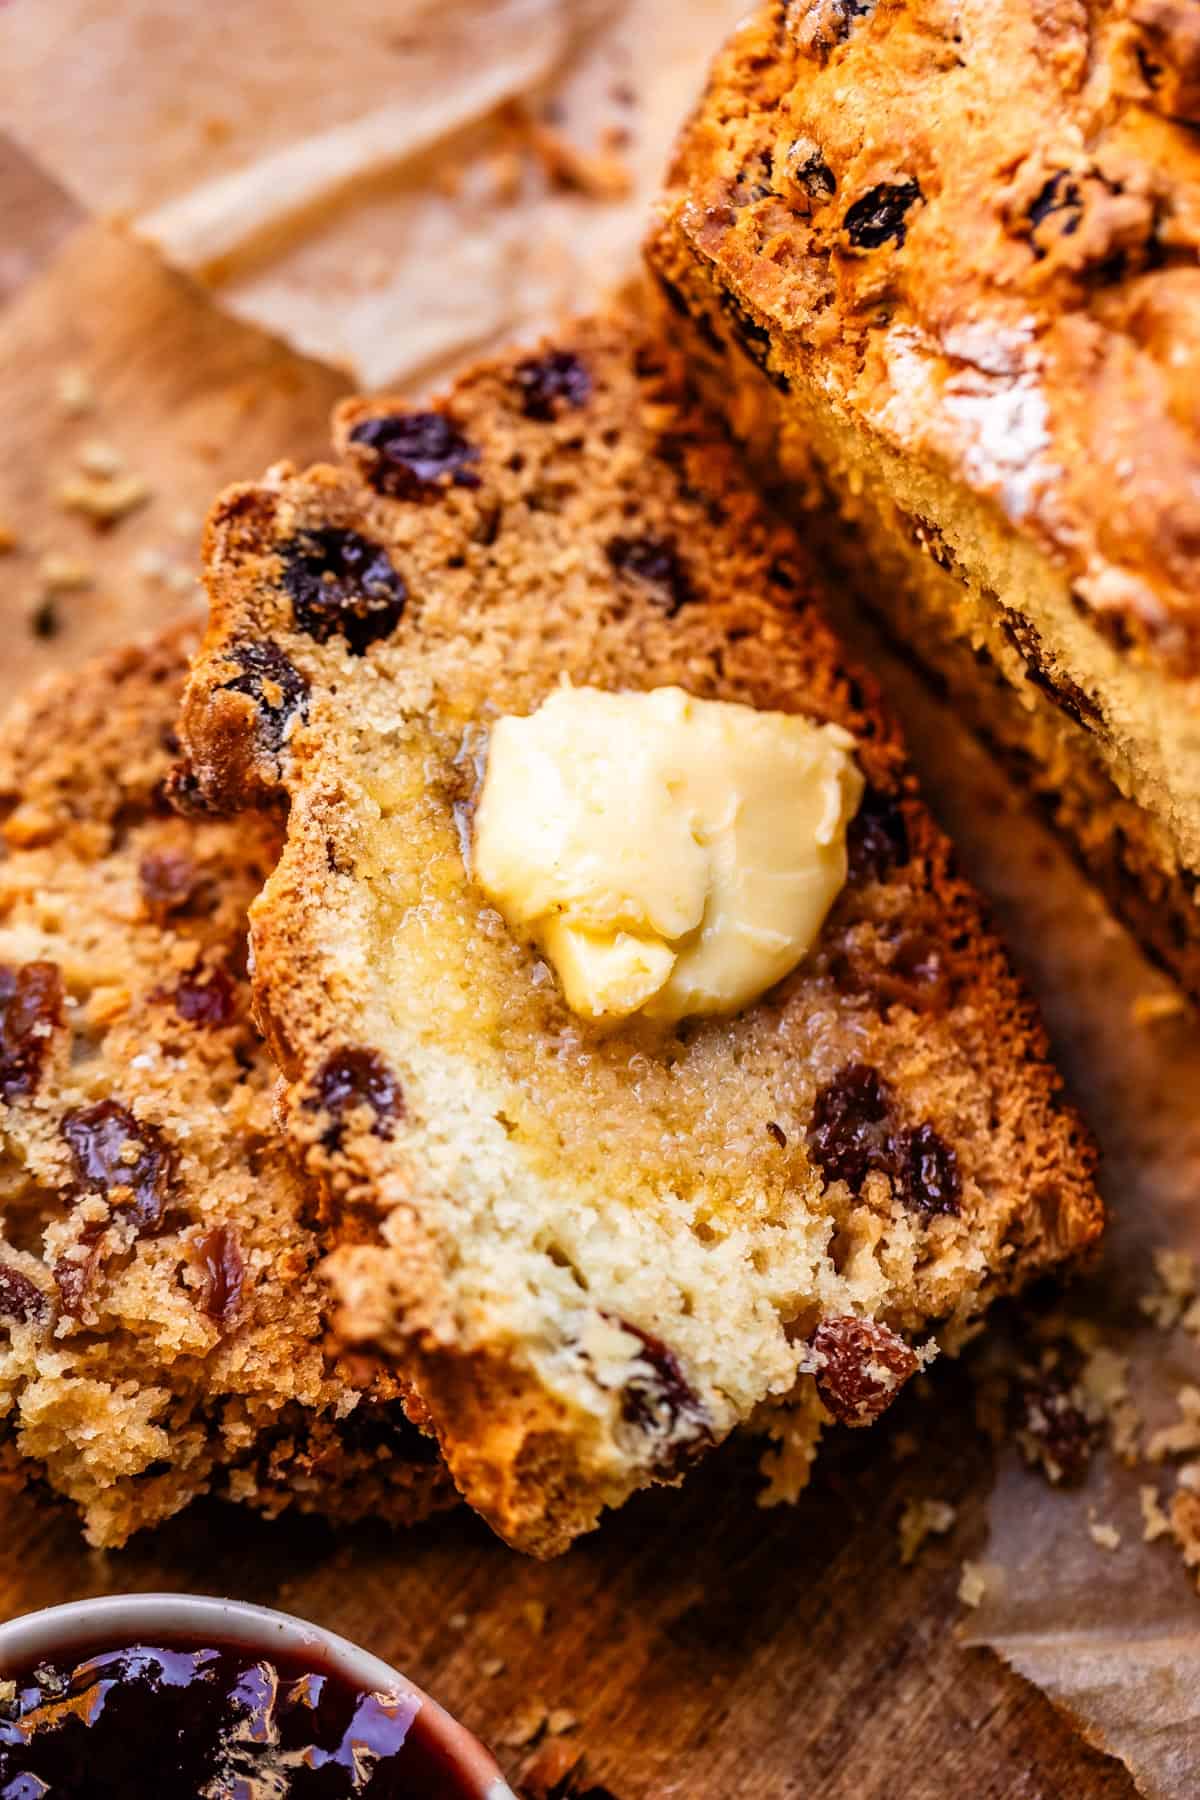
Table of Contents
- What is Irish soda bread, anyway?
- The secret ingredient
- The ingredients: more than 4
- How to make Irish soda bread with buttermilk
- How do I know when the bread is done?
- Why did my Irish soda bread fall apart?
- Why is my soda bread soggy in the middle?
- Irish soda bread substitutions and variations
- Serving ideas
- Frequently asked questions
- Irish Soda Bread with Buttermilk Recipe
I posted this recipe for Irish Soda Bread way back in 2012. Here’s what was going on back then:
“Charlotte is one year old now, and has developed a habit of pinching my back-fat while indignantly squealing in disbelief. It’s like she’s trying to send me a message. “Mom! Check out your squishy back-fat! This is incredibly disgusting! You really should try dieting.”

It reminds me of when I was at a Chinese restaurant one time with my friend Sarah. She opened her fortune cookie and read the message. It was something like this: You have many talents and gifts that will allow you to achieve your goals. Dream big.
Then I opened mine: Improve your exercise regimen.
You can’t make this stuff up, guys. Off to the gym I go, I guess. But first, one more slice of this Irish Soda Bread…
What is Irish soda bread, anyway?
This bread is amazing. I had never heard of it until 2012, when I tried a sample at a local bakery. I probably “sampled” about half of their loaf; I’m sure I was that customer, you know, the one that all the employees are glaring at from underneath their visors and hair nets.
I found a recipe that looked similar, posted it on the blog, and have been making it every since! And every time I make it I think, hm, this is good, but it could DEFINITELY be better.
The thing about Irish Soda bread is that it’s VERY simple.
Irish soda bread is a 200 year old recipe. Traditionally, it had only four simple ingredients:
- flour
- baking soda
- buttermilk
- salt
When times were hard, families could make soda bread in the ashes of a cooking fire even when they didn’t have much else.
The secret ingredient
Today, Irish soda bread has many variations, as well as more ingredients. My recipe includes butter, sugar, and eggs. Oh, and oil. That’s the clincher, really. God bless you, sweet, fatty oil.
Oil is 100% fat. Butter, for all it’s delicious flavor, is only about 80% fat (American butter, anyway.) I decided to try using oil in my Irish Soda Bread to help with the moisture issue—it can be dry as a bone if you over bake it even one degree. But with the oil addition, the loaf is just a little more fatty and a little more moist. And a lot more forgiving.

I’m in LOVE with this new version and will absolutely never go back. Here’s us eating our 14th loaf this week 😂
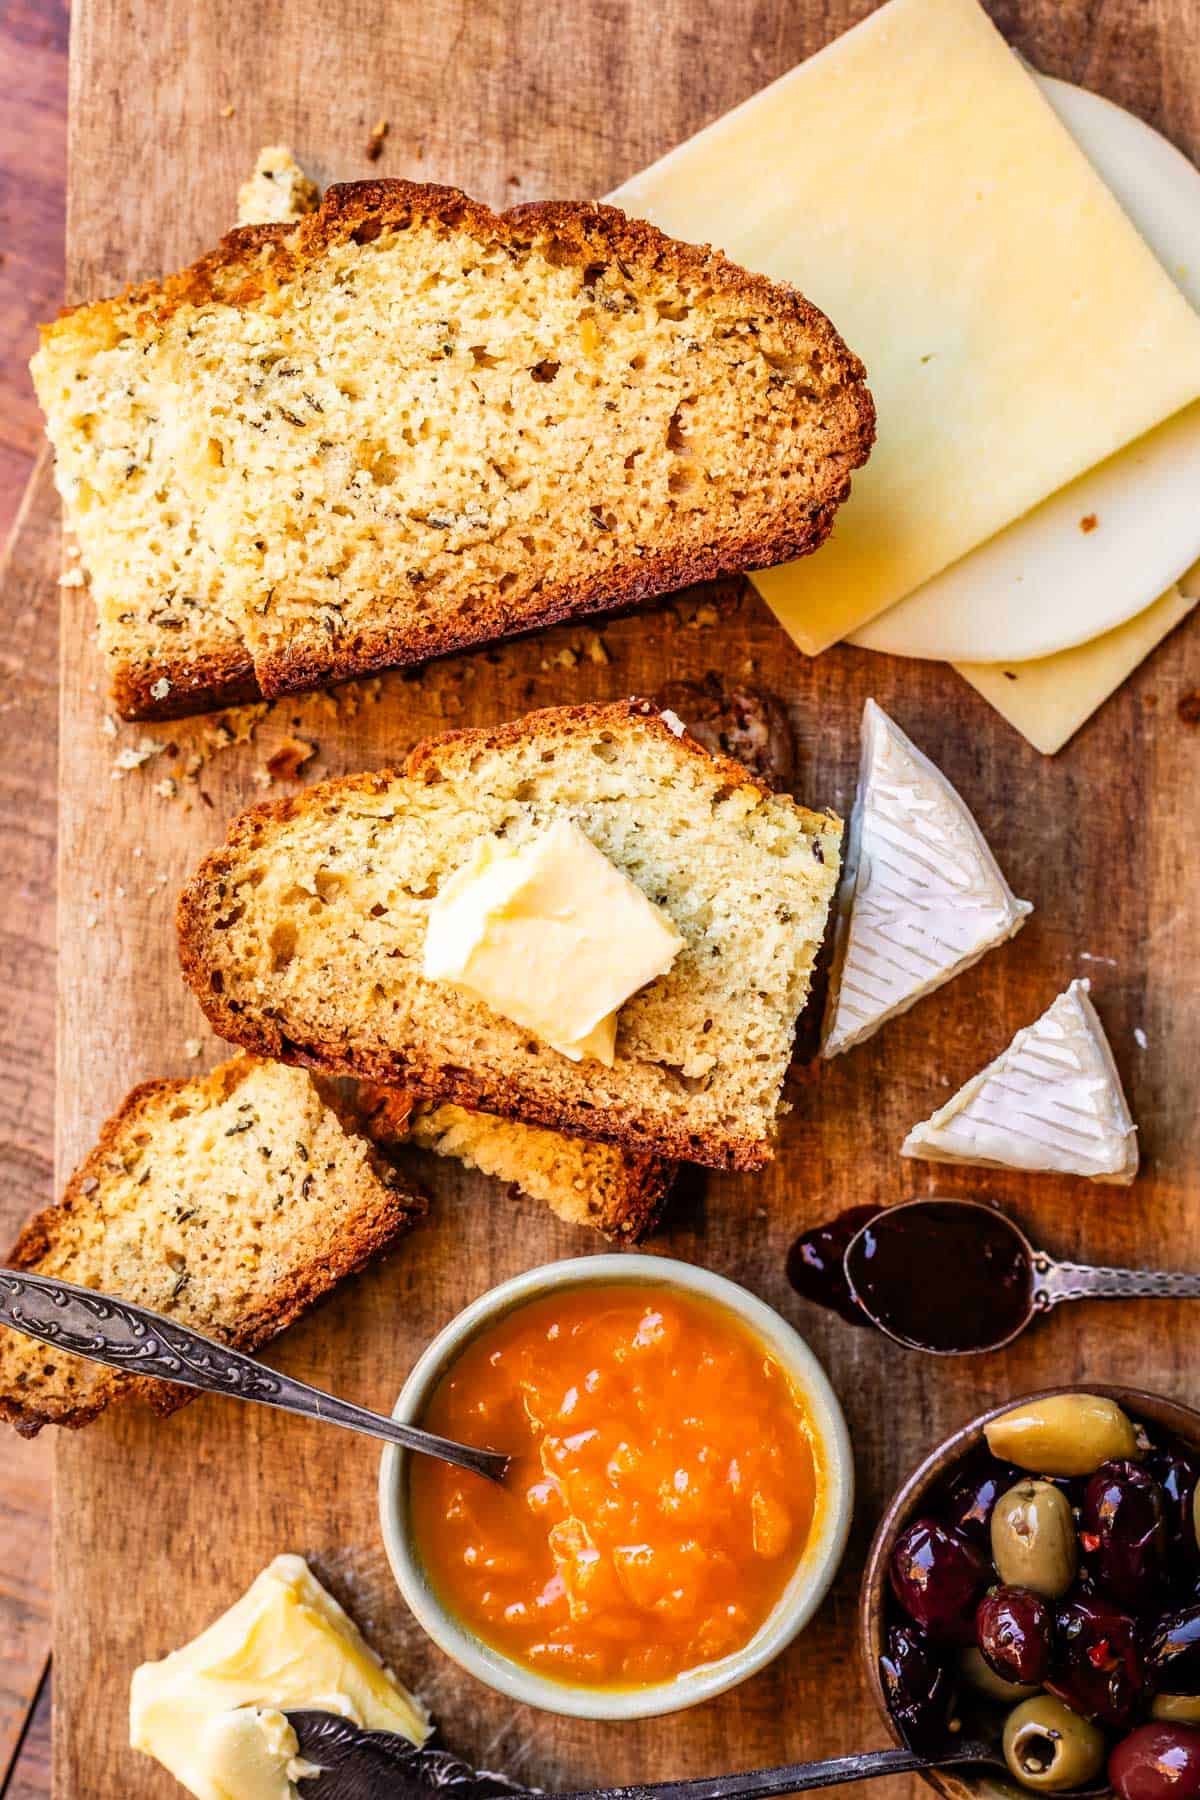
Irish Soda Bread is a great addition to a Charcuterie Board.
The ingredients: more than 4
Ok, so yes my version has slightly more than the traditional four ingredients….but I promise you it maintains the essence of what soda bread is. Just in a way that’s a lot less dry and tooth-cracky. (thank u oil 🥹)
Here’s a quick shopping list to help you gather your ingredients. See the recipe card below for the full ingredients and instructions!
- flour
- sugar
- baking soda
- salt
- butter
- oil
- buttermilk
- eggs
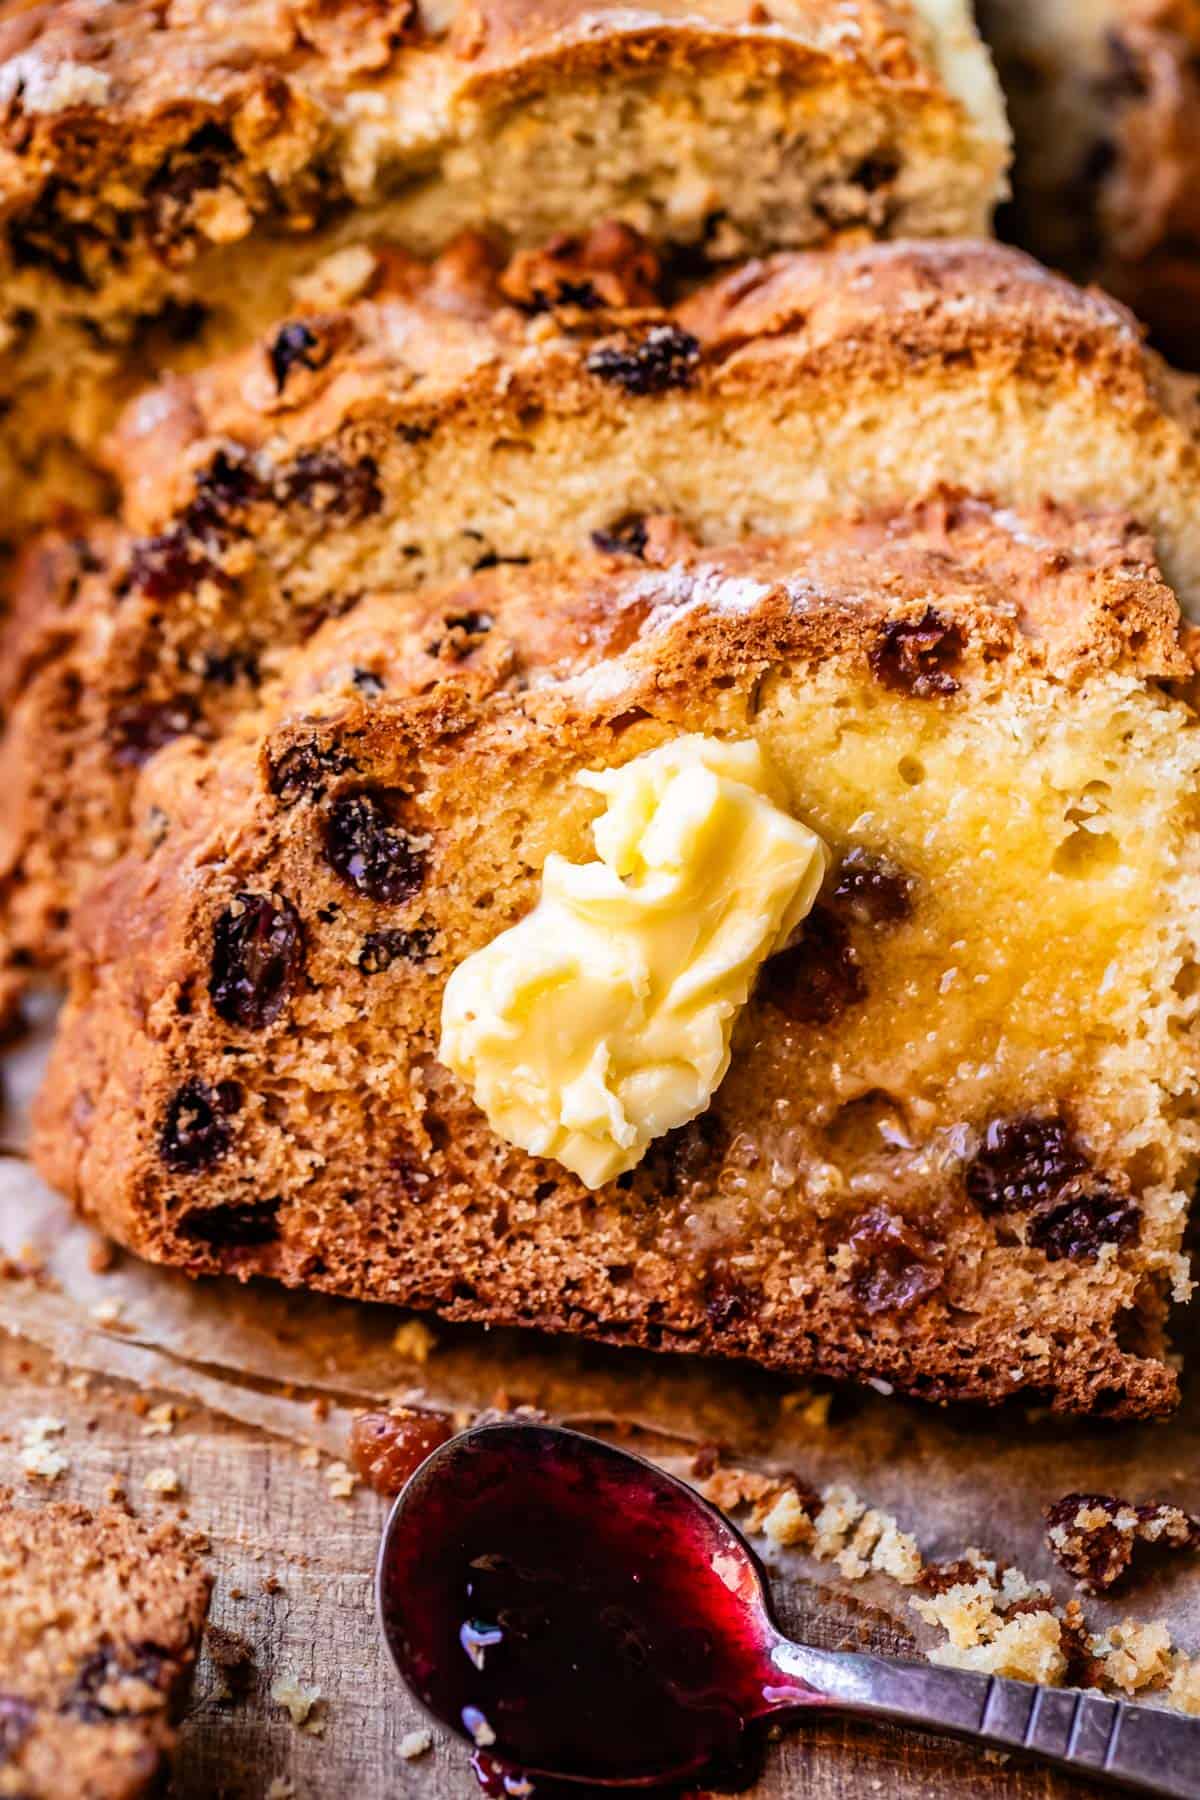
- Zante currants (optional; you could also choose raisins or real currants)
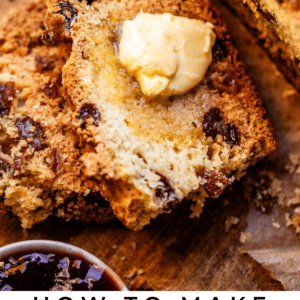
How to make Irish soda bread with buttermilk
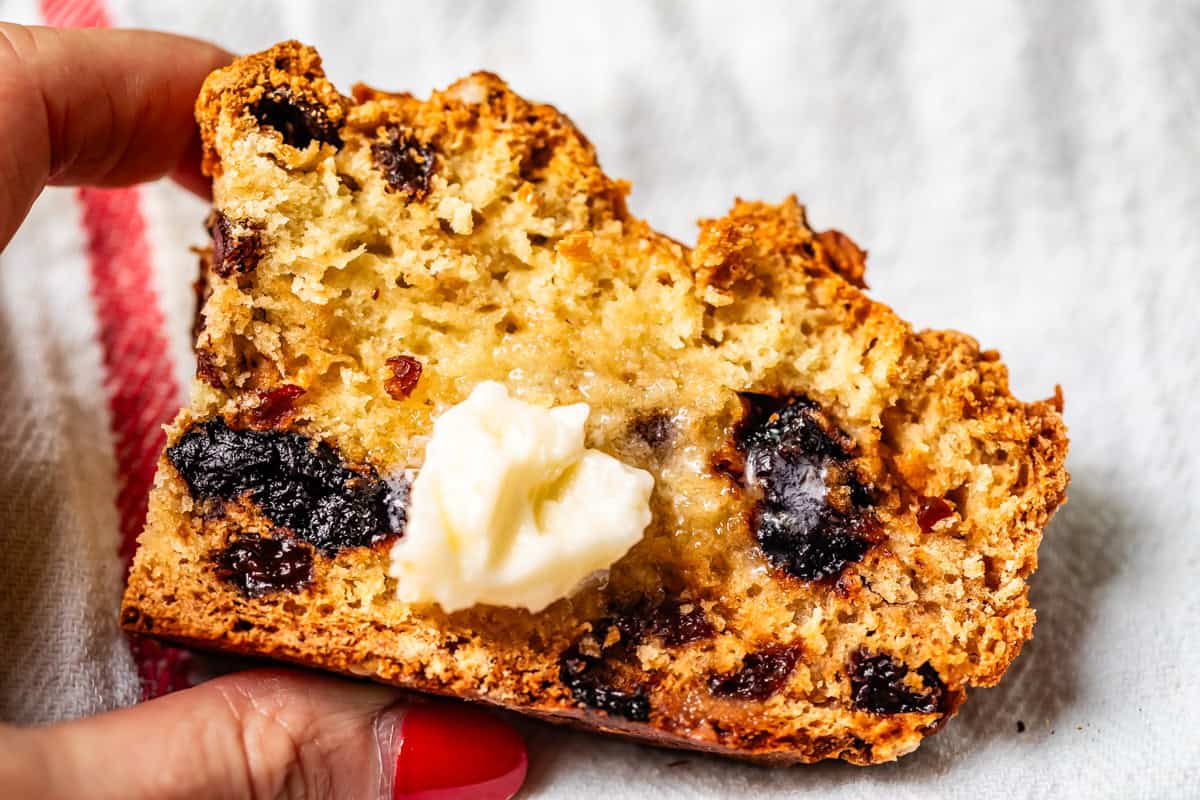
Start by plumping your raisins. I highly recommend adding some kind of dried fruit into your bread, unless you are going to serve it with a savory dish like Corned Beef. (And even then, I still wouldn’t say no to the raisins…)
Boil some water, remove from heat, and add in the raisins. Let them sit for 10 minutes or so in the hot water. This makes them fat and moist, instead of overly-hard and chewy.
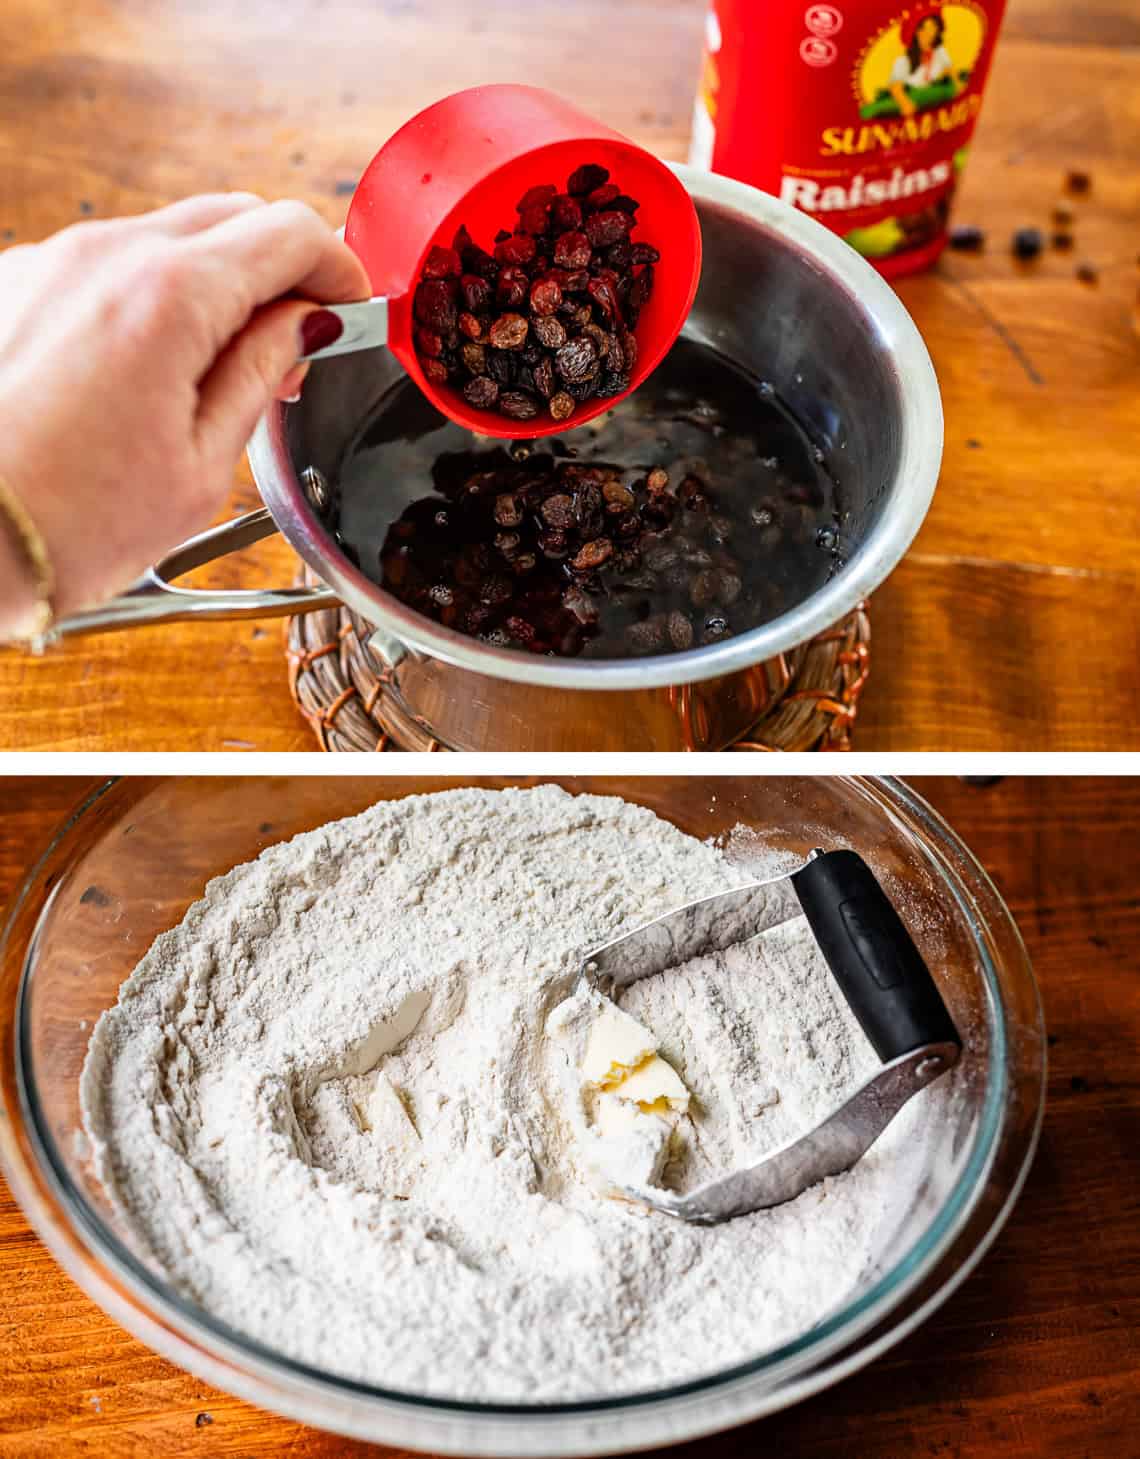
Next add all the dry ingredients to a big ol bowl, flour, sugar, soda, salt. Sift your flour if you have the time, it will give your bread an even better texture!
Cut 2 tablespoons of butter into the flour mixture. I know this is not a lot of butter and it gets a little lost in all that flour. That’s okay, just cut it in until the butter is pea-size or smaller.
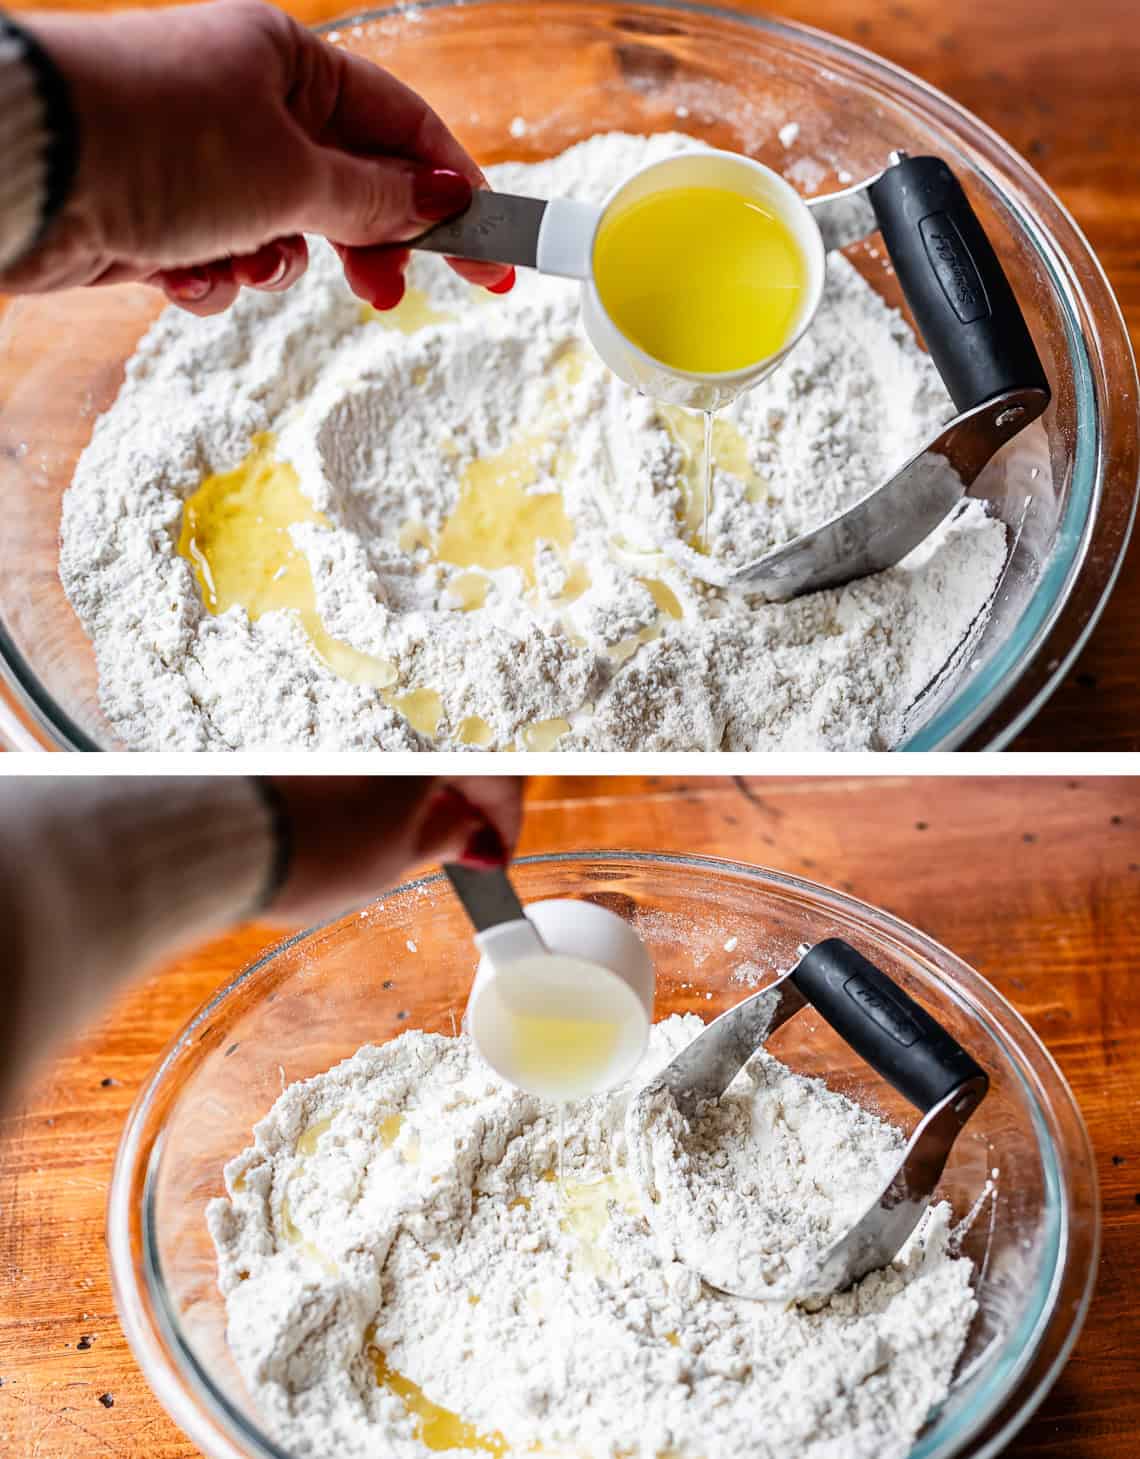
Now we are going to “cut” in the oil. Use a pastry cutter or a butter knife. Drizzle a little oil, cut it in, then drizzle a little more and repeat. Go slow. You want to try to distribute the oil throughout the flour without smoothing it or mixing it into a paste. CUT it.
Now add in those plumped up raisins (drained well) and toss them around in the flour.
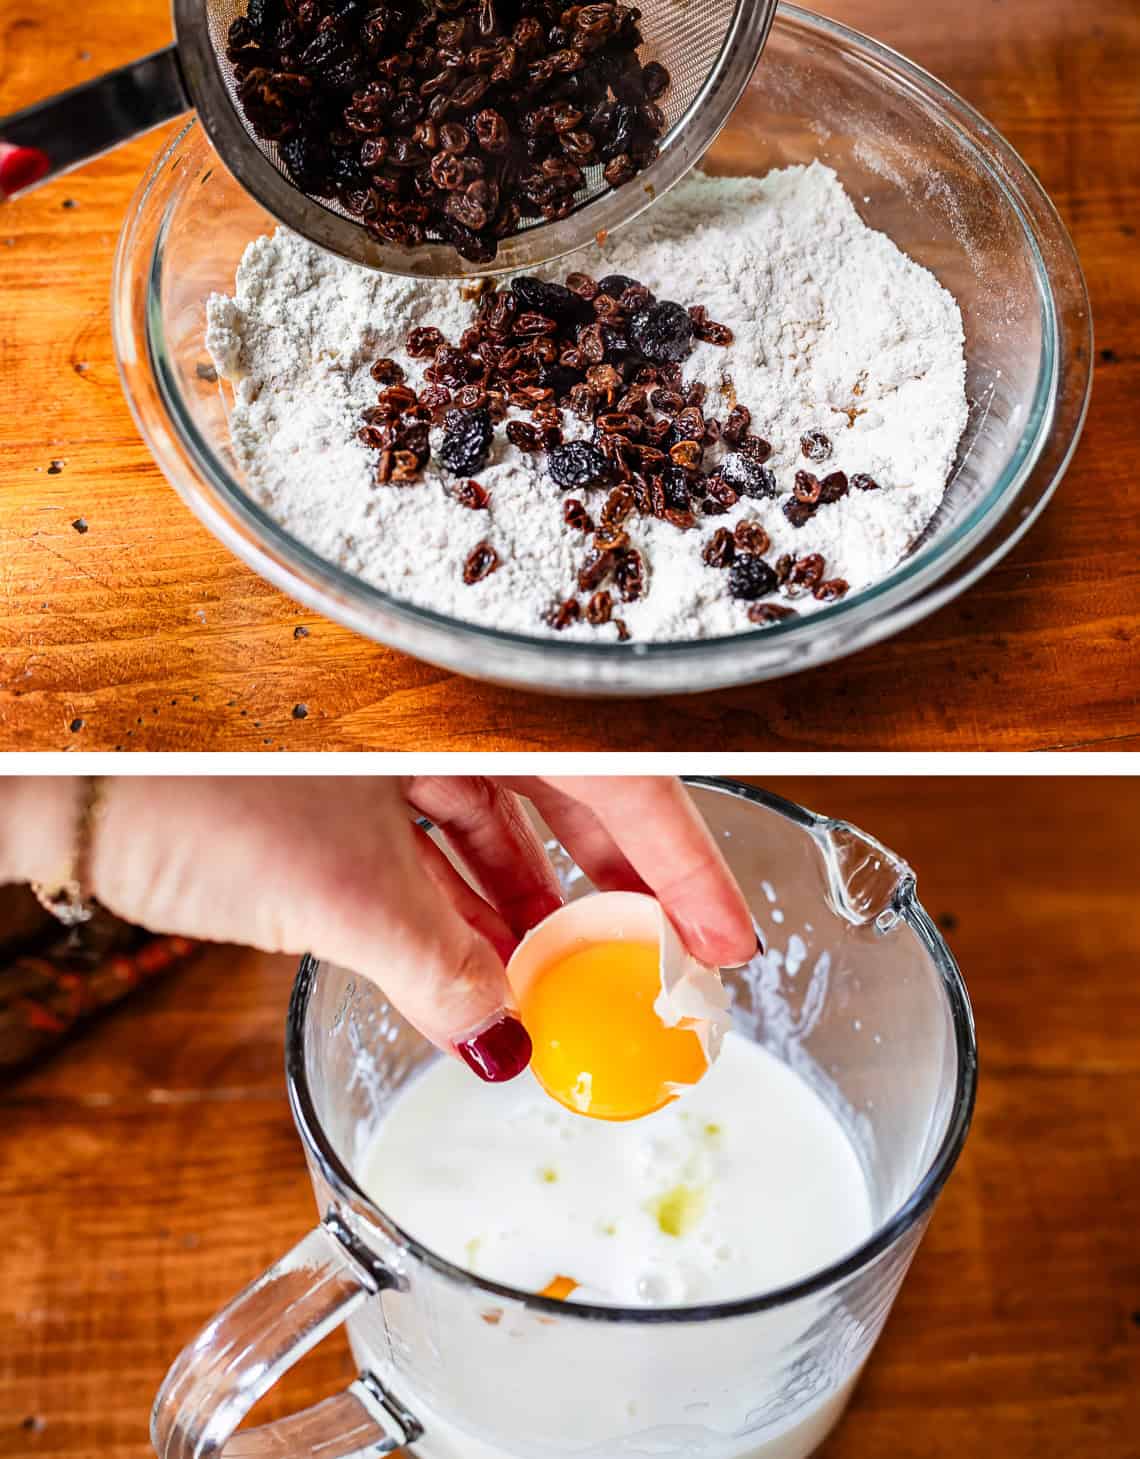
In a measuring cup, add the buttermilk plus an egg and one egg yolk (Be sure to save that egg white for something else!!! That precious white has got to be worth $2 in 2025!! 🤣) Whisk it all together.

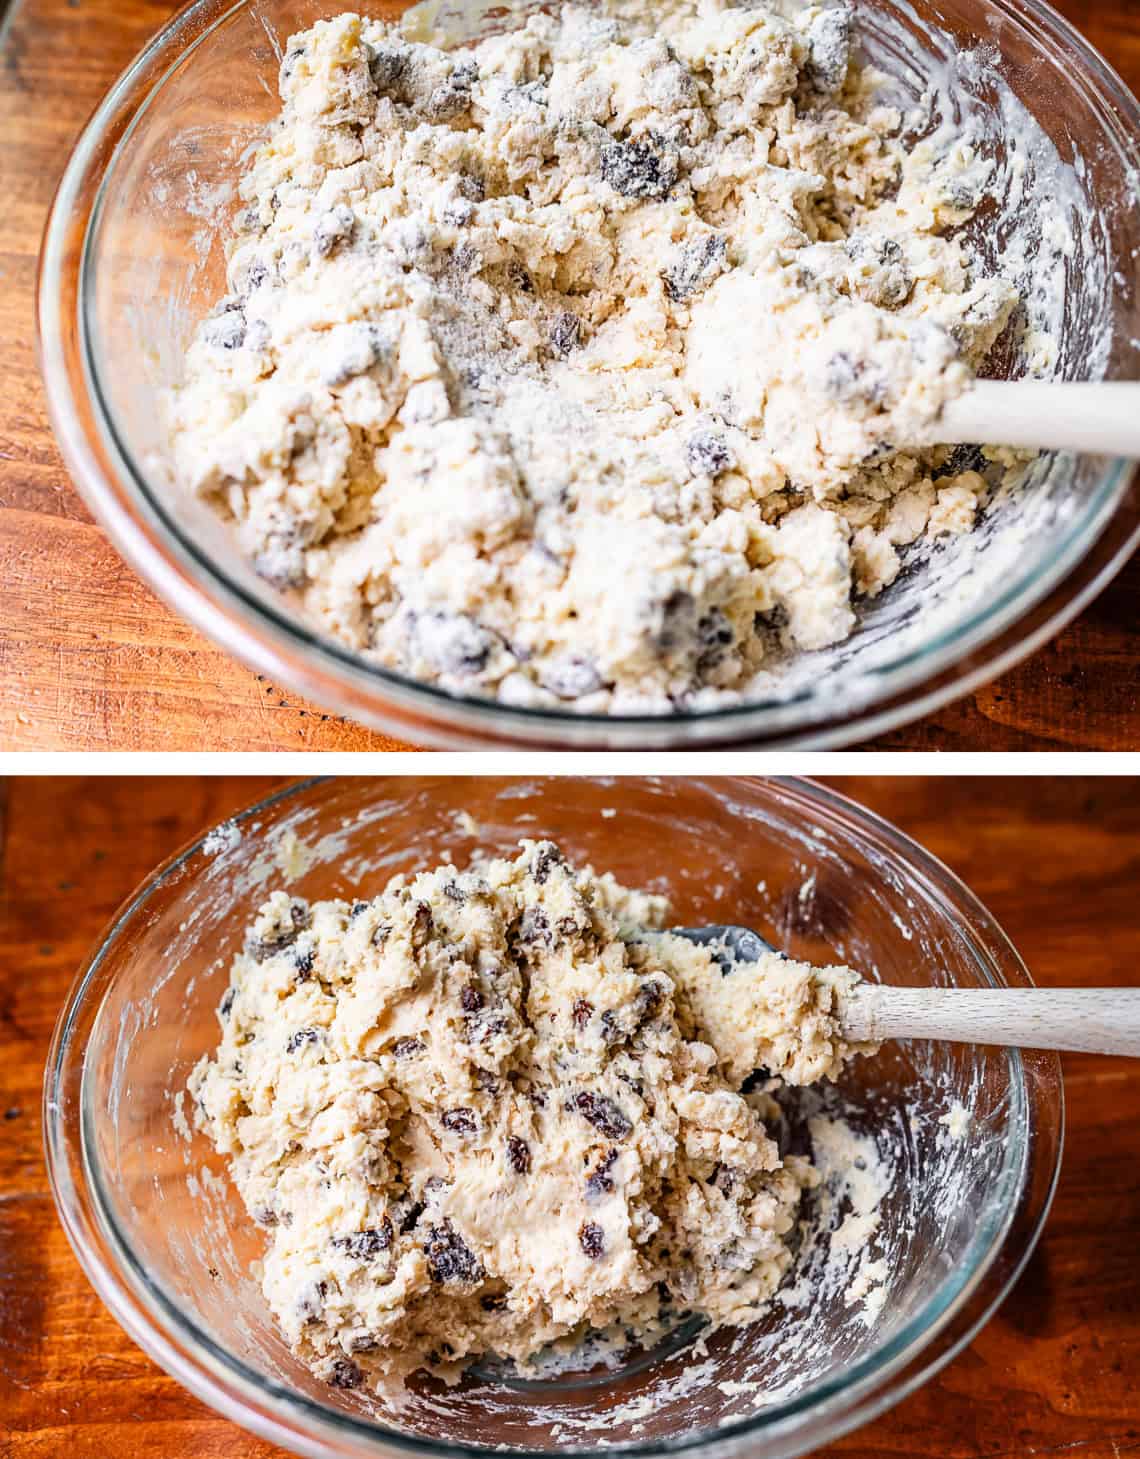
Pour the liquid into the flour mixture and use a rubber spatula to just barely gently combine it. Don’t over mix! No kneading! that’s one of the beauties of this recipe. NO ELBOW GREASE at all whatsoever, hallelujah.
Now transfer to a floured surface just for a minute, and okay fine I lied. We are going to knead it once. Maybe twice. Sometimes when I’m ultra lazy I just sprinkle on some extra flour and do this right in the bowl.
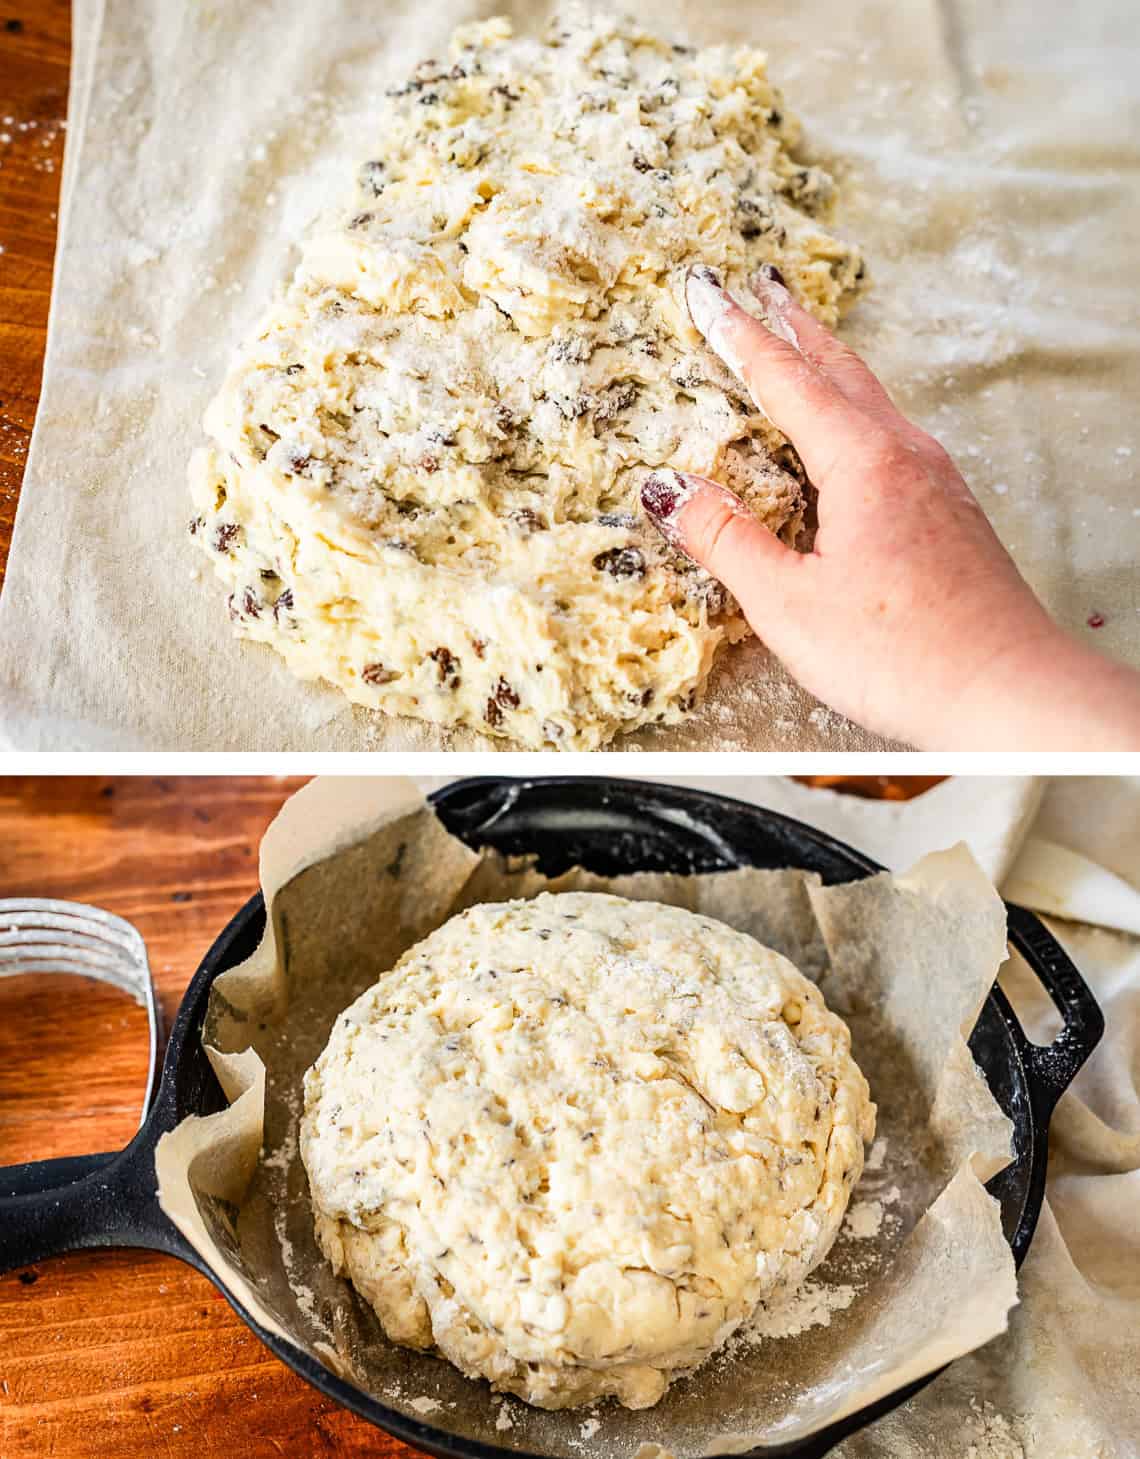
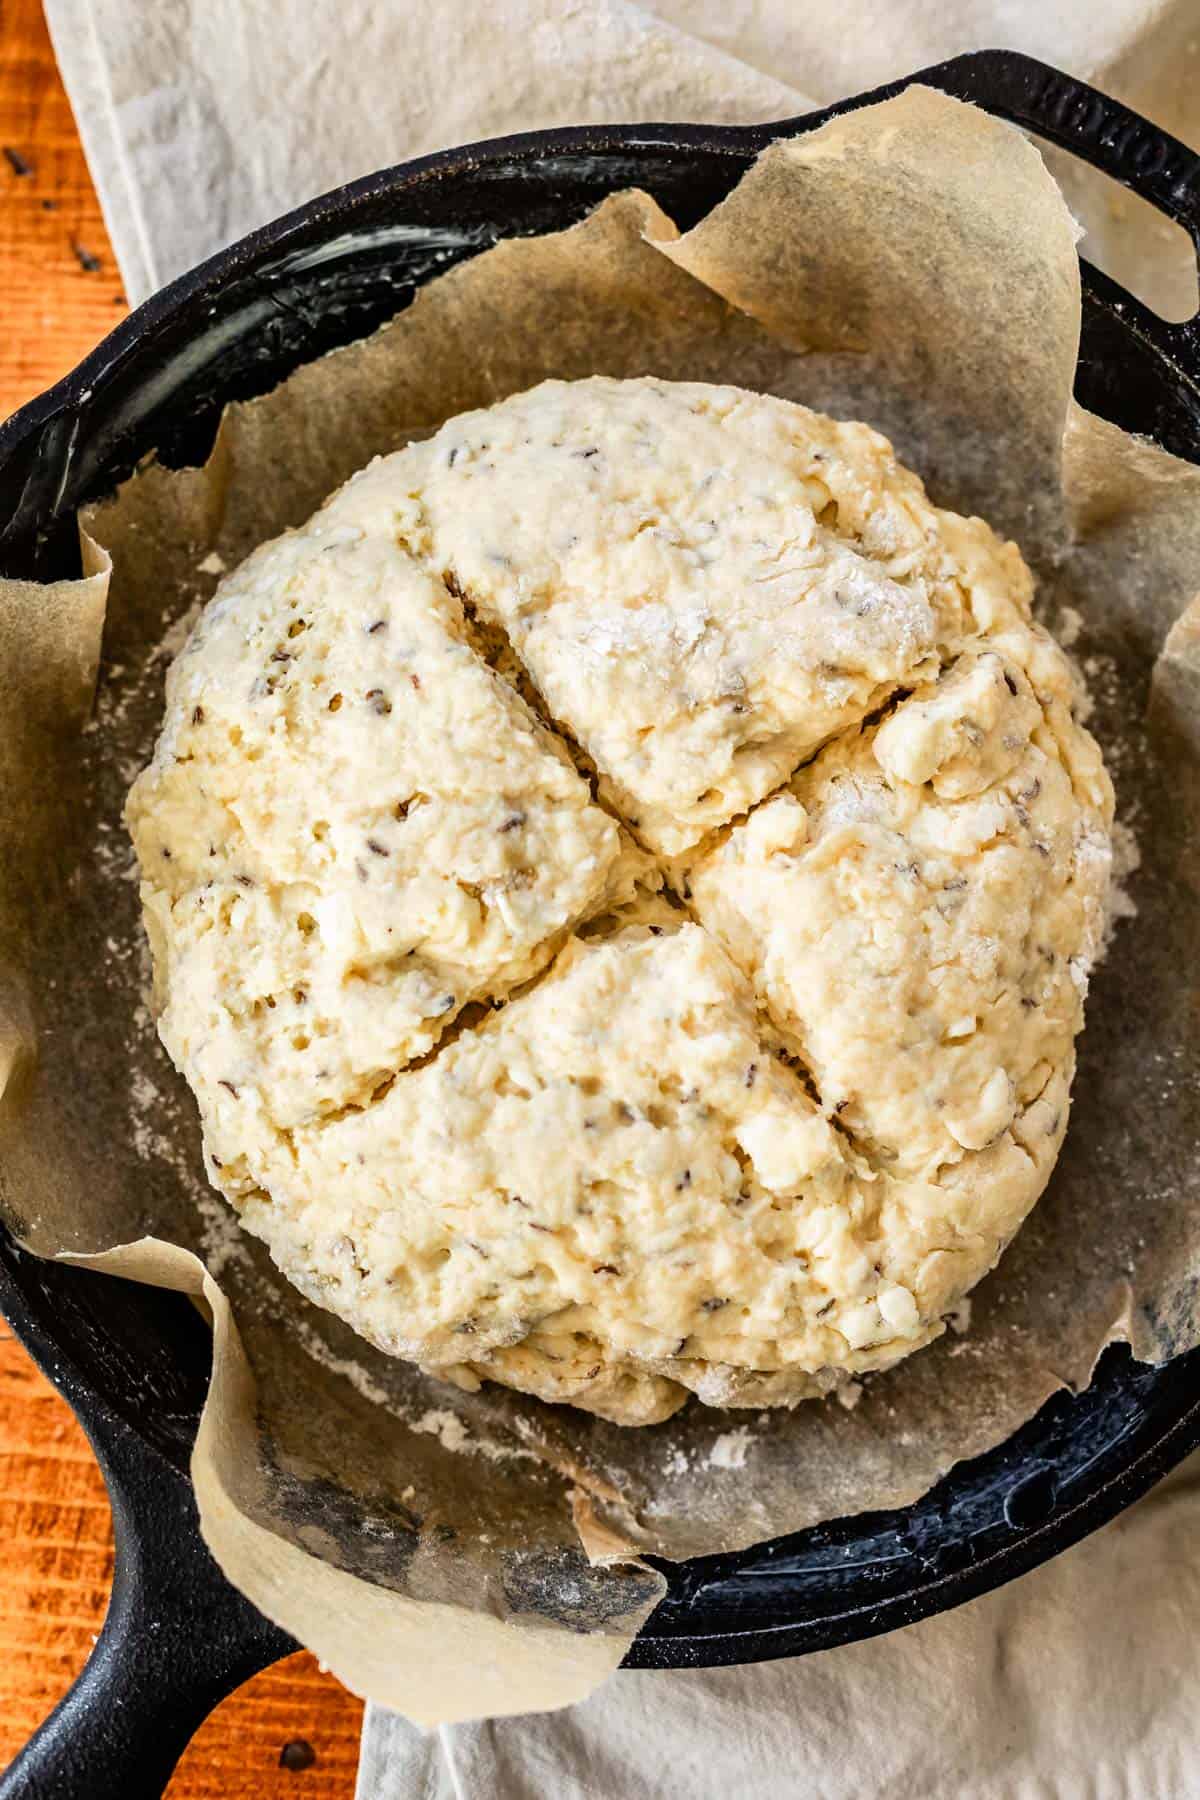
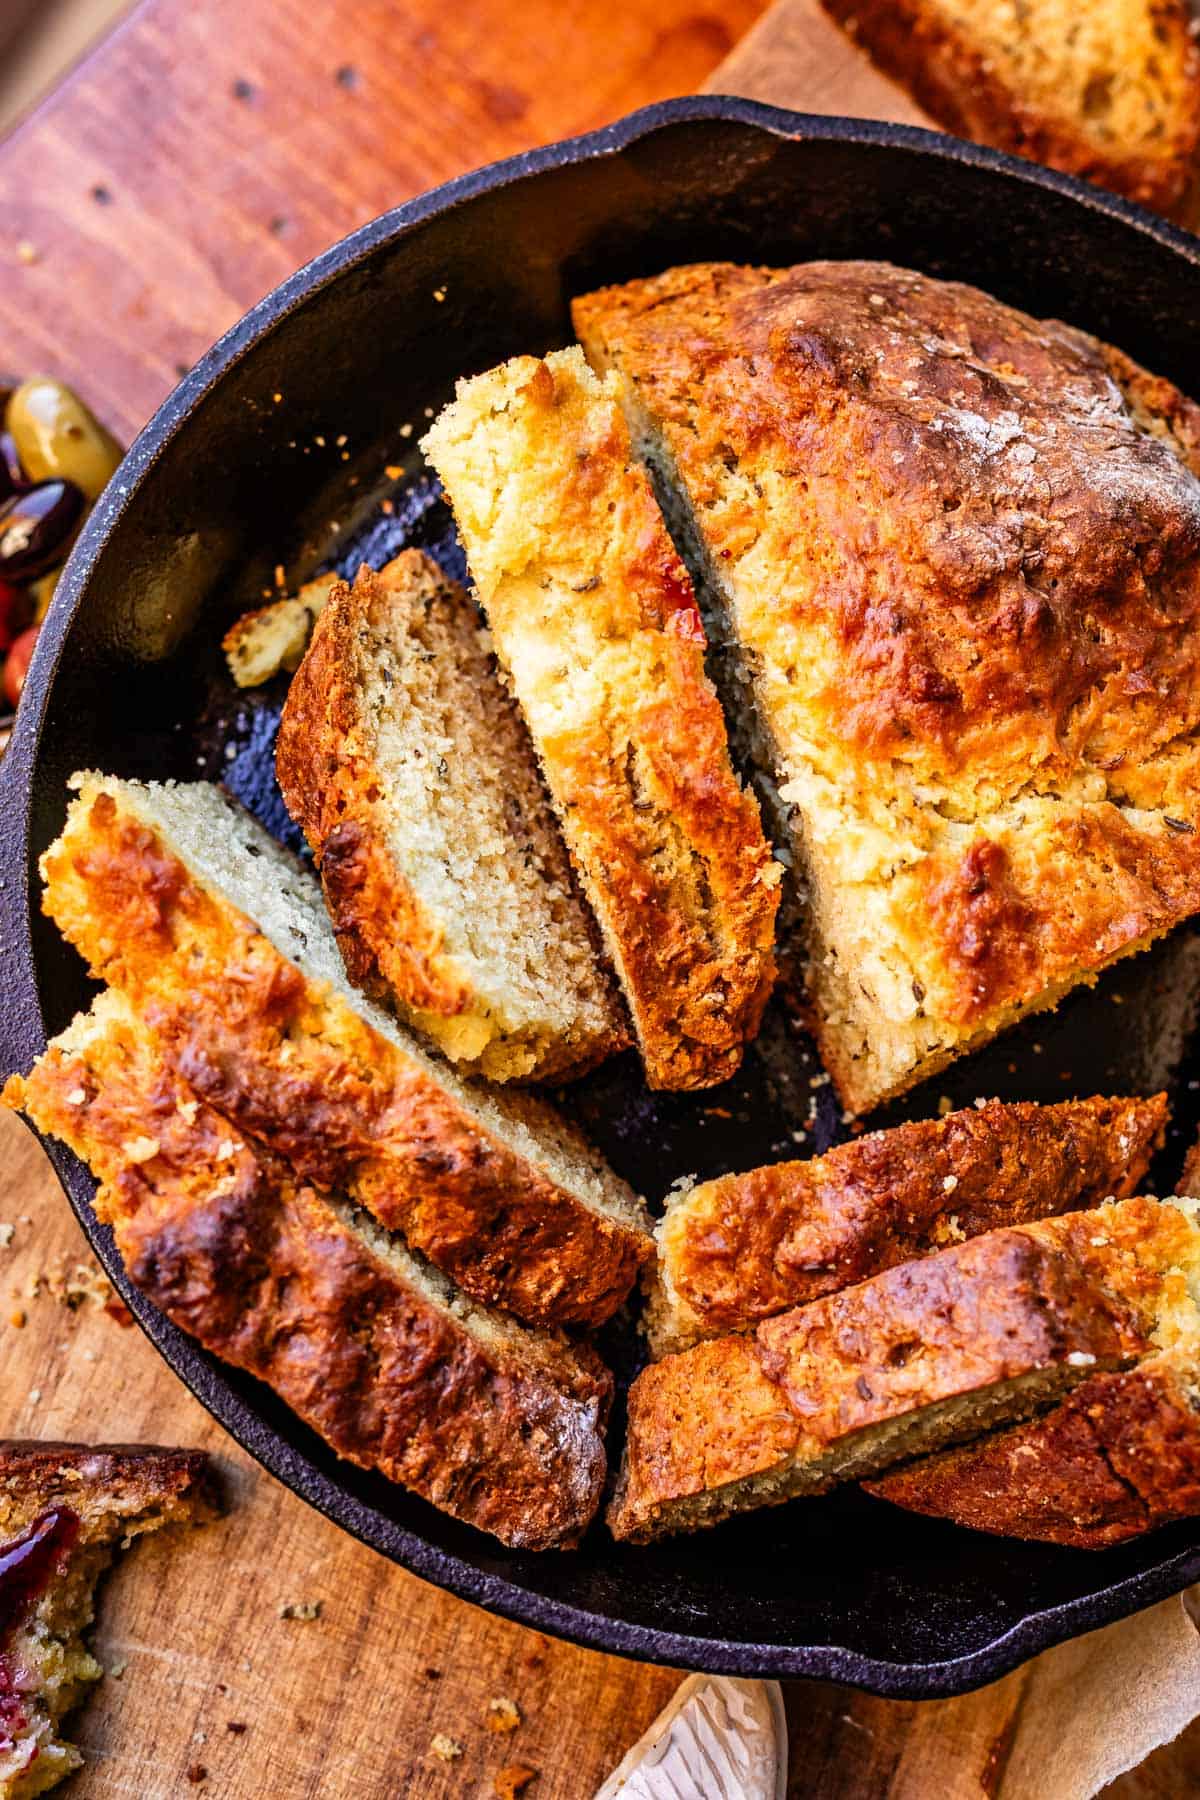
Transfer to a well buttered cast iron skillet, or one lined with parchment paper. You can also make this on a baking sheet, a 8×8 pan, or an 8 inch cake pan will also work. It so forgiving!
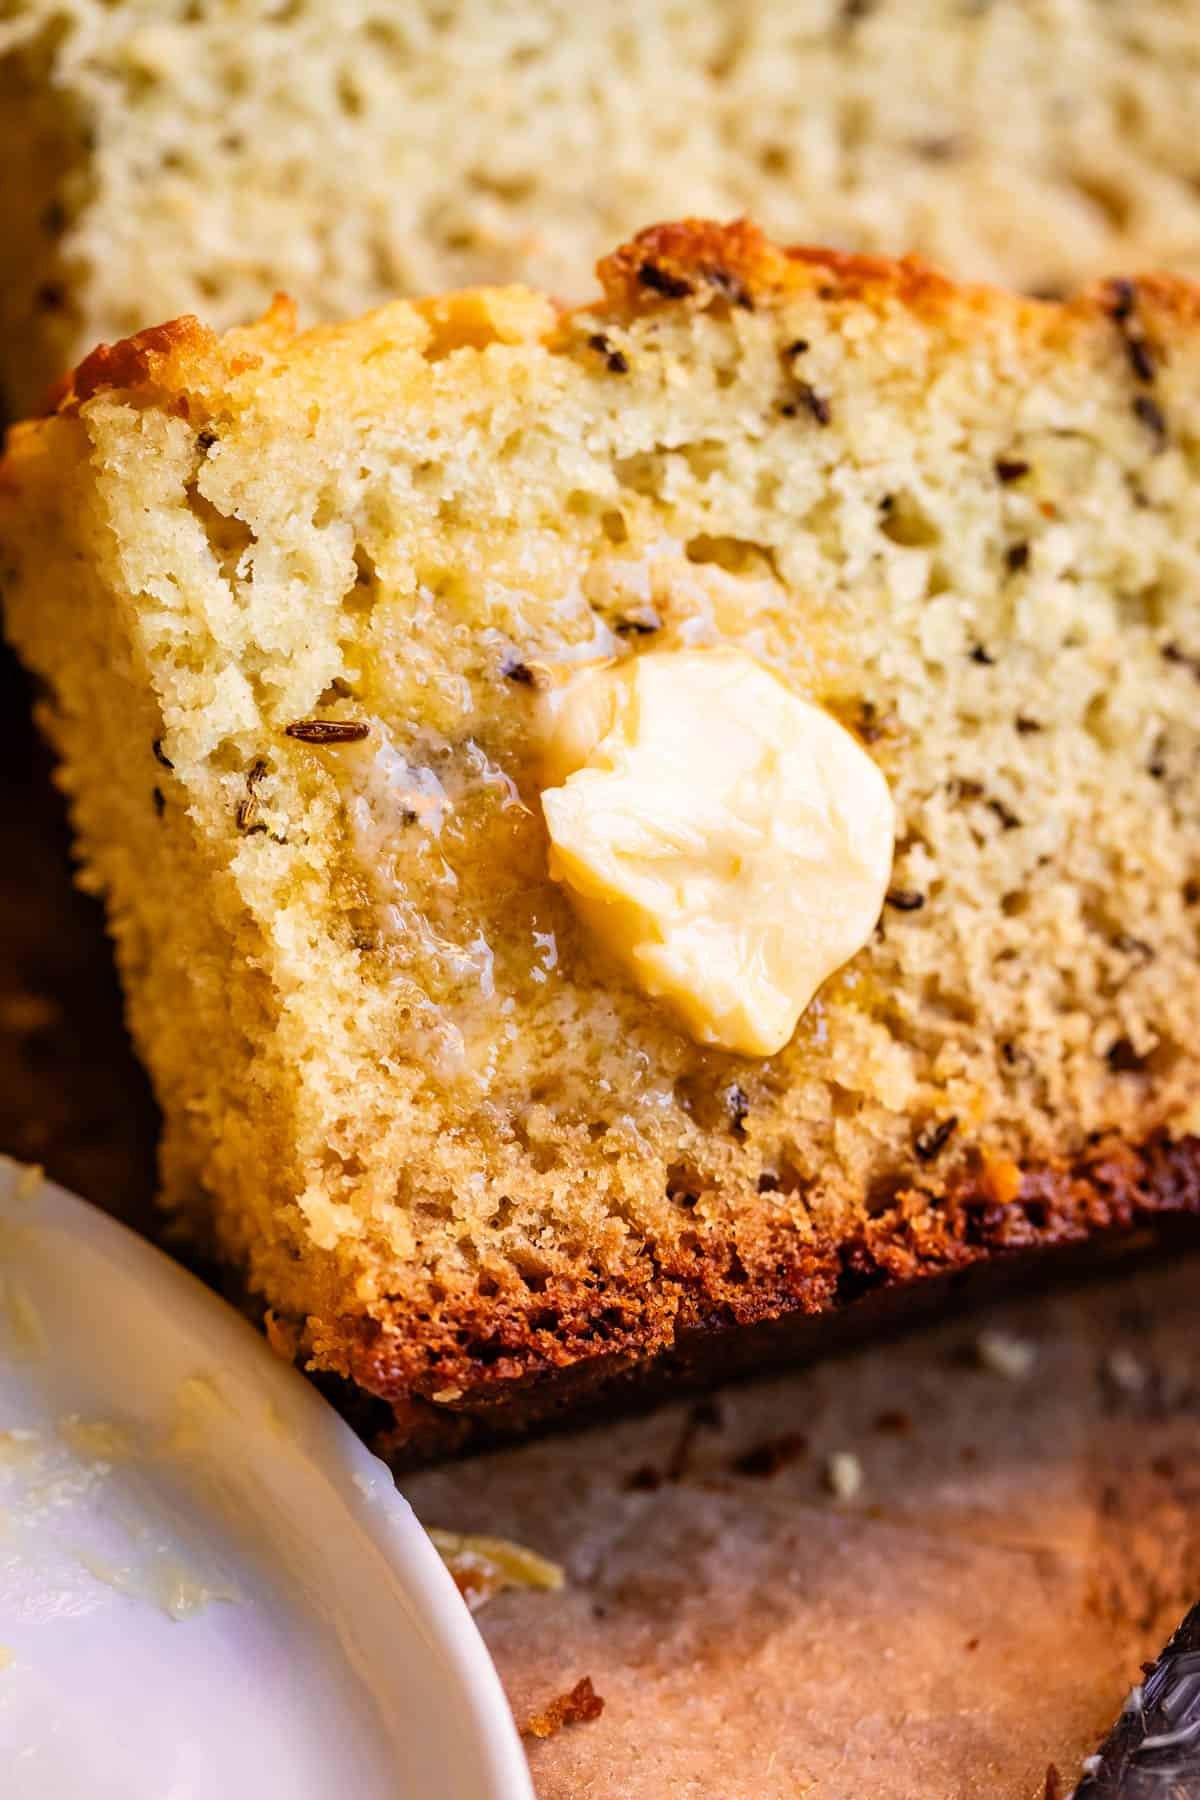
This loaf here looks a little different, there are no raisins in it. I added caraway seed on this test instead. It was a great savory version!
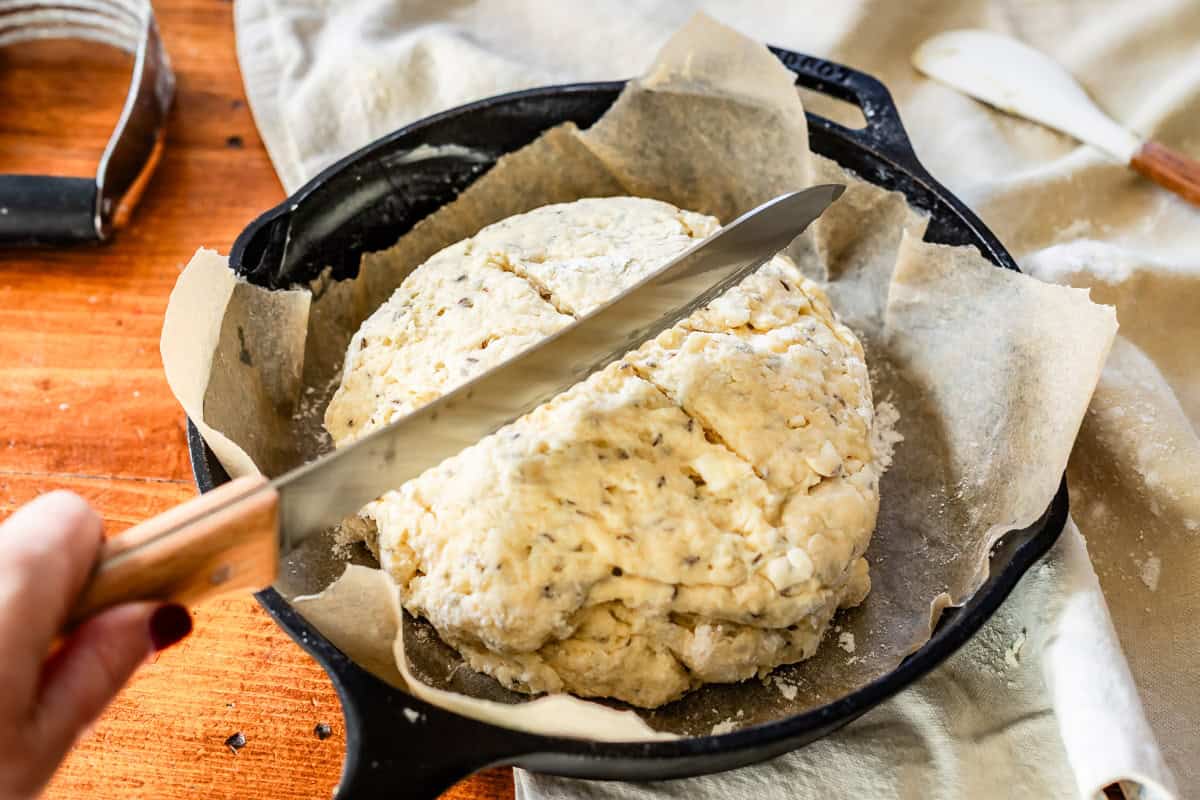
Now it’s time to cut. We cut this cross in the top to let the devil out in the steam. True story in Ireland! It helps cook the center of the bread too :)
She’s ready for the oven! We are cooking this bread just like biscuits. Super high temperature, 425°. It helps the baking soda to rise the bread!
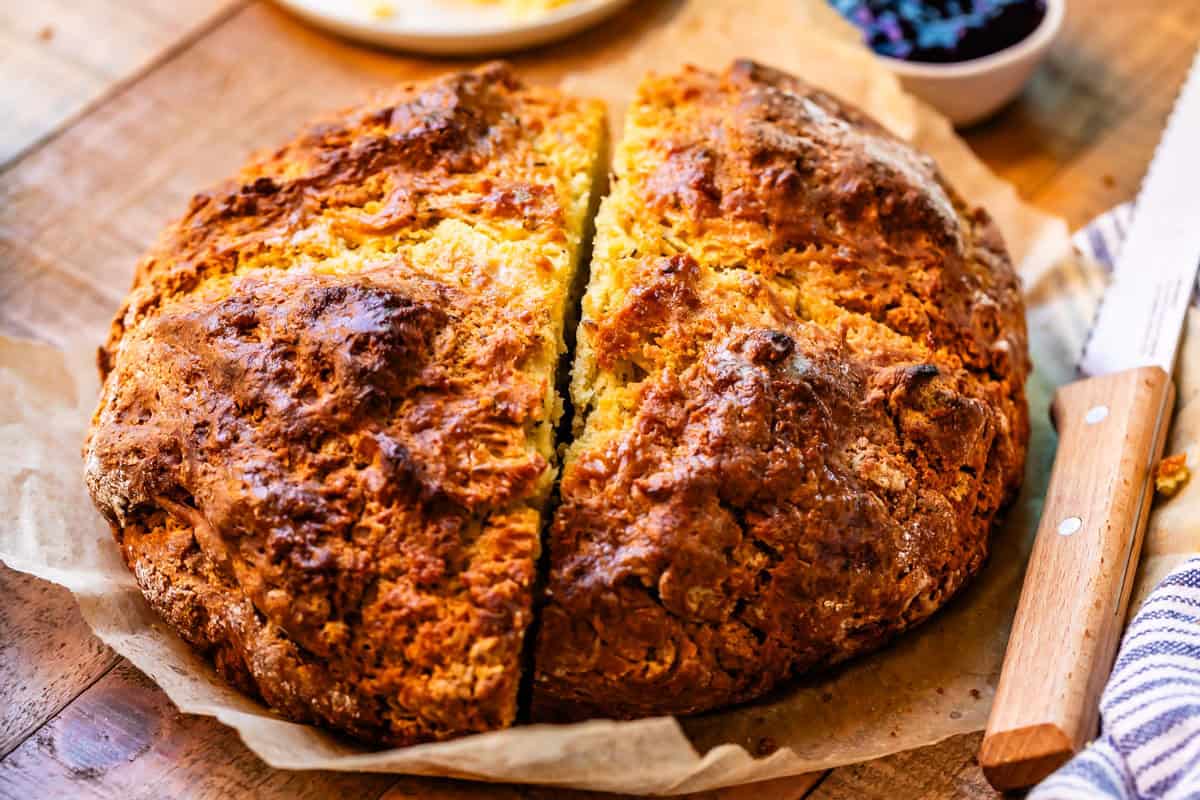
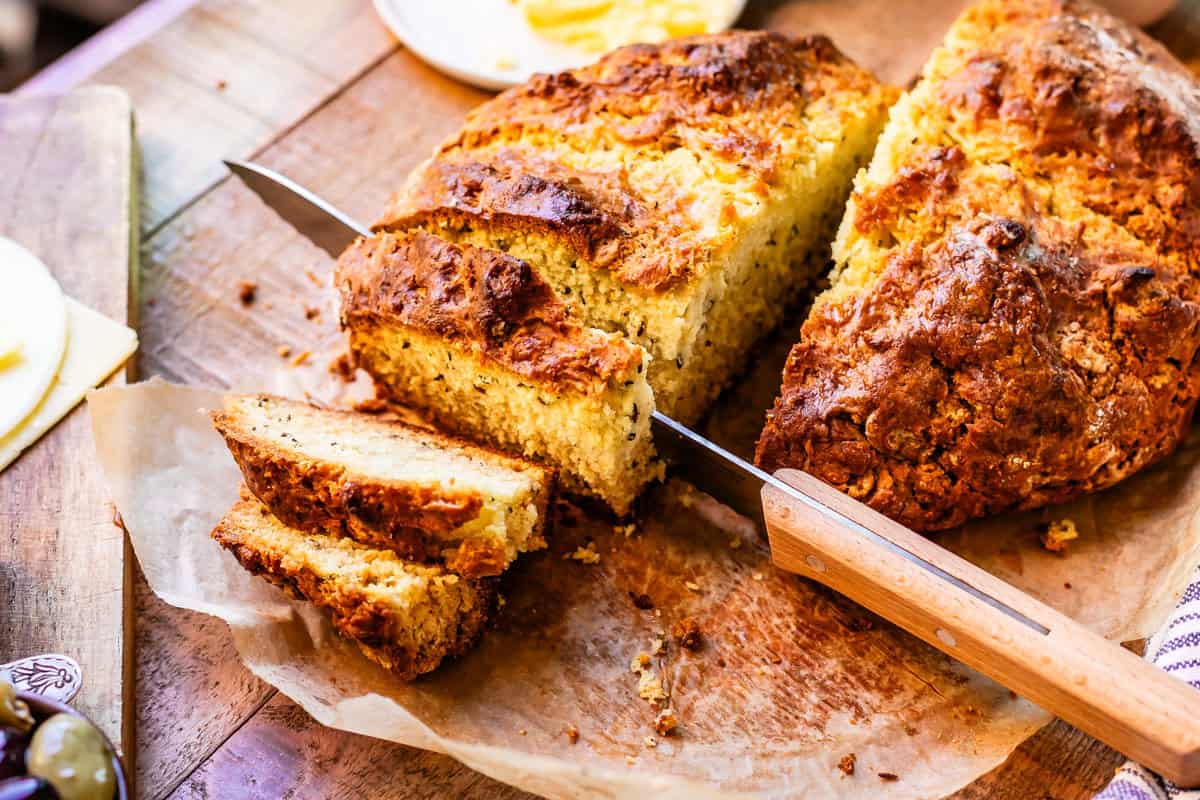
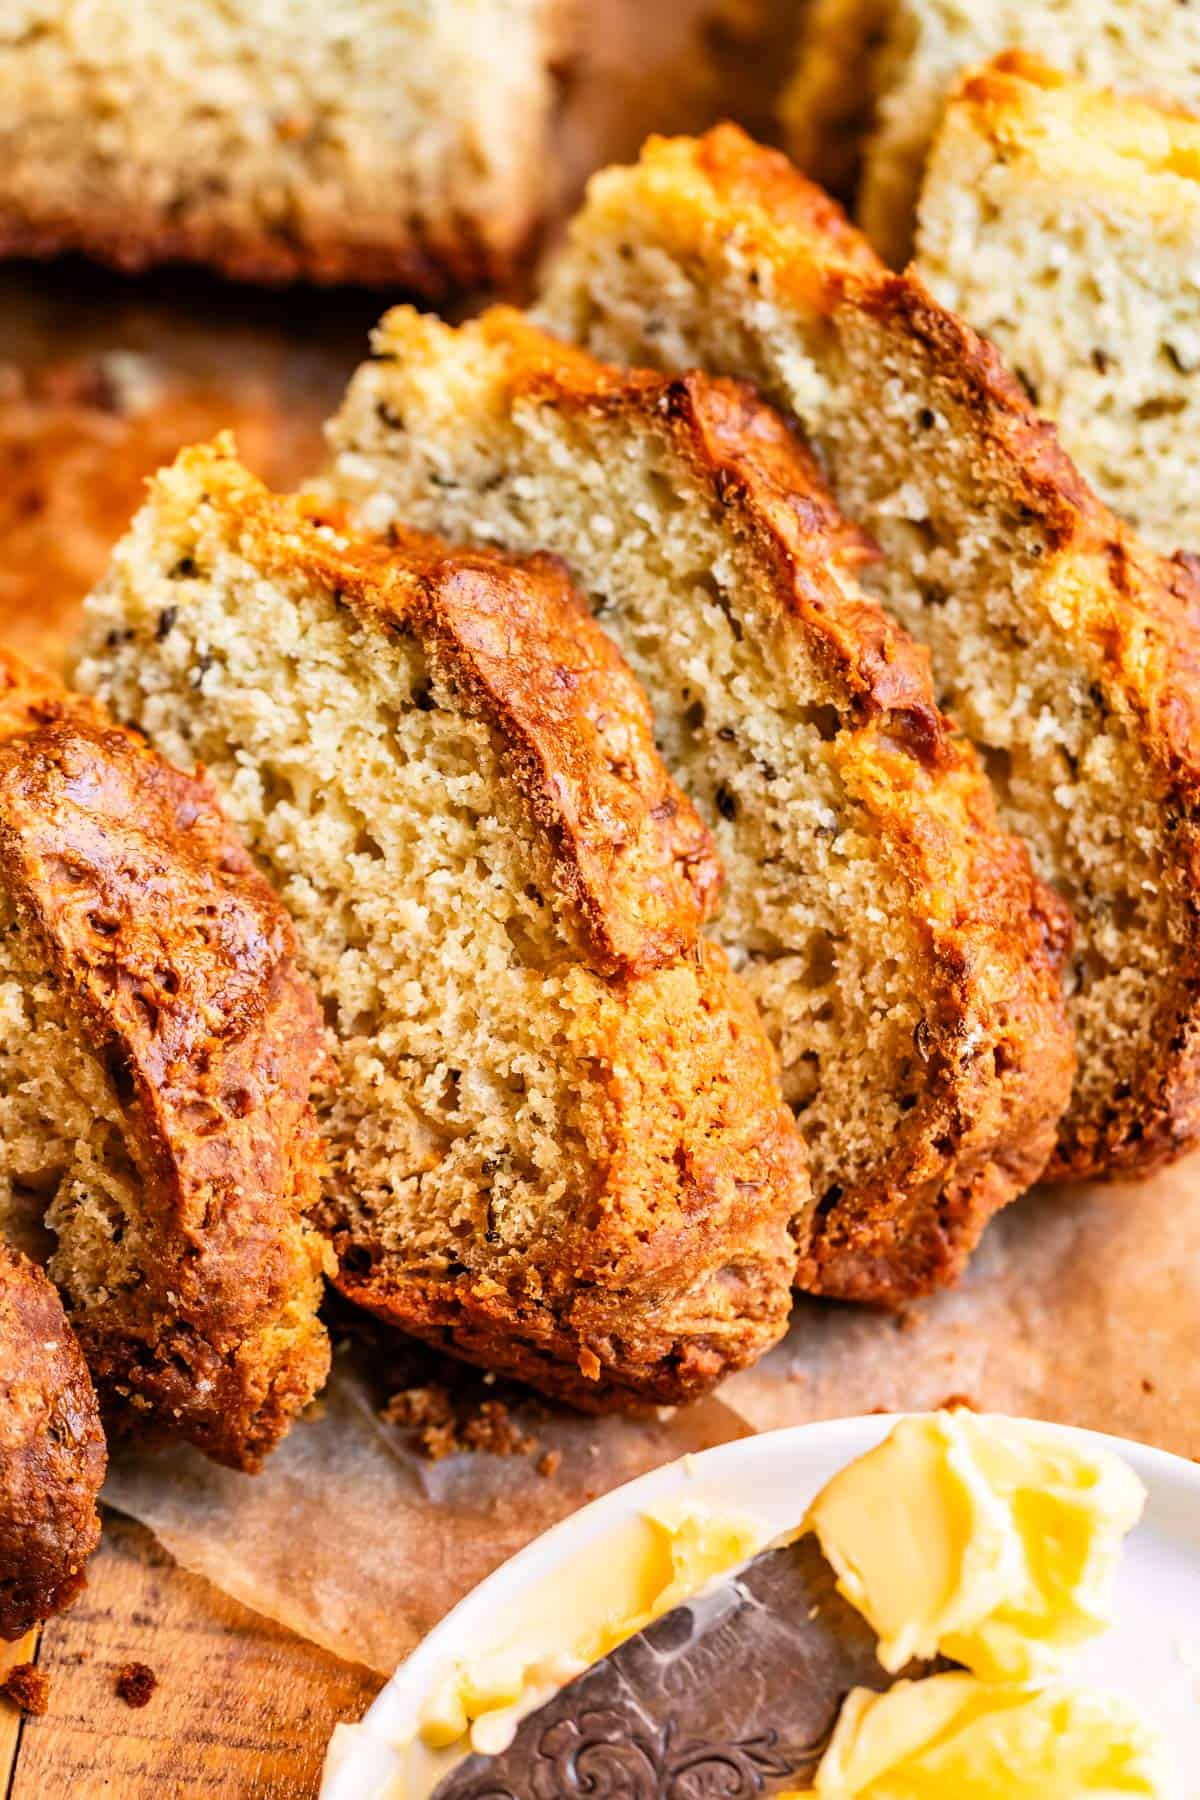
Don’t forget to brush the top with more melted butter for that irresistible golden finish when it is done baking.
I like to slice it in half, then cut into smaller slices.
How do I know when the bread is done?
Your soda bread is done when a skewer inserted to the center comes out completely dry and batter free. I always double check with an instant read thermometer though. The center of the bread should reach 180 degrees F. You can also try tapping the bottom of the bread to see if it sounds hollow.
Why did my Irish soda bread fall apart?
Eep, did you add too much flour? I recommend using the “fluff and scoop” method: fluff up your flour with a spoon, then scoop the flour into your measuring cup lightly without packing it down. Then level it off. The second problem could be too much kneading. Don’t knead this bread much! Just use a rubber spatula to bring it together, and then knead a couple times until it’s shapely, and that’s it.
Why is my soda bread soggy in the middle?
Did you forget to slash a deep cross into the top? It’s not just a decoration, or for letting the fairies out. Cutting those lines serves the purpose of letting steam escape from the center of your bread. Make sure that you’re cutting deeply, at least an inch or two into the top of the bread. Don’t be shy!
Irish soda bread substitutions and variations
Irish soda bread is a great base recipe that is fun to mess around with. Try these other versions!
- Throw in 1 and 1/2 cups of chocolate chips instead of raisins! (or you can try white chocolate, or butterscotch, or peanut butter chips??)
- Add ½ cup each of shredded sharp cheddar and crumbled, cooked bacon. YUM this would be so good.
- Try a cup of chopped dried apricots with some orange zest.
Serving ideas
Irish soda bread can be eaten for breakfast, lunch and dinner, if you’re like me lately, and have several test loaves sitting in the kitchen and you are feeling incredibly lazy. But for most normal people who don’t have terrible grazing habits, it’s eaten as a snack, with a hot cup of tea, or served with a meal like Corned Beef and Cabbage. You really can’t go wrong as long as a toaster and soft butter are involved.
Should Irish soda bread be warmed?
Um, unequivocally YES. Non-negotiable. Toast it, broil it, pan-fry it, microwave will do. Warm up a slice, slather in butter, and you’re golden.
How to store Irish soda bread
Like most good bread, Irish soda bread is best on the first day, but it’s still good for 2-3 days after making it. It should be kept covered on the counter.
If you’d like to freeze your bread for later, you can freeze the whole loaf or slices. Just make sure they’re in ziplock or airtight containers to keep them fresh. They’ll last for 2-3 months. Let thaw on the counter.
Frequently asked questions
The traditional recipe for Irish soda bread only calls for four ingredients: flour, salt, baking soda, and buttermilk. However, today Irish soda bread usually calls for sugar (mine does!) and even contains sweet mix-ins like currants, raisins, and more. It’s lightly sweet, but not a dessert.
In Ireland, Irish soda bread may be called a variety of different names, including farl, wheaten bread, soda bread, and brown bread. The American version is generally sweeter and uses all white flour, rather than whole wheat flour.
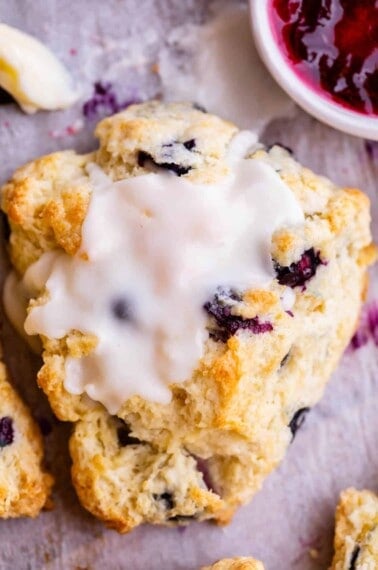
Irish soda bread has a very mild flavor, similar to a biscuit. In fact, the ingredients are almost identical to those found in many biscuit recipes. Like a biscuit, Irish soda bread is great with giant glugs of butter and jam. No need to hold back here friends.
When someone says “I made bread!” you probably think of yeast bread. Yeast breads are often crusty on the outside, soft on the inside, and chewy. Irish soda bread has the consistency of a biscuit (or British scone). It’s tender, and pieces can be broken off rather than torn off.
More Irish recipes
Is it St. Patrick’s Day yet?? Here are more Irish-inspired recipes to get you in the mood for “Leprechaun Day” as my 5-year-old calls it:
- Corned Beef and Cabbage Recipe >> made in the oven or the slow cooker! A perfect cozy dinner for St. Patrick’s Day or anytime you’re craving comfort food.
- Roasted Red Potatoes >> ok so maybe this recipe isn’t from Ireland, but it’s one of the best ways to eat potatoes
- Horseradish Sauce >> you have GOT to make this to serve with corned beef and cabbage
- Shamrock Shake >>not super traditional, but it’s green! And has the best smooth & creamy mint flavor and makes a perfect easy dessert
- The Best Scone Recipe I’ve Ever Made >> a wonderful teatime treat
- Roasted Sweet Potatoes and Brussels Sprouts >> Brussels sprouts are a very popular vegetable in Ireland–combine them with sweet potatoes and you have a winning combination
- Irish Stew from The Irishman’s Wife
- Traditional Irish Colcannon from Small Town Woman
- Irish Bangers and Mash from Christina´s Cucina
I posted this recipe way back in 2012, a few months after I started this blog! Here is the old photo. It’s not half bad?? Could be worse anyway 🤣 PS we still use those napkins on the regular and I’m realizing now how faded they are. Time flies my friends!

Irish Soda Bread with Buttermilk
Ingredients
- 4 cups sifted all purpose flour, spooned into the cup and leveled
- 1/3 cup granulated sugar
- 1 and 1/2 teaspoons baking soda, make sure it's fresh and not out of date
- 2 teaspoons kosher salt, (or use 1.25 teaspoons of table salt)
- 2 tablespoons cold butter
- 1/4 cup vegetable oil, I used light olive oil
- 1 and 1/2 cups buttermilk
- 1 large egg
- 1 large egg yolk
- 1 and 1/2 cups zante currants, or raisins, or dried cherries (optional)
Instructions
- Preheat the oven to 425 degrees F.
- Plump the raisins. (this step is optional) Bring a small pot of water to boil. Once boiling, turn off the heat, and add 1 and 1/2 cups raisins (or whatever dried fruit). Cover with a lid and let the raisins sit in the boiling water for about 10 minutes. When they are nice and plump, drain the raisins in the colander and let them drip dry for a bit.
- Sift the flour: Spoon flour into a one-cup measuring cup and use a knife to level off the top. Add the flour to a mesh strainer set over a large bowl. Stir until the flour is sifted through. Repeat until you have 4 cups of sifted flour in the bowl.
- Make the dough: Add 1/3 cup sugar, 1 and 1/2 teaspoons baking soda, and 2 teaspoons kosher salt to the flour. Use less salt if you don't have kosher salt.
- Use a pastry cutter to cut 2 tablespoons cold butter into the flour mixture.
- Add 1/4 cup oil in increments. Drizzle a bit over the flour, then use the pastry cutter to cut it in. Drizzle a little more and repeat. Do not smooth the dough with a spoon or try to blend it together. Use a cutting motion. Use a table knife if you don't have a pastry cutter.
- Add raisins. Once the raisins have plumped and drained a bit, add the raisins to the flour mixture and toss them in the flour. (raisins are optional)
- In a glass measuring cup, add 1 and 1/2 cups buttermilk. Add in 1 egg and 1 egg yolk. Whisk together until smooth.
- Add liquid. Add the buttermilk mixture to the flour and combine with a rubber spatula, folding gently until it comes together.
- Turn the mixture onto a floured surface and knead just once or twice to bring it together. Shape into a 6 or 7 inch circle. Shaggy dough is good, don't knead too much.
- Spread 1/2 tablespoon butter all over a cast iron skillet, or on the bottom of a baking sheet. Or you can line either pan with parchment paper.
- Transfer the loaf to the greased baking sheet or cast iron skillet. Use a serrated knife to slice an X into the top, about an inch deep, or even more. Don't be shy. This allows heat to penetrate to the center of the bread.
- Bake at 425 for 20 minutes, then cover the top loosely with foil, to prevent over browning. Continue baking for another 30-35 minutes. The total bake time should be 50-60 minutes. A skewer inserted into the center of the bread should come out with no wet batter. An instant read thermometer should reach 180 degrees F. The bottom of the bread will sound hollow when tapped.
- Brush the top of the bread with melted butter. Let cool on a wire rack before slicing. Spread with butter and jam! Or leave it plain and eat with Corned Beef and Cabbage and a side of Horseradish Sauce. SO. GOOD.


Excellent. I wouldn’t change a thing.
I used a cast iron skillet, with parchment paper. I rubbed butter on the parchment paper.soaking the raisins is a must.
I’m so happy to hear this Erin! I will be making this tomorrow for the holiday, too. Thank you so much for your review, super helpful and kind. Happy St. Patrick’s Day!
Even though my husband doesn’t remember loving soda before his accident, I still make it for him on his birthday!
This was better than my recipe, more moist and definitely richer. Thank you for another wonderful recipe!
Love it Annette, thanks so much for sharing. That’s really special you still make it on your husband’s birthday.
How far ahead of time can you make this?
Hi Danielle! Irish soda bread is best on the day you make it, but it’s still good for 2-3 days. You can store it on the counter in a leftover container (unsliced is best) or wrap it in a couple layers of plastic wrap or tinfoil. You can also freeze your bread, sliced or unsliced, for 2-3 months. Just heat sliced up in the toaster or microwave when you’re ready to eat.
I had never made Irish Soda Bread before, but it was St Patrick’s Day, I found your corned beef recipe (which also turned out scrumptious) and I saw the bread recipe so I tried it. It was off the chart yummy! I did include raisins AND chopped dried apricots. I also used “Blood Orange” flavored olive oil for the oil. So much for dieting!!!
Dieting schmieting right Nancy! haha. I’m SO happy you enjoyed your St. Patrick’s Day feast using my recipes!! That makes me so happy. LOVE the idea of dried apricots in the bread, did you “plump” them as well? So fun. Thanks for commenting!
I made this recipe for Irish soda bread this year. Omg, it was amazing. My mother had been telling her family all about how amazing this bread came out. I used raisins in my bread and my youngest even said I dont like raisins but with it in this bread, I really loved the raisins in it.
I made one change after reading many different reviews from different Irish soda breads and this one. I saw in some people’s reviews and in the recipes its said to be careful because the middle can become dry. So I know you used oil to help this, which i used but I also added 1 package of vanilla pudding during the dry ingredients stage and whisked it together. It came out so amazing!!
Thanks for and making recipe! This will become a stable in my home!
I’m so happy you loved this bread Kat! LOVE the idea of the pudding mix! It has modified cornstarch in it which definitely helps with moistness and softness. Thank you for sharing your review and your tip, this is so fun!
Wondering why 1 egg plus 1 yoke
Can you use 2 eggs with a good outcome?
I know I’ve made this recipe multiple times in the past when it was called Irish Soda Bread with Browned Butter and we loved it- I see that it’s been updated and that there are a few comments referring to browned butter but it doesn’t seem to be anywhere in the recipe anymore. Is there a reason the recipe changed and could I get a copy of the old one?
Hi Lucy! Yes I changed the recipe! I like the new one better and it’s a little more traditional :) but I’m glad you’re loving the old one too!
Here it is!
2 1/2 cups flour
3 tablespoons brown sugar
1 teaspoon baking soda
1 teaspoon baking powder
1/2 teaspoon salt
4 1/2 tablespoons butter (a little more than 1/2 stick)
scant 3/4 cup buttermilk
1 egg
melted butter, for brushing
Combine flour, sugar, baking soda, baking powder and salt in large bowl and set aside.
Place 4 1/2 tablespoons butter in a small saucepan and turn the heat to medium or medium low. Allow the butter to reach a simmer, stirring occasionally. Continue to simmer for about 5 minutes, or until the butter reaches a golden brown color. Sometimes it is so foamy that it’s hard to see what the color is, so spoon some into a white dish to see what it looks like. As soon as it is the right color, transfer the browned butter to a small mixing bowl so that it stops the cooking process. Let the browned butter cool for a couple minutes (so that you don’t cook the egg when you add it.)
Add the buttermilk and egg to the browned butter and whisk it into submission. The butter might start to solidify a bit, but that is okay, just whisk it all together. Add the mixture to the flour mixture and combine with a spoon. (If your butter is too solid, use a pastry cutter.) Knead the dough with your hands for a minute to make sure that it has all come together and is smooth.
Shape into a round loaf, about 6 1/2 inches in diameter. Place on a greased cookie sheet, or use parchment paper. Cut an X shape about 1/2 inch deep through the loaf with a very sharp knife.
Bake at 375 for 30 to 35 minutes or until golden brown. Brush the top of the loaf with melted butter.
This bread was awesome!
I made it with a couple of additions: I like raisins so I threw some in; I also added some green. Ok, maybe a lot of green – think the color of a healthy lawn, except in bread form. But it was yummy, way better than grass!
Green bread is at least better than green pork chops :)
Do you have to brown the butter or can you just melt it???
You can melt it if you want, but the bread will not be quite as rich. Let me know how it turns out Ashley!!
I’m a sucker for a good bread recipe so this is right up my alley.
Joy and I are looking for the raisins. . . we can’t see them. It looks good even though you forgot them. Good addition with the butter. And the backfat story is funnnnyyyy!