


I used to be a total Apple Pie hater. It was always too mushy and bland. But no longer! I’ve found the perfect method to make the Best Homemade Apple Pie of your life! This classic recipe has a double crust (you won’t miss that crumble), a cooked filling for great texture and flavor, and is super easy to make from scratch. I’ll show you how! Originally published on November 16, 2011. UPDATE! Don’t miss the Dutch Apple Pie version of this recipe!
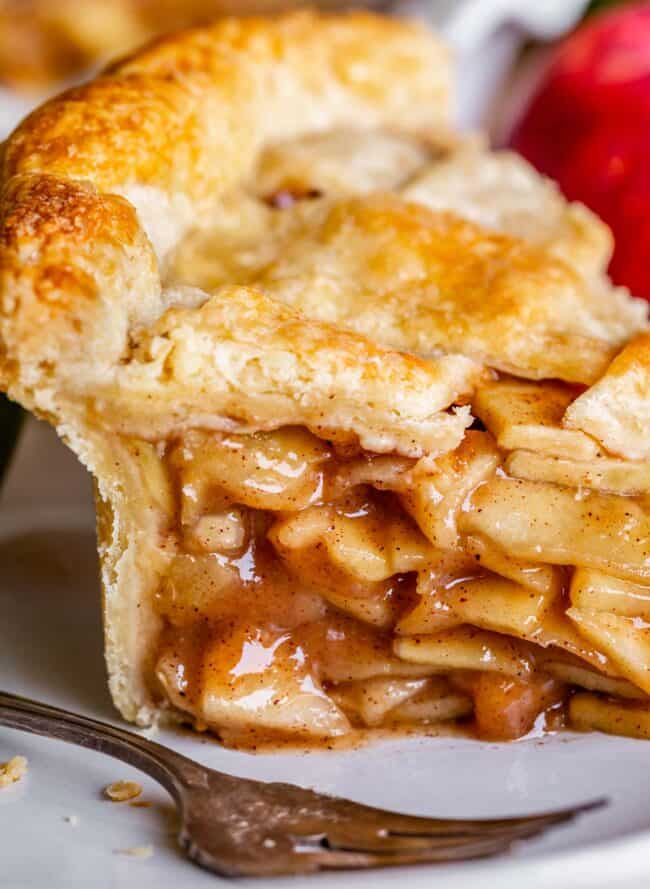
Table of Contents
- Homemade apple pie with a double crust
- Key ingredients
- What are the best apples for apple pie?
- How to make the best apple pie from scratch
- No more soggy crust
- How to keep pie crust from browning too fast?
- Make (and store) your pie filling ahead of time
- Does apple pie need to be refrigerated?
- How long does apple pie last?
- How to freeze apple pie filling
- Can you freeze an apple pie?
- The Best Homemade Apple Pie Recipe (No Soggy Bottom!) Recipe
- More apple desserts you will love!
How’s everyone’s October coming along? We finished summer off strong just last week with a streak of 97-degree days, of course. Totally normal here in Sacramento, but it seems to surprise us every year anyway. “The Target dollar section is telling me that it’s fall! What even is this 100-degree day??”
My brother sent me this tweet yesterday that said, “Why would I spend $5 on a bag of apples at the store when I can wear warm fall clothes in 88-degree weather and pay $36 for our family to pick them ourselves.” Ha! That got me. (Because it’s not as Instagrammable to take your family photos in the produce section at the grocery store??)
We did indeed head up to Apple Hill a couple of weeks ago. It’s a bunch of apple farms all next to each other, where you can pick your own apples, eat doughnuts, and pretend it’s not hot. We always buy a ridiculous amount of apple cider to boil down to make Caramel Apple Cider-Reduction Milkshakes. (We added a slice of today’s Apple Pie to the shake this time, too. HEAVEN.)
Homemade apple pie with a double crust
Naturally, we bought a ton of apples too. And I had so much fun testing pies to find my favorite one. To be perfectly honest, apple pie has never been a huge favorite of mine. There are just so many ways it can go wrong: mushy apples, undercooked apples (a worse problem, in my opinion), too much spice, not enough spice…
And, generally, I find that most apple pie recipes are just plain boring when it comes to flavor. I usually much prefer apple pie when it has a custard or a crumble of some kind, like in this classic Dutch Apple Pie or even this Apple Custard Pie with Cinnamon Streusel. But, I wanted to give a double-crust apple pie recipe a fair shot. So, I got to testing. The results had me reconsidering my feelings on this classic.
Featured Comment
“Absolutely worthy! Followed the pie crust recipe and apple pie filling to the letter. Delish!!! Thanks for the recipes.” – Bev
Key ingredients
- I like to use a mix of apples, tart, sweet, and somewhere-in-between, for the best flavor. I’ve found that Granny Smith-Gala-Golden Delicious is a great combo. Since the apples cook down considerably, you’ll need five pounds to start.
- I also use a combination of brown and granulated sugar, brown sugar for a deep caramel flavor, and granulated to keep the filling balanced.
- Add a little lemon (juice and zest) as you prep your apples, both to brighten the flavor and keep the apples from browning.
- I love the classic apple pie spice combo of cinnamon and nutmeg, but I also like a bit of cardamom (my favorite flavor to add to cinnamon desserts, even cinnamon rolls!) as a subtle, more complex complement.
What are the best apples for apple pie?
Technically, you can use almost any apple for apple pie, but I recommend using a mix of tart, sweet, and in-between varieties for the best flavor. I like Granny Smith, Gala, and Golden Delicious, but there are plenty of good combinations.
I would avoid using Red Delicious or McIntosh as your primary apple, though, because they tend to turn mealy and mushy when cooked. A few mixed in with firmer varieties are totally fine, but I wouldn’t build the whole pie around them.
How to make the best apple pie from scratch
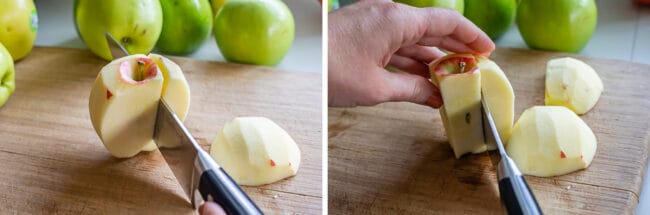
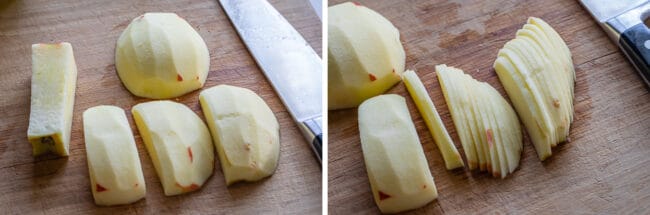
First, slice up your apples. Here’s how I slice my apples. You can use a mandolin if you want, but be sure to use a metal glove. Those suckers are sharp!
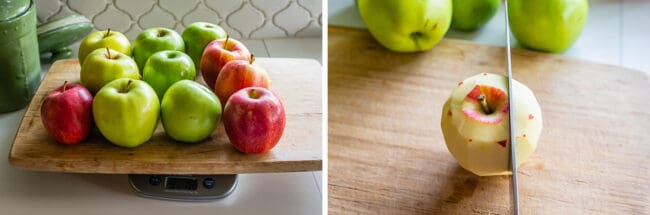
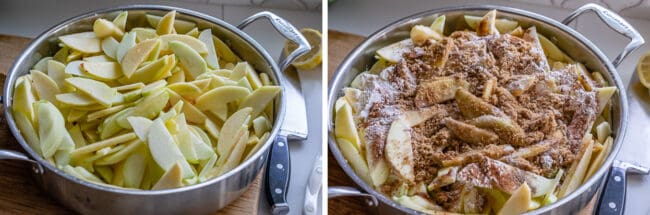
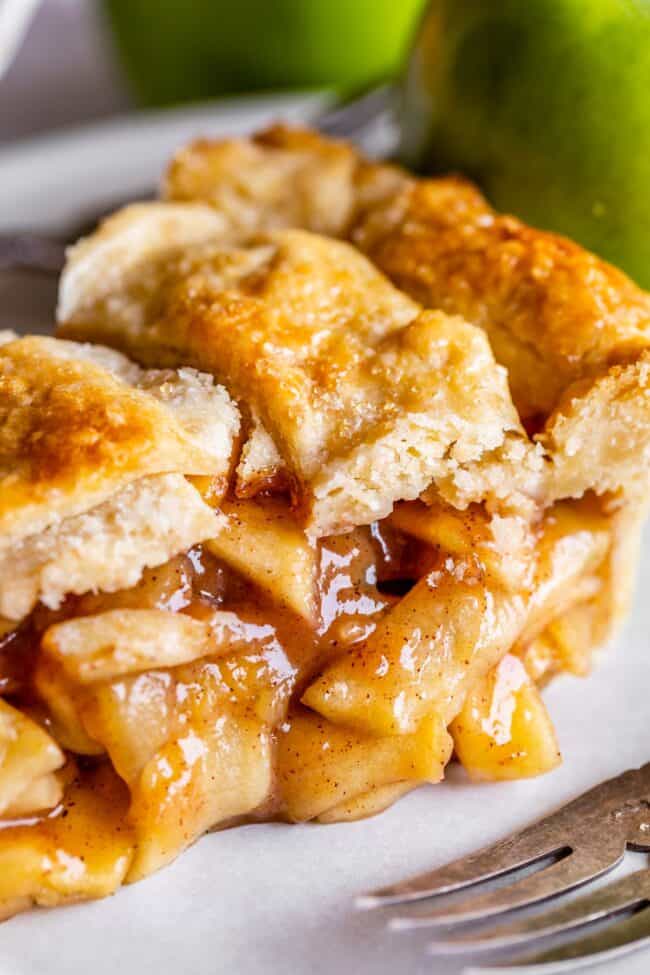
Then toss your sliced apples with the sugars, lemon, flour, spices, and vanilla. Then, cook them on the stove until the apples are translucent and fork-soft, but still holding their sliced shape.
As the apples cook, their pectin softens and helps thicken the filling, so you’re not just getting a puddle of apple juice soaking into your crust.
Let the filling cool before adding it to your homemade crust. And remember: if you’re using a solid top crust, make sure to cut 4-5 large slits to vent steam. This isn’t a problem if you’re making a lattice, since the gaps between the strips act as natural vents.
No more soggy crust
Ok, guys, now the main “success secret” to this apple pie: cooking the filling before it goes into the crust.
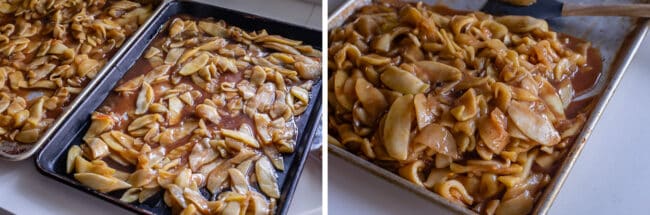
The cooked filling gives you a much more concentrated apple flavor and helps prevent a couple of classic apple-pie problems: undercooking the apples and a soggy bottom to your crust. Cooking the apples first not only zaps some of their moisture before they go into the pie, it also shrinks them so there’s much less settling as the pie bakes. That means less chance of another enemy of apple pie: the dreaded gap between the filling and top crust. Speaking of the crust…
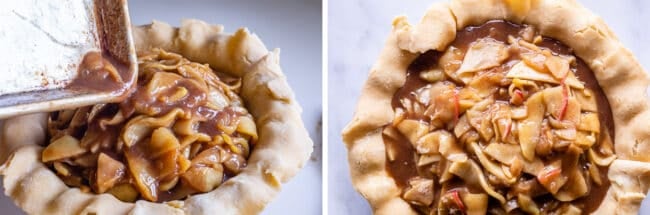
There are two elements to this pie: the filling and the crust. If your crust sucks, it doesn’t matter how great your filling is. There is a time and place for store bought crusts. This isn’t it. To help your pie be the best it can be, give it the buttery support (and flavor) of a flaky, homemade crust.
Pro-Tip: Whatever texture your apples have when you finish cooking them on the stove is essentially the texture they’ll have in the finished pie. You want them tender and translucent, but not applesauce-y, or “apple al dente,” as I like to call it. This is a huge reason why I prefer a cooked filling over adding raw apples straight to the crust.
Also, a few more things make a big difference here: don’t add butter to the filling (don’t worry, it’ll be in the crust), as it can dull the apple-y zing. Also, don’t rush the cooling process.
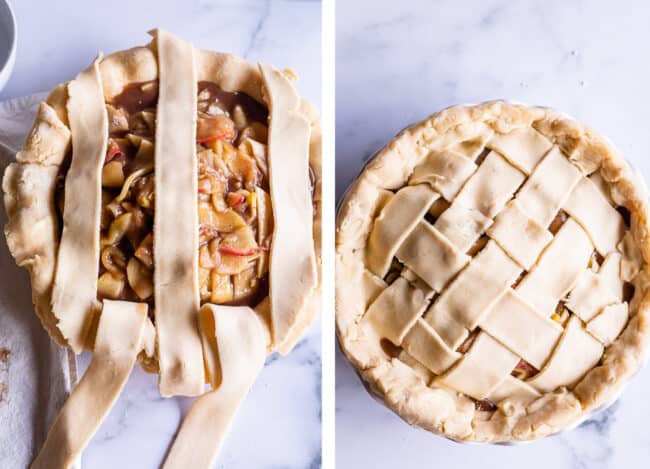
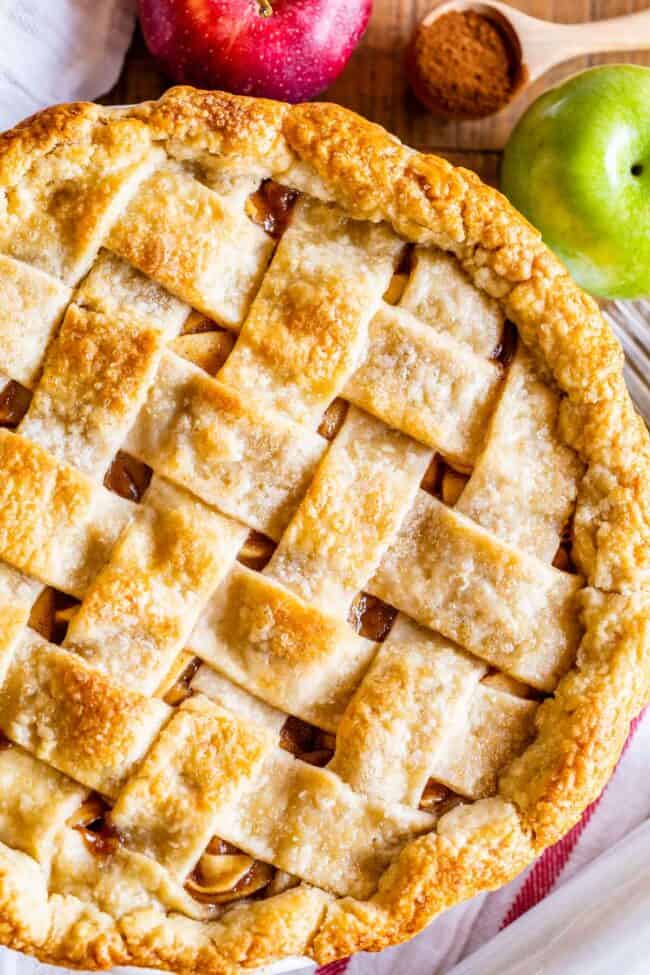
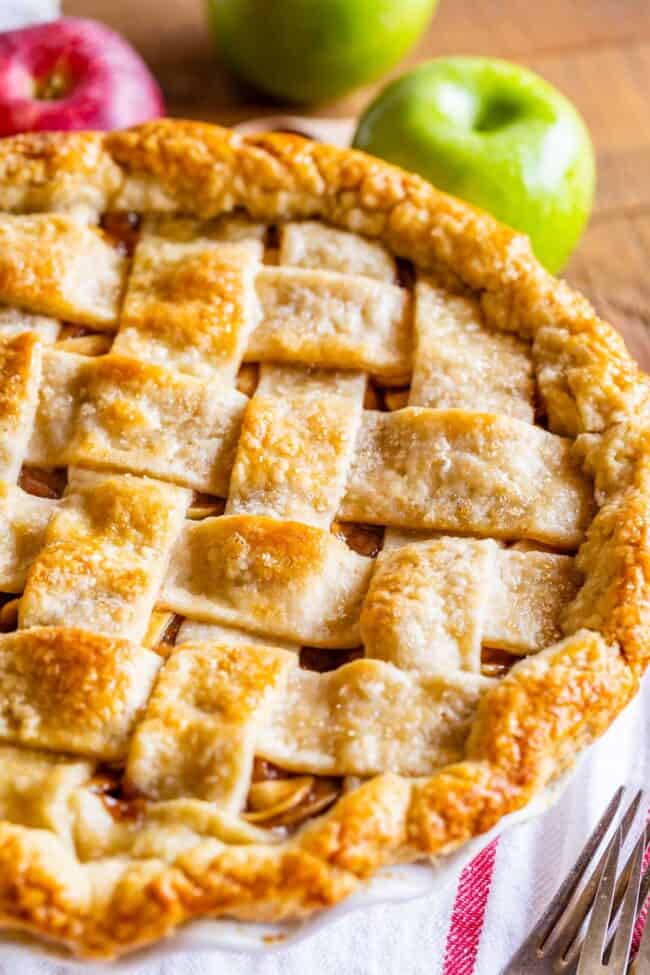
I topped my pie with a lattice crust. See my How to Make a Lattice Pie Crust post for all the details! But you can just use a whole crust and put it on top, no problem. Don’t forget to vent the top.
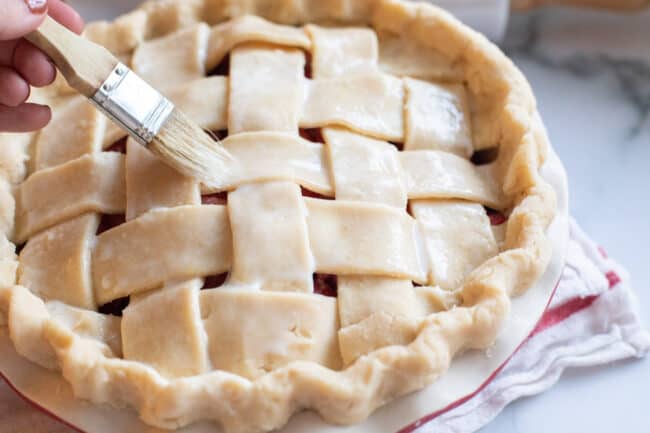
Brush with egg/milk and sprinkle with sugar before popping it in the oven.
How to tell when your pie is done
The nice thing about this recipe is that your apples are already cooked exactly how you want them. You only need to worry about getting the crust baked right. If you use raw apples, you’ll be sticking a fork in your pie to make sure they are tender.)
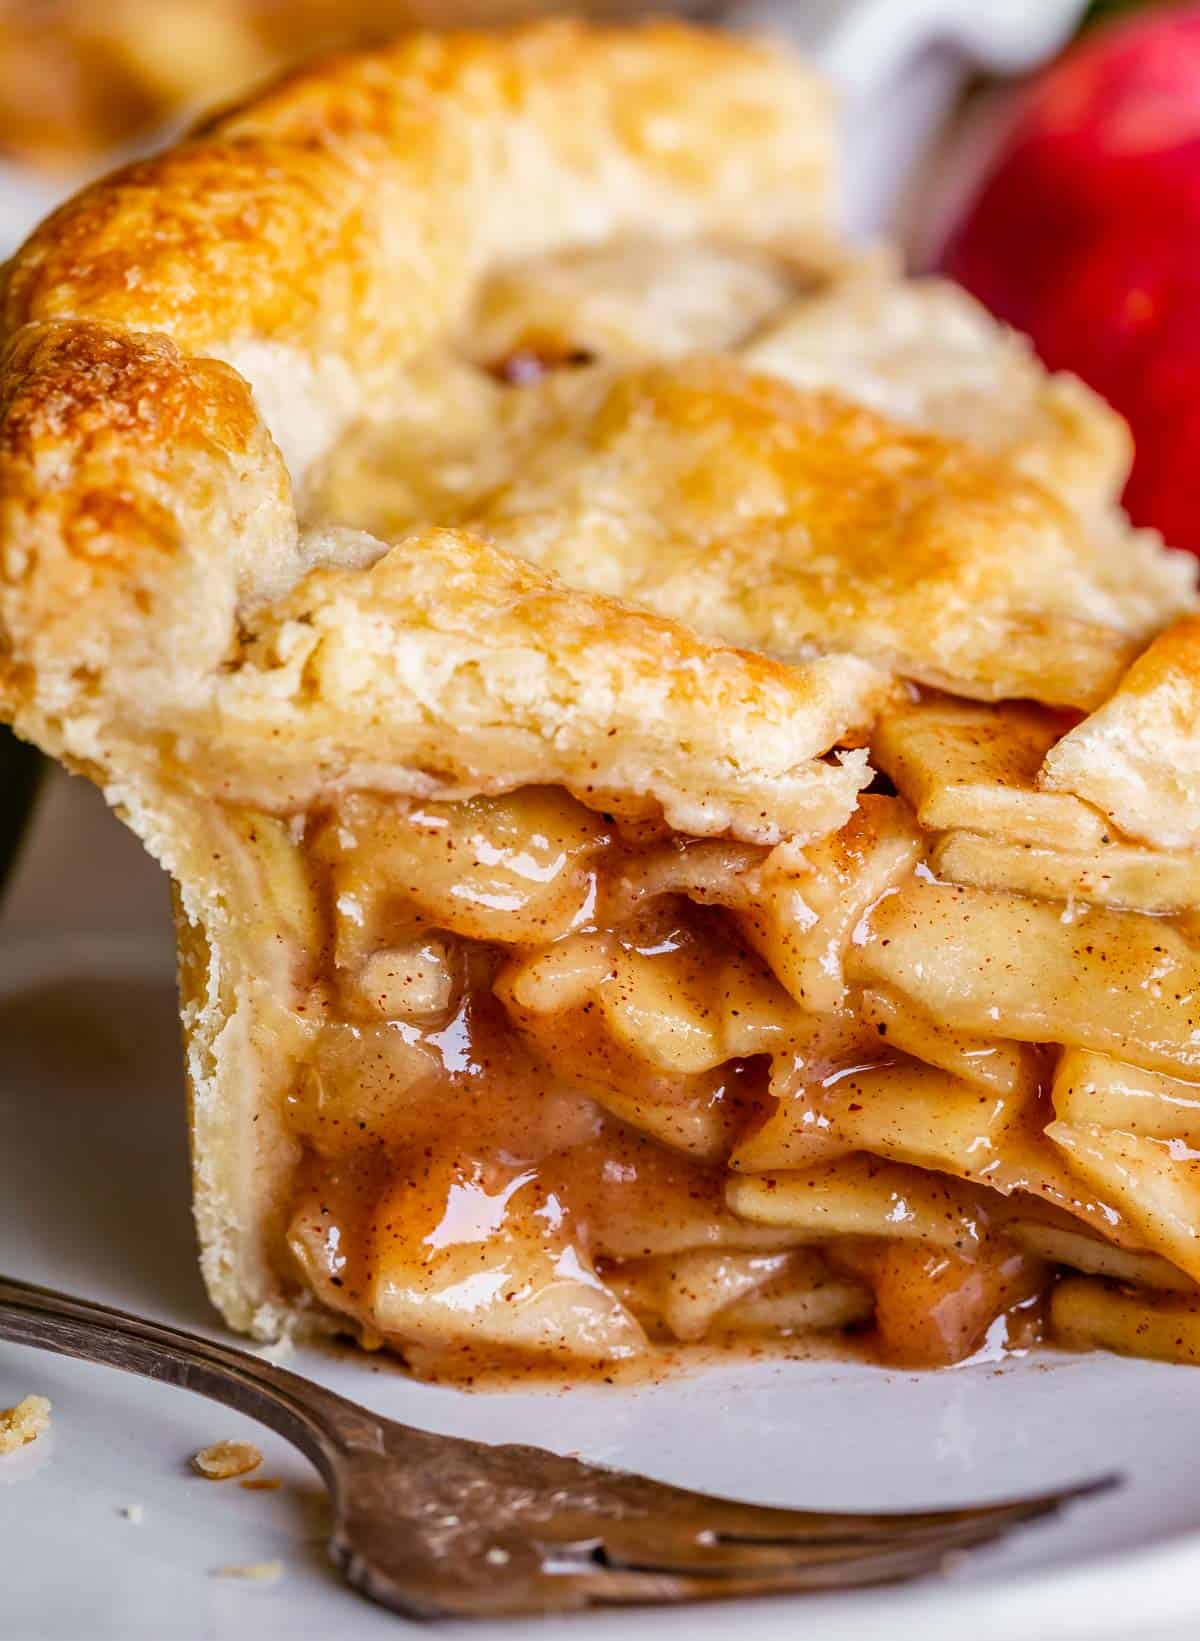
The pie is done when the edges of the crust are a deep golden brown, and the top of the pie (slitted crust or lattice) is just turning golden. When you cut into it. You can put it in the freezer to speed up the cooling process if you want.
How to keep pie crust from browning too fast?
The best way to get an evenly browned crust that doesn’t burn on the edges is to use a pie shield made out of tin foil. They sell pie shields made of metal or silicone, but I prefer foil because it is so lightweight and will not crush your crust.
To make a pie shield, get a square of tin foil that is the same size as your pie. Fold it in half, then in half again. Cut out the center. Open it up again. You should have a square of foil with a circle cut out of the center. See pie crust post for photos. It’s so easy and the perfect way to make sure your crust doesn’t get burned on the edges.
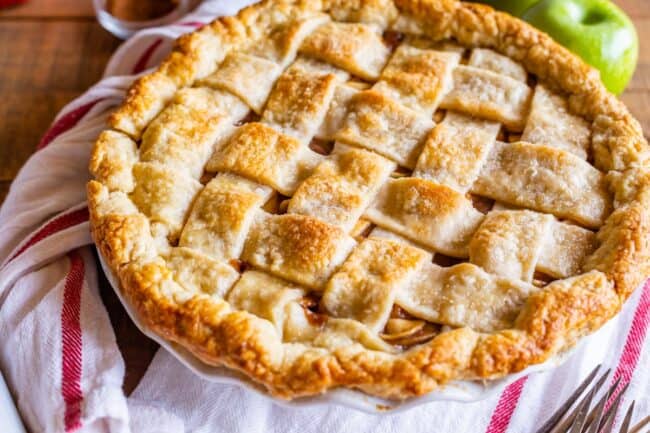
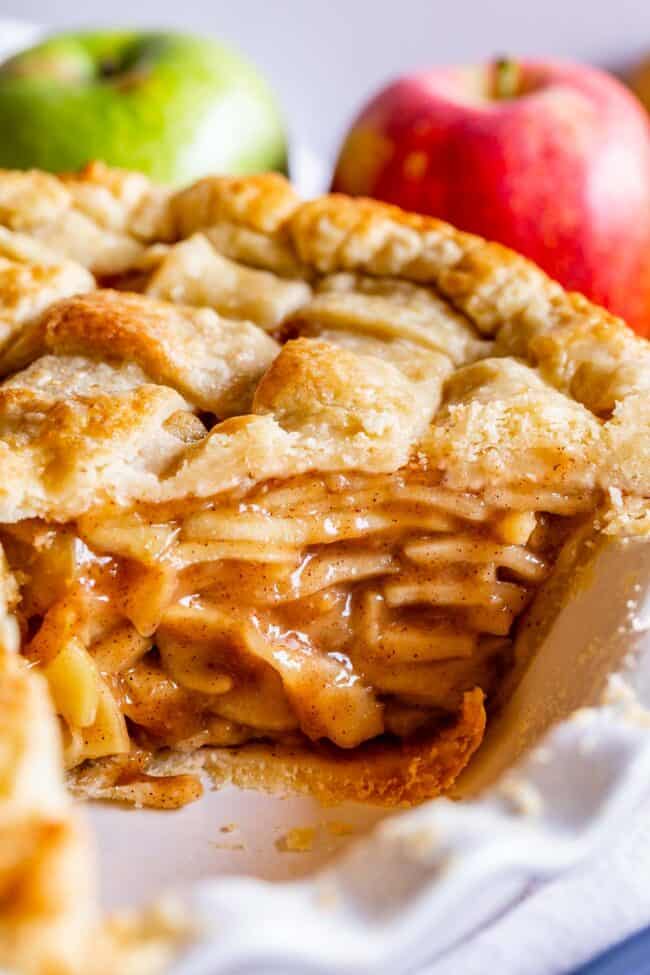
And voila! A beautiful apple pie for fall! Here is the hard part: don’t slice into your pie for 2-4 hours. I know, I know, it’s tough. But the liquid in your pie needs time to come to room temperature so it doesn’t completely fall apart
Make (and store) your pie filling ahead of time
This is actually a great make-ahead option when you want to get some of the work done the day before. You can make the apple pie filling up to 24 hours in advance. To store it, let it cool completely, then cover and refrigerate until you’re ready to assemble the pie. In fact, chilling the filling overnight makes it even less likely to produce a soggy bottom. The filling thickens as it cools and won’t hit the bottom crust as a hot, liquidy mixture that can soften the dough.
Does apple pie need to be refrigerated?
Not for the first couple of days! The sugar in the pie acts as a preservative. You can leave it on the counter in the pie plate you baked it in, covered with plastic wrap or one of these handy pie covers. After two days, transfer to the fridge, where it will last another 2 or 3 days.
How long does apple pie last?
Apple pie is good on the counter for about 2 days. After that, you’ll need to store it in the fridge, where it will last another 2-3 days. If you’re already at the fridge stage, you’ll definitely want to warm it up a little before eating it. Expect that the crust will be soggier by this point! Apple pie is best in the first couple days, so holler at your friends and neighbors to come and get it while it’s fresh.
How to freeze apple pie filling
If you want to save your apple pie filling for a rainy day, let it cool and then put it in a gallon size ziplock bag. Then place the bag in the pie plate you intend to bake the pie in and freeze. Once it’s frozen, you can remove the ziplock from the pie plate.
Later, roll out your pie crust and add the frozen apples on top. You can bake it straight from frozen. Just add about 20 minutes to the total bake time, and remember to cover your pie toward the end so it doesn’t burn.
Can you freeze an apple pie?
You can freeze an entire unbaked apple pie for another day. Top with the second crust, but don’t brush with egg/milk or sprinkle with sugar. Put the pie in the freezer for an hour to flash freeze. Then wrap with plastic wrap. Then wrap in foil and freeze for up to 3 months.
Facebook | Pinterest | Instagram

The Best Homemade Apple Pie Recipe (No Soggy Bottom!)
Ingredients
- 1 homemade double pie crust, 2 sheets of pie dough
- 1/4 teaspoon lemon zest
- juice from half a lemon, 2 tablespoons
- 5 pounds apples, 5 pounds before peeling and coring*
- 3/4 cup brown sugar, packed
- 3/4 cup granulated sugar
- 5 tablespoons all purpose flour
- 1/4 teaspoon kosher salt
- 1 & 1/2 teaspoons cinnamon
- 3/4 teaspoon nutmeg
- 1/2 teaspoon cardamom, optional
- 1 teaspoon vanilla
- 1 tablespoon milk, for brushing on pie
- 1 tablespoon beaten egg, optional, for brushing on pie
- 1 tablespoon raw sugar, for topping pie
Instructions
- Choose your apples. You need 5 pounds of apples for this recipe, which is about 11 large apples. I like to use a mix of apples for the best flavor. For this pie I used Granny Smith, Gala, and Golden Delicious.
- Make the filling: Use a microplane grater to zest 1/4 teaspoon lemon peel into a 12 inch high sided skillet.
- Add the juice from half the lemon to the skillet, about 2 tablespoons.
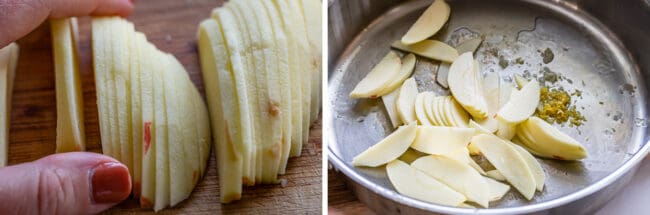
- Use a potato peeler or this handy apple peeler to peel the apples. Slice the apples into 1/8 inch pieces. Check out the photos above to see my method for slicing apples. I like to peel and slice one apple at a time so that they don't get brown; I peel one apple, then stop and slice it, add it to the lemon juice, and then move on to peeling the next apple. Stir the apples in the pan occasionally to coat everything with lemon juice.
- Once you have all the apples peeled and sliced in the pan, set it over medium heat on the stove.
- Add 3/4 cup packed brown sugar, 3/4 cup granulated sugar, 5 tablespoons flour, 1/4 teaspoon salt, 1 and 1/2 teaspoons cinnamon, 3/4 teaspoon nutmeg, and 1/2 teaspoon cardamom. Stir it together gently so you don’t break all the apples.
- Once the mixture is all moistened and you don't see patches of flour or cinnamon, set a timer for 20 minutes. Cover the mixture with a lid but don't walk away. Stick around and stir the mixture every 3 minutes or so, Replacing the lid each time. Cook for 20 minutes, until the apples are fork tender but still hold their shape. The apples will not soften more while baking in the oven. So have a taste and see if you want to cook a longer or shorter time. Only you can know your apple al dente perfection level.If your apples start to stick to the pan, add 1 tablespoon water as needed; use sparingly.
- Remove the pan from heat and stir in 1 teaspoon vanilla.*
- Transfer the apple pie filling (including the brown caramel gooeyness) to a half sheet pan, or any pan with a lip. Spread the apples all the way to the edges. Cool the apple pie filling completely by placing it in the fridge or the freezer, it only takes 30 minutes or so. (If you have plenty of time, you can just leave the apples in the pan to cool down; it will take a couple hours.)
- Roll out your pie dough and place in a deep 9 inch pie dish, with the excess hanging over the edges. See my pie crust post for lots of photos and details.
- Use a rubber spatula to scrape all the chilled apple pie filling into the pie dish. Don’t forget to scrape in every last bit of the gooey filling.
- Top your pie with the other pie crust. Follow this recipe for How to Make a Lattice Pie Crust, if you like. It's so pretty and not as hard as you think. You can also just toss the crust on whole. It's going to taste delicious either way! See my pie crust recipe for details on topping with a whole crust.
- Fold the edges in and crimp however you like. If you didn't do a lattice, make sure to vent your pie by poking the top a few times with a sharp knife.
- Place the whole pie in the fridge or freezer for about 20-30 minutes, for a really flaky crust.
- Place a baking sheet in the center rack of your oven and preheat to 425 degrees F. Let it heat up for at least 20-25 minutes to make sure it’s really hot.
- Right before putting it in the oven, brush the crust of your pie all over with milk or egg, or both. I like to use 1 tablespoon milk beat together with 1 tablespoon beaten egg that I have leftover from making my homemade pie crust. You can just use milk if you don't have beaten egg lying around. Milk will help your pie crust brown but will stay matte; egg will add gloss and shine to your pie crust.
- Sprinkle the whole pie with raw sugar, or regular sugar is fine too.
- Place the chilled pie onto the baking sheet in the oven and let bake for 15 minutes. The crust on the edge should be turning light brown.
- Meanwhile, get a square of tin foil that is the same size as your pie. Fold it in half, then in half again. Cut out the center. Open it up again. You should have a square of foil with a circle cut out of the center. See pie crust post for photos.
- Reduce the heat to 350 degrees F. Remove the pie from the oven and place the foil on top. Loosely crimp it around the crust on the edge. This will protect it from burning.
- Don’t forget to lower the oven temperature to 350. Place the pie back on the baking sheet in the oven and bake at 350 for 40-45 more minutes.
- You will know the pie is done when the edges are brown and the center is light golden brown. If you did a lattice crust, you should see the filling bubbling away nicely.
- Let the pie cool on a wire rack for about 4 hours. I know, this is killer. But if you cut into it now, the juices will be lava hot and way too liquid-y. You have to wait for it to cool to room temperature to get the right texture for the filling. Pie! A lesson in patience indeed.
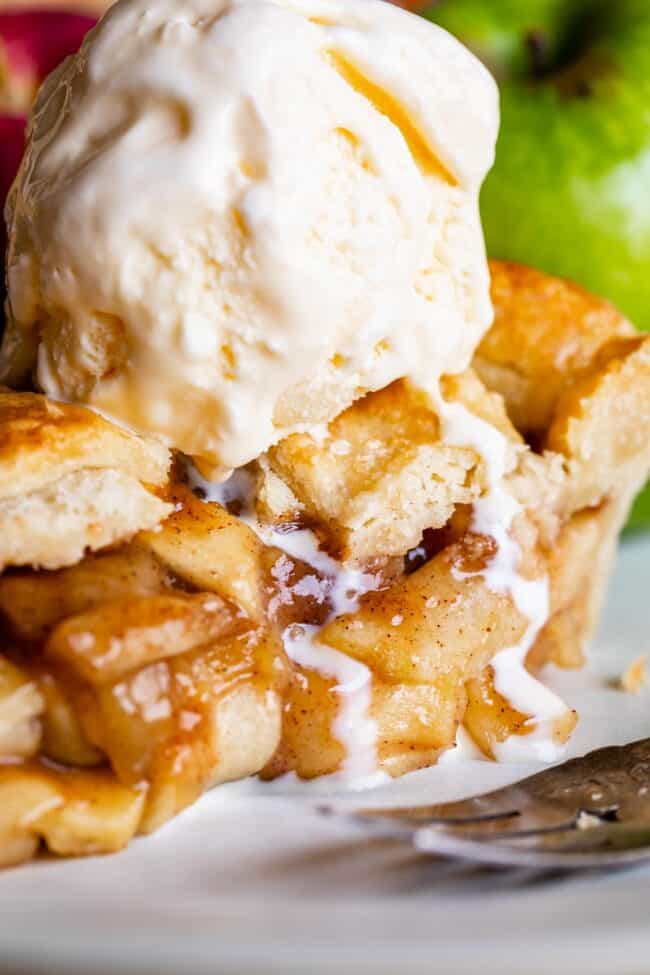
- Once the pie is completely cool, slice and serve! My husband Eric considers it a crime to serve this without vanilla ice cream, and I tend to agree. Treat yoself right. Add in some caramel sauce for a really decadent treat!
- Store the pie on the counter for up to 2 days, covered with plastic wrap. After that transfer it to the fridge.
Video
Love my recipes?
Make us a Preferred Source on Google and we’ll pop up more often in your Top Stories.












Can I make this pie 4 days in advance, cover, refrigerate, and just heat up when ready to eat?
Hi Linda! This pie is best in the first 2-3 days, so if you’d like to make it in advance, I recommend freezing it. You can freeze an entire unbaked apple pie. Just top with the second crust, but don’t brush with egg/milk or sprinkle with sugar. Put the pie in the freezer for an hour to flash freeze. Then wrap with plastic wrap. Then wrap in foil and freeze for up to 3 months. You can bake the pie from frozen, no need to defrost – just plan on adding an extra 15-25 minutes to the total bake time.
Made this for the second time and it’s honestly the best pie i’ve ever made and ever eaten. Thank you so much for this recipe and for including your crust because that really just took it to the next level. Saving this for life. Thank you!!!!
Thanks for sharing Stephanie, we love hearing that this went so well for you!
10 out of 10!
Takes time but it will be worth it!
This is my favorite Apple Pie Recipe!
If I wanted to go a gluten free route would this recipe be okay if used with Gluten Free Flour?
Hi Suzie! We haven’t tested this with gluten-free flour, but using it to replace the 5 tablespoons in the filling should be just fine. Of course, I’m sure you’re planning to use a gluten-free pie crust that you buy pre-made, or make one at home. Just so you know we haven’t tested the linked pie crust recipe with gluten-free flour. Come back and tell us how it turns out, we’d love to hear from you!
How far in advance can I make this apple pie?
BEST apple pie recipe! Easy to make and is adored by friends.
This an awesome recipe…I’ve made it for a couple of years now…Truth be told, I won our neighborhood pie contest with this recipe! Thank you.
Question: can I make the apple mix ahead of time, cool, then put in pie crust day 2?
Hi Mary!! I love to hear this! I’m so glad you were crowned Queen Apple Pie!!! That’s amazing and I hope they got you an actual crown ;) YES you can totally make the pie filling ahead of time! keep it covered in the fridge. Thanks so much for taking the time to comment!
Your Apple Pie recipe is my regular go-to after our NY apple picking outing as it’s a #ProvenWinner. I am so grateful for your tip to pre-cook the sliced apples on the cooktop to the desired tenderness (in my case, cooking the Granny Smith slices first, since they’re firmer & then adding my softer FAVS like Golden Delicious & Macouns). Whatever it is that happens in cooking, then cooling them is absolutely MAGIC: the cooled apples don’t cook any further when baked in the pie! Genius!! The only step I’ve skipped is making the crust. Between picking, peeling, cutting & cooking ’em, I cheat with a pre-rolled refridgerated crust. And somehow, even though your instructions are clear, I’ve missed the “freeze the prepared pie for 20-30 minutes before cooking” step, but I DID IT THIS TIME (but I forgot to add the vanilla…win some, lose some), and these are the 1st pies where my top crust has fractured like crazy!! Confession: I took immediate advantage of all those fractured edges and picked at 2 of them, right where the apple lava flowed, and that fractured crust is NOT worse for wear! 😉 Now I’m paying the 4 hourr pennance, waiting for my 1st slice of #TFCApplePiePerfection of the season!
P.S. In every respect, your recipe is SHEER PERFECTION: the ONLY improvement I’d make would be to encourage readers to add two extra apples 🍏🍎 for “pickin’s” or else the volume of apples in their pie 🥧 will be that much decreased! You open the flood-gates by having us “taste-test” the tenderness of thee apples, and the aromas draw every family member into the kitchen, so they descend on the skillet like its #OpenSeasonOnApples! 😁
I have been using your apple pie filling for years 😍 such a fantastic recipe. thank you.
now my questions… is the crust still crispy when I leave the pie on the counter for just one day?
also, I want to pack slices and sell them, will my filling stay in place when the pie is packed? ( since its been at room temp)
Hi Asaali! The crust won’t be crispy after one day, but it also won’t be soggy. The filling will begin to soften the crust, but it doesn’t make it any less delicious. You can see from the pictures that the filling does mostly stay in place when the pie is sliced. If you use a hinged plastic clamshell container with the pie lying on its side instead of standing straight up and down, you shouldn’t have any problems with the room temperature pie keeping its shape. Good luck!
Omg! Best apple pie filling ever! I thought I would cheat and use premade pie crust dough-don’t! So not enough for all the filling! Definitely use a deep dish pan. Was messy with not enough crust but still soo worth it ! I would just eat this or use it for almost anything else apple related!
Thank you for sharing a comment and review Jan, it means so much :-) So glad you loved this! Check out these apple pie bars, it’s basically the same thing but in bar form. Let us know if you try it!
Can you leave the filling in the fridge overnight?
Hi Jess, yes, you sure can!
Absolutely worthy! Followed the pie crust recipe and apple pie filling to the letter.
Delish!!! Thanks for the recipes.
I loved this recipe. I made the filling one day, the crust dough the next, put the pie together the 3rd day and then baked it! I love that I could just do parts of the pie when I had time and it turned out great! I used tallow then butter for the crust. I think it was the best crust I’ve ever made. Cooking the filling on its own was such a great idea. I will never do it my old way again! Thank you.