
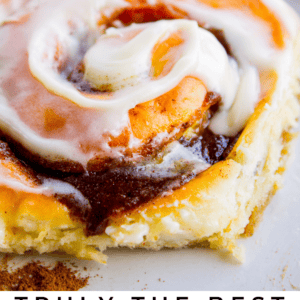
If you guys have never tried making a homemade cinnamon rolls recipe with a simple sweet dough (brioche style) instead of regular bread dough, you are totally missing out. These are the FLUFFIEST homemade cinnamon rolls of your life, I promise! They are very easy, and you can make them overnight! Originally published June 1, 2022.
 from The Food Charlatan. If you haven't made cinnamon rolls with a simple sweet dough (brioche style) instead of regular bread dough, you are totally missing out. These are the FLUFFIEST homemade cinnamon rolls of your life! They are very easy, and you can make them overnight! #cinnamon #cinnamonrolls #creamcheese #frosting #homemade #fluffy #gooey #easy #overnight #cinnabon #recipe #best #fromscratch #icing #makeahead")
Table of Contents
- Cinnamon Roll Recipe
- Homemade Cinnamon Rolls Ingredients
- How to make Cinnamon Rolls
- Secret tip for the gooiest Homemade Cinnamon Roll Recipe
- How to make Cinnamon Rolls Icing
- How to make the Best Cinnamon Rolls overnight
- Storing Cinnamon Rolls: do you need to refrigerate?
- More sweet breakfast recipes you are going to love!
- Best Cinnamon Rolls Recipe with the Best Cinnamon Roll Icing! Recipe
The other day Truman and I stopped by the grocery store on the way home from kindergarten. He found a toy that he wanted, and I said no, and then the world exploded. 0-to-60 meltdown. At one point he screamed, “But Mom, Christmas is about GIVING!” I just about died laughing at that one, but then he quickly followed it up with, “And besides, I’M HUNGRY!!”
 from The Food Charlatan. If you haven't made cinnamon rolls with a simple sweet dough (brioche style) instead of regular bread dough, you are totally missing out. These are the FLUFFIEST homemade cinnamon rolls of your life! They are very easy, and you can make them overnight! #cinnamon #cinnamonrolls #creamcheese #frosting #homemade #fluffy #gooey #easy #overnight #cinnabon #recipe #best #fromscratch #icing #makeahead")
You know what, I have to give serious props to this 5-year-old-kid for being able to identify the root cause of his tantrum. I never realize I’m hangry until after I’ve eaten something.
Cinnamon Roll Recipe
Speaking of hangry…I have been on a MISSION my friends. A cinnamon roll mission. It’s serious business, finding a cinnamon roll that is so soft and fluffy and absolutely perfect that it will make you want to cry tears of joy.
 from The Food Charlatan. If you haven't made cinnamon rolls with a simple sweet dough (brioche style) instead of regular bread dough, you are totally missing out. These are the FLUFFIEST homemade cinnamon rolls of your life! They are very easy, and you can make them overnight! #cinnamon #cinnamonrolls #creamcheese #frosting #homemade #fluffy #gooey #easy #overnight #cinnabon #recipe #best #fromscratch #icing #makeahead")
I am a little picky about cinnamon rolls. Okay, a lot picky. I used to accept any and all cinnamon rolls that came my way, but lately I’ve just been a little underwhelmed with the cinnamon rolls in my life. (“I know you can be overwhelmed, and I know you can be underwhelmed, but can you ever just be…whelmed?” “I think you can in Europe!” (Name that movie!)
 from The Food Charlatan. If you haven't made cinnamon rolls with a simple sweet dough (brioche style) instead of regular bread dough, you are totally missing out. These are the FLUFFIEST homemade cinnamon rolls of your life! They are very easy, and you can make them overnight! #cinnamon #cinnamonrolls #creamcheese #frosting #homemade #fluffy #gooey #easy #overnight #cinnabon #recipe #best #fromscratch #icing #makeahead")
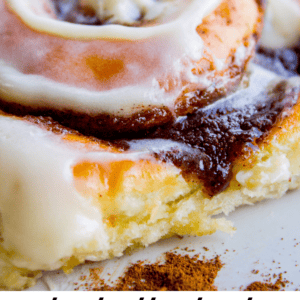
My main complaint is that most cinnamon rolls are too dry. Does anyone else feel this way? Any cinnamon roll coming hot out of the oven is going to be hard to argue with, but the real test comes when brunch is over and the leftover cinnamon rolls have cooled, and you’re going back for seconds as a late afternoon treat. Even on the day they were baked, many of the cinnamon roll recipes that I’ve tried were just DRY.
I feel like a lot of cinnamon roll recipes solve the problem of not-great-dough by PILING on the brown sugar filling and cream cheese icing to achieve the gooey factor. Now, I’m no heretic, I love a really thick and gooey filling and a healthy slather of frosting (and today’s recipe does not skimp), but I also just need the actual roll part to be soft and fluffy and not just a medium for frosting. This recipe delivers 100%. Here is everything you’re going to need!
Homemade Cinnamon Rolls Ingredients
- whole milk
- active dry yeast
- granulated sugar
- large eggs
- all purpose flour
- Kosher salt
- butter
- heavy whipping cream
- brown sugar
- cinnamon
- cardamom, optional but sooooo good
Cinnamon Roll Icing Recipe Ingredients
- 8-oz package cream cheese
- butter
- powdered sugar
- Kosher salt
Um yes, there is butter in all the sections of this recipe (dough, pan, filling, icing), for a grand total of 4 sticks. 1 pound, in all. DID I SAY BEST OR DIDN’T I?
 from The Food Charlatan. If you haven't made cinnamon rolls with a simple sweet dough (brioche style) instead of regular bread dough, you are totally missing out. These are the FLUFFIEST homemade cinnamon rolls of your life! They are very easy, and you can make them overnight! #cinnamon #cinnamonrolls #creamcheese #frosting #homemade #fluffy #gooey #easy #overnight #cinnabon #recipe #best #fromscratch #icing #makeahead")
How to make Cinnamon Rolls
Here’s a quick overview of the basic steps before you dig into the details below. It’s true, there are a lot of steps, but don’t worry, it’s pretty simple to follow. And all instructions are given in the recipe card below! I got you!
Warm milk in the microwave. Stir in yeast and sugar, then proof.
 from The Food Charlatan. If you haven't made cinnamon rolls with a simple sweet dough (brioche style) instead of regular bread dough, you are totally missing out. These are the FLUFFIEST homemade cinnamon rolls of your life! They are very easy, and you can make them overnight! #cinnamon #cinnamonrolls #creamcheese #frosting #homemade #fluffy #gooey #easy #overnight #cinnabon #recipe #best #fromscratch #icing #makeahead")
Whisk in eggs. Add flour and salt, then mix. Slowly add in very soft butter, 1 tablespoon at a time.
 from The Food Charlatan. If you haven't made cinnamon rolls with a simple sweet dough (brioche style) instead of regular bread dough, you are totally missing out. These are the FLUFFIEST homemade cinnamon rolls of your life! They are very easy, and you can make them overnight! #cinnamon #cinnamonrolls #creamcheese #frosting #homemade #fluffy #gooey #easy #overnight #cinnabon #recipe #best #fromscratch #icing #makeahead")
Beat until silky smooth.
 from The Food Charlatan. If you haven't made cinnamon rolls with a simple sweet dough (brioche style) instead of regular bread dough, you are totally missing out. These are the FLUFFIEST homemade cinnamon rolls of your life! They are very easy, and you can make them overnight! #cinnamon #cinnamonrolls #creamcheese #frosting #homemade #fluffy #gooey #easy #overnight #cinnabon #recipe #best #fromscratch #icing #makeahead")
REFRIGERATE the dough, yes really.
 from The Food Charlatan. If you haven't made cinnamon rolls with a simple sweet dough (brioche style) instead of regular bread dough, you are totally missing out. These are the FLUFFIEST homemade cinnamon rolls of your life! They are very easy, and you can make them overnight! #cinnamon #cinnamonrolls #creamcheese #frosting #homemade #fluffy #gooey #easy #overnight #cinnabon #recipe #best #fromscratch #icing #makeahead")
Prep your pan with a mixture of cream, brown sugar, and melted butter.
 from The Food Charlatan. If you haven't made cinnamon rolls with a simple sweet dough (brioche style) instead of regular bread dough, you are totally missing out. These are the FLUFFIEST homemade cinnamon rolls of your life! They are very easy, and you can make them overnight! #cinnamon #cinnamonrolls #creamcheese #frosting #homemade #fluffy #gooey #easy #overnight #cinnabon #recipe #best #fromscratch #icing #makeahead")
Roll out the dough on a lightly floured surface while it is cold!
 from The Food Charlatan. If you haven't made cinnamon rolls with a simple sweet dough (brioche style) instead of regular bread dough, you are totally missing out. These are the FLUFFIEST homemade cinnamon rolls of your life! They are very easy, and you can make them overnight! #cinnamon #cinnamonrolls #creamcheese #frosting #homemade #fluffy #gooey #easy #overnight #cinnabon #recipe #best #fromscratch #icing #makeahead")
Make the cinnamon sugar filling and slather it on the dough. Slather, I say!
 from The Food Charlatan. If you haven't made cinnamon rolls with a simple sweet dough (brioche style) instead of regular bread dough, you are totally missing out. These are the FLUFFIEST homemade cinnamon rolls of your life! They are very easy, and you can make them overnight! #cinnamon #cinnamonrolls #creamcheese #frosting #homemade #fluffy #gooey #easy #overnight #cinnabon #recipe #best #fromscratch #icing #makeahead")
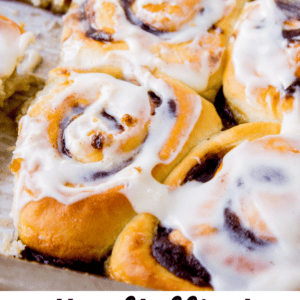
Roll up and put rolls in the pan, then let rise in the oven with a pan of boiling water.
Bake, drizzle on the cream cheese frosting, and DEVOUR!
Did you catch all that funny business about refrigerating the dough? These aren’t your average cinnamon rolls, I told you. Let me explain.
You can take any basic dinner roll recipe and turn it into homemade cinnamon rolls. Instead of shaping into balls, just roll the dough into a rectangle and slap on some cinnamon sugar. That’s what almost every cinnamon roll recipe that I researched calls for. Almost ever recipe I saw calls for warm liquid and yeast, combined with softened butter/shortening, eggs, sugar, and THEN add flour until the dough is workable.
The ingredients for this recipe are essentially the same, but with WAY less flour than you would normally add. And a lot more butter. (ALLLL THE BUTTER). Like double the amount you see in most roll recipes.
This of course makes a super sticky dough that is impossible to roll out. That’s where the chill step comes in. Instead of leaving the dough in a warm place to rise for an hour like most recipes, we’re sticking our lovely dough straight into the refrigerator.
I learned about this type of sweet dough when my mother-in-law Kris made these Ultimate Sticky Buns from Epicurious. (Which are amazing, btw.) My final recipe is a little different, but it’s the same idea. Proof the yeast, stir together all the ingredients (including the minimal amount of flour), and then add softened butter in increments. Regular bread dough is just never going to measure up when you compare it to this brioche style dough.
There are two other things that make this recipe for homemade cinnamon rolls next level: a bit of cardamom in the filling, and brushing the baking pan with cream and butter before baking. The cardamom adds just a little bit more interest, it’s not overwhelming. I absolutely love cardamom, but if you’re not into it, you can leave it out no problem.
Secret tip for the gooiest Homemade Cinnamon Roll Recipe
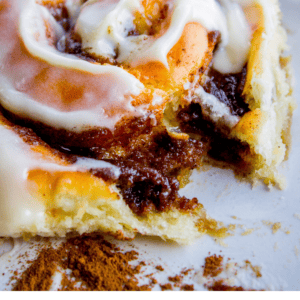
Now my trick for getting the gooiest homemade cinnamon rolls in all the land: Combine melted butter, cream, and brown sugar and spread it all over the bottom and sides of your pan before baking. I’m obsessed with this idea and will never go back to regular cinnamon rolls! It makes every inch of the cinnamon rolls ultra gooey and moist. I do the same thing with my favorite Bran Muffins: brush the pans with a molasses glaze. YUM.
 from The Food Charlatan. If you haven't made cinnamon rolls with a simple sweet dough (brioche style) instead of regular bread dough, you are totally missing out. These are the FLUFFIEST homemade cinnamon rolls of your life! They are very easy, and you can make them overnight! #cinnamon #cinnamonrolls #creamcheese #frosting #homemade #fluffy #gooey #easy #overnight #cinnabon #recipe #best #fromscratch #icing #makeahead")
How to make Cinnamon Rolls Icing
I love America. It’s not enough to have a decadent sweet roll stuffed with cinnamon filling, oh no, we’ve gotta FROST.
Are you team cream cheese or plain vanilla? I love a good cream cheese frosting on my cinnamon rolls. It is not overly sweet and adds the perfect tang to the rolls. Here’s how to make it:
- Beat your softened cream cheese and butter to within an inch of its life. Get all those lumps out! Make it nice and fluffy.
- Add 1 cup powdered sugar and 1/4 teaspoon salt, then beat well. That’s it!
 from The Food Charlatan. If you haven't made cinnamon rolls with a simple sweet dough (brioche style) instead of regular bread dough, you are totally missing out. These are the FLUFFIEST homemade cinnamon rolls of your life! They are very easy, and you can make them overnight! #cinnamon #cinnamonrolls #creamcheese #frosting #homemade #fluffy #gooey #easy #overnight #cinnabon #recipe #best #fromscratch #icing #makeahead")
When is the best time to ice the cinnamon rolls?
Make sure the rolls cool for at least 10 minutes before adding the icing, or it will melt too fast. And then, my favorite tip, only spread with HALF of the cream cheese frosting.
If you are serving these to a large group and they will all be eaten right away, use the entire amount of frosting. Otherwise, save the other half of the frosting to serve with leftover rolls, or to pass at the table for guests to serve themselves. I find that people have such different opinions on the level of frosting they enjoy, that it’s better to let guests serve themselves.
 from The Food Charlatan. If you haven't made cinnamon rolls with a simple sweet dough (brioche style) instead of regular bread dough, you are totally missing out. These are the FLUFFIEST homemade cinnamon rolls of your life! They are very easy, and you can make them overnight! #cinnamon #cinnamonrolls #creamcheese #frosting #homemade #fluffy #gooey #easy #overnight #cinnabon #recipe #best #fromscratch #icing #makeahead")
How to make the Best Cinnamon Rolls overnight
These rolls would be perfect for Christmas morning, and it’s what I plan on making for the big day this week! Make the dough and chill it on Christmas Eve during the day (or up to 2 days in advance!). Roll out the dough and shape the rolls in the evening, and refrigerate overnight. Pick up with the final rise in the morning! See recipe for all the details!
Storing Cinnamon Rolls: do you need to refrigerate?
No, definitely not! Putting these sweet rolls in the fridge will just dry them out. Leave them on the counter, well sealed.
How long can Cinnamon Rolls sit at room temperature?
If you still have cinnamon rolls left after 2 days (what kind of monster are you?? Why are you eating anything but these rolls??) then transfer them to the fridge to prevent mold.
Homemade cinnamon roll frequently asked questions
Now for a little FAQ! I know you have burning questions!
Yes, bread and rolls freeze beautifully! You can’t go wrong here.
Completely finished, frosted rolls freeze well and cool to perfection when transferred to the fridge overnight, or set them on the counter for a few hours. At that point, you can heat individual portions for 10-20 seconds in the microwave if you love a warm roll. (Who doesn’t??) The frosting should stay mostly intact. Will it be A++ as the day you made it? No. Is it a heck of a lot better than the grape nuts you were planning to eat for breakfast today? YES.
If you want to warm them all at once, I recommend frosting after freezing. You’ll reheat your thawed out, unfrosted rolls in an oven at 350 degrees for 8-12 minutes, just until warm. Then add the frosting after a few minutes of cool-down time.
You can also freeze the rolls before baking. Place them in the prepared baking dish after rolling, cover with greased plastic wrap, and then seal with a bunch more plastic wrap and foil. Thaw in the fridge overnight, then continue with rising in the oven with boiling water as described in the recipe. If they are not fully thawed, they will need more time rising.
They’re basically the same except that active dry yeast needs to be dissolved and rehydrated in warm water to work. Instant yeast can be added straight in with the dry ingredients, no rehydration necessary.
I haven’t tried this recipe with instant yeast but it should work just fine. I’m a maniac and always test instant yeast in warm water anyway, so I wouldn’t change the method on this recipe no matter what kind of yeast you use! You test by mixing the yeast with warm liquid. If you don’t see bubbles after 5 minutes, your yeast is not working; dump it and start over. Better to start over at the beginning than after hours of (no) rising!
A lot of people think dry cinnamon rolls result from not using enough cinnamon filling. Not true! It’s usually the roll dough itself that makes cinnamon rolls taste dry. If you do not have enough moisture in your bread, your rolls will dry out faster than you can say glass-a-milk. This is exactly why we are using a brioche dough! More steps, but it absolutely results in the best (most moist) cinnamon rolls of your life.
Some people use cinnamon roll and cinnamon bun interchangeably. Technically, Cinnamon Buns are made with a method more like these Caramel Pecan Sticky Buns. A cinnamon filling is added to the bottom of the pan, and then flipped over after baking so the gooey goodness seeps into the rolls.
“Cinnamon bun” is also the translation for these popular Swedish Cinnamon Buns with Cardamom (kanelbullar in Swedish.) These rolls were the inspiration for adding cardamom to today’s recipe. The Swedes know how to get it done right.
Do we want all-purpose flour or bread flour for cinnamon rolls? All purpose flour is what you need! Bread flour has extra protein in it; this helps a loaf of bread hold its shape better. But for cinnamon roll dough, we want less protein in order to make the rolls taste light and airy. All purpose flour is perfect for getting a more delicate texture.
I like to use a serrated knife! Saw back and forth, do not push down. Let the blade do the work. Remember this dough needs to be chilled before you slice. If not, it will just melt into a soupy mess on your counter. Transfer your whole rolled up dough into your fridge or freezer for a few minutes until it is sturdy enough to slice again, if it gets warm.
You can also try the unflavored dental floss trick for cutting cinnamon rolls! Personally I think it’s more trouble than it’s worth, but some people swear by it. Get some non flavored floss (no mint in our rolls please) and work a strand under your roll. Bring up the two sides and pinch them together to cut off a 1 inch roll.
 from The Food Charlatan. If you haven't made cinnamon rolls with a simple sweet dough (brioche style) instead of regular bread dough, you are totally missing out. These are the FLUFFIEST homemade cinnamon rolls of your life! They are very easy, and you can make them overnight! #cinnamon #cinnamonrolls #creamcheese #frosting #homemade #fluffy #gooey #easy #overnight #cinnabon #recipe #best #fromscratch #icing #makeahead")
This is my last post before Christmas! Thank you so much for following along with my blog this year, it means so much to me. I love talking about food with all of you. It’s the best! I hope that you have had a chance to try out some of these recipe for the holidays! It really is the most wonderful time of the year. Merry Christmas to all, and to all fluffy cinnamon rolls for brunch!
More sweet breakfast recipes you are going to love!
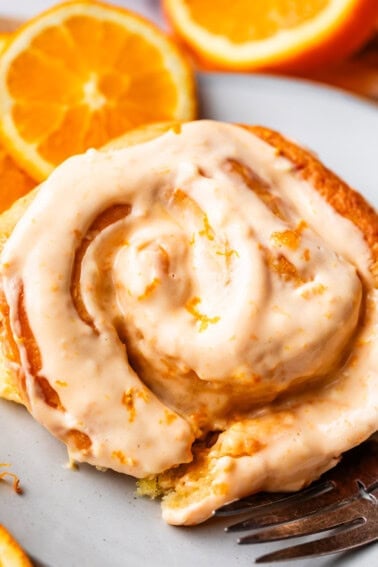
- Orange Rolls Recipe << the perfect orange-y goodness version of the classic. The filling is like candy and I’m obsessed!
- One Hour Cinnamon Rolls << these have been my standard rolls for years and years. They are a GREAT one hour option
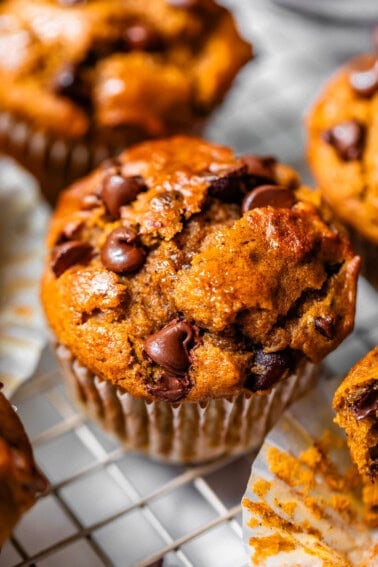
- Almost One Hour Pumpkin Cinnamon Rolls with Caramel Cream Cheese Frosting << I think this wins for longest title ever
- One Hour Honey Almond Crunch Rolls << this is like Honey Bunches of Oats…but in cinnamon roll form. SO GOOD.
Facebook | Pinterest | Instagram
Best Cinnamon Rolls Recipe with the Best Cinnamon Roll Icing!
Ingredients
For the sweet dough
- 1 cup whole milk, warm
- 1 tablespoons active dry yeast
- 5 tablespoons granulated sugar
- 2 large eggs
- 3 & 1/4 cups all purpose flour, spooned and leveled
- 1 teaspoon kosher salt
- 1/2 cup butter, 1 stick, very soft (divided)
For the pan
- 1/4 cup butter, 1/2 stick, barely melted
- 1/4 cup cream
- 5 tablespoons brown sugar
For the filling
- 3/4 cup butter, 1 & 1/2 sticks, very soft
- 1 cup plus 2 tablespoons brown sugar
- 2 tablespoons cinnamon
- 1/4 teaspoon kosher salt
- 1/2-3/4 teaspoon cardamom, optional
For the cream cheese frosting
- 1 (8-oz) package cream cheese, softened
- 1/2 cup butter, 1 stick, softened
- 1 cup powdered sugar
- 1/4 teaspoon kosher salt
Instructions
- Make the sweet dough: In a glass measuring cup, add 1 cup milk. Use whole milk if you have it. Warm the milk in the microwave in 20 second increments until it is nice and warm. Stir it with a small spoon and feel it with your finger. It should be about 105-110 degrees F, or about the temperature of nice bath water. If it feels at all HOT, stick it in the fridge until is cools down.
- Add 1 tablespoon of yeast and 5 tablespoons granulated sugar and stir. Wait 5 minutes and check to make sure your yeast is getting bubbly. If not, you have killed your yeast; dump it and start over. Better to start over now than after hours or rising!
- Once you are certain that your yeast is alive and well, add two eggs to the measuring cup and whisk it all together until smooth.
- Meanwhile, add 3 and 1/4 cups flour to a large bowl or stand mixer. Make sure you spoon and level your flour. Add 1 teaspoon kosher salt.
- Add the wet ingredients to the flour in the bowl. Use the paddle attachment on your mixer (or regular beaters if you’re using a hand mixer) and beat until combined, about 1 minute. Make sure to stop and scrape the sides and bottom of the bowl.
- With the mixer running on low or medium low, add 1 tablespoon of very soft butter at a time, until the entire 1/2 cup has been added in. Make sure each tablespoon of butter is fully incorporated before adding more butter. The process of adding in the butter should take a couple minutes at least.
- Once all the butter is incorporated, beat on medium low speed for 5 minutes. The dough should be silky, smooth, and shiny. After 5 minutes, it will not have cleaned the sides of the bowl, but it should be formed together in a loose ball. It is VERY wet and not workable at all.
- Grease a large bowl with butter or oil. Don’t be stingy now.
- Use a spatula to scrape the sweet dough into the greased bowl. Cover and refrigerate for 2 hours or up to 2 days. (Chilling is not optional. You won’t be able to work with this dough until it is completely chilled!)
- When you are ready to roll out the dough, prepare the pan and the filling.
- To prepare the pan: In a small bowl, microwave 1/4 cup (1/2 stick) butter until it is just barely melted. Add 1/4 cup cream and 5 tablespoons brown sugar. Stir together and scrape it into the pan you are using to bake your cinnamon rolls in.
- A note on what pan you use: I like to use an 11x17x1 inch half baking sheet. This will give you rolls that are not quite as tall but have a beautiful round shape. I prefer the ratio of cinnamon filling to dough when the rolls are baked. You can also use a 9×13 inch pan. This will give you taller rolls that will bake into each other in the oven. This recipe will work in either pan you use, but I recommend the 11×17 baking sheet.
- Use a spoon or pastry brush to spread the cream, butter, and brown sugar mixture all over the bottom of the pan you are using, and all the way up the sides as well.
- Prepare the filling for the rolls: Add 3/4 cup (1 and 1/2 sticks) very soft butter to a medium bowl. Add 1 cup plus 2 tablespoons brown sugar, 2 tablespoons cinnamon, 1/4 teaspoon kosher salt, and 1/2 or 3/4 teaspoon cardamom, if you are using it. (you should use it.) Stir it all together and set aside.
- Bring a pot of water to a boil on the stove. Place a 9×13 inch pan on a bottom rack in your oven. Place another rack above it. Turn your oven on to 350 for about 3 minutes, then turn it off. Your rolls are going to rise in the oven with a water bath.
- Roll out the dough: Prepare a work surface with a generous dusting of flour. I love to roll out dough on my pastry cloth, it makes it so easy.
- Scrape the chilled dough onto the flour and knead it together a couple times with your hands. Press it out into a rectangle with your hands, then use a rolling pin to roll the dough into a large rectangle. It should be about 1/4 inch thick if not a little thicker. It should measure about 12 inches by 16-18 inches. It doesn’t have to be exact.
- Use a spatula to spread the filling on top of the dough, all the way to the edges. If the filling looks like it’s not soft enough to spread easily, put it in the microwave for 5 seconds and stir. You want the filling to go into the oven thick, not melted, so don’t put it in the microwave for too long.
- Roll up the dough, starting from the long edge. As you roll, use your hands to smooth out the dough from the center to make the roll even (so that the center of your roll is not way thicker than the edge of your roll.)
- Use your fingers to seal the roll.
- Use a very long and sharp serrated knife to cut the dough into 1 or 1 and 1/2 inch rolls. Use a sawing motion. Dip your knife in flour in between cuts. The dough is pretty sticky on the inside.
- Place each roll in the prepared pan. They should not touch each other.
- Once all the rolls are on the pan, generously spray some plastic wrap with nonstick spray, and cover the rolls. Do NOT forget to spray the plastic wrap. Do NOT use a tea towel. The dough is pretty sticky, and if your cover sticks to them, it will ruin your beautiful rise when you try to take it off. No, I’m not at all bitter that this happened to me on one of my test runs, why do you ask??
- Pour the boiling water that you have on the stove into the 9×13 inch pan that’s on the lower rack in your oven. Make sure that you remembered to turn off the oven. It should be nice and warm but NOT HOT. You want the rolls to rise, not cook. If you accidentally left your oven on too long, leave the door open and let it cool down. If the racks are too hot to touch with your fingers, don’t put the rolls in the oven. Let them start rising on top of the oven and put the rolls in when the oven has cooled a bit.
- Let the covered rolls rise for about 45 minutes. They should be nice and puffy.
- About 15 minutes before the rolls are finished rising, remove the rolls and the pan of water from the oven. Preheat the oven to 350 degrees F.
- Once the rolls are quite puffy and have just about doubled in size, bake at 350 for about 15-18 minutes.
- The rolls should be golden on top when fully baked. The best way to know if the rolls are done in the middle is to use a thermometer: the center of the rolls should be 190 degrees F. The bottom of the rolls should also be lightly browned, but lifting the edge of a roll can be tricky.
- Make the cream cheese frosting while the rolls are in the oven. In a large bowl or stand mixer, beat 8 ounces softened cream cheese with 1/2 cup softened butter. Scrape the sides and bottom and beat for a couple minutes until it’s nice and fluffy. Add 1 cup powdered sugar and 1/4 teaspoon salt, and beat well.
- Let the rolls cool for about 10 minutes, then spread with HALF the cream cheese frosting. If you are serving these to a large group and they will all be eaten right away, frost with the entire amount. Otherwise, save the other half of the frosting to serve with leftover rolls, or to pass at the table for guests to serve themselves. I find that people have such different opinions on the level of frosting they enjoy, that it’s better to let guests serve themselves.
Overnight Instructions:
- Make the recipe as written through step 23 (except don’t boil the water). Once the rolls are shaped and on the pan, cover as directed, then refrigerate overnight. In the morning, prepare the oven by preheating the oven (and then turning it off) and placing a pan of boiling water on a bottom rack. (Remember to turn the oven off, as described in step 24.) Let the rolls rise for the same amount of time and bake as directed.


These are the best rolls I’ve ever had!!
SO happy to hear this Tammy!! Hard to beat a good cinnamon roll, right? The dough makes such a huge difference!! Thanks so much for taking the time to come back and leave a positive review, people like you make the world go round 💕
Can I use a sourdough starter in this recipe??
Hi B! I bet you could! I’m so sorry though, I’m not super experienced with sourdough, so I’m not sure how much starter to tell you to use, or what the process would be. Tell me if you try it out!
I made bread machine cinnamon rolls for Sunday dinner, they were good, everyone liked them. Then I found your recipe and I thought, why not? I’ll try them. I made them for our brunch at church Easter Sunday. OMG!!! I got raves from everyone!! They were so freaking good! So soft and gooey and delicious. My go to now. THANK YOU! I won’t ever go back to the others. Kinda time consuming but so worth it. There weren’t many left and my friends husband “stole” the leftovers.
Ahaha! I’m so happy these were a winner Kathy!! You know it’s good when friends are stealing the leftovers!! I love it 😂 Thanks so much for chiming in with your review!
I didn’t know what cardamom was but glad I used it lol. Best cinnamon buns I’ve ever had hands down!! Definitely needs extra baking time if using a 9×13, trust me. You don’t want this labor of love to be raw in the middle. Thankyou so much for this amazing recipe. I may try using two pans next time but I did like how they rose as well. I’m thinking with a less crowded pan I may not need the extra baking time. Thankyou Thankyou
I have made these rolls 4 times. The first 3 times, they came out perfect. They were soft and light and delicious. I made them again today (the dough was made yesterday) and they were just awful. I don’t know what I did differently. It’s a very soft and sticky dough and I had to leave them in an extra 10-12 minutes for them to be done. My husband didn’t even like them.
Trying them again tho….so we’ll see how they turn out.
I made these once and as I noted on my facebook post these are the best cinnamon rolls I’ve ever eaten. I’m making them again today and ran into the same problem as last time, the dough wants to climb up into the inside of my mixer. I don’t have paddles but I tried it last time with my dough hooks. This time I used it with the beaters and same thing. Any suggestions?
I like you!! I love how you wrote this, the tone you used. Everything!! I have now sufficiently read your entire blog and feel confident I can make these! I was shaky at the get go, cuz I’m in a small hurry, but I’m off to do this!! I LOVE CINNAMON rolls and I’m stoked to have found this recipe!! Thank you!! Bless you in Jesus Name as my 6 yo daughter is singing Kumbaya. 💗💗
They are delicious! One thing to note is that they take a LOT longer if you are doing the 9×13. I learned the hard way….
I’ve made this recipe once, and have been contemplating a well-known sourdough discard brioche C.R. recipe but I keep going back to that ooey-gooey photo of the cinnamon filling — it’s what got me two years ago and I keep going back.
I’ll save my discard for something else and make these for Christmas day brunch HOWEVER, is the boiled water necessary is my oven has a 78 degree proofing setting? Also, how many does this recipe make? Thank you! (and you’re a cardamom fan, go check out the cardamom cake from Food52 by Niloufer Ichaporia King. It’s a life changing cake!)
Karen, I am excited to find this recipe. I have been making cinnamon rolls for my family (of 7) for 50 years and always found the crumb a little dry after cooling. Your recipe looks like a 60% hydration and should be wonderful. I will be trying it soon. However, my children are grown and out of the nest, so will have to try freezing some of the dough. I have just discovered your website and tried your apple pie recipe. Left a comment for you there. Have also read through many of your recipes and see that you are a scientist and know food chemistry even though you call yourself a charlatan. Your personality also comes through and keeps me smiling. I have recently dug out my mother’s old dough making machine which I have never used until now. It’s been hiding in the closet for 30 years, but still works. I tried some bread dough and am now hooked on the ease of making dough. I took the dough out after the first rise and finished it myself. I have a question: Could I possible make your dough in the machine using the appropriate sequence of adding ingredients? I am getting lazy in my old age. The biggest problem I see is calculating the perfect amount of flour. Just dumping everything in doesn’t allow any tweaking. What are your thoughts on that?
Thank you so much for doing all the research on recipes and generously sharing it with us.
I love this cinnamon roll recipe…so much so I keep coming back to make it again. Also, when I make a variation of a cinnamon roll (like an apple cinnamon roll or any sweet roll really), I have started to add butter, cream, and brown sugar to the pan before adding the rolls because it just makes them so much better! Thank you so much for this recipe.
Oh so fun Kacie, I’m glad the pan coating has been handy for other recipes! would love to try an apple cinnamon version!
Made these in two 8-inch cake tins, one tin for Christmas breakfast, the other to take to Christmas dinner at my neice’s. Not quite as presentable as I’d have liked in that they rose and slopped over the sides a bit, but utterly delicious! I think next time I will simply add a collar of parchment paper to hold them in as otherwise they were a perfect amount in each tin.
They were a massive hit with the relatives, and the leftovers here at home are now gone with our feeling being that they just got better upon sitting. In fact both my husband and I initially felt that when hot they were just a bit TOO gooey, but cooled they were just as tender and moist and yummy as you can imagine!
And the cardamom is a stroke of genius giving a wonderfully complexity to the flavor.
I had never made cinnamon rolls before even though I’m an experienced baker. I feel fortunate to have found this recipe for my starting point as I suspect there’s no reason to try another. The dough was challenging to handle as the two-hour rest didn’t turn out to be enough so I had to leave them overnight, and I suspect I added a bit more flour than intended. Still, they were no-where near hard or dry so the recipe can take that tweaking.
Hi Anna! Thanks for taking the time to share your experience with these, and so glad you enjoyed them. The collar of parchment paper in the 8-inch tins is a great idea :-)
My dough is currently chilling. I scrolled through the reviews but couldn’t find my answer…if I want to freeze half the batch, do I freeze them after cutting them in rolls? Thanks!
As a Canadian baker and major critic of all things Cinnamon Buns.. holy moley.. these are the flavour BOMB!! I have probably baked 10 different Cinnamon Bun recipes, attempting to find the perfect bun. Its got to be sweet, spicy, sticky, gooey, pillowy soft and of course loaded with creamy cheese frosting. I had my doubts to be honest. When i saw “Brioche”, i thought “oh no!”. Our local bakery sells Brioche Cinnamon Buns and they are dry and crumbly..not soft at all. I tried this one and WOW is all I can say. It nailed it for me! The only problem I had was getting down my rectangle dough rolling and cutting skills down. This dough was super nice to work with once chilled. Again.. never tried fridge rising but wow..i love this dough! And it had such a rich sweet yeast flavour..soo good. Thank you!
This recipe looks amazing!!! I will try it, and I am really good at baking, so it might just turn out. But, there are a lot of instructions. My mum was a bit hesitant on the cardamom, but I thought it would taste great! Fingers crossed. Thanks so much!!! Ps. Making for Easter🤞🤞🤞💖💖💖
I hope these turned out perfectly Alyssia! Come back and let us know what you thought :-)
Hey! I thought the recipe was delicious, but I wonder why they were a bit too brown at the top? I put them in the oven at the same temperature you said, and the same amount of time. I wonder if it was because of the fact that our oven gets a little too warm (It’s very obnoxious). I think that might be the cause. But anyway, I loved how fluffy they were, and I made a sticky bottom for them, I didn’t put they icing on them, though. They were amazing otherwise!!! Thanks so much!
Ps. I would give an emoji, but I am typing off my computer lol :):):):):)
How did you come about this recipe? Is it something you pieced together from different recipes to get the results you wanted?
Hi Carolyn! Yes, I started with a brioche dough and went from there! Lots of testing later, this was the result :)
I made the dough last night and let it sit in the fridge overnight. This morning after the rise they were short and spread out a bit. They tased good but I was hoping for taller rolls. what did I do wrong?
Hi Lauren, such a bummer! I’m wondering if you used too-hot water when mixing your dough, and killed the yeast? So sorry it didn’t work out.
These are my favorite cinnamon rolls!