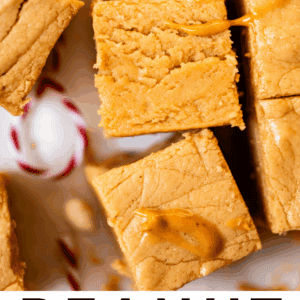
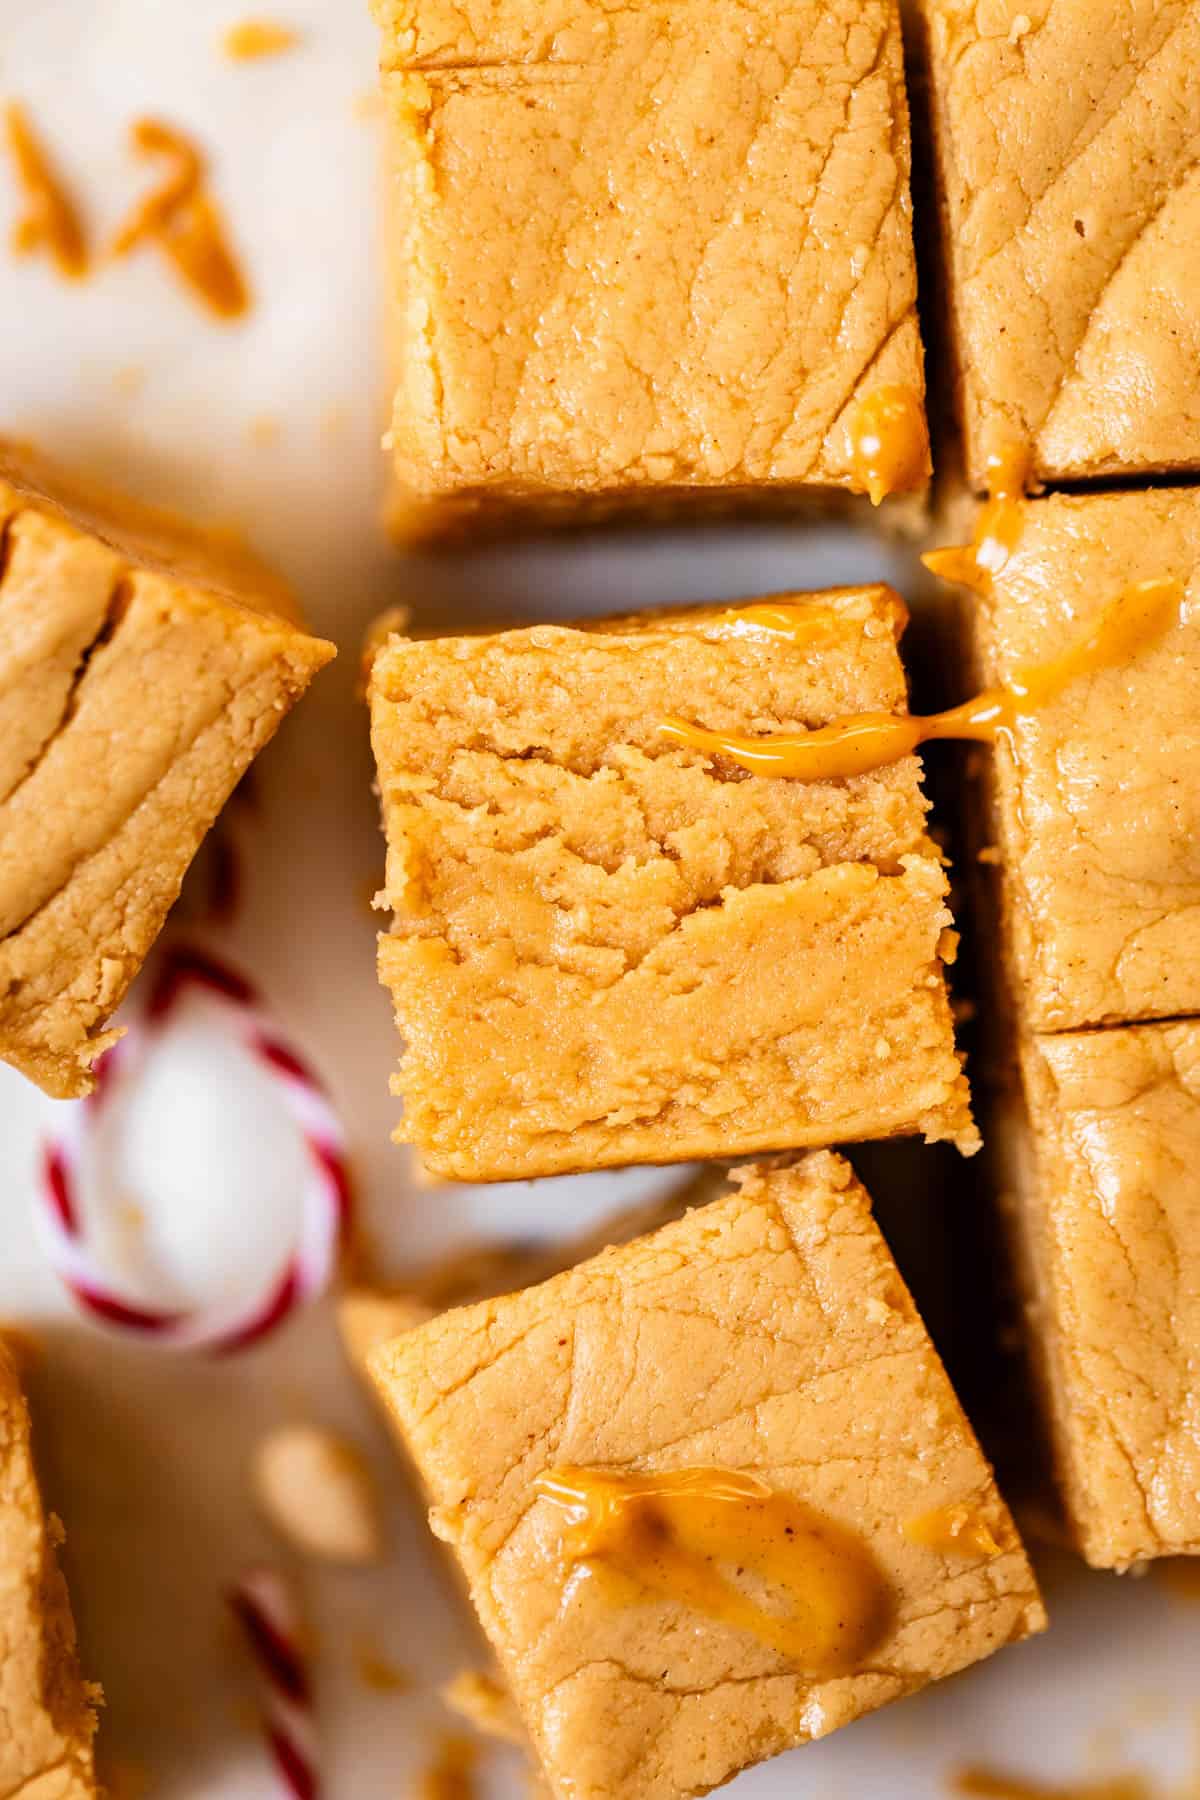
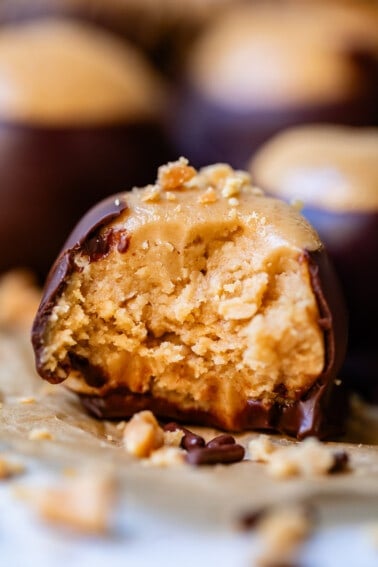
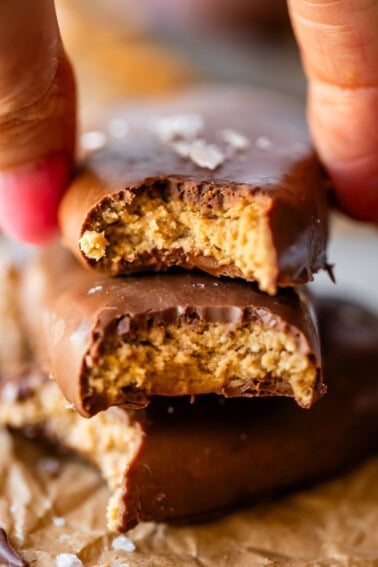
BEHOLD: the day has come. The day that I’ve finally mastered Peanut Butter Fudge. Readers have been asking for this recipe for 10 years. It has the EXACT same fudgy, rich, moist texture as classic chocolate fudge made with marshmallow fluff, but has intense peanut butter flavor. It’s decadent and you can’t stop at one piece! With a step by step guide with pictures, you can’t fail. Make it for your neighbors this Christmas!
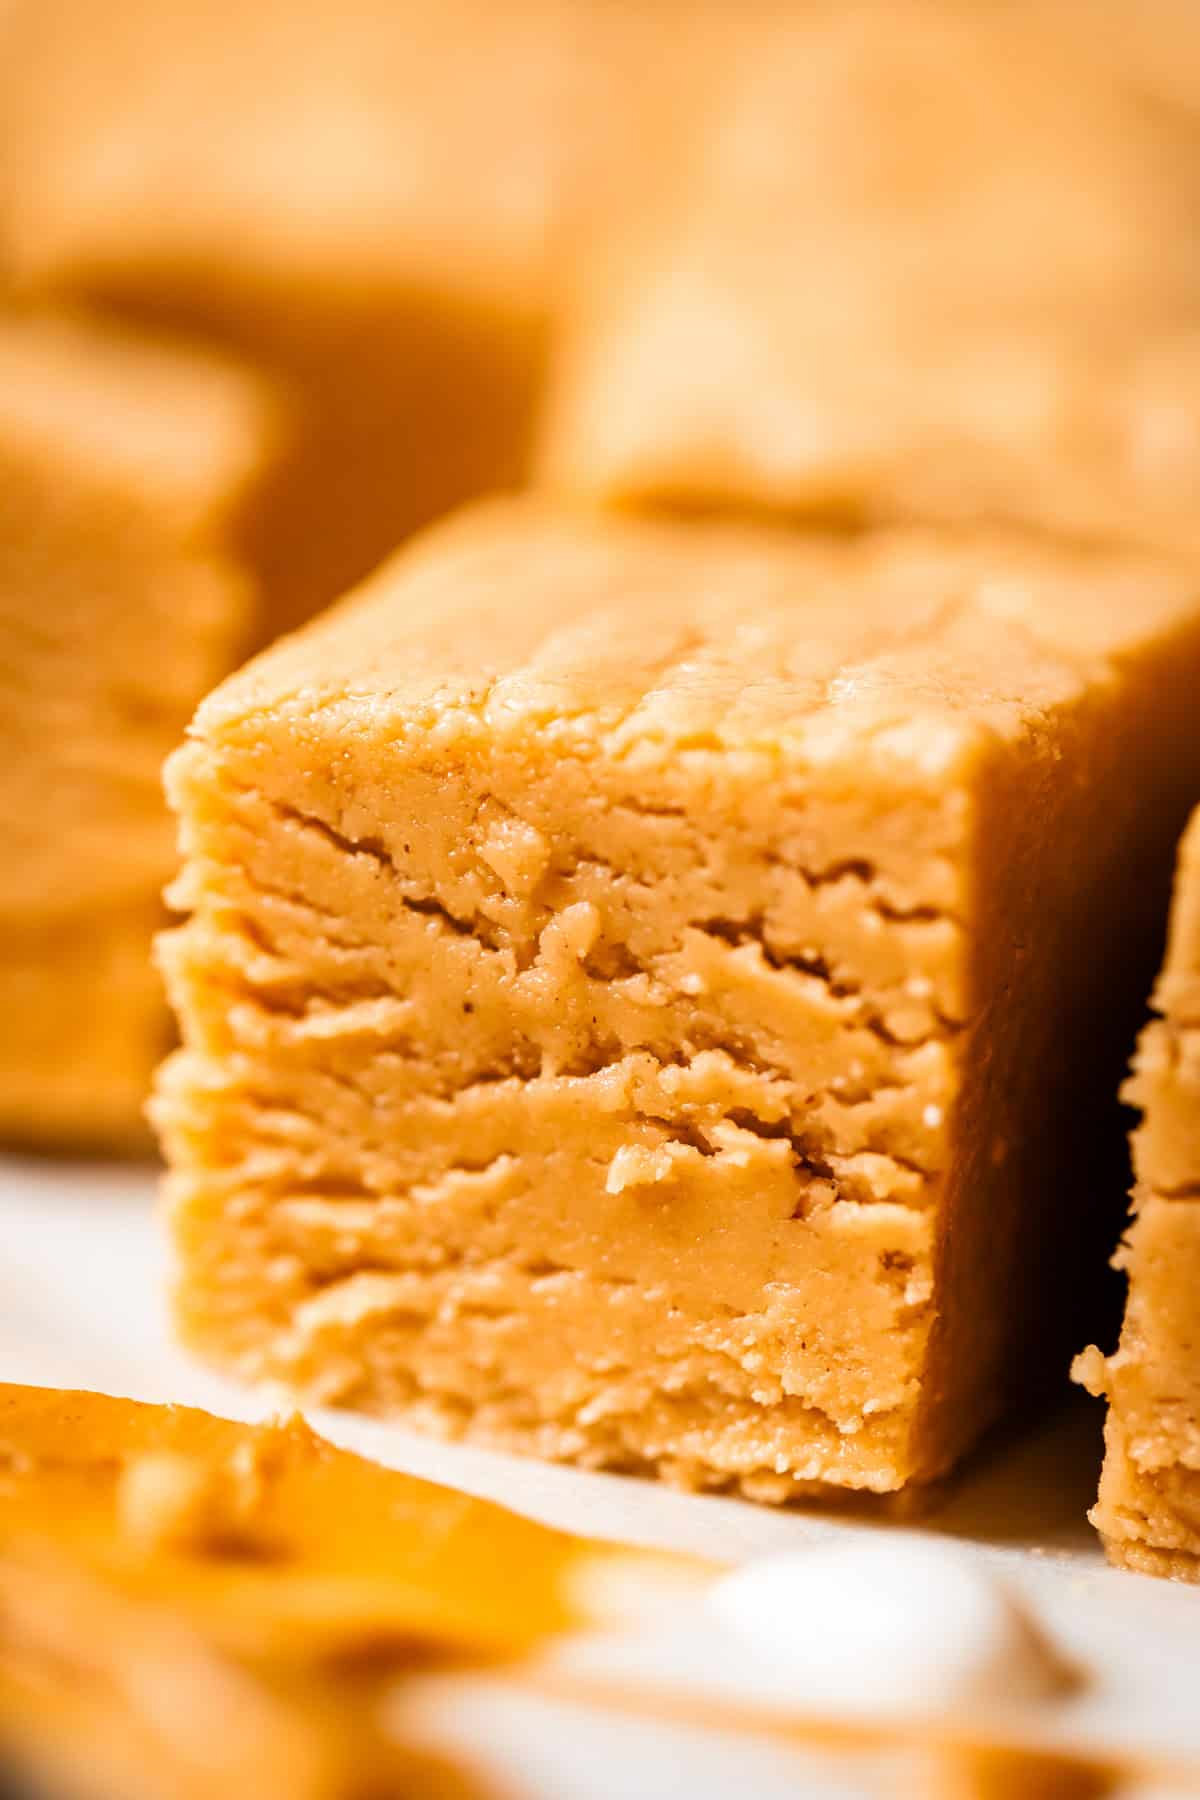
Table of Contents
- The case for peanut butter fudge with marshmallow fluff
- Important ingredients
- How to make peanut butter fudge
- Looking for neighbor plate ideas? I gotchu.
- How to store easy peanut butter fudge
- Can you freeze this fudge?
- Frequently asked questions
- More peanut butter recipes you’ll love
- Peanut butter Fudge Recipe
The Elf-on-the-Shelf that my children dubbed “Elfie” years ago, has returned. (Maybe not their most imaginative moment in the naming department, but it has stuck.)
Edison is my 5-year-old, and the Christmas magic is STRONG with this one. Yesterday, the Elf was perched high up on a cupboard. Eric saw Edison kneeling reverently, eyes cast up toward Elfie, with his hands clasped in front of him, whispering quietly.
Okay, okay, I am ALL about the wonder of Christmas in all its consumerist magical glory, but this is TOO FAR!! What have we done??
I told my friend Heidi about Edison praying to our Elf, and she told me about a time when her brother was a little kid. Someone asked him what we celebrate Christmas for, and he said, it’s Santa’s birthday! Ohhhh child. 😂
Well, aside from letting you know that Jesus is the reason for the season 😂 I have to also tell you that I HAVE FINALLY DONE IT. I have finally mastered Peanut Butter Fudge. This post is a looong time coming!
I published My Mom’s Chocolate Fudge recipe back in 2012, and it has been a top recipe on the blog ever since. Thousands of people have made it over the years. It’s the creamiest, dreamiest chocolate fudge you will EVER try.
I’ve had years worth of comments, emails, and messages over the years asking for a peanut butter version of my mom’s fudge. After a lot of trial and error, I’ve finally figured it out! I’m absolutely in love.
The case for peanut butter fudge with marshmallow fluff
Growing up, we made one thing for our neighbors as Christmas treats every year: My Mom’s Fudge. And in my mind, fudge was synonymous with smooth, pure chocolatey goodness; so much so, that I didn’t even KNOW there were other kinds of fudge until adulthood. Why mess with perfection?
But I have seen the light. The peanut butter light, that is. It is the exact same experience as eating a piece of classic chocolate fudge: creamy, decadently rich, with a perfect texture that is somehow smooth and crumbly at the same time, that melts in your mouth instantly. Peanut butter fudge is exactly the same, but with an INTENSE peanut butter flavor, sweet and salty and nutty.
I cannot WAIT for you guys to try it out, it’s truly one for the books!! It will be a new standard Christmas recipe in our house. We are a little obsessed, haha!
Important ingredients
Now, let’s talk about some details. This is NOT one of those 3 ingredient, sickly-sweet, sweetened condensed milk fudges. We can do better than that! It’s still a cheater version from true fudge making (which requires a lot more time and a lot more stirring! I’ve never tried it!), but I think it’s the perfect medium effort for insanely good results. A Goldilocks fudge, if you will. Here’s how!
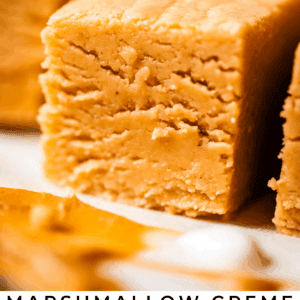
- marshmallow creme: the star of the show that helps us skip some of the work and time to get the best creamy fudge. It’s got the perfect consistency for setting fudge, and there is NO substitute that will give the same results. My favorite brand is Kraft Jet Puffed Marshmallow Creme.
- evaporated milk, which is basically normal milk with most of the water boiled out of it. What’s left is a super creamy, thicker milk that instantly makes the fudge more rich and smooth. Do NOT use sweetened condensed milk!!
- peanut butter: there is a time and a place for natural peanut butter, and fudge-making is not it; it’s way too runny, and the fudge will not set. Get the best brand you can since it’s the star of the show and you want that flavor to really shine through. My all time favorite for baking is JIF!
How to make peanut butter fudge
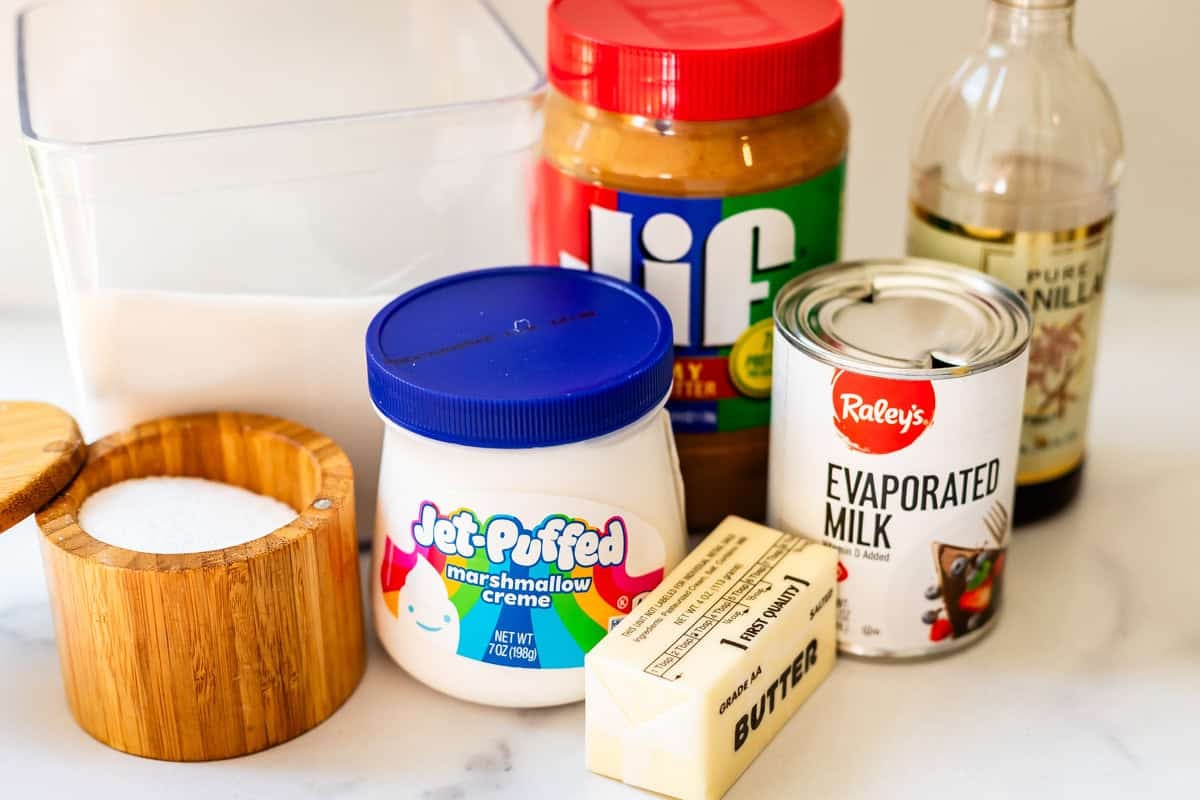
Here are all the things you need to make this recipe. Make sure you are using Jif Peanut butter…or Skippy if you didn’t have a choosy mom (it’s not your fault, you are loved.) Any generic brand that has a healthy dose of Fully Hydrogenated Vegetable Oil will also do. Stop looking at me like that. Don’t hate me for what we’ve become. But whatever you do, DON’T use natural peanut butter! It won’t work for this recipe. You need the solidified fat (the previous mentioned hydrogenated stuff) in regular peanut butter to help the fudge hold together.
You’d think, with the above photo, that you have all the ingredients and you are ready to turn the heat on and get going making the fudge, right? WRONG!
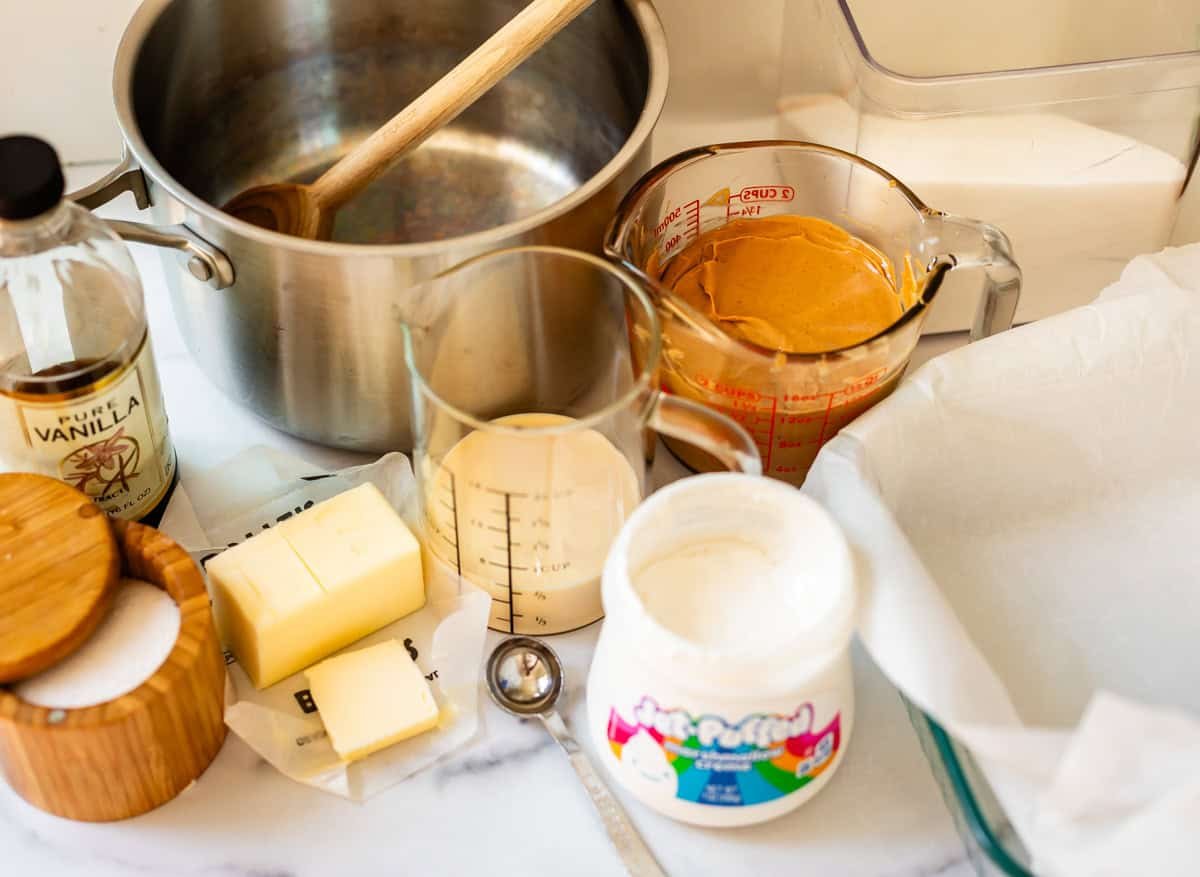
HERE is what all your ingredients should look like before you start cooking. You have to prep everything. Measure the pb, open the tub of mallow and remove any foil bits, and line your pan with parchment paper.
Things move FAST when you make this fudge, and on top of that you need to be stirring it constantly. So unless you are really confident in your ability to scrape peanut butter into a measuring cup one-handed, (while stirring a boiling pot with the other hand…) get it all ready beforehand!
Next we’re going to talk about your pot. Yes, this really does matter! You need a heavy 3-quart pot. That means when you pick it up, it should feel HEAVY. Give it a swing! Sometimes people call these “heavy bottomed pans.” Can you see how thick the bottom of this pan is compared to the thickness of the edges?
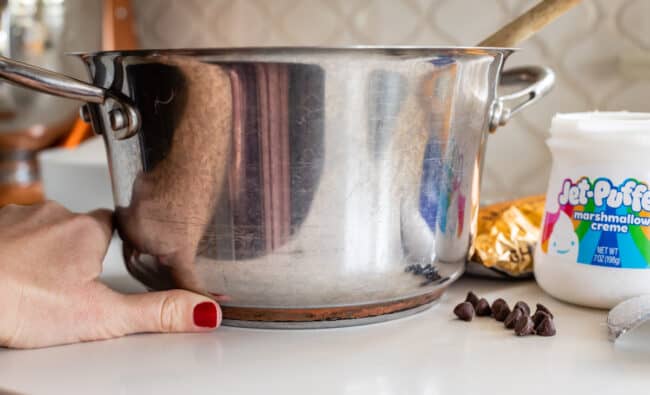
A cheap thin pan will heat your fudge unevenly, creating “hot spots” and causing it to scald. This leads to dry, crumbly fudge. The pan quality REALLY CAN BE the difference between perfect fudge and failure fudge. Trust me! (this photo is from my Chocolate Fudge post, ignore the chocolate chips!)
Add your butter to the pot first, and turn the heat to medium. Use your wooden spoon to swirl the butter all up around the edges of the pot. This grease will help keep your fudge from crystallizing!
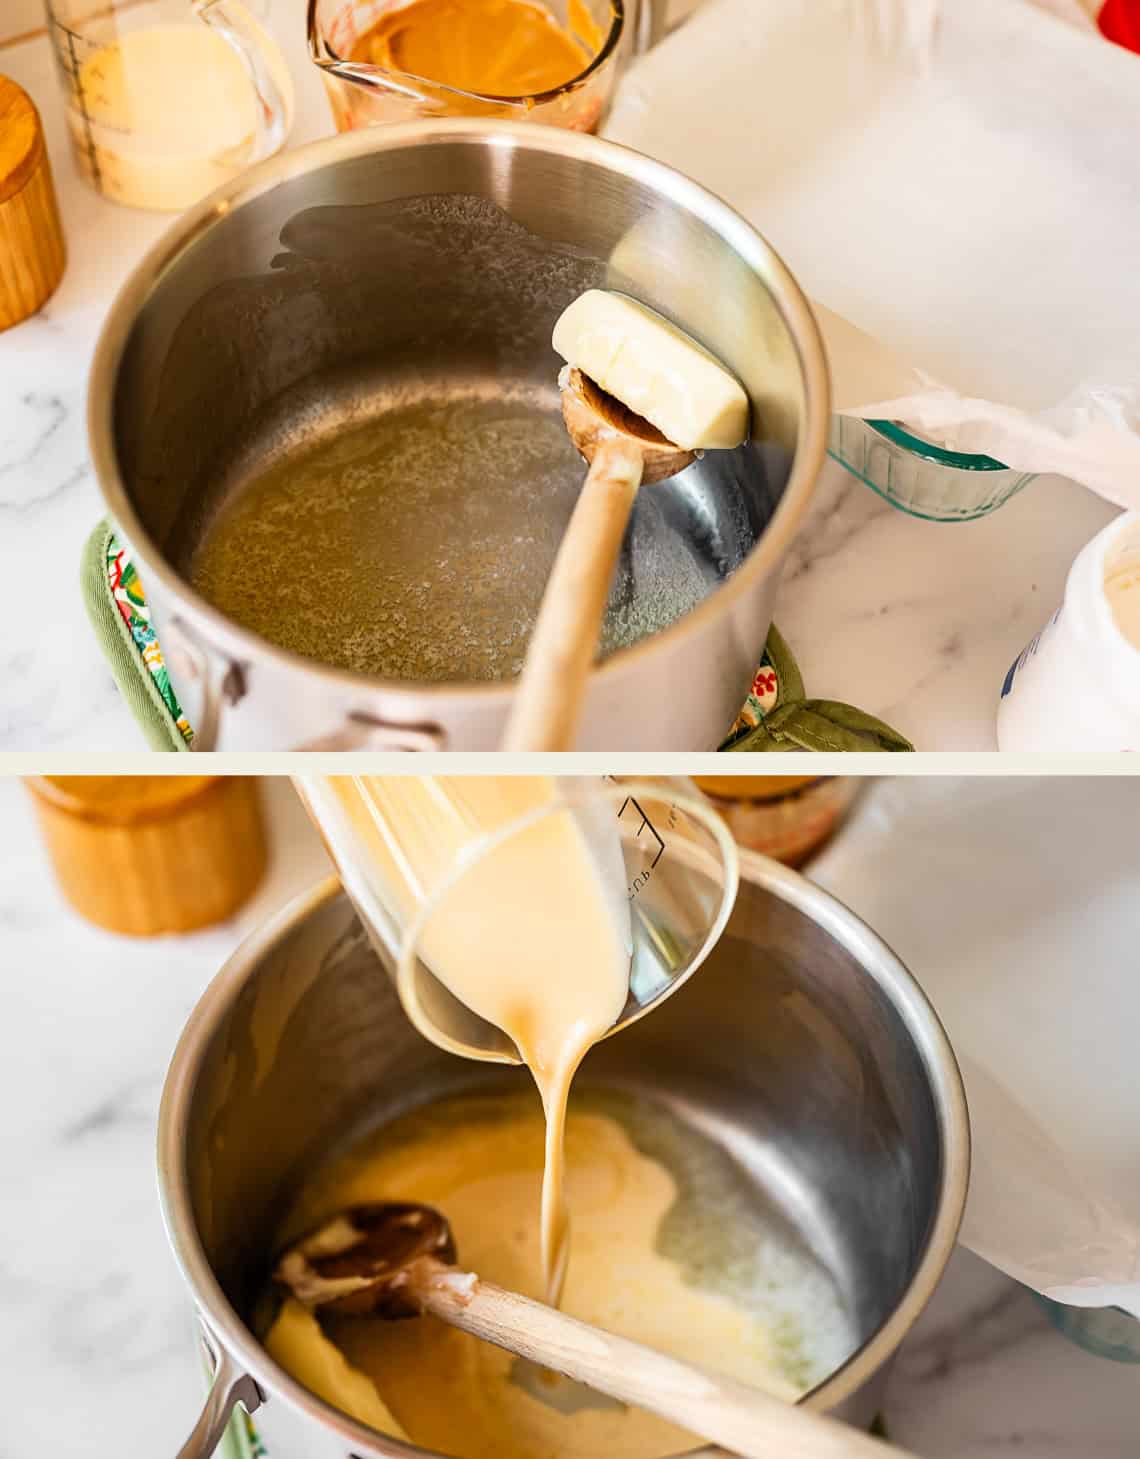
Add in the evaporated millk, then the sugar. Slowly pour the sugar into the center of the pan as carefully as you can, making sure to not get any sugar on the side of the pan. With a long wooden spoon, draw the butter and milk in from the edges toward the center, going slowly all the way around the pan until the edges are moistened.
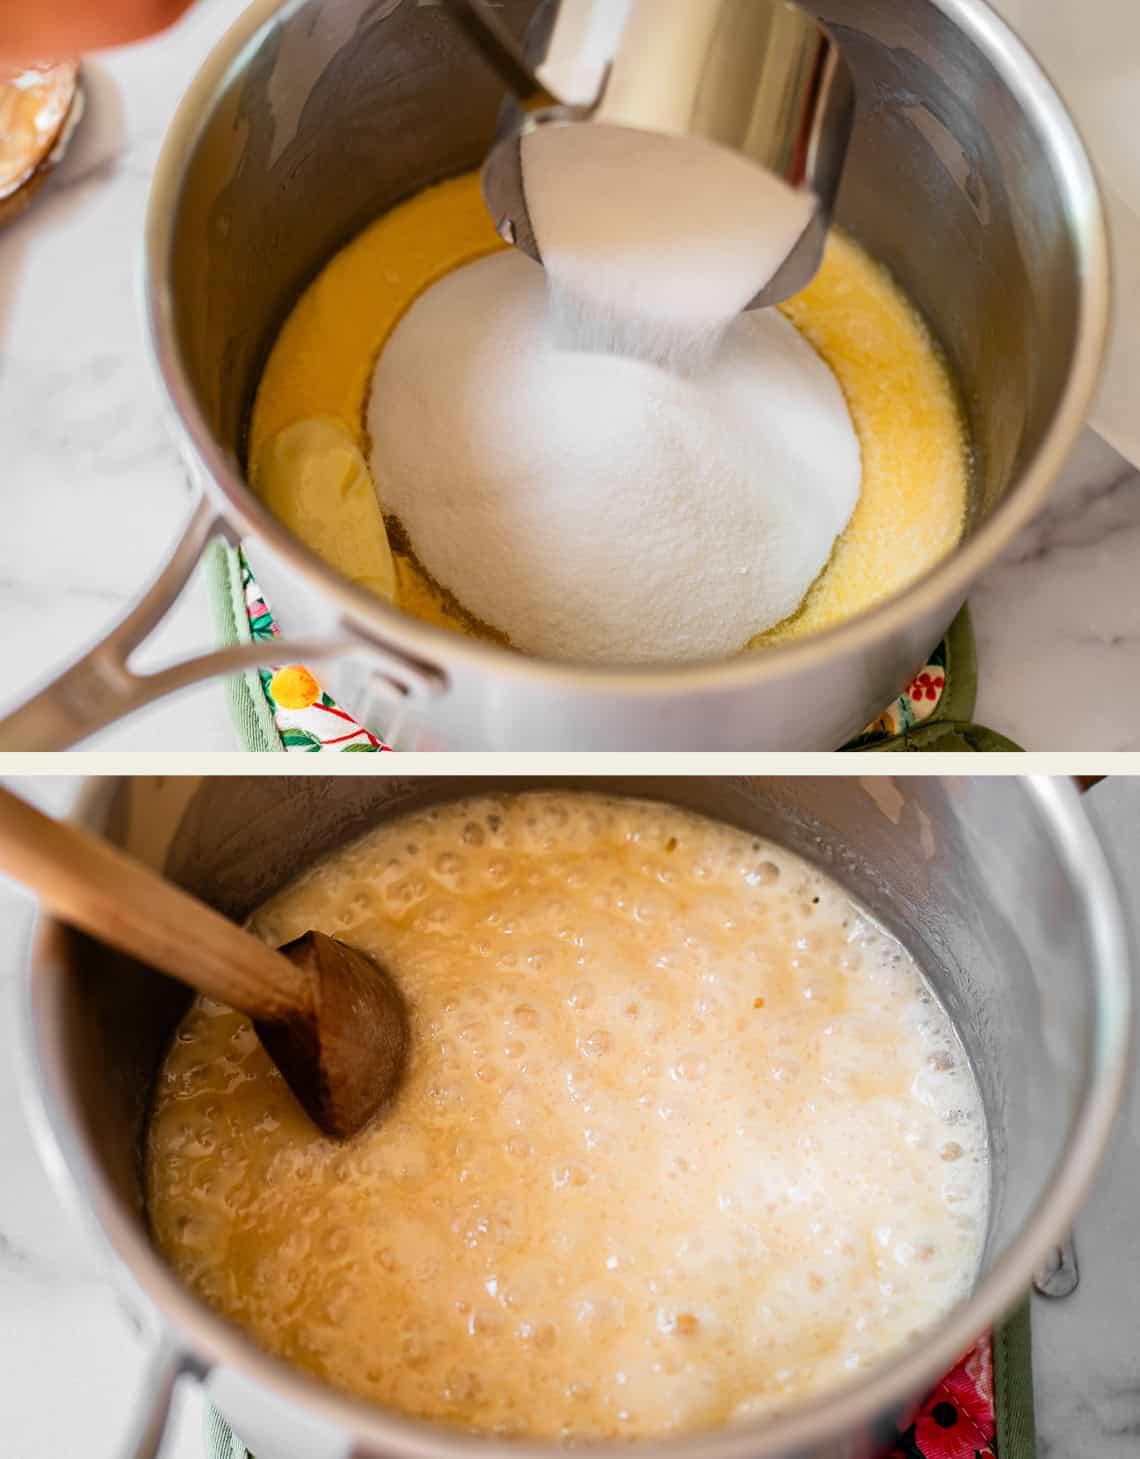
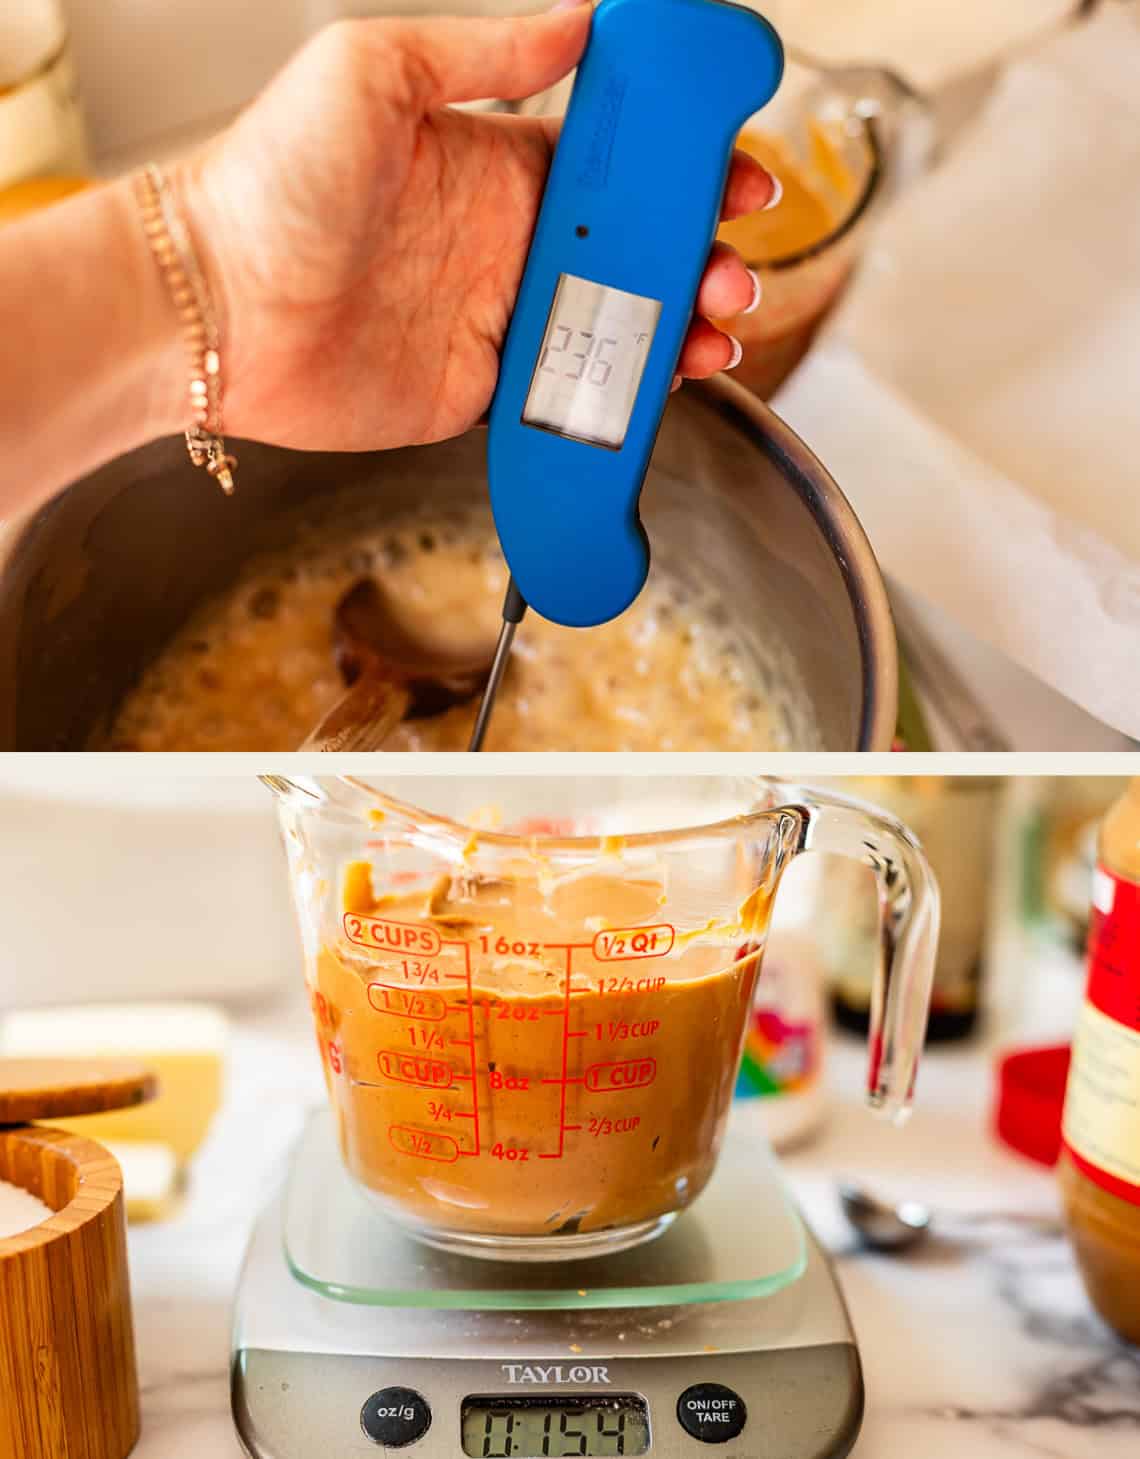
ONLY when the sugar is completely dissolved (rub a bit between your fingers if you’re not sure; you should feel no grains.) bring the mixture up to a boil. When it is at a full rolling boil, with bubbles coming up from the center, set a timer for 5 minutes. Or, use a thermometer to reach about 234-236 degrees.
Immediately add in the peanut butter and stir quick.
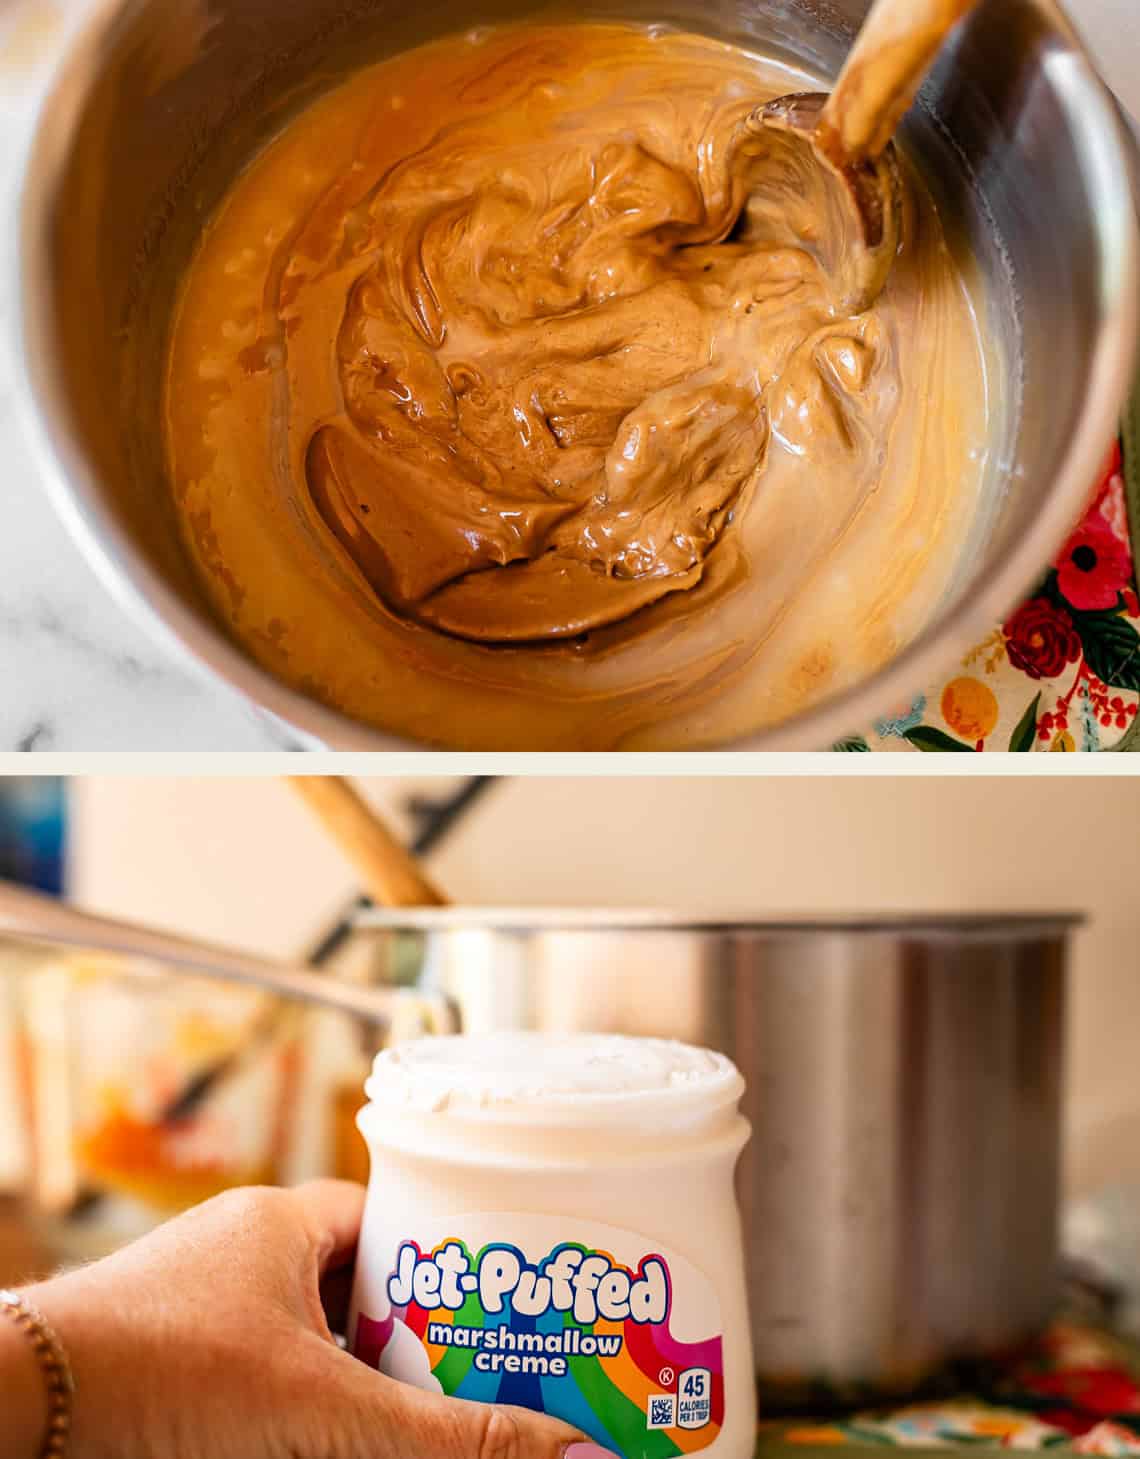
Hopefully you have taken the time to remove the foil seal from the top of your marshmallow jar before you started. Sometimes they can be stubborn and you need two hands (you don’t have two hands when you are stirring).
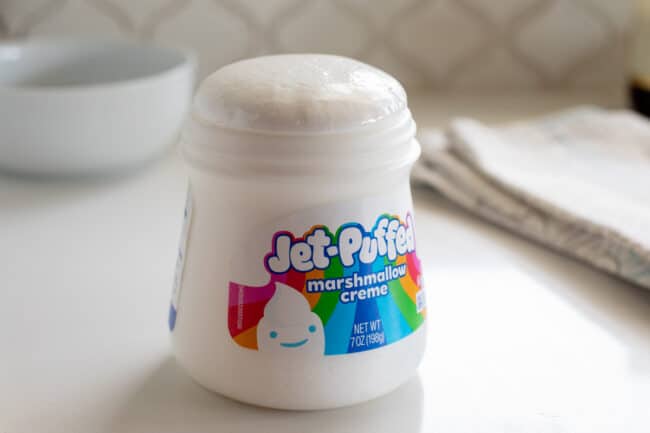
I prefer Kraft jet-puffed fluff, but that’s more for ease of opening than how it affects the fudge, I’ve used generic brands with good results. Make sure ALL the foil comes off! Heat it in the microwave for about 20 seconds, until it starts puffing over the lip of the tub, like this:
Then scrape it into the peanut butter fudge and stir the heck out of it.
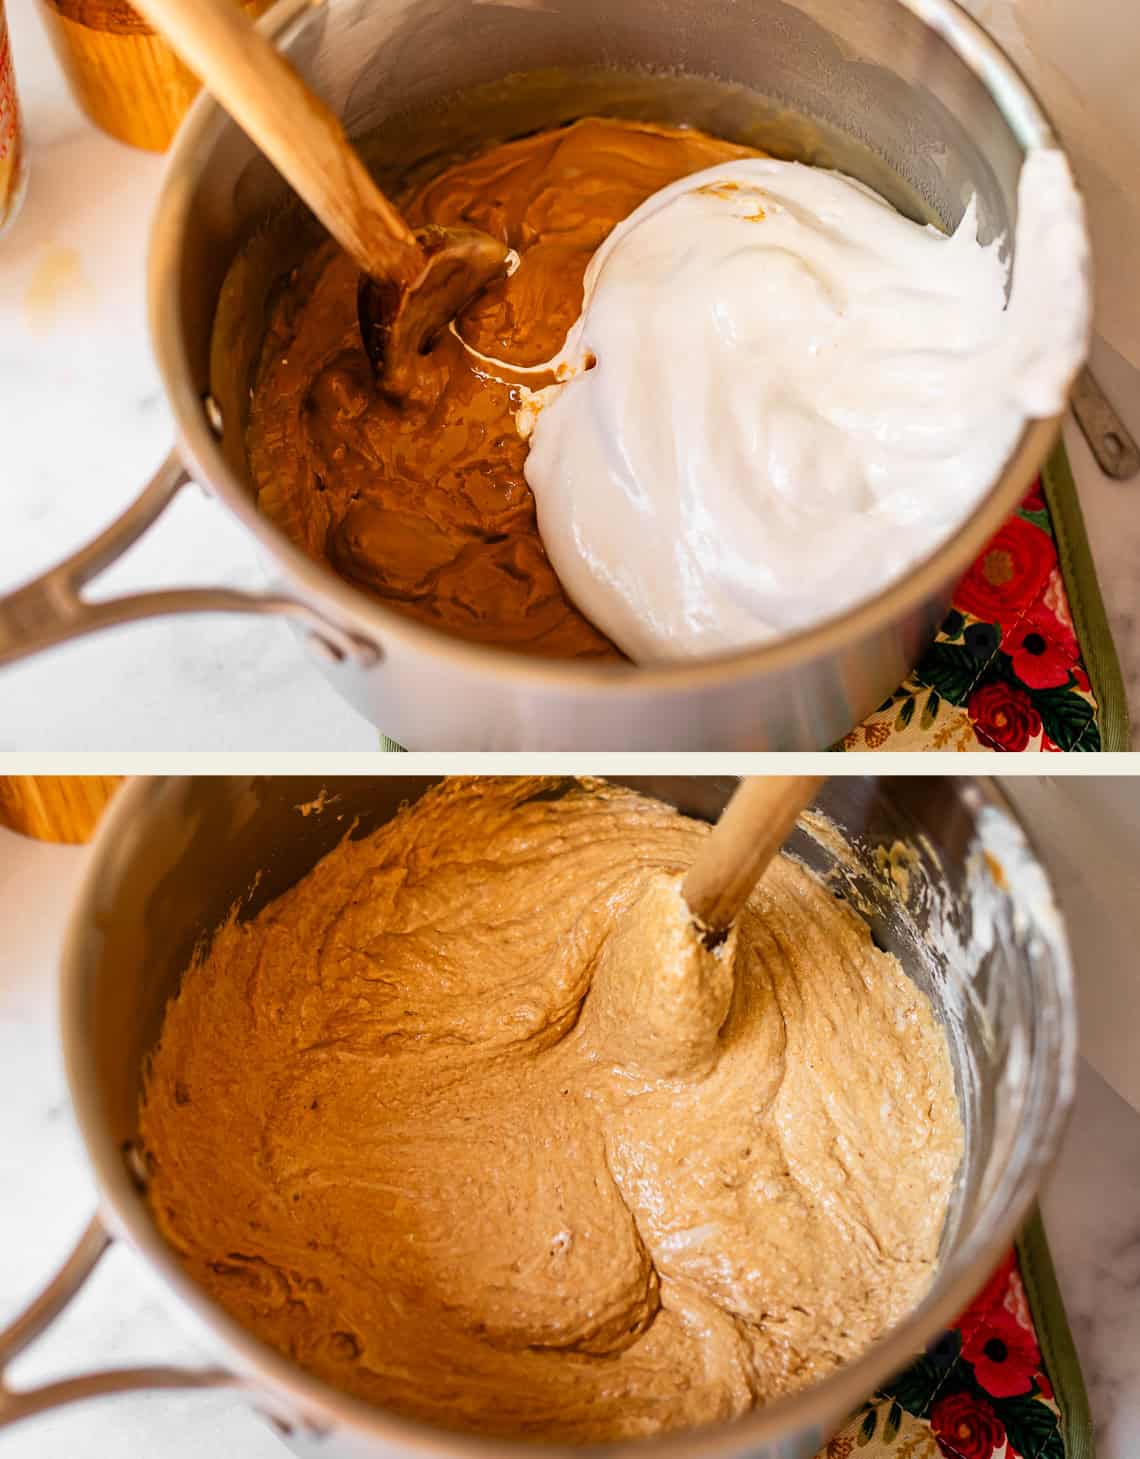
It’s looking a little grainy. That’s ok!! Add in the vanilla.
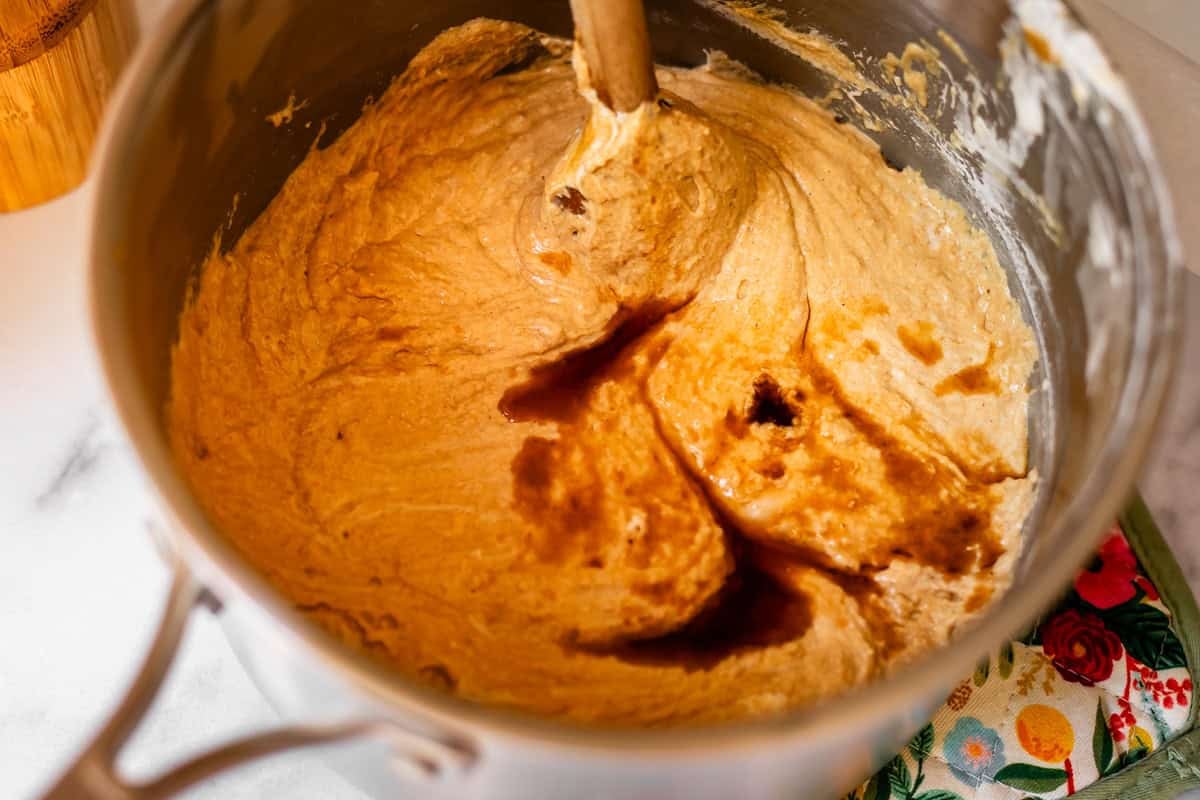
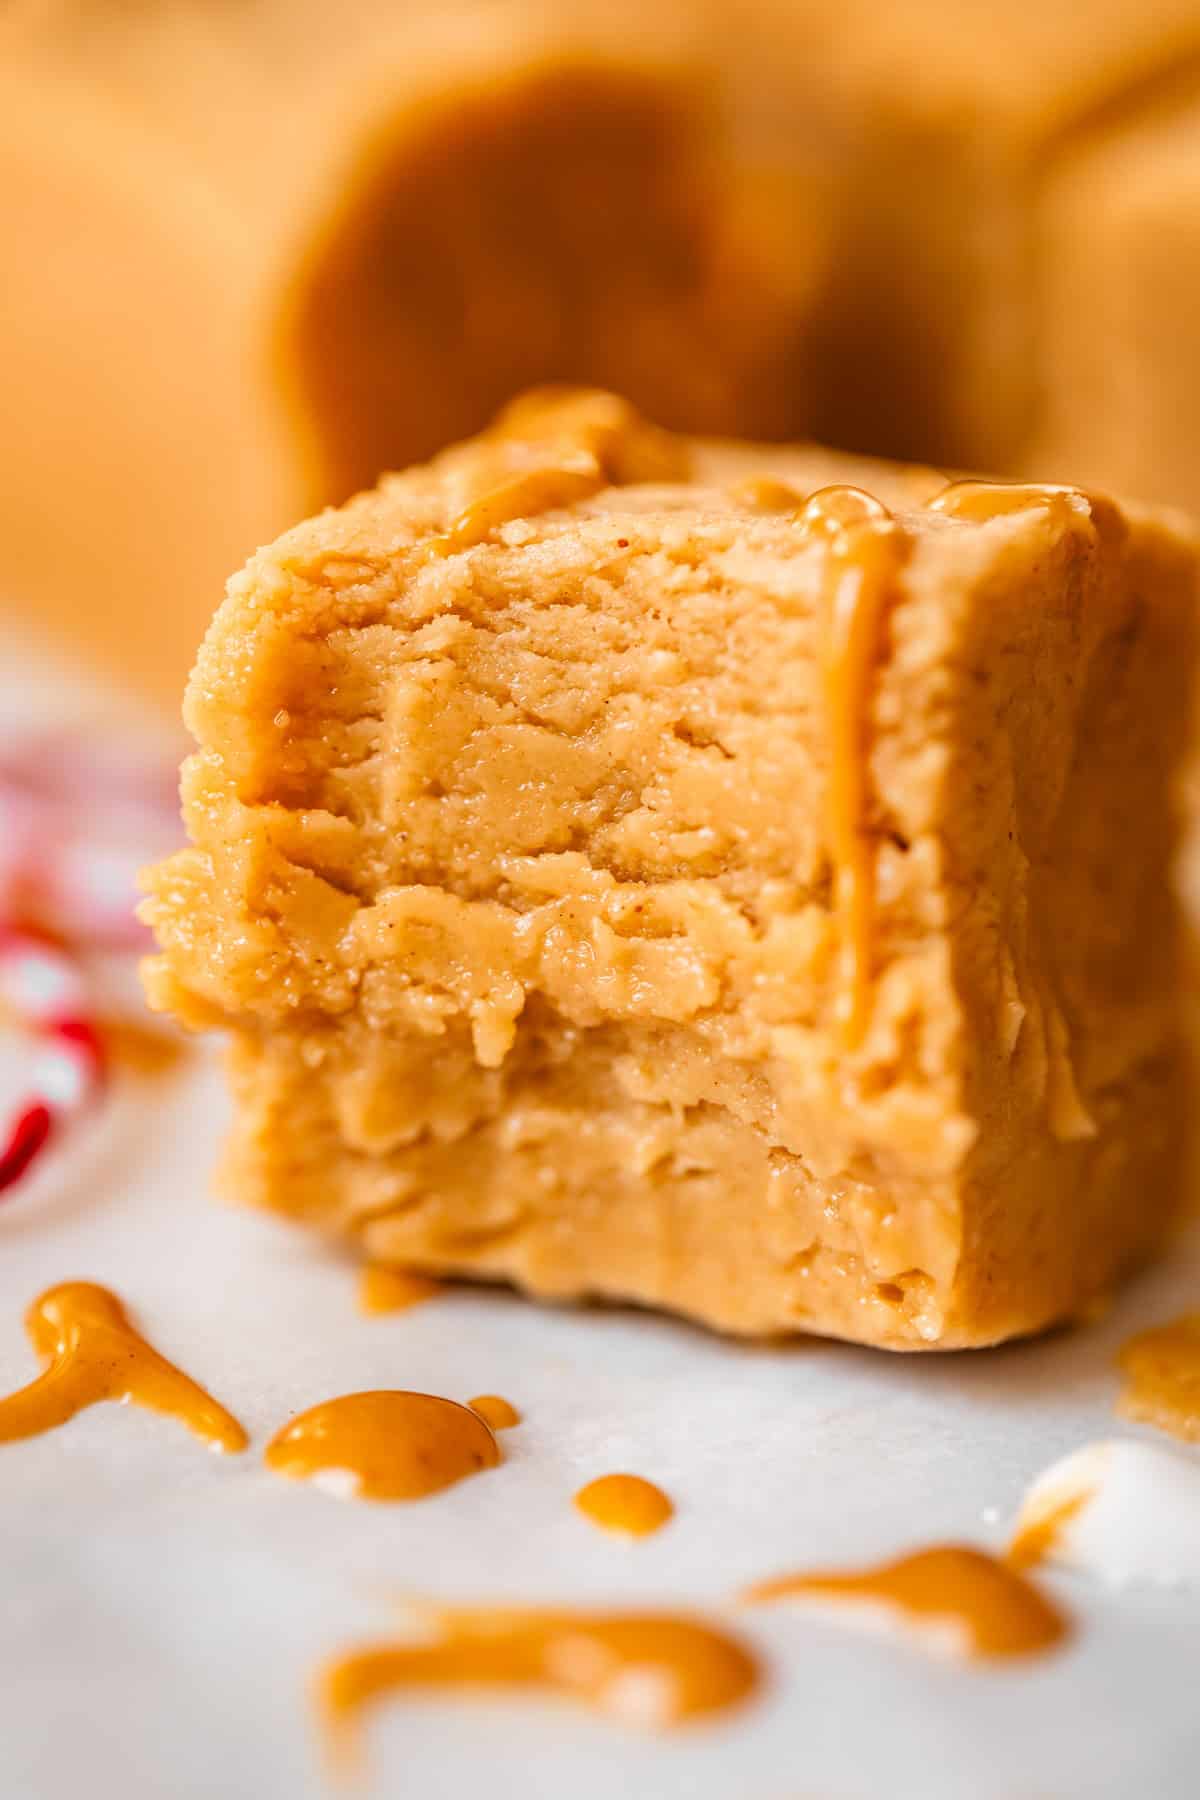
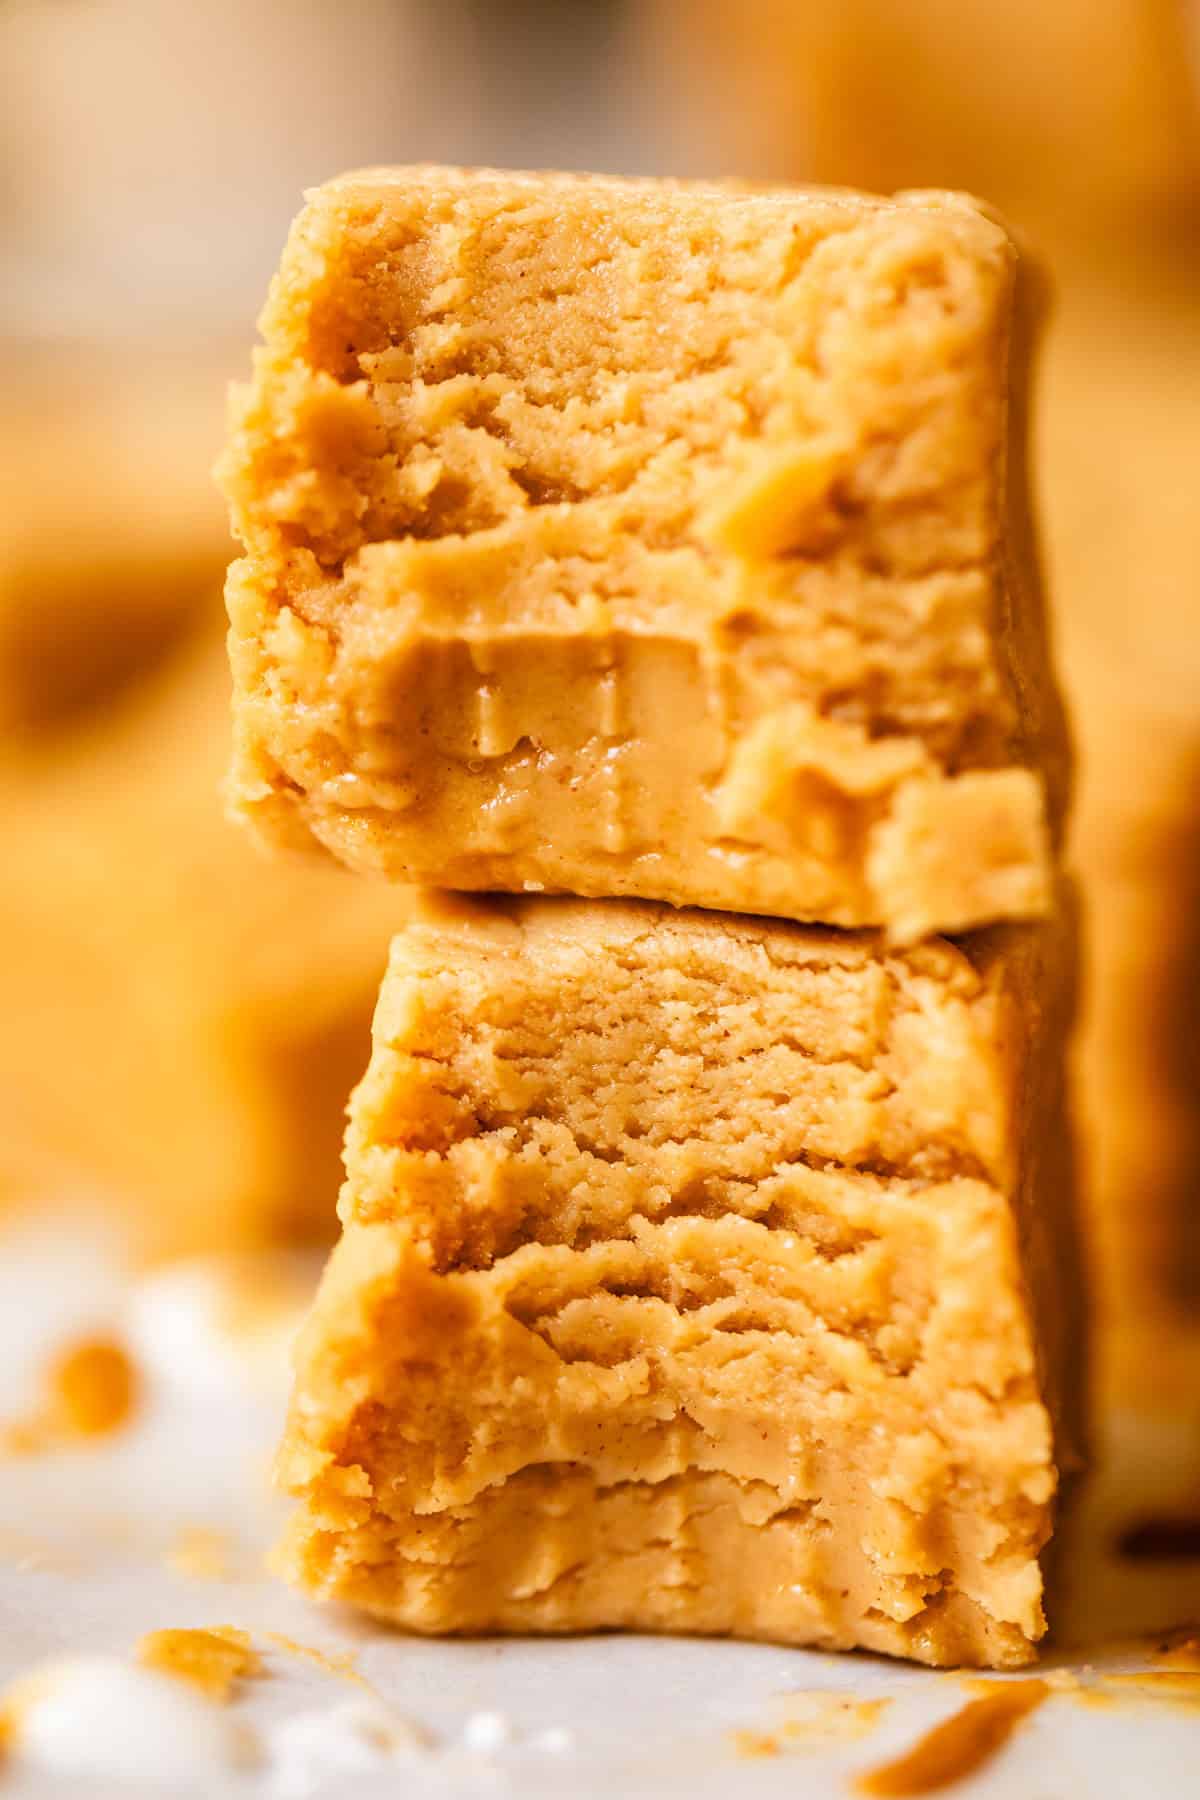
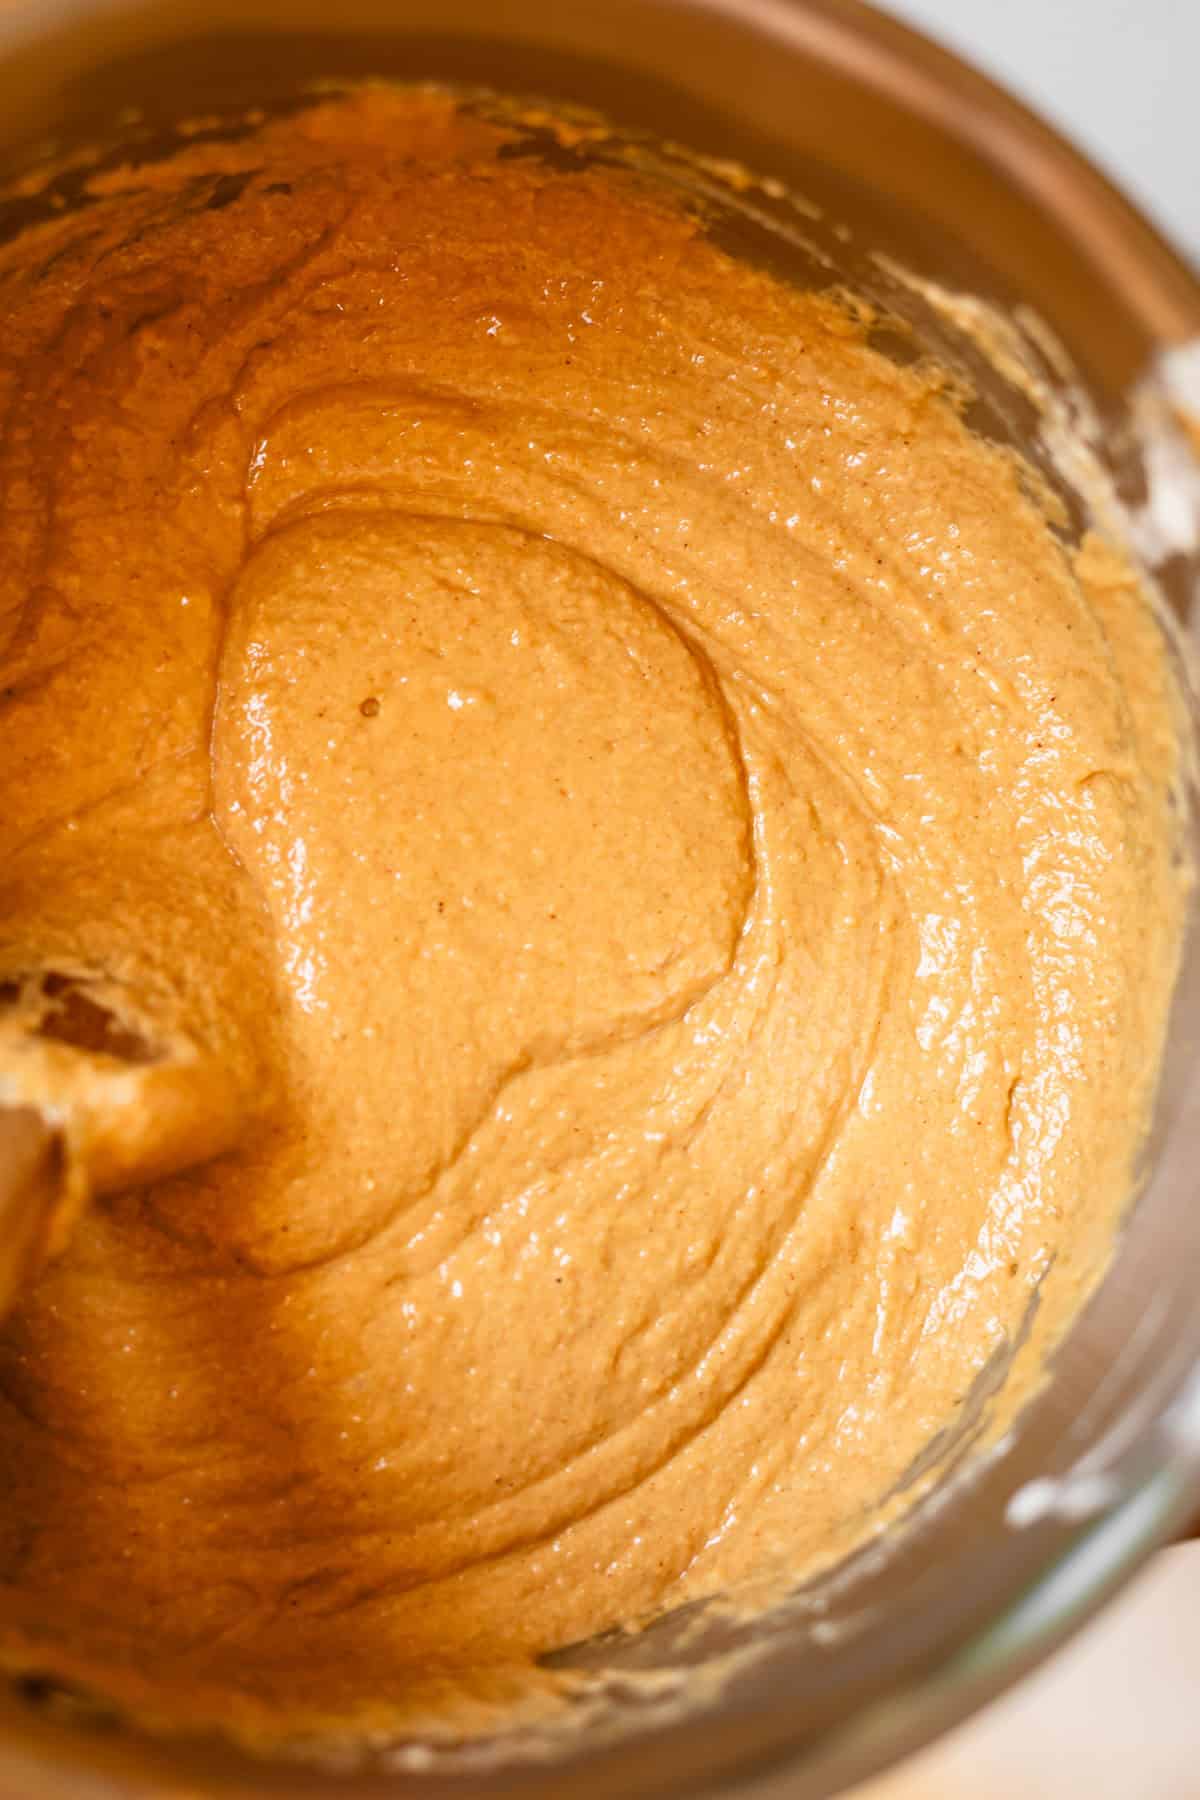
Here is the final fudge. Grainy is okay, I promise! I panicked the first time I tried this, thinking it wasn’t going to turn out. But I promise it smooths out.
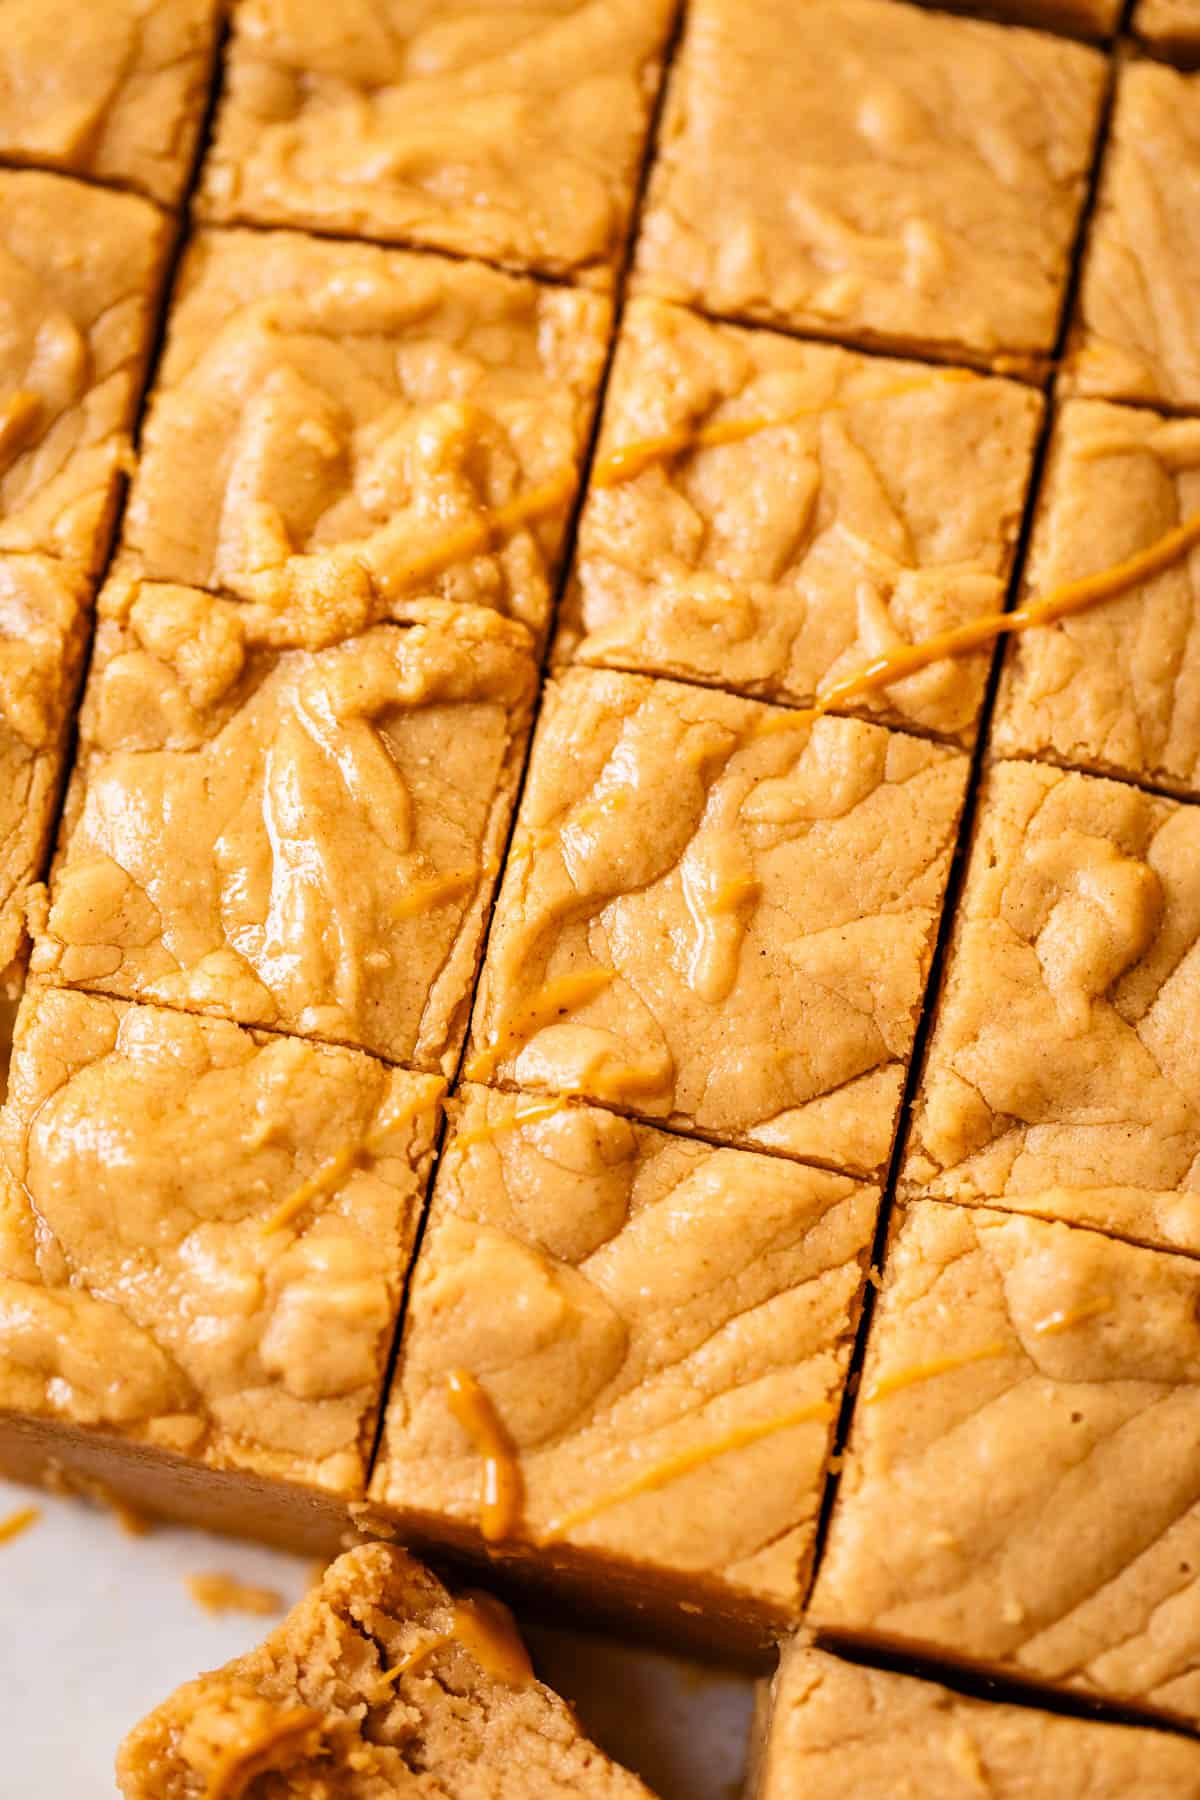
Pour the fudge into the prepared pan.
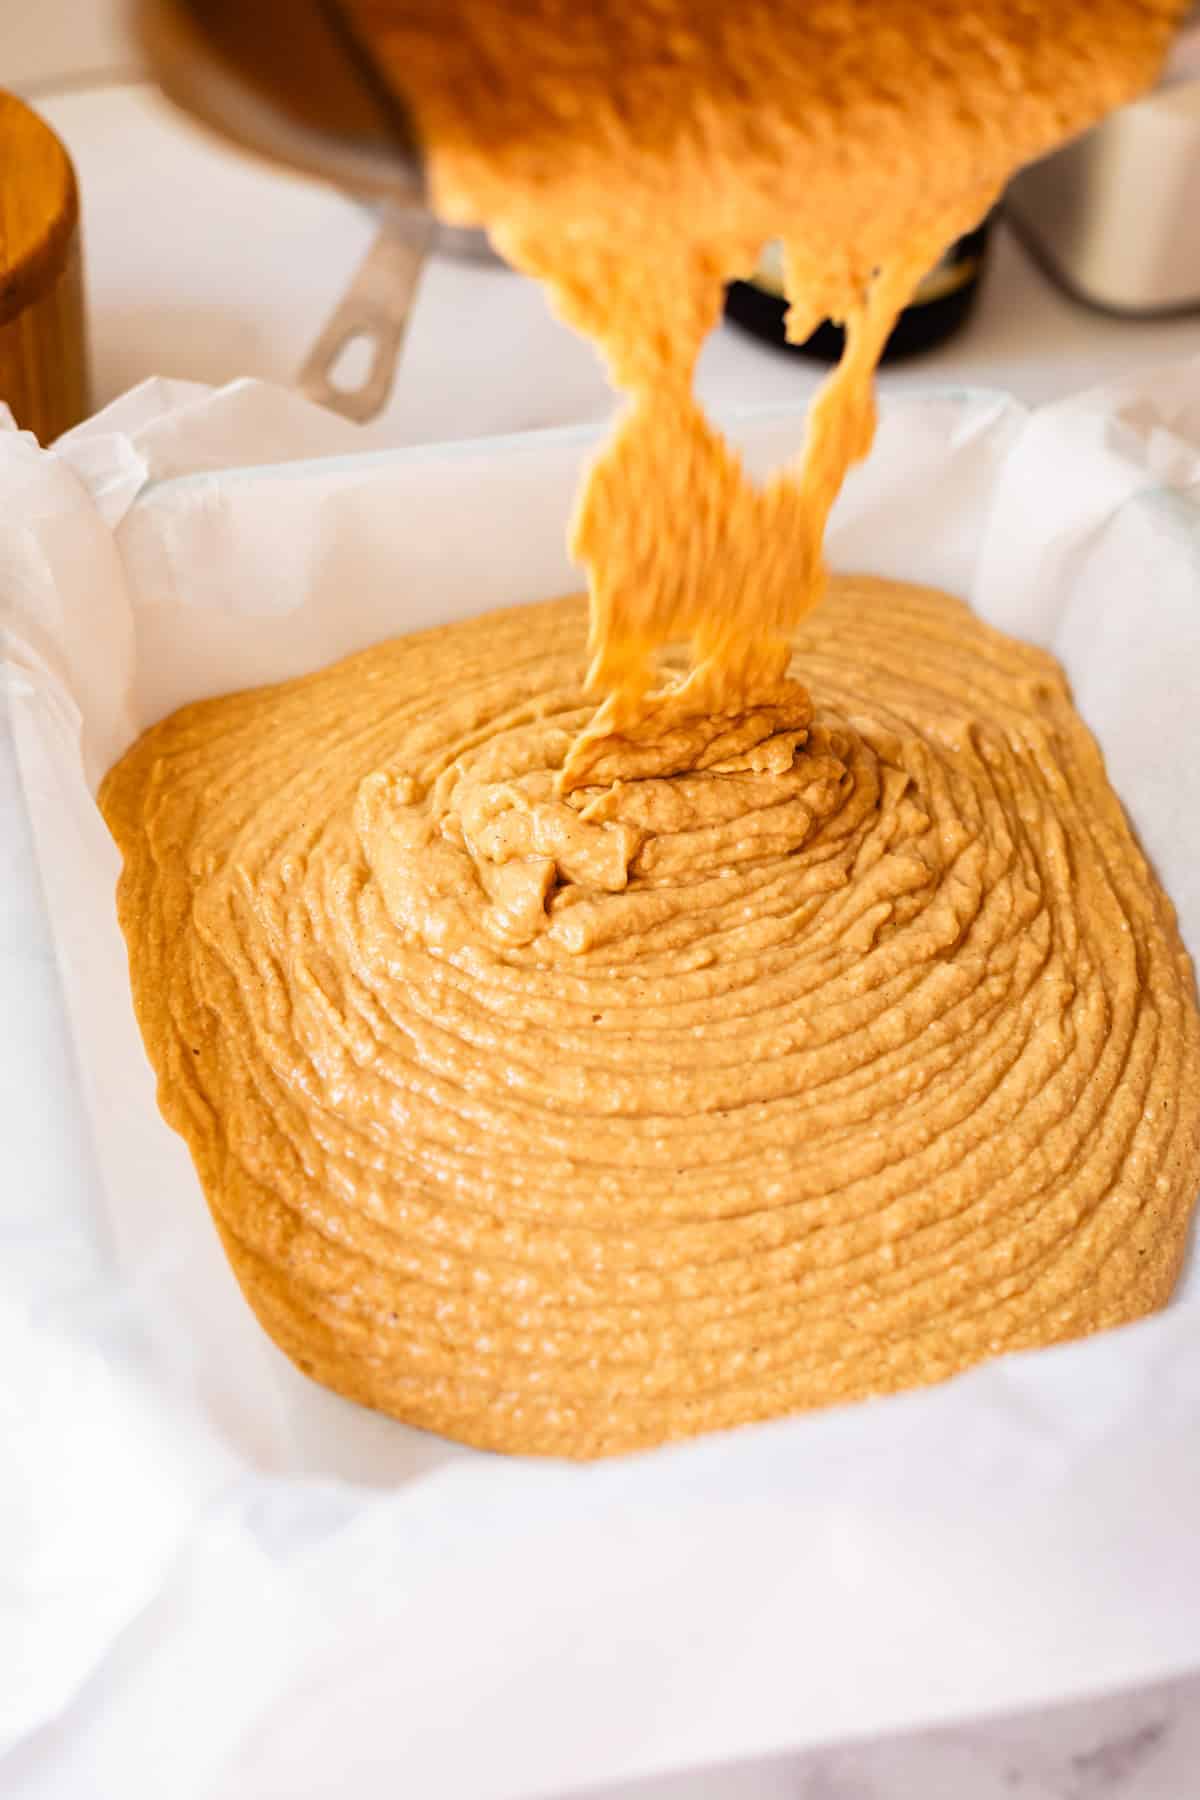
DO NOT scrape out the pot well! You will just be covering the top of your beautifully rippled fudge with already-crumbly-dried-out-edge-of-the-pan-bits. Don’t ruin the top of your fudge.
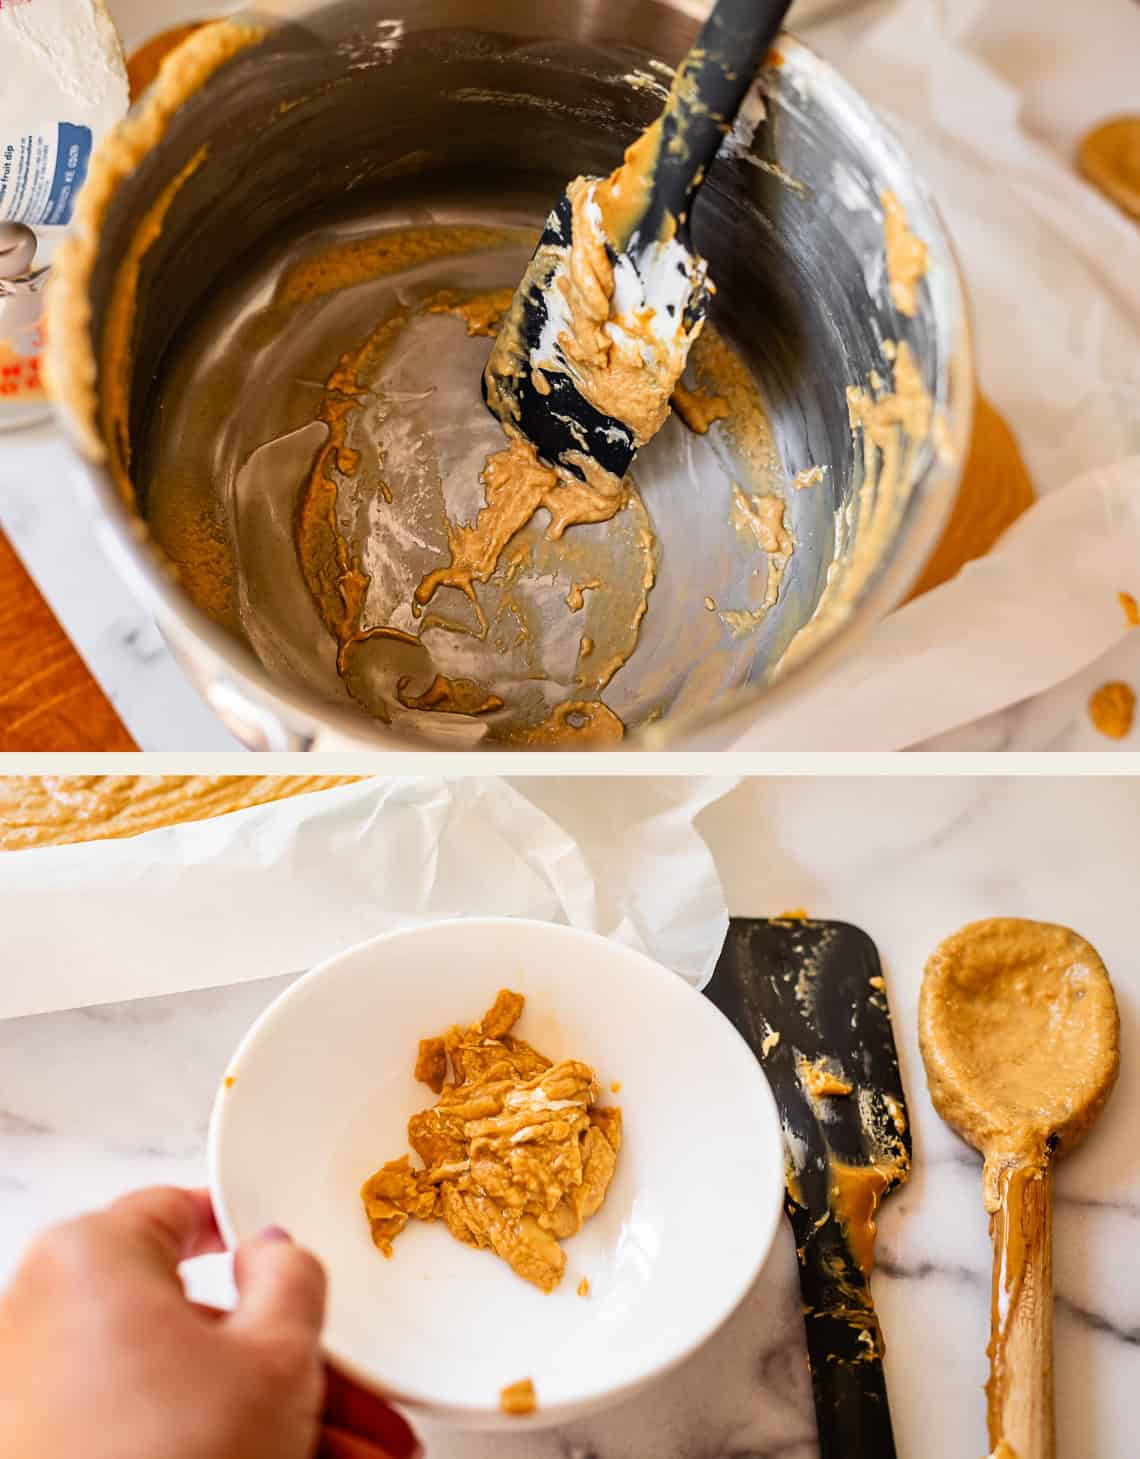
Once all the smooth liquid fudge is in the pan, get a spatula and carefully scrape all the remaining fudge into a small bowl. Then by golly, have at it with a spoon. Treat yoself. Everyone else has to wait hours to try this fudge, but not you, oh no. This bowl is a special treasure that no one else even has to know about.
Gently shake it to help the fudge in the pan settle in. Do no touch the top of the fudge or spread it with a spatula. It should be ridged on top, and yes, slightly grainy, like this:
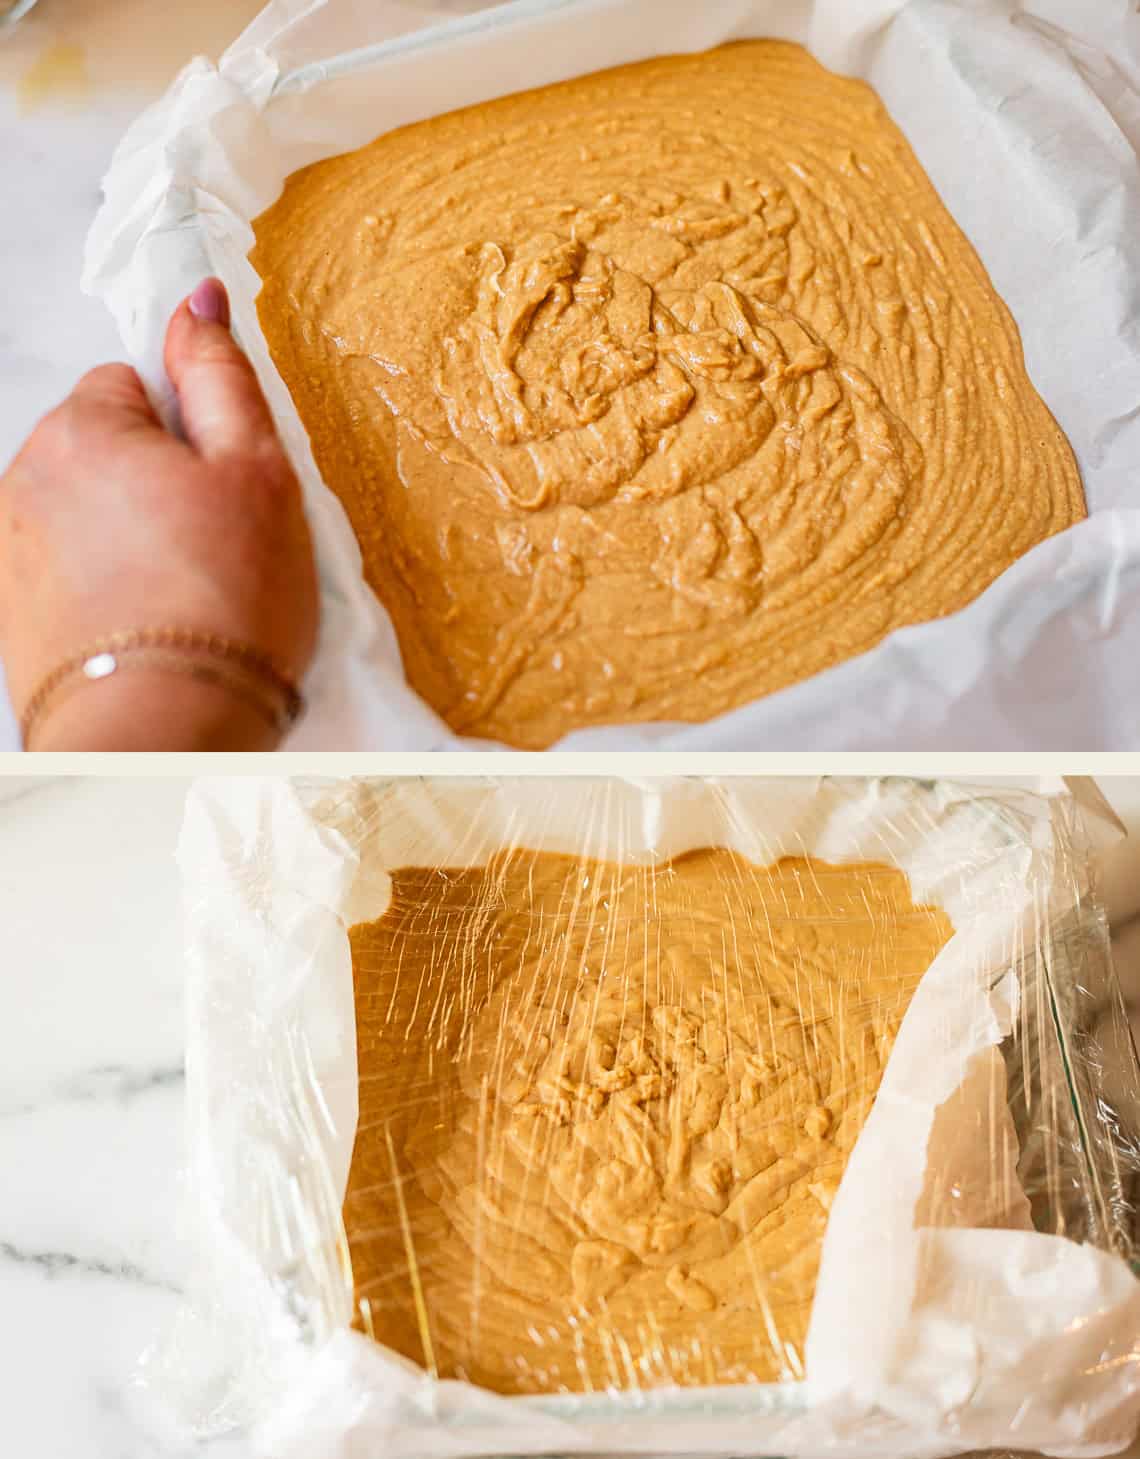
Once the fudge has had a chance to cool for about an hour, cover tightly with plastic wrap to seal in all that moisture. Then wait for another 2-4 hours. This is killer, I know!!
Lift it out of the pan with the parchment paper.

Slice off the edges for clean lines. EAT THEM!!
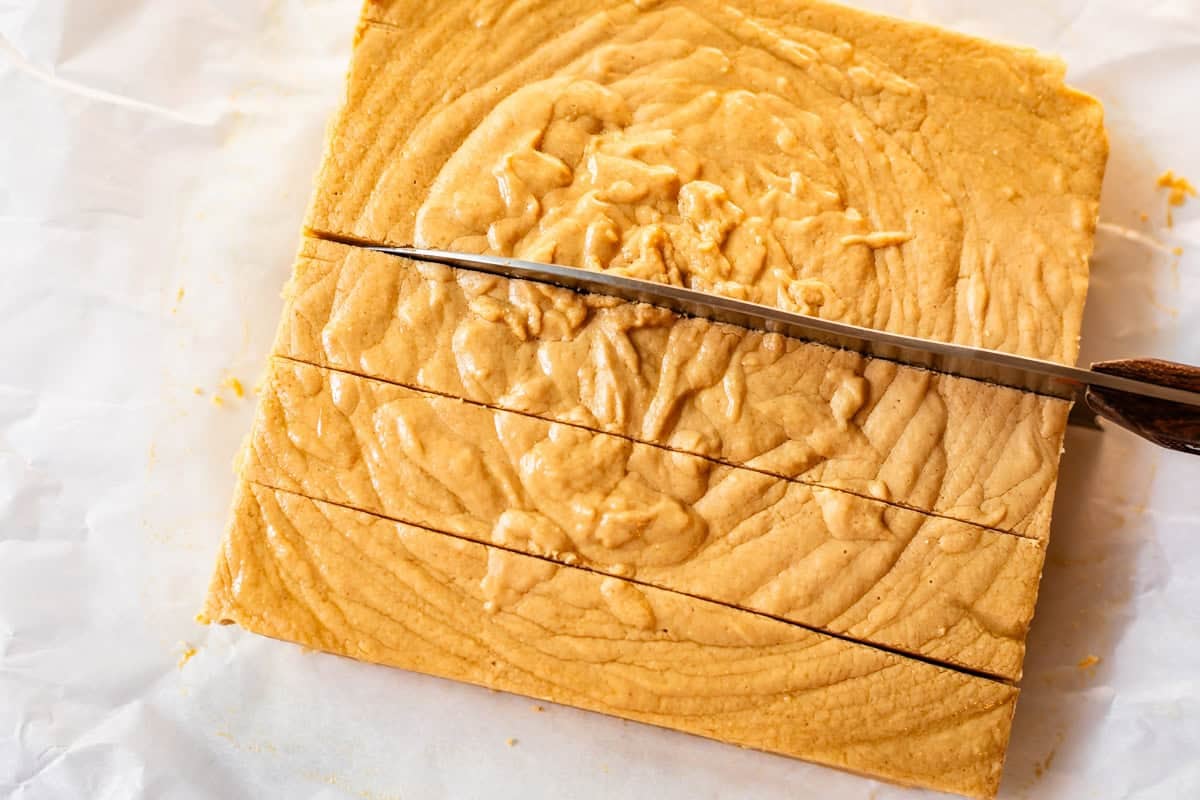
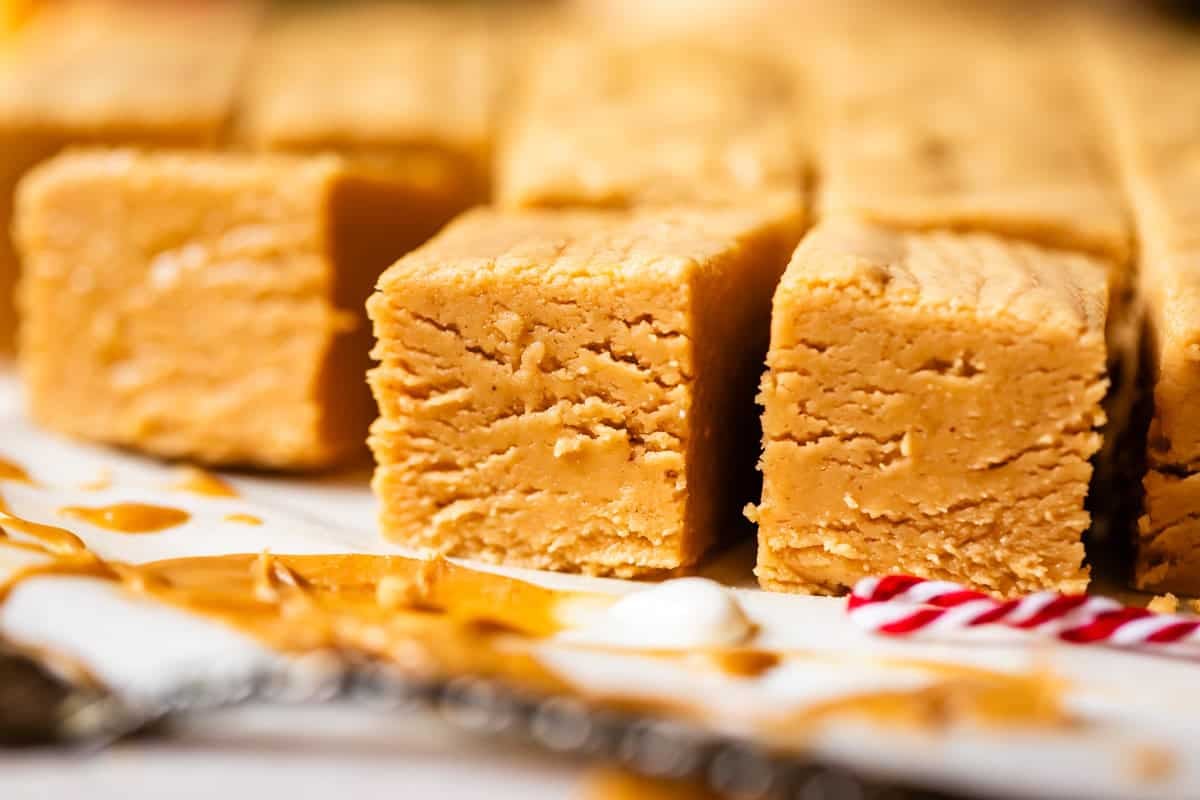
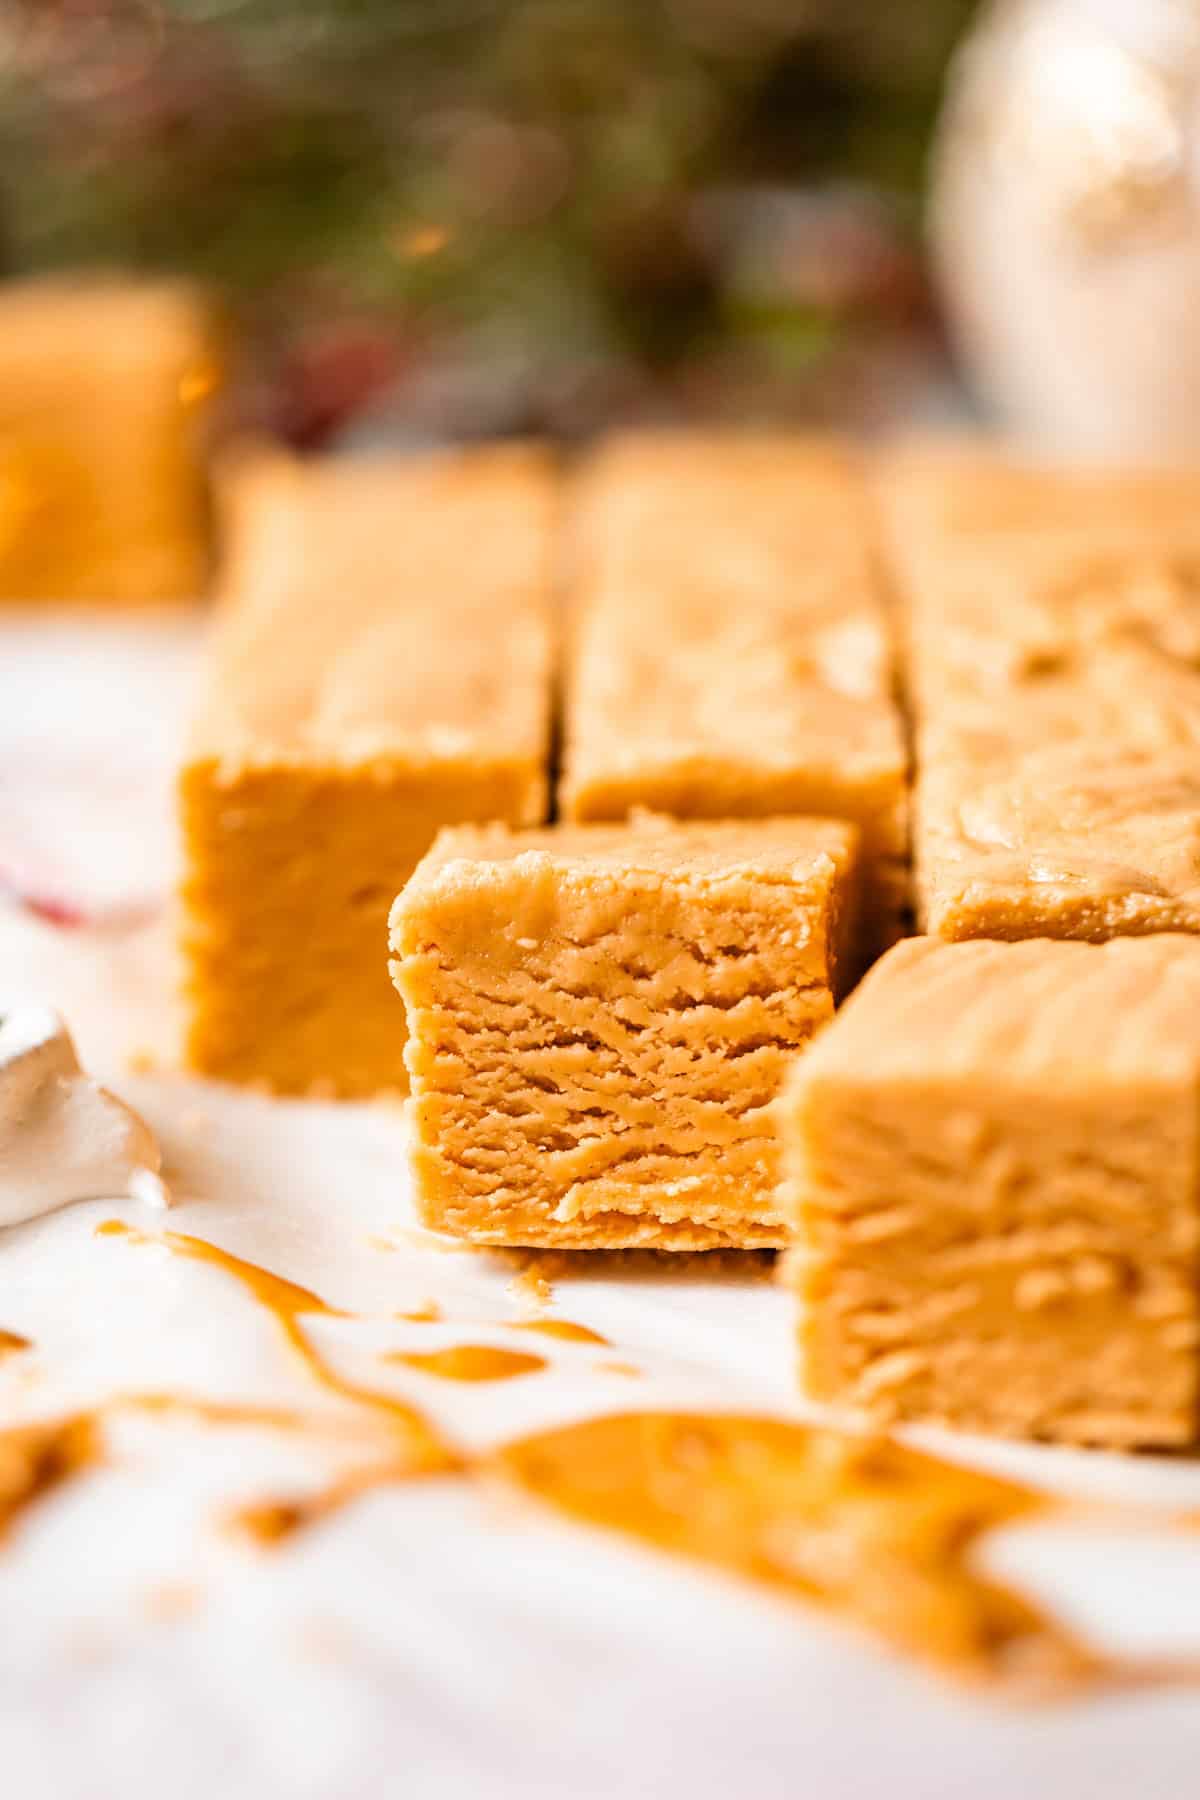
Use a very sharp, not serrated chef’s knife to slice the fudge. Wipe off the knife in between slices. Do NOT try to slice the fudge when it’s not set up all the way, it will just start to moosh on you. Moosh: a technical term.
I can get about 49 piece of fudge from one batch, if you slice it just a leeetle bit smaller than I’ve shown above. To get 49 pieces you will need 7×7 rows.
One tip though, unless you are chopping this all up to eat it right away, leave the fudge in a block. It will stay more moist that way (for days!)
That way as you slice off a sliver when you pass through the kitchen every hour or so, you will never know how much you’ve eaten. It’s the little things, you know? yolo.
Looking for neighbor plate ideas? I gotchu.
Here’s ideas for what to serve with this fudge! I looooove giving plates of goodies to my friends and neighbors during the holiday season. As I’ve mentioned, chocolate fudge was the ONE thing we would make in my family growing up to give away. But now I have so.many.things that I want to make that it’s hard to get rid of it all. Life is so hard with so many amazing holiday options, haha! I have too many to list here, but here are some of my all time favorites. (You can comb through my Christmas Recipes page for even more ideas for the whole season!)
Candies
- Mom’s Easy Fudge Recipe >> the chocolate original!! So creamy and decadent
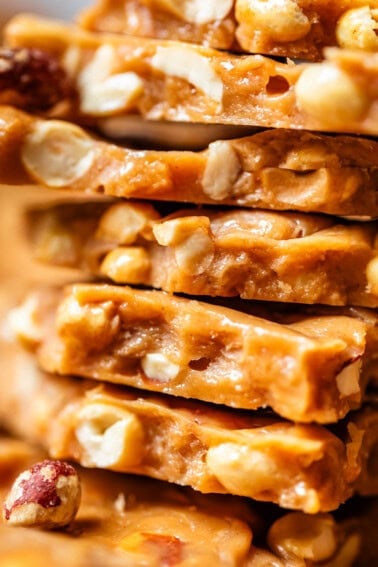
- Peanut Brittle >> thin, flaky layers of peanut-buttery toffee, studded with salty roasted peanuts
- Reese’s Peanut Butter Eggs >> this homemade version is even better than the name brand, I promise. And you can shape them to look like the Reese’s trees or whatever other shape you want!
Cookies
- Grandma Prudy’s Spritz Cookie Recipe >> our family’s #1 Christmas cookie, straight from my husband’s Swedish great-grandma
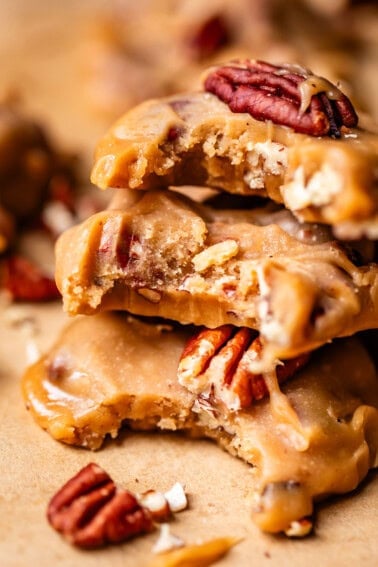
- Pecan Pralines >> these are kind of a cookie and a candy, but whatever you call them I am obsessed with this brown sugary, caramely, fudgy goodness
- Thick & SOFT Sugar Cookie Recipe (That Holds Its Shape) >> No lie, this is the PERFECT RECIPE for Christmas cookies to decorate as a family. Over 400 reviews and nearly 5 stars!
Bars
- Cranberry Shortbread Bars >> fresh tart cranberries nestled between layers of rich, buttery shortbread
- Fudgy Mint Chocolate Brownies >> so decadent, so irresistible!!
How to store easy peanut butter fudge
The biggest risk isn’t the fudge going bad or moldy, but getting dried out! There’s so much sugar in fudge it basically acts as a preservative so you can leave it out for quite a long time, like 2-3 weeks. The quality will start to go down day by day. Exposure to the air (every time you sneak a bite passing through the kitchen, I know you) makes it dry out!
To keep your fudge nice and moist and smooth, first make sure you cover it VERY well. The best way is to leave it in the pan and to cover the top very tightly (like, sealed) with plastic wrap. You can transfer the fudge to an airtight container, but it will do best if you still wrap plastic wrap directly on the fudge and then add it to the container.
The more intact the whole block of fudge is the better, as cut pieces will dry out faster. If you do need to cut your fudge, wait til the last minute, and make sure you seal the pieces by wrapping well in plastic wrap.
DO NOT put your fudge in the refrigerator! It will dry out into a crumbly, crusty mess due to the forced cold air moving about. Don’t risk it!
Can you freeze this fudge?
Yes! In fact, I highly recommend it! I make so many fudges and cookies in copious amounts during the holidays, and being able to start early and freeze a bunch of it is such a life saver. Literally I have some in my freezer right now. Thank you past Karen.
To freeze, prepare the entire recipe as written and let the peanut butter fudge cool completely to room temperature. Give it a good long while, you definitely want to make sure it is completely set before moving. Once you’re sure it’s ready, pull up on the parchment paper sides and lift the entire block of fudge out and set it on the counter. If you see any movement in the fudge at all, it’s not set and you need to wait longer! It should move very easily as one block, not cracking.
Once the block is out, get a long piece of plastic wrap, and carefully move the fudge, without the parchment paper, onto the plastic wrap. Wrap the whole thing very well in at least two layers of wrap. Then, place the wrapped fudge in a gallon size ziplock freezer bag, seal, and place in the freezer. Make sure it goes on a flat surface. It will last a good 4-6 months, just make sure it’s wrapped REALLY well so it doesn’t dry out. To use, take the fudge out and set it on the counter at room temperature for a couple hours, then slice and serve as usual.
Frequently asked questions
Technically, yes. BUT. I don’t recommend using them unless you’re desperate. Marshmallows are coated in cornstarch to keep them from sticking to each other in the bag. In fudge, the cornstarch dries out the fudge and makes for a not-quite-as-smooth texture. The older the marshmallows, the drier and tougher your fudge will get. Regular marshmallows should be a last ditch effort for fudge. So get your booty down to the store and buy the real stuff, if you can get your hands on it! If that’s all you have and you need pb fudge right now, measure the marshmallows by weight (7 ounces).
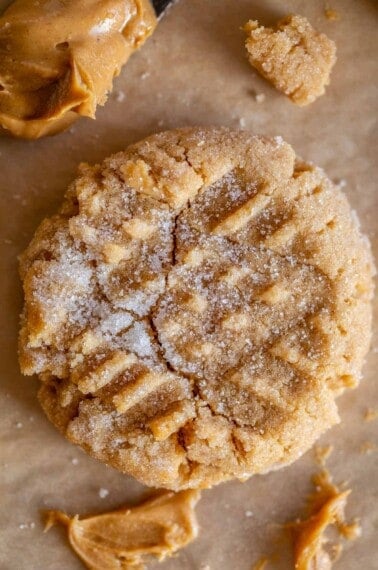
More peanut butter recipes you’ll love
Peanut butter. It’s a thing! Apparently very much an American thing, but that just makes me grateful once again to be an American. If you love peanut butter like I do (no matter where you’re from), here are some great options to try. You can also use the search bar on the blog to find even more pb recipes, I have so many!
Peanut butter Fudge
Ingredients
- 7 tablespoons butter, I use salted butter
- 2 and 1/4 cups granulated sugar
- 2/3 cup evaporated milk
- 1/4 teaspoon kosher salt
- 1 and 2/3 cups peanut butter, 15 ounces
- 1 (7-ounce) tub marshmallow creme
- 1 teaspoon vanilla
Instructions
- Prepare your ingredients: For peanut butter fudge-making, it's important to have everything completely measured out and ready to go before you turn your burner on. Fudge moves fast, so you need to be totally prepared!
- Line an 8×8 or 9×9 inch square pan with parchment paper. Unscrew the lid from the marshmallow creme and remove all traces of the foil seal from the tub (we are microwaving it later). Spoon 1 and 2/3 cup peanut butter into a measuring cup. It's about 15 ounces, if you prefer to use a scale. You won't have time to measure this later because you will need to be stirring.
- Make the fudge: In a 3-quart HEAVY saucepan over medium heat, melt 7 tablespoons butter (one tablespoon less than a full stick). Use a wooden spoon to drag the melting butter up the sides of the pot, clear to the top, greasing the edges of the pan.
- Pour in 2/3 cup evaporated milk and stir.
- Once the butter is mostly melted, slowly pour 2 and 1/4 cups sugar and 1/4 teaspoon salt into the center of the pan as carefully as you can, making sure to not get any sugar crystals on the side of the pan.
- With your wooden spoon, draw the butter and evaporated milk in from the edges toward the center, going slowly all the way around the pan until the sugar is mostly moistened. Do not leave any sugar crystals on the side of the pan or on the edge of your spoon; it will make your fudge grainy. The goal is to dissolve all of the sugar BEFORE the mixture comes to a boil.
- Keep the heat at medium for a couple minutes, stirring until the sugar is dissolved. Dip two fingers into the mixture and rub together; if you feel granules, the sugar is not yet dissolved. Once you are certain the sugar is dissolved, you can turn up the heat to medium high to help get it to a boil.
- Settle in for the boil: Bring the mixture to a full rolling boil over medium high heat, stirring constantly with a long wooden spoon. A rolling boil means bubbles are coming up from the center of the pot, not just the edges.
- Once it starts boiling, set a timer for 5 minutes and turn the heat down to medium so that you don't burn your fingers off while stirring. The mixture should be bubbling the full 5 minutes. Stir constantly. A candy thermometer should read about 234-236 degrees F at the end.
- Take it off heat early if it reaches 234-236 before 5 minutes. Overcooking at this stage makes for dry, crumbly fudge.
- Remove the pan from the heat.
- Add in 1 and 2/3 cups peanut butter and stir quickly until mixed in.
- Heat your 7-oz tub of marshmallow creme in the microwave for about 15-20 seconds until the mallow has risen slightly above the lip of the tub. This makes it super easy to scoop out.
- Move quickly. Add all the 7 ounces of marshmallow creme to the peanut butter mixture and beat with a wooden spoon until nearly blended.
- Add 1 teaspoon vanilla and continue stirring until there are no more marshmallow streaks and the mixture looks even and smooth. Stop stirring as soon as it's combined. It will look slightly grainy. TRUST. Also, move faster.
- Pour into final pan. Immediately pour into the prepared pan. Don't scrape the edges of the pot too well. Only pour fudge into the pan that is completely liquid and smooth. If the fudge-bits on the edges of the pot look dried out at all, leave them behind.
- Shake the prepared pan to help the fudge settle. Do not touch the top of the fudge or try to smooth it with a spatula. It will have a rippled appearance.
- Let cool to room temperature. (Good luck with that.) It will take about 2-4 hours depending on the temperature of your house.
- Slice and serve! I like to slice a square pan of fudge into 7×7 rows, making about 49 small pieces. Fudge is so rich! Rich for you guys. I actually say this fudge serves 7 people, I count by rows. 1 row for me, 1 row for you…
- Store on the counter covered with plastic wrap. Do not refrigerate. Unfortunately this means you will probably eat "just a sliver" of fudge every time you pass through your kitchen. Oh darn! This is one of the greatest joys of the season if you ask me! Dopamine all day
- To freeze, remove completely cooled fudge from the parchment paper and wrap well in plastic wrap two times. Put it in a ziplock freezer bag and seal.


living in the UK, I can’t get marshmallow creame the grocery stores over here never heard of it can I use anything else, please?
Hi Micha! Sarah here, currently living in the UK. Here it’s called marshmallow fluff and can be bought at shops like Sainsbury’s.
hi Sarah,
Thanks, I’ll look again in Sainsbury’s but I’ve never seen it in there. In the US are you from? I’m from Cusseta Alabama nursing home like hell , don’t think I’ll ever get used to the freezing cold weather here home in July for the 4th think of a case full of goodies from Walmart thanks again. I’ll comment once I have gotten hold of the ingredient and make the cookies x
more of a question than a comment. can I use chunky peanut butter so there’s bits of nuts in it? Also if I make a batch of the chocolate fudge and one of the peanut butter…….can I swirl the two together and pour it into the pans for a reeces pb effect? or no? Also on the fudge one can I add mint instead of vanilla and sprinkle chopped Andes mints on top adter pouring for a choc mint fudge?
These are all super fun ideas Rhonda. I think all of them would work great! If you try them, come back and let us know how they turn out, we love hearing from you!
I just made this here in VT, where were experiencing an unusually warm and cloudy winter day (not ideal for fudge-making!). I followed the recipe step by step, but ended up with my 1/4 tsp. kosher salt sitting there, looking forlorn. Where was I supposed to add it in? It still tastes great, however😊
Oh no Devon! Don’t worry, the salt is not essential, peanut butter is already pretty salty! It will still be good. You add it in step 5 along with the sugar. I’m so glad it tastes good!!! Enjoy and merry Christmas!
Thank you, I see it now! Merry Christmas!