This 15-minute Hummus recipe has knock-your-socks-off flavor! Nutty, garlicky, lemony bliss. I have discovered the secret for hummus with the perfect creamy texture that does NOT require the annoying step of picking out chickpea skins. It’s a miracle! Make this as an appetizer or as a staple condiment, you will find yourself putting it on everything. Serve it with pita, alongside kebabs, or even on your next sandwich!
Welcome to my new FAVORITE obsession lately! Hummus is the best meal rounder-outer. (That’s a word right?) I’ve been adding it to everything lately. But first I have to tell you what happened at church last week, I have never guffawed so loud in such a quiet room:
Charlotte, my 15-year-old daughter, is obsessed with babies right now. At church, she stole our friend’s baby to sit with us. Baby Benny is about a year old, an adorable girl with bright red hair.
When it was time for the Sacrament, the deacons passed around the trays of bread. The tray gets passed to Charlotte who has baby Benny on her lap. I’m watching her… Charlotte takes a piece of bread and pops it in her mouth. Then she hands a piece of bread to Benny, but instantly Charlotte’s eyes go wide and she freezes. I can hear her thinking: Wait, does this baby eat food yet??
Benny is lifting the bread to her mouth…Charlotte quickly snatches it and throws it back on the tray like it’s a hot potato. Then she panics again, realizing that she’s just thrown baby-touched bread on the communal tray. She grabs it again, utterly perplexed with what to do with it.
She looks around, and then lightning fast tosses it in her mouth, looking as guilty as if she just swallowed the crown jewels. I think I actually snorted trying to suppress my laugh. Do you get extra blessings for taking the sacrament twice, or does stealing a baby’s bread cancel out your own absolution?? God have mercy 😂
This hummus is why you should always have chickpeas in your pantry
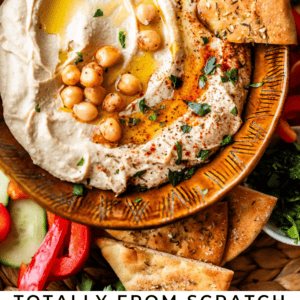
Hummus is the BEST party trick. Everyone loves a good hummus, and it’s even more lovable when you serve it with some toasty Za’atar pita bread, olives, and fresh chopped veggies.
The hummus recipe I have for you today is special for two reasons:
- It has extra nutty, almost buttery flavor from one simple step: boiling the chickpeas with garlic before blending.
- Using ICE while blending the hummus makes it creamy and light, without having to go through the process of picking off the chickpea skins.
Why I don’t care about perfectly smooth hummus
I have discovered that the secret to getting hummus with perfectly light, airy texture is NOT found in obsessing over it’s smoothness. Did you know this is a thing? Look up any hummus recipe. People go on and on about how important it is to get perfectly smooth hummus, smoother than a baby’s bottom. (okay, that analogy got weird real fast. I told you we are obsessed with babies right now 😂).
The way to get PERFECTLY smooth hummus at home is by rolling your chick peas around with your hands and painstakingly picking off each and every single one of the skins that naturally start to detach. It’s not fun at all, trust me.
I’m assuming this has become an online obsession because we are all used to eating store bought hummus: factory hummus has a machine to either 1) remove the skins or 2) whip the hummus much more thoroughly than our home blenders can do, using food processors with very powerful motors.
I’ll let you know which one it is after I visit the hummus factory with Mr. Rogers, but until then, just know that you DON’T need your homemade hummus to taste like it came from a factory. I refuse to believe that ancient Mediterranean grandmothers in the 13th century were going through this pick-off-the-skins process. Ain’t nobody got time for that.
Instead of focusing on complete smoothness, I found that aerating the hummus was way more important for a pleasant texture.
The best hummus is creamy and aerated
You can achieve a great, creamy, non grainy (almost fluffy) texture without the time consuming process of picking out chickpea skins.
It’s simple: boil the chickpeas before blending. This softens the chickpeas, making them much easier to crush and blend, and in addition to that, it brings out an even more complex, nutty flavor in the chickpeas.
My favorite thing to do is add a couple cloves of garlic to the pot. The boiled garlic keeps it’s sweet garlic flavor but mutes some of the sharpness. Then we add 1 more raw clove of garlic in the food processor to get that little bit of bite that gives depth to the hummus.
The other important step is to use ICE when you are blending. ICE is the secret ingredient that makes hummus extra smooth. Blending an ice cube into the hummus whips in a bunch of air, creating a fluffy texture that is not so heavy. The coldness of the ice also keeps the natural oils from separating from the rest of the ingredients, giving it a smoother, lighter consistency.
Important ingredients
There are only FIVE main ingredients in this recipe, six if you include water / ice cubes. It’s so simple, and almost everything is a pantry staple! Here are a few of the stars:
- Chickpeas, also know as garbanzo beans, are literally the main event. Did you know that’s what hummus actually means in Arabic? True story. If you can find chickpeas sold in JARS, not cans, they will be higher quality, but they can be tough to find unless you are at a specialty market. But canned chickpeas also work just fine.
- Tahini is a creamy sesame seed paste, and most traditional hummus recipes call for it. Not only does it act as an emulsifier to create a velvety consistency, it also adds a distinctive nutty flavor.
- Fresh lemon juice really brightens the hummus and helps balance the heavier beans and tahini. Don’t can’t skip it! And no fake lemon juice, it has to be fresh.
- ICE will make your hummus extra smooth! It whips in lots of air, plus the coldness keeps the natural oils from separating from the rest of the ingredients.
How to make homemade hummus
Look at these ingredients!! SO easy to keep this stuff on hand. Tuck a few cans of chickpeas in your pantry. Tahini is shelf stable until it’s opened, and then what’s left in the jar keeps for a LONG time in the fridge.
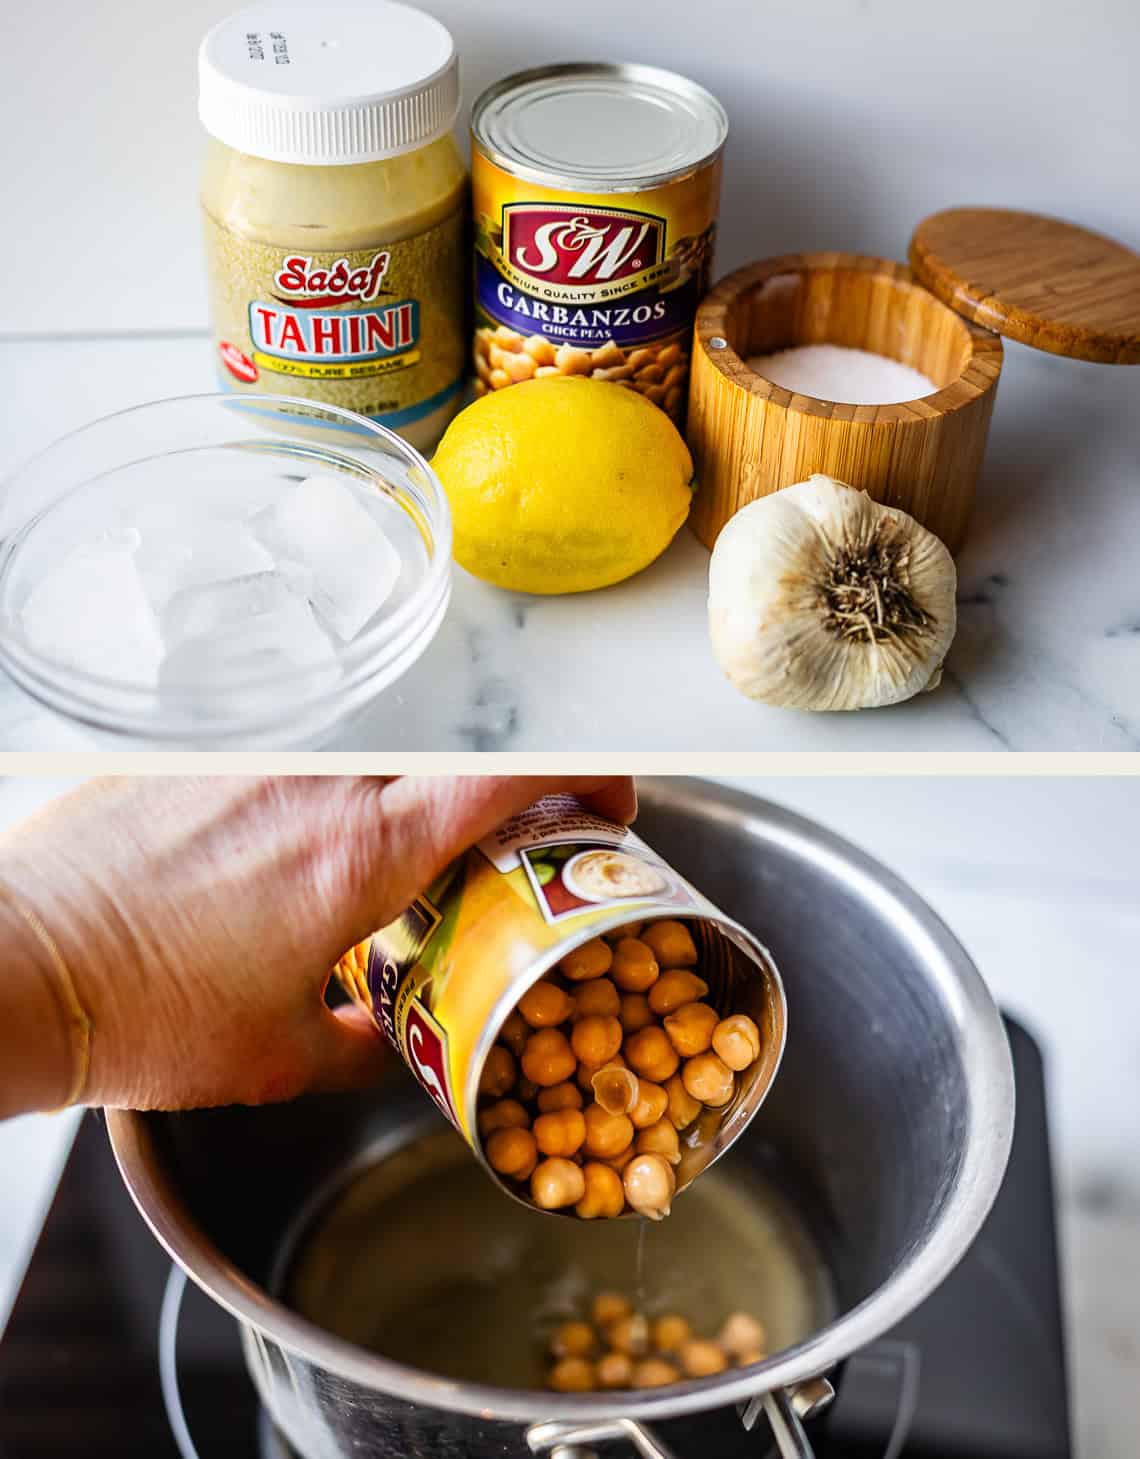
Open up the can of chickpeas and dump it in a pot with all the can liquid.
Smash up 3 cloves of garlic. Add only TWO of the cloves to the pot. Cooking two of the garlic cloves calms down their flavor, making it taste roasty and buttery. I LOVE this hack, because I love the flavor of garlic but don’t want it to be so sharp that it makes my eyes water and gives me dragon breath for 2 days.
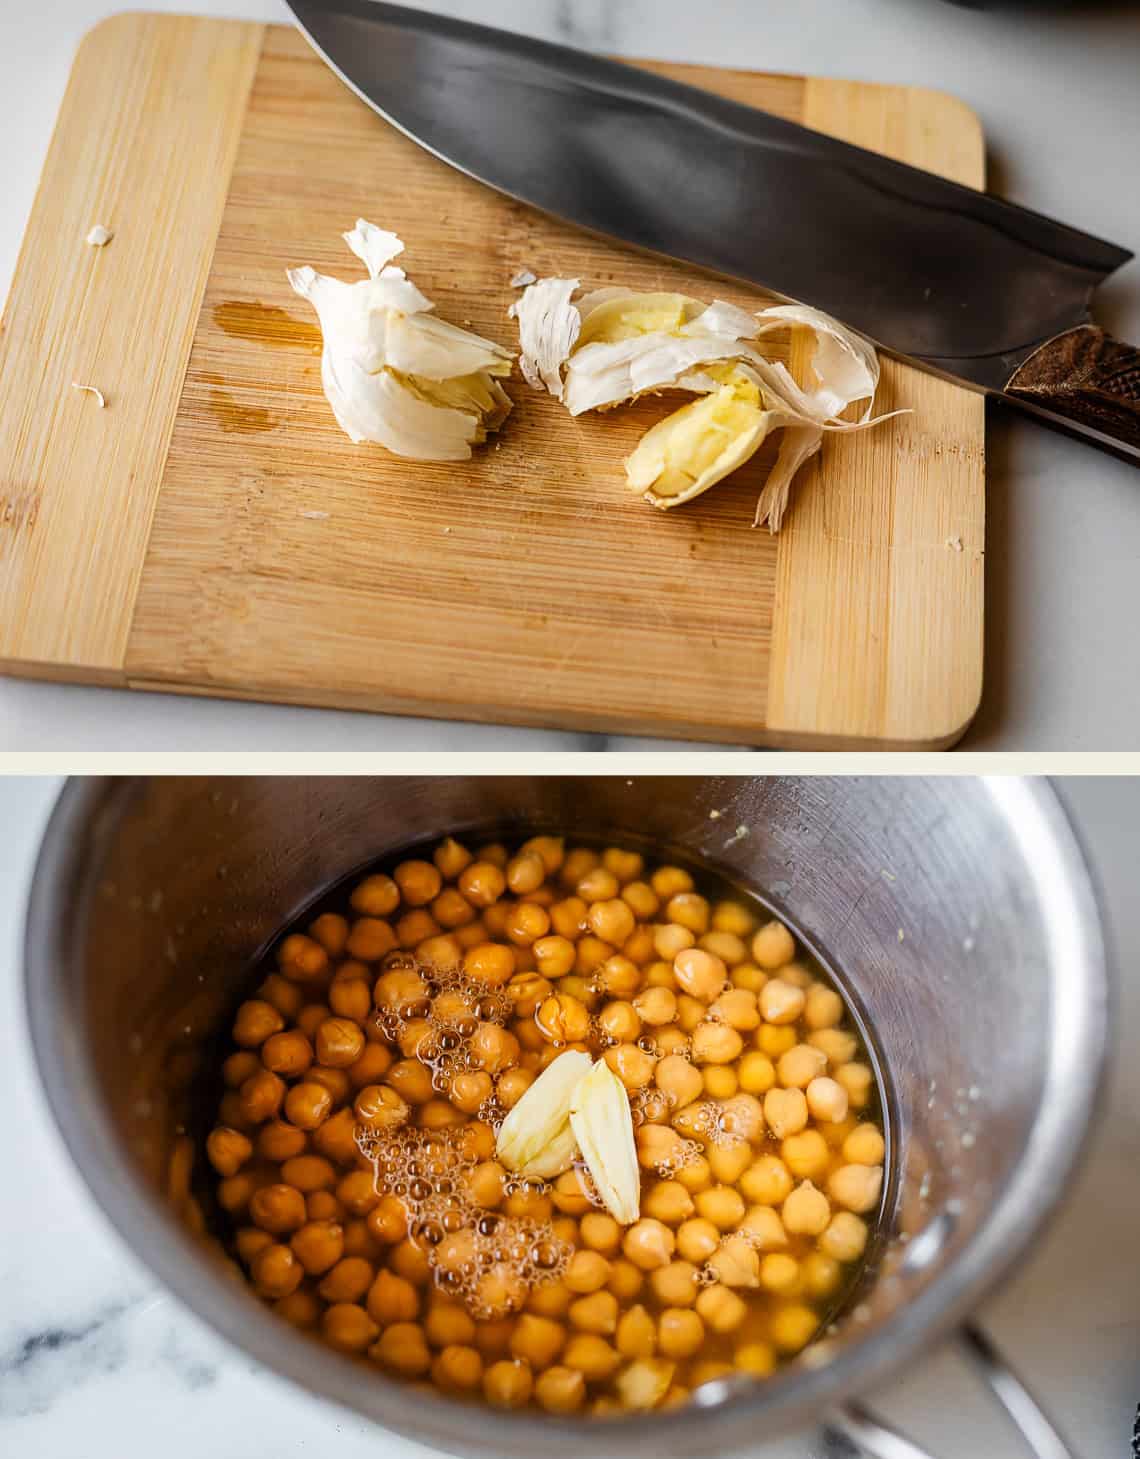
Add about 1 cup water and throw it on the stove. Bring it to a boil and let it go for about 10 minutes, until the chickpeas have softened. Something magical happens to these chickpeas as they boil: they become even richer and nuttier in flavor. They taste more golden and become less brittle and chalky. You can definitely taste the difference in a side by side test of boiled chickpea hummus vs. non boiled.
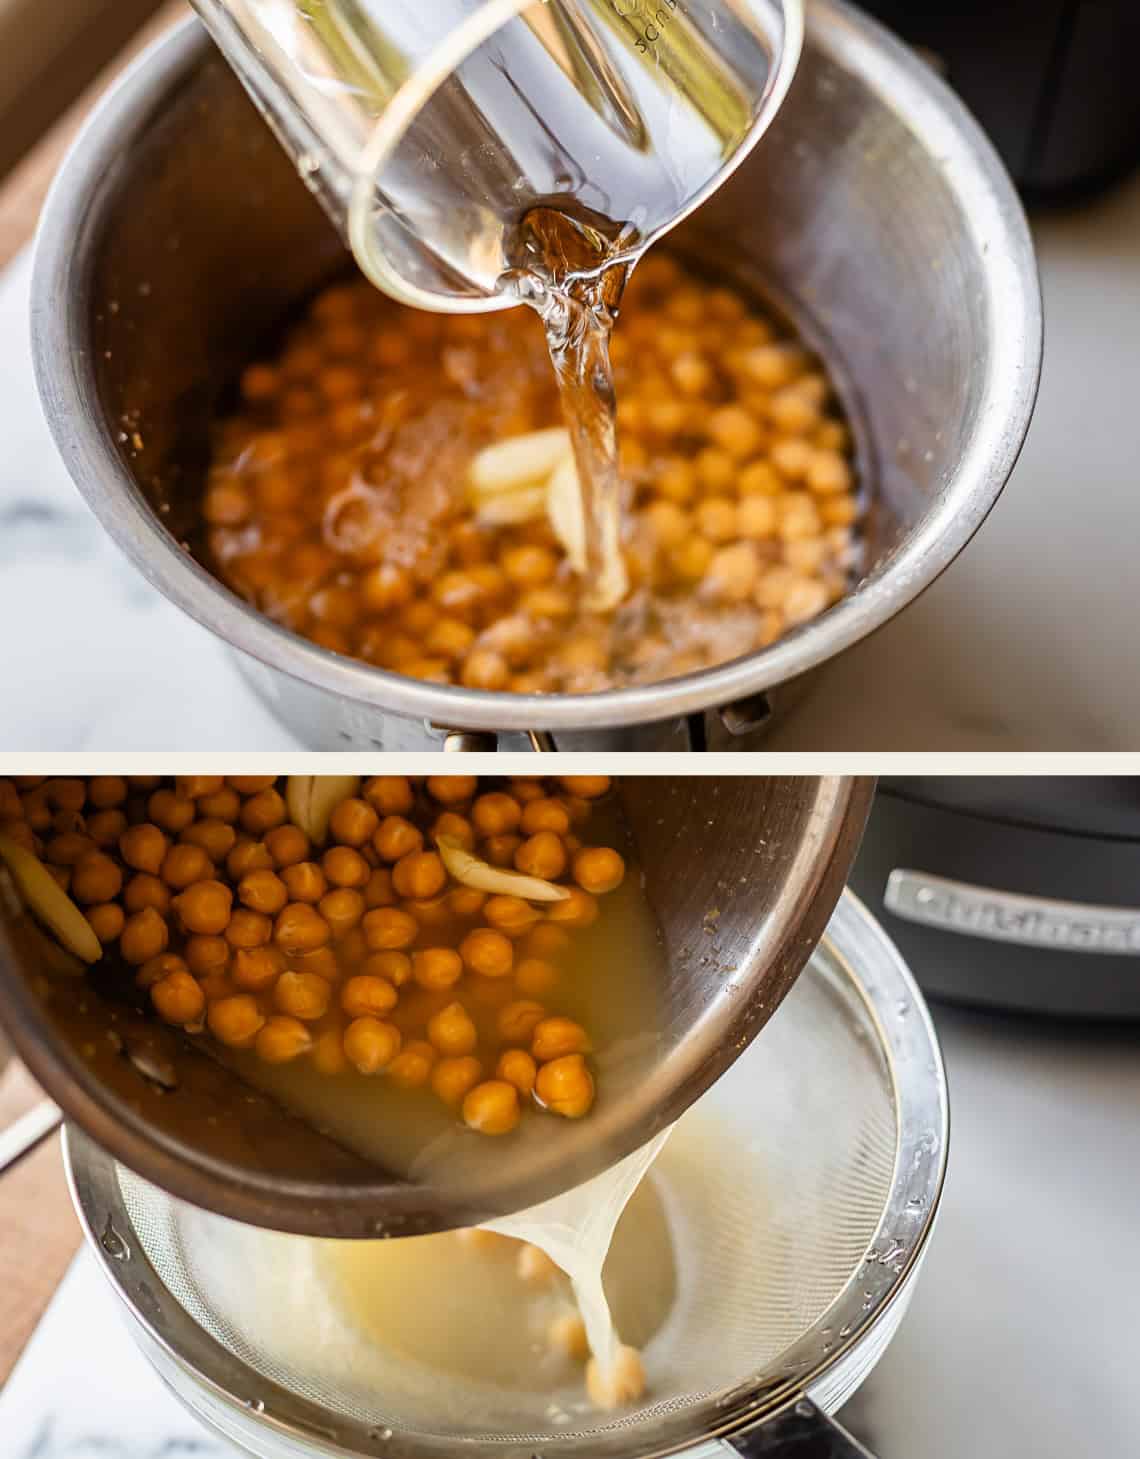
Remove it from the heat and send it through a strainer placed over a bowl. We need just a little bit of that cooking liquid, so don’t do it straight into the sink!
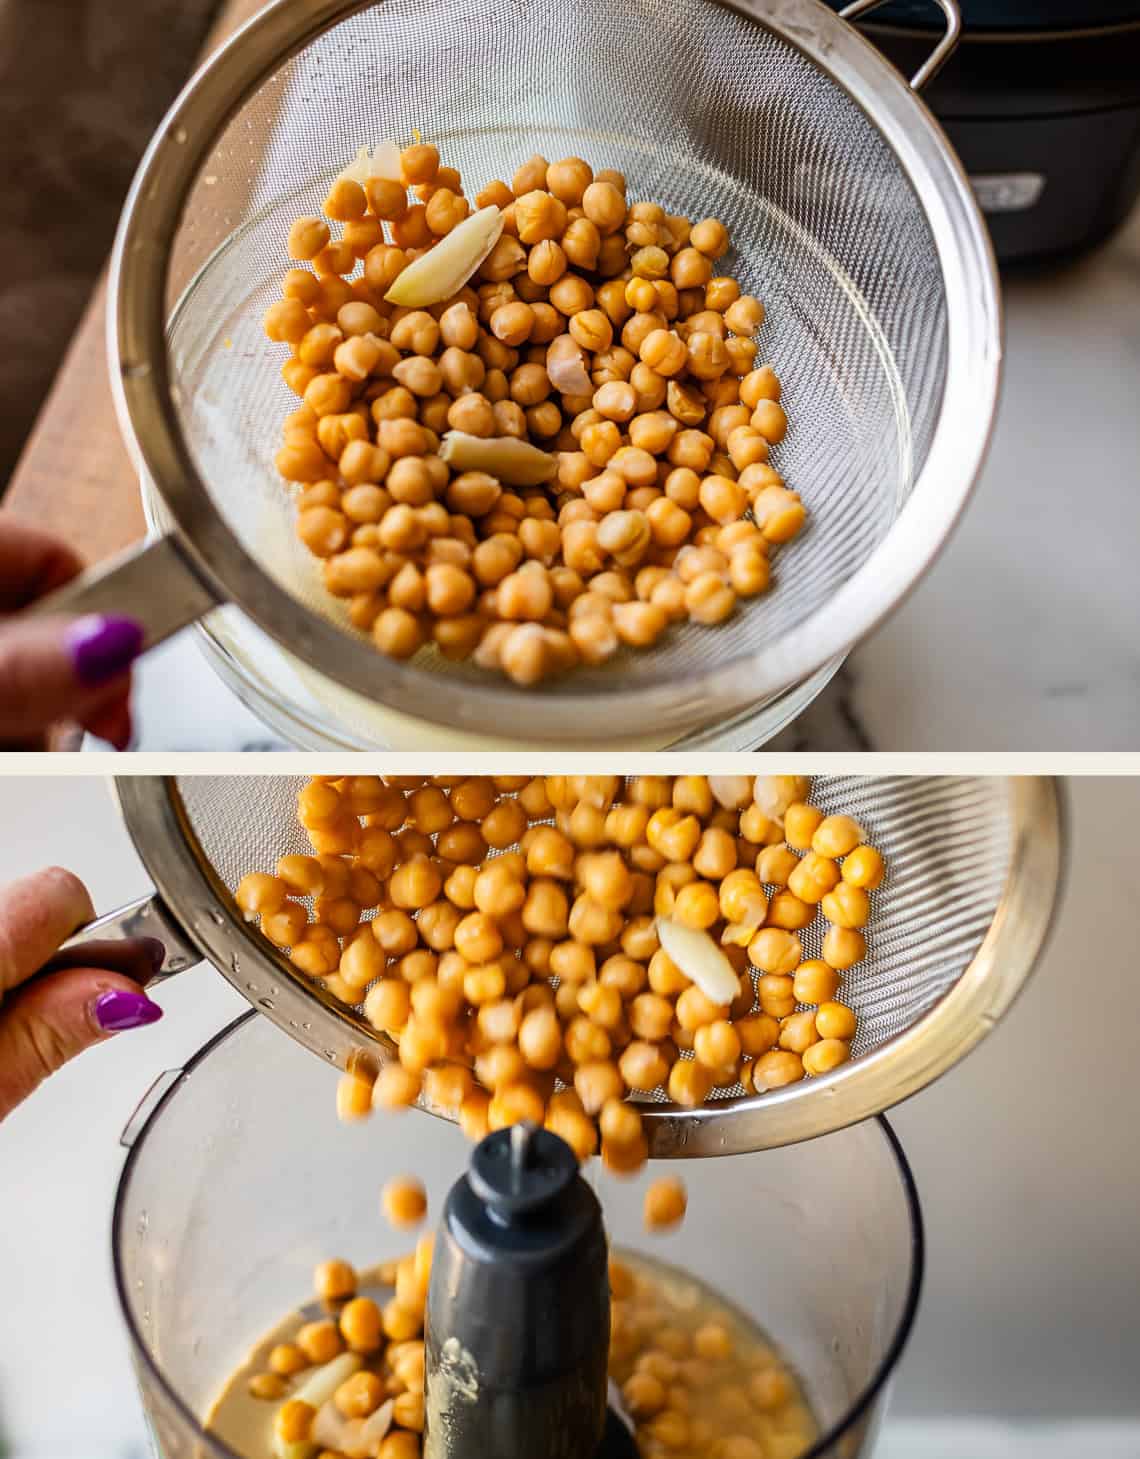
Add the boiled chickpeas and the garlic into a food processor.
THIS is the part where you are not bothering to take the time to pick out those chickpea skins. If there are a bunch that have separated (or floated to the top of the water) and they are easy to scoop out, you totally can. It will indeed make your hummus smoother. In all my testing, I found that perfect smoothness was not as important to me as a fluffy, creamy, aerated texture. The techniques of boiling the chickpeas to soften them and make them even more nutty, plus blending with ice, give the hummus a perfectly fluffy texture.
Add in just 1 tablespoon of the cooking liquid from the boil. The starch helps bring everything together for the initial blend.
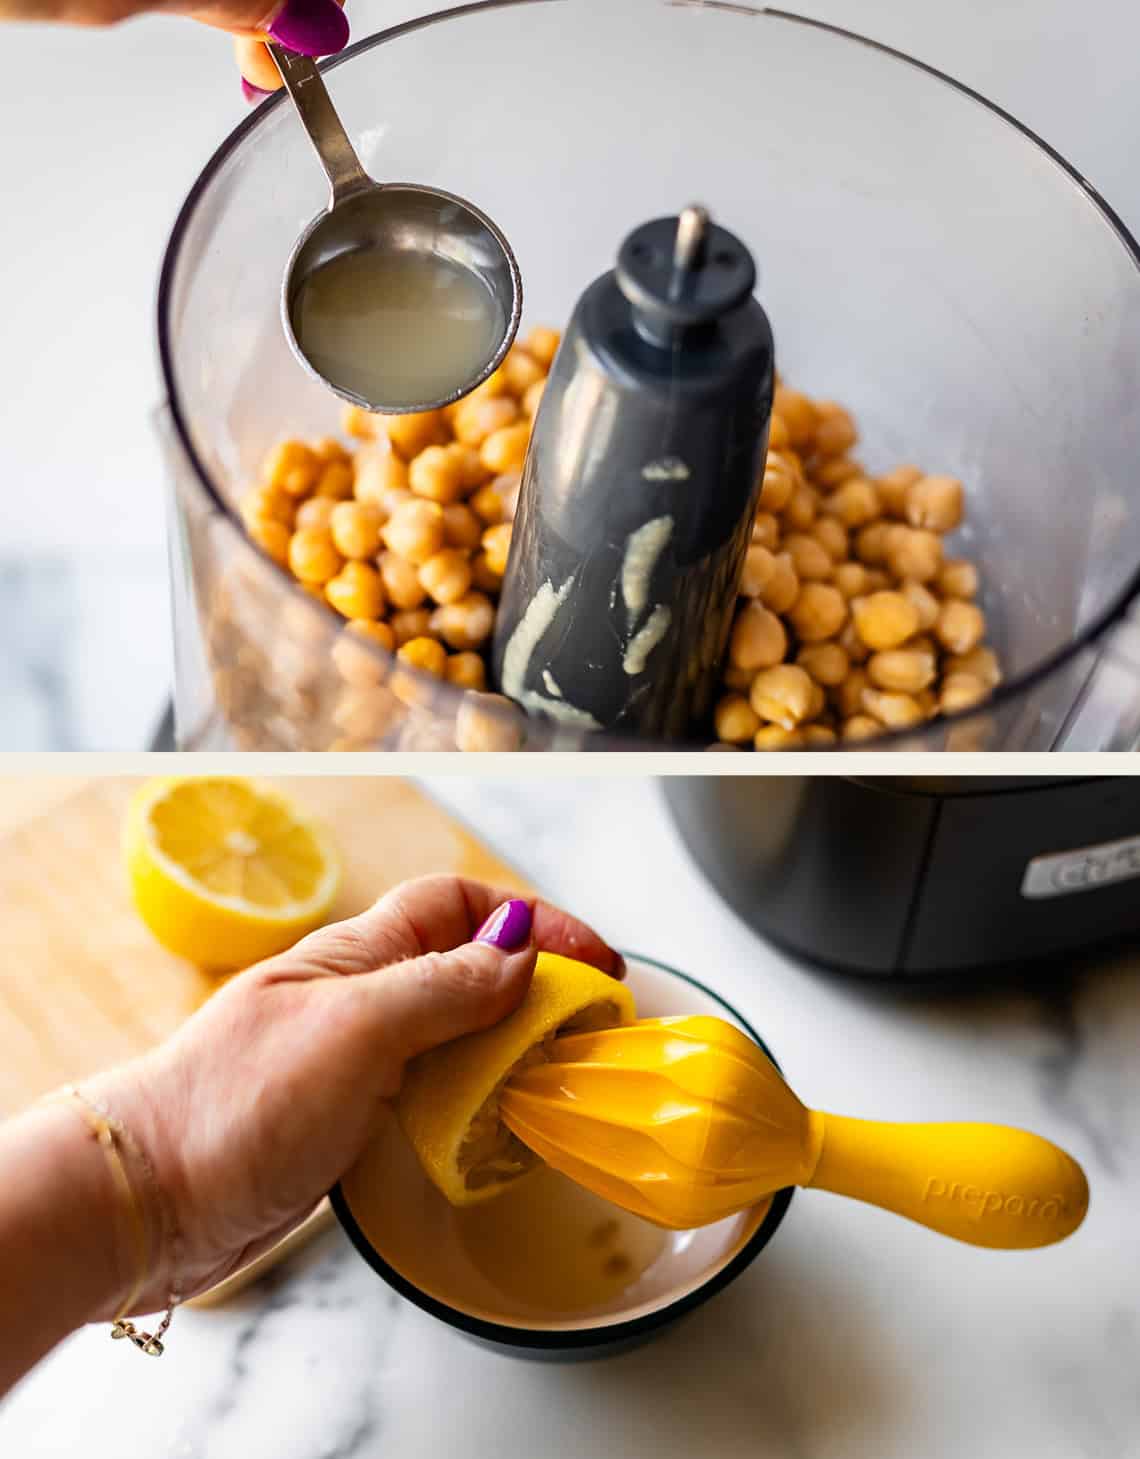
Juice a big lemon. You need at least 1/4 cup lemon juice, so use 2 lemons if you need to.
Here’s the tahini. It’s pretty runny, which is great. Give it a good stir. The smell is so good it wil knock you out!
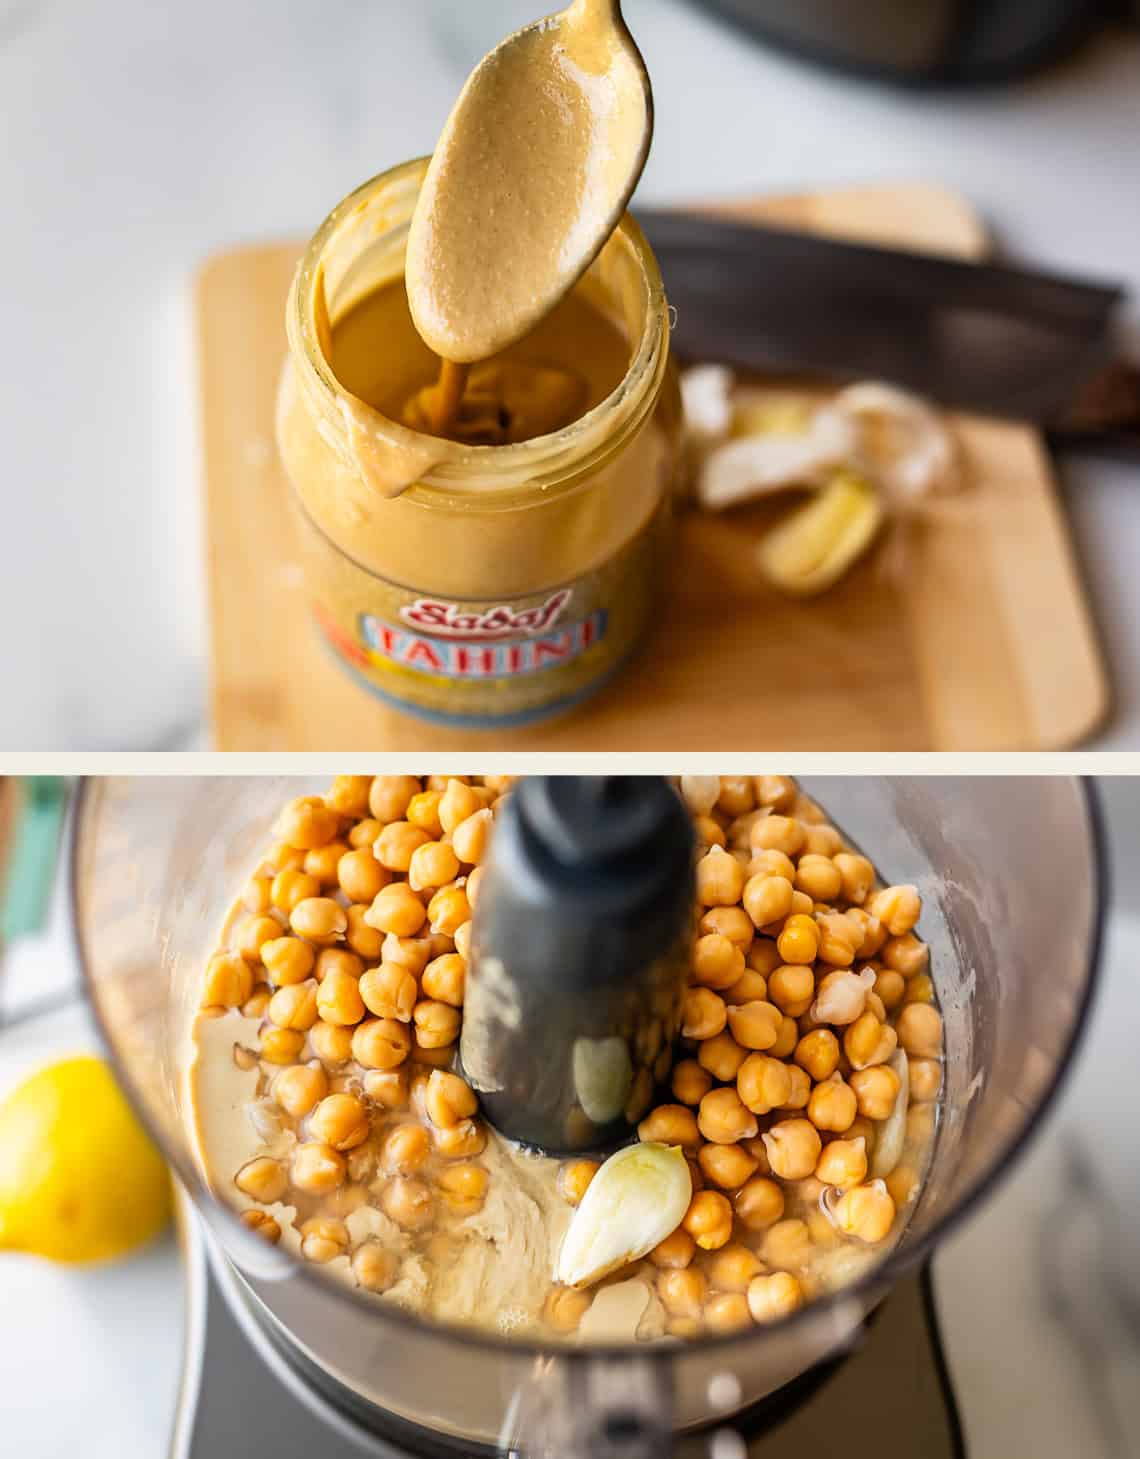
Then, don’t forget to add in that third clove of garlic that wasn’t boiled along with the chickpeas. I love garlic flavor and I do want a LITTLE bit of that sharpness. 1 clove fresh and 2 cloves boiled is perfection for me.
Give it a few pulses in the food processor, it will look like this:
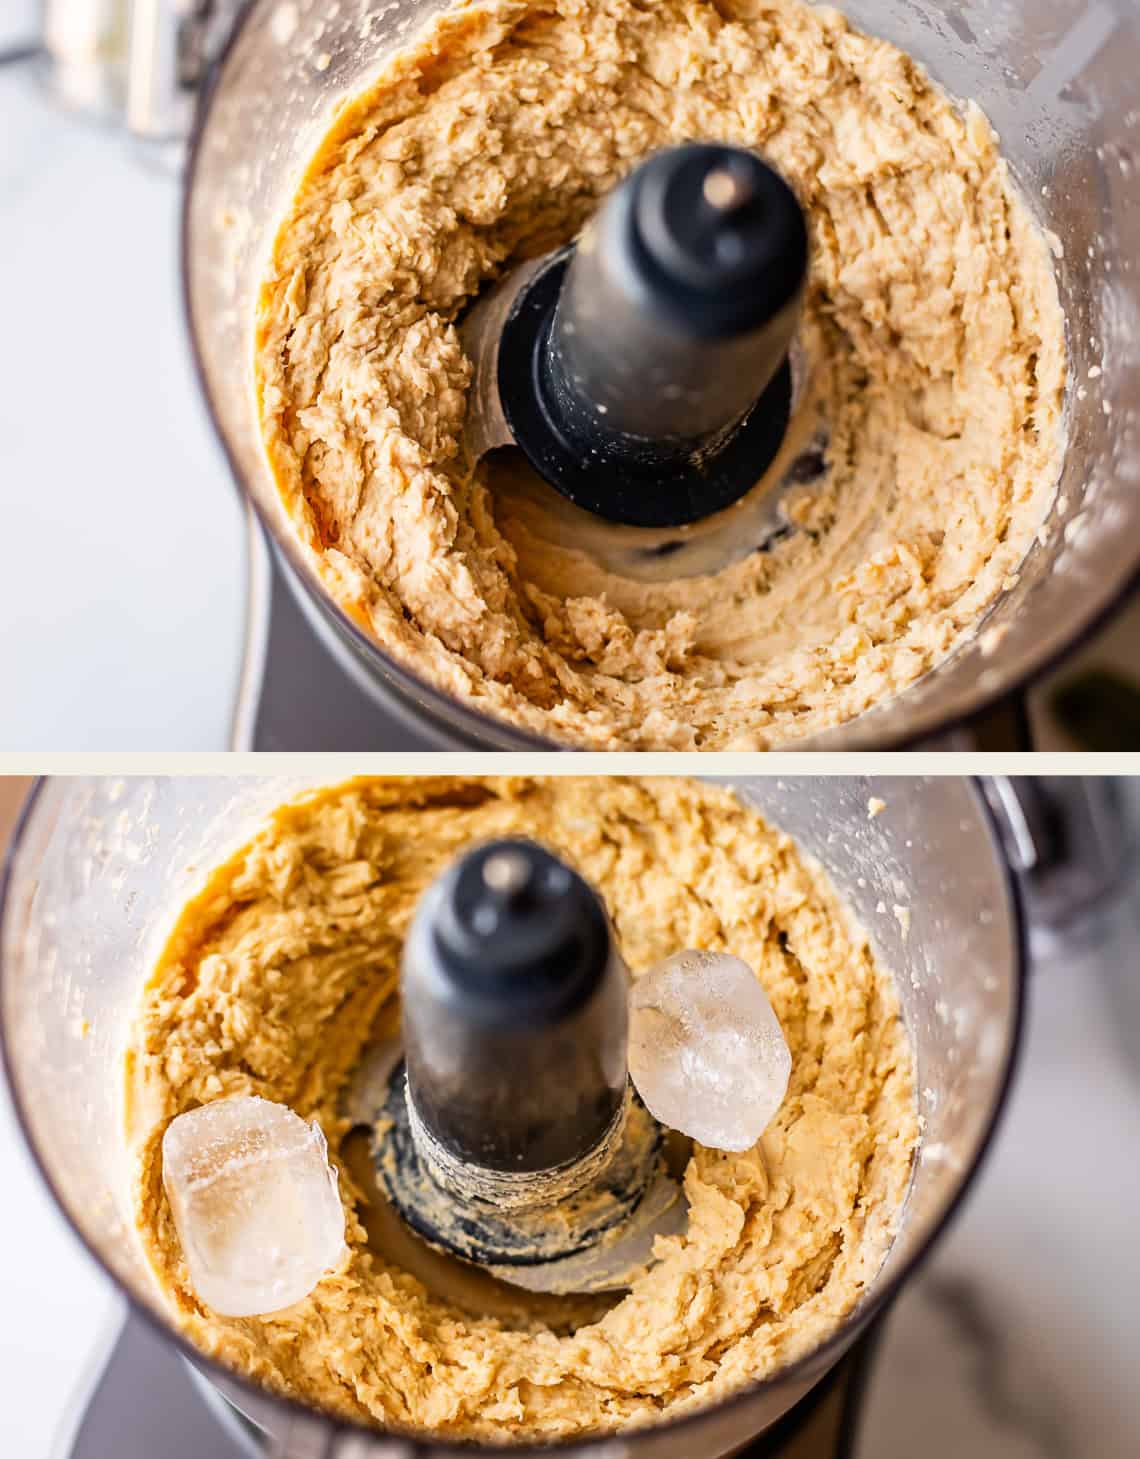
This is when the magic of the ice comes in! Start with 2 cubes, then blend until they are fully melted. My ice cube tray makes big ice cubes, about 2 tablespoons water per cube, so if you have smaller ice cubes, you might need more.
It’s better, but not ready yet.
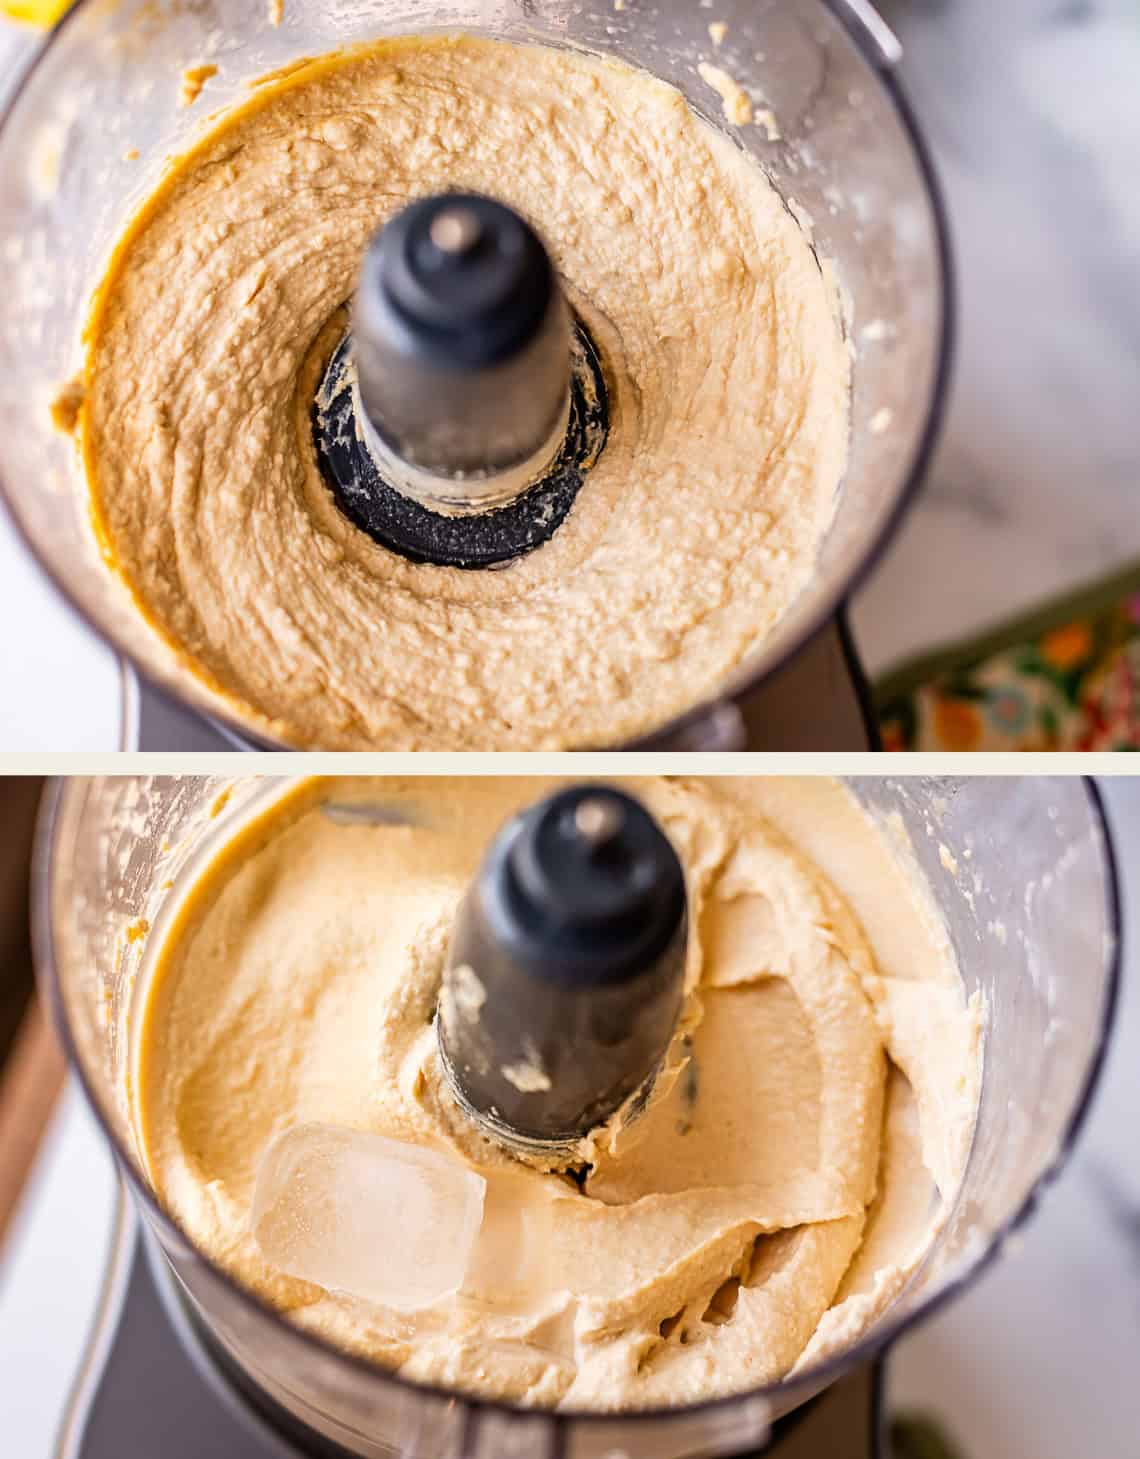
Add in a couple more cubes of ice…
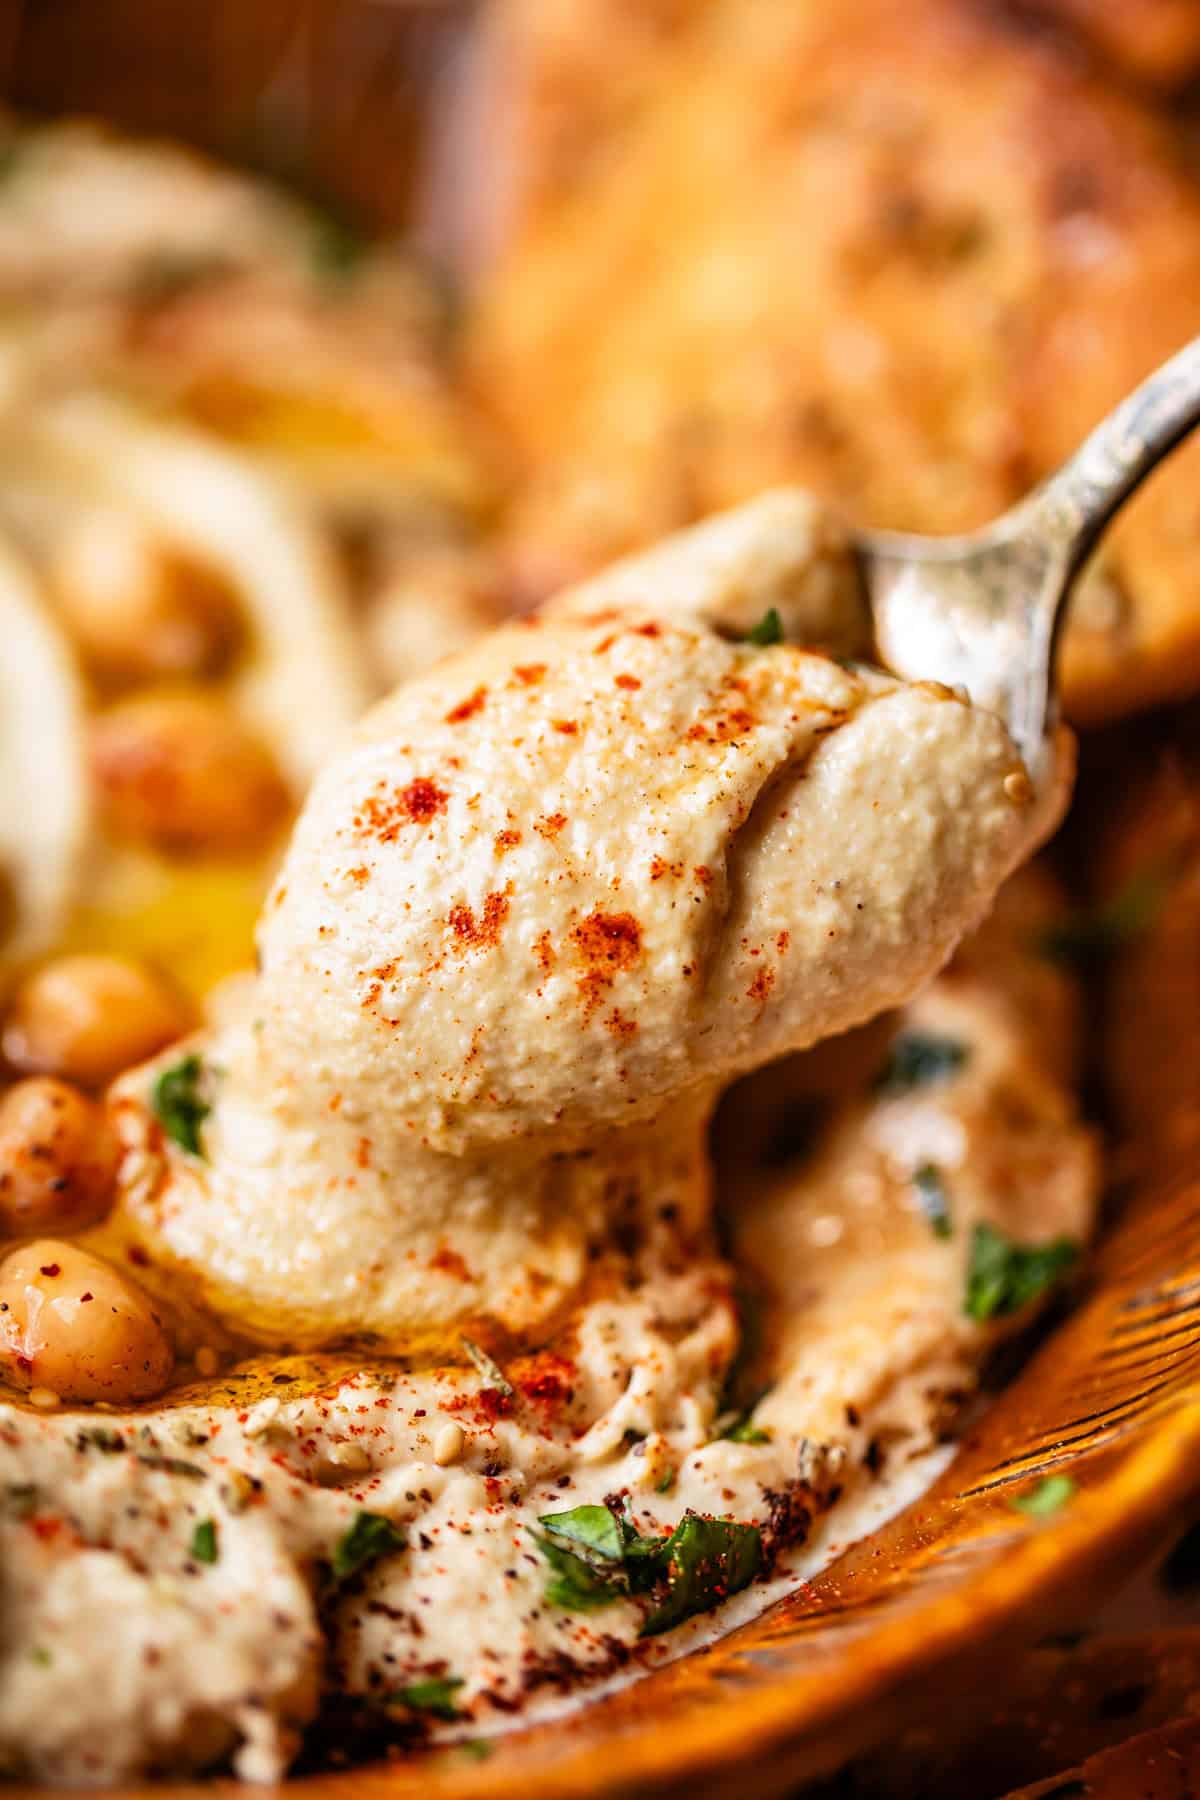
and voila!
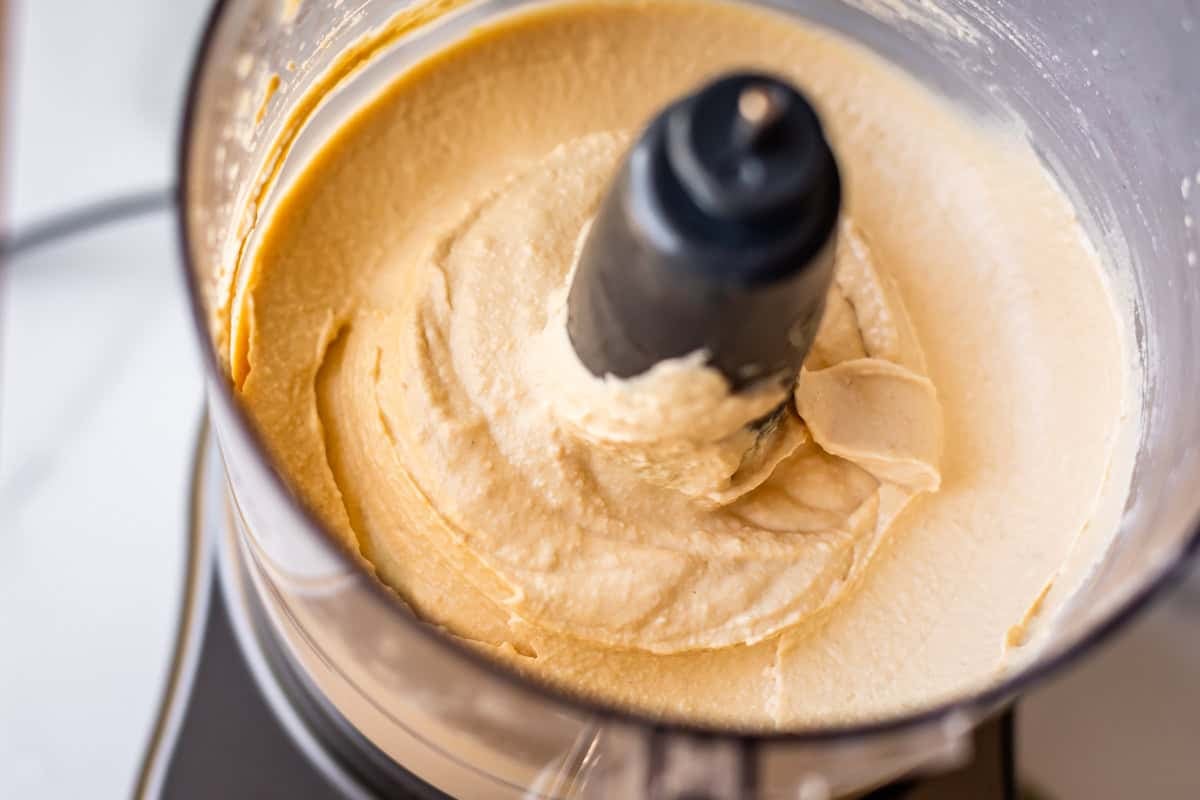
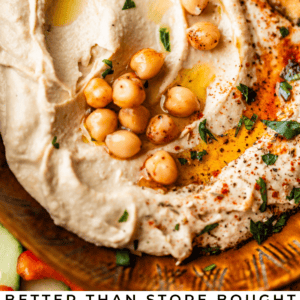
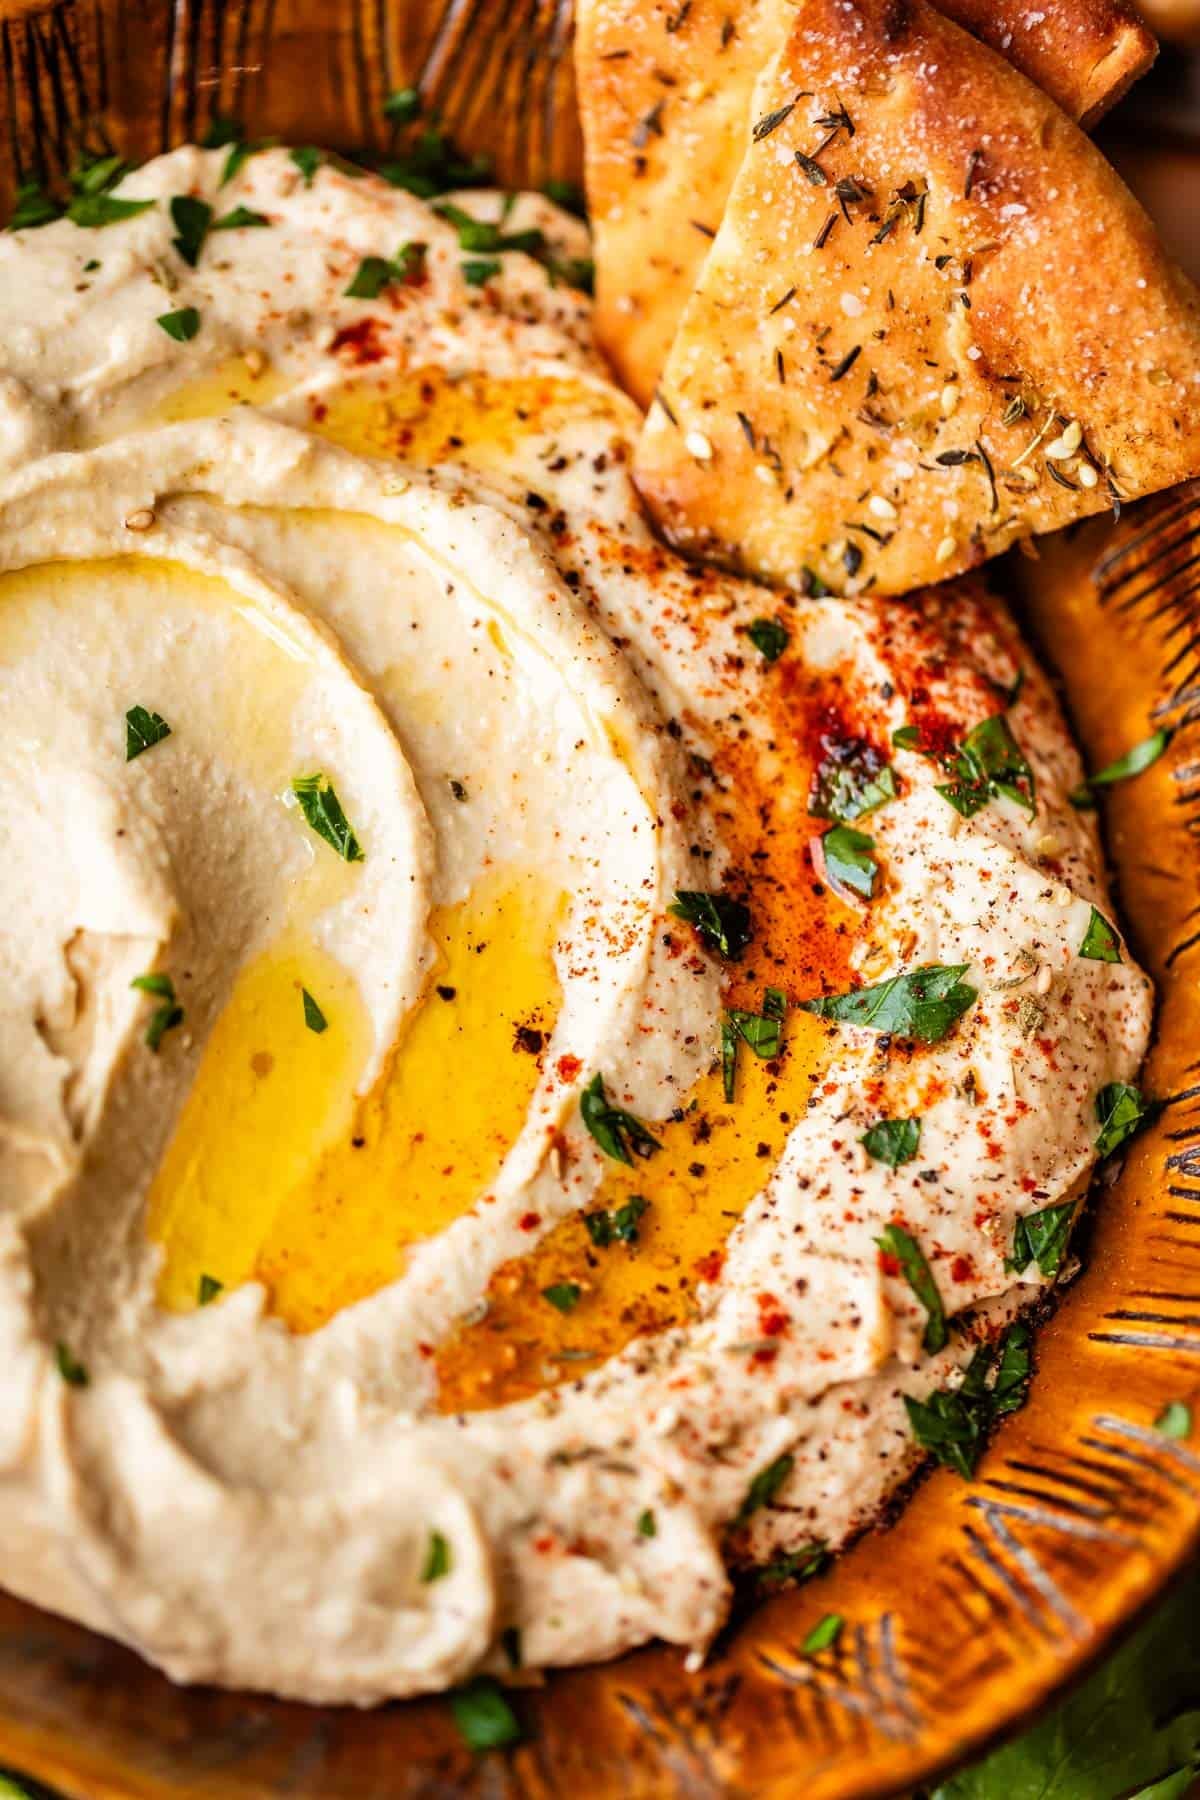
Look at this deliciousness! Give it a taste. Does it need more salt? pepper? Lemon juice? A touch more tahini? Make it your own!
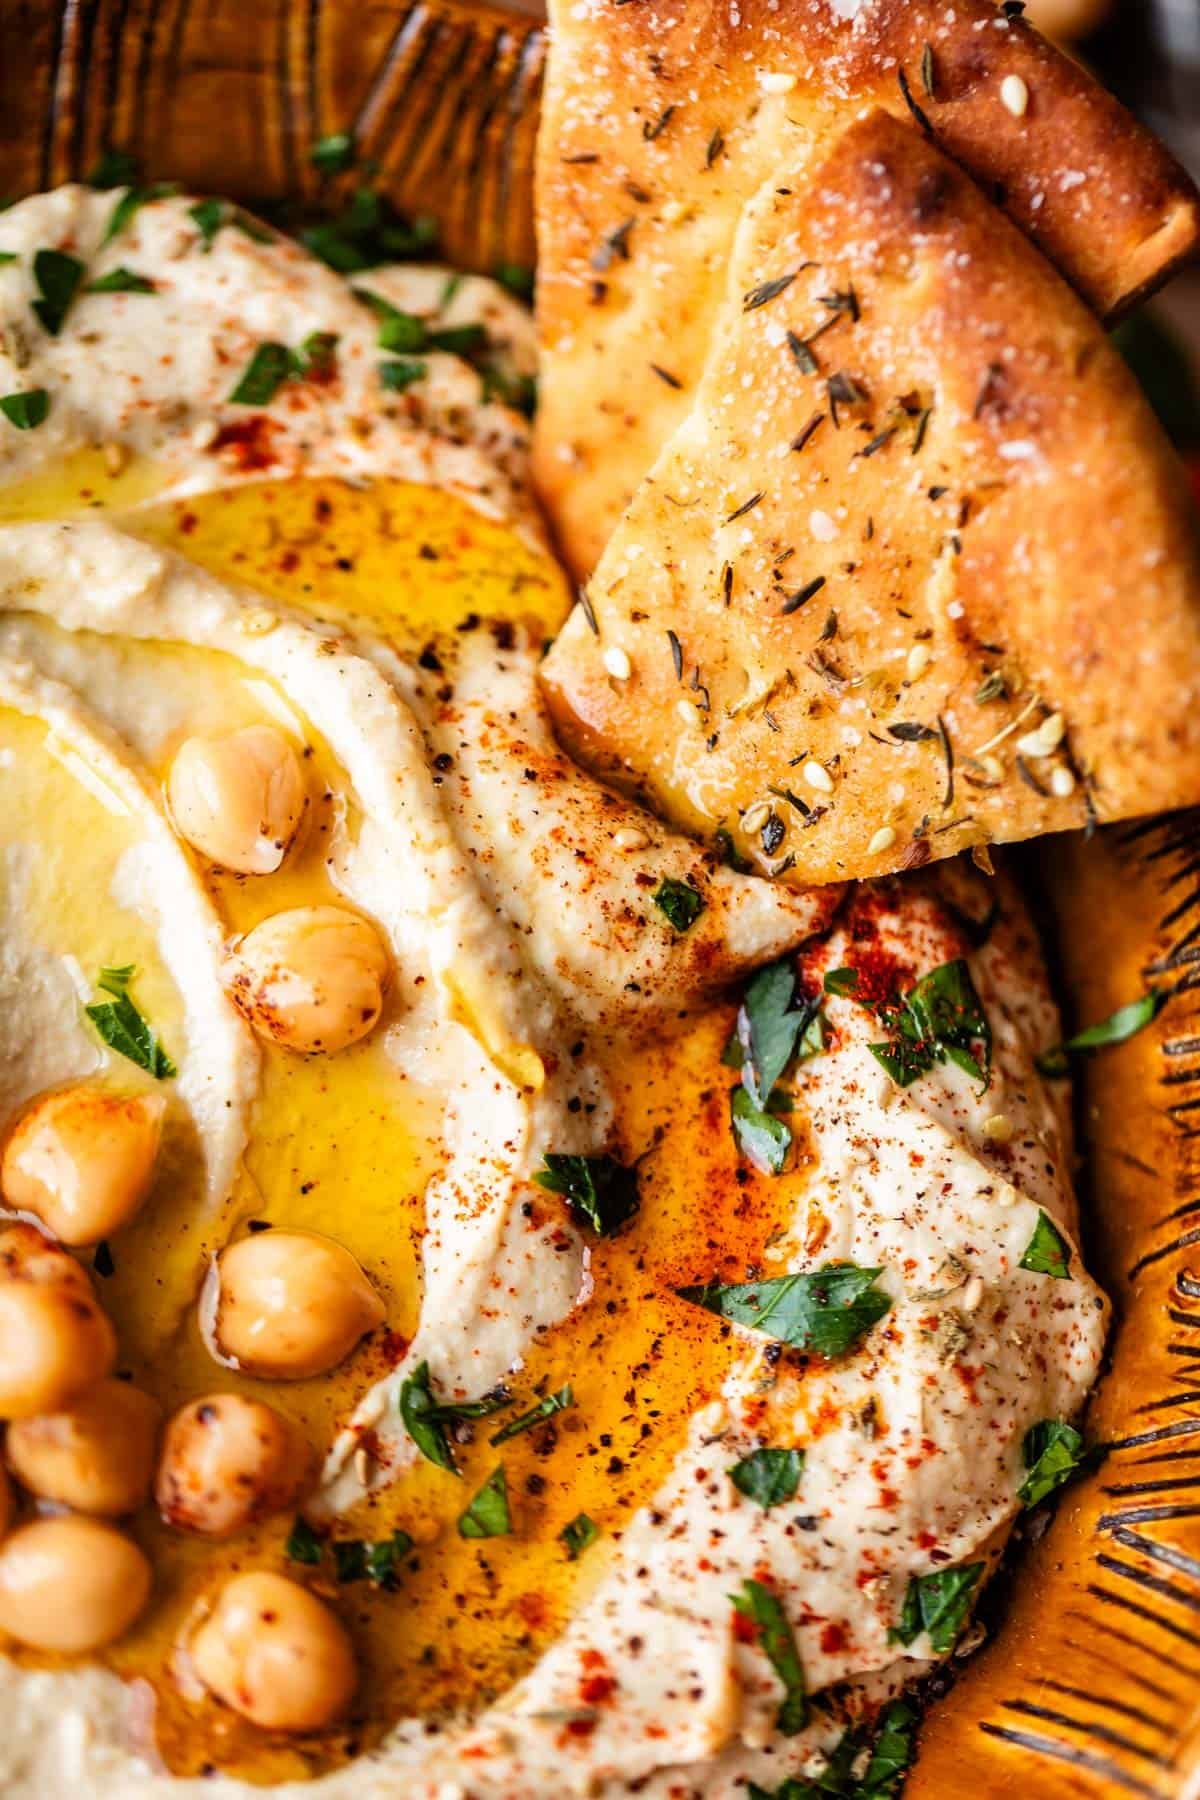
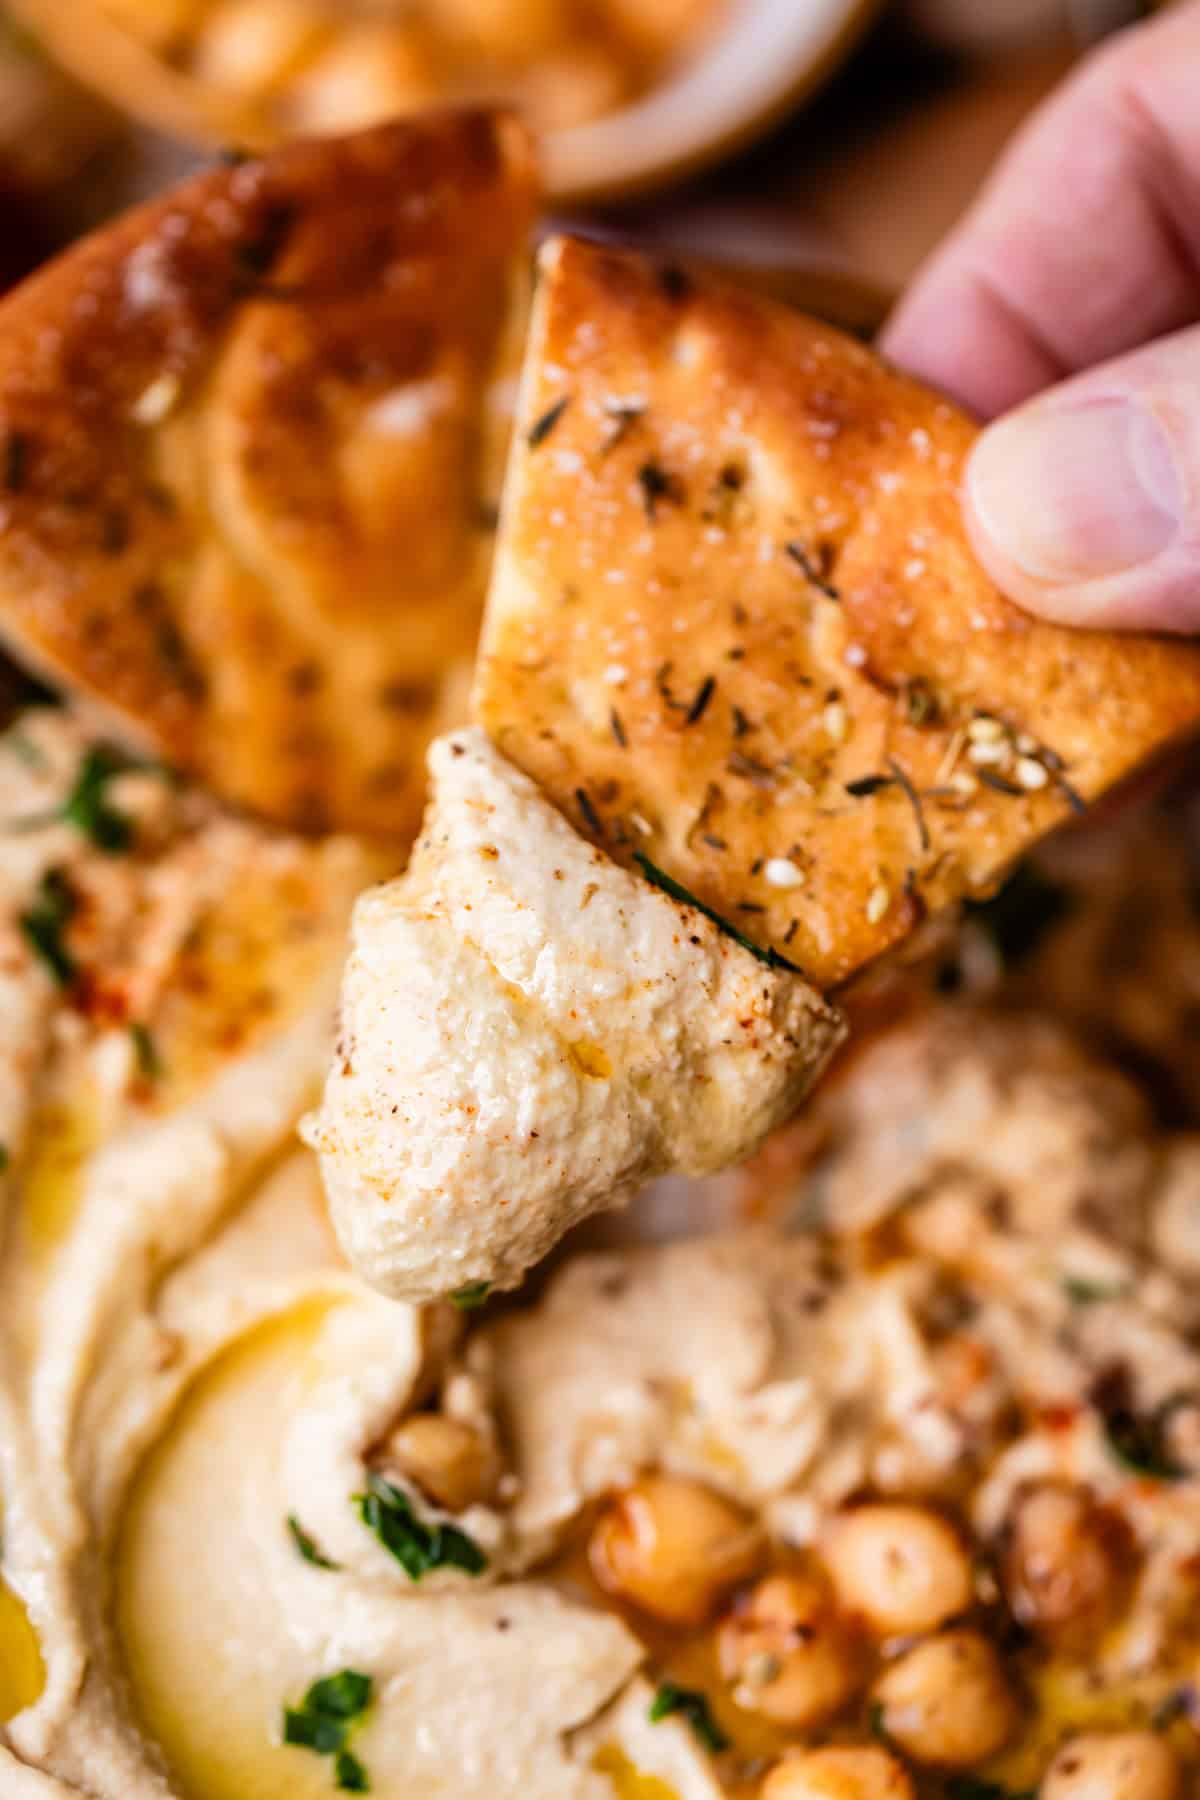
If you really want to take this over the top, serve it with some Za’atar pita bread. Just brush some pita with oil…
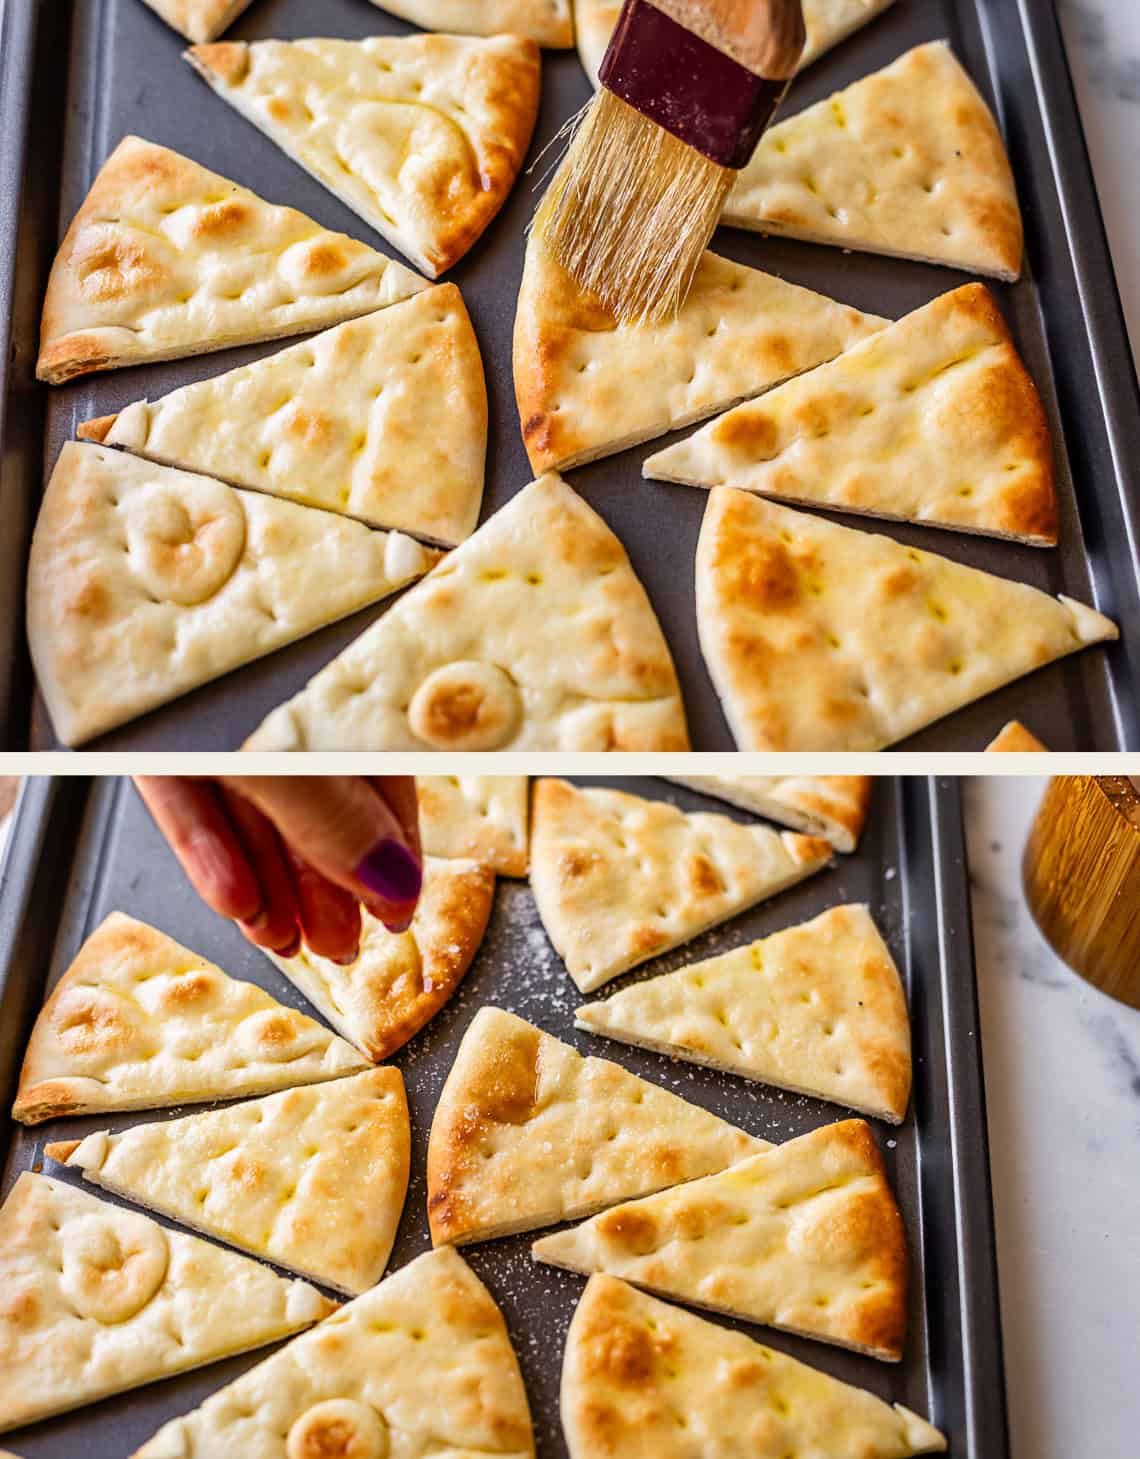
Sprinkle with salt…
Sprinkle with zataar…
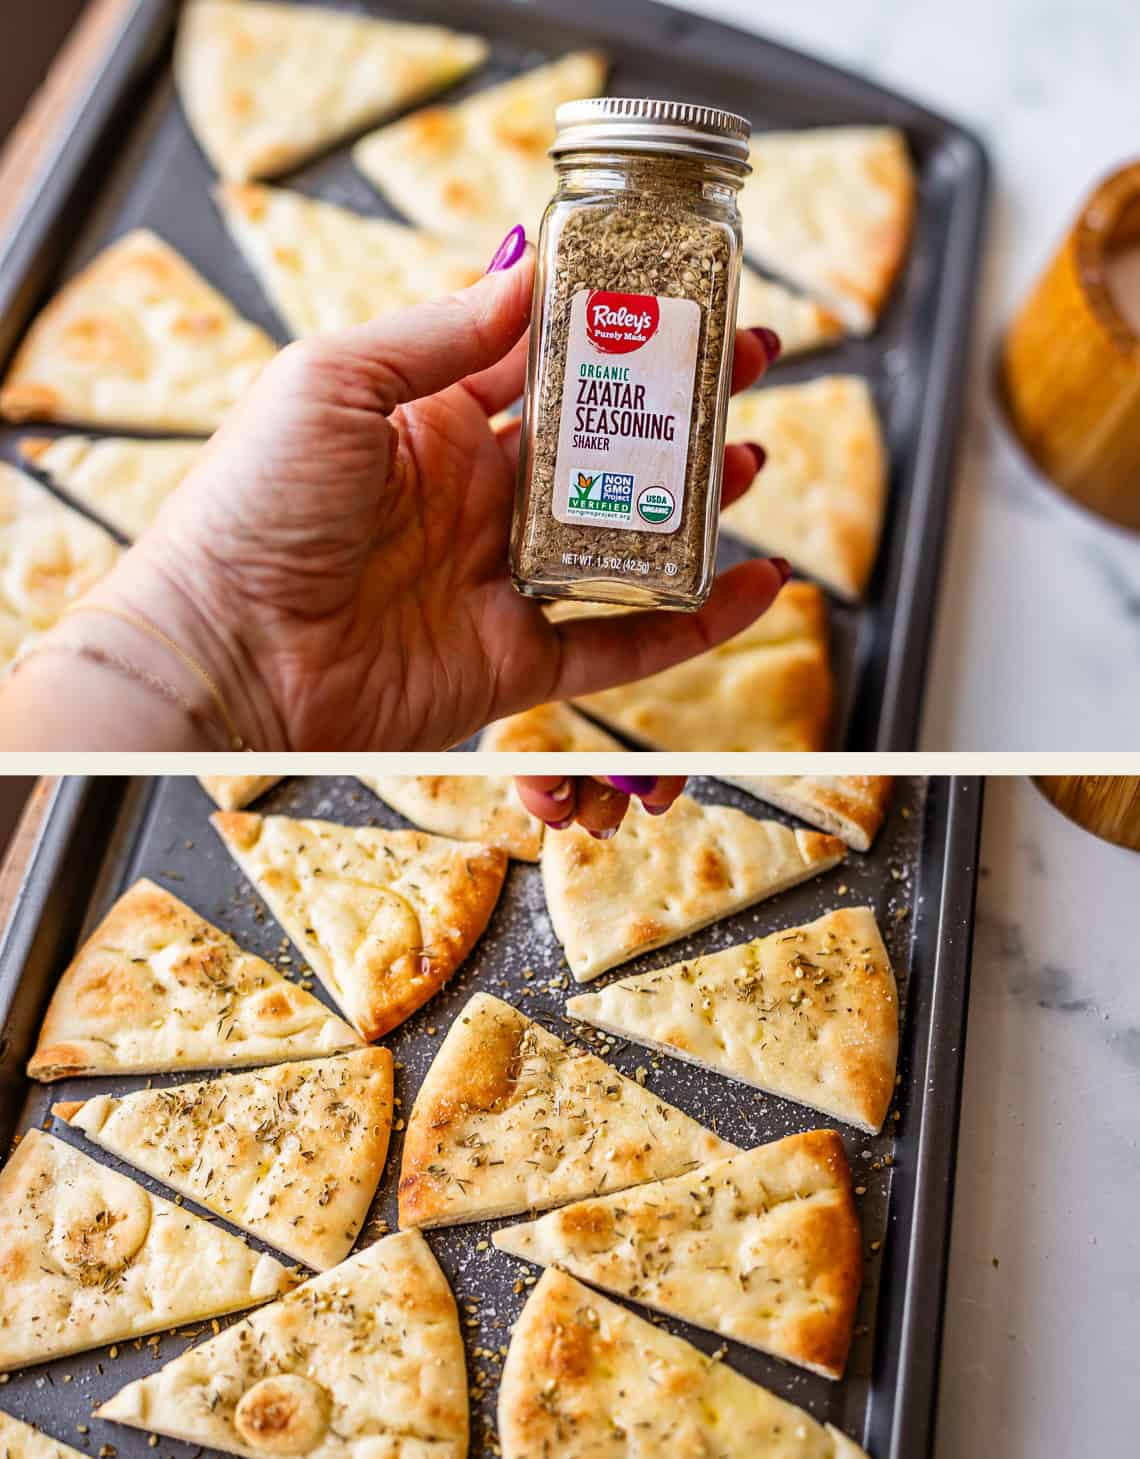
and then bake for just a few minutes, until it’s crispy on the edges but still tender in the middle! Perfection.
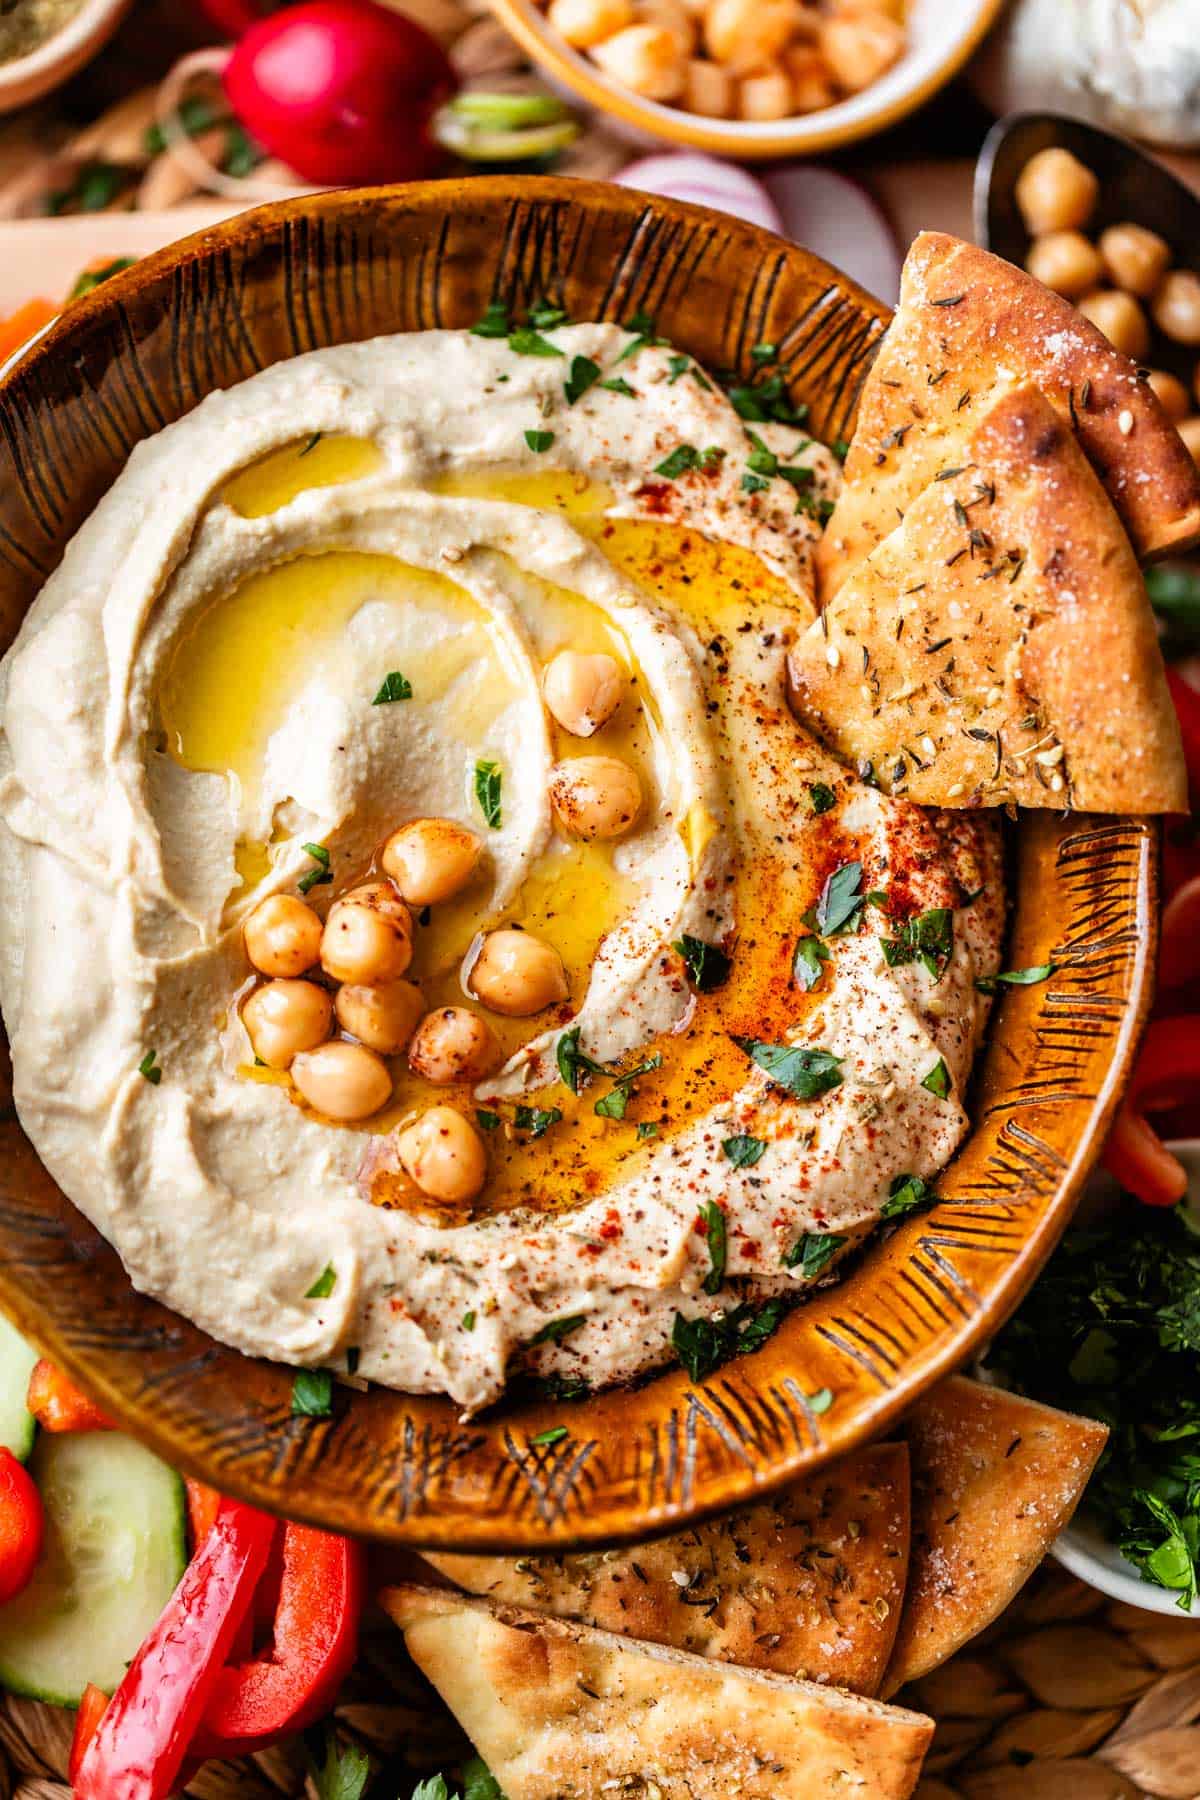
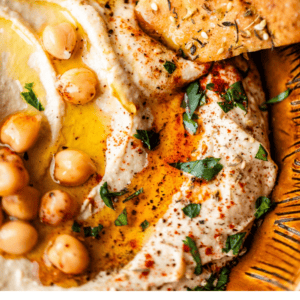
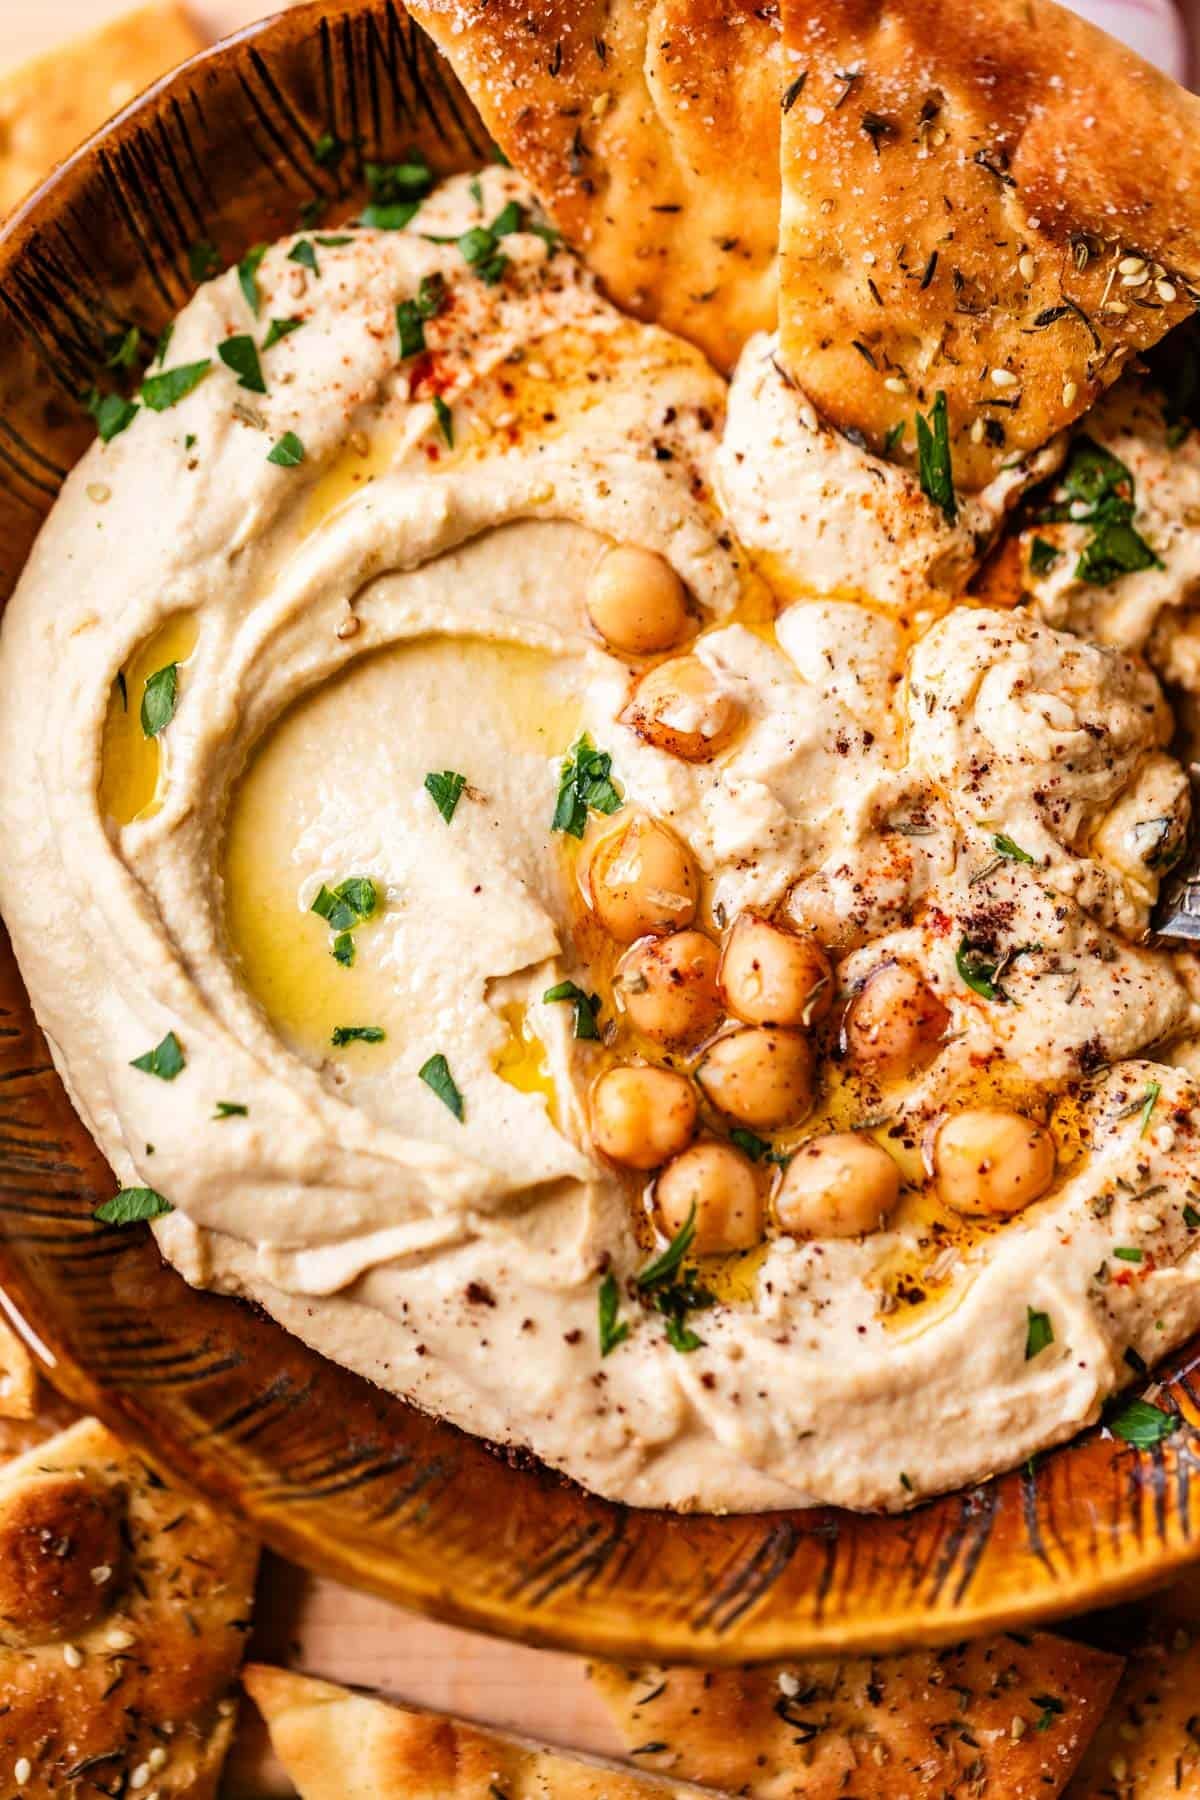
Garnish with some extra chickpeas, or just a sprinkle of parsley and sumac. Or sesame seeds would be good! I could eat this whole bowl! Yum.
What to serve with hummus
Hummus is a chameleon food. It can stay humble with a simple pita, or it can be the star of a whole spread. Here are some great options to choose from!
- Warm pita bread is the most traditional dipper for hummus. This Toasted Za’atar Pita would be incredible! If you happen to have any Middle Eastern stores near you, I highly recommend getting whatever version of flatbread they sell. It will be way higher quality than they stuff you can get at the grocery store. Totally worth it! You can also use baguette slices (toasted or fresh), bagel thins, etc.
- Good crackers or chips! I love all kinds of crackers for hummus. Wheat Things, Ritz, Triscuits, Nut-Thins, or any cracker you like will work. I also love hummus with pita chips, pretzels, or even tortilla chips.
- Fresh vegetables like carrot or celery sticks, cucumber or radish slices, or cherry tomatoes. Look at you, so healthy!
- Other Mezze table items like olives, pickles, feta or other cheeses, other dips like tzatziki or baba ghanoush, or even grilled meats or falafel if you want a whole Mediterranean spread!
- Hummus is a great centerpiece for a simple (or epic!) Charcuterie board!
Make your hummus a meal
If you’re looking to eat more than just a snack, here are some great recipes that go really well with hummus.
- Oven Baked Greek Chicken with Veggies >> super easy to put together, and healthy to boot
- Chicken Shawarma >> juicy, garlicky, and made in your kitchen in about 45 minutes. Yes, please!
- Best Greek Tomato Cucumber Salad with Feta Cheese >> perfect with the hummus for a snacky style lunch or a light summer dinner!
More ideas beyond dipping!
Hummus is not just for dip. Here are some ways you can use hummus you may not have thought of before!
- as a spread in a sandwich or wrap
- thin the hummus with a bit of broth and get a rich and creamy pasta sauce
- add yogurt or buttermilk to make a simple salad dressing
- as a mayo replacement in things like deviled eggs or tuna salad
How to store leftovers
Make sure the hummus is put in an airtight container so it doesn’t dry out. You can even add a very thin layer of oil to the top before adding the lid to limit air exposure. Homemade hummus will last in the refrigerator for 3-5 days, which I think is pretty generous considering my family can demolish all of it in one night. If you don’t think you will eat all of the hummus before it goes bad, or have doubled or tripled the batch, you can always freeze the leftovers (instructions below)!
Can you freeze hummus?
YES! I have tons in my freezer right now from testing this recipe so much! Transfer the hummus to a ziplock bag and squeeze as much of the air out as possible, then seal and place in the freezer. That’s it! It will last quite a long time, a good 4-6 months.
To thaw, place the bag in the refrigerator overnight or on the counter for a few hours. It may have separated a bit or gotten slightly grainy, but it’s an easy remedy. Just whisk it vigorously in a bowl with a splash of tahini and/or lemon juice and it’ll come together again.
In my research I read about people flash freezing hummus in ice cube trays and transferring the cubes to a ziplock bag. Then, they use the cubes as sauce thickeners, as a pasta sauce base, or even just to control the exact amount of hummus they want to eat that day. GENIUS, right? I haven’t tried it yet, but I will soon to. Such a great idea!
Facebook | Pinterest | Instagram
The Best Hummus (Easy!)
Ingredients
For boiling:
- 1 (15-ounce) can chickpeas, also called garbanzo beans
- 1 cup water, for boiling the chickpeas, save 1 tablespoon
- 2 cloves garlic, for boiling the chickpeas
Add to the food processor:
- 1 tablespoon cooking water
- 1/2 cup tahini*, stirred up very well
- 1 clove garlic
- 1/4 cup lemon juice, fresh squeezed (1 very large lemon, or 2 small)
- 1 and 1/4 teaspoon kosher salt, (use 1 tsp if all you have is table salt)
- black pepper, to taste
- 4 ice cubes, (about 2 tablespoons water per ice cube)
Optional garnishes:
- extra chickpeas, to garnish
- high quality olive oil, to garnish
- parsley or dill , to garnish
- smoked paprika, to garnish
- sumac, to garnish
Instructions
- Boil the chickpeas: In a small pot, add 1 can chickpeas with all it's liquid, 1 cup of water, and 2 smashed cloves of garlic. (Smash the garlic cloves with the side of a chef's knife.)
- Bring to a boil and then lower the heat to a medium simmer. Simmer for about 10 minutes, until the chickpeas have softened a bit.
- Strain (save some of the cooking liquid!): Set a colander or a strainer over a bowl. Pour the chickpeas and garlic into the colander, reserving some of the cooking liquid.
- Add the drained chickpeas and boiled garlic to a food processor.
- Prep: Stir the tahini really well. Juice a lemon until you have 1/4 cup. Smash 1 clove of garlic with the side of a chef's knife.
- To the food processor, add 1 tablespoon cooking liquid, 1/2 cup well-stirred tahini, 1 additional clove of FRESH (not boiled) garlic, 1/4 cup fresh lemon juice, 1 and 1/4 teaspoons kosher salt, and a few grinds of black pepper.
- Blend the chickpeas and tahini on low until it has reached a chunky, not quite smooth texture.
- Add 2 cubes of ice. Blend again until the ice is melted.
- Add 1 more cube of ice. Blend until smooth. Taste it. If your hummus is the perfect texture, stop now.
- Add another cube of ice, if necessary (don't add so much ice that it becomes runny!) Blend until smooth.
- Taste it again. Add more kosher salt, pepper, lemon, or even another tablespoon of tahini if necessary.
- Transfer to a serving bowl. Garnish with extra chickpeas (open a new can), olive oil, fresh parsley or dill, and if nothing else, I really love to sprinkle with smoked paprika and sumac.
- Make the Za’atar Pita: Preheat your oven to 350 degrees F. Line a baking sheet with pita bread slices. Brush the top of each pita with a small amount of olive oil, just enough to coat. Sprinkle with kosher salt, then top with a few shakes of Za’atar seasoning, to taste. Bake at 350 for about 5-8 minutes, until the pita is slightly crisp on the edges but still tender in the middle.
- Serve the hummus with fresh veggies like carrots, cucumbers, celery, bell peppers, radishes, or snap peas! Crackers of any kind, sourdough toasts, and pita chips or pretzel chips are good too. Use it as a spread on Laura's Veggie Sandwich for an amazing lunch!


ICE….that’s brillian. Coupled with boiling the beans! You may have unlocked the issue I have with making hummus. Cuz, like you, I hate peeling the skins. I’m so going to try this! Thanks for the recipe. I’m going to go ahead and assume it’s a 5 stars recipe.
Oh Jenn, how I love your faith!! You just made me feel like a million bucks 💕 I hope you get to try out this hummus soon, it is making an appearance on all my plates lately 😂 Thank you so much for your support and chiming in!!