Gingerbread Man Cookies
Do you have a special recipe from your grandmother for Gingerbread Cookies that you WANT to love (because you love your grandma), but never actually make, because eating it feels like taking a bite of actual cardboard? You are not alone! I have finally discovered all the secrets for perfectly soft, chewy, melt-in-your-mouth-buttery Gingerbread Man Cookies. Plus recipes for Royal Icing, Glaze Icing (my favorite), and Buttercream Frosting!
Servings: 24
Calories: 306kcal
Equipment
- Piping tip #1 if using royal icing
- Piping tip #2 if using royal icing
Ingredients
For the Cookies:
- 1 cup butter softened
- 1 cup dark brown sugar packed
- 1 cup molasses I like Grandma's brand (don't use blackstrap)
- 1 tablespoon vanilla extract
- 4 cups all purpose flour spooned and leveled
- 1 & 1/4 teaspoon kosher salt
- 1 tablespoon ground ginger
- 1 tablespoon ground cinnamon
- 3/4 teaspoon ground cloves
- 1/2 teaspoon ground allspice
For Royal Icing
- 1/4 cup meringue powder or 3 egg whites, see notes
- 4 cups powdered sugar about 1 pound
- 6 tablespoons warm water omit if using egg whites.
- gel food coloring optional
For Glaze Icing
- 2 cups powdered sugar
- 6-7 tablespoons milk or more as necessary
- 1 tablespoon corn syrup
- 1 teaspoon vanilla
- 1 pinch kosher salt
For Buttercream Frosting
- 1 batch Buttercream Frosting
- gel food coloring optional
Instructions
- Make the cookie dough: In a large bowl or stand mixer, add 1 cup (two sticks) slightly softened butter. (I always soften my butter in the microwave for 1 minute on power level ONE.) Beat the butter for about 1-2 minutes, scraping the sides, until it is smooth and creamy.
- Add 1 cup dark brown sugar (light brown works fine too). Beat the butter and sugar together for another 1-2 minutes, scraping the sides down after it comes together. Beat until the mixture has become light and fluffy.
- Add 1 cup molasses. (Do you have one of those adjustable measuring cups? They are a lifesaver for measuring sticky ingredients like molasses.) Use any brand of Unsulphured Molasses (might be labeled dark or light, both are fine. Just don't get blackstrap, it's too strong and bitter.)
- Add 1 tablespoon vanilla and beat until incorporated.
- Add the dry ingredients. Spoon and level 4 cups of flour (that means use a spoon to add it to the measuring cup, then level off the top) and add to the bowl. Don't mix yet.
- Make a little well in the flour, and add the rest of the ingredients: 1 and 1/4 teaspoons kosher salt, 1 tablespoon ginger, 1 tablespoon cinnamon, 3/4 teaspoon cloves, and 1/2 teaspoon allspice. Stir the spices into the flour a bit, breaking up any clumps (the ginger will especially need this).
- Mix the dry ingredients into the dough on the lowest speed. Scrape the edges of the bowl and continue mixing until it comes together. There should be no more flour streaks and no flour on the edges of the bowl. Do not over mix. Over mixing cookie dough makes your cookies tough (instead of soft and tender.)
- Chill the dough: Lay out 3 sheets of plastic wrap on your counter. Divide the dough into 3. Wrap each portion of the dough in the plastic and chill for about 2 hours, until firm (I cheat. I put the wrapped dough in the freezer (not stacked; separate the discs) for about 30 minutes, then finish chilling for about 30 minutes in the fridge.) The goal is to have firm dough that is not too sticky to roll out.)
- Meanwhile, get your pans ready. Line 3 half baking sheets with parchment paper or silicone baking mats.
- Roll out the dough: Preheat your oven to 350 degrees F. Prepare a work surface with a light dusting of flour. (I love to use my pastry cloth.) Place one disc of dough on the flour and coat each side. Use your rolling pin to smash the dough a couple times, loosening it. Start rolling, turning the dough over every couple times to make sure the dough doesn't start sticking to the surface, sprinkling with flour as necessary.
- Roll the dough to about 3/8 inch thickness. This is just under a half inch. See photos for an idea of what size this looks like against my thumb. Don't roll them out too thin! You will get harder cookies. This is the moment when you are achieving the texture you want, so look alive people. (It's even more important than not over-baking.)
- Cut the cookies. Dip your cookie cutter in flour. Place the cutter as close to the edge of the dough as possible. Press down firmly, then lift the cutter and loosen your gingerbread man directly onto your prepared baking sheet. If you are baking tiny gingerbread men, take the time to run your finger around the edge of the cutter, removing excess dough, to make sure you get clean lines.
- Place the gingerbread men on the pan with at least an inch or two of space in between each cookie. These cookies will hold their shape, but they still puff a bit in the oven.
- You can use any shape cutters you like, just make sure all the cookies on each pan are about the same size.
- Chill the cookies again. This step is optional, but if you want your cookies to REALLY hold their shape, stick the whole pan of cookies in the freezer for 5 minutes before baking. If you don't have space, make sure you work quickly when rolling your dough so that the cookies hit the oven as cold as possible. This makes for the best texture.
- Bake in the oven at 350. For 2-inch tall gingerbread men, bake for 6-8 minutes.For 3-inch tall gingerbread men, bake for 8-10 minutes.For 4-inch tall gingerbread men, bake for 10-12 minutes.Take the cookies out of the oven when the centers are no longer shiny. Keep an eye on them to make sure they do not over bake! Take them out AS SOON as you notice the centers are not raw (shiny). This will take some trial and error as you test things out with your oven and the size of your cookies. Stick around and keep checking on your first batch.
- Within 30 seconds of taking your cookies out of the oven, assess the shape of your little men, and decide if you want to make any nudges to help them be the exact shape you want. Use the side of a knife to press the edges of the cookies in toward the center. Separate any cookies that are trying to hold hands or kick each others heads. You can only do this easily within 30-60 seconds of taking them out of the oven. See tips for shaping just-baked cookies on my Chocolate Chip Cookie post.
- Let the cookies finish setting up on the pan for about 5 minutes. They will continue to firm up. Wait longer for big cookies. Use a spatula to remove the cookies to a cooling rack. Let cool completely, then once cool, transfer right away to a sealed tupperware, to keep them soft.
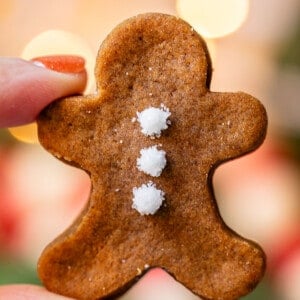
- Choose your frosting. At this point you need to decide if you are doing more intricate decorations with Royal Icing, dipping these cookies in a simple Glaze Icing (my favorite), or topping with Buttercream Frosting (to either spread on or pipe; this is the richest option).
Royal Icing
- Update Jan 2024: I created an entire post about Royal Icing, check it out for tons of details. This is a simplified recipes. See notes for making this recipe with egg whites.In a large bowl or stand mixer, whisk together 1/4 cup meringue powder and 4 cups powdered sugar. Gradually add 6 tablespoons warm water and beat on low, using the whisk attachment if you have it. Once it's come together, mix on medium speed for 30-60 seconds, until the frosting is thick and white. Do not over beat; it makes the frosting unstable. Add water a little at a time until your frosting is about the consistency of toothpaste, or a bit thinner. Separate into bowls if you are adding gel food coloring; one color for each bowl. Add the frosting to piping bags set up with #1 or #2 size tips. (or add to a ziplock and snip the corner a tiny bit.) Pipe the icing on the cookies.Royal icing is finicky and takes a lot of practice to get it just right. I could write a whole post about this (and sometime soon I will. Update! I did! Royal Icing here.) Be patient and remember practice makes perfect. I had dozens of reject cookies I decorated before getting the ones I photographed for this post, which are still definitely not Instagram level, but good enough for me.
Glaze Icing
- In a large bowl or stand mixer, add 2 cups powdered sugar. Add 6 tablespoons milk, 1 tablespoon corn syrup (this helps prevents sugar crystals forming in the glaze, making the glaze super-smooth and shiny), 1 teaspoon vanilla, a healthy pinch of salt, and beat. You can even just do this by hand with a whisk. Add more milk gradually, 1-2 teaspoons at a time, until you have a thin, dip-able glaze. The thicker your frosting is, the longer it will take to dry.
- Lay out 3 sheets of parchment paper, wax paper, or aluminum foil on your counter, and line up 3 cooling racks on top. Dip the top side of each cookie into the glaze. Set on the cooling rack to dry. Sprinkle with sanding sugar if you want. The glaze will take 1-3 hours to set up completely.* Then you can stack them. Be sure to rotate the cookies every now and then as the glaze hardens, so they don't glue themselves to the cooling rack. See notes for an alternative glaze to use if you are shipping these cookies.
Buttercream frosting
- Make the frosting as described on this Ginger Molasses Sandwich Cookies recipe.** Separate into bowls and add gel food coloring, if you want. You can spread the cookies with an offset spatula or butter knife. Or you can add to a piping bag set with a mid-size tip and pipe frosting on the cookies.
- How to store: Wait until whichever frosting you used is completely dry (unless you used buttercream), then store the cookies in an airtight container, where they'll be good on the counter for 4-5 days. (If you used buttercream, store airtight in a single layer.)
- To freeze the dough: You can wrap the discs of dough tightly in plastic wrap and add it to a ziplock freezer bag. Or, you can roll and cut out your pieces, lay them on a cookie sheet, and flash freeze them for 30-60 minutes. Once flash frozen, layer them in stacks with wax or parchment paper and store in a large tupperware or ziplock freezer bag. No matter how you store them, they should be good in the freezer for 1-2 months. You can bake them straight from frozen, do not thaw.
- To freeze baked, not frosted cookies: Wait until they are completely cool, then add any cookies to a tupperware or freezer ziplock bag, getting out as much air as possible. They'll be good in there for 2-4 weeks.
- To freeze decorated cookies:Royal Icing: Once completely dry, store the cookies in a tightly sealed tupperware and freeze for 2-3 weeks. You should be able to stack them just fine. Spread them out and thaw at room temperature. Glaze icing: Wait until they are completely dry (this could take a few hours), then store in a tupperware, with a piece of parchment paper in between each layer. When thawing, lay out the cookies in a single layer, no cookies touching each other. The glaze will release moisture again, and they will need to re-dry; it will look like you just dipped them again. So you can't thaw them out stacked. Buttercream frosting: Flash freeze the cookies, then store in a tupperware, separating each stack with parchment paper. Lay out the cookies in a single layer when thawing, so they don't melt into each other.
Notes
Nutrition Facts: I calculated the nutrition facts to include Royal Icing, not the Glaze Icing or Buttercream. This recipe makes about 24 (3-inch) cookies.
Royal icing using egg whites: Use the whisk attachment (if you have one) to beat 3 egg whites until frothy. Add 1/2 cup powdered sugar and beat until incorporated. Add all the remaining powdered sugar and beat well. Add warm water or more powdered sugar as necessary to achieve the consistency you want.
*Glaze for shipping: If you plan to ship these cookies, I recommend using the glaze recipe I created for Glazed Donuts. It takes a bit longer to dry (6-8 hours) But the glaze dries even more firm than the other glaze recipe. And it does a great job sealing in the moisture of the cookie, so they stay fresh in the box for shipping for a few days. You might consider dunking the whole cookies (instead of just glazing the top) to help seal in moisture. Keep rotating the cookies periodically as they dry so they don't stick to the cooling rack.
**Buttercream Frosting that forms a slight crust: Cookies frosted with buttercream will not be stackable. But you can get the frosting a little more sturdy for your cookie plates by adding 1-3 teaspoon meringue powder in with the powdered sugar.
Nutrition
Calories: 306kcal | Carbohydrates: 56g | Protein: 3g | Fat: 8g | Saturated Fat: 5g | Polyunsaturated Fat: 0.4g | Monounsaturated Fat: 2g | Trans Fat: 0.3g | Cholesterol: 20mg | Potassium: 264mg | Fiber: 1g | Sugar: 39g | Vitamin A: 238IU | Vitamin C: 0.03mg | Calcium: 47mg | Iron: 2mg
