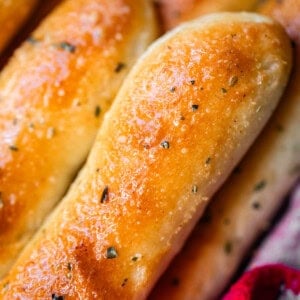
Olive Garden Breadsticks
We all know the best thing about Olive Garden is their awesome soup and salad deal. For just a few dollars you can get unlimited breadsticks. Oops, I mean unlimited soup and salad. (We all know the breadsticks are where it’s at though!) These copycat Olive Garden Breadsticks are even better than the originals, because we are brushing the tops with butter and garlic. They are sooo fluffy!
Servings: 14
Calories: 143kcal
Ingredients
For the dough
- 1 & 1/4 cups warm water
- 1 tablespoon active dry yeast or instant yeast works too!
- 2 tablespoons granulated sugar
- 1 tablespoon kosher salt if you only have table salt, use 2 teaspoons
- 1 tablespoon vegetable oil
- 1 tablespoon soft butter
- 3 cups all purpose flour plus 1/4 cup as needed
- vegetable oil for greasing the pans
For the topping
- 3 tablespoons butter melted
- 1 teaspoon granulated garlic
- 1/2 teaspoon kosher salt if you only have table salt, use 1/4 teaspoon
- oregano or Italian seasoning to sprinkle on finished breadsticks
Instructions
- In a large bowl or stand mixer, add 1 and 1/4 cups warm water. I use water straight from the tap, and let it run until it's nice and warm like a baby's bath. If it feels so hot that you want to pull your finger away, it's too hot. If you want to bust out the thermometer, we're looking for a temperature between 105-110 degrees F.
- Add 1 tablespoon yeast and 2 tablespoons sugar to the water. Stir this together and wait a minute or two, to make sure that your yeast is starting to bubble. See photos. You don't need to wait a long time, you just want to make sure the yeast is starting to bloom (and that you didn't kill it with too-hot water) Once you see any measure of foaming or bubbling, move to the next step. (If the water is flat and unmoving, ya done killed it. Toss it and start again.)
- Add 1 tablespoon kosher salt (if you have table salt, use only 2 teaspoons!)
- Add 1 tablespoon vegetable oil and 1 tablespoon soft butter.
- Use a spoon or cup to add flour to a 1 cup measuring cup. Level off the top with a knife (or anything flat) and add it to the bowl. Repeat until you have added 3 cups of flour, spooned and leveled.
- If you are using a stand mixer,* use the dough hook and mix on medium low speed until the flour is mostly incorporated. Scrape the sides of the bowl with a spatula and continue mixing with the hook on low speed.
- At this point you need to decide if you should add more flour to your dough or not. You do not want to add too much flour or your dough will be stiff and your breadsticks won't be tender. If you don't have enough flour, your breadsticks won't rise well. You want your dough to be smooth, elastic, and slightly sticky.
- So, if necessary, add flour 1 tablespoon at a time, as needed, up to 1/4 cup.** (see notes!)
- Once all the flour has been added, continue kneading for a total time of at least 5-6 minutes, until it is soft, smooth, and elastic.
- Scrape the dough onto a lightly floured surface (I love to use my pastry cloth) and shape into a ball. Cover with a tea towel or plastic wrap and let rest about 10 minutes.
- Drizzle 2 half baking sheets with about 1-2 tablespoons vegetable oil or olive oil. Rub it on with your hands so that the pans are fully greased.
- Divide the dough in half. Split each half of the dough into 7 equal pieces, to make 14 pieces total. Each piece should weigh about 2 ounces, if you want to bust out your scale, but it's not necessary, you can just eyeball it!
- Use your hands to roll each piece of dough into a snake, just like with playdough when you were a kid. I like to use my palms to roll it on a work surface, but you can roll it between your palms if that's easier. Try to make it even all the way across, we don't want one end of our breadstick fatter than the other. Roll each piece to be about 8 or 9 inches long. Place each finished log on the baking sheet. The 8 or 9 inch log should be parallel with the short side of the pan (the 12 inch side, see photos).
- Continue with all the rest of the dough. Each pan should have 7 breadsticks. Loosely cover each pan with a tea towel, or cover with plastic wrap that you have sprayed with nonstick spray (so that it doesn't stick and ruin your rise).
- Arrange your oven racks to fit two pans at once, one in the top third of the oven, the other rack in the bottom third.
- Turn your oven on to 350 degrees F, and set a timer for 30 seconds. Turn the oven off when it is nice and warm inside, but not hot. You should still be able to comfortably place your fingers on the oven rack. Place your two pans of covered dough in the oven and shut the door. Set a timer for 10 minutes.***
- After 10 minutes, remove the pans from the oven.
- Preheat the oven to 400 degrees. Let the breadsticks continue to rise on the counter for another 15-20 minutes while the oven gets up to temperature. They are ready to bake when they have doubled in size.
- Melt 3 tablespoons of butter in a bowl. Add 1 teaspoon granulated garlic and 1/2 teaspoon kosher salt (or sea salt). Use a little less salt if you only have table salt.
- Just before putting them in the oven, use a pastry brush to gently brush the breadsticks with about half of the melted butter mixture.
- Preheat the oven to 400 degrees and Bake the breadsticks at 400 degrees F for 12-14 minutes. Switch the pans halfway through the bake time.
- You will know the breadsticks are done when the tops are turning golden brown, and the bottoms are also starting to brown (you can lift one up with a spatula to check)
- Immediately after taking the breadsticks out of the oven, brush with the remaining garlic butter. Add a bit more butter if necessary, live your best life bro.
- Serve the breadsticks immediately. Or, if you are serving them later, remove to a cooling rack so that they can finish cooling. If you leave the on the pan to cool, the bottoms will get soggy.
- To reheat: Place them back on the pan and stick them in the oven at 350 degrees F for about 5 minutes, until warm.
Notes
*No stand mixer? You can mix this bread by hand if you don’t have a stand mixer! Use a wooden spoon to mix everything together, and when as it starts to become difficult to mix, set the spoon aside and flour your hands. Knead the flour into the dough in the bowl, until it has come together. Scrape the dough out onto a lightly floured surface. Knead with your hands, using minimal flour, for a full 7-8 minutes. Press the heels of your hands in, stretch the dough onto itself, then repeat. Return to the bowl to rise and continue with the recipe.
**How to know if you've added enough flour: This dough will NOT QUITE form into a ball in the mixer. It is pretty tacky. Do not over flour. If you reach your finger in and press the dough, your finger should come away glossy but with no dough stuck to it. But if you take two fingers and pinch it harder, you will have dough stuck to your fingers.
***Rising the dough in a slightly warm oven. You can skip this step! It's just a hack to make the rising go faster. You can leave the breadsticks to rise at room temperature out on your counter, it will take more like 40-45 minutes, depending on the temperature of your kitchen.
FREEZING:
There are two ways to freeze these breadsticks. The first is to freeze already-baked breadsticks by placing them on a lined baking sheet, no touching, and flash freeze for 30 minutes. Transfer the breadsticks to a freezer ziplock bag and store in the freezer for 1-2 months. You can thaw them in a bag on the counter for an hour or so. Or, place them right on a lined baking sheet and bake in a 400 degree oven for 5 to 10 minutes until hot.
You can also freeze these breadsticks before baking them! Prepare the dough as instructed, let it complete the first rest, and shape them into individual breadsticks. Put them on a lined baking sheet and flash freeze for 30-60 minutes until completely frozen. Transfer them to a freezer ziplock bag and store for no more than 1 month or the yeast will start to lose strength. To use them, put the frozen breadsticks on a lined baking sheet to thaw and rise for about an hour. It can take more or less time depending on the temperature, but you want them to get soft and puff up to nearly double. Once they're ready, follow the baking instructions as usual!
Nutrition
Serving: 1g | Calories: 143kcal | Carbohydrates: 22g | Protein: 3g | Fat: 5g | Saturated Fat: 2g | Polyunsaturated Fat: 1g | Monounsaturated Fat: 1g | Trans Fat: 0.1g | Cholesterol: 9mg | Potassium: 35mg | Fiber: 1g | Sugar: 2g | Vitamin A: 100IU | Vitamin C: 0.004mg | Calcium: 6mg | Iron: 1mg
