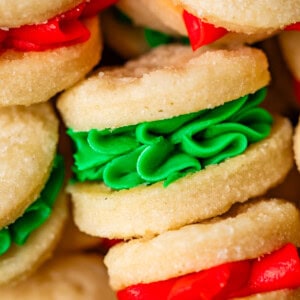
Pariserwafiers (Vanilla Cream Cookies)
I am O B S E S S E D with these Swedish Cream Wafer Cookies, you guys!! (Pariserwafiers? Vanilla Cream Cookies?) This is a recipe the world forgot. Perhaps because until you taste them, they look unexceptional: two tiny cookies sandwiched with buttercream frosting. Sounds like your average sugar cookie, right? NOPITY NOPE NOPE. These cookies are flaky, buttery, crispity-tender discs of bliss. In combination with the super RICH buttercream (thank u, egg yolk 🥹), these cookies are an unstoppable combination of everything you ever wanted for Christmas. I cannot eat less than 4 at a time.
Servings: 70
Calories: 63kcal
Ingredients
For the cookies
- 1 cup butter softened (2 sticks)
- 1/3 cup cream*
- 2 cups all-purpose flour spooned and leveled
- 1/2 teaspoon kosher salt use less if all you have is table salt
- granulated sugar for dipping the rolled cookies
For the frosting
- 1/2 cup butter softened (1 stick)
- 1 large egg yolk optional; add 2 tablespoons cream as a substitute
- 2 teaspoons vanilla
- 1/8 teaspoon kosher salt
- 1 and 1/2 cups powdered sugar
- pink, red, or green food coloring optional
Instructions
- Make the dough. In a large bowl or stand mixer, add 1 cup butter (2 sticks). I used salted butter, but unsalted works great too! Beat the butter until it is smooth and creamy, scraping down the sides and bottom of the bowl.
- Add 1/3 cup heavy cream.* Beat together until the mixture looks slightly curdled. It won't look like it's completely coming together, that's okay. Don't over mix, or the butter will all lump together in a ball. We want it choppy, shaggy.
- Spoon and level the flour. Use a spoon to add flour to a measuring cup, then level off the top with a knife. Add 2 cups flour to the butter mixture. Add 1/2 teaspoon kosher salt to the flour and gently stir the salt it into the flour.
- Use the beaters to mix the flour into the butter. Mix until it is just combined. Scrape the sides and bottom of the bowl. See photos. You don't want the dough to be over mixed, it will just make your cookies tough. As soon as all the ingredients are incorporated, turn off the mixer.
- Form into discs. Lay out two large sheets of plastic wrap on the counter. Divide the dough in half and place each half on the plastic wrap. Fold the plastic over on itself and press the dough through the plastic to create a disc. You can press the dough even flatter with your hands a bit (it will chill faster). Repeat with the other half of the dough.
- Refrigerate the discs of dough for 30 minutes.
- Preheat the oven to 375 degrees F. Get out 2 half baking sheets.
- Lightly flour a work surface. I love to use a pastry cloth.
- Roll out the dough. Place the first disc of (unwrapped) dough on the flour, and dust with a little more flour. Use a rolling pin to make even strokes, and roll the dough out to about 1/8 inch thick. It's quite thin! Like pie crust.
- Cut the dough. Use a 1 and 1/2 inch cookie cutter (or any shape of a similar size) to cut the dough into several dozen rounds.
- Roll the cut out dough in sugar. Place the rounds of dough in a bowl of granulated sugar. Toss them around a bit and get the top and bottom of each cookie round completely coated in sugar.
- Line up the rounds on two ungreased cookie sheets. No parchment paper needed for these cookies. These cookies don't spread much at all, so you can put them pretty close together, but they should not be touching.
- Prick the cookies 3 times with the tines of a fork. This is an important step, it's not just for looks! (although it is adorable.) This makes it so the cookie doesn't puff up in the center.
- Freeze or chill. If you have time and space, place your baking sheets in the freezer or fridge for a few minutes before baking, until they are very cold (5 minutes in the freezer, 20 minutes in the fridge). Super super cold fat in the dough going into a screaming hot oven is what makes these cookies the MOST flaky. If you don't have time or fridge space, move as quickly as you can through the rolling and sugaring and pricking process.
- Bake the cookies at 375 for 7-8 minutes until they are just setting up. They should NOT be brown or even golden on the edges, but they should not be shiny on top either. If you tap the edge of one, it should be firm and not feel mushy or wet.
- Take the cookies out of the oven and let them sit on the pan for about 5 minutes before removing to a wire rack to cool completely.
- Make the frosting. Meanwhile, add 1/2 cup (1 stick) of butter to a clean large bowl or stand mixer. Beat the butter until it is smooth and creamy, scraping the sides and bottom of the bowl.
- Add 1 egg yolk, 2 teaspoons vanilla, and a pinch of salt to the butter. Beat well, scraping down the sides a few times, until it is smooth and creamy.(If you don't want to use the egg yolk, add 2 tablespoons cream.)
- Add 1 and 1/2 cups powdered sugar to the bowl and beat well, until all the powdered sugar is incorporated, scraping the edges of the bowl. If the frosting seems really stiff, add 1 extra tablespoon of cream.
- Place a piping tip (any kind) in the end of a pastry bag. Place the bag in a tall glass and fold the edges up over the sides (see photos; the glass is just to provide structure, to make the bag easier to fill). Use a spatula to add all the frosting to the bag, then twist the top of the bag to close it. (If you don't have tips or pastry bags, add all the frosting to a ziplock bag and snip the corner!)
- Frost the cookies. When the cookies are completely cooled, use the pastry bag to pipe a teaspoon or two of frosting onto HALF of the cookies. Top the frosted cookies with the remaining cookies.
- See if you can eat just one. Go on, honestly, I'd like to see you try.
- Storage: Store these cookies in an airtight container on the counter. These cookies are best on day one, when the cookies will still be ultra flaky. The frosting will eventually soften the cookies. If you are planning to serve them on day two, wait until the last minute to frost them. Store the pastry bag in the fridge (let it sit out a few minutes to come to room temperature before piping the frosting.)
- Freezing. You can freeze these cookies, I do it all the time! You can freeze the completed, frosted cookies, or you can freeze the cookies and the frosting separately. To freeze already baked cookies, place them on a baking sheet and put the sheet in the freezer to flash freeze for about 30 minutes. Transfer the cookies to a ziplock freezer bag, try to remove as much air as possible, and seal. Cream wafers will last 2-3 months in the freezer. To use them, place the whole bag or as many cookies as you like out on the counter until they're soft enough to eat.
- Make ahead. These are great make ahead cookies. You can roll out the dough and cut into individual pieces. Flash freeze the unbaked cookies as described above, then add them all to a ziplock freezer bag. To bake, follow the baking instructions in the recipe card, checking to see if they need one extra minute of bake time. The buttercream frosting can also be made ahead and frozen in a ziplock bag or made the day you want to make sandwiches. Frozen frosting will need to sit out in the bag for an hour two before it will be soft enough to use.
Notes
CREAM: Heavy cream is usually sold near the milk at the store. It is sometimes called whipping cream. The different names refer to different fat content levels. (Any type of cream will do for this recipe. The higher the fat content, the richer your cookies and frosting will be. You can see in the photo that I used cream with 36% fat.)
Cream is not the same as coffee creamer. It is the thick, rich part of milk that rises to the top when you milk a cow. Those of you who know what cream is think it is odd that I am explaining this, but it is one of my most-asked questions when I post a recipe involving cream!
Nutrition
Calories: 63kcal | Carbohydrates: 5g | Protein: 0.5g | Fat: 4g | Saturated Fat: 3g | Polyunsaturated Fat: 0.2g | Monounsaturated Fat: 1g | Trans Fat: 0.2g | Cholesterol: 14mg | Potassium: 7mg | Fiber: 0.1g | Sugar: 3g | Vitamin A: 142IU | Vitamin C: 0.01mg | Calcium: 3mg | Iron: 0.2mg
