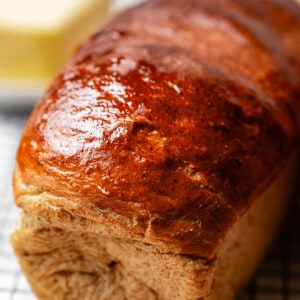
Grandma Prudy's Rye Bread
This is the best, softest, most flavorful Rye Bread you will EVER try, passed down in our family for 3 generations. The recipe is from my husband's great-grandma Prudy, who was Swedish. Rye bread has a reputation for being heavy and sour, but this recipe is the exact opposite: it is light and fluffy, with an earthy, nutty flavor. There is nothing like it.
Servings: 40 slices
Calories: 84kcal
Ingredients
- 1 scant tablespoon active dry yeast about one (1/4 ounce) packet yeast
- 1 teaspoon sugar to feed the yeast
- 1/4 cup warm water
- 1/2 cup granulated sugar
- 2 tablespoons molasses
- 2 tablespoons shortening I like butter-flavored Crisco
- 2 teaspoons kosher salt use less if using table salt
- 1 tablespoon caraway seed optional
- 2 cups warm water
- 2 cups light or dark rye flour* spooned and leveled
- 1/4 cup vital wheat gluten
- 3 cups all purpose flour plus an extra 1/2 cup flour, about
- vegetable oil or olive oil for greasing, plus more for rolling
- 1/4 cup butter for rubbing on bread
Instructions
- Make the bread dough. In the bowl of a stand mixer, add 1 scant tablespoon active dry yeast. (Scant means not quite full). Or use 1 (.25 oz) packet of yeast.
- Add 1 teaspoon sugar to help the yeast grow, and 1/4 cup warm water. It should be about 105-110 degrees F, or about the temperature of nice bath water. Feel it with your wrist. If you wouldn't bathe a newborn baby in it, then it's too hot.
- Stir it together and wait 5 minutes to make sure your yeast is getting bubbly. If not, you have killed your yeast; dump it and start over. Better to start over now than after hours or non rising!
- Once you are sure the yeast is foaming, add 1/2 cup sugar, 2 tablespoons molasses, 2 tablespoons shortening, 2 teaspoons kosher salt, and 1 tablespoon caraway seeds.
- Add 2 cups of warm (but not too hot) water. Stir this mixture together with the dough hook, or with a wooden spoon.
- Add 2 cups rye flour, making sure to spoon the flour into the measuring cup and leveling the top.
- Add 1/4 cup vital wheat gluten flour along with the rye flour. Turn the mixer on to low speed, so that you don't poof flour everywhere.
- Add 3 cups of all purpose flour, 1 cup at a time. Turn the mixer on low, mixing in between each cup added. Don't add more than 3 cups of all purpose flour to begin with. This is the part that could make or break your bread, so look alive people. Rye bread dough is NOT THE SAME as regular bread dough. Adding too much flour will turn your bread into a sad, dry, flavorless waste of carbs.
- Knead the dough. Let your dough knead on medium-low speed for about 5 minutes.* The dough will be STICKY. As it kneads, the dough will start to clean the edges of the bowl, but will still be very sticky. Add up to another half cup of all purpose flour (for a total of 3 and 1/2 cups). Add the flour as it kneads, a tablespoon or two at a time, as necessary. Try not to add more than that, but use your best judgment, there are a lot of variables when it comes to bread making. Knead the dough for a full 7-10 minutes. The dough should start to clean the sides of the bowl, but not the bottom.You can of course knead it by hand if you don't have a mixer; knead for 10-12 minutes on an OILED surface, not floured.
- Grease the inside of a large bowl with 1 tablespoon vegetable oil.
- Rise the dough. Scrape the sticky dough into the greased bowl and shape into a ball. Turn it over to coat with oil. Cover with parchment paper or greased plastic wrap, and let rise in a warm place for 1 hour, or until doubled in size. I like to turn my oven on to 350 for about 45 seconds, then turn it off. You don't want a hot oven, just warm. If you can't touch the racks with your fingers, it's too hot (leave the oven door open until it's cooled a bit, if you overheated.)
- Once the dough has doubled in size, punch it down. Take it out of the bowl, reshape into a ball, and grease the bowl with more oil. Return the dough, turn to coat with oil, and cover. Reheat the oven for another minute until it is warm again, and let rise a second time for about 1 hour, until doubled in size.
- Punch down the dough a second time. Prepare a work surface with a tablespoon or so of oil. I like to lay a silpat or two on my counter, then grease them with oil. You don't want to roll this bread out on flour, it will get too stiff!
- Prepare four (7x4) inch pans** with nonstick spray. Be generous! You don't want this bread to stick. (You can also use two 9x5 or 8x4 inch pans.)
- Shape the loaves. Divide the dough into 4 pieces. Use your hands to pat each piece of dough into a square that it about the length of your pan, 7 inches. Use your fingers to fold the top 7-inch-edge of the dough down about an inch, pat it in with your fingers, then roll again, then keep going until it's in a cute little roll. Pinch the edges into itself. Tuck the ends underneath. Place each roll seam side down in the pan. (If you are using a 9x5 inch pan, split the dough in half and follow the same instructions.)
- Cover all the pans with parchment paper or greased plastic wrap and let rise in a warm place (I do this in the lightly warmed oven as described before) until doubled in size, about 45 minutes. The dough needs to crown the pan and rise over the edges (at least an inch or so) before it goes in the oven. Wait longer if you need to!
- Bake the bread. Preheat the oven to 375 degrees F. (Take the pans out of the oven about 30 minutes into this last rise, if you are keeping them warm in there! Don't preheat your oven with the bread inside!)
- Bake the bread at 375 for about 30-35 minutes for 7x4 inch pans. For 9x5 inch pans, bake for about 40-45 minutes. Read on:
- I highly recommend using an instant read thermometer to test the bread for doneness. Kris has made this recipe a thousand times and still uses a thermometer every time. A thermometer inserted into the center of the bread should read 205 degrees F before you take it out. For a 9x5 inch pan, wait until the bread reaches 208-210 degrees F.
- If you don't have a thermometer, wait until the loaves are well browned on top. They might even look a little burned; remember, rye flour is darker than wheat flour. It's better to over bake than under bake. (You can add more butter to dry bread, but you throw away doughy-in-the-middle bread.)
- Place the hot pans of bread on wire racks and let cool for about 1-2 minutes. During this time, rub a stick of butter all over the tops of the bread until they are covered with melted butter.
- Immediately (and carefully, using hot pads) turn the bread loaves onto the cooling racks. The bread should come right out, but if it doesn't, loosen with a knife. Let the bread cool out of the pan on the racks, turned on their sides. Kris cools them on their sides because this bread is so tender and soft (and top heavy) that if you keep them upright it tends to smoosh the bottom half of the bread.
- I know this is killer, but you HAVE to wait for rye bread to cool a decent amount before slicing in, about 30-60 minutes. It is so soft and tender that you will crush the bread if you slice while too warm. I often don't follow my own advice well enough on this.
- Use your sharpest serrated knife to slice the bread, using sawing motions, not pushing down. Cut the bread on it's side if you suck at following instructions and it's still slightly warm.
- Slather with copious amounts of butter and eat immediately. Or pop in the toaster until almost burned, add an obscene amount of butter, and enjoy the shattery crisp flavor. Add jam if you're like me. For a retro twist, spread with Liver Pate (we do this every Christmas Eve.)
- How to store: Once the bread is completely cool, store in a big ziplock bag on the counter for up to 3 days. It's best to slice as you go, so it doesn't dry out. If you are not planning to eat it right away, it's always best to store it in the freezer. Bread freezes beautifully.
- How to freeze: Store the bread in a large ziplock bag, press out as much air as you can, and freeze for up to 3 months. Let thaw on the counter with the bag sealed for an hour or so. Or if you need it now, you can defrost it in the microwave on the defrost setting or on low power. Keep an eye on it and don't let the bread get too hot, it will start to cook it (and get tough). It's best to slice partially-frozen bread and pop slices right in the toaster to finish thawing.
Notes
*Light rye flour is best for this recipe, but dark (or sometimes called stone-ground) rye flour will work just fine.
** It's tradition in our family to make rye bread in these small 7x4 inch loaf pans. They measure about 3 inches across on the bottom, and 4 inches across at the top. I received my mini pans from family members as a wedding gift when I married into the family. The bread is traditionally served as a cocktail party appetizer, so it's meant to be mini.
But you can use two 9x5 inch loaf pans, the smaller the better (sometimes you can find 8x4 inch pans.) Split the dough in half and bake for about 40 minutes.
Prudy always made double this amount of bread to make EIGHT 7x4 inch loaves of bread. You can do that if you have a Bosch or a huge Kitchenaid. Or a lot of patience to knead it all by hand like she did!
Nutrition
Serving: 1slice | Calories: 84kcal | Carbohydrates: 15g | Protein: 2g | Fat: 2g | Saturated Fat: 1g | Polyunsaturated Fat: 0.3g | Monounsaturated Fat: 1g | Trans Fat: 0.1g | Cholesterol: 3mg | Potassium: 47mg | Fiber: 1g | Sugar: 3g | Vitamin A: 36IU | Vitamin C: 0.03mg | Calcium: 8mg | Iron: 1mg
