This simple how-to guide will take you through how to make an Elmo Cake for your favorite kid’s birthday. Even if you are a novice decorator, you can make this look great! This works great as a smash cake for a first birthday or any toddler! Originally posted February 18, 2013.
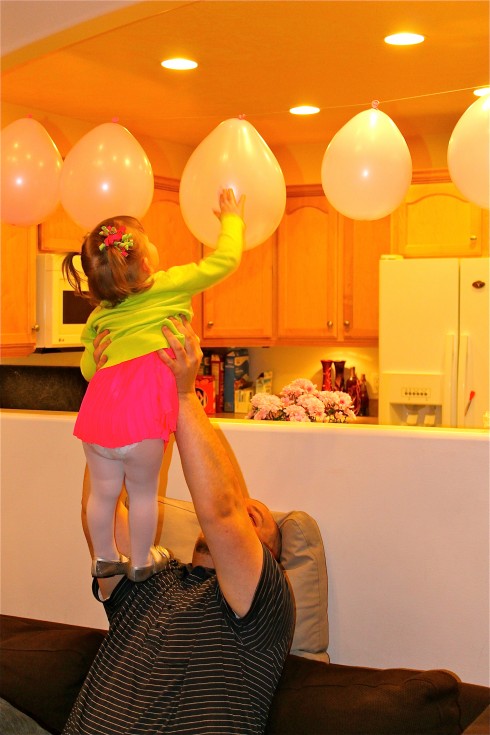
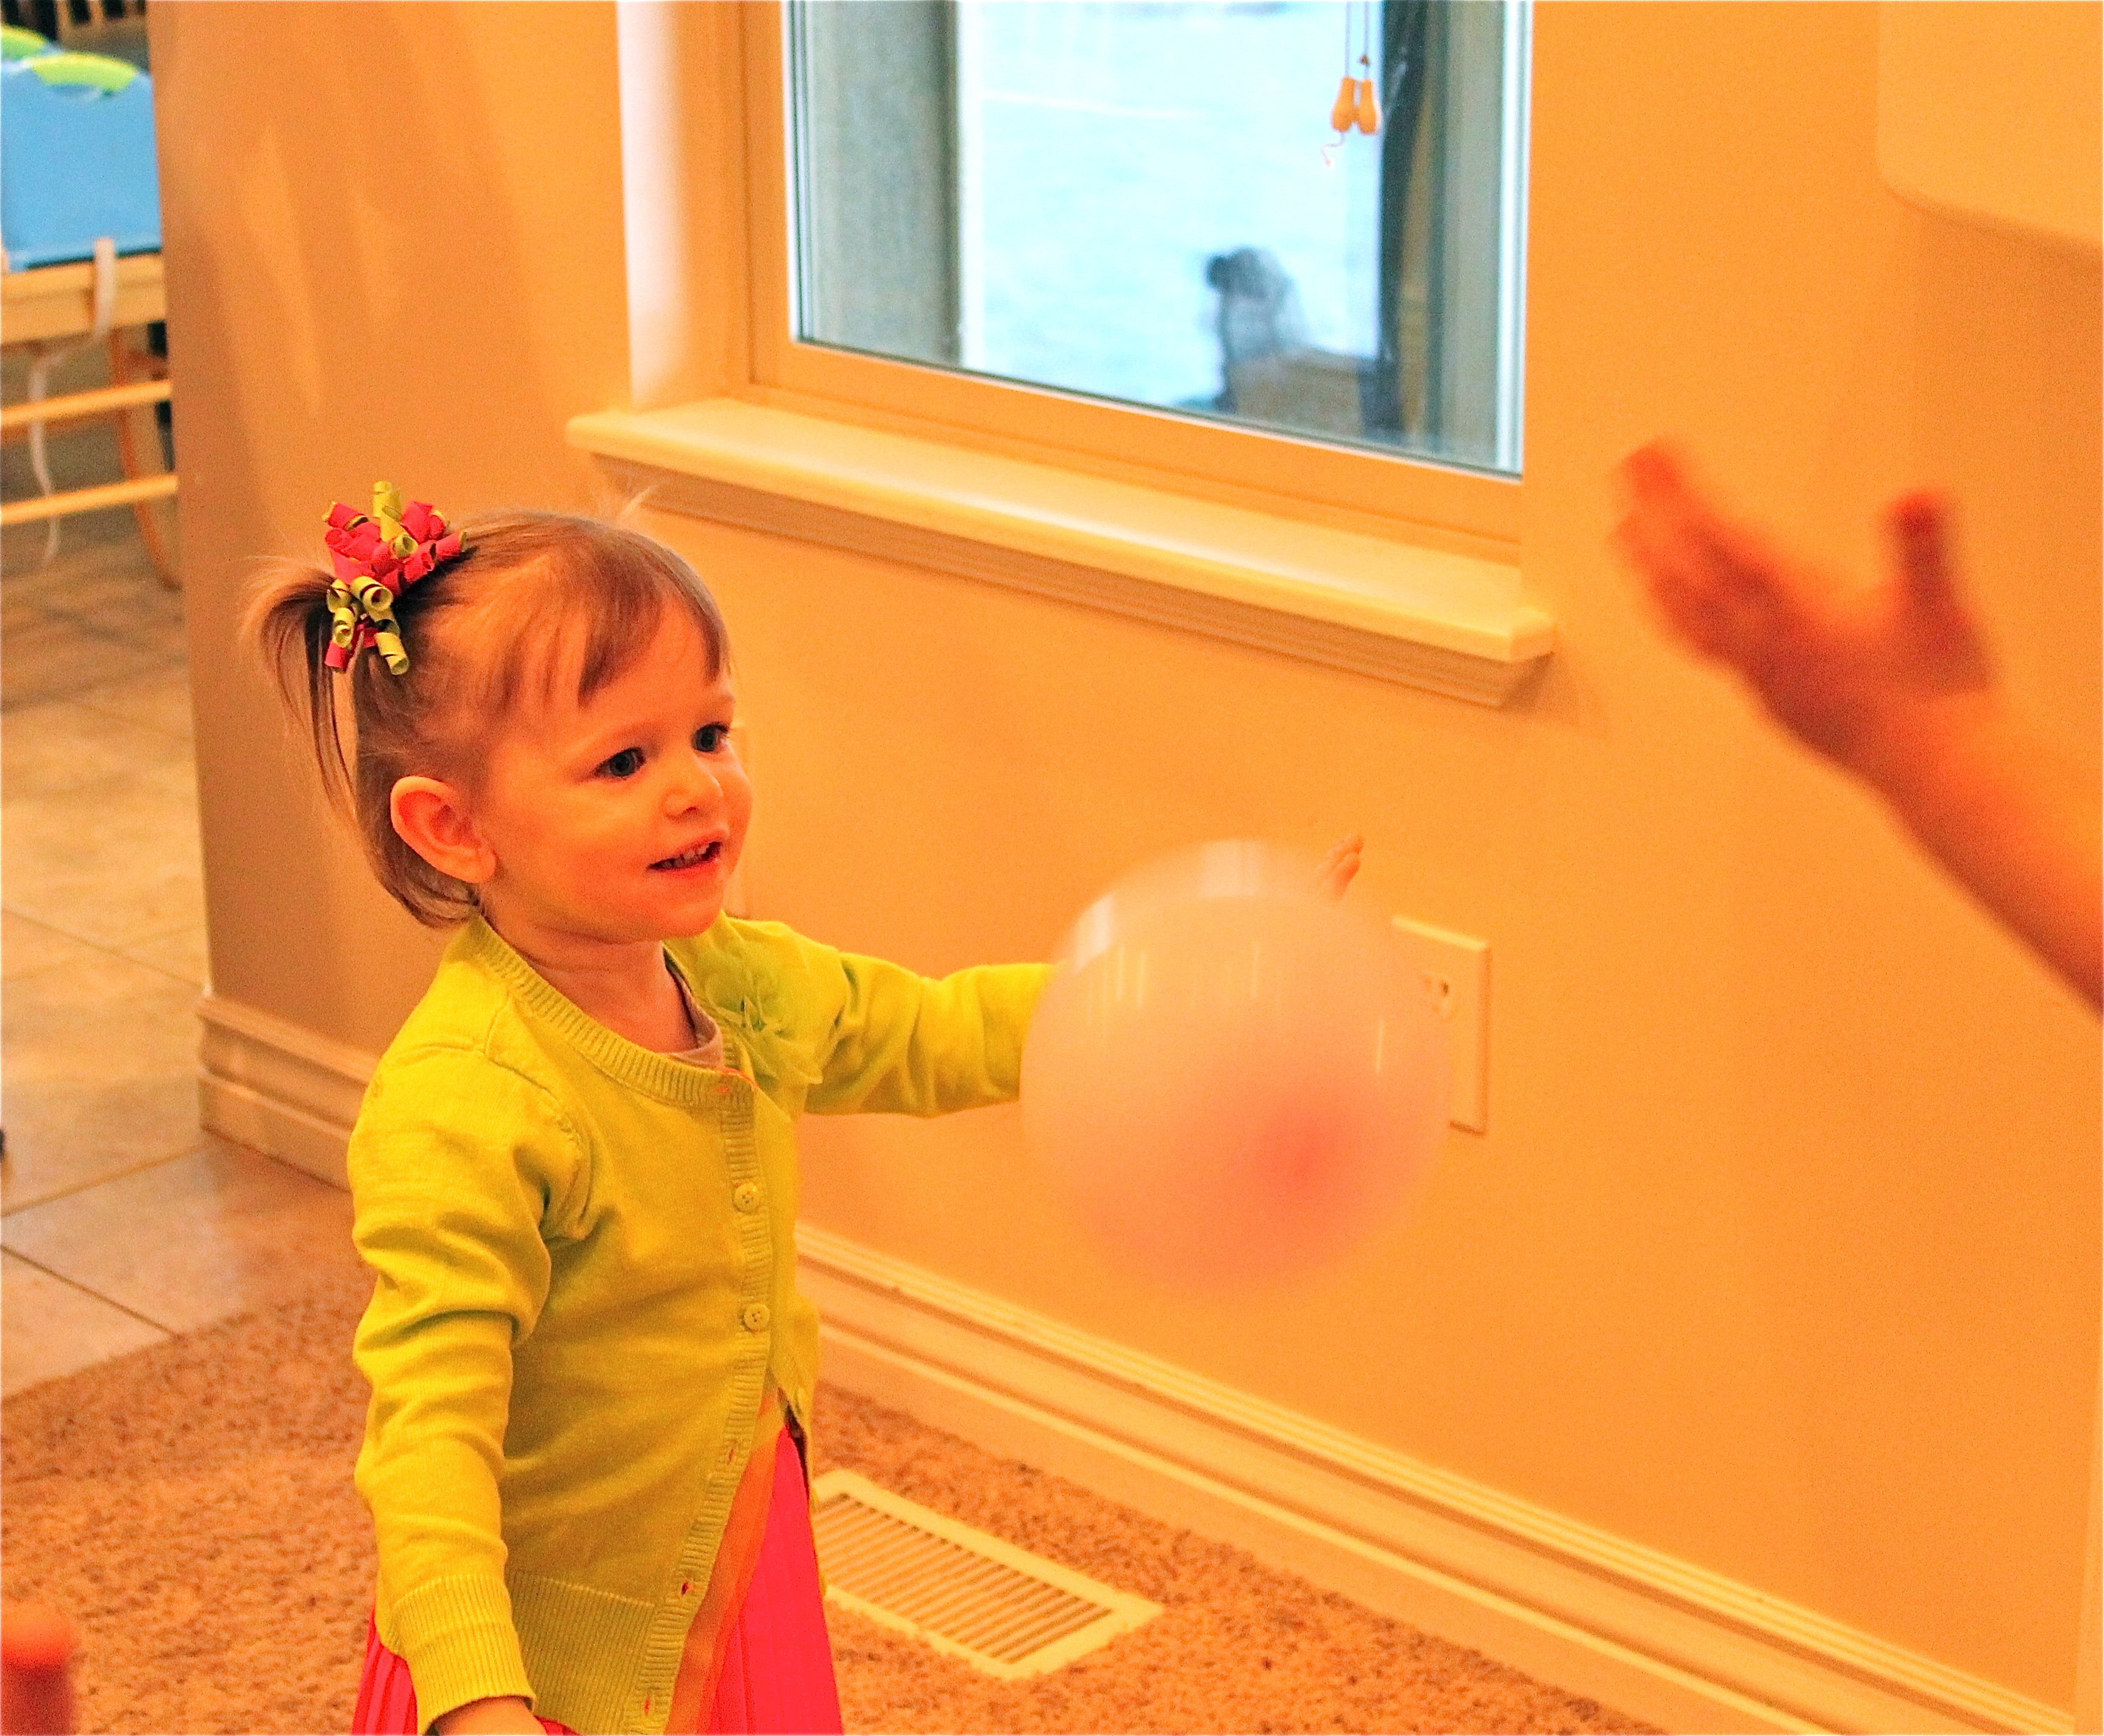
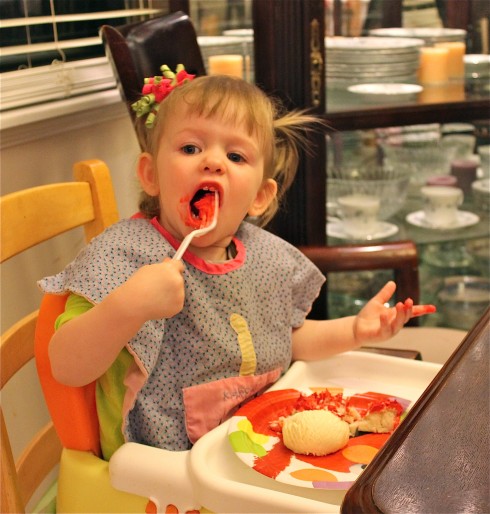
We had Charlotte’s 2nd birthday party this weekend! It doesn’t get any better than family, presents, balloons, and bright red cake. At least I’m pretty sure those are Charlotte’s favorite things.
I decided to make an Elmo cake for the big day. She loves Sesame Street even though we rarely watch it anymore—that was only during the dark ages (also known as the first trimester. TV is a mom’s best friend when you’re sick.) Two-year-olds have long memories when it comes to furry red monsters though, apparently.
There is an Elmo cake pan you can buy for 10 bucks, but some of us just can’t justify that kind of purchase. I mean, how many Elmo cakes do I anticipate making in my life? Probably just this one. I looked for tutorials online and only found one that didn’t use the cake pan and wasn’t a fondant cake. So I followed it the best I could. I was so happy with how it turned out!

%20%7C%20TheFoodCharlatan.com) I am NOT a cake decorator. I got skipped when they were handing out the “makes crafts/food beautiful with little or no effort” gene. If you ever see food on this blog that could be classified as beautiful, it’s usually either a trick of the light or the result of a ridiculous amount of effort. But never fear; this cake falls under neither category. It was easy, even for me. All it takes is a little time. Here we go!
I am NOT a cake decorator. I got skipped when they were handing out the “makes crafts/food beautiful with little or no effort” gene. If you ever see food on this blog that could be classified as beautiful, it’s usually either a trick of the light or the result of a ridiculous amount of effort. But never fear; this cake falls under neither category. It was easy, even for me. All it takes is a little time. Here we go!
Elmo Cake Tutorial for Dummies (without an Elmo Cake Pan)
Source: Third Time’s a Charm
Makes a little less than 1 single layer 9-inch cake
1 white or yellow cake mix (plus the eggs, water, and oil called for on the box)
1 cup butter (2 sticks)
1 tablespoon vanilla
4 ½ cups powdered sugar
2-4 tablespoons milk, plus more for thinning the base frosting
red food coloring, gel or paste (NOT liquid)
orange food coloring (gel, paste, or combine 1 part red liquid food coloring to 3 parts yellow liquid food coloring)
1 tube of black decorating icing
a printed picture of Elmo’s face, about 8 inches across.
about 1,000 toothpicks
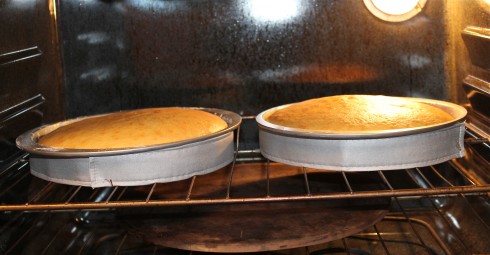
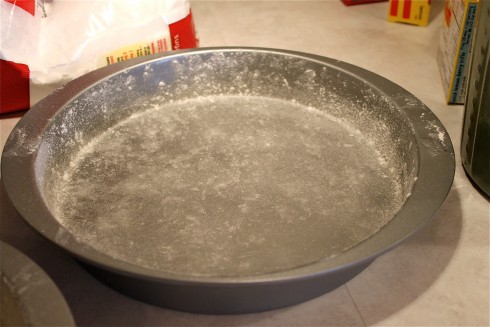 I didn’t take pictures of the batter-making process. I figure you probably all know how to pour oil and crack an egg. Use a yellow or white cake mix so that if you end up having a really crumbly cake, the crumbs won’t be so dark. So, after you mix up your cake batter, grease two 8 or 9 inch round cake pans very well, and dust with flour. Sprinkle the flour into the pan, and, working over a sink, shake the pan sideways until it is all covered in flour.
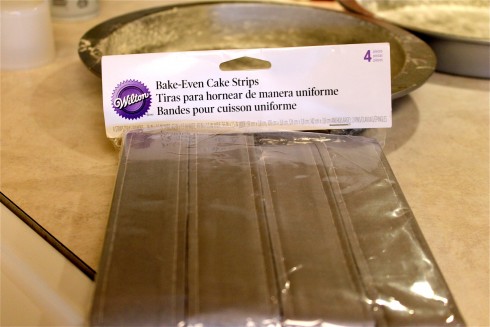 I used these Bake-Even Cake Strips to get my cake to bake flat. My mom gave them to me for Christmas.
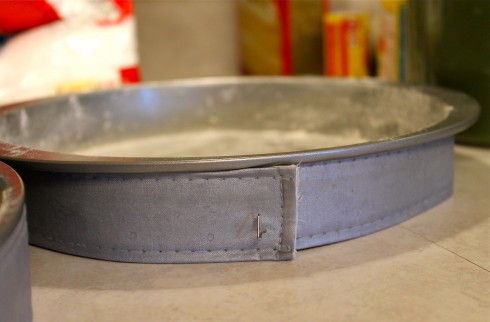 Here they are…
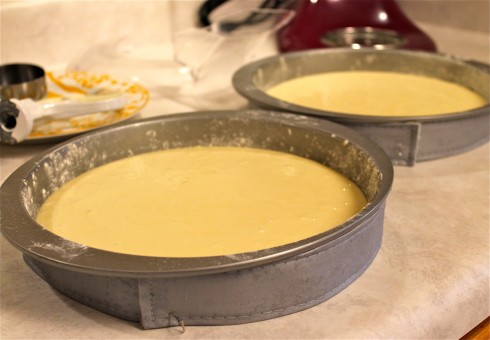 Pour in the batter…
 They did NOT work. I was totally bummed. Way to go, Mom. :)
 Look at that dome! Sigh.
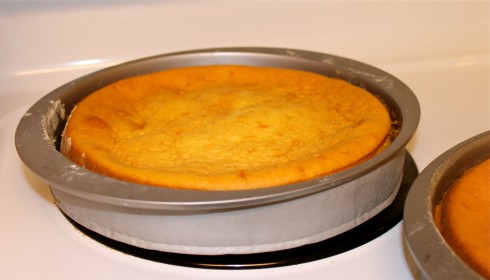 But then I tried it again. (I made a second cake for the adults at our party, since the Elmo cake was only enough to feed the kids.) It worked the second time around. They puffed up quite a bit in the oven, but once I took them out they flattened. This is just an fyi. If you buy these cake-strips, make sure to soak them VERY well the first time you use them. I think they just needed to be tempered. I’ve heard you can replicate this process by soaking strips of towels and wrapping them around the pan.
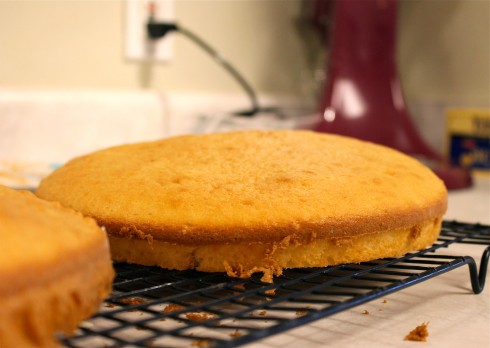
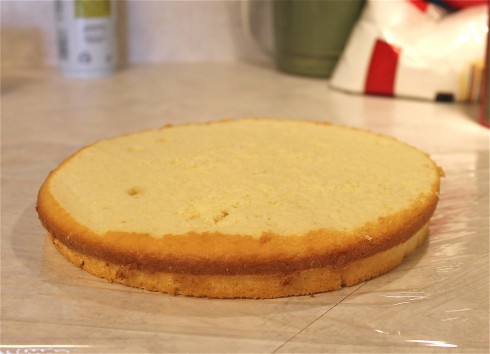 Well however you get it done, make your cake flat. I used a long serrated knife to chop off the top here. We are only using one layer to make Elmo, so save the other half for something else.
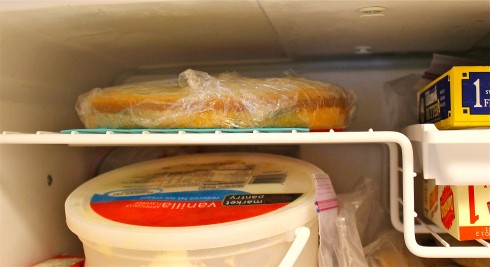 Then wrap it up in saran wrap and toss it in the freezer for at least an hour or two. This will make it easier to cut. (Try to ignore my freezer full of butter and ice cream.)
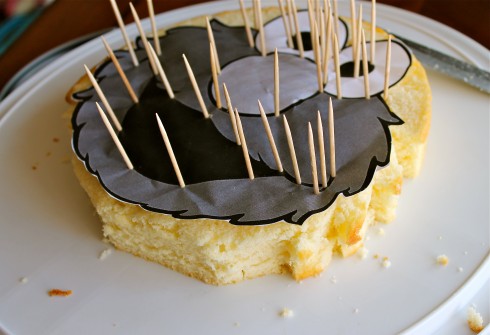
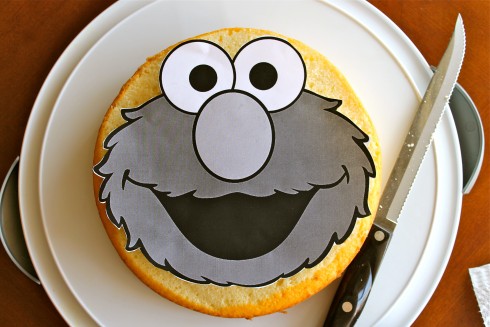 If you do a Google image search for “Elmo’s face” you will get about a trillion options for a face to print out. I think I used the first hit. Just make sure that Elmo’s face is no wider than your cake. Cut out the face and place it on top of your cake.
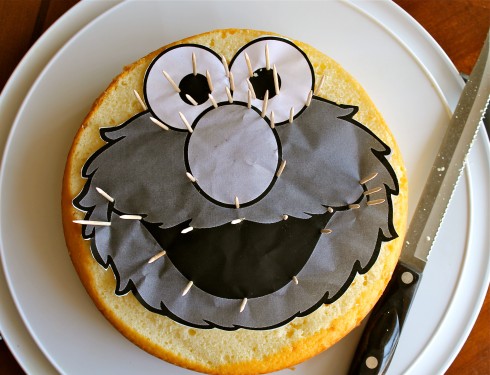 Then practice a little voodoo. Just kidding. Use as many toothpicks as you need to outline the features of Elmo’s face. I used a ton because I have no artistic skills at all whatsoever. Connect the dots is about as creative as I get.
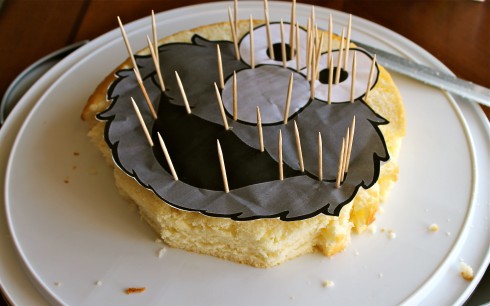 Then use a knife to cut off the edges of the cake. The tutorial I was following said not to bother cutting the furry edges of his face jagged…
 …but I couldn’t help myself. I did it anyway. This makes it really hard to frost, and I ended up using so much frosting on those spots that you couldn’t really tell I had made the effort. So you might want to make this choice according to your frosting-skill-level. (I believe they have frosting-skill-level-quizzes online; check it out. This is an important thing to know.) If you consider yourself an advanced froster, then go ahead, make your fur jagged. If you are a beginner like me, then don’t worry about it. You can creatively dollop the frosting to make it look like fur later.
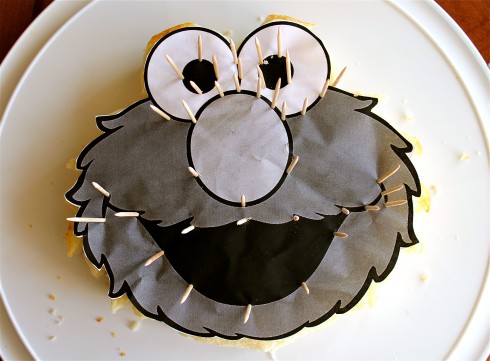 Okay. Elmo’s all cut out.
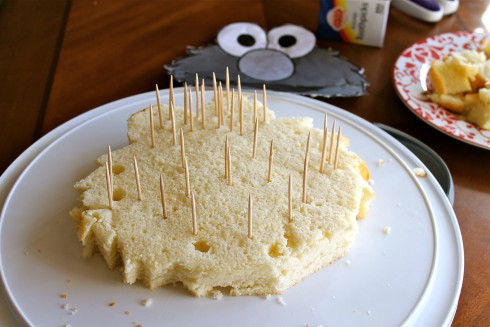 Now carefully lift off the paper, leaving the toothpicks in place. Try not to stab yourself.
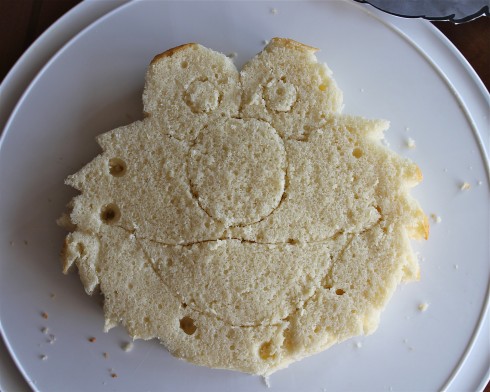 Next, take a serrated knife and score the outline of the face according to where your toothpicks are. Then toss Elmo back in the freezer (sorry I forgot to take a picture) while you make your frosting.
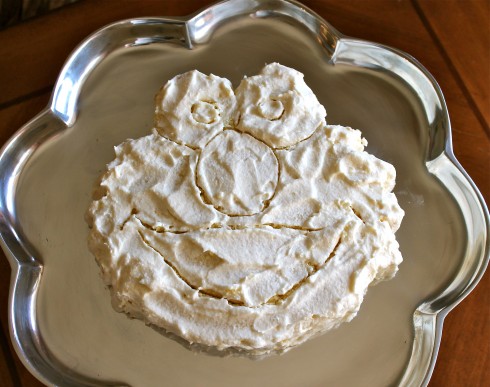
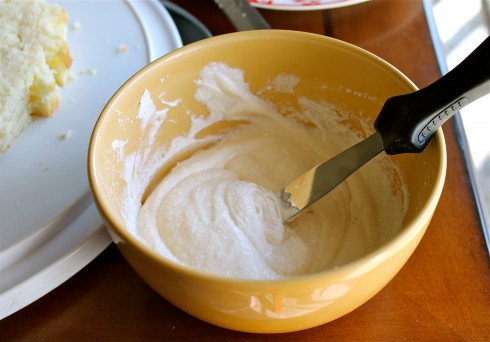 Cream the butter, add the powdered sugar a cup at a time, add the vanilla, add milk until it is a spreadable consistency that you like, yadda yadda. Then take out a cup or two and put it in a separate bowl. Add a couple more tablespoons of milk to the bowl and stir it up. This is your base frosting, the thin layer that you put on the cake before your colored frosting so that you don’t have crumbs in Elmo’s eyes. You want the consistency of this frosting to be pretty thin, but not to the point that it’s drippy. You can see in my picture how it’s started to get a little grainy.
 Then frost your cake. Use a toothpick to outline Elmo’s face as you frost. This does not need to be a thick layer of frosting and it certainly does not have to be perfect. NOTE: If you are doing your base frosting on the cake plate that you plan to serve this on, then take strips of parchment paper and tuck them under the cake before you start frosting. This will keep your cake plate clean and pretty.
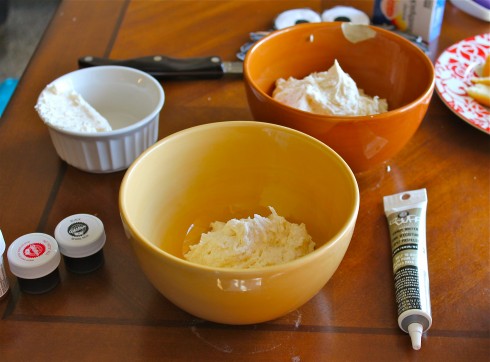 Now spoon some of your original frosting (not the extra-thin-milky-stuff) into 3 separate bowls. Leave one white, for the eyes, then dye one red and one orange.
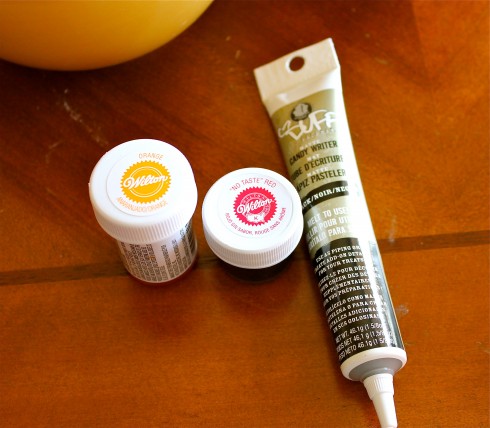
Here is the gel food coloring that I used. I had orange, but if you don’t have it liquid food coloring will work fine; it doesn’t need to be ultra-bright. The red, on the other hand, does. This red gel food coloring was a little more than half full and I used all of it for maybe 2 cups of frosting. It still didn’t look red enough, so I dumped in some liquid red food coloring too. Just keep in mind that the longer it sits, the deeper the color becomes. (This gel coloring claims to be “No-taste” which I totally did not believe. But I was proved wrong. I used a ton of the stuff and it still tasted like buttercream.) Above you can see the black-decorator-icing I used. I didn’t want to bother dying frosting and having it turn out gray. Plus it was nice to have it in a tube like this to make the edges of his mouth and eyes.
 Once you have your frostings all dyed and ready to go, get Elmo out of the freezer. It’s cold in there. At this point I used a flat baking sheet and a spatula to transfer the cake to the plate I was going to serve it on. I only did this because my cake platter won’t fit in my freezer. (At least not with all the butter and ice cream in there.) Skip this step if you can, it was a little nerve wracking.
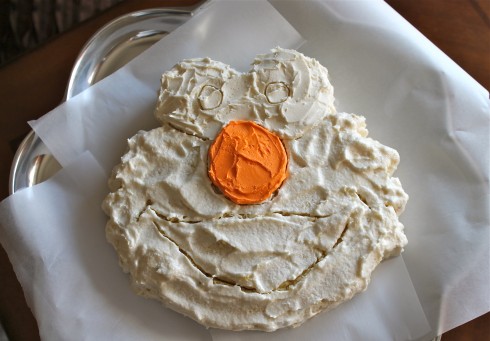 Now take strips of parchment paper, if you haven’t already, and slide them under the cake so that you don’t get your plate all frosting-y. Then start on Elmo’s nose. Dump some frosting right in the middle and spread carefully to the outside. Next do his eyes, toothpick-drawing the pupils as you go.
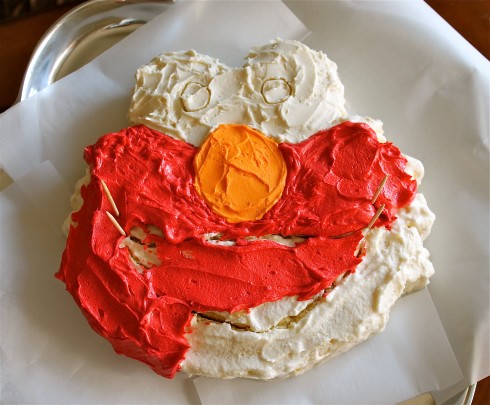 Then get started on the red. Put the frosting in the middle and carefully spread to the edges. Use toothpicks to spread in tight areas, like that scary spot under his eyes where the red, orange, and white meet. Put in toothpicks to outline his mouth. You don’t need to put red frosting on the inside of his mouth, I just did it on accident.
 Once you get the edges all done, carefully remove the parchment paper. Do this as soon as you can, the colder your cake is the better. Then get started on the pupils and mouth…
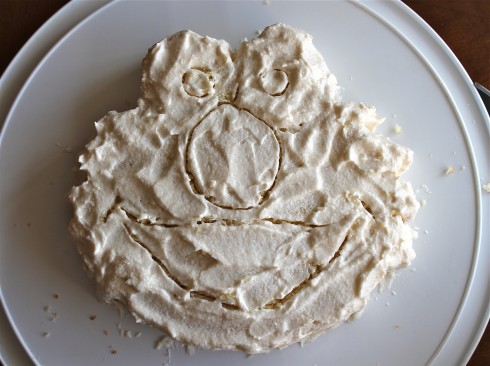
Use a toothpick or spatula to spread out the black icing.
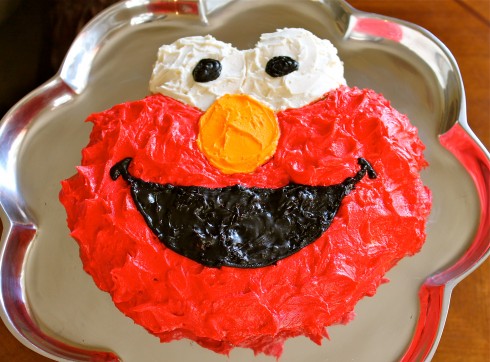 Use a knife or the back of a spoon to make little red dollops on the face so that it looks like fur. And voila! You’re done! Every two-year-old who sees this will think you are the most awesome person ever! And who doesn’t want that? Happy Birthday Charlotte!!


Also I didn’t have a working printer, so i drew it myself. It wasnt too hard to do and im awful at drawing.
Great job! I decided to make it..I had two parties this year, first one I did a minion cake. For both I did two levels. It came out really well and I managed to use most of the cake (only cutting cake off around the eyes). I’m excited for tomorrow! :) I do have pictures as well.
Wow!! 2 level minion cake!! You are awesome Becky! Cake making queen :) I bet the kids loved it.
The cake looks awesome! I’m going to give it a go this weekend for my daughter’a second birthday. It will be the first time I actually decorate a cake or make buttercream! Eek!
Just one question, pls don’t laugh – when you say vanilla in your recipe for buttercream, do you mean vanilla essence or vanilla powder? I wasn’t sure and just wanted to confirm :)
Hey Umama! Don’t be nervous, your cake will turn out great! Vanilla means vanilla extract, the liquid stuff. If you only have vanilla powder, start with using half the amount called for, then add more to taste. Good luck! I know your daughter will love it! Post a picture to my Facebook page if you get a chance, I’d love to see it :) https://www.facebook.com/TheFoodCharlatan
I am making this tonight for my daughters 2nd birthday. The party is tomorrow. My mom is helping me so hopefully it turns out great!
Good luck Wendy! I’m sure your daughter will love it! If you want, take a picture and tag me on Instagram or post it on my Facebook page, I’d love to see it!
If it is a success, I will upload, if not, it will never see the light of the camera :) I am going to do a practice one and see how it goes.
Thanks for posting this. I am going to try this for my daughters 2nd birthday on 14th. I was reading about the red coloring having a bad after taste. Did the no taste gel help? What brand and how much of it did you have to use?
Hey Annie! Yes, I definitely recommend the no taste gel. It’s the Wilton brand. There is a picture of it in the post. How much to use is really up to you–just keep adding it until it looks Elmo-red :) Here’s one thing though. After adding the red gel, let it rest for a half hour or so. The color will intensify. Then you can decide if you need to add more. Have fun with your daughter’s birthday! I’d love to see your finished cake, by the way. If you remember you should upload a photo on my Facebook page or tag me on Instagram @thefoodcharlatan. :)
My daughter’s second birthday is on Friday…I’m totally doing this. Thanks for sharing!
That’s awesome Leah! I hope it turns out for you! You should take a picture and post it on my Facebook page so everyone can see just how awesome you are :) tell your daughter happy birthday!!
I am looking for an Elmo How To for my daughter’s first birthday in March… I’m a blogger too and I stumbled on your blog when I was searching for Elmo Cakes..! I think I might give your cake a go! If I do, I’ll let you know how I did!
Haley @ Truth Be Told
http://www.haleyspace.blogspot.com
Awesome Haley! I think Alina will love it :) Let me know if you try it out! And thanks for leaving a comment :)
I did it and I have you to thank! My cake did not turn out as good as yours at all. BUT- for me, I think it turned out pretty awesome! I tried putting red food colouring in with my frosting and I ended up with a pretty dark pink colour, but it worked! Besides, my little one just turned one, so she didn’t mind….. ;)
http://www.haleyspace.blogspot.ca/2014/03/one-years-old-two-parties.html
If you wanted to use both layers, could you? Totally want to do this but need cake for 10… two layers would stretch it enough.
I honestly don’t recommend it, unless you have previous cake decorating experience. If you do a layer cake, then you have to deal with it sliding or tilting. But if that doesn’t sound hard to you, then by all means go for it! If I were going to do it, I would level each cake to make it flat, freeze, then put the first round on the serving plate, frost the top with a VERY thick frosting to prevent sliding (less milk, more powdered sugar), then top it with the other cake. Freeze, then pick up with the toothpicking-Elmo’s-face part. Just cut both layers. Everything else after that should be the same. If you want to just make another easy cake instead of doubling this one though, you could do a simple sheet cake. Here’s a yummy peanut butter one, and this almond one is to die for. Let me know what you do Val! If you double up Elmo (or even if you don’t!), you should take a picture and post it on my Facebook page. I would LOVE LOVE LOVE to see it! Good luck! I bet you are making some toddler very happy!
I admire that you are a million percent ambitious. I got as far as pinning a picture on the cake and decided if I ever have kids, I’m paying someone else to do this (o:
Pay me. I would love to crash your kids birthday parties anyway. :)
Step One: Have Kids. Right? (o:
I’m actually sad I didn’t get to crash Charlotte’s birthday party!
And it tasted great, too! Thanks for blowing my diet.
I know, I was very pleasantly surprised with how delicious the frosting turned out. The No-Taste Red gel food coloring was key.
Don’t sell yourself short on your cake decorating skills, that’s pretty cool! I completely relied on Shirley’s awesome skills for every single birthday cake in our family – I probably still owe her :) Looks like Charlotte had lots of balloon fun, wish I could have been there…
Okay. You’ve just impressed the snot out of me with your Elmo cake. This is seriously awesome. (Oh, by the way everyone’s freezer SHOULD be full of ice cream and butter. In fact, I think that’s why freezers were invented in the first place.)
Seriously though. World peace might finally be achieved if everyone had this much butter and ice cream in their freezer.
The cake looked great, awesome job!!
That looks awesome. I never go to that much effort for my kids. Haha. I hope Charlotte appreciated your incredible talents!
I don’t know about talents, but she definitely appreciates the copious amounts of buttercream involved.