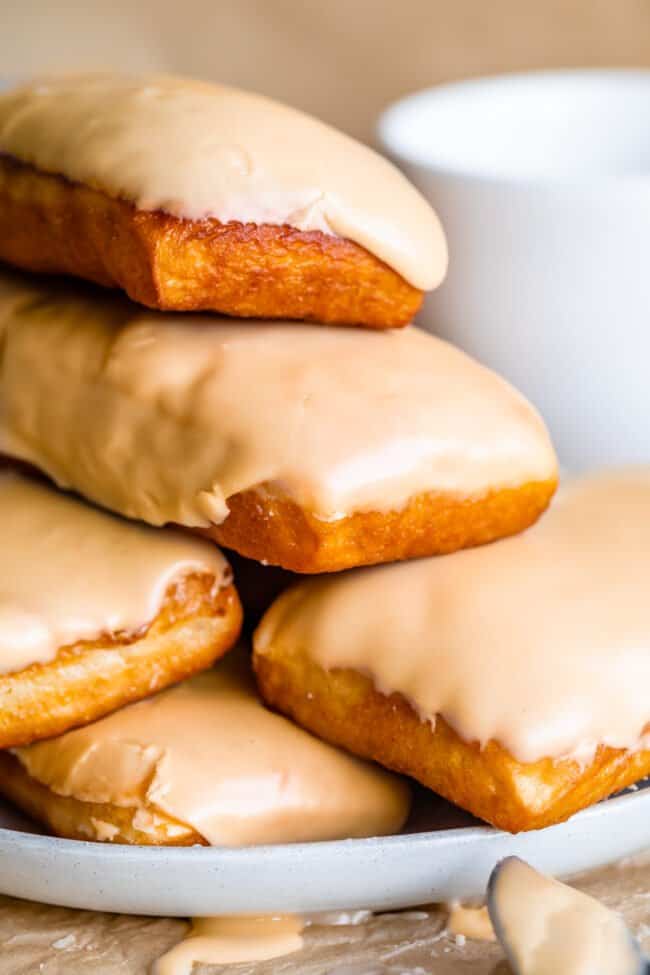
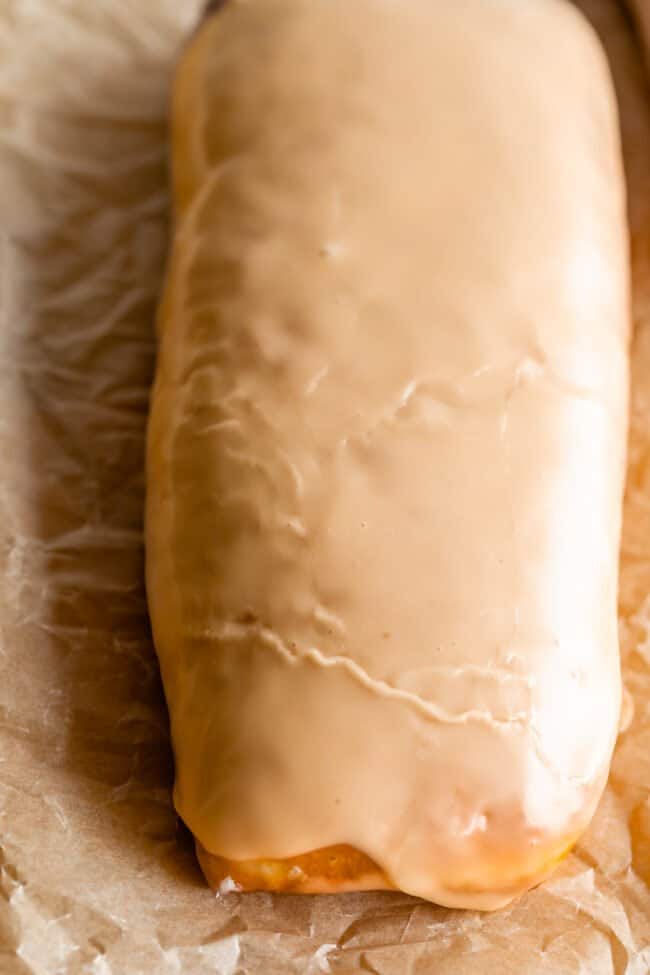
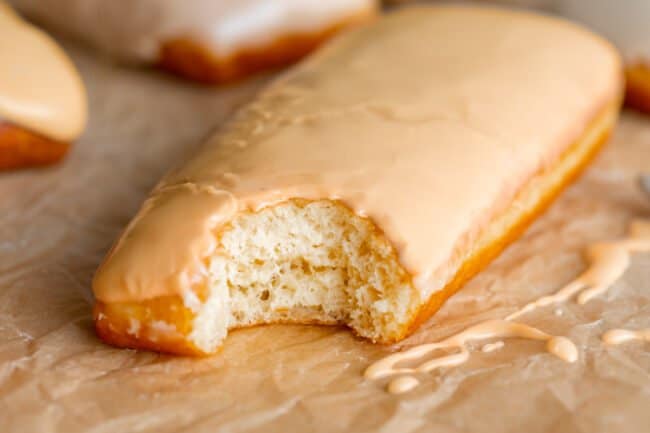
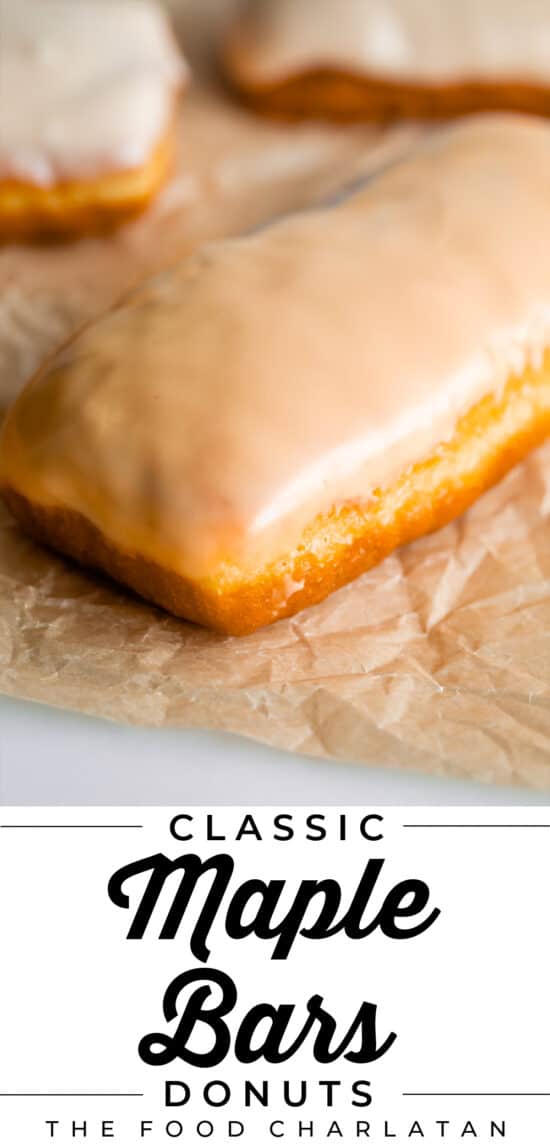
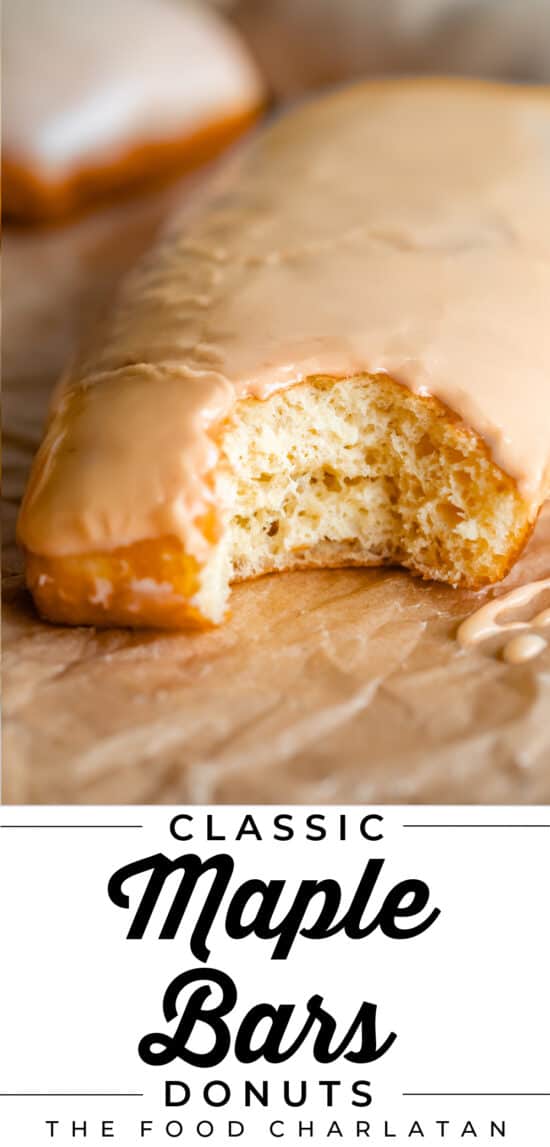
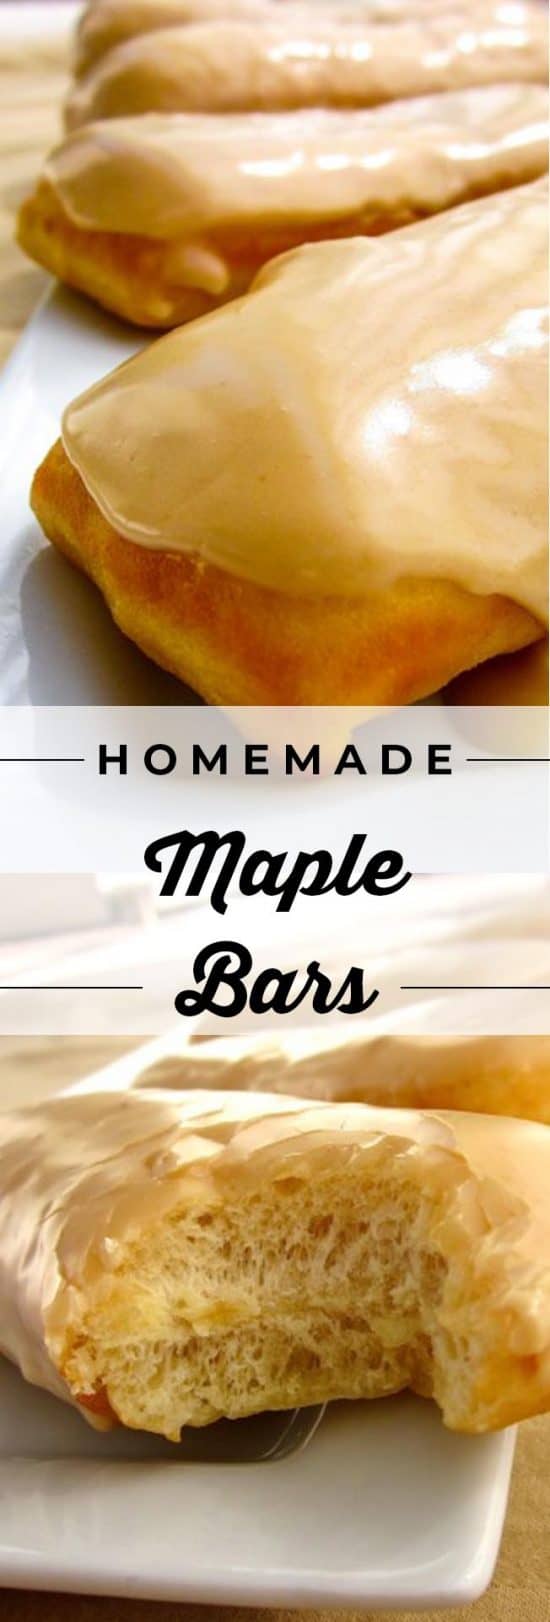
If you live out west, you’ve surely had a Maple Bar! An impossibly soft-and-chewy raised yeast donut, shaped in a long rectangle and topped with maple glaze. They are a standard menu item in every donut shop west of the Rocky’s. I will show you exactly how to make them at home, it’s super easy. The maple donut glaze is to die for! Originally posted April 20, 2012.
Sometimes Eric and I like to pretend we don’t have kids, and lock ourselves in the bedroom for a moment of peace. Sometimes it’s to eat stolen cookie dough from the freezer without witnesses, sometimes it’s because we have actual work deadlines and need to get stuff done.
We can always tell how much time we have left by the decibel level. It gets louder and louder until inevitably we hear some BOOM. And then we rush out and act shocked that it’s come to this point again. (Oh, you thought it was a good idea to jump off the top bunk onto the toddler bed? My kids are geniuses.)
Anyway, the other day we were both working in our room. Eric had a zoom meeting with a VIP, which means I’m the one who should respond to screams and broken furniture. I was totally absorbed in my own work, when suddenly Eric quickly stands up and moves toward the door. I’m thinking, Oh no, what have I missed, are the animals getting restless?
But he stopped in front of our bookcase, not the door. He picked up his prized Imperial Starship Lego set that he completed over Christmas. And brought it back to his computer.
I hadn’t been paying attention, but apparently his Super Important Meeting had turned into a total nerdfest. I could hear the other guy going on about his Millennium Falcon Legos, and at this point Eric triumphantly flies his Imperial Starship into view (yes, I said “flies.”)
Just when you think you’ve reached the mature stage of life. I wonder if this is the way guys feel when they hear girls talk about…what? Makeup? What is the comparison here??
I’m convinced that most people have a favorite doughnut shop back home. Do you? Mine is called Sam’s Donuts and they are amazing. They have the puffiest, softest doughnuts in the world, with the perfect glaze-to-doughnut ratio. Their best donut? The MAPLE BAR, hands down.
Maple Long John Donut
Okay okay, show of hands, who knows what a Maple Bar is? All of you who live west of the Rocky mountains are scratching your heads right now. OF COURSE you know what a Maple Bar is.
But did you know they are regional?? You can’t even find these donuts on the east coast! I know because this recipe has been on my blog since 2012, and many people have commented they went searching for a recipe when they moved east and realized their beloved Maple Bars were nowhere to be found in bakeries.
(What is with you east coasters?? You have all the maple syrup in your neck of the woods, get with the program!!)
What is a Maple Bar?
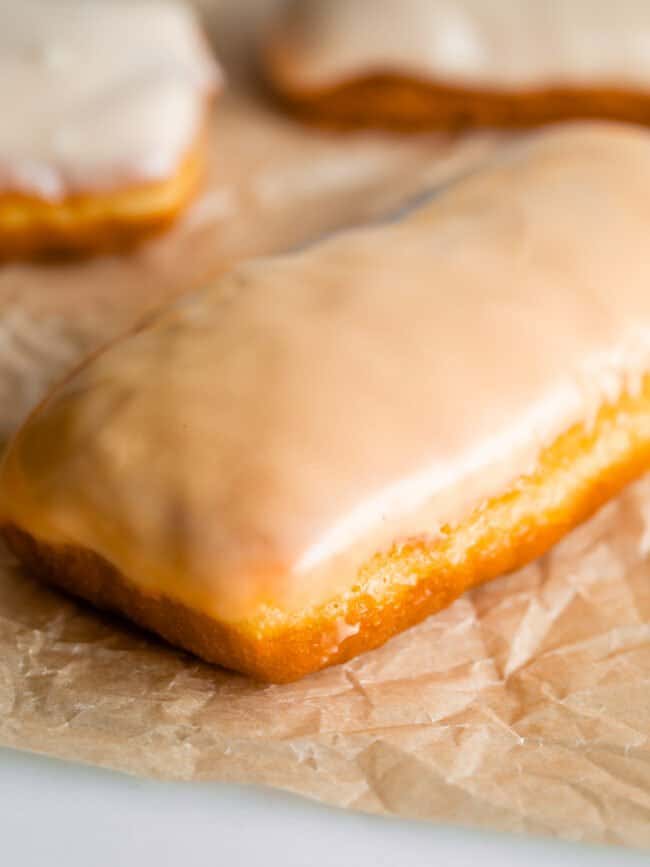
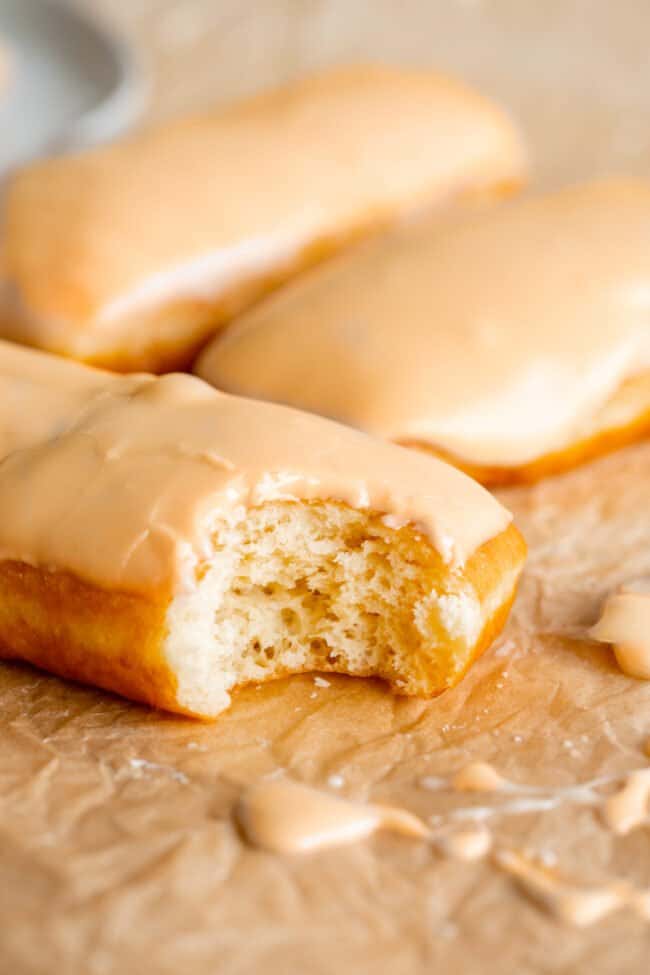
A Maple Bar, Maple Long John, or a Cougar Tail (as they are called at my alma mater BYU!) is a raised yeast donut, cut into a long rectangle shape, and glazed with maple flavored frosting. It is so simple and yet SO GOOD.
Today’s recipe is adapted from a Top Pot Doughnuts recipe, one of the best donut shops in the Pacific Northwest. They know what they are doing when it comes to donuts! And as I mentioned, Maple Bars are a west coast thing, so Top Pot is especially qualified.
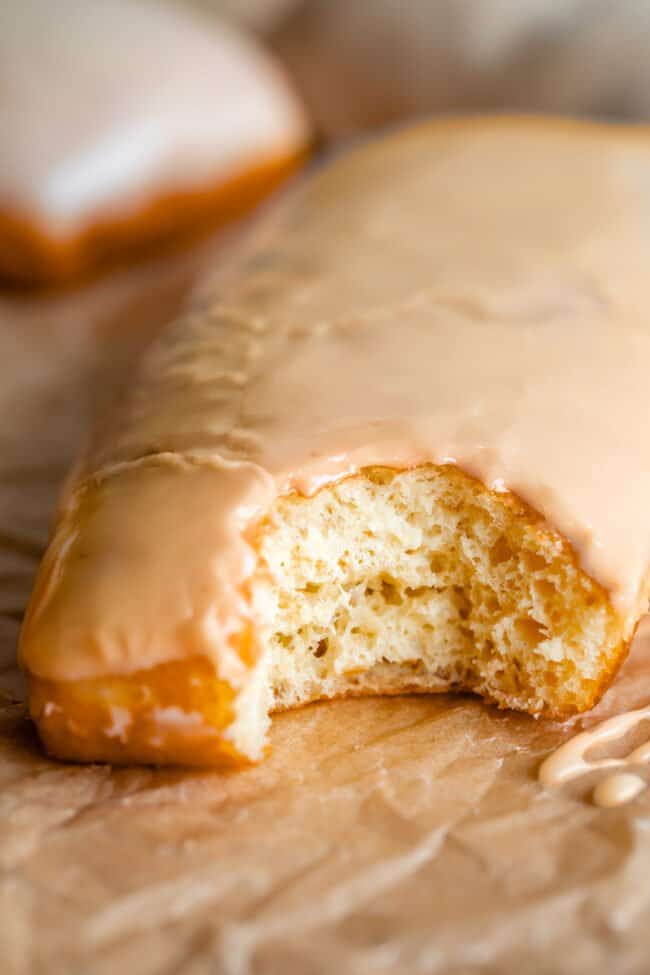
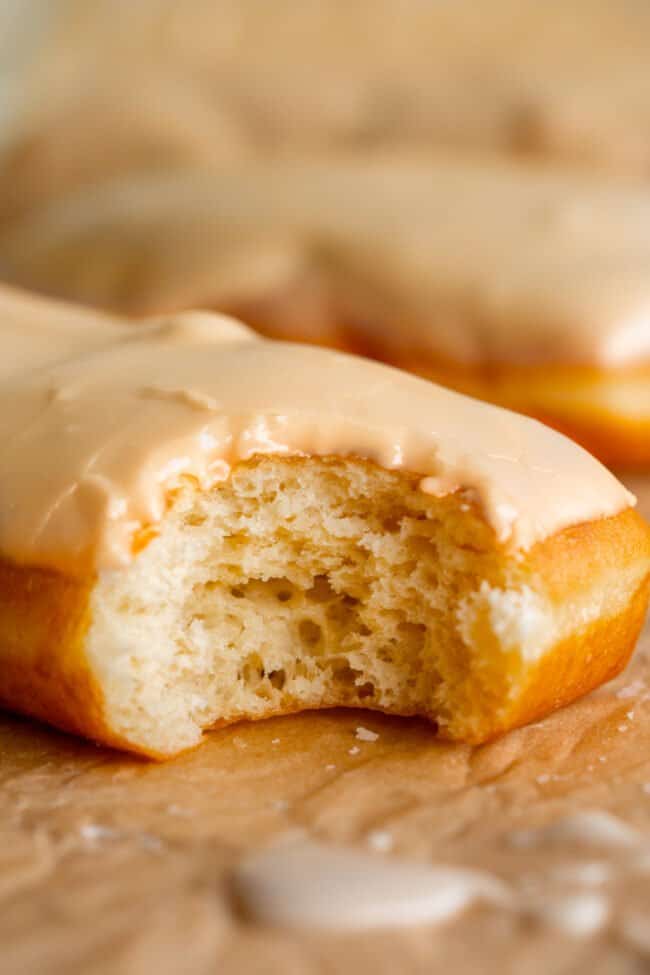
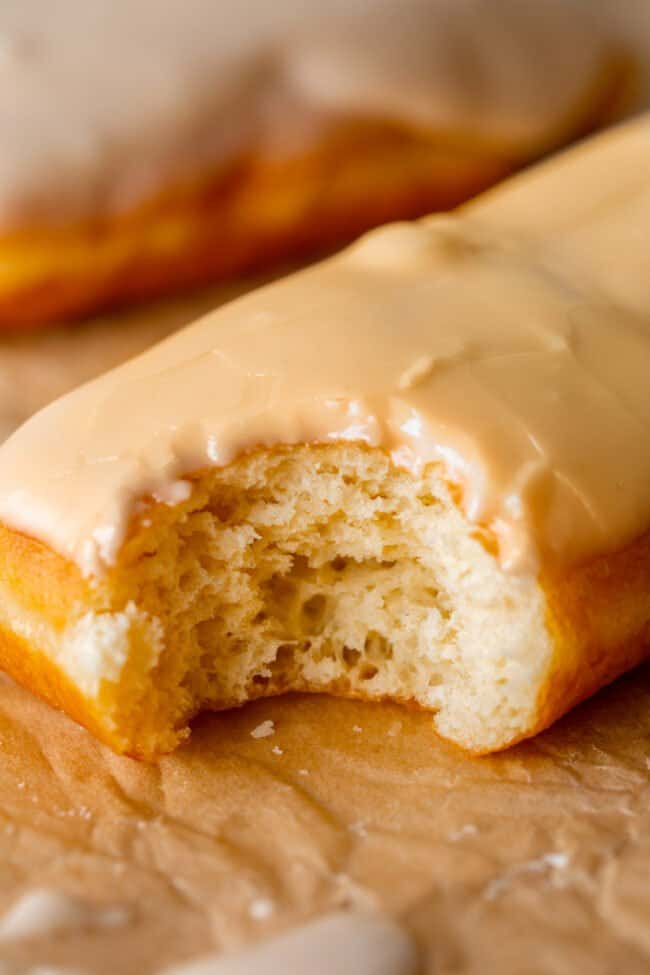
This recipe produces a soft and fluffy yeast donut that is perfectly chewy. It is yeasty, sweet, and flavorful. It’s like biting into a cloud. The dough is scented with vanilla (all the maple flavor comes from the glaze) and really could just be eaten on it’s own. But then you add the maple glaze and the rest is history. Maple donut HEAVEN.
This recipe is fun because you get to make a homemade proofing box in your oven. Professional bakeries have these special proofing boxes that help dough rise super fast (using warm temps and humidity), and today we are going to fake one using boiling water and your oven. I’ve mastered this technique over the years and use it all the time when I want a fast rise, like for these Best Cinnamon Rolls, or these Caramel Pecan Rolls.
Maple Bar Ingredients
Here’s everything you need! It’s really nothing fancy!
- active dry yeast
- water
- granulated sugar
- kosher salt
- baking powder
- bread flour (you can substitute all purpose flour! See notes)
- Shortening (I like butter-flavored)
- egg yolks
- vanilla
- peanut oil (or any neutral oil)
How to make a Maple Donut
Homemade donuts sounds intimidating, right? I’m telling you guys, it could not be easier to make this dough. Here is a quick overview. I’ll go over all the method details below, and of course the recipe card is at the bottom of the post.
- Mix together yeast and water to proof
- add in remaining dough ingredients (sugar, salt, flour, eggs, etc.)
- Knead 5 minutes
- Rise in homemade proofing box
- Roll out and cut into rectangles
- Rise again in homemade proofing box
- Fry in oil and let cool
- Dip in maple glaze. DEVOUR!!
Okay let’s dig into the details! First we’re going to start off with a MOUNTAIN of yeast, 3 tablespoons! Yes I said tablespoons!

This is how much it foams after 5 minutes of proofing. We need these donuts to PUFF, and tons of yeast is how it gets done. You can mix this right in your bowl, by the way, I just used a measuring glass to show how much it bubbles.
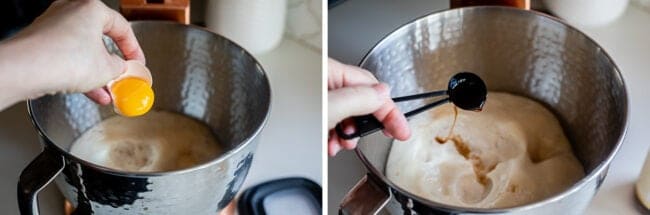
Add in your egg yolks, vanilla, shortening, all the other wet stuff.
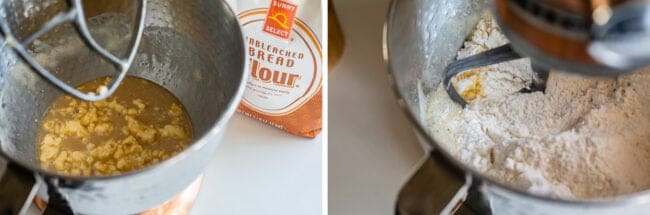
Beat with the paddle for a bit, then add in the dry ingredients. This recipe uses a bit of baking powder for even MORE rise and lift, in addition to the tons of yeast. It makes these donuts PUFF PUFF PUFF i love it.
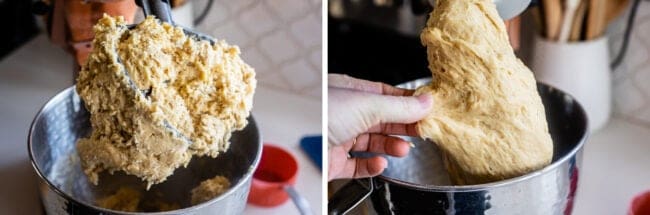
Switch to the dough hook once you’ve added all your ingredients. Go easy on the flour. Add too much and your donuts will be tough instead of tender. You want the dough to be pulling itself together as it kneads, but it can definitely be a little sticky and tacky. It should clean the sides of your mixer.
Shape the dough into a square and place on a greased pan (or silpat). Place on the upper rack in your oven.
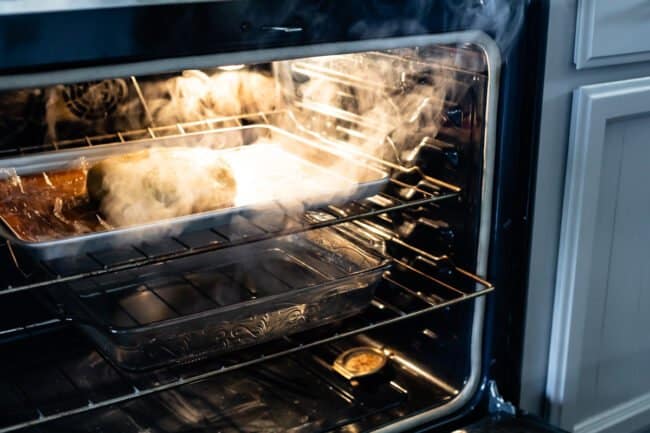
Now for the fun part. Boil a big pot of water and pour it into a pan on a lower rack in your oven. Then shut the door, stat!! You want to keep all that steam in the oven. This creates a mini proofing box, with warm temperatures and lots of humidity. This makes yeast grow like crazy and makes your dough big and puffy and beautiful.
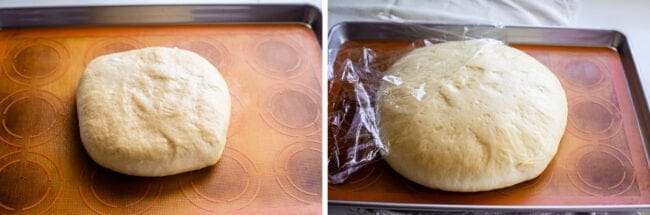
Here is the dough before and after rising.
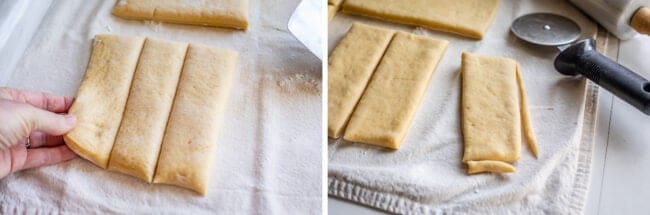
Instead of punching down the dough, gently tilt your pan and turn the dough out onto a floured work surface. You don’t want to press out all of its fluff. It will deflate a lot of course, but don’t smash it. Use a rolling pin to GENTLY roll the dough into an 11×12 inch square. It should only take a few rolls.
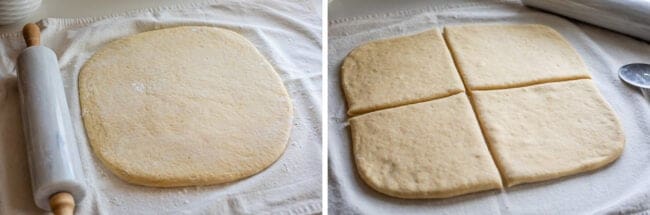
Use a pizza cutter to cut the dough into 4 squares. Then cut each square into 3 long rectangles.
How big is a maple bar?
Each rectangle should measure about 5 inches by 1 and 1/2 or 2 inches. (Once they have risen and been fried, the final donuts will be more like 8 by 3 inches.)
If you are really invested in making your donuts the perfect rectangle shape, then you will need to cut off the ends of the dough that are too round. You can skip this step if you don’t care about triangular ends. If you choose to trim, you can gather up all the scraps to fry into an ugly 13th donut. I’ll come over and eat it if no one else will. I love Quasimodonuts.
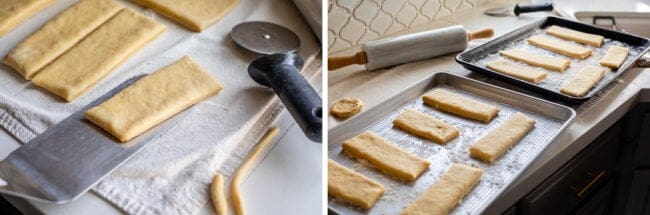
Use a flexible bench scraper or a long metal spatula to CAREFULLY lift the donuts (don’t smash whatever rising has happened!) onto a very well floured baking sheet. You will need two. Give them plenty of space to rise or they will run into each other and then deflate when you take them apart to fry, and you will end up with sad flat donuts (no, this didn’t happen to me, I don’t know what bitter note in my voice you are referencing.) Let the donuts rise again in the homemade proofing box.
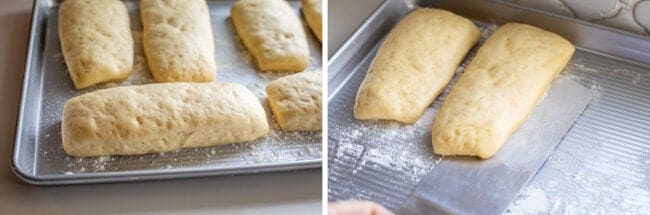
Look at these beauties!! All ready for their fry fest! Heat at least 2 inches of oil in a high sided pan until it reaches 350 degrees F. Not 375, not 325. Use a candy thermometer to check. This takes a solid 15 minutes depending on how much oil you have, so be patient.
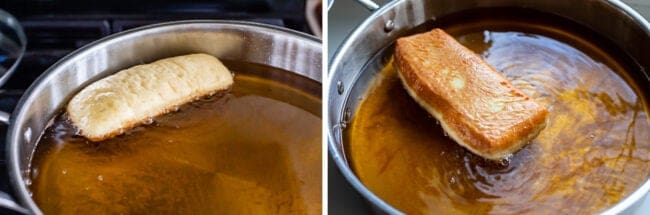
CAREFULLY lift a risen donut with a spatula, and slide it into the hot oil. You can fry 2-3 at a time, if there is space. Let cook for about 30 seconds, then flip with tongs and do another 20 seconds. The donuts will darken significantly in color once they are removed from the oil. Keep this in mind and remove the donuts before they look like the golden color that you would like to eat.
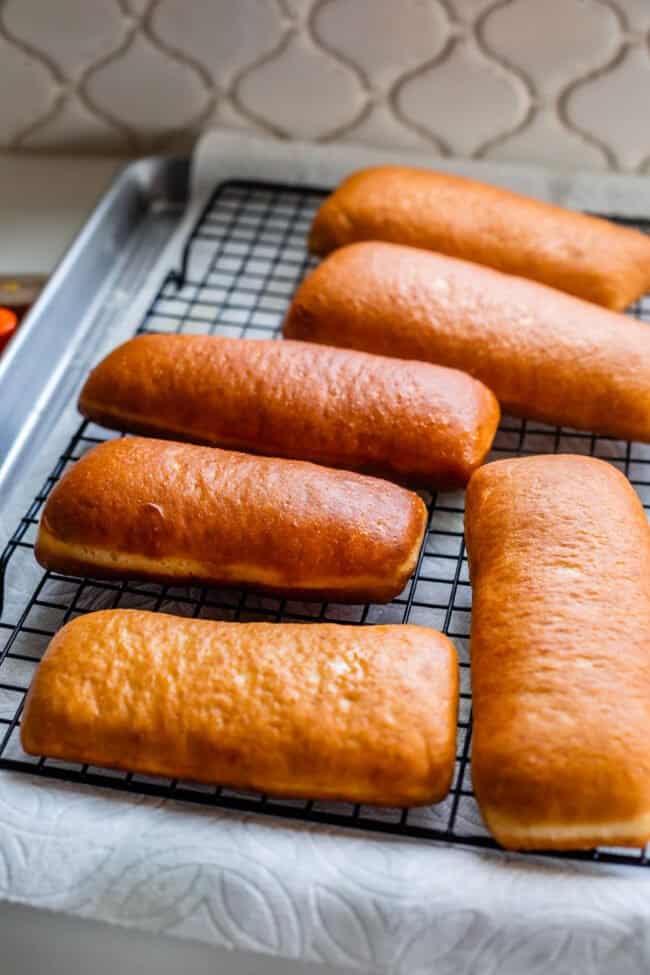
These donuts are probably a little darker than I would prefer. Be patient getting the oil to the right temperature, and watch carefully while frying!
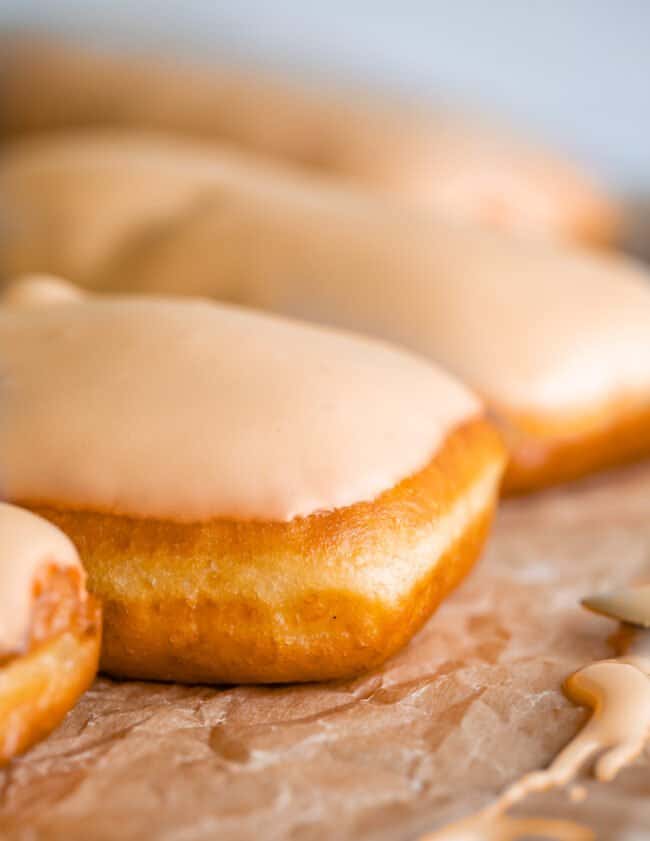
Let the donuts cool on paper towels once they are done frying. Don’t try to glaze them while warm, the glaze will just run right off. You’ve come this far!! Wait just a little longer!!
Maple Donut Glaze Ingredients
Now that our donuts are all fried and completely cooled, gather up your glaze ingredients:
- powdered sugar
- light corn syrup
- kosher salt
- vanilla
- maple extract
- hot water
How to make maple glaze for donuts
This part’s easy. You literally just whisk together all the ingredients in a bowl. I like to do it in my stand mixer.
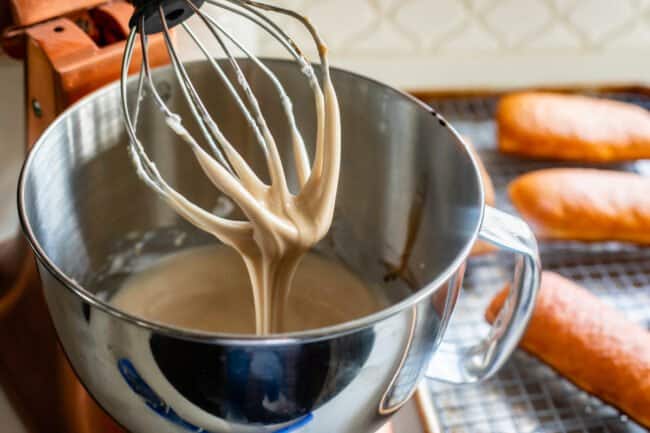
Start with 4 cups of powdered sugar and see how the consistency is. 1 pound of powdered sugar is the correct amount, but if you don’t have a scale you will need to use cup measurements, and this can vary widely depending on how compacted your sugar is.
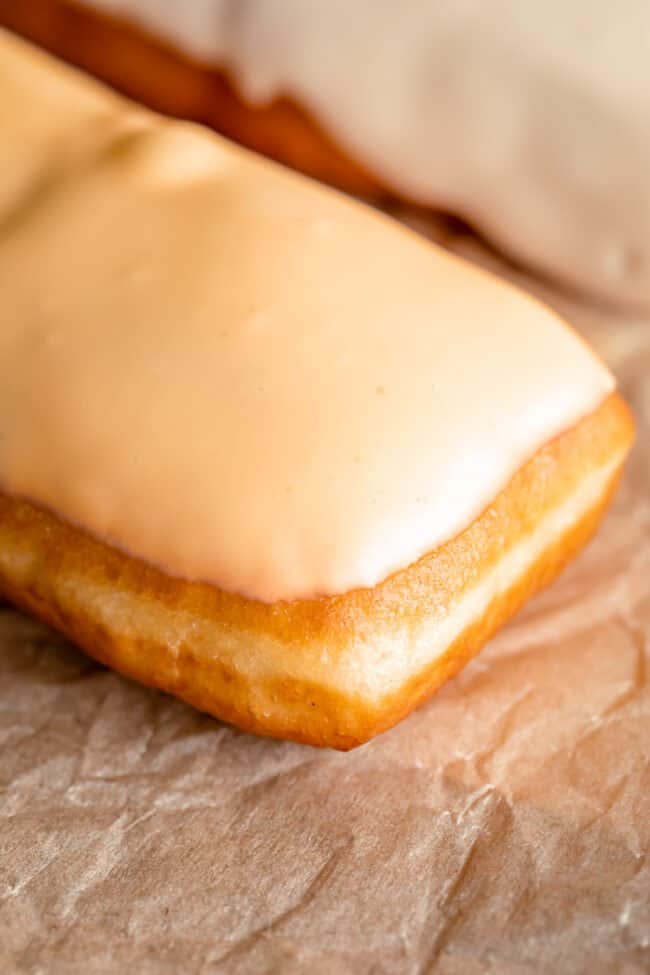
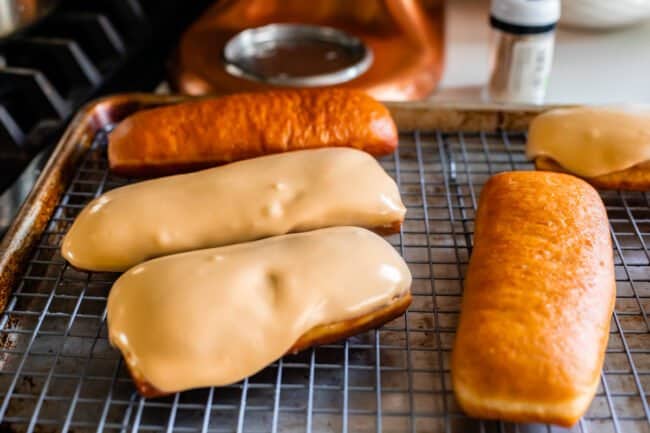
If the glaze is too thin, it will not harden into a straight line of frosting, it will drip down the sides. You want a nice solid layer on the top. Add another 1/2 cup of powdered sugar as necessary, or more hot water a teaspoon at a time.
How long does it take for donut glaze to dry?
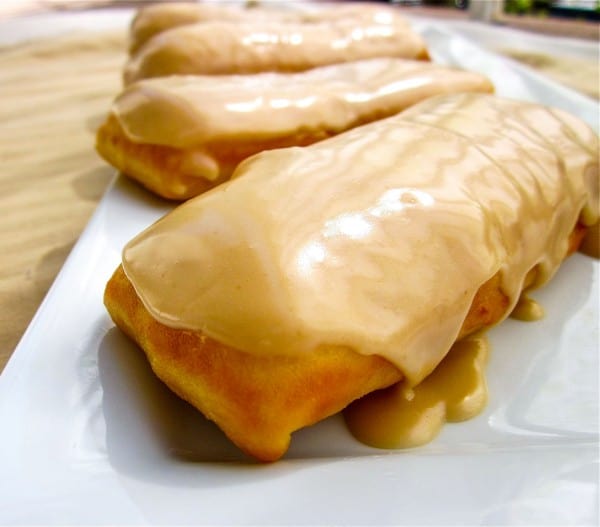
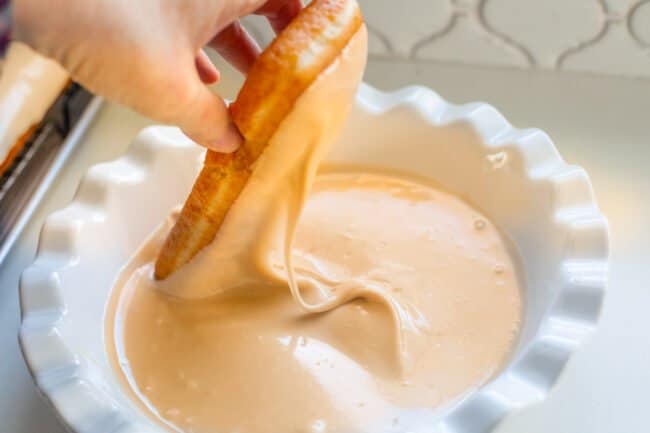
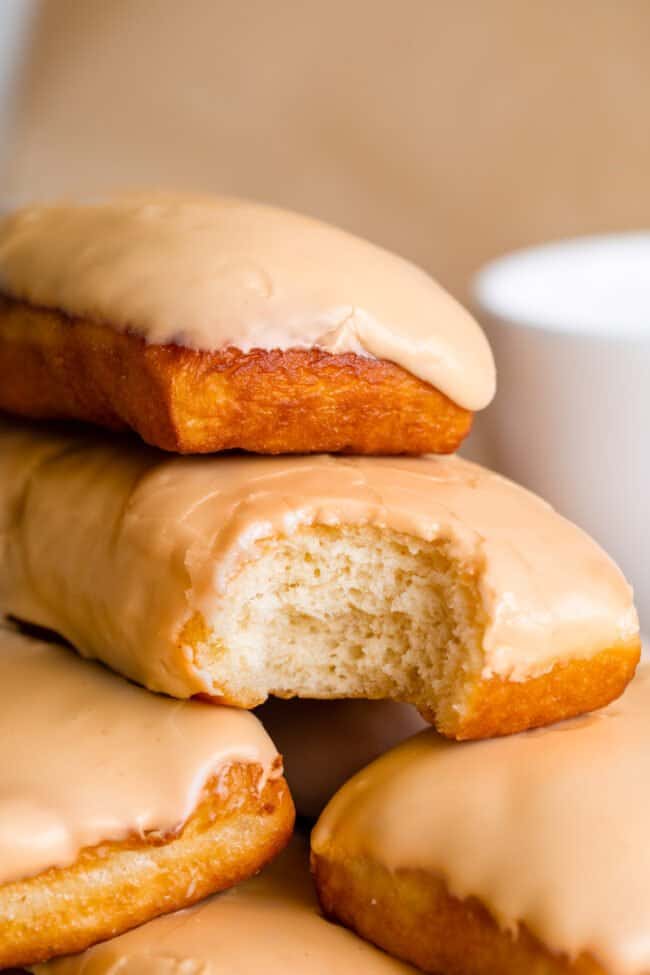
Dip all the donuts and set on a wire rack to let the frosting dry out and harden. It takes about 15-30 minutes depending on how thick it is.
You can eat one right away of course, I’m no stranger to frosting dripping down my fingers, but I actually prefer to wait. The dried out glaze takes on a creamier, smoother texture when it has hardened. It’s definitely worth it!
How to store Maple Bar Donuts (how long will they keep?)
When sealed properly, maple bar donuts should keep three to four days at room temperature, and up to three months in the freezer (let thaw at room temperature).
Don’t stack them for storing, or the frosting will become moistened and the texture will be ruined. I like to use a long rectangular tupperware dish with a lid, to keep the donuts nice and soft. You can also put them on a plate, poke the tops with toothpicks, then cover with plastic wrap. This will keep the frosting intact. My grandma taught me that old trick!
You have got to try these Maple Bars, you guys! They are soooo worth all the effort. And really, they aren’t hard at all. It’s no more effort than making bread, right?? (Okay, maybe a teensy bit more effort.) But the result is absolutely incredible. You will win many friends with this one. Because that’s what cooking is all about right? Making people like you through food? Should I contact a psychologist now??
More maple and breakfast ideas to try!
- Love Maple Bars? Try this 30 MINUTE version!! Uses store bought biscuit dough!
- You will also love these 4-ingredient Apple Cider Doughnuts! The glaze is made with reduced apple cider.
- Maple Butter Twist Coffee Cake << so easy!
- Pumpkin Cupcakes with Maple Pecan Frosting << perfect for fall!
- Nutella Filled Donuts Recipe << yes it’s the best.
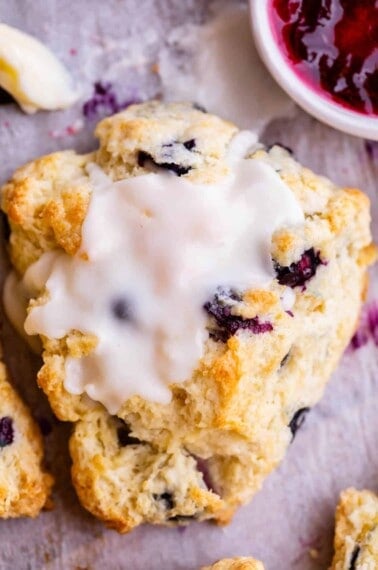
- The Best Scone Recipe I’ve Ever Made << for real.
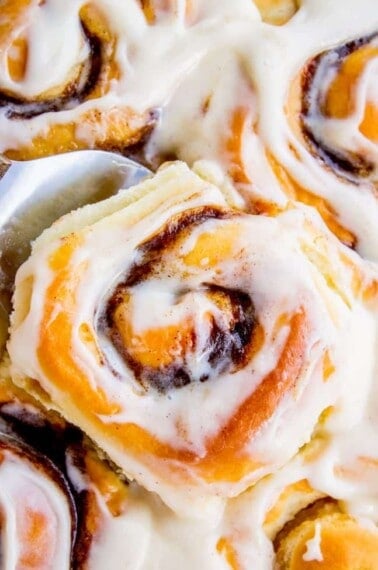
- My Favorite Cinnamon Rolls << I mean if we’re going all out for breakfast.
- Homemade Peach Cobbler << wouldn’t this be amazing for breakfast?
Facebook | Pinterest | Instagram
Maple Bar Donut Recipe

Ingredients
For the dough:
- 1 cup warm water, about 105 degrees F
- 3 tablespoons active dry yeast
- 1 tablespoon granulated sugar
- 1/2 cup granulated sugar
- 1/4 cup butter-flavored shortening, or regular shortening is fine
- 3 large egg yolks
- 1 teaspoon vanilla
- 3 & 1/2 cups bread flour*, spooned and leveled, you can use up to 4 cups
- 2 & 1/2 teaspoons kosher salt
- 1/2 teaspoon baking powder
- peanut oil for frying, I used two 24-ounce bottles**
For the Maple Icing
- 4 cups powdered sugar, plus an extra 1/2 cup (1 pound total)
- 2 teaspoons light corn syrup
- 1/4 teaspoon kosher salt
- 1/2 teaspoon vanilla
- 1 teaspoon maple extract, or more to taste
- 1/3 cup hot water, plus more if needed
Instructions
- In a large bowl or stand mixer, add 1 cup warm water (105-110 degrees F), 3 tablespoons yeast, and 1 tablespoon sugar. Let sit for 5 minutes until it is bubbly. (If it doesn't bubble, you killed your yeast! Start over!)
- Once your yeast is nice and frothy, add 1/2 cup granulated sugar, 1/4 cup shortening, 3 large eggs yolks, and 1 teaspoon vanilla. Beat it all together with the paddle until the shortening is broken up but hasn't blended in.
- Add 1 cup of the bread flour but don't stir yet. Add 2 and 1/2 teaspoons kosher salt (use a little less for table salt), and 1/2 teaspoon baking powder on top of the flour, and use your teaspoon to stir it into the flour a bit. Beat the flour into the dough for about 1 minute until well blended.
- Add the remaining flour 1 cup at a time. Switch to the dough hook (or turn out onto flour and start kneading by hand). You want to add a total of 3 and 1/2 cups of flour to the dough, or up to 4 cups if it is extremely sticky. But keep in mind that a stickier dough is going to be more tender (yes please). Add more flour a little bit at a time if necessary. The dough should be in a mass and pulling away from the sides of the bowl. Once all the flour is added in, knead the dough for about 5 minutes.
- While the dough is kneading, bring a large pot of water to a boil (at least 2 quarts). Lightly flour a baking sheet. DON'T use a silicone mat.
- When you are done kneading and the dough is smooth, shape it into a ball and transfer it to the floured baking sheet. Form a 6×6 inch square out of the dough, and cover it with a clean cloth. (Sprinkle the top of the dough with flour too, so the cloth doesn't stick to it. Not that that happened to me.)
- Turn your oven on to 350 degrees F for about 30 seconds, then turn it off. We're creating a warm humid environment for the dough to rise in. The oven should not be hot. You should be able to touch the racks comfortably with your fingers. WARM not hot.
- Place the pan of dough in the oven. Place a glass 9×13 inch cake pan on the rack below the dough. Pour the boiling water into the 9×13 inch pan and close the door to the oven. (save the boiling pot) Allow the dough to rise in this homemade proofing box for 1 hour or until doubled.
- When the dough has doubled in size, pour the water from the 9×13 inch pan back into the boiling pot. Add more water if necessary (2 quarts-ish). Bring to a boil. Meanwhile, remove the dough from the oven and gently turn it onto a lightly floured work surface (I like to use a pastry cloth.) I like to tilt the pan until the large square of dough falls onto the floured surface, not even disturbing it with my fingers. We want PUFFY donuts. Dust two baking sheets (one of the ones you just used) with flour. Don't be stingy now.
- Use a rolling pin to gently roll the dough into an 11×12 inch rectangle. It shouldn't take much rolling. Don't press it hard to make it lose all its puff. Use a pizza cutter to cut the dough into quarters, see photos. Cut each quarter square into 3 long rectangles to make 12 donuts. They should be about 5 inches by 1.5 or 2 inches. Trim about 1/2 inch off the edges of the rounded corner donut, so that you get nicely shaped rectangles. (If you don't care what shape your donuts are, skip trimming! Or trim, and then use the scraps to make a 13th ugly-doughnut.) Cut the dough into 12 rectangles about 5×2 inches each.
- Use a flexible bench scraper or long metal spatula to carefully transfer the dough rectangles onto to two well-floured baking sheets, spaced at least 2 inches apart. Preheat the oven as before, for about 30 seconds, then turn off the oven (we just want it warm.)Place the baking sheets uncovered back onto the top rack of the oven, and pour the boiling water back into the 9×13 inch dish. Let rise for 45 minutes (or more), until the dough is doubled.
- When the dough is about 15 minutes out from finishing the second rise, heat about 2 inches of peanut oil in a large, high-sided pot with a candy thermometer attached to it. Heat it to 350 degrees, this should be about medium heat. It should take at least 15 minutes. Keep checking the temperature of the oil to maintain even cooking.
- In batches of 2 or 3, use a rubber scraper or spatula to carefully transfer the puffy rectangles to the hot oil. Be very careful and movie quickly so your donut doesn't deflate! Fry for 30-40 seconds and then flip and cook for another 20 seconds or until golden brown. Remove doughnuts from the hot oil with a slotted spoon, allow to drain on paper towels, and repeat with the remaining dough. Let the donuts cool completely. If you try to ice them while warm, the glaze won't stick.
- Whisk together all the icing ingredients in a large bowl or stand mixer: 4 cups powdered sugar, 2 teaspoons corn syrup, 1/4 teaspoon salt, 1/2 teaspoon vanilla, 1 teaspoon maple extract, and 1/3 cup hot water. Add more hot water a teaspoon at a time, or up to 1/2 cup extra powdered sugar as necessary if the consistency isn't right. It needs to be liquid-y enough to dip the donuts in, not spreadable like cake frosting. Taste it and decide if you want to add more maple extract! This is a personal choice! I like lots of maple to I usually add a bit more.
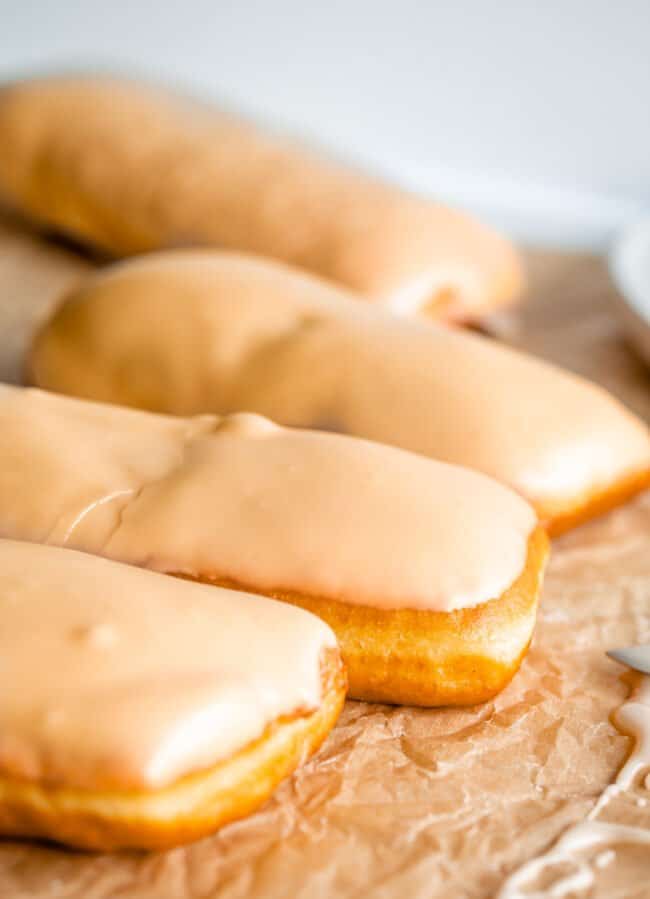
- Transfer the glaze to a pie plate or other shallow bowl. Dip the roundest side of the donuts into the icing and let it drip for a second. Place on a wire rack. Allow to stand for 15-20 minutes before serving to allow the glaze to harden.
- Store these donuts on the counter in a sealed container for however long you think they will last! (2-3 days is fine.)


Kick it up a notch, the Texas way is sprinkle the maple top with bacon pieces. Try it, you’ll love it!
I live in the metro-Boston area and, yes, apparently some of us do live under rocks. Maple is a big (and popular) industry up the road in Hew Hampshire, Vermont, and Maine, and even has a respectable presence in Western Mass. While apple cider donuts are a big hit this time of year, I have never seen a maple bar until last week, and Karen is right about location – I got introduced to maple bars at Pinkbox Donuts while on vacation in Las Vegas. Some donut shops and bakeries here in the Boston area sell maple bacon donuts (traditional round dounts with maple glaze, topped with bacon bits), but nothing like these maple bars. After discovering them in Las Vegas last week, I’m definitely looking forward to making my own batch – thanks to today’s post from Karen.
Could lard be substituted for the shortening?
Hi Tammy! This recipe hasn’t been tested with lard, but I bet it would be great. If you try it, come back and let us know how it turns out!
“(What is with you east coasters?? You have all the maple syrup in your neck of the woods, get with the program!!)”
I’m an east coast maple syrup farmer! I was looking to make these, but there’s NO maple syrup in it! In the east, we use real maple syrup in our recipes. Have you ever tried to make the glaze with syrup instead of extract? I reduce my syrup until it gets really thick-then use that and it turns out great. I also use that reduction in whoopie pie filling!
Haha, touche Kim!! I love this idea of reducing. I bet it would lend amazing flavor to these donuts! Let me know how it goes, I bet it would make an amazing glaze for these donuts!
Hi! So everything has been going smooth and just as directed I’m on the second proof, dough has been in the oven for over and hour and my dough is still very flat. Is this normal?? My 1st proof went well and doubled in size..I was gentle rolling..idk what I did! I’ll just keep waiting I guess?
Hi Trisha! I hope your donuts eventually rose well during the second proof, but if not, here are some suggestions. First, if the donuts are placed too close together they can sometimes run into each other, and then deflate (always so sad to see it happen!). Second, water needs to be boiled again and poured back into the 13×9 inch pan to create that homemade proofing box on the second proof, just like on the first. Third, don’t be too hard on yourself (or your donuts). They don’t have to rise super high on the second proofing to puff up and be delicious. I hope you enjoyed them!
Can these be air fried?
Hi Kathy! I haven’t tried making these in an air fryer, but if you decide to experiment let us know how they turn out! Donuts in the air fryer is definitely a thing (I hear it’s important to make sure they’re not touching in the air fryer basket). Enjoy :-)
I did a test today with these. I air fried one to compare the difference. I actually really liked the air fried version, it was really good.
Ooh yum!! Thanks for sharing Yvette!
I am 64 yrs of age and from the Northeast. We did have these, except they were creme filled, maple frosted squares. Usually found in bakeries, my parents would splurge every now and again and bring home a box. We called them ‘Maple Squares’, but they were definitely filled with creme! I know we all LOVED THEM!!! Nothing is wrong with us East-coasters. Most of us, anyway.
I think the creme filled version of maple bars is definitely a popular thing Roxana! Us west coasters need to get with the program and start filling! ;)